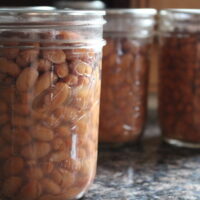
Canning Beans
Canning beans at home saves money compared to store-bought, and they taste better too. All you need is dry beans of your choice (pinto, black, etc), plenty of water, canning, jars and a pressure canner.
Servings: 7 Quarts
Equipment
- Pressure Canner
Ingredients
- 4 Pounds Dry Beans about 8 cups
- Water
- Salt Optional, see note
Instructions
- Pick over dried beans, removing any discolored beans or non-bean debris.
- Place the beans in a large pot or bowl and cover with cool water. Allow the beans to soak for 12-24 hours, ensuring that they always stay submerged.
- Drain the soaking water.
- Place beans in a large stockpot with fresh water. Bring the pot to a boil and cook 30 minutes.
- While the beans are cooking, prepare a pressure canner according to the manufacturer's instructions. (This usually means adding the bottom trivet and heating 2-3 inches of water in the bottom.)
- Put a kettle of water on and bring to a boil. (This will help top off the liquid in the jars if there's not enough water in the bean pot.)
- Hot pack the partially cooked beans into quart or pint jars. Top with boiling water, either from the bean pot or from the kettle. Be sure to leave 1-inch headspace.
- If adding salt, use 1/2 tsp per pint or 1 teaspoon per quart (optional, adjust to your taste).
- Seal jars with 2 part canning lids and load them into the pressure canner, following the manufacturer's instructions on loading/spacing/etc.
- Place the lid on the pressure canner and secure it. Allow the unit to vent steam for 10 minutes before adding the pressure weight to allow it to begin pressurizing.
- Process jars at pressure for 75 minutes (pints) or 90 minutes (quarts) for locations under 1000 feet in elevation. Be sure to adjust times based on your elevation. (Wait until the unit is up to pressure before starting a timer.)
- Once the processing time is over, turn off the heat and allow the unit to come to room temperature before opening (this can be several hours, I usually let it sit overnight).
- Unload the canner and check seals. Store any unsealed jars in the refrigerator for immediate use.
- Remove canning bands from sealed jars, and clean off the outsides before storing in the pantry.
- Home-canned beans should last 12-18 months in the pantry if properly canned and sealed.
Notes
Dry Bean Quantities ~ I've written this recipe for a standard canner batch of 7 quarts. I use a larger canner that can accommodate 14 quarts at a time, so I start with double the beans (8 lbs total). For a standard canner batch of 9 pints, start with roughly 2 3/4 to 3 pounds of beans. In my canner, a pint batch is 19 narrow mouth pints and I use 5 1/2 to 6 pounds of dry beans.
Water ~ It takes a lot of water for this recipe, first in soaking and then in boiling the beans. Be sure to add plenty of water to the pre-cook pot as you'll need it to fill the jars. It takes more water than you'd think to fill the jars with the beans, so be sure you add plenty of water to the cooking pot. I've found that it should be about 3 inches above the level of the beans before I start cooking them, but having a second kettle boiling ensures you have plenty of water to fill the jars just in case.
Salt ~ Adding salt is optional, and I actually don't add salt when canning beans. Salt toughens bean skins during cooking, and I like the results better when they're canned without salt. We just add salt to the pot when we're actually cooking with the canned beans, which allows for more flexibility anyway. If you do choose to add salt, roughly 1/2 tsp per pint or 1 tsp per quart works for most people's taste. I'd suggest using canning salt or sea salt.
