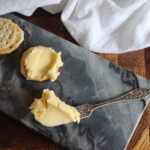
Cultured Butter
Cultured butter has so much more flavor than regular butter, and it's incredibly easy to make it yourself.
Servings: 16 Servings (About 1 1/4 cups butter and 3/4 cup buttermilk))
Equipment
- Kitchenaid Mixer for mixer churned
- Paddle Butter Churn for hand-churned
Ingredients
- 1 pint Heavy cream High-quality, preferably grass-fed Jersey or Brown Swiss cream for best flavor
- 1/4 cup Cultured Buttermilk with live cultures
Instructions
Culture the Cream
- Pour your heavy cream into a clean jar or bowl. Add a splash (about 1/8 to 1/4 cup) of cultured buttermilk to the cream, stirring gently to combine.
- Cover and let it sit at room temperature for 24 to 72 hours. You’ll know it’s ready when the cream thickens to a consistency like crème fraîche, with a fresh, buttery aroma and mild tang.
- (Note: If you want to skip this step, just skip the buttermilk and proceed directly to churning, though the flavor will be milder.)
Churn the Cream
- Pour the cultured cream into your stand mixer (using the whisk attachment). Start mixing at medium-low speed (about 3-4 out of 10) for 15-20 minutes.
- Alternatives: You can also use a hand mixer or traditional butter churn. If you're in a pinch, place the cream in a mason jar, filling it no more than halfway, and shake vigorously until butter forms.
Separate the Butter and Buttermilk
- After about 10 minutes, the cream will whip into whipped cream. Keep churning until you notice the cream "break" and the butter begins to form clumps, separating from the buttermilk.
- When the butter is firm and cohesive (about 20 minutes total), stop the mixer.
- Drain off the liquid—this is your fresh buttermilk, which you can reserve for other uses, like pancakes or baking.
Wash the Butter
- (Optional) To improve the shelf life and texture, rinse the butter under very cold water. Use a wooden spoon to gently work the butter, rinsing until the water runs clear.
- This step helps remove excess buttermilk, which can cause the butter to spoil faster.
Season and Store
- (Optional) If desired, add salt to taste, mixing it into the butter.
- Pack the butter into a container, and refrigerate. Homemade butter will be firmer than store-bought, but it will stay spreadable at room temperature for a few hours.
Notes
Cream Quality: The higher the quality of the cream, the better your butter will taste. Grass-fed Jersey or Brown Swiss cream is ideal, but any good-quality heavy cream will work.
Buttermilk Choice: Use a good-quality cultured buttermilk for the best results. If you don’t want to culture the cream, just skip this step. Your butter will still be delicious, though less tangy.
Churning Methods:
Mixer: For the smoothest texture, use a stand mixer or hand mixer on medium-low speed.
Hand Churning: A traditional butter churn or even a mason jar can work if you're up for a bit of manual labor.
Butter Fat Content: Homemade butter typically has a butterfat content between 82-86%, making it richer and firmer than most store-bought options, which typically sit around 80%.
Storage: Unwashed butter will keep in the fridge for about 1-2 weeks. If washed, it can last a bit longer, up to 3-4 weeks, but it’s always best fresh. Freeze for up to 2-3 months.
Buttermilk Uses: The leftover cultured buttermilk can be used for more butter-making, as a tangy addition to baked goods, or as a flavorful marinade for meats.
Troubleshooting:
Butter is too grainy or greasy? You likely churned it too quickly. Next time, try churning on a lower speed for a longer time to achieve a smoother texture. Butter too soft or hard? Let the butter sit at room temperature for a few minutes before using if it’s too cold and stiff. If it’s too soft, try refrigerating it a bit longer. Don’t like the tangy flavor? Simply skip the culturing step. The butter will still taste great without it, though it won’t have that signature cultured flavor. At that point, you have just regular homemade butter, not cultured butter. It's also delicious, and so much better than storebought...but it's not "cultured butter."Nutrition
Calories: 103kcal | Carbohydrates: 1g | Protein: 1g | Fat: 11g | Saturated Fat: 7g | Polyunsaturated Fat: 0.5g | Monounsaturated Fat: 3g | Cholesterol: 34mg | Sodium: 12mg | Potassium: 33mg | Sugar: 1g | Vitamin A: 441IU | Vitamin C: 0.2mg | Calcium: 24mg | Iron: 0.03mg
