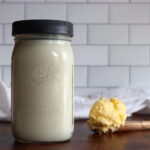
Cultured Buttermilk
Making cultured buttermilk at home is a simple, rewarding process that yields a tangy, creamy liquid perfect for baking, cooking, or dressings. Plus, you’ll have fresh homemade butter as a bonus—two delicious staples in one easy recipe!
Servings: 1 cup buttermilk (and 8 ounces butter)
Ingredients
- 1 pint heavy cream preferably grass-fed or high-quality cream
- 1/4 cup cultured buttermilk with live cultures
- buttermilk starter culture only if you don't have access to cultured buttermilk
Instructions
Culture the Cream
- Pour the heavy cream into a clean jar or bowl.
- Add a splash (about 1/8 to 1/4 cup) of cultured buttermilk to the cream. Stir gently to combine.
- Cover the jar loosely with a lid or cloth and let it sit at room temperature for 24-48 hours. You’ll know it's ready when the cream has thickened and has a fresh, buttery aroma with a slight tang (like mild yogurt or crème fraîche).
Churn the Cream into Butter
- Pour the cultured cream into your stand mixer, food processor, or use a hand mixer.
- Mix on medium-low speed for about 15-20 minutes. At first, the cream will turn into whipped cream, but keep going until the butter begins to separate from the liquid (buttermilk).
- You’ll notice the butter will clump together and separate from the buttermilk as you continue churning. Once it forms into a mass, stop the mixer.
Strain the Buttermilk
- Once the butter has been separated, strain off the buttermilk into a clean container. This is the magic liquid you’ll use for your recipes!
- You can store the fresh buttermilk in the fridge for about a week.
Wash the Butter
- Butter doesn't have to be washed, provided you use it within a few days. To prolog the shelf life of the butter you get when making buttermilk, wash it in very cold water to get out every last bit of buttermilk.
- To wash, work the butter gently with a spoon while running cold water over it until the water runs clear.
- If you’ve made butter, now you have a batch of the creamiest, freshest homemade butter. If you’ve just made buttermilk, it’s ready to be used in baking, cooking, or even as a tangy addition to dressings.
Nutrition
Calories: 37kcal | Carbohydrates: 3g | Protein: 2g | Fat: 2g | Saturated Fat: 1g | Polyunsaturated Fat: 0.1g | Monounsaturated Fat: 1g | Cholesterol: 7mg | Sodium: 63mg | Potassium: 81mg | Sugar: 3g | Vitamin A: 99IU | Calcium: 69mg | Iron: 0.02mg
