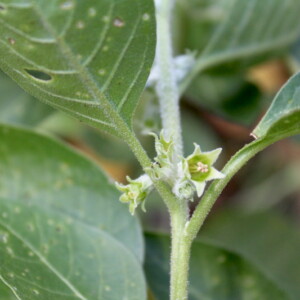
How to Grow Ashwagandha
Step-by-step instructions for starting ashwagandha from seed and growing it as an annual or tender perennial in any temperate climate, including the harvest and drying of medicinal roots.
Equipment
- Garden Trowel
Ingredients
- Ashwagandha seeds Withania somnifera
- sterile seed-starting mix
- sandy potting mix 3 parts cactus mix to 1 part compost
Instructions
- Sow ashwagandha seeds 1/8 inch deep in sterile seed-starting mix, 8 to 10 weeks before your last spring frost. Use bottom heat to maintain soil temperature at 70 to 80°F, and keep the soil consistently moist until germination.
- Seedlings should emerge in roughly 2 weeks. Once they appear, provide bright light from a sunny window or full-spectrum grow lights to prevent leggy growth.
- Once seedlings have several true leaves, pot them up into 4-inch containers. Continue growing under bright light until they're 4 to 6 inches tall and outdoor temperatures are reliably warm.
- Harden off seedlings gradually over a week, exposing them to outdoor conditions for increasing periods. Transplant outdoors when nighttime temperatures are consistently above 50°F, spacing plants 2 feet apart in full sun with well-drained soil.
- Water sparingly throughout the growing season, allowing the top inch or two of soil to dry between waterings. Skip the fertilizer entirely, since ashwagandha actually produces stronger medicinal compounds in lean conditions.
- Harvest the roots after 150 to 180 days, ideally after the plant has produced ripe red fruit. In short-season climates, harvest just before the first hard frost even if fruit hasn't appeared yet. Use a digging fork to loosen the soil in a wide circle around the plant, then lift carefully to keep the long taproot intact.
- Wash the roots thoroughly under running water, scrubbing between your fingers to remove all soil from the crevices. Trim away the foliage at the soil line and pat dry.
- Chop the cleaned roots into pencil-thick pieces and dry in a dehydrator at 95 to 105°F for 12 to 24 hours, until pieces snap cleanly when bent. Store whole dried pieces in a sealed glass jar away from light, or grind to powder as needed.
Tried this recipe?Let us know how it was!
