
Affiliate disclosure: This post may contain affiliate links. Please see our Privacy Policy.
Boiled cider is a simple one ingredient apple cider syrup that’s perfect for topping pancakes or yogurt. It’s also ideal for infusing incredible apple flavor into baked goods.

Boiled cider is a real treat, but you don’t often hear about it outside the northeast. It was originally an old school method of preserving apples, long before refrigeration and international shipping.
Apples are pressed into cider, and then that cider is boiled down into a syrup that’s a bit like another New England staple ~ maple syrup.
Once concentrated, apple cider syrup will keep at room temperature indefinitely, which made it a valuable resource back when cider orchards were plentiful but refrigeration non-existent.
These days, boiled cider is made less for preservation and more for taste. The sweet-tart flavor of super-concentrated apple cider makes an unbelievable pancake syrup, and it’s the perfect sweetener for adding apple flavor to all manner of baked goods.

Choosing Cider for Homemade Boiled Cider
Boiled cider is made from just one ingredient…fresh apple cider, but not all cider is the same. The cider you’d use to make hard cider contains a lot of tannic apples that add character to the fermentation. Similarly, most modern grocery store apples are “dessert” apples without enough acidity to create a balanced cider.
If you’re pressing cider for boiled cider, as we sometimes do with our double-barrel cider press, choose a mixture of sweet and acidic apples. A little extra acidity will help bring out the flavor of the finished cider syrup.
When buying store-bought cider, just about any preservative-free drinking cider will do. Pasteurized is fine, but avoid cider with chemical preservatives like potassium sorbate, or additives like “apple flavoring.” Stick with real cider.
If there’s anything else in the cider, you’ll be concentrating it into the finished boiled cider with potentially disastrous (or at least disgusting) results.
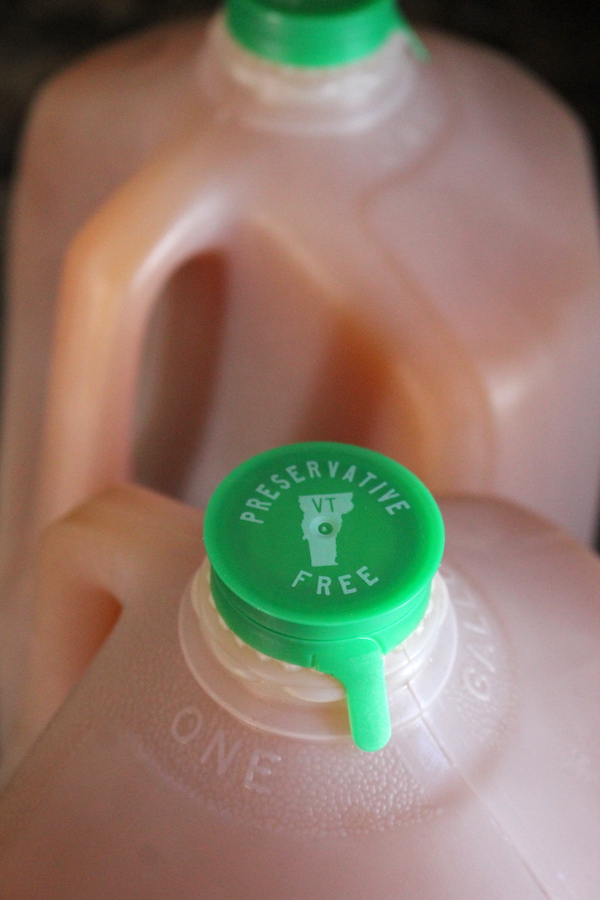
How to Make Boiled Cider
Once you have cider in hand, pour it into a deep-sided, heavy-bottomed stockpot. It’s going to bubble up during cooking, so make sure you have plenty of headspace. A 6-quart pot works perfectly for one gallon of cider.
Pour the cider into the pot and crank the stove on high.

While the cider is coming up to temperature, mark the depth of the liquid in the pot on a wooden skewer. This will help you determine when the boiled cider is finished.
The finished volume should be 1/7th the starting volume. Mark the fluid level, and then divide the space into 7 equal distances. Set the skewer aside, you won’t need it until the boiled cider is nearly finished.
As the cider comes to a boil, the natural pectin inside the juice will congeal into a foam. That’s totally normal, but it’ll be in the finished cider syrup if you don’t remove it.
Skimming it off with a spoon works decently, but I’d actually suggest allowing the cider to boil hard for about half an hour and then pour it all through a cheesecloth-lined fine-mesh strainer.

After that, return the filtered cider to the pot and continue cooking the cider syrup. After that initial filtering step, turn the heat down to medium/low and allow the cider to simmer.
The lower the cider cooks, the more flavor it’ll retain. I know, your house smells amazing when it’s boiling hard, but the more aroma that’s driven into the air means less in the finished syrup.
All in all, it takes around 4 to 6 hours of simmering to make boiled cider, so be patient.
Keep a close eye as the cider starts to get down to the 1/7th volume mark. As it gets close, turn the heat down even lower to prevent scorching.

When is Boiled Cider Finished?
So most people use the wooden skewer method to measure the depth of the cider and then finish boiling the cider once it reaches the 1/7th mark. There is a more scientific method though…an instant-read thermometer.
The sugar in apple cider is fructose, which is a bit different than maple syrup’s glucose. Our homemade maple syrup finishes at 7.5 degrees above the boiling point of water. Birch syrup (made from birch trees), on the other hand, is fructose just like apple cider.
The finishing temperature for boiled cider is 13 degrees above the boiling point of water or 225 degrees F at sea level. That’s the same as birch syrup.
We’re at about 1000 feet above sea level, and the boiling point of water drops 1 degree for every 500 feet of elevation. Our cider syrup finishes at 223, just like our birch syrup.

Storing Boiled Cider
Properly made boiled cider, believe it or not, is actually shelf stable just like maple syrup. If you’re going to use it within a few months, just keep it in a sealed container at room temperature.
(This assumes it’s cooked completely until it’s 1/7th its original volume. If less concentrated, then the boiled cider can ferment.)
If you’re planning on storing it for extended periods, canning is a good option just to prevent surface mold. Over time, condensation can form on the very surface of the boiled cider and cause it to mold on the surface (again, just like maple syrup).
The process for canning boiled cider is the same as canning maple syrup, and it’s not technically canning in the true sense of the word. Hot syrup is poured into clean, dry canning jars, leaving as little headspace as possible (around 1/4 inch).
Seal with 2 part canning lids and the heat from the syrup will cause a vacuum to seal the jar (no water bath canning required).

Recipes Using Boiled Cider
Looking for ways to use boiled cider? King Arthur flour has a list of ways, including on top of pancakes and oatmeal of course.
As for actual recipes, try using it in place of maple syrup, honey or corn syrup in recipes. It’ll change the character of the finished baked goods, giving it an incredibly sweet/tart apple flavor.
If you’re looking for something to really feature boiled cider, try Apple Cider Caramels or Boiled Cider Glaze (for cakes and loaves).
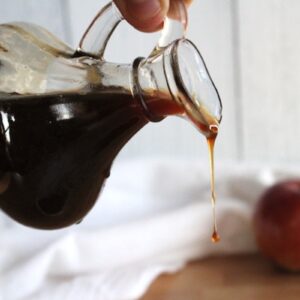
Homemade Boiled Cider (Apple Cider Syrup)
Equipment
Ingredients
- 1 Gallon Apple Cider, Preservative Free
Instructions
- Pour the apple cider into a 6 quart non-reactive stockpot or dutch oven. (Don't use aluminum or copper.) Mark the depth of the cider on a wooden skewer.
- Bring the cider to a boil and cook for about half an hour.
- Pour the cider through a cheesecloth-lined fine mesh strainer to remove the pectin.
- Clean the pot and return the filtered cider to the pot.
- Return the cider to a boil and then turn the heat down to medium/low.
- Simmer the cider for 4 to 6 hours, until it's reached 1/7th it's original volume (as measured on a wooden skewer). Alternately use an instant-read thermometer. The finish temperature is 225 degrees at sea level, and drops by 1 degree for every 500 feet in elevation rise.
More Apple Preservation Recipes
Looking for more ways to preserve this autumn’s bounty?
- 30+ Ways to Preserve Apples
- Canning Apple Cider
- Apple Wine
- Canning Applesauce
- Apple Butter
- Canning Apple Pie Filling
- Best Winter Storage Apples
- Storing Apples without a Root Cellar










I kind of wondered how to divide the skewer measurements into 7 sections, but then I thought of a gadget I have with my sewing stuff. It’s an accordian-type device for equally spacing buttonholes. I think that that would work splendidly. I’ll attach a link so you can decide if it would be helpful!
https://www.amazon.com/dp/B0B67WL14Z?lv=shuf&channelId=500&plpRedirect=mhFallback&th=1
Ha, that’s clever! A sewing gadget in the kitchen. Thanks for sharing.