Affiliate disclosure: This post may contain affiliate links. Please see our Privacy Policy.
Canning bone broth is a practical way to preserve homemade stock while saving freezer space and money. You can use scraps like bones roasted bones and simple vegetables to create a rich, nourishing broth. Once you start pressure canning your own bone broth, you’ll always want a shelf full in your pantry.
Canning bone broth at home is one of the simplest pressure canning projects for beginners. Not only does it help you make use of every part of the animal, but it also gives you instant access to shelf-stable, protein-rich broth all year long—without relying on store-bought cartons.
While many people assume bone broth is high in minerals, the real value is in the protein content. A long-simmered pot of bone broth contains gelatin and collagen, which support joint, gut, and skin health. It’s no wonder health advocates have started recommending a warm mug of bone broth instead of coffee.
If you’re looking to preserve a large batch of homemade stock or bone broth, pressure canning is the safest and most practical method.
Why Can Bone Broth?
You’ve probably seen “artisanal” bone broth on the shelves for as much as $8 a pint. But traditionally, bone broth was a way to use up scraps—especially bones that would otherwise go to waste. If you’re making broth from leftover roast chicken, turkey carcasses, beef bones, or pork necks, the raw materials are practically free.
So why can your own bone broth?
- Cost Savings – A single home-canned batch can save you hundreds. We can over 200 quarts of broth each year—worth nearly $3,000 if we bought it retail.
- High Quality – Control every ingredient, especially if you raise your own animals or buy organic, pasture-raised meat. Homemade means no preservatives, additives, or hidden sodium.
- Customization – Add garlic, herbs, or mushrooms to suit your taste. Make low-sodium, no-salt, or allergen-friendly versions for your family’s needs.
- Self-Reliance – Having home-canned broth on hand is a huge asset during power outages, flu season, or busy weeknights. Just pop the lid and use it in soups, sauces, or for sipping.
Whether you’re preserving stock from a whole Thanksgiving turkey or putting up weekly scraps, canning bone broth is a satisfying and sustainable kitchen project. It saves money, reduces waste, and gives you instant access to nourishing broth for soups, stews, and sipping.
If you’re serious about self-reliance or just tired of paying steep prices for store-bought broth, pressure canning is the way to go. Once you get started, you’ll never go back.
Equipment You’ll Need for Canning Bone Broth
Bone broth is a low-acid food and must be pressure canned to ensure safety. Here’s what you need:
- Pressure Canner – We use a 30-quart All-American pressure canner, which holds 19 pints or 14 quarts. Larger models like the 41.5-quart version can process even more at once. This is a lifetime investment—and it pays for itself fast.
- Mason Jars – Bone broth can be canned in pints or quarts (not half-gallons). Narrow-mouth jars allow you to fit more per batch in a pressure canner, but wide-mouth jars are easier to clean and fill.
- Canning Lids and Rings – Single-use lids are the only major recurring cost. We buy them in bulk for discounts. Rings are reusable and last for years.
- Canning Jar Lifter – Essential for safely placing hot jars in and out of the canner.
- Wide Mouth Funnel – Helps keep jar rims clean and ensures consistent headspace. Bonus if it has measurement lines built in.
Making Bone Broth for Canning
Before you can bone broth, you need to make it. Here’s how we prepare our broth for pressure canning:
- Collect Bones – We freeze bones from meals until we have enough to fill our 5-gallon stockpot halfway (roughly 2 to 3 gallons of bones).
- Roast (If Needed) – If the bones are raw, roast them in the oven at 425°F for 30–45 minutes to enhance flavor.
- Add Aromatics – Toss in 2–3 onions, 4–5 carrots, and a few cloves of garlic. You can also add celery, leeks, or herbs.
- Fill with Water – Cover everything with water, leaving about 2 inches at the top of the pot.
- Simmer – Bring to a boil, then reduce to a simmer for 8–24 hours. The longer you cook it, the more collagen you’ll extract.
- Strain – Remove solids using a colander, then strain again through a fine mesh sieve.
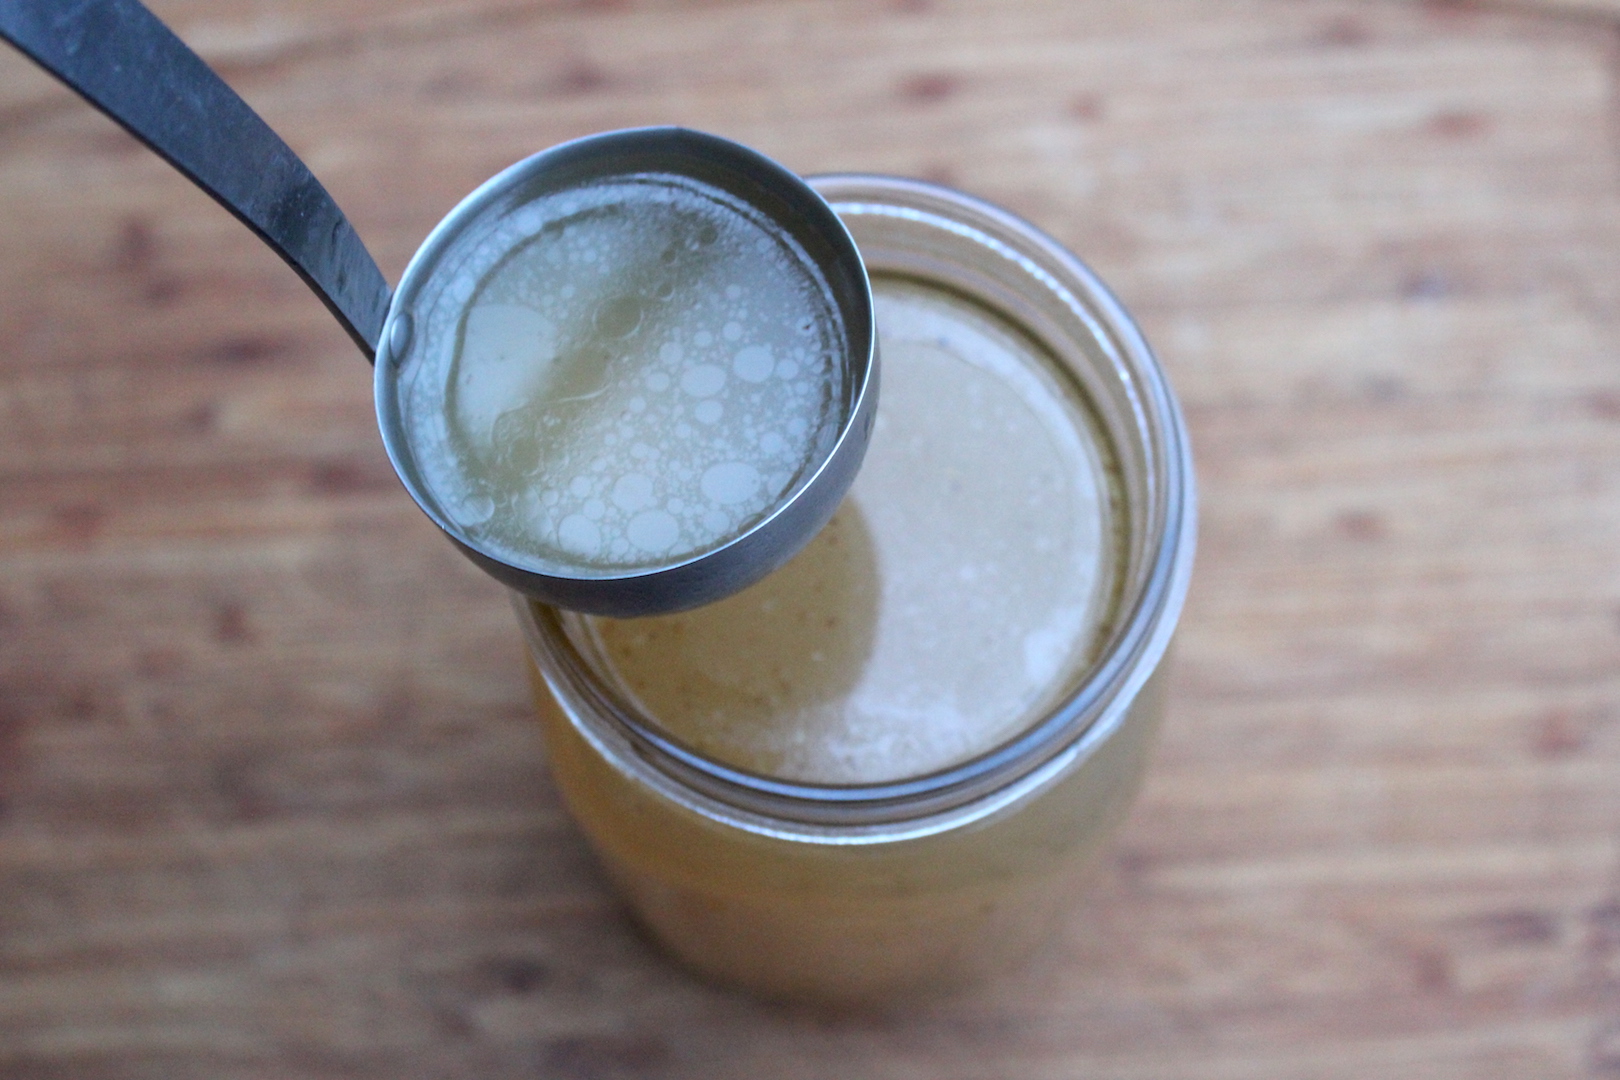
- Skim – If the broth has a thick fat cap, you can skim it after chilling. But if there’s minimal fat, you can skip this step and go right to canning.
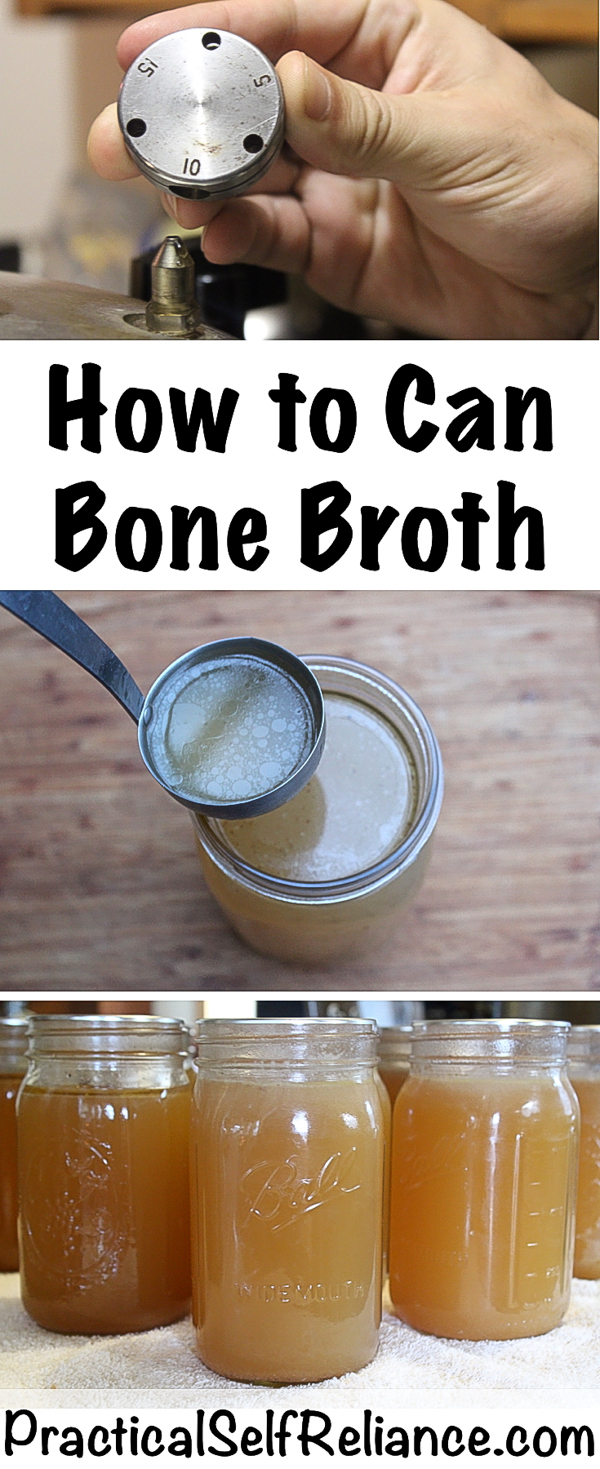
Pressure Canning Bone Broth (Step-by-Step Instructions)
Here’s the basics:
- Method: Pressure Canning
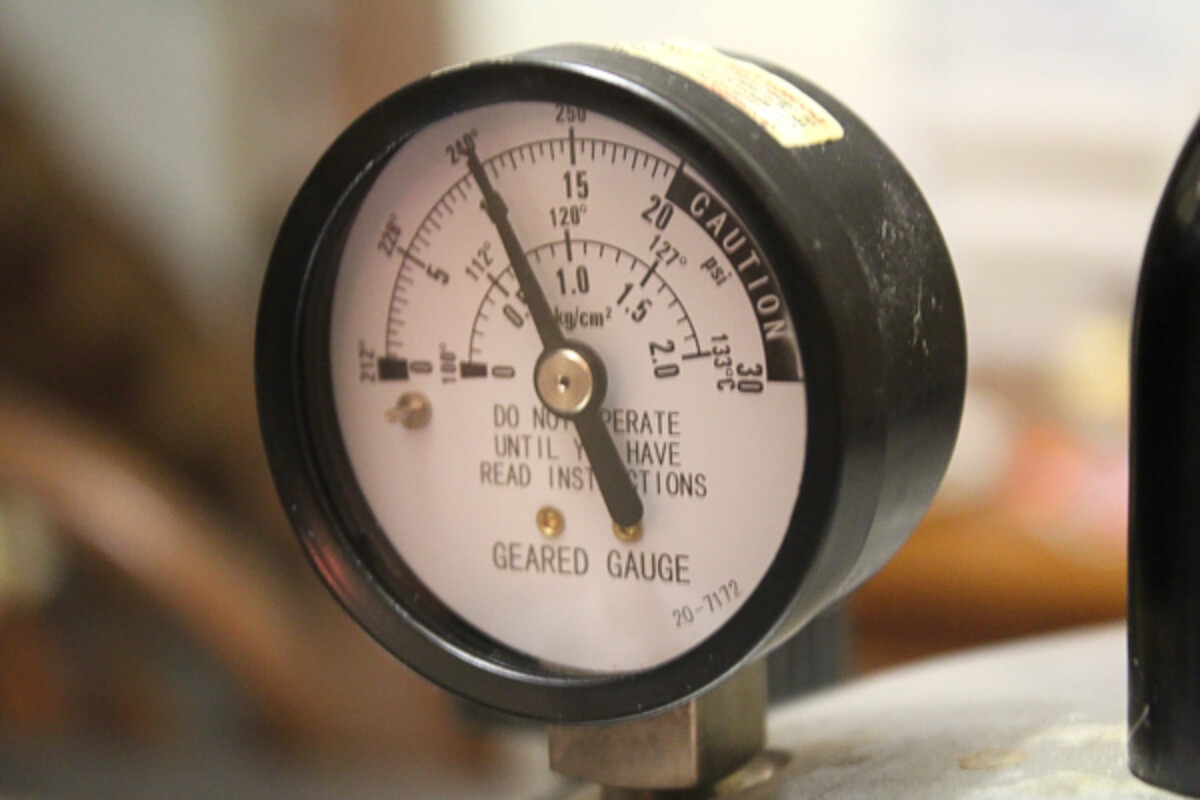
- Pressure: 10 lbs (weighted gauge) or 11 lbs (dial gauge) at altitudes under 1,000 ft
- Time: 20 minutes for pints and 25 minutes for quarts
- Headspace: 1 inch
Preparing for Canning
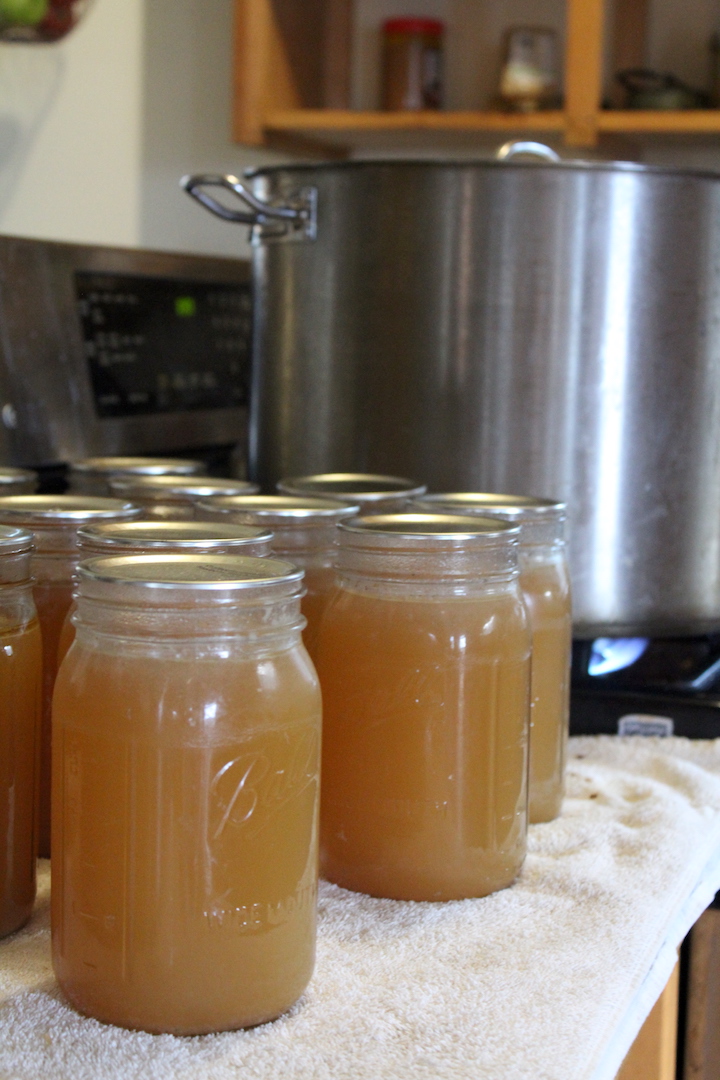
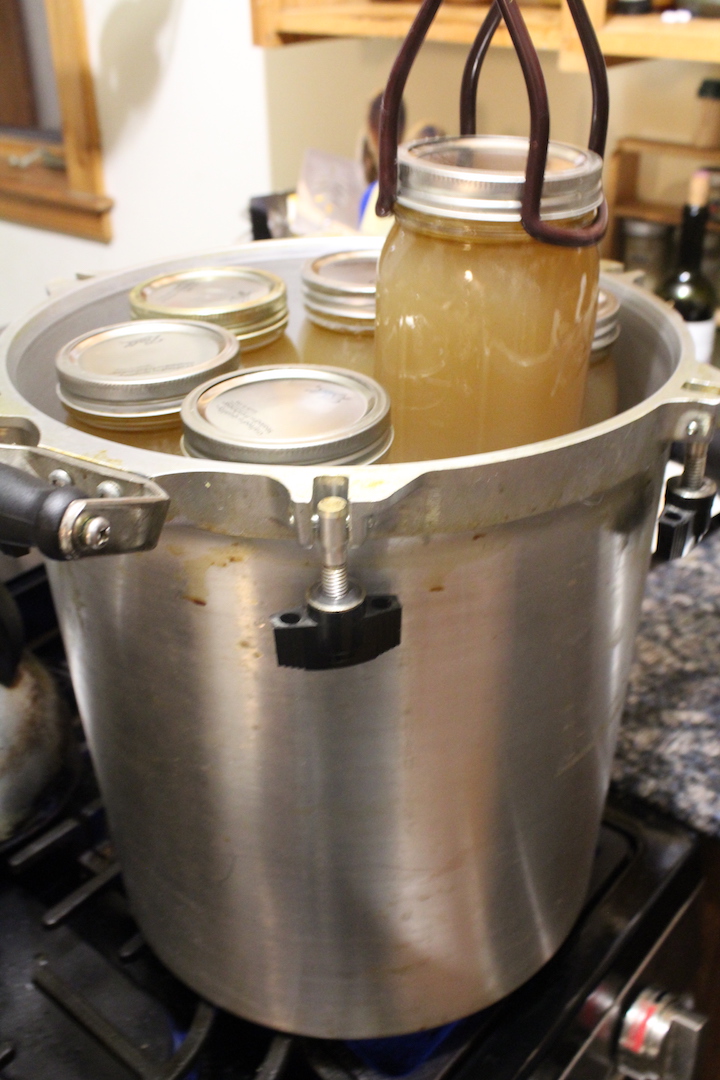
Start by bringing 2 inches of water to a boil in the bottom of your pressure canner. Place the bottom rack inside. On a separate burner, keep your strained bone broth hot but not boiling.
Ladle hot broth into hot, clean jars, leaving 1 inch of headspace. Wipe rims clean, apply new lids, and screw bands on finger-tight.
Use a jar lifter to load the jars into the pressure canner, spacing them evenly on the rack. If you have a two-tier canner, insert the divider rack and load the top layer.
Pressure Canning Process
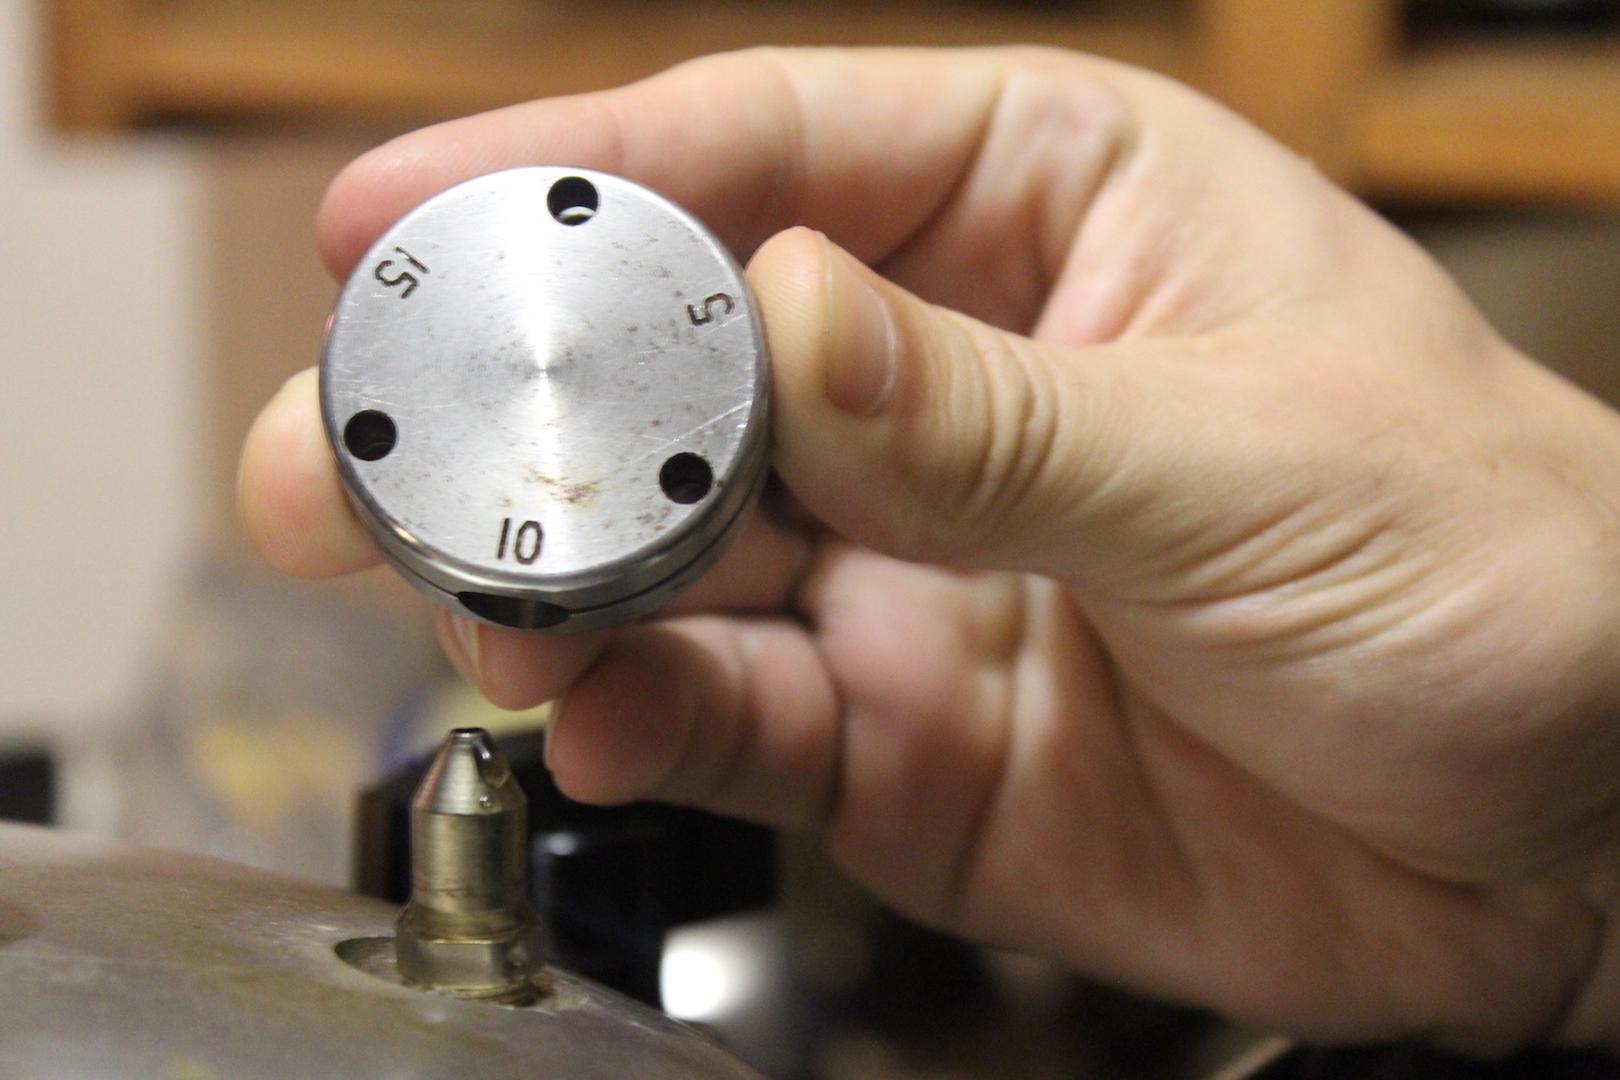
Secure the canner lid and bring it up to temperature. Allow steam to vent through the spout for a full 10 minutes before placing the weight.
Once the canner reaches pressure and the weight starts to jiggle, begin your minute timer. These are processed for 20 minutes for pints and 25 minutes for quarts.
After the timer ends, turn off the heat and let the canner depressurize naturally.
Don’t remove the weight or open the lid until the pressure gauge reads zero and the canner is cool to the touch—this may take an hour or more.
After Canning
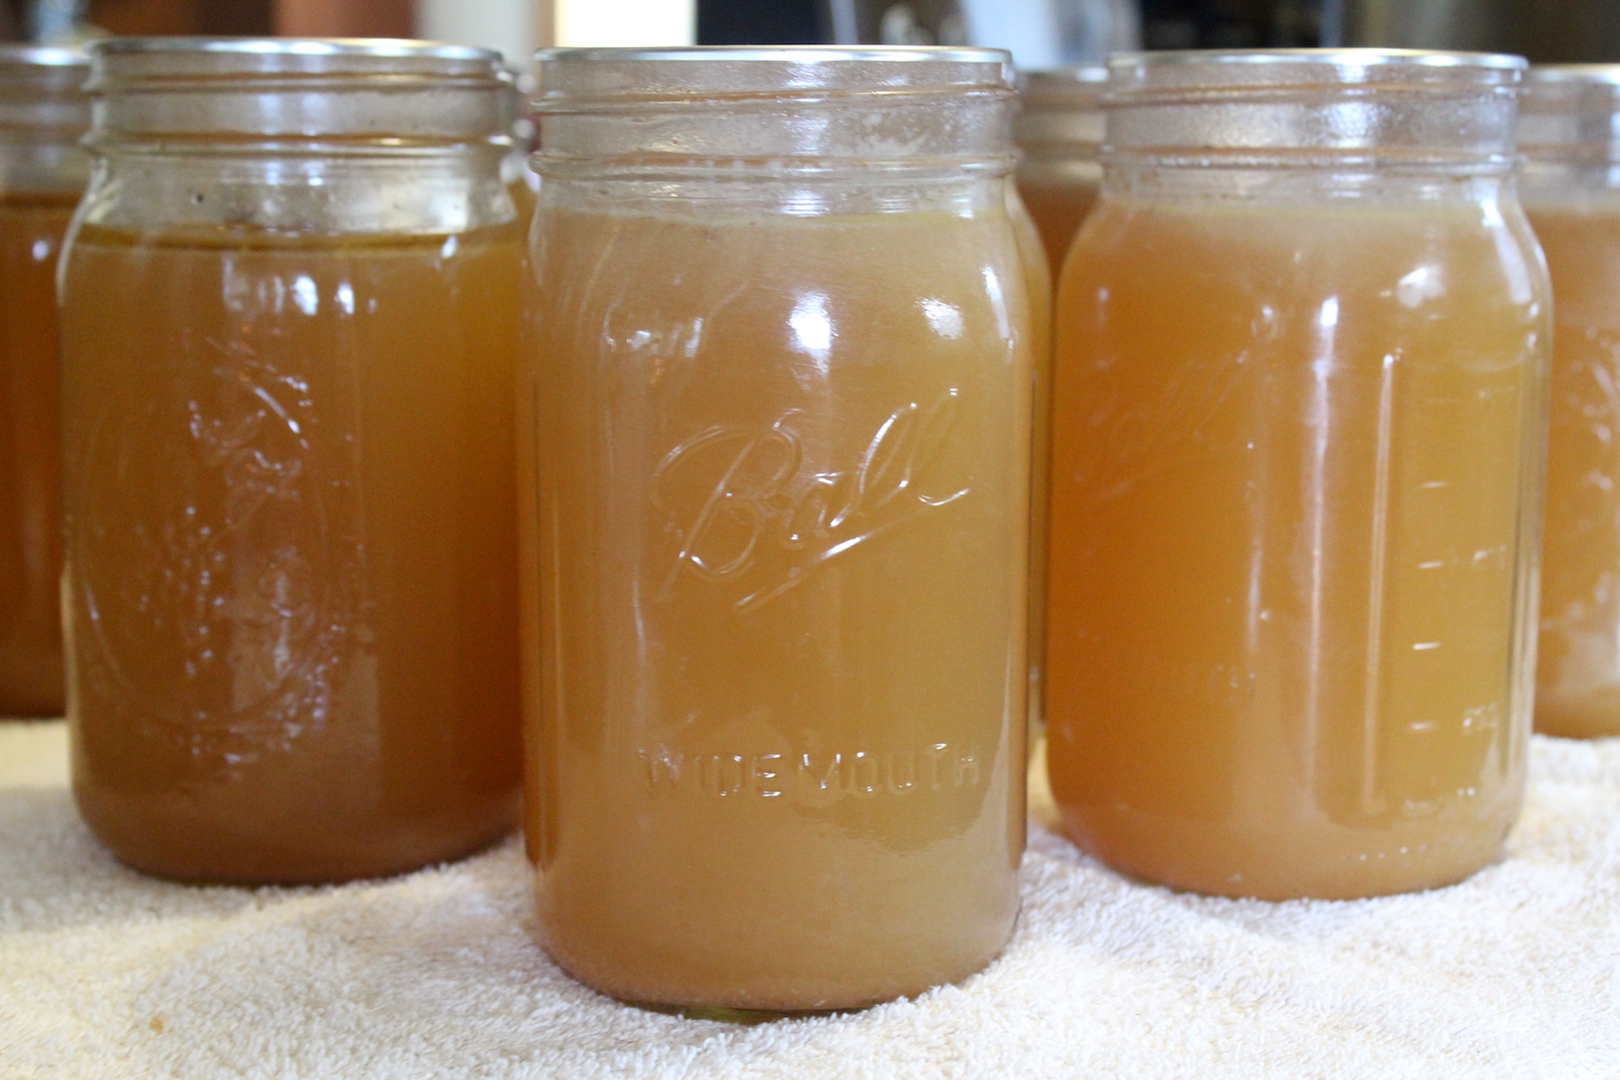
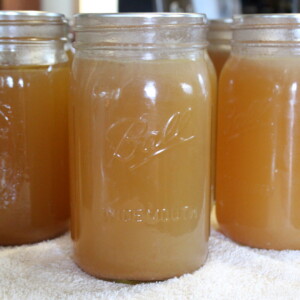
Use a jar lifter to remove the jars and place them on a towel to cool undisturbed for 12–24 hours. Once cool, remove the rings, check seals, and wipe down the jars.
Store your home-canned broth in a cool, dark place. Properly sealed jars are shelf-stable for at least 18 months, but they’re often good for years.
Pressure Canning Altitude Adjustments
With pressure canning, the processing times stay the same at higher altitudes, but the pressures change. Here are the altitude adjustments for pressure canning:
For dial gauge pressure canners:
- 0 to 2,000 feet in elevation – 11 lbs pressure
- 2,001 to 4,000 feet in elevation – 12 lbs pressure
- 4,001 to 6,000 feet in elevation – 13 lbs pressure
- 6,001 to 8,000 feet in elevation – 14 lbs pressure
For weighted gauge pressure canners:
- 0 to 1,000 feet in elevation – 10 lbs pressure
- Above 1,000 feet – 15 lbs pressure
Using Bone Broth
Home-canned bone broth is incredibly versatile and ready to use straight from the jar. Heat it up for sipping on cold days, use it as a base for soups and stews, or cook grains like rice, quinoa, or barley in it for added flavor and nutrition.
It also makes a rich base for gravies, sauces, risottos, and braises, adding depth to everything from weeknight dinners to holiday meals.
Canning Bone Broth
Equipment
- Pressure Canner
Ingredients
- 8 lbs bones, beef, chicken, turkey, pork, or mixed
- 3 medium onions, quartered (skins on for color if desired)
- 5 medium carrots, chopped
- 2 stalks celery, chopped (optional)
- 4 cloves garlic, smashed
- 1 tablespoon apple cider vinegar, optional, for flavor—not mineral extraction
- 1 bunch parsley, optional
- Water to cover, approximately 3 gallons
Instructions
- Place the bones in a roasting pan and roast at 425°F for 30–45 minutes until browned (skip this step if using previously cooked bones). Transfer bones to a large stockpot (at least 16 quarts). Add the vegetables, garlic, herbs if using, and vinegar. Fill with water to cover the contents by 1–2 inches, leaving room at the top to prevent boiling over.
- Bring to a gentle boil over medium-high heat, then reduce to a low simmer. Simmer uncovered for 12–24 hours, adding water as needed to keep bones submerged. Strain through a colander, then again through a fine mesh sieve for a clear broth. Let cool slightly and skim fat if desired.
- Reheat strained broth to a boil. Prepare a pressure canner with 2 inches of simmering water and pre-warm 7 quart jars. Ladle hot broth into jars, leaving 1 inch headspace. Wipe rims, apply new lids, and screw on bands finger-tight.
- Load jars into the canner, vent steam for 10 minutes, then apply the weight. Process at 10 lbs pressure for 20 minutes for pints and 25 minutes for quarts(adjust for altitude if needed). Let pressure return to zero naturally before removing the weight. Open lid away from you, and let jars rest for 5–10 minutes before removing.
- Cool jars on a towel for 12–24 hours. Check seals, remove rings, and store in a cool, dark place.
Notes
Pressure Canning Altitude Adjustments
With pressure canning, the processing times stay the same at higher altitudes, but the pressures change. Here are the altitude adjustments for pressure canning: For dial gauge pressure canners:- 0 to 2,000 feet in elevation – 11 lbs pressure
- 2,001 to 4,000 feet in elevation – 12 lbs pressure
- 4,001 to 6,000 feet in elevation – 13 lbs pressure
- 6,001 to 8,000 feet in elevation – 14 lbs pressure
- 0 to 1,000 feet in elevation – 10 lbs pressure
- Above 1,000 feet – 15 lbs pressure
FAQ
No. Bone broth is a low-acid food and must be pressure canned to be shelf-stable. Water bath canning does not reach a high enough temperature to kill harmful bacteria in low acid foods (meats, veggies, etc). Waterbath canning is only used for acidic foods like jams and pickles.
Properly sealed jars stored in a cool, dark place will last at least 12–18 months. Many home canners safely use jars that are several years old, as long as the seal remains intact.
Yes, but it’s often better to leave the broth unseasoned and salt it when you use it. This gives you more flexibility for cooking and allows you to control sodium levels in your final dishes.
Absolutely. Mixed-bone broths from chicken, turkey, beef, pork, or even venison all work well. You can use what you have on hand—just be sure the broth is fully strained before canning. The only meat that’s not approved for canning as a broth is fish or seafood, but all land based animals are allowed.
That’s a good sign! Gelatin from connective tissue means your broth is rich in collagen. It will liquefy again when heated and makes for a deeply nourishing base.
Yes, broth freezes well. However, pressure canning saves freezer space, avoids the risk of thawing during power outages, and gives you shelf-stable broth that’s always ready to use.


I am new to pressure canning – I intend to use it first to make home made dog food and bone broth. My dog is tiny – is there any issue with using 4oz canning jars??
You can put it up in 4 oz jars, no problem. There are no tested times for jars smaller than pints though, so you’d have to use pint times.
I understand that this stock requires boiling to be made, but why do so many pressure canning recipes call for boiling hot liquid and hot, sterilized jars? Doesn’t the pressure canning process make that unnecessary? I have raw packed many meats and vegetable in tepid water, capped the jars, set into the pressure cooker that held tepid water, slowly brought up the temperature until I could “pressure vent” the steam for ten minutes, and then set the jiggler and pressurized as required.
What am I missing?
Pre-sterilization is not required if the processing time is over 10 minutes for elevations under 1,000 feet. Raw packing is a perfectly acceptable canning method as long as there is a tested recipe to do so. Depending on the food that is being preserved, some people may prefer hot pack or raw pack for quality purposes.
I think it’s more about hot foods into hot jar, and cold food into cold jars, and like temperatures of water in the canner.
Robin
New to pressure caning and a bit frustrated. I am having a hard time getting my pressure regulator to steady out. It seems it is either too jiggly or not moving at all. I am thinking I should re process the last two batches of bone broth I canned. They all sealed but the temperature was not at or above 15 lbs. of pressure (I am at 4,500 ft) for the entire time. Can I just reprocess them, even though they have already sealed?
Yes, you can just reprocess them.
Second time trying to pressure can bone broth (beef first, then turkey) and both times 3 of my 8 never sealed.
What am I doing wrong, and can I re-can what didn’t seal?
New to pressure canning.
Yes, you can reprocess them. If they didn’t seal, it may not be anything that you did wrong. Did you clean the rims of the jars well before putting the lids on? It’s possible that it could be the lids. Try a different brand and see if you get different results.
Thank you! I did reprocess. I think it was the fat causing it not to seal. I almost always use ball lids, but I do have some Walmart brand ones too. Maybe I accidentally used them.
I have canned since about 1976. I have used all kinds of lids, foreign and USA manufacture. I bought some at auction in the 80ies that were price tagged .49 cents for a dozen. They were white and said red magic button on them. They were old then and I used them for several years till I ran out of them. No problems with them. Recently I have used lids that I purchased on eBay. I think some were made in China. I have done more than 400 jars of things this season and no failure from lids of any make. eBay lids average about .10 cents each now, much more reasonable than Wal-Mart or anywhere else I can find them.
Does any bone broth recipe work for this? I like to add Apple Cider Vinegar and lots of chicken feet to make it super gelatinous. Do I still fill the jars to 1″ and is it still safe to pressure can with these instructions?
Yes, this process should work with any broth recipe.