Affiliate disclosure: This post may contain affiliate links. Please see our Privacy Policy.
Leaf lard isn’t just any old lard, it’s smooth creamy magic that’s unlike any other type of lard available. In general, lard refers to rendered pig fat.
Pigs have more than one type of fat stored on their bodies, and each type produces a distinctly different type of lard. The most widely available is generic lard is made from back fat, and it’s relatively hard and dense. Leaf lard is different.
Made from the visceral fat, namely a sheet of vaguely leaf-shaped fat stored around the loin and kidneys of a pig, leaf lard has a smooth and creamy texture. It’s soft and spreadable at room temperature, meaning that it has very different cooking properties than a generic block of backfat lard.
The most important distinction in leaf lard? It doesn’t taste like pork. That means it’s perfect for making donuts, pie or just about any old school country recipe in the traditional way.
The first time I encountered leaf lard was during sugaring season in Vermont. My 80+-year-old neighbor was making a huge batch of her famous donuts for “the boys” who were out trudging the mountain in snowshoes collecting sap buckets. I’d come over to help with the boil once the boys got back with the sap, and she had just finished frying up at least 10 dozen donuts.
She hands me one, and I’ll admit I’m not much of a donut eater so I tried to politely decline, but she insists. I take one bite and my whole donut outlook changed forever.
That was by far one of the best things I’d eaten in my life. Not just the best donut, but the best food I’d ever put into my mouth hands down.
I looked at her with obvious shock on my face and said, “Dot, you’ve got to give me the recipe, these are AMAZING!” She cackled, the way a toothless old Vermont Mountain woman does when she encounters a clueless flatlander asking a silly question.
“Recipe?? I ain’t got no recipe, I just make ’em. The secret though is leaf lard.”
She went on to explain in detail about leaf lard, where it comes from and why it’s special. I couldn’t imagine a special piece of fat shaped like a leaf hiding inside a pig, but at that point, I’d never harvested a pig with my own hands. Now that I’ve butchered at least a dozen pigs with my own hands, I know in detail how each cut is different, both in meat and in lard, and the special cut of leaf lard is one of the first things I pull out.
Then she took me into a back room and opened up a giant chest freezer. The entire thing was filled with plastic tubs of lard as far as the eye could see.
She pulled one of the biggest tubs, ironically in an old country crock margarine container, and handed me her secret ingredient. I treasured it and slowly used small amounts making homemade lard pie crusts for my pie-loving husband.
A few years later, we’d moved away, but I got a Christmas card from her with a small handwritten note. While she doesn’t make her donuts from a recipe, the next sugaring season she measured and wrote it down just for me, noting to be sure to use leaf lard for frying or they wouldn’t be the same. I actually cried reading it, and even writing this now the thoughtfulness of that beautiful note brings a tear to my eye. (Scroll to the end for the recipe)
That was more than a decade ago, and now we make our own leaf lard at home. Every time I make up a batch, I think of my neighbor and the way she cackled when I asked for her recipe.
What Is Leaf Lard?
Pigs have three distinctly different types of fat on their bodies: Back Fat, Caul Fat, and Leaf Lard.
Back fat, which is very firm, and comes off in solid slabs from a well-fed pig. That fat is commonly ground as an additive to sausage because it holds together well and adds richness, while remaining as distinct pieces.
That means it doesn’t easily emulsify into the meat, which would result in something more like hot dogs or bologna than sausage. In traditional charcuterie, whole slabs of back fat are cured in salt to make something called lardo, which is just salt cured aged pork fat hunks.
Caul Fat isn’t something you’ll easily find, but it’s finding its way into the fanciest restaurants these days. It’s a lacy sheet of fat that surrounds the intestines of a pig.
It’s traditionally used to wrap meats and other dishes to give them the appearance of being wrapped in lace, but also to add richness and flavor. If you’re curious what it looks like, there’s a picture here.
Leaf lard is the visceral fat from inside the cavity of a pig, usually found in a big sheet near the kidneys and loin. The texture is very distinct, and it’s so soft it feels like you’re touching butter.
Holding a piece of back fat, you’ll get little bits of grease on your hands, but holding a piece of leaf lard is like holding a sheet of pudding. It rubs off everywhere and you know you have something completely different.
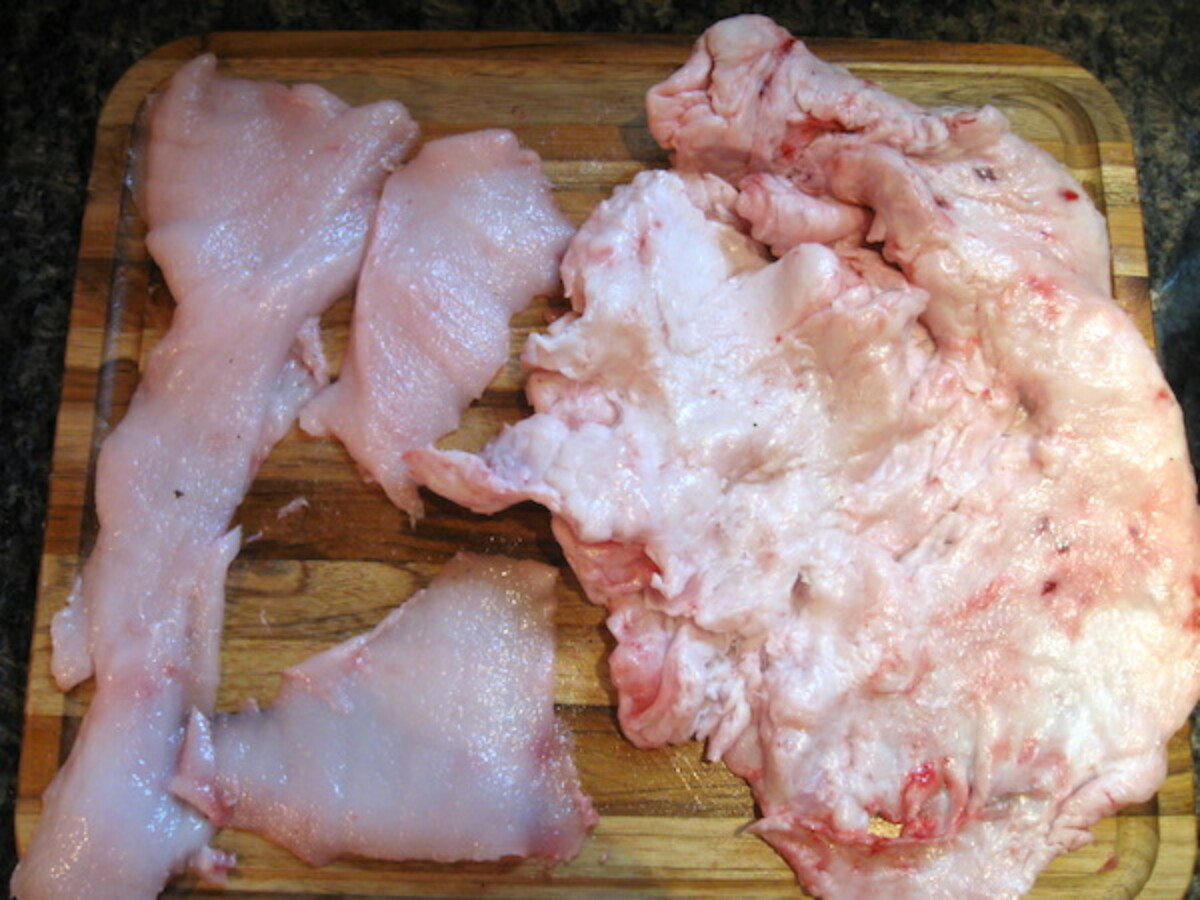
Leaf lard gets its name from its shape because it’s supposed to be shaped like a leaf. I’ve pulled leaf lard out of many a pig, but not one looked like a leaf to me.
Perhaps I lack imagination? Either way, here’s a sheet of leaf lard next to some back fat trimmings for comparison. It’s something that’s hard to see visually, but you’ll know it if you touch it.
Where to Buy Leaf Lard
If you want to skip that rendering step and just buy it ready to use, pre-made leaf lard generally costs about $25 to $30 per pound. It’s convenient for sure, and you just order it online without having to spend 2-3 hours slow rendering it. It depends on your priorities, and how much you value that time and effort spent (plus the cooking fuel).
The benefit is you know it’s high quality, pasture-raised and organic…and that it’s been rendered by an expert to be completely pure without any porky taste. If you’re not confident in your ability to render it yourself, that’s the way to go.
If you’re going to render your own leaf lard, you have to either raise a pig or buy a sheet of it from your local butcher. They’ll know exactly what you’re talking about and can special order it if they don’t carry it.
Rendering your own leaf lard is much cheaper than buying it already rendered. Generally, you can buy leaf lard for $1-2 per pound un-rendered because not many people know how to use that cut.
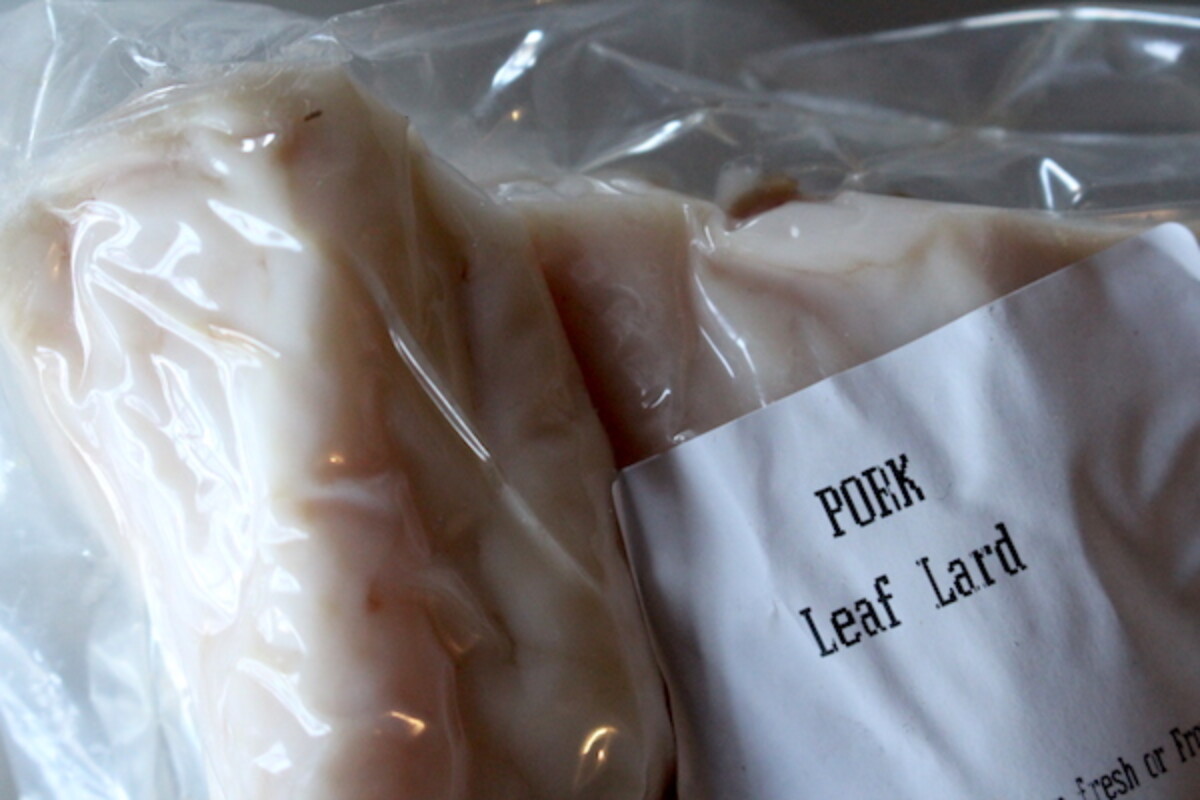
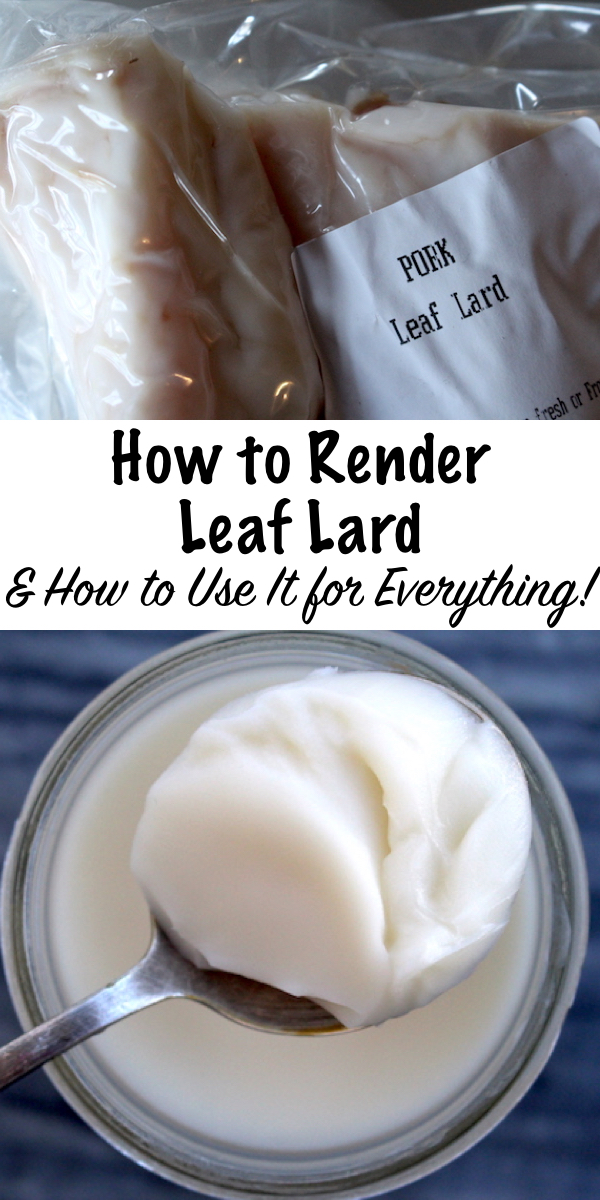
While we’ve always had an ample supply of home-harvested leaf lard in the past, with two toddlers in the house it’s been a few years since we’ve had pigs. I actually broke down and bought a package of leaf lard to render…
How To Render Leaf Lard
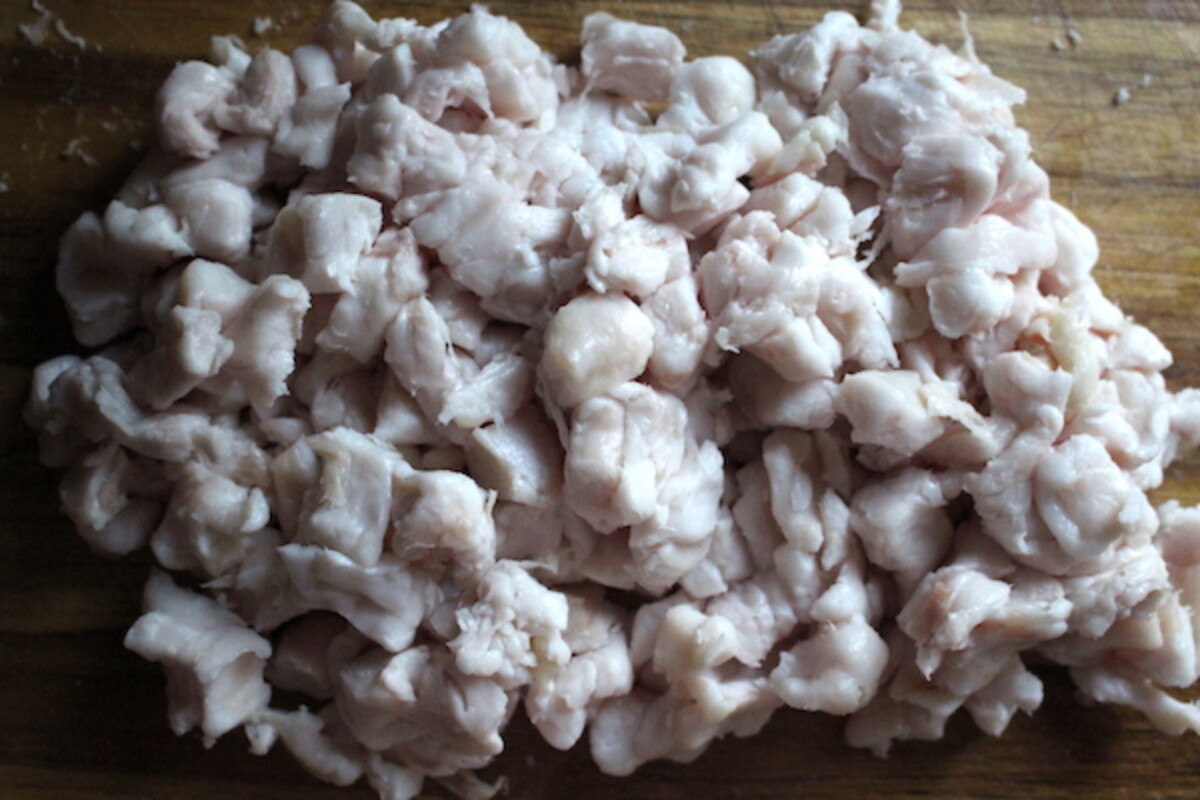
Once you’ve acquired a whole leaf lard cut, the next step is to chop it as finely as possible. The more surface area you open, the better your yield. And more importantly to me, the more likely you’ll be to render it out cleanly without any porky taste what so ever. Since I’m making donuts and pie, that’s pretty important to me.
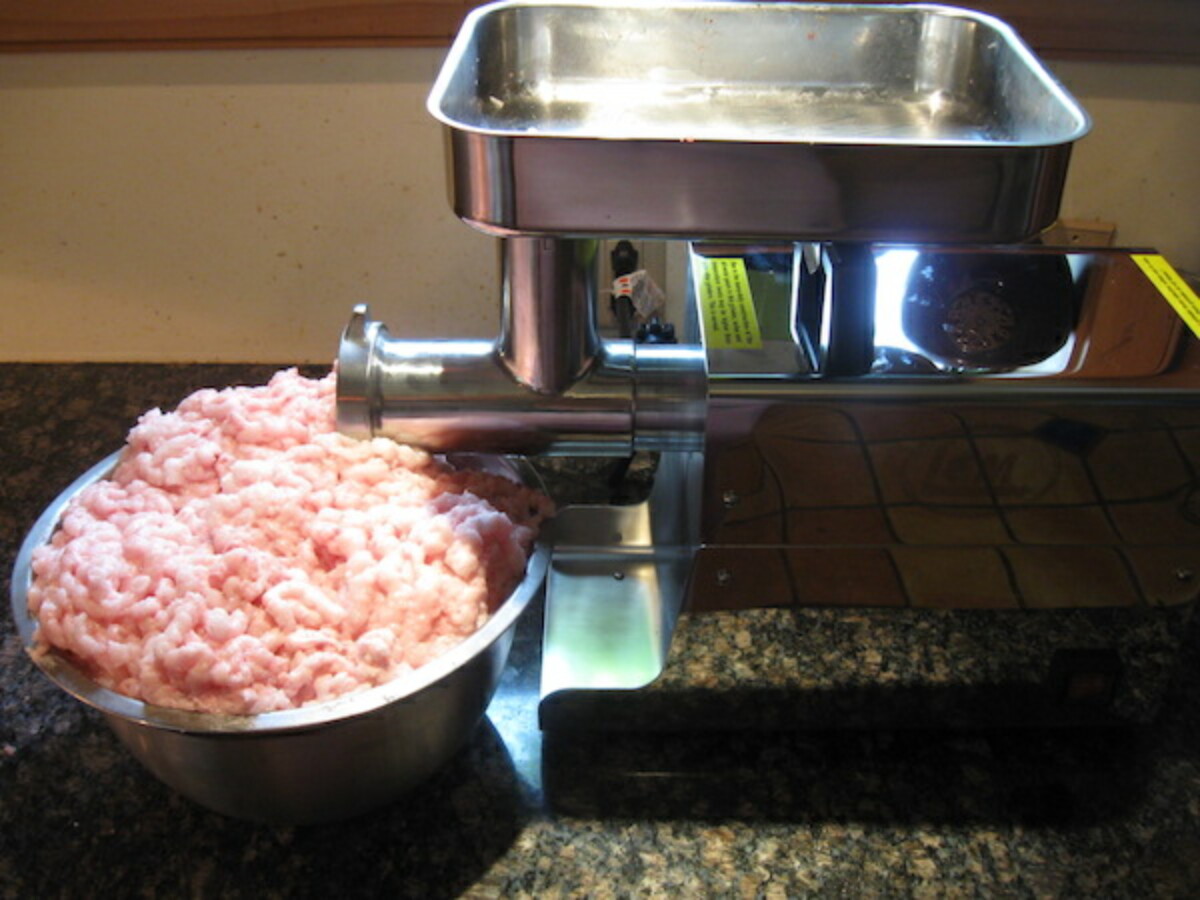
When we processed 6 pigs one fall, we already had the meat grinder out for sausage making. Using a meat grinder is the very best way to ensure that you open up as much surface area as possible.
We have a pretty huge grinder that can process through about 7 pounds a minute, which is ideal if you’re making a couple hundred pounds of sausage in a day. Before we were processing huge batches, we used the meat grinder attachment for a KitchenAid, and it works great but much slower at a rate of about 5 minutes to grind 1 pound.
Here’s one big old pile of ground up hog fat ready for rendering…
If you’re not making a huge batch, the best way is to simply chop the leaf lard finely with a sharp knife. I know, not everyone’s as lard crazy as we are, and you don’t have to fill a chest freezer with rendered lard.
Sometimes it’s nice to have just enough for day to day use, or enough to make a couple of pies. A single package of leaf lard from the store is likely to be more like 1 to 2 pounds, and there’s no reason to pull out a grinder for that.
A single pound of leaf lard will render down to roughly 2 cups of finished leaf lard. That’s more than enough for most people.
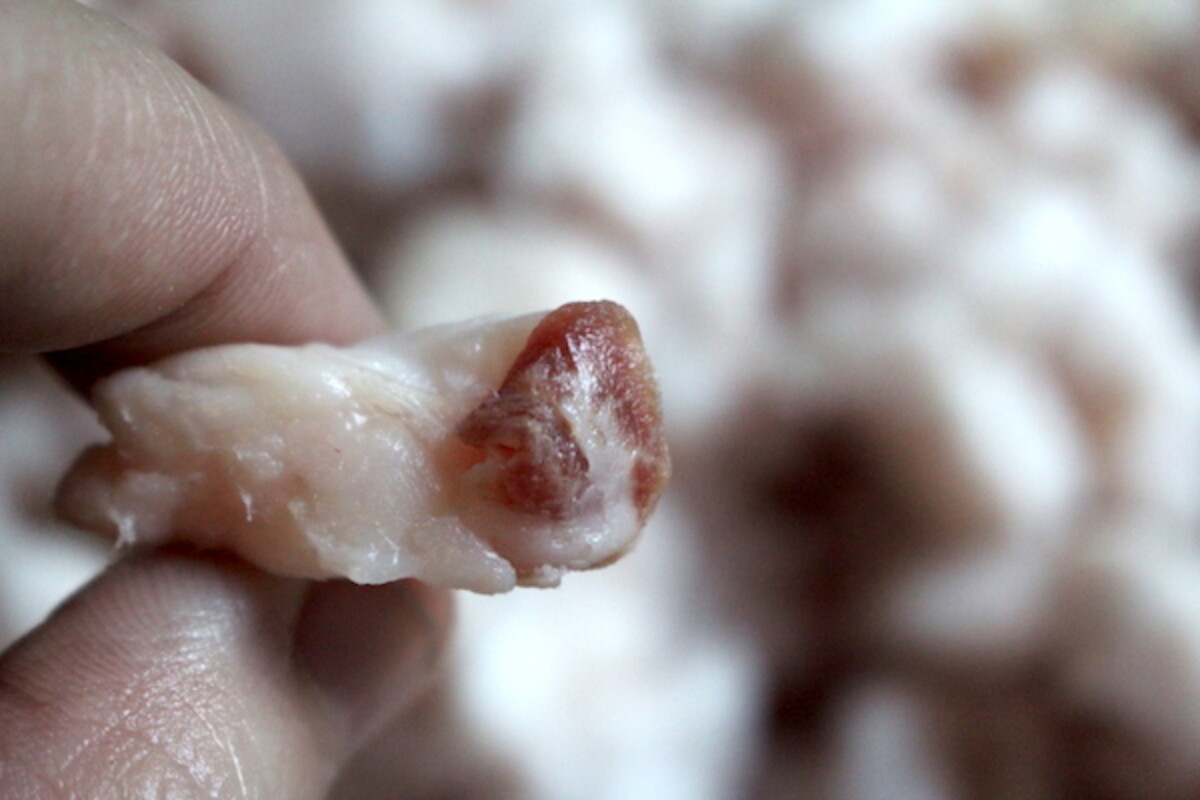
One other thing to note when you’re chopping up the leaf lard to prepare it for rendering…be very careful to remove every last trace of meat. Leaf lard is meat-free for the most part, since it’s a big hunk of visceral fat rather than marbling within the meat. That said, it’s attached to the meat in a few places, and those attachment sites may still have tiny little meat nubbins attached.
Why is it important to remove every last trace of meat? Any meat left in the leaf lard during rendering will contribute flavor to the lard, and you’ll never make neutral leaf lard that way. Those little meat pieces will be delicious because they’re basically deep-fried pork nubbins, but then you’ll have fry oil instead of clean snow-white rendered leaf lard.
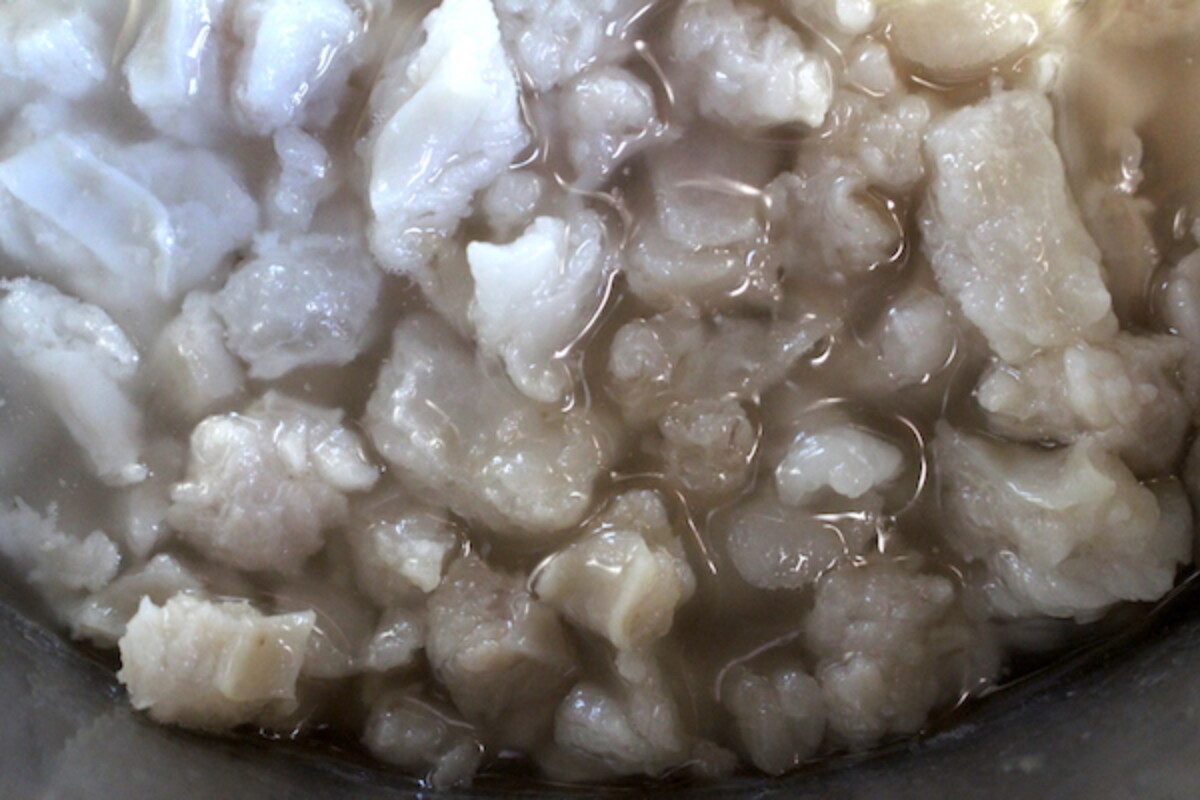
Place the chopped leaf lard in a thick bottomed pan with a small amount of water. I used about a half cup for one pound of chopped leaf lard.
The water helps prevent the lard from scorching at the beginning, which is important to the finished flavor. If the lard scorches, the whole batch will taste distinctly porky, think crisp bacon but without the salt and seasoning. Good in theory, but not so great for baking.
If you do scorch the lard, no worries, it’s still tasty. Just use it for cooking things that could use a bit of porky flavor.
Then get some more leaf lard and try again, with a good bit of water to start and a much lower temperature. The start looks a little strange, just hunks of white lard floating in a bit of water, but turn the heat on low and let the magic happen…
In a short bit, the water will begin to simmer, and it’ll slowly evaporate away as the lard begins to render. Make sure you cook it uncovered so the water can escape. After about 90 minutes on low heat, none of the original water is left and the lard bits are rendering in a pot of their own released fat.
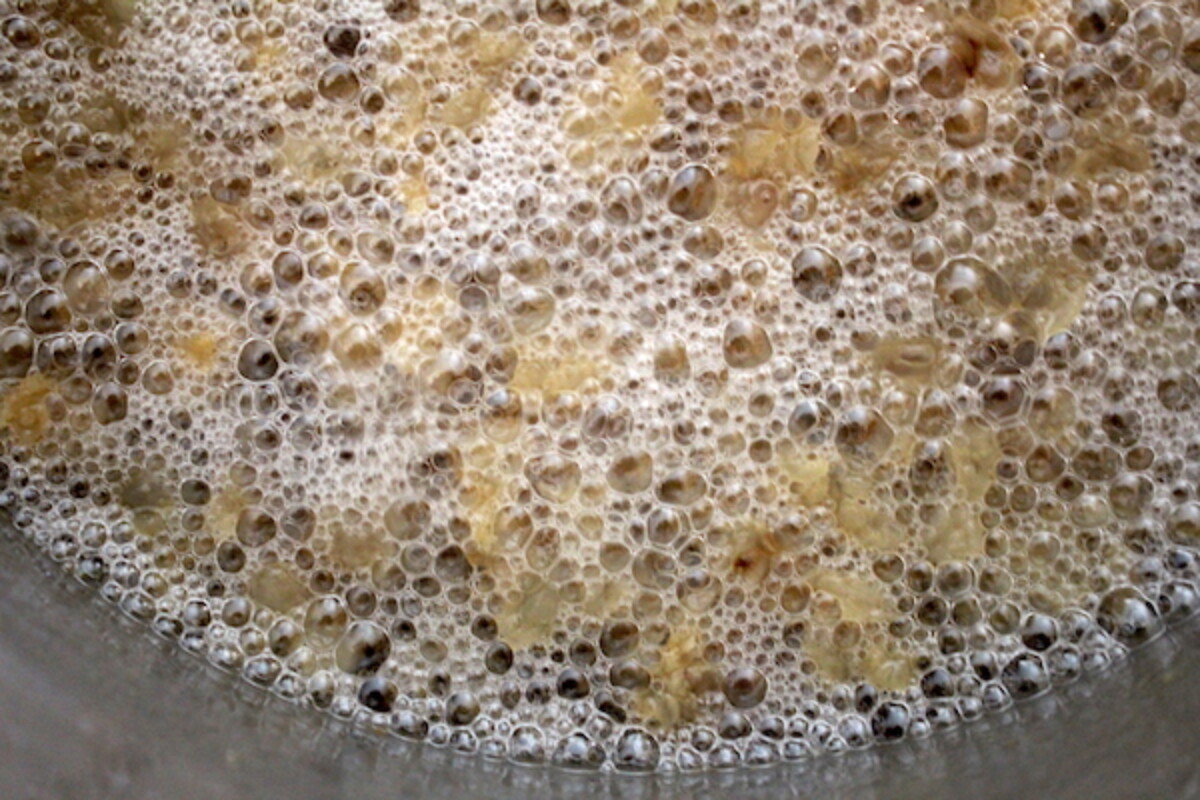
At this point they’ll be putting out big bubbles as the last of the water leaves the fat globules, and more fat melts out.
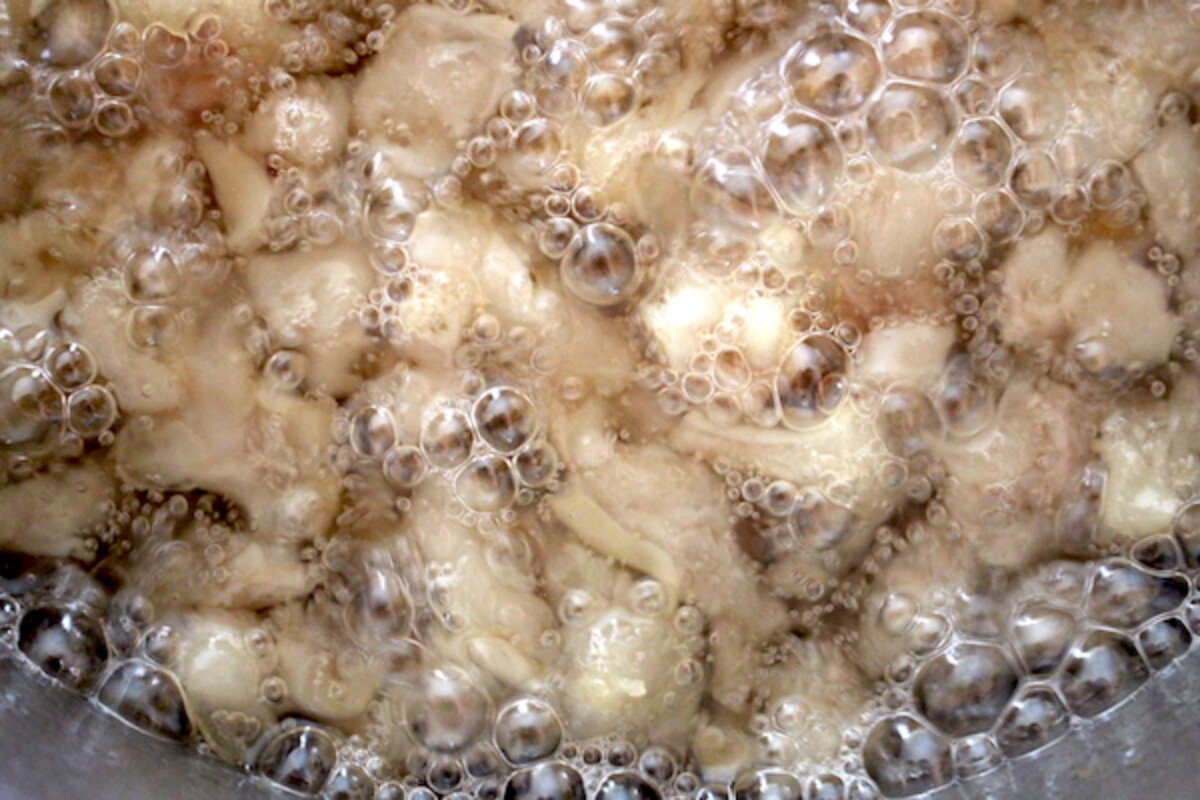
About 15 minutes later, when the lard has been cooking for about 1 hour and 45 minutes on low, I reached the point where the bubbles changed. This signals that the lard is almost completely rendered. Those big lazy bubbles will change to tiny fast bubbles as the very last bits of water are driven from the fat, and the last bits of liquid leaf lard render out of the fat hunks.
The time may vary a bit because stoves are different, and lard varies a bit from pig to pig, but once you reach the tiny bubble stage it’s time to watch the rendering leaf lard closely.
Here’s the part that seems strange…when the leaf lard is completely done rendering, all the bubbles will stop. I know, how does it go from rapid tiny bubbles to complete stillness without changing the heat?
A pot of pure, very hot oil doesn’t bubble. It only spatters when there’s water or other food frying in there. Once everything else has been driven off, all you have is cracklings floating in liquid pure rendered lard. Once the lard completely stops bubbling, remove it from the heat.
If you leave it on the heat at this point it’ll start smoking, which will taint the flavor and hurt the quality of the finished lard. That’s why you have to watch it carefully towards the end.
Filter the cracklins from the liquid leaf lard by using a fine mesh strainer, but be careful, the oil is obviously very hot.
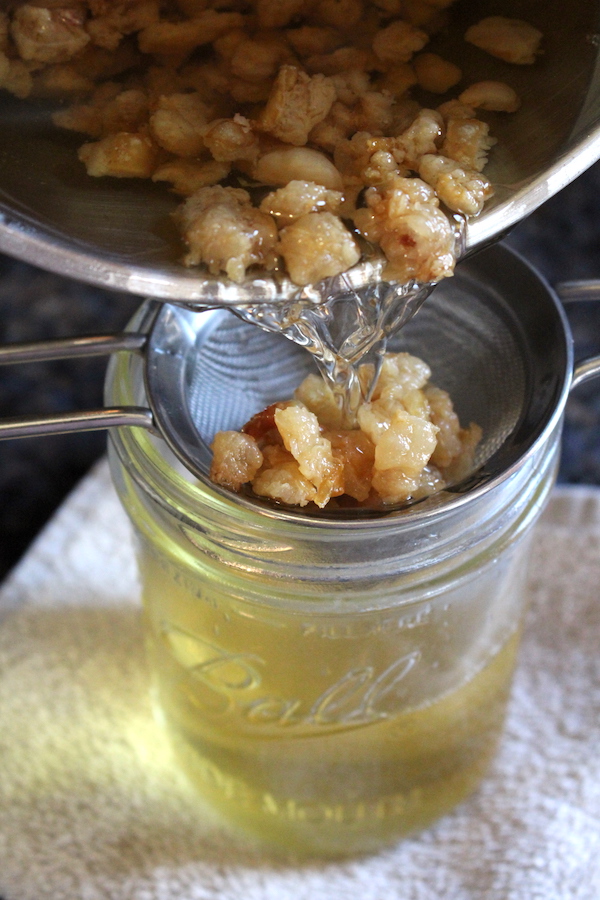
The cracklings are a tasty by-product of leaf lard rending, but they’re only good while they’re hot and fresh. I wouldn’t bother saving them to reheat or trying to eat them cold, it just doesn’t compare.
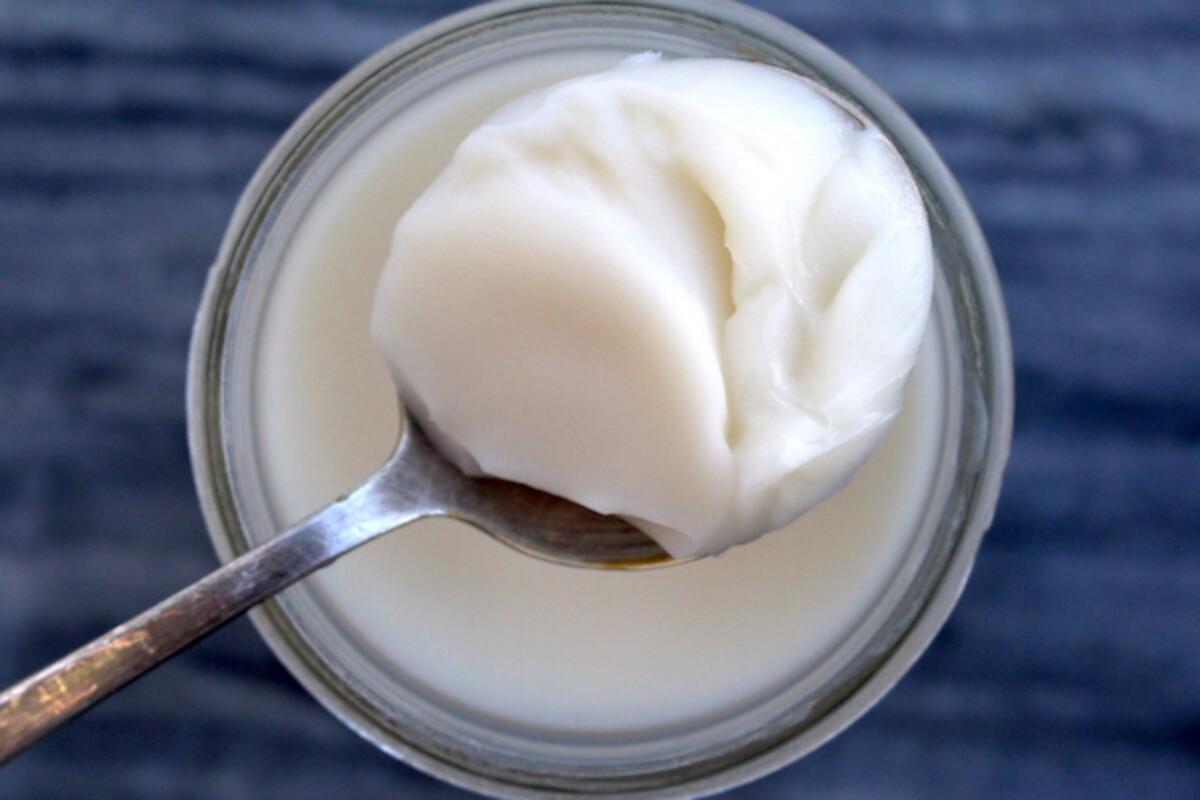
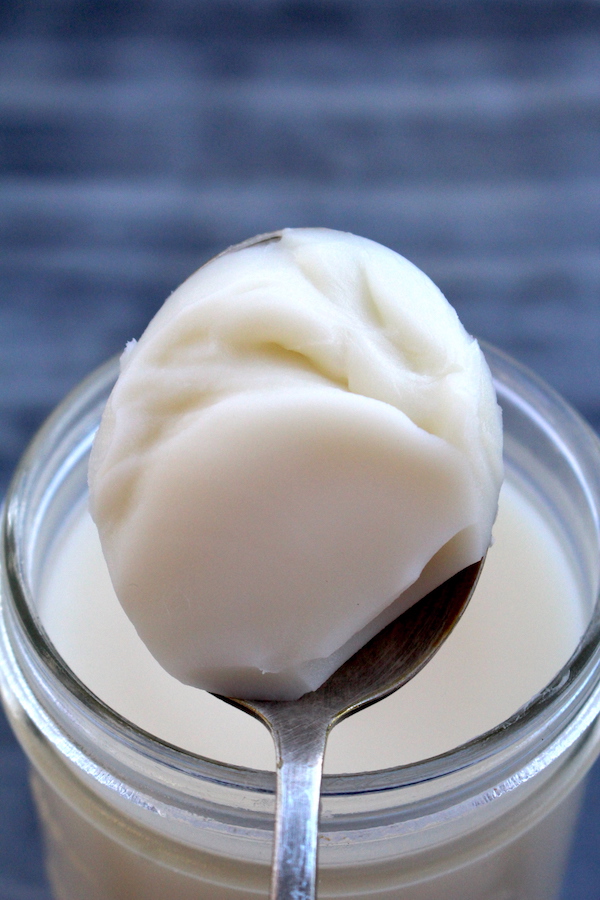
While it’s liquid, leaf lard has a golden yellow color, but once it cools completely the leaf lard will be a pure snow white. At this point, if you’ve done it right and patiently kept the temperature low, the leaf lard should have no porky taste. The texture will be creamy and spreadable, like very soft butter.
Cap up the hot lard jars quickly and they’ll seal, preventing condensation from the air as they cool. The main spoiler of lard is moisture contamination, so now that you’ve driven off the liquid through rendering get it capped hot to keep it out.
It’s probably unnecessary, but I want to make sure my pure leaf lard keeps for a long time. Not that it’s likely to last in my kitchen very long.
How to Store Leaf Lard
There are differing opinions on how to store lard.
Many places on the internet say that it’ll keep for about 6 months if kept tightly sealed in the refrigerator, but historically lard was stored for extended periods of time without refrigeration. There’s a great article on nourishing days about storing lard without canning or freezing. They live off-grid in Texas and she discusses how her lard retained perfect quality even through a 100+ degree Texas summer.
The main thing when storing lard is to make sure that it’s tightly sealed. Any moisture that comes in contact with the fat can contaminate the batch.
Similarly, other contaminants can cause spoilage. Always use a clean utensil to scoop out lard and keep it really clean. With those two precautions, lard should keep quality at room temperature for a very long time.
That said, if you have access to a refrigerator there’s no reason not to refrigerate it. And if you have many containers, it’s fine to put them in the freezer too. Keep in mind, that it’s likely an unnecessary precaution, but better safe than sorry.
Food for thought on lard storage….Pemmican, the old school survival food the frontiersmen carried was made by mixing rendered lard and dried meat in a 1:1 ratio. That stuff, even with dried meat added in, reputedly keeps indefinitely at room temperature.
That said, if leaf lard does become contaminated by moisture, or it wasn’t rendered completely, it can spoil. Rancid lard has a distinct smell, and it’ll taste a bit sour.
How to Use Leaf Lard
If made properly, leaf lard has a neutral taste and it can be used just about anywhere shortening is used in modern recipes. In fact, Crisco was actually developed to replace lard, and Crisco-based cookies are just old-time lard cookies adapted to a supposedly healthier alternative.
Studies are now showing that hydrogenated vegetable lards are horribly unhealthy, and lard was the better bet all along. Funny how things come full circle.
Lard is great just about anywhere you’d use butter, and the old timer’s still spread it thickly on their morning toast. While that one’s an acquired taste, using it in cooking is good for just about anyone.
Here are some great ways to use lard:
- Homemade Flour Tortillas
- Chewy Sourdough Tortillas with Lard
- Tamale Dough (Masa)
- The Ultimate Lard Pie Crust
- Old Fashioned Lard Biscuits
- Sourdough Corn Tortillas
- English Lardy Cake
If you need more inspiration, check out the book Lard: The Lost Art of Cooking with Your Grandmother’s Secret Ingredient
Leaf Lard Fried Donuts
So you didn’t think I was going to keep the perfect old school Vermont Sugar House Donut to myself, did you? These things are amazing and meant to be shared. I posted it here on my Instagram, where I share all manner of fun DIY projects and old school recipes.
These come out just barely sweet, since they’re often served with traditional sugar on snow (maple taffy). You can dust them with sugar while they’re hot if you’d like a sweeter donut.
Enjoy!


Thank You for the primer on leaf lard. I took a pie-making class one time and the instructor provided small amounts for our crusts, but being lazy I have found 50/50 butter and ‘Crisco’ does fine.
Just wondering if leaf lard can be simmered (?) to imbue it with a spice (or spice mix) prior to adding to a recipe so as to increase richness but also add depth of flavor to a dish (especially savory)?
Also, though you make your own, can you recommend a high-quality purveyor online?
Thanks!
Steve
Yes, you can infuse it with spices, that’s a great idea. You’ll just need to cool it completely before using it in the crust. And for purchasing leaf lard, I have bought from Fatworks in the past and their stuff is great.
You are an Angel; you must have legions of helpers to manage… well, EVERYTHING. I thank you from my whole heart. I grew up on a farm and know a lot of formulas and practices— but not as much as you. It is encouraging to see how many people are learning from you. If ther was an affordable (I live on the tiniest SSecurity you can imagine) I would gladly do it. Click on my email button if you can think of anything someone on the other side of the continent can do. Love, Letha
Thank you so much for your kind words. We’re so glad you’re enjoying the blog.
I tried to find your recipe on IG and I could not find it! So disappointed! Can you post it here, please? The link you supplied just takes me to your page and searchingdid not work.Thank you!
You actually don’t need to go to the IG account for the recipe. That link is just there in case you want to follow us on IG. If you scroll down a little bit there is an image of IG post with the recipe.
Great read! Would you please explain what suet is and how it is different from the other fats?
Thank you!
The main difference between this fat and others is that when rendered, it creates a tasteless and odorless lard which can be used in things like pastries without having the meat flavor.
My grandmother made donuts all thru my childhood about a batch of a couple dozen every week. She used lard in a deep fat fryer. The donuts were cooked and she made sure she cleaned out every crumble than kept the fat in the cooker with a glass lid on for next time. When she started the fryer back up and got the oil hot she fried a potato until it was a browned French fry wedge. She said it kept it fresh and got rid of any rancid taste. Then she made the donuts. So good! And we ate the French fries.
Thanks for sharing that great tip from your grandmother. What precious memories.
Thank you so much for this post! Your descriptions make me feel confident that this is something I could try to do myself. I have a question about the cooking temperature. I want to do the rendering in my countertop roaster oven, since it’s basically a slow cooker but with temperature settings.. Should I set the temperature to around 212 degrees or so to make sure that the water comes to a boil? It seems to me that this should work, but I’d like to know your thoughts.
Sounds like a great idea! You’ll have to play around with it to see how accurate that little thermometer is on there, as you might have to set it ever so slightly higher or lower to get the slow rendering result you want, but it sounds like it’s work well. Good luck!