Affiliate disclosure: This post may contain affiliate links. Please see our Privacy Policy.
Natural dyes are a fun way to experience the natural world, and plants, mushrooms, lichnes and moss not only decorate our world, they have hidden color inside that can dye fabrics, paper, wood and more. Whether you’re interested in a fun craft to do with your kids or if you’ve always wanted to change the color of your clothes on a whim, I’ll walk you through how to use natural materials to dye your fabrics.
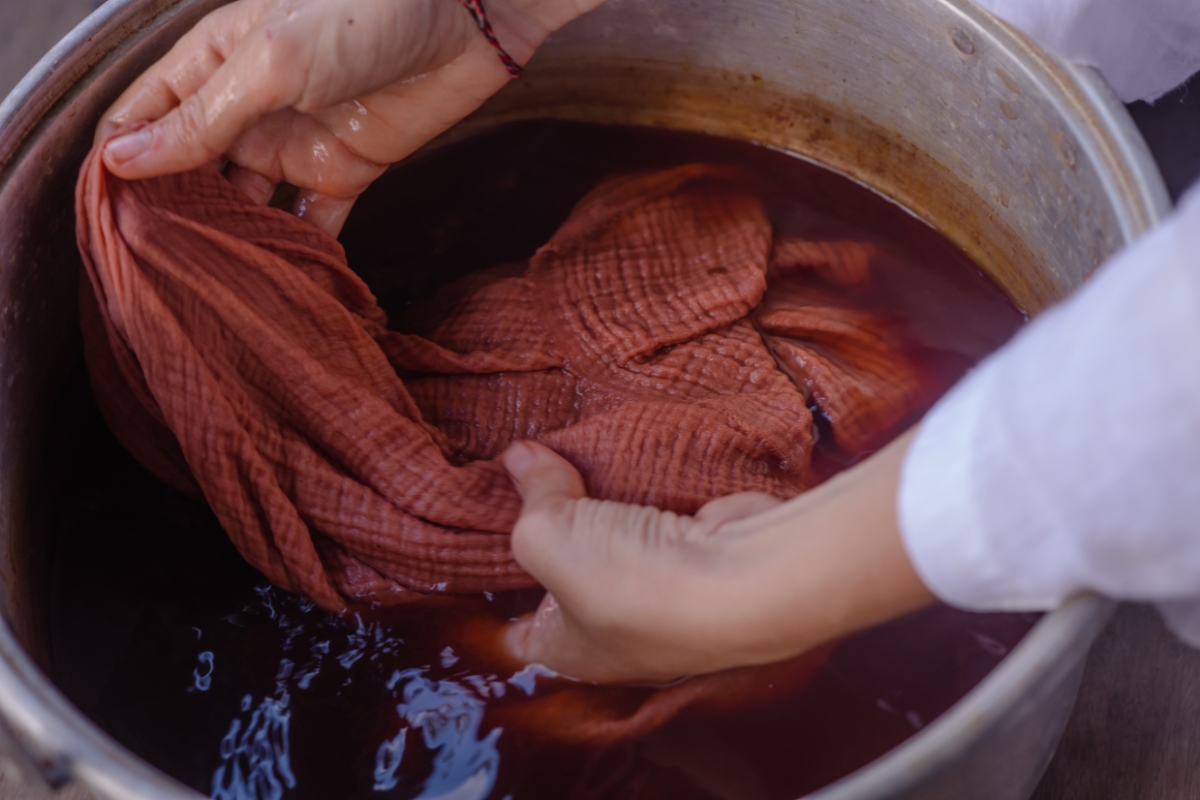
As kids, we experimented with dyes whether we intended to or not. From summer afternoons making tie dye t-shirts, to mishaps at ice cream parlors, we’ve all changed the color of fabrics at some point. There’s a tea towel I refuse to throw away because I kind of like the pattern I stained into it when I was wiping up a smoothie mishap.
In this article we’ll discuss how to dye your yarns and clothes (intentionally) using natural materials you can find outside in your garden, harvest from kitchen scraps, or even forage in the wild! There’s a greater wealth of color available to you than you may at first believe.
Dyeing with natural materials can be tricky for beginners. But many people who start brewing their own dye baths find they never want to stop.
Natural Dye Reference Material
Every plant or mineral you place into a dye bath is going to behave differently. With some, like eucalyptus leaves, this boils down to which tree you chose to harvest. With others, like blackthorn berries, their color shifts depend on the pH of their dye bath.
In the rest of this article, I’ll walk you through the basics of using natural materials to dye fabrics. However, if you’re thinking of making this a hobby (or going even deeper!), I’d recommend grabbing a full book on the subject.
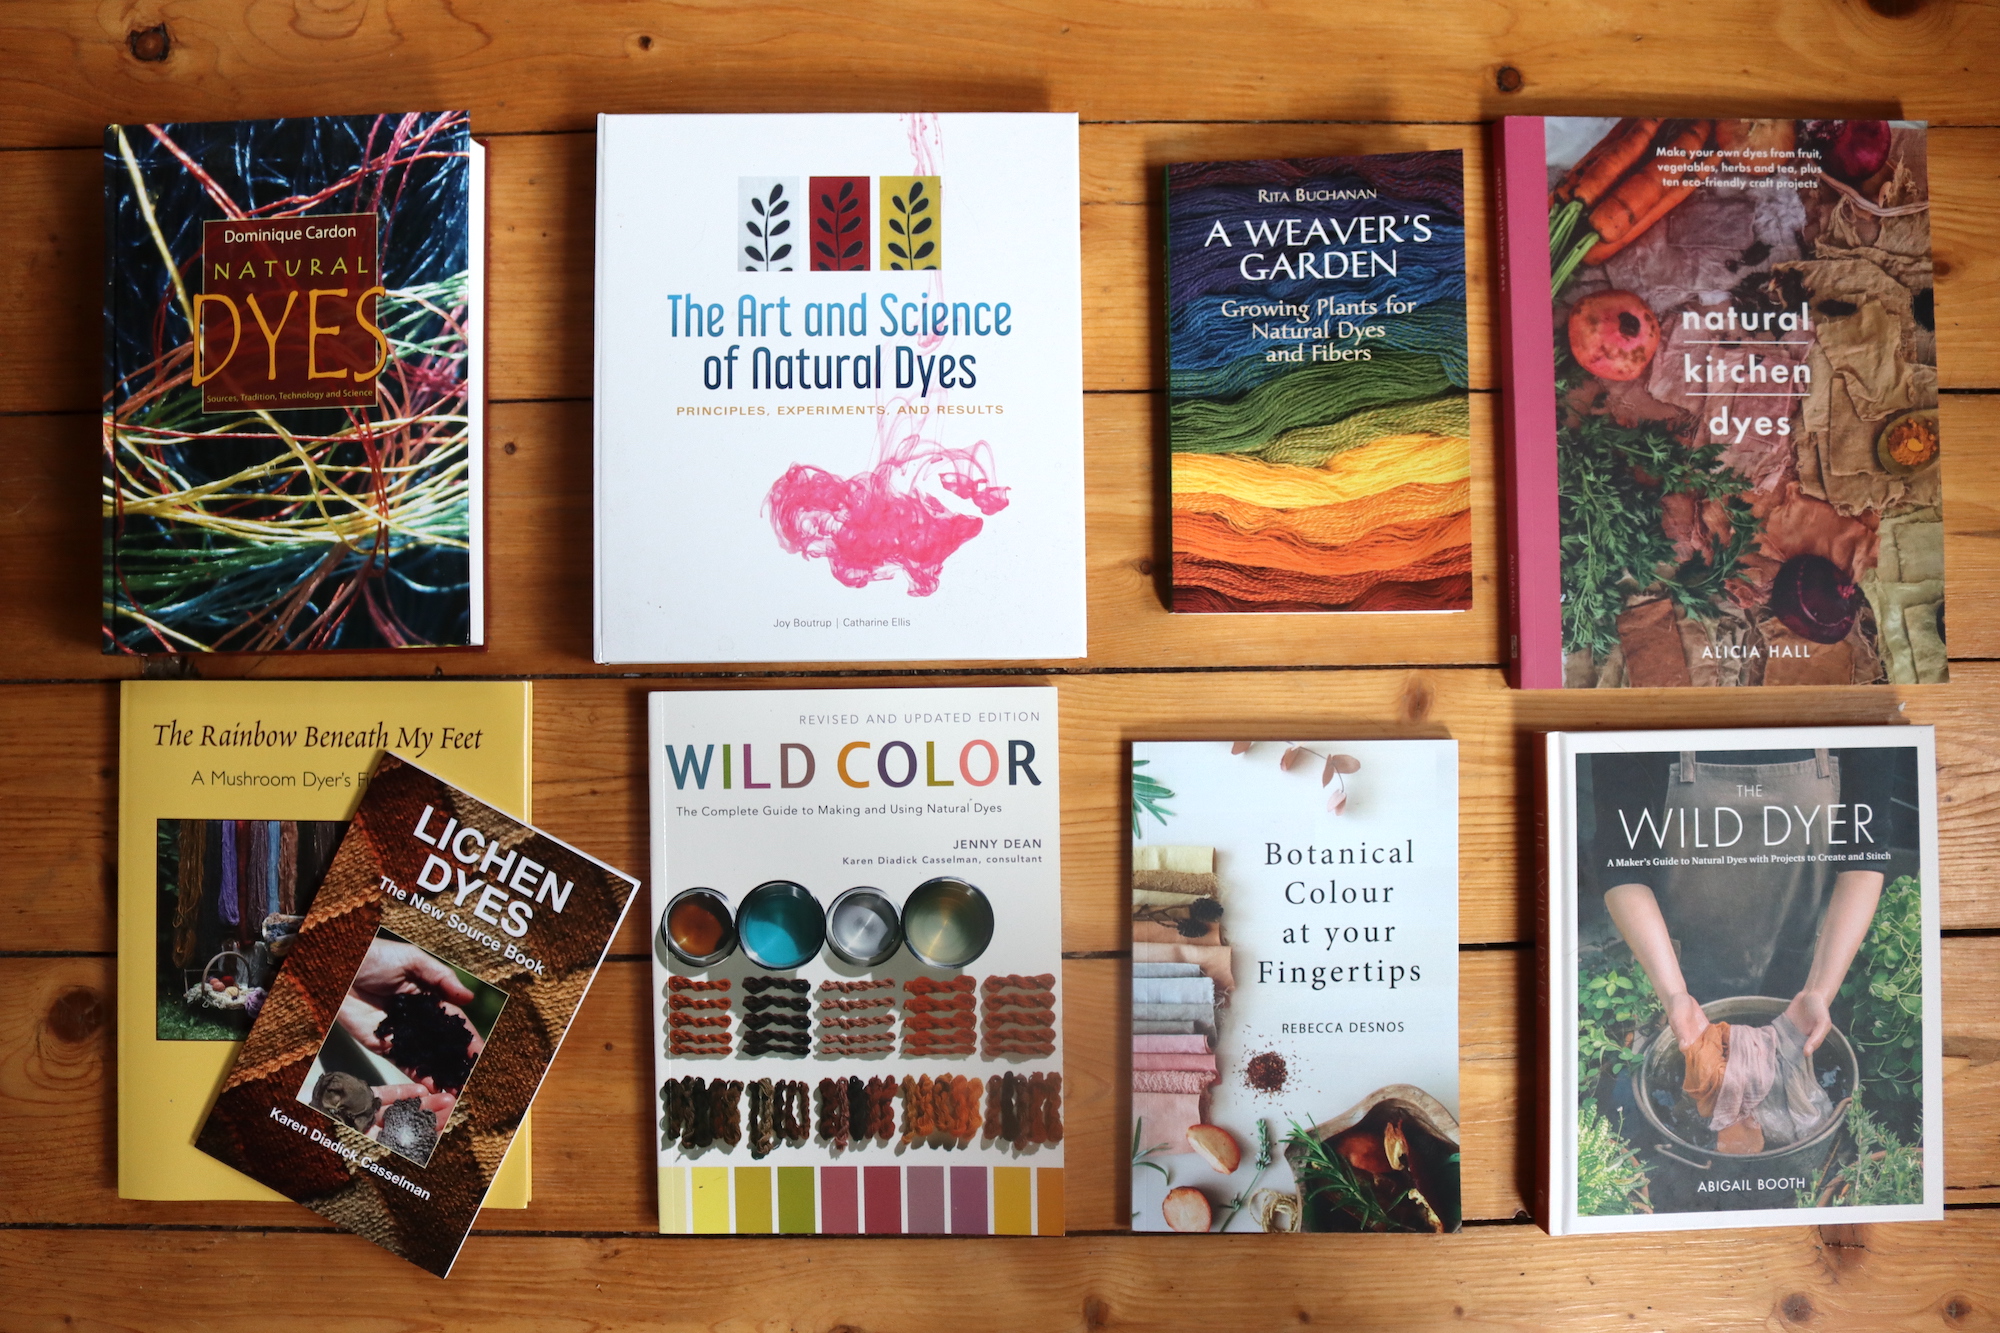
Experience through practice really is the best teacher on how to use natural dyes, but here are the main books I pulled from to write this article:
- Wild Color by Jenny Dean ~ this covers a wide variety of dye sources and provides dye instructions in a clear, easy-to-understand format
- The Wild Dyer by Abigail Booth ~ a good resource for anyone wondering about natural dyeing from a holistic perspective.
- A Weaver’s Garden by Rita Buchanan ~ this is really a gardening book. But, if you’re interested in sourcing everything for your dyes from your own yard, this is the book for you!
- The Art and Science of Natural Dyes by Joy Boutrup and Catharine Ellis ~ as the title implies, this approaches the dye process from a chemical level. A great choice if you want that extra explanation into why dyes behave the way they do.
List of Terms
As you get started with dyeing fabrics, you’ll notice a lot of new vocabulary words being thrown your way (I sure did). While I’ll provide definitions as we go, I’ve also compiled this short list of terms that you can check if you’re feeling a bit lost.
Adjective dyes—dyes that require a mordant in order to stick to a fabric. Almost all natural dyes will fall into this category.
Alum—this is a term that technically can refer to any aluminum-based mordant. Most commonly it refers to aluminum sulfate.
Dye Bath—a term for water that is ready to receive fibers. A dye bath is the result of simmering and straining out your dyestuffs.
Dyestuffs—I have a hard time keeping this one straight. “Dyestuffs” refers to what the dye is coming out of (walnut shells, blueberries, dyer’s woad, etc) and not the things being dyed.
Fugitive colors—any colors given by natural dyes that are never fully washfast or lightfast. Any dyes made from berries will be in this category
Lightfastness—one of 2 terms used to describe how well a dye holds on fabric. Lightfastness refers to how well a dye holds up when exposed to light.
Modifiers—substances that can alter the color of dyed fabrics. Some modifiers deepen or brighten colors. Others add various hues like yellow to the fabric.
Mordant—a material (often a metal) used to help dye bond to fabrics. Mordants bite into the fabric and essentially create a bridge for the dye to go deeper into the material. Alums and tannins are the most common types of mordants.
Overdyed/Overdyeing—this is a term that refers to situations where a lot of dye is used. Most commonly it refers to when a fabric is dyed for a second or third time. But it can also be used for fabrics that have been dyed for too long.
Scour—the process of stripping fabrics of starches, oils, and dyes in preparation for mordanting and dyeing those fabrics. It also can refer to the washing soda used to clean the fabric.
Tannins—a group of bitter and astringent chemical compounds regularly found in nature. They can act as mordants or modifiers (sometimes both).
Top Dyeing—also known as Sequential Dyeing, this is the method you’ll follow to mix dye baths. Combining dyestuffs together into the same dye bath usually results in a muddy or brown color regardless of what’s in the bath. In top dyeing, you’ll dye fibers once, let them dry, and then dye them again in a different dye bath.
Washfastness—the 2nd term used to describe how well a dye holds on fabric. Washfastness refers to how well a dye holds up to repeated washes. You may also see this term as “Wash fastness” or “Washing fastness.”
WOF—an acronym standing for Weight of Fiber. Typically, the total weight of the fiber being dyed should tell you how many grams/pounds of dyestuff you need.
Materials you Need
I imagine you have many of these items already on hand. However, anything you choose to use for dyeing should only ever be used for dyeing after that point—no kitchen items listed should be returned to the kitchen for food use. So I’d buy an extra set of wooden spoons and decide which you’re okay sending to the dye baths.
Here’s what you need:
A scale or measuring cups/spoons—many directions for dyeing fabric assume you can measure using grams. A scale will obviously do this, but you’re also welcome to convert the weight to volume and use measuring spoons/cups instead.
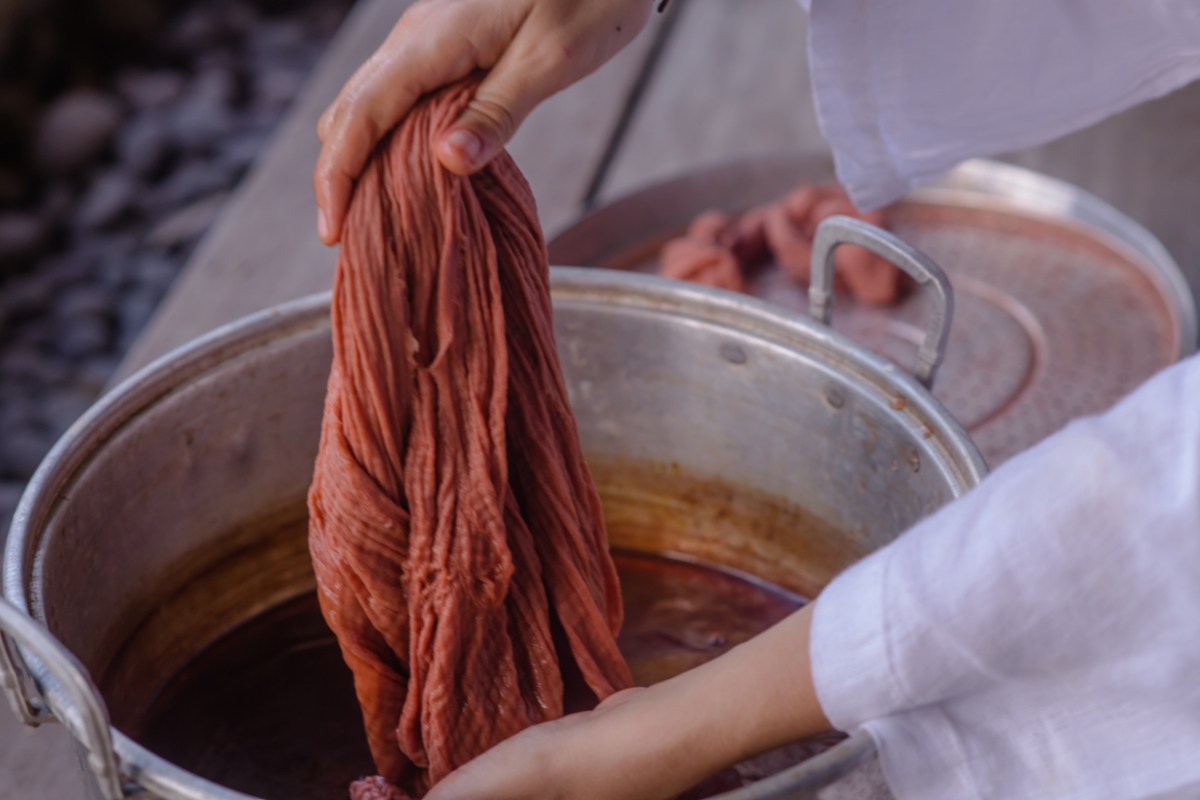
A pot—stainless steel is the ideal! Some folks use aluminum or copper pots because they like the results they get. Just be aware that the aluminum may influence your final color and it may not turn out as expected.
Wooden spoons—these are gentle on fabric and good for stirring your baths during the dye process.
A thermometer—some dyestuffs are sensitive and will need to be heated in specific temperature ranges. A thermometer you can place safely in boiling water will be ideal here.
A grinder—this will help break up your dyestuffs to the right size. A mortar and pestle work great, but so will a pepper grinder or whatever you prefer.
Protective gloves—while most of the dye process is fairly safe, some plant dyes can be toxic. You’ll want to wear gloves to protect your skin from irritation and coloration.
Strong tongs—when fabric gets wet it gets heavy! A sturdy pair of tongs is one of the best implements for pulling your freshly dyed materials out of the dye bath.
A strainer—a mesh bag or colander will both work great for separating dyestuffs from the dye bath.
A rinsing spot—you probably don’t want to rinse your fabric in the kitchen sink. A rinsing spot can be a dedicated sink or some buckets set outside by a hose.
A heat source with good ventilation—you’re welcome to use your kitchen stove, provided you are confident in your extractor fan/window arrangement. Otherwise, plan on setting up outside with a hotplate.
Optional Materials
The above list are all the things you’d need to dye once and be done with the project. For those looking to go a little deeper, here are some items veteran dyers often recommend having:
Glass jars—good for storing dried plants or small amounts of dye bath.
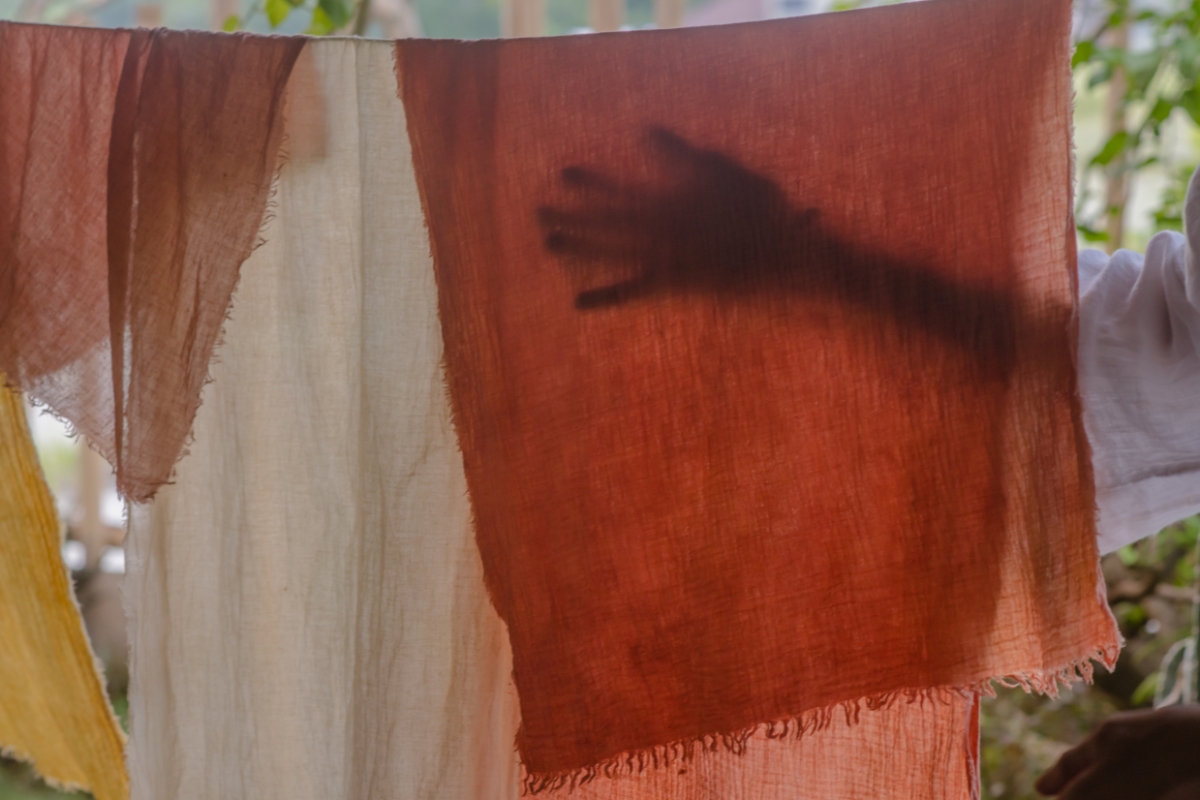
Washing line/drying rack—you’ll need to hang up your rinsed fabric to dry, but you don’t necessarily need something this formal from the start.
Stainless steel bowls—these can be helpful for preparing mordants or dyestuffs ahead of time.
Muslin—after using the mesh strainer, you can use this to get the finer grit out of your dye bath.
Potato Masher—one of the best tools for mashing berries. However, a fork or wooden spoon will work well.
Steel wool—a phenomenal tool for cleaning your equipment thoroughly and preventing one dye bath from staining the next.
Kitchen scissors—these make it easier to chop up dye stuff but you’ll want a dedicated pair for this purpose.
A label maker—since most of these items can be kitchen items, it may be worthwhile to label your dye materials to make it obvious what they’re for.
pH testing strips—the pH of your water will affect many of your dyestuffs. While not required, having pH strips around will help you better understand why you’re getting certain colors.
A notebook—as you get more into natural dyes, you’ll want to keep a record of your work. Especially when you start experimenting, you’ll need to keep track of what you use, when and how it was collected, and any changes you made to the process.
Principles for Dyeing with Natural Materials
From here forward we’ll be discussing the steps you’ll need to follow in order to successfully dye a piece of fabric.
Keep in mind that these steps are ideal for beginners. As you continue dyeing, you’ll fine-tune your own process to suit your own dye setup and the materials you’re using.
Sections covered below:
- Type of Fibers
- Scouring Fibers
- Adding Tannin
- Mordanting Fibers
- Basics of Prepping a Dye Bath
- Using Modifiers
- Storing Dyes
Types of Fibers
The first thing you’ll want to determine is what you’re going to dye. As the base for your color, you need to understand how your fiber will handle taking up dye, how you’ll need to scour it, and what type of mordant to use.
Fibers typically fall into 4 types: cellulose, protein, blended, and synthetic.
Protein fibers, also known as animal fibers, are anything that comes off of an animal or insect. Wool, silk, and cashmere are all examples of protein fibers. In general, these fibers tend to have greater sensitivity to heat, mordants, and scouring, but will strongly take up dye—you’ll get bolder colors with this base.
Cellulose fibers, on the other hand, are plant-based fabrics (cotton, hemp, linen, etc.). Your colors won’t pop on cellulose like they do on protein—you’ll get more faded, dusky tones. However, cellulose fibers are tougher and are unlikely to be damaged at any dyeing stage, making them ideal for beginners.
Blended fibers are a mix of protein and cellulose and will usually be named after whatever was mixed to make them (silk/cotton or wool/hemp). While less sensitive than pure protein fibers, you’ll find they are the trickiest to dye as they’ll need to be dyed and mordanted with materials suited to both types of fibers. Definitely a medium for experienced dyers.
Synthetic fibers are chemically fabricated and could technically be called blends. While they can be dyed, most synthetic fibers don’t take up natural dyes well. I’d avoid nylon, rayon, and polyester for this reason. For similar reasons, I would avoid bamboo fibers or any other wood-based fiber—while advertised as purely plant-based, these are all actually synthetic fibers closer to rayon than cellulose.
As this is a beginner’s guide, I’m going to focus on cellulose and protein fiber dyeing in this article.
Scouring Fibers
Most yarn has starch added to it to prevent fraying and to smooth the fibers as they’re woven into fabric or wound into skeins. This starch will make it difficult for the fibers to take up dye and is why new fabrics feel stiff to the touch. Natural oils in the fibers will create the same effect.
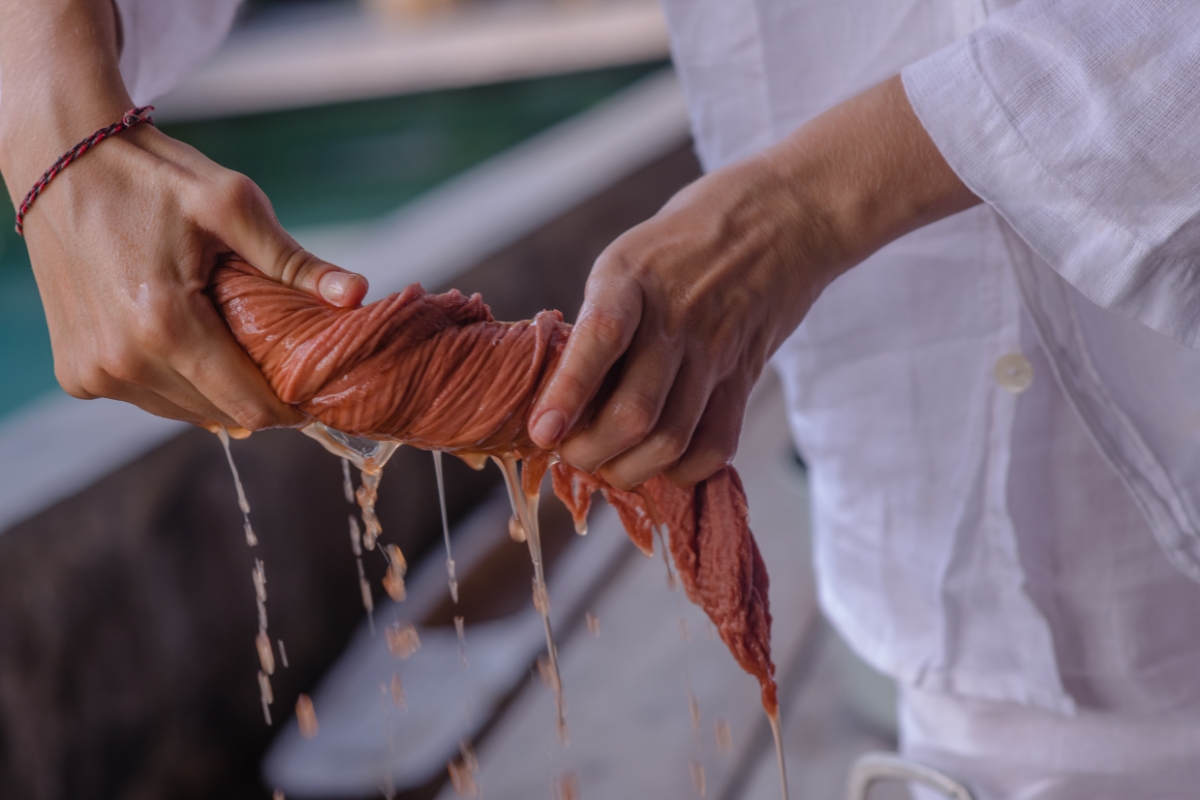
New fibers will need to be thoroughly washed before dyeing, a process referred to as “Scouring.”
How to scour fabric
Before you get started, please keep in mind that new fibers will shrink after their first wash, so plan on scouring more than you need for your fiber project.
For both cellulose and protein fibers you will need a pH neutral soap, washing soda, and a pot big enough for the fabric to move around freely.
To scour cellulose fibers:
- Machine wash the fibers with hot water
- Don’t dry them
- Bring a pot of water to a boil
- Add equal parts washing soda and pH neutral soap (1 tbsp each is fine)
- Boil the fibers for 2 hours
- The water will likely turn yellow
- Rinse your fibers thoroughly
- Dry them
To scour protein fibers:
- Fill a pot with lukewarm water and about 1 tbsp pH neutral soap
- Add the fibers to the pot, making sure they’re fully submerged
- Soak your fibers overnight
- Rinse the fibers thoroughly
- The water should be running clear by the end
- Dry them
To scour repurposed fabric:
In general, try and discover what it’s made of and follow one of the processes above. If the fabric is used but hasn’t been previously dyed, you can just run it through the washing machine like normal. However, if you suspect it has been washed with fabric softener at any point, plan on scouring it.
Used silks that have been dyed previously shouldn’t be scoured—they’re too delicate. Instead, skip scouring and overdye the silk.
Adding Tannin
Tannin is one of many chemicals in plants that make them bitter. In natural dyeing, tannins act as a pre-mordant, a pure mordant, and/or a modifier.
Typically, tannins are sorted into 3 categories depending on what color they leave behind: clear (no color), yellow, and red-brown. If choosing to add tannins to your dye process, take care to select a color additive you want on your fabric.
You’ll want to treat your fibers with tannins when working with cellulose. While mordants help dyes stick to fibers—improving both lightfastness and washfastness—tannins help mordants stick to the fibers before dyes are introduced.
Many natural dyestuffs already include tannin and don’t need extra added to the fabric. Having high levels of tannin can affect the color, and can make for a fun dye experiment—just be sure that’s what you want before you start.
You can even use leaves with high levels of tannin to create patterns on your fabrics.
Treating fibers with Tannin
After scouring your fibers, allow them to fully dry and then weigh them. You’ll want the weight of your powdered tannin to match the weight of the fabric (WOF). If using natural materials that have tannins, you’ll want to aim for 125% WOF.
- Grab a pot and fill it with enough water to submerge your fibers
- Heat the water to 120⁰F-140⁰F
- Add your tannins to the water and stir for a bit
- Pre-wet your fibers and add them to the pot
- Cover the pot and keep it warm (but not hot). Stir occasionally and let the fibers soak for 1-2 hours
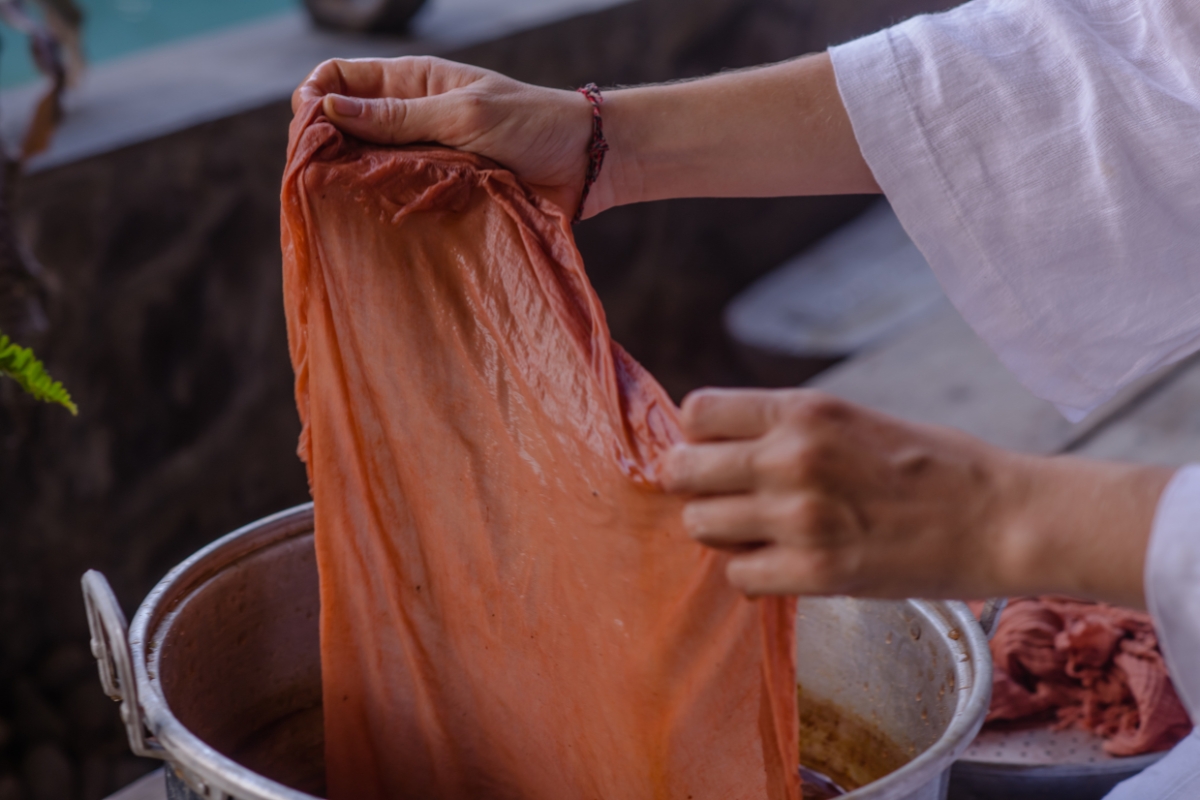
- Rinse gently and press some of the excess water out
- You’ll want to mordant the fibers while they’re still wet from the tannin bath
Mordanting Fibers
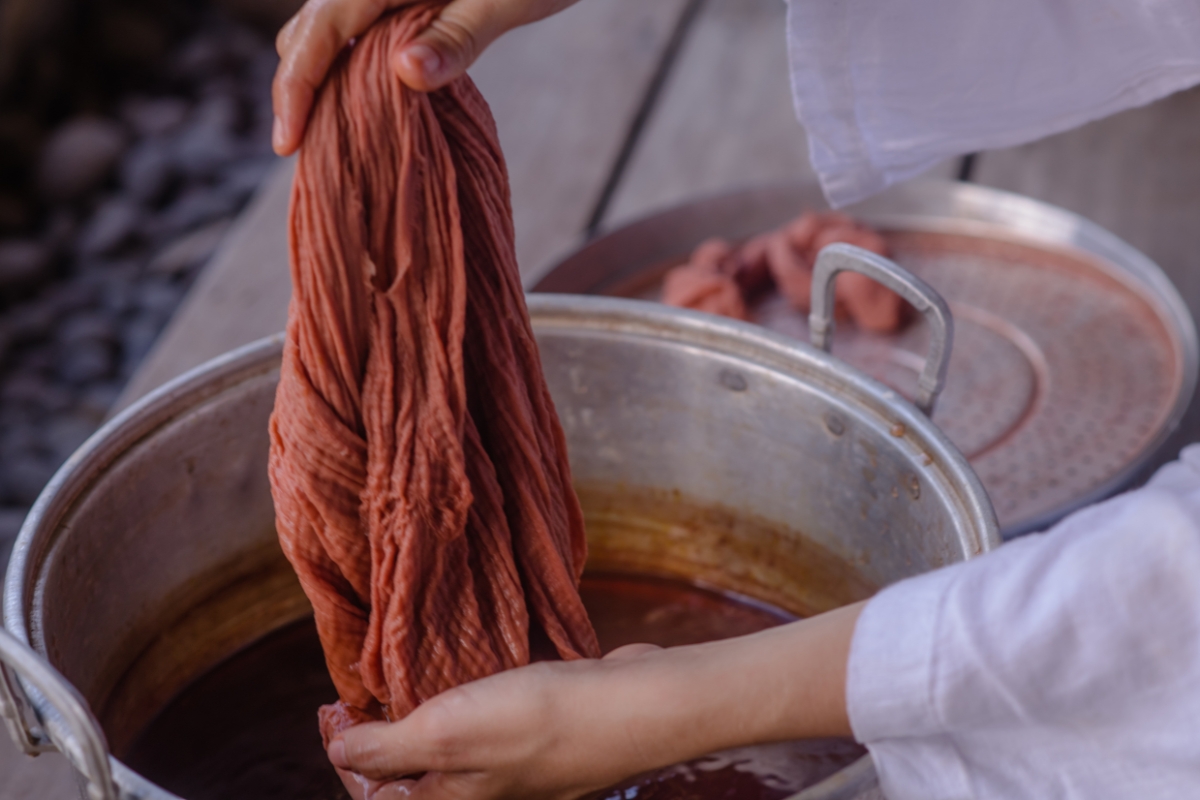
This step helps the dye sink deep into the fabric. “Mordant” comes from a French word meaning, “to bite.” Adding a mordant allows your dye to “bite” deep into the fabric instead of lounging on the surface where it can be washed away.
Most people use aluminum acetate to mordant cellulose fabrics and aluminum sulfate to mordant protein fibers. Dyers tend to refer to both mordants as “alum,” as they are both aluminum based. Alum is popular because it’s safe to handle and relatively easy to use.
Other minerals that can act as mordants include iron (as ferrous sulfate), copper (as copper sulfate), tin (stannous chloride), or chrome (potassium dichromate). Many of these are mildly toxic or volatile to use and I’d recommend them for more experienced dyers.
While a high concentration of tannins in your natural dye can act as a mordant, it’s still a good idea to use an alum every time when using natural dyes. This will deepen and strengthen your color, as opposed to simply helping it affix to the fabric.
As you look into choosing a mordant, you may see some recommendations to use soy instead of metals or tannins. Soy shouldn’t be considered a mordant—it acts more like a conditioner and only rests on the surface of the fabric. Any soy you add to a fabric will wash off fairly easily.
Mordanting process
Conveniently, no matter the fabric you’re using, you can follow the same steps to figure out how much alum to use. Once your fabric has been scoured, rinsed, and fully dried, weigh it. Multiply the weight of your fabric by a number between .05 and .12 (5% and 12% respectively). That’s how much alum you need!
Likely, you’ll only be using a few teaspoons worth of alum. But that should be more than enough. If you’re interested in exploring the impact of using more or less alum, here’s a cool community experiment using protein fibers.
To mordant cellulose fibers:
- Your fibers should be wet: mordant them immediately after scouring, a tannin bath, or from an hour-long soak
- Fill a deep pot with water and bring it to a simmer (avoid boiling the water)
- Measure out your aluminum acetate into a bowl
- Don’t breathe it in
- Preferably use a stainless-steel bowl
- Add some water from the simmering pot to the bowl
- Try to fully dissolve the alum at this step
- You are welcome to mix it with a whisk
- Pour the dissolved alum into the deep pot of water
- Submerge your fibers in the water
- Simmer them for an hour
- Stir and check on your fibers regularly
- Make sure the fibers stay submerged
- Take the pot off of the burner and leave the fibers in the mordant overnight
- Rinse and hang them up to dry (optional)
To mordant protein fibers:
- Your fibers should be wet: mordant them immediately after scouring, a tannin bath, or from an hour-long soak
- Fill a deep pot with water but don’t heat it at all, yet
- Measure out your aluminum sulfate into a bowl
- Don’t breathe it in
- Preferably use a stainless-steel bowl
- Add some water from the pot to the bowl
- Try to fully dissolve the alum at this step
- You are welcome to mix it with a whisk
- Pour the dissolved alum into the deep pot of water
- Submerge your fibers in the water
- Heat the pot until your water is almost simmering
- Leave it on a low level of heat for an hour
- Take the pot off of the burner and leave the fabric in the mordant overnight
- Rinse and hang it up to dry (optional)
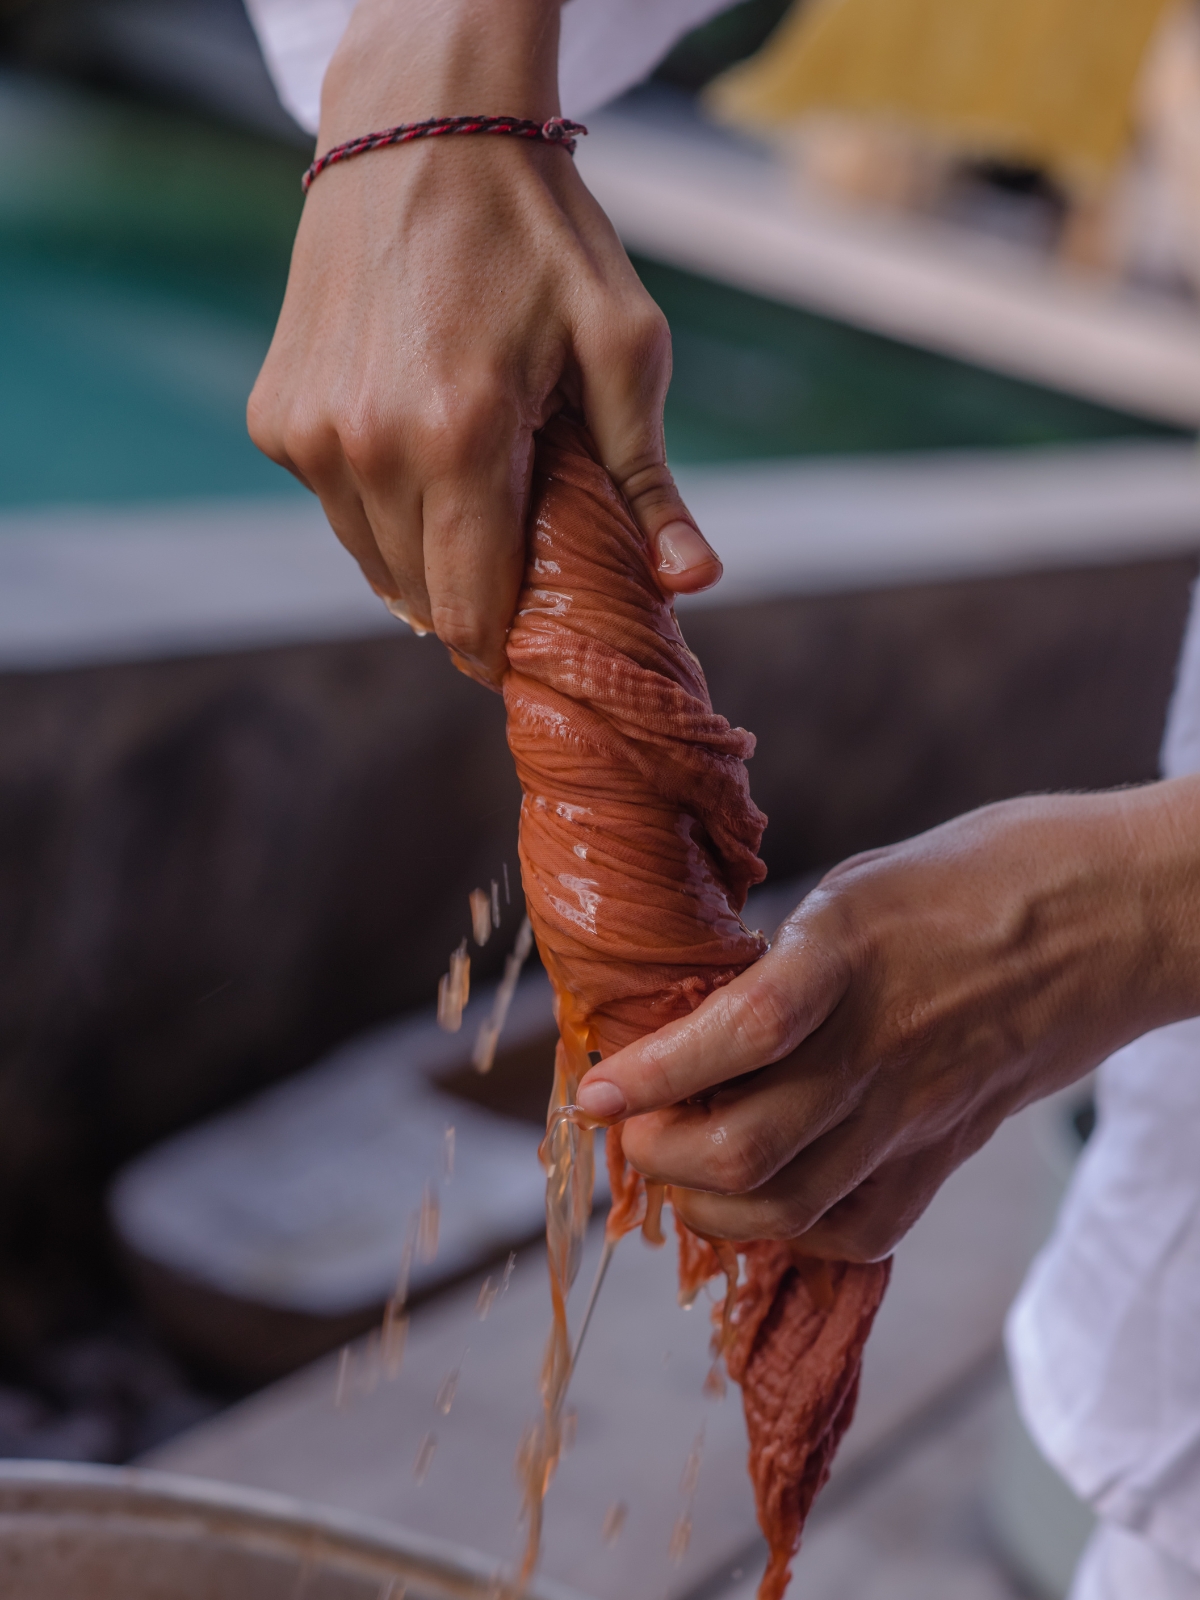
- Keep rinsing until the water runs clear
Neutralizing your mordant water
Alum is an acidic substance and the water leftover from mordanting your fabrics will be the same. For those living on septic systems, don’t pour the leftovers down your drain—find a place outside that won’t be harmed by a little acidity. Some of your plants might even enjoy it!
If you’re struggling with finding a safe place to dump your alum, try adding in some washing soda. As a base, washing soda will help bring your leftover water closer to neutral. Test it with some Ph strips before you assume it’s at neutral and you’ll be good to go.
Alternatively, mordant baths can be reused and recharged. How you recharge will depend on the mordant used.
Basics of Prepping a Dye Bath
Here we’ll go over the most common process you can follow to prep a dye bath, including rules of thumb to follow for each category of dyestuff being used. As we get closer to discussing specific dyestuffs, some of these steps will likely need to be adjusted.
As a good rule of thumb, plan on gathering enough dyestuff that it weighs the same as your fibers being dyed (also known as the Weight of Fiber or WOF). Less is fine and is ideal if you want a lighter color.
Prepping a Dye Bath:
Fill your pot ¾ of the way full with water. Leave enough room in the pot for all of the fibers you want to dye to move around without the water sloshing out.
Add in your dyestuff and cover the pot. Slowly bring the water to a simmer (about 20 minutes) and turn the heat down to avoid boiling your dyestuff.
After an hour, start checking on the color of your dye bath. If it looks about the right shade, take the pot off the heat. You can leave the dyestuffs to boil for up to 2 hours.
Strain your dye bath to remove your dyestuffs. Retain the water—this is your dye bath.
Add in your fibers. They should already have been mordanted and should still be wet from being rinsed.
Place the pot back on the heat on low and agitate your fibers to release any air trapped by them. Avoid simmering your fibers, but keep the water hot for about an hour.
After an hour, remove the bath from heat and leave the fibers in the pot at least overnight.
After 24 hours, check your fibers. If they look dark enough, you can remove the fibers and rinse them. Remember that the fibers will look much darker while wet, so look for a shade that’s darker than your optimal color.
You can leave your fibers in the bath for up to 2 days.
Using natural dyes means you should be safe to dump your bath anywhere from the kitchen sink to your garden. However, many people choose to save their dye baths for later. See “Storing Dyes” for more.
Dye Bath special considerations:
Fruit and vegetable skins can handle being heated quickly and simmered for a long time. They can go into the bath whether cut up or whole. No temperature or time adjustments needed.
Bark, nuts, and cones are the toughest natural material to use—you’ll actually want to soak them for a few days beforehand to help release their pigments. Once soaked they can be simmered for a long time or even boiled.
Leaves and roots are more delicate and you’ll want to avoid ever boiling them. Keep these on the lowest simmer possible without adjusting timing.
Flowers can be used when dry or fresh, whole or in pieces. They are delicate—slowly bring them to a simmer and keep them on low heat for a longer period of time.
Berries will need to be pulped or mashed to release their pigment and are best when fresh. Letting them soak in some water with a splash of vinegar ahead or time will also help. Berries are delicate—slowly bring them to a simmer and let them simmer for a longer period of time. Dyes from berries will never be truly washfast or lightfast and are often called “fugitive” dyes.
Anything that was dried before you begin will need to be soaked for a while before you set it on any heat. Leave them for a few hours or overnight and they’ll be ready to go.
Anything hard (roots, nuts, bark, etc) will do better when ground or chopped into chips first.
Using Modifiers
While mordants help dyes hold on to their fabrics, tannins and other materials can help modify the color coming from your dye. Brighter or darker shades can be achieved with just a little extra push!
Modifiers all follow the same general pattern of use:
- Start with dyed fibers
- Wet your fibers (unless it’s already wet from its first post-dye rinse)
- Pre-dilute 1 tsp of your modifier in some cold water, enough for the modifier to dissolve
- Add your diluted modifier and your fibers to a large container
- Add the diluted modifier to the container
- Submerge your fibers in the water
- Watch the fibers—when you notice the color changing to a shade you want, remove them!
- Finally, rinse your fibers and wash them in pH neutral soap
- Hang up to dry
Below I’ll cover some of the common modifiers and how they specifically like to be handled.
Iron modifiers
Using iron to modify fabrics will give you a “sadder” color than what you started with. New colors will range from deep purple to grays and blacks.
How to make an iron modifier:
- In a jar, mix a handful of steel wool and 1 part vinegar to 2 parts water
- You want the jar to be as full as possible
- Rusty iron nails also work fine
- Leave the jar alone for 2-3 days
- Don’t cover the jar, you want the contents to oxidize
- As your iron source sits in the liquid, it will rust. You’ll know your modifier is ready when the contents of the jar have turned orange.
- Once it’s done, strain it thoroughly and set it aside.
To use an iron modifier, you have 2 options: add it to your dye vat, or dunk your dyed fabric into the iron solution (the generic modifier method).
When adding an iron modifier to your dye vat, you’ll add a few tablespoons of modifier before you add the fabric. This method runs the risk of your iron modifier affecting future batches—you’ll need to scrub your dye pot thoroughly afterwards.
Iron can damage natural fibers (particularly protein fibers) if they’re left in the solution for too long. As such, many people choose to follow the generic method and only dunk their fibers.
Copper Sulfate
Handle this one with caution—copper sulfate is a known irritant. Take extra care not to touch this with bare skin or inhale any while handling.
That said, copper sulfate is an interesting modifier to experiment with. It has a tendency to pull yellows towards green and it’s known to subtly alter browns.
You can purchase copper sulfate and follow the generic modifier instructions above. Or, you can drop a few copper pennies into your dye bath. Enough copper should leech from your pennies during the dye stage to alter the colors without making a dye dunk.
Tin (Stannous Chloride)
Tin isn’t an enormously popular modifier. You can purchase stannous chloride in the form of a metal salt, but you’ll likely want to handle it just as carefully as you would with copper sulfate. At high temperatures it can be volatile, so I’d recommend against using it as a mordant.
Despite its lack-luster showing in the dye community, tin is the go-to modifier for reds and purples. It pulls them away from duller hues and brightens them significantly.
Tin can make fibers brittle and isn’t recommended for protein fibers (wool in particular becomes crackly after coming into contact with it). Cotton is the best fiber to use to test tin modifications.
Chrome (potassium dichromate)
This metal is no longer recommended for mordanting or modifying. The leftovers are toxic and any fibers that were soaked in chrome may be a health hazard.
It has historically been used in dyeing, specifically to help affix dark colors to wool, but for the most part has gone to the wayside.
Acidic modifiers
Managing the pH of your dye bath solution is one way to influence your color results. If you live somewhere with soft water, your tap probably is already giving you something on the lower end of the pH scale.
If you want to lower the pH of your dye bath, consider adding a few tablespoons of cream of tartar, citric acid, lemon juice, lime juice, or vinegar before you submerge your fibers. Note that acidic modifiers are really only used with protein fibers.
Fibers dyed in an acidic solution will have brighter colors. In general, you can expect reds to tip towards orange, oranges towards yellows, and purples towards pinks.
Alkaline modifiers
Similarly to the acidic modifiers, alkaline modifiers are used to manipulate the pH of your dye bath solution. In many cases this will cause the colors to deepen (from red to purple or from purple to blue-green), but that’s entirely dependent on the dyestuffs used.
If you live somewhere with hard water, you’re likely already using slightly alkaline water. But if you want to modify the water yourself, to the dye bath add a few tablespoons of chalk, soda ash, or baking powder.
Mainly used in the scouring phase, soda ash (sodium carbonate) has a few other dye uses you can leverage to get even better colors. After scouring cellulose fibers with soda ash, don’t rinse the fibers between their scour and their mordant—this will enable the mordant to bite more firmly into the fibers.
Storing Dyes
How you store dyes depends on what form those dyes are in—are they still dyestuffs or do you have leftover dye bath you want to keep? Did you just harvest them fresh from the garden? Most dyes will follow similar steps to keep them fresh and ready to hand.
Fresh foraged materials: if you collected enough to match the weight of your fiber (WOF), go ahead and make them into a dye bath right away! Alternatively, depending on the material, you can dry them or pop them into the freezer until you’re ready.
Kitchen scraps: you probably won’t be able to collect enough peelings or end pieces to dye your fibers while your kitchen scraps are fresh. Plan on freezing or thoroughly drying your collection until you have enough to make a dye bath.
Leftover dyestuffs: after you’ve strained out your dyestuffs from the dye bath, you don’t have to throw them away. Dry them thoroughly– mold is a major concern here– and inspect your dyestuffs to see if any looks like it’s spoiled. With flowers, check to see if they have any color left. If not, they won’t be useful as a dye anymore and should be composted.
Leftover dye baths: in general, your dye baths likely won’t store well. Cabbage-based dye baths, specifically, should be disposed of when you’re done dyeing (they quickly start to smell terrible!). The main danger is from mold. You’re welcome to place the remnants of your dye bath in a sealed glass container and keep them in the fridge for a few weeks. Some dyes even change as they age! Alternatively, you can try your hand at drying your dye baths into pigments.
Natural Dyestuffs
Alright, now for the fun part—picking out your dyestuffs!
Below is a quick list of natural dyestuffs that you should be able to source from your home. An even greater wealth of options are available to purchase, but we’ll stick to the basics here.
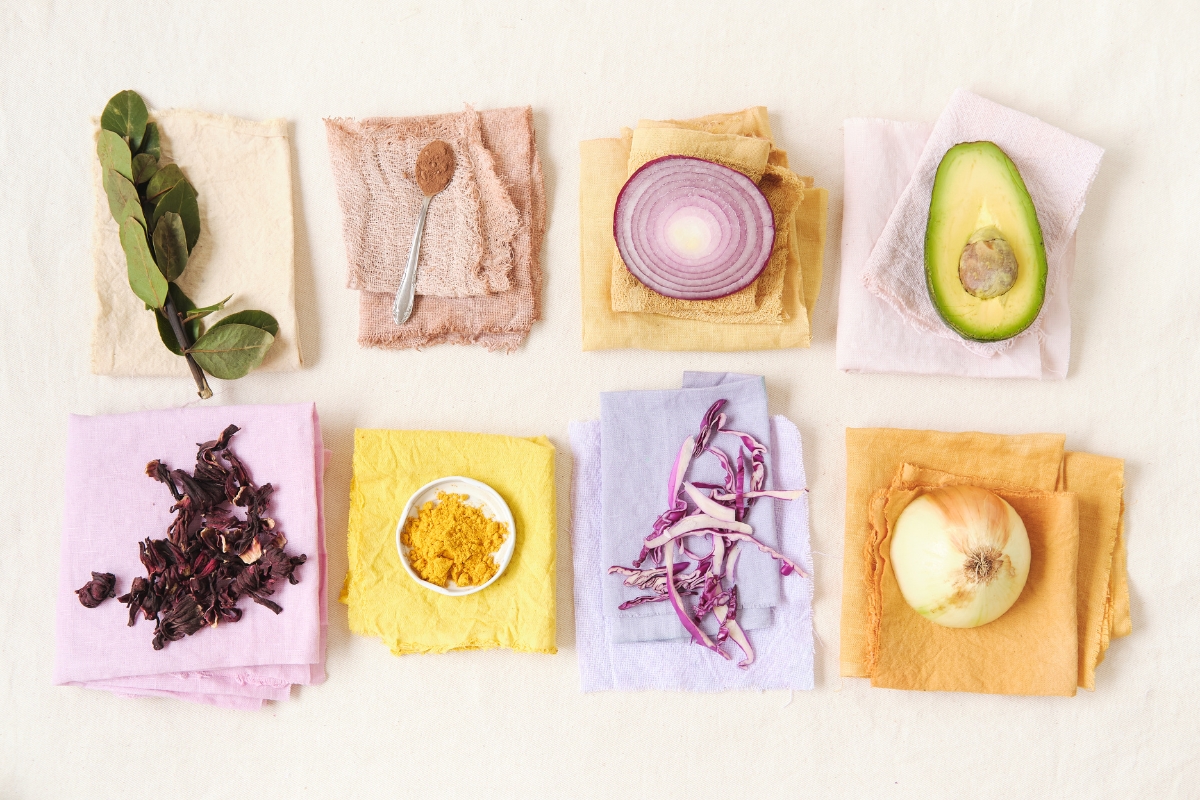
All of the colors represented here assume the fibers have been treated with an alum mordant. Alternate mordants (or no mordants) and alternate modifiers will increase the number of color possibilities.
You’ll notice some plants are represented in multiple color brackets. Usually this indicates a different part of the plant is being used. Sometimes, though, plants will give off one color on their first extraction and another color on their second.
Red dyes
Madder (rubia tinctorum)
- Parts: roots
- Colors: red and maroon
- Modifiers: an iron modifier will bring out dark red or dark maroon; a cream of tartar modifier will bring out orange; an alkaline solution will pull the color towards red
- Source: can be garden grown
Pokeweed (Phytolacca americana)
- Parts: berries and roots
- Colors: brilliant red
- Modifiers: alkaline solutions bring out blue-gray
- Source: can be foraged, not ideal for gardens
Safflower (carthamus tinctorius)
- Parts: stems and flowers
- Colors: red to pink
- Modifiers: the yellow dye needs to be extracted first and the plant re-used to get red;
- Source: can be grown in a garden
Yellow Bedstraw (Galium verum)
- Parts: roots
- Colors: red
- Modifiers: an alkaline modifier will bring out pink hues; an iron modifier will bring out brown
- Source: can be foraged, not ideal for gardens
Orange dyes
Annatto (bixa orellana)
- Parts: seeds
- Colors: reddish orange
- Modifiers: an iron modifier will bring out green-browns
- Source: can be garden grown
Avocado (persea americana)
- Parts: skins
- Colors: orange
- Modifiers: an iron modifier will bring out pale gray
- Source: can be garden grown or collected from kitchen scraps
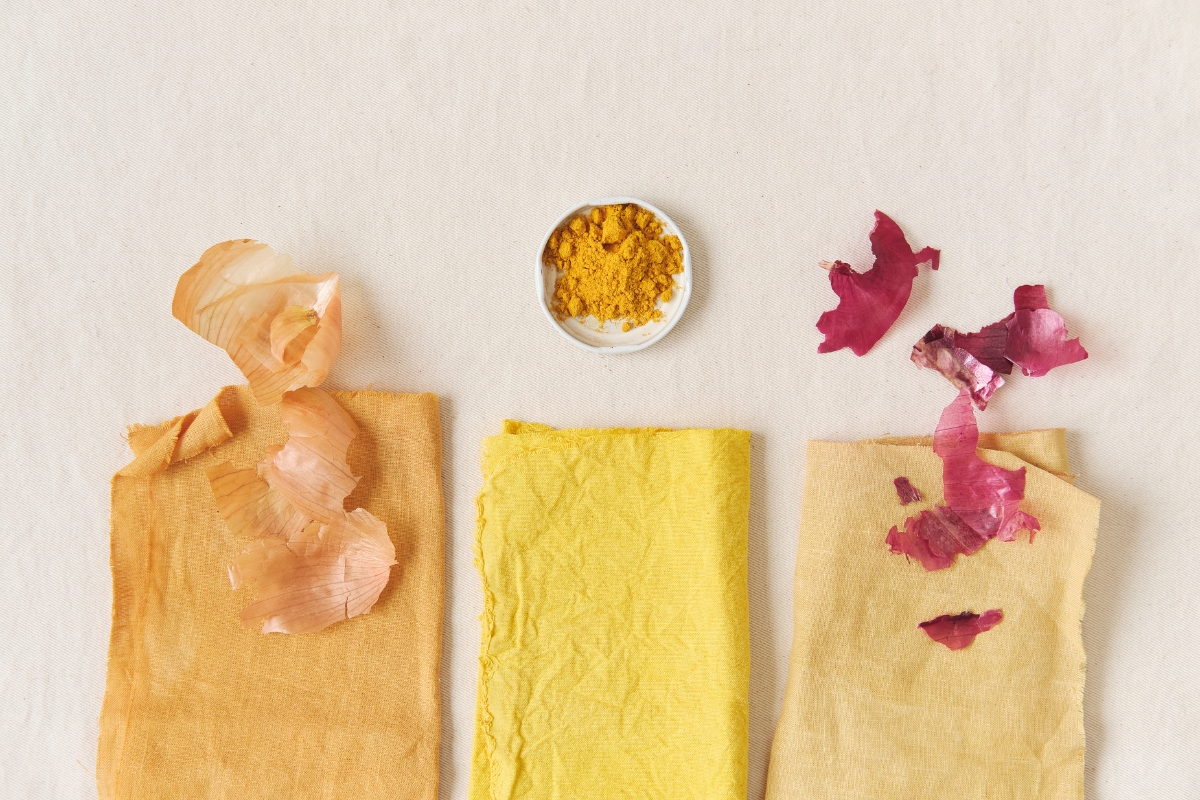
Onions (allium spp.): strong ocher, iron mordant will bring it to dark brown
- Parts: skins
- Colors: strong ocher
- Modifiers: an iron modifier will bring out green
- Source: can be garden grown or collected from kitchen scraps
Plains Coreopsis (coreopsis tinctoria)
- Parts: flowers
- Colors: burnt orange
- Modifiers: an iron modifier will bring out dark brown; an alkaline solution will bring out reds
- Source: can be foraged or garden grown
Rhubarb (rheum rhabarbarum): pale ocher, iron modifier to warm gray
- Parts: roots
- Colors: pale ocher
- Modifiers: an iron modifier will bring out warm gray or green
- Source: can be foraged, garden grown, or purchased
Yellow dyes
American Smoke Tree (cotinus obovatus)
- Parts: twigs (aka Fustic)
- Colors: yellow to gold
- Modifiers: NA
- Source: can be foraged or garden grown
Calendula (Calendula officinalis)
- Parts: flowers
- Colors: yellow
- Modifiers: an iron mordant will bring out green
- Source: can be garden grown
Cosmos (cosmos sulphureus)
- Parts: flowers
- Colors: yellow to gold
- Modifiers: alkaline solutions will bring out reds; an iron mordant will bring out green
- Source: can be foraged or garden grown
Cow Parsley (Anthriscus sylvestris)
- Parts: flowers, leaves, stems
- Colors: yellow to yellow-green
- Modifiers: NA
- Source: can be foraged
Dahlia (dahlia spp.)
- Parts: flowers
- Colors: yellow to gold
- Modifiers: an iron mordant will bring out green
- Source: can be garden grown
Dyer’s Broom (genista tinctoria)
- Parts: stems
- Colors: yellow
- Modifiers: an iron mordant will bring out dull green
- Source: can be foraged or garden grown
Dyer’s Chamomile (anthemis tinctoria)
- Parts: flowers
- Colors: yellow to gold
- Modifiers: an iron modifier will bring out green
- Source: can be garden grown or purchased
Garden Sorrel (rumex acetosella)
- Parts: fresh stems and leaves
- Colors: yellow to green
- Modifiers: an iron mordant will bring out more green, an iron modifier will bring out dark gray
- Source: can be foraged
Goldenrod (solidago spp.)
- Parts: flowers
- Colors: pale yellow
- Modifiers: an iron mordant will bring out soft green
- Source: can be foraged
Marigold (tagetes spp.)
- Parts: flowers
- Colors: yellow to tan
- Modifiers: an iron mordant will bring out green
- Source: can be foraged or garden grown
Osage Orange (maclura pomifera)
- Parts: sawdust, wood chips
- Colors: yellow to gold or orange
- Modifiers: an iron mordant will bring out green
- Source: can be foraged or garden grown
Pomegranate (punica granatum):
- Parts: rinds or whole fruit
- Colors: yellow to gold
- Modifiers: an iron modifier will bring out mossy green, gray, or black
- Source: can be garden grown or collected from kitchen scraps
Queen Anne’s Lace (Daucus carota)
- Parts: flowers
- Colors: yellow
- Modifiers: an alkaline solution will bring out gold; iron and copper as mordants/modifiers will bring out forest green
- Source: can be foraged
Rhubarb (rheum rhabarbarum)
- Parts: leaves
- Colors: yellow-green
- Modifiers: an iron modifier will bring out warm gray
- Source: can be foraged, garden grown, or purchased
Safflower (carthamus tinctorius)
- Parts: stems and flowers
- Colors: yellow
- Modifiers: an iron modifier will bring out green
- Source: can be garden grown
Scotch Broom (cytisus scoparius)
- Parts: stems
- Colors: yellow
- Modifiers: NA
- Source: can be foraged
Tansy (Tanacetum vulgare)
- Parts: leaves and flowers
- Colors: yellow to yellow-green
- Modifiers: an iron mordant will bring out dark green
- Source: can be foraged
Weld (reseda luteola)
- Parts: plant tops
- Colors: yellow
- Modifiers: an iron modifier will bring out green
- Source: can be foraged or garden grown
Wood Sorrel (Oxalis spp.)
- Parts: flowers and stems
- Colors: pale yellow
- Modifiers: NA
- Source: can be foraged
Yellow Bedstraw (Galium verum)
- Parts: flowers
- Colors: yellow to tan
- Modifiers: NA
- Source: can be foraged
Zinnia (zinnia spp.)
- Parts: flowers
- Colors: yellow to gold
- Modifiers: NA
- Source: can be foraged or garden grown
Green dyes
Alder (alnus spp.)
- Parts: bark and cones
- Colors: green
- Modifiers: an iron modifier will bring out dark green or pale gray; an alkaline solution will bring out a reddish color
- Source: can be foraged or garden grown
Black Eyed Susans (rudbeckia hirta)
- Parts: flowers
- Colors: pale green
- Modifiers: an iron modifier will bring out darker green
- Source: can be foraged or garden grown
Comfrey (symphytum officinale)
- Parts: leaves and stems
- Colors: green
- Modifiers: an iron modifier will bring out dark green to green-brown
- Source: can be foraged or garden grown
Dyer’s Chamomile (anthemis tinctoria)
- Parts: stems and leaves
- Colors: green
- Modifiers: an iron modifier will darken and dull the color
- Source: can be garden grown or purchased
Blue dyes
Blue False Indigo (Baptisia australis)
- Parts: leaves
- Colors: blue
- Modifiers: NA
- Source: can be foraged
Dyer’s Knotweed (polygonum tinctorium)
- Parts: leaves
- Colors: blue
- Modifiers: an iron mordant will bring out purple
- Source: can be garden grown
Dyer’s Woad (Isatis tinctoria)
- Parts: first year leaves and seeds
- Colors: blue to lilac
- Modifiers: NA
- Source: can be foraged or garden grown
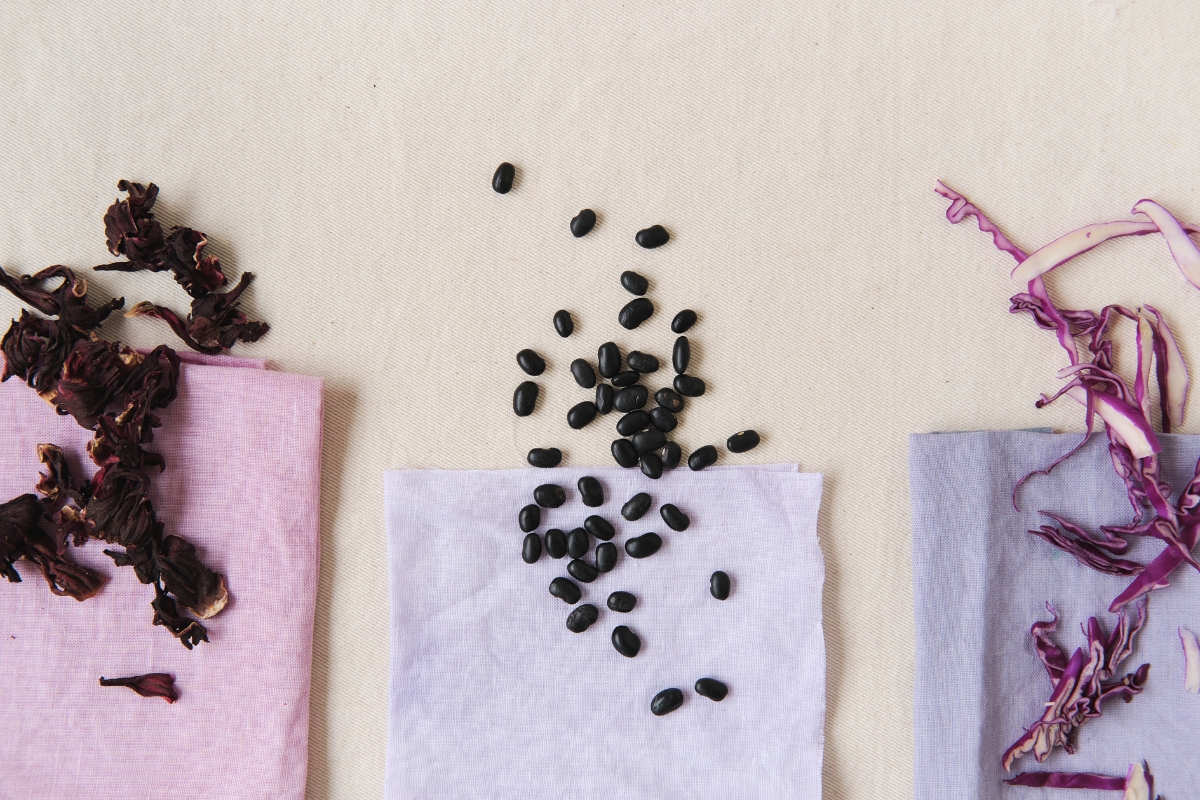
Red Cabbage (brassica oleracea)
- Parts: whole plant
- Colors: icy blue to pale purple
- Modifiers: an iron modifier will bring out blue-gray; an alkaline solution will bring out blue; an acidic solution will bring out pink to purple
- Source: can be collected from kitchen scraps
Purple dyes
American Black Elderberry (sambucus nigra)
- Parts: whole berries
- Colors: purple
- Modifiers: an iron modifier will bring out gray
- Source: can be foraged or garden grown
Blackberries (rubus frucicosus)
- Parts: fresh berries
- Colors: light purple
- Modifiers: an iron modifier will bring out dusky blue
- Source: can be foraged, garden grown, or purchased
Blackthorn (prunus spinosa)
- Parts: berries
- Colors: purple to pinkish
- Modifiers: an iron mordant will bring out blue; adjust pH to deepen purple or bring out pinks
- Source: can be foraged or garden grown
Pink dyes
Avocados (persea americana)
- Parts: stones
- Colors: baby pink
- Modifiers: an iron modifier will bring out pale gray
- Source: can be garden grown or collected from kitchen scraps
Cherry Trees (prunus):
- Parts: bark
- Colors: pale peach
- Modifiers: an iron modifier will bring out more red
- Source: can be foraged or garden grown
Copper Beech (Fagus sylvatica f. purpurea)
- Parts: leaves and branches
- Colors: pink
- Modifiers: and iron modifier will bring out purple-gray
- Source: can be garden grown
Dog Rose (rosa canina)
- Parts: rose hips
- Colors: pink
- Modifiers: an iron modifier will bring out blue-gray
- Source: can be foraged or garden grown
Dyer’s Woad (Isatis tinctoria)
- Parts: used leaves with the blue extracted
- Colors: pink
- Modifiers: an iron modifier will bring out green
- Source: can be foraged
Mountain Ash (sorbus aucuparia)
- Parts: berries
- Colors: pale pink
- Modifiers: an iron modifier will bring out blue-gray
- Source: can be foraged or garden grown
Brown dyes
Apple (malus spp.)
- Parts: bark
- Colors: tan to yellow
- Modifiers: an iron mordant will bring out green
- Source: can be foraged or garden grown
Black Tea (camellia sinensis)
- Parts: used or fresh, bagged or loose
- Colors: warm brown
- Modifiers: an iron modifier will bring out a dark gray or black
- Source: can be collected from kitchen scraps
Coffee (coffea)
- Parts: used or fresh grounds
- Colors: pale brown
- Modifiers: an iron modifier will bring out pale gray
- Source: can be collected from kitchen scraps or local coffee shops
Garden Sorrel (rumex acetosa)
- Parts: roots
- Colors: tan
- Modifiers: an iron modifier will bring out dark gray-green
- Source: can be foraged or garden grown
Hemlock (tsuga spp.)
- Parts: bark
- Colors: tan, beige, or brown
- Modifiers: NA
- Source: can be foraged or garden grown
Maple Trees (acer spp.)
- Parts: bark
- Colors: tan, beige, or brown
- Modifiers: NA
- Source: can be foraged or garden grown
Mimosa Trees (Acacia dealbata):
- Parts: bark
- Colors: tan to deep brown
- Modifiers: NA
- Source: can be foraged or garden grown
Oak Trees (quercus spp.)
- Parts: bark, galls, and acorns
- Colors: brown
- Modifiers: an iron modifier will bring out gray or black
- Source: can be foraged or garden grown
Walnuts (juglans spp.)
- Parts: shells and whole nuts
- Colors: yellow-brown
- Modifiers: an iron modifier will bring out dark brown
- Source: can be foraged or garden grown
Willow (salix spp.)
- Parts: bark
- Colors: pale tan
- Modifiers: an iron modifier will bring out green
- Source: can be foraged or garden grown
Variable colors
American Black Elderberry (sambucus nigra)
- Parts: bark and leaves
- Colors: pale pink, or green
- Modifiers: an iron modifier will bring out gray
- Source: can be foraged or garden grown
Birch Trees (Betula pendula)
- Parts: bark
- Colors: red, orange, or pink
- Modifiers: and iron modifier will bring out dark gray
- Source: can be foraged or garden grown
Black Beans (Phaseolus vulgaris)
- Parts: whole beans or the water used to soak the beans for cooking
- Colors: blue, purple, or pink
- Modifiers: an iron modifier will bring out blue-gray
- Source: can be collected from kitchen scraps
Bracken (pteridium aquilinum)
- Parts: fronds and leaves
- Colors: yellow-green, or tan
- Modifiers: an iron modifier will bring out brown or gray
- Source: can be foraged
Eucalyptus (eucalyptus)
- Parts: leaves
- Colors: tan, brown, or dark orange
- Modifiers: an iron modifier will bring out gray or black; colors will vary depending on the tree
- Source: can be garden grown
Hawthorn Trees (Crataegus monogyna)
- Parts: leaves, branches, and berries
- Colors: yellow and green when harvested in spring, potentially pink in late summer
- Modifiers: an iron modifier will bring out warm gray or light maroon
- Source: can be foraged or garden grown
Red Onions (allium cepa)
- Parts: skins
- Colors: tan, brown, or green
- Modifiers: an iron modifier will bring out dark brown or black
- Source: can be garden grown or collected from kitchen scraps
Stinging Nettle (Urtica dioica)
- Parts: stems and leaves
- Colors: yellow-green, or tan
- Modifiers: an iron modifier will bring out brown or gray
- Source: can be foraged
Willow (salix spp.)
- Parts: leaves
- Colors: yellow, orange, or pink
- Modifiers: an iron modifier will bring out dark brown; colors will vary depending on how long the dye bath sits
- Source: can be foraged or garden grown
Poisonous Dye Plants
While I doubt anyone reading this is interested in how their dye baths taste, I feel it’s important to separate out some of these plants from the rest due to how toxic or poisonous they are. As Rita Buchanan warns in her book “A Weaver’s Garden,” it’s easier to ingest or inhale plant matter than you think.
You may see some of these plants recommended as sources for dyes. Many dyers consider them to give poor quality colors and considering the risk, I’m not sure I’d recommend them either.
- Bloodroot (sanguinaria canadensis)
- Larkspur Flowers (delphinium spp.)
- Lily of the Valley Leaves (convallaria majalis)
- Privet Branches and Leaves (ligustrum vulgare)
- Rhododendron leaves (rhododendron spp.)
- Yellow Flag Iris Rhizomes (iris pseudacorus)
Preparing a Fermentation Vat
Some plants and pigments need a little extra help to release their color and adhere properly to fibers. Woad is a good example of a plant that does better in a fermentation vat instead of a traditional dye vat.
Below is a recipe for setting up a woad fermentation vat. You can use this as a launchpad towards experimenting with different dye methods.
How to ferment woad:
- Take 300g of fresh woad leaves, chop them up, and set them in a stainless-steel bowl or pot
- Cover your leaves with boiling water and let them steep for an hour
- In a mason jar, add 3 tbsp sugar, 2 tbsp yeast, and enough hot water (not boiling) to fill the jar. Allow this to sit until it becomes nice and frothy
- Test your woad leaf tea after an hour to make sure it’s cooled to under 120⁰F. Begin sprinkling in powdered lime (not the citrus) a little at a time, stirring it as you go. You’ll likely add in about 1 tbsp total. Look for when the tea begins to turn from brown to dark green
- Add your yeast water to the woad leaf tea, stirring it
- Cover the bowl or pot and set it aside in a warm place for up to 48 hours to allow the solution to ferment
- Check on your woad solution occasionally, waiting for it to turn a yellow-green
- Add your mordant-free fibers into the woad solution, making sure they’re fully submerged—avoid agitating the liquid as much as possible
- After 20 minutes, scoop out your fibers and rinse them thoroughly. Hang them up to dry
As the fibers dry, they’ll turn from green to blue as the pigment oxidizes. To get a deeper color of blue, let the fabric fully dry and then re-submerge it for another 20-minute soak—repeat the soaking and drying process as needed.
Preparing a High pH Vat
Just as woad needs to be fermented to produce brilliant blues, some dyestuffs respond better to pH manipulation than to boiling. Madder roots showcase this point well—they contain pigments for brown, orange, pink, and red. Setting up a pH vat and prepping your madder well will allow you to confidently choose which of these colors you end up with.
Adding madder to a high pH vat:
- Prepare your fibers in advance through mordanting. If you’ve harvested fresh madder roots, wash them thoroughly and chop them into smaller pieces
- Set the madder roots in a separate bowl or pan. Pour boiling water over them and let them steep for a few minutes. You can use this water as a brown/orange dye if you wish, or dispose of it
- Take your scalded madder roots and set them in a deep pot filled with about 5 L of water. Slowly bring the water up to a gentle simmer (do not boil) and let the roots sit for an hour.
- If you want a pink hue, add 1 tbsp of chalk to the dye bath. Otherwise, leave it alone for a red to orange color. For a softer tone, strain out your roots from the dye bath.
- Add your fabric into the dye bath. Keep the temperature around 160⁰F for 1 to 2 hours. The longer the fabric soaks, the stronger the color.
- Remove and rinse your fabric thoroughly—keep going until there isn’t any more runoff from the dye (this may take a while).
- Specifically watch out for the madder roots—if any stay on the fabric while it’s drying you may get marks. Alternatively, you could try laying out the roots to create a dye pattern on the fabric.
As you can see, there’s a lot of ways to put color into fabric, and just about every plant out in nature holds some color waiting to be found!
Author Bio
This article is written by Morgan Hyde, a former reference librarian from Arizona. Working for the library refined her passion for learning and deep research—a passion that began in her rural AZ upbringing and continues in her work as a writer and editor. If it’s something she can do on her own, it’s something wants know about.


Thank you SO MUCH for this detailed and easy to follow breakdown of natural dye! I am leading a workshop through natural dying this month and having this information so digestible has been a godsend. Thank you for sharing this with us!
You’re quite welcome!