Affiliate disclosure: This post may contain affiliate links. Please see our Privacy Policy.
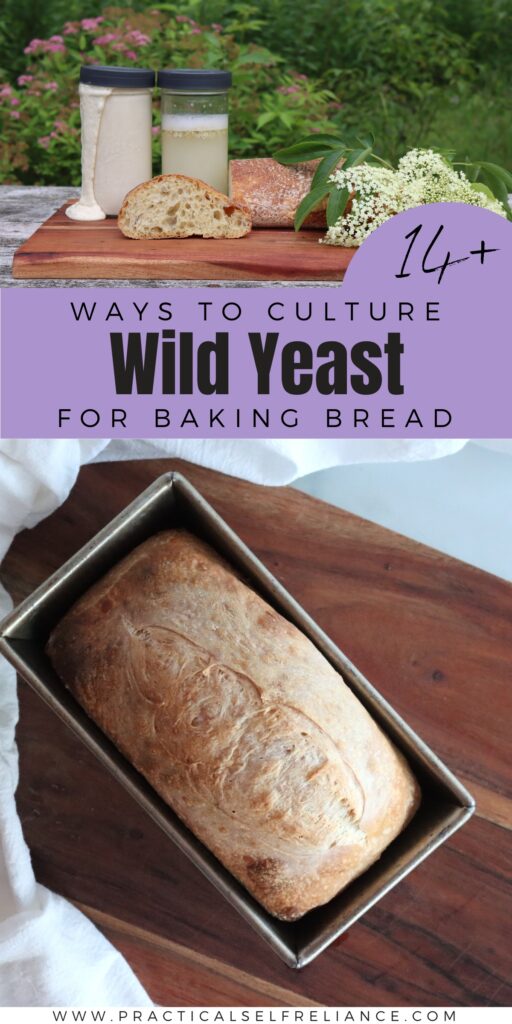
Wild yeast is in the air all around us, and it’s easy enough to capture and culture this natural yeast for baking homemade bread. Learn how to make your own wild yeast starter from common pantry staples and wild foraged plant sources.
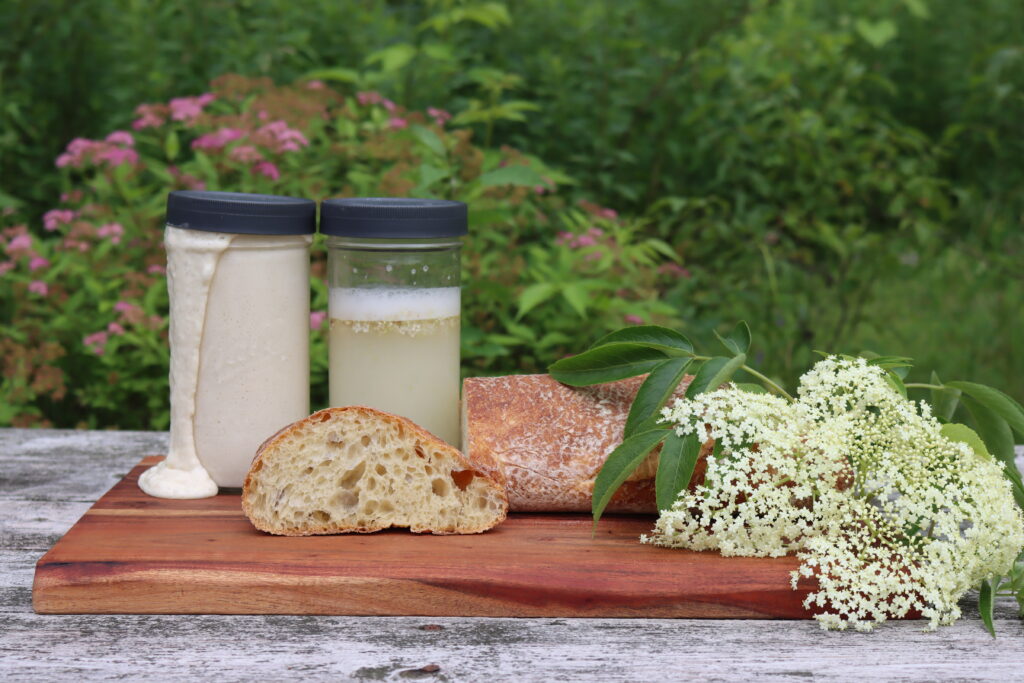
Table of Contents
- Natural Yeast vs. Commercial Yeast
- Sourdough vs. Natural Yeast
- How to Culture Wild Yeast for Baking Bread
- Homemade Sourdough Starter
- Potato Water Starter
- Making Yeast from Raisins
- Yeast from Beer
- Yeast from Crabapples
- Fruit and Vegetable Yeast Starters
- Wild Foraged Yeast
- Other Natural Cultures for Baking
- Salt Rising Bread
- Kombucha Bread Starter
- Water Kefir Bread Starter
- Sauerkraut Bread Starter
- Tea Bread Starter
- Ginger Bug Bread Starter
- More Bread Yeast Options
- Caring for a Wild Yeast Culture
Few people bake their own bread these days, and even those that do keep flour in the house for things like pancakes generally don’t have yeast on hand.
This spring the threat of a pandemic emptied supermarket shelves of bread and pantry staples, and seemingly overnight everyone had a keen interest in making their own homemade bread.
The problem is, supermarkets (let alone bread yeast manufacturers) just weren’t prepared for this drastic shift. There’s no baking yeast to be found anywhere.
We usually buy yeast in bulk, big one-pound packages of SAF yeast for about $10 (about a year’s supply for us, kept in the freezer). I watched those quickly sell out on amazon, and then re-sellers started listing them for $70 to $100 per pound. Those disappeared quickly too, and now there’s not a pinch of commercial bread yeast for sale at any price.
The thing is, yeast is free. It’s floating in the air all around us, and it only takes a bit of patience to catch it, before putting it to work naturally leavening homemade bread.
Natural Yeast vs. Commercial Yeast
To be fair, there’s a difference between specially selected strains of yeast bred for a consistent rise and the run of the mill yeast floating in the air.
Wild yeast will, in fact, raise bread. The thing is, it may not do it in exactly the way the bread recipe dictates. When you read directions like, “allow the bread to rise for 90 minutes, or until it’s doubled in bulk,” toss that time measurement out the window and just go with the visual, “doubled in bulk” direction. Easy enough.
The flavor may also be different. Believe it or not, yeasts release a lot of aromatic compounds as they ferment a substrate, and bread yeast has been selected to release that familiar “fresh baked bread” smell we’re all used to.
Many wild yeasts have a similar aroma, but others have, believe it or not, fruity or floral notes. There’s a reason that certain yeasts have been selected for wine, others for beer, and still others for bread. Brew beer with bread yeast, and the yeast will make it taste like bread, for better or worse.
In bread though, many of those aromatic compounds will bake off in the oven, and it’s not really a big deal.
Believe it or not, some breads are actually traditionally made with home cultured wild yeast starters. Amish friendship bread is made with a homemade potato starter, and artisanal pain a levain is traditionally leavened with a simple raisin-based starter.
In short, your wild yeast starter will not be exactly the same as store-bought bread yeast, but it will get the job done, and there’s a chance it may even make better bread than standardized commercial yeast.
Sourdough vs. Natural Yeast
One more note…there’s actually a difference between breads cultured with sourdough, and those made with just yeast.
Sourdough is a community of organisms; some yeast to be sure, but also other lactobacilli (like in yogurt). Those lactic acid bacteria give sourdough its characteristic sour flavor and actually help break down the flour into more digestible forms. The “sour” flavor comes from the lactic acids they produce, which believe it or not, actually helps sourdough bread keep longer than other types of bread.
Don’t like the sour flavor of sourdough? No worries!
Culturing wild yeast doesn’t necessarily mean sourdough. You can culture regular old bread yeast as well. Online you might find some of these yeast cultures called “sourdough,” but here they’ll all be organized by taste.
You can also raise bread with other probiotic cultures, including kombucha, sauerkraut juice, water kefir and yogurt whey.
Believe me, there are a lot of ways to make leavened bread without commercial yeast, and I’ll take you through every one I can find.
How to Culture Wild Yeast for Baking Bread
Since yeast is more or less everywhere, the biggest challenge is capturing it, and then nurturing it with starch, sugar and other nutrients until it’s concentrated enough to leaven bread.
There are two main methods for culturing wild yeast:
- Sugar/Starch Liquid ~ Add some tasty starches and nutrients to water, and then leave it open to the air until yeast land in it. This is more or less just an open-air trap. The technical specifics are a bit more complicated, but basically you’re trapping airborne yeast.
- Culturing Yeast from a Yeast-Covered Substrate ~ Some things, like crab apples and raisins, for example, are naturally covered in a bloom of wild yeast. Start with a good yeast source, and then feed it by placing it in a starch/water solution until bubbly. There are a lot of options here, and one beer maker even cultured yeast from his own beard hair…don’t worry, most choices are a lot more appetizing.
How you go about culturing wild yeast will determine the yeast you catch and/or encourage in your culture.
Yeast culture recipes that include an acid (like lemon juice or pineapple juice) or salt will encourage cultures that thrive in those conditions. Namely, the lactic acid bacteria from sourdough.
A sugar/starch heavy culture, on the other hand, will call all the bread yeasts to the yard.
The method you choose should depend on your end goals, as well as what you happen to have readily available at home.
Homemade Sourdough Starter
Alright, here we’ll cover the “sourest” starters—if you want something with a mellow flavor, you may be itching to jump ahead. But much of the basic terminology for Yeast Starters is covered in this section, so skim over it before you move on.
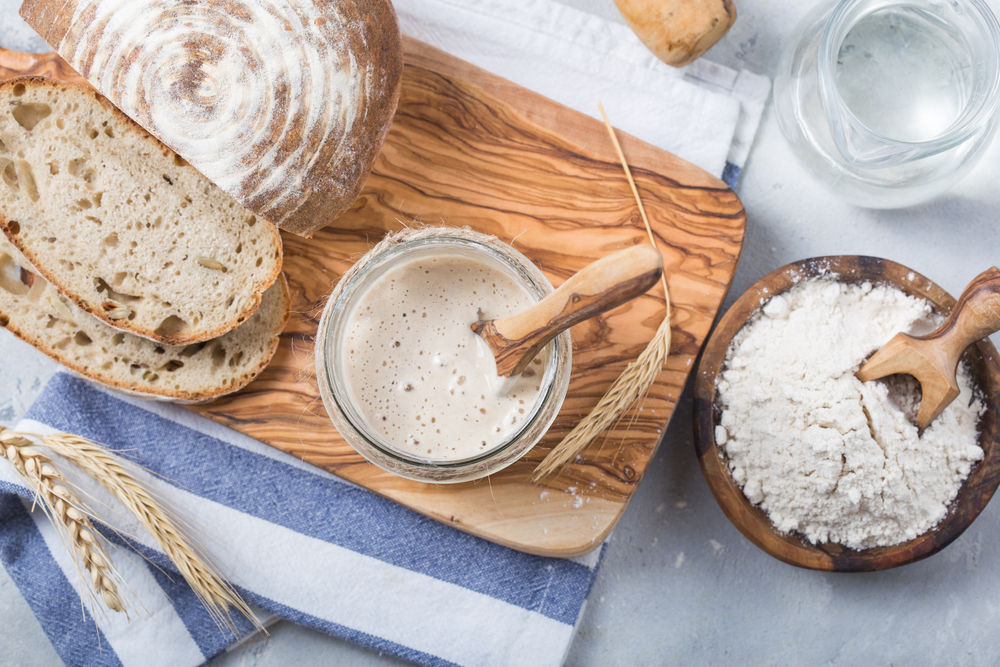
Traditional sourdough starters are just wheat flour and water, lovingly fed over a long time. But here we’ll also cover a rye-specific method and one that’s gluten-free.
Traditional Sourdough (aka liquid starter)
Creating a sourdough starter is a time commitment—on average it takes 7 to 14 days for the starter to become active.
If you’re looking for a fast fermentation window, you’ll definitely want to use whole wheat flour initially. As this is the least-processed flour you’ll find in a store, it will have the greatest collection of natural yeast on it.
As you move into the feeding phase, all-purpose flour will be your friend—it has a good blend of protein and starch, which your yeast will love! But any flour will work.
You should aim to use filtered water for all of your starters. Tap water is often treated with chlorine and will disturb your yeast’s activity.
Using self-rising flour to feed your starter is generally frowned upon in the sourdough community. However, if that’s what you have, it will probably be fine, you may just not get consistent results thanks to the salt present in self-rising flours. Salt inhibits yeast activity. Additionally, self-rising flour has baking powder, an alkaline substance that may change the Ph of your starter.
How to make a sourdough starter:
- Pick a time when you can consistently feed the starter
- The starter prefers it, and it’ll also make it more likely you’ll feed it!
- Mix ½ cup whole wheat and ¼ cup filtered water together until smooth, adding more water if needed
- Cover your jar lightly, with a towel or plastic wrap
- Place the jar somewhere warm—75 to 80 degrees—for 48 hours
- Pro tip: place it in the oven or the microwave with the light on for a few hours
- You may see some discoloration or hooch (sourdough liquid) appear, that’s fine
- Don’t worry if your starter is bubbling, or even if it isn’t!
- Your starter will likely smell terrible, at this stage, that’s ok
- After 48 hours have passed, feed the starter:
- Drain off the hooch and remove half of the starter (aka the discard)
- Aim to remove any discolored bits, but you don’t have to take them all out
- Mix in ½ cup of flour and ¼ cup of water until smooth like yogurt
- Cover and warm
- Repeat the feeding process every 24 hours until your starter is active
And there you have it! You can test if your starter is active by plopping a small spoonful in a bowl of water. If it floats, it’s ready.
Once you have the starter, try it out with my favorite sourdough loaf bread recipe!
Potato Water Starter
Breads, biscuits, and vodka! People have been culturing yeast off of potatoes for centuries and there’s plenty to learn. We’ll skip the deep dive and instead dig our hands into three potato starters: Simple, Sourdough, and Amish Friendship.
Simple Potato Starter
Truly the simplest, this recipe just calls for a potato and water. Traditionally how yeast was cultured for vodka, you can use it in bread recipes by switching out a liquid for your potato water.
This will be a quicker process than feeding a floury sourdough starter. You can find directions online for the best time to begin making your starter and planning on how to use it in baking.
How to make a Simple Potato Starter:
- Place a single, peeled potato in a pot of (filtered) water
- Bring the pot to a boil and simmer the potato for 35 to 45 minutes
- Test your potato with a fork to make sure it’s fully softened
- Pour the water into a bowl to cool
- Mash the potato thoroughly
- Place the mash into a 1qt jar and fill the jar with the cooled, starchy water
- If you don’t have enough, you can top the jar off with filtered water
- Set the jar aside, lightly covered
- Check on your jar between 24 to 36 hours
- If you see bubbles, seal the jar and shake to move the yeast around
- Open, lightly cover, and set aside your jar again
- Wait another 24 to 36 hours
Once you’re seeing a LOT of bubbling, you’re ready to bake!

Sourdough Potato Starter
I know, I know, we left the sour stuff behind. But there are ways to turn a Potato Starter into a sour form by slowing the yeast’s activity and lengthening the process—namely, adding salt.
Many potato starter recipes online will direct you to add salt and sugar, but only do so if you want that distinctive sour taste.
How to make a Sourdough Potato Starter:
- Follow the directions for the Simple Potato Starter up to when you begin filling the jar
- Once the mashed potato and its starchy water are in the jar:
- Add 1 teaspoon sugar and 1 teaspoon salt
- Keep following the simple starter directions, but repeat the shaking process every 36 hours or so until it begins to bubble like crazy!
Amish Friendship Potato Starter
A traditional starter in a slightly different sense, what makes it unique is how it’s passed from friend to friend. Yes—the starter travels too! When a loaf is made, a bit of the starter is set aside to be delivered to your neighbor alongside your baked goods.
What you’ll need on-hand:
- A bowl
- 1 packet active dry yeast (It feels like cheating, but it’s required. You Can also substitute a handful of raisins, which also have wild yeast on their surface. It’ll take a bit longer, but it still works)
- 3 tablespoons potato flakes (double, for feeding)
- ½ cup sugar (double, for feeding)
- 1 cup filtered water, warm (double, for feeding)
How to make Amish Friendship Potato Starter:
- Mix your ingredients together in a small bowl
- Cover loosely and let it sit for 2 days
- Feed your starter:
- Add 3 tablespoons potato flakes, ½ cup sugar, and 1 cup warm water
- Mix well, and set aside
- Leave your starter overnight, or 8 to 12 hours
- Refrigerate for 3 to 5 days before using to bake
If you want to share your starter, grab some plastic bags! After portioning out how much you’ll use, divvy up the rest into individual zipper bags for your neighbors. Try not to exceed 1 cup of starter per 1 gallon bag, or the starter might spill out.
Making Yeast from Raisins
A staple in some French baking, many people claim yeast from raisins is easier (and more powerful) than any sourdough starter.
The process of extracting yeast from raisins actually happens in two phases: you’ll extract the yeast into water first and then create a starter dough.
How to extract yeast from raisins:
- Heat 250g filtered water until it’s warmed but not boiling (about 95 degrees)
- Mix water, 125g raisins (not oil coated), and 60g sugar together in a jar until the sugar is dissolved
- The jar should have an air-tight lid
- Set aside the sealed jar in a warm area, from 75 to 95 degrees
- Let your mixture ferment 4 to 6 days
- Once you’re seeing bubbles and all the raisins are floating to the top, strain your mixture
- DON’T put the water down the drain, this is your yeast
- Discard or bake with the raisins
- Pour any raisin yeast that you won’t use yet into an airtight jar and refrigerate
- It should stay good for a few months and can be used to make more starter dough
How to create a Raisin Starter Dough:
- Mix 90g of your new raisin yeast water with 90g flour of your choice
- Set the bowl aside to ferment for at least 4 hours, but overnight works
- Refresh your dough:
- Add 90g water and 90g flour into your fermented mixture
- Knead until smooth
- Let it ferment for 3 to 4 hours
- Make the Levain (the true starter in this recipe):
- Start the evening before, if possible
- Mix 44g of your refreshed and fermented dough with 134g water and 224g flour
- Knead it until it’s smooth
- Let it ferment 4 hours or overnight
From there, you can use the levain as a starter in bread. You’ll likely have extra raisin yeast water and refreshed dough (the pre-levain, if you will). These can be kept in the fridge. The dough can be refreshed and made into levain as you have time, or you can start a new dough with the leftover raisin yeast.
If that seems like a lot of things to keep in your fridge, consider making the Raisin Yeast Water and only making as much bread starter as you need.
You can sub in 1 tablespoon of the yeast water for some of the liquid you add to your other sourdough starters to help kick them into action– it’s a great tool to have around!
Yeast from Beer
If you’re not already into the homebrewing scene, this might not seem very exciting to you. But you can actually harvest yeast directly from your favorite beer! Not without restrictions, though—the beer has to be unfiltered and the directions here are for ales specifically. Your yeast mileage may vary with other types.
How to harvest yeast from beer:
- Place your beer in the fridge for a week
- You’re watching for a thick slurry to form at the bottom
- Bottles work best
- Using 3 will increase your success rate
- Sanitize your cap and bottle neck, open the bottle, and sanitize the lip with a flame
- Carefully pour the beer into a glass, leaving the sediment behind
- This is where the yeast will be
- Swirl your sediment
- Flame-sanitize the lip again
- Pour the sediment into a sanitized container
Congratulations! You now have some yeast to work with and you just need to grow it. For home brewers you’ll want to follow a stepped-starter process, adding a small amount of wort, letting it ferment for a few days, adding the rest and fermenting.
For the bread makers, there are recipes for you too! Formally, it’s known as “Trub baking” and you’ll find far more recipes under this name.
How to make Beer Trub Bread:
- Weigh your sediment
- Feed your sediment:
- Use equal parts water and flour
- Combined, the water and flour should weigh the same as your sediment
- Add 1 teaspoon of sugar for the first feed
- Mix everything together evenly
- Use equal parts water and flour
- Seal your jar and store it in the fridge
- Feed your beer starter weekly, discarding half of it by weight and adding an amount of water and flour equal to your discard
- Use as desired!
Many people who bake Beer Trub Bread state they find the best results with recipes that already call for a starter (also known as a bread sponge). But it should work as a general baking rising agent.
Yeast from Crabapples
Highly popular as a yeast for ciders and wines, you don’t even need to create a starter first—just press your crabapples and let the juice sit!
Okay, it’s a little more complicated than that if you want a good hard cider or wine.
But you can also create a simple bread starter out of crabapples.
How to create a Crabapple Starter:
- Cut out the cores and dice 20 unwashed, ripe crabapples
- Add the crabapples and ¼ cup warm filtered water to a blender
- If using a food processor, the water may be unnecessary
- Strain the mixture, retaining the yeasty water and discarding the pulp
- In a bowl:
- Measure your yeast water and add enough water to bring it to 1 full cup
- Mix the yeast water with 2 tablespoons sugar and 1 cup flour
- Stir until all lumps are gone
- Leave the bowl out, uncovered, for 24 hours
- After 24 hours, stir down the starter
- You may see that there is some color separation, that’s fine
- After 48 hours, feed your starter:
- Stir it down and add 2 cups water and 2 cups flour
- Leave it alone for another 24 hours and you’ll have a good starter!
If you choose not to use all of this starter in one go, place some of it in a container and treat it like another sourdough starter.

Fruit and Vegetable Yeast Starters
At this point, you might be eyeing your fruit bowl, wondering what else you can turn into a yeast starter. The answer, almost anything!
Generally, you can use the same methods found above for potatoes, raisins, or crabapples to make a yeast starter.
Some ground rules, though: root vegetables will need to be blanched first. There’s a reason we boiled the potato earlier, and it’s to prevent fungus found in the soil from eating your bread before you can.
Dried fruits and veggies will work great for a yeast water starter, but so will fresh options. I’d recommend looking to see what ratios your fellow adventurers are using with a specific ingredient to get you started. From there, experiment!
Some fun ideas I found while researching:
- Dates
- Beets
- Raspberries
- Cranberries and Blueberries together
- Carrots and Tomatoes together
- Prickly pear fruit
- Lemons (unwashed and organic)
Any fruit with a white bloom will provide plenty of yeast. But just because the yeast isn’t showing, doesn’t mean it’s not there.
Wild Foraged Yeast
It’s not just fruits and vegetables—greenery can also help you harvest yeast!
Foragers already know that picking up edible plants from nearby fields and walks can be a bit hazardous. The first thing to remember about foraging for a yeasty plant is to pick something you know is edible. If you’re unsure at any level, leave it there, and ask a local expert.
Edible list in hand for your region, head outside and get foraging!
For maybe obvious reasons (i.e. convenience), this isn’t a well-researched branch of the yeast community. While some plant material is known to provide a good amount of yeast, we frankly don’t know about other plants.
To try extracting yeast from foraged plants, follow these steps:
- Research whether you should pull mature or immature parts of your plants
- Don’t take plant matter that has fallen to the ground
- Unless it was meant to be there in the first place, in which case, plan on blanching it first
- Check everything for mold, decay, and insects
- Take it home and clean it
- Place your plant in a jar with a mixture that’s 15-20% sugar and 80-95% water
- Leave a bit of head-room at the top
- Leave it alone, checking on it regularly for bubbles, and “burping” it if necessary
Bubbling will indicate there’s yeast, and vigorous bubbling will indicate a LOT of yeast. A good starter won’t smell bad, so if it smells awful it either isn’t done yet or may need to be scrapped.
Here’s a list of some plants known to house yeast:
- Dandelions
- Petunias
- Marigolds
- Many grasses
- Sweet ferns
- Spruce tips
- Juniper berries (not all are edible!)
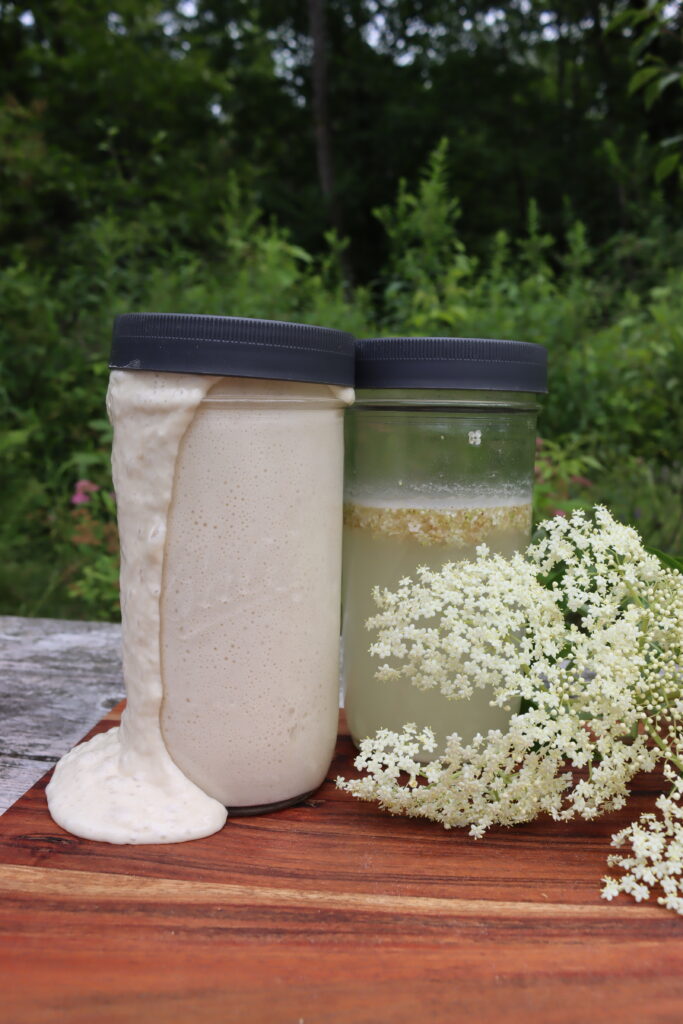
- Elderflowers
- Green pinecones
- Birch bark
- Aspen bark
- Pinyon pine branches
- White pine branches
Yeast water created from wild foraged plants can be used the same as the Potato Water Starter for breads. It’s also a popular option for making wines and sodas!
I’ve personally had great success with dandelion yeast starters, as well as elderflower yeast starters.
Other Natural Cultures for Baking
It’s easy to get tunnel vision with yeast cultures. Much like how brewer’s yeast is rarely used in bread, there are other cultures that get railroaded into one area: kombucha, water kefir, sauerkraut, tea, and ginger bug can all be used to make bread.
Salt Rising Bread
While the art of cultivating wild yeast is fascinating and rewarding, there’s another traditional bread-making method that doesn’t rely on yeast at all: salt-rising bread. This unique bread is made using a natural fermentation process that involves bacteria rather than yeast. The fermentation is typically achieved by using a mixture of flour, water, and salt, which creates an environment where lactic acid bacteria can thrive. These bacteria produce carbon dioxide gas as a byproduct, causing the dough to rise.
Salt-rising bread is known for its distinctive flavor and texture, often described as having a cheesy or sour taste, similar to sourdough but without the yeast. The process of making salt-rising bread is more labor-intensive and unpredictable than traditional yeast bread, as it requires precise conditions to encourage the right type of bacterial growth. However, for those interested in exploring alternative bread-making techniques, salt-rising bread offers a fascinating and rewarding experience. It’s a testament to the diversity of bread-making traditions and the creative ways people have found to leaven bread without relying on commercial yeast.
Here is a step-by-step guide to making Classic American Salt-Rising Bread using the provided ingredients:
Starter 1:
- 1/4 cup (57g) milk
- 2 tablespoons (14g) yellow cornmeal
- 1 teaspoon granulated sugar
Starter 2:
- 1 cup (227g) hot water (120°F to 130°F)
- 1/2 teaspoon table salt
- 1/2 teaspoon baking soda (or 1 Tbsp clean wood ash)
- 1/2 teaspoon granulated sugar
- 1 1/2 cups (180g) All-Purpose Flour
Dough:
- 4 tablespoons (57g) soft butter
- 1/2 teaspoon table salt
- 2 1/4 to 2 1/2 cups (270g to 300g) All-Purpose Flour
- Mix Starter 1: In a small bowl, combine 1/4 cup of milk, 2 tablespoons of yellow cornmeal, and 1 teaspoon of granulated sugar. Stir until smooth.
- Incubate Starter 1: Cover the bowl with a cloth and let it sit in a warm place (around 90°F to 100°F) for about 8 to 12 hours.
- Mix Starter 2: In a separate bowl, combine 1 cup of hot water (120°F to 130°F), 1/2 teaspoon of table salt, 1/2 teaspoon of baking soda, and 1/2 teaspoon of granulated sugar. Stir until dissolved.
- Add Flour to Starter 2: Gradually add 1 1/2 cups of all-purpose flour to the hot water mixture. Mix until smooth.
- Combine Starters: Add the mixture from Starter 1 to Starter 2. Mix well and let it sit for another 4 to 6 hours, or until it becomes bubbly and active.
- Add Butter and Salt: Once the starter is active, add 4 tablespoons of soft butter and 1/2 teaspoon of table salt. Mix until well combined.
- Add Flour: Gradually add 2 1/4 to 2 1/2 cups of all-purpose flour to form a dough. Knead on a floured surface until smooth and elastic.
- First Rise: Place the dough in a greased bowl, cover it with a damp cloth, and let it rise in a warm place for about 4 to 6 hours, or until it has doubled in size.
- Punch Down: Gently punch down the dough to release air.
- Shape the Loaf: Form the dough into a round or oblong loaf.
- Second Rise: Place the shaped loaf on a baking sheet or in a greased loaf pan, cover it with a damp cloth, and let it rise for another 2 to 4 hours, or until it has doubled again.
- Preheat Oven: Preheat your oven to 375°F (190°C).
- Bake: Place the loaf in the oven and bake for about 35 to 40 minutes, or until the bread is golden brown and sounds hollow when tapped on the bottom.
- Cooling: Remove the bread from the oven and let it cool on a wire rack for at least 30 minutes before slicing.
Kombucha Bread Starter
A quick, simple, and tangy starter, anyone who’s already familiar with fermenting kombucha will have most of what they need to make this bread starter. Yeasts found in kombucha won’t provide as much lift as others, so you’ll end up with a pretty dense bread.
How to make a Kombucha Bread Starter:
- Mix ¼ cup kombucha yeast, 1 cup room temperature kombucha or kombucha vinegar, 1 cup sugar, and 2 cups of all-purpose flour together
- This should be pretty lumpy
- Kombucha yeast is the brown, stringy parts of the drink
- Cover your container with a cloth and close with a tie or rubber band
- Set aside in an area with little temperature change
- Every 24 hours, stir your starter, repeat for 3 to 7 days
- Once you start seeing bubbles, move your starter to a 3qt container and feed it:
- Mix in 1 cup kombucha and 1 cup flour
- Cover the container with the cloth for now
- Repeat feeding every 24 hours for 2 days
Once you’ve fed the starter 3 times, it should be active enough for baking!
Water Kefir Bread Starter
Water Kefir actually has nothing to do with the more commonly known kefir that comes from livestock milk. Rather, like many of the cultures listed here, it’s a combination of grains, their wild yeasts, and water.
In stores you’ll often see Water Kefir being sold as a drink, similar to kombucha. Many of these drinks won’t work for a starter, but that’s okay! Making your own Water Kefir is pretty simple.
How to make Water Kefir:
- Combine ½ cup of water and ¼ cup of sugar in a jar
- Swirl to dissolve the sugar
- Many recipes will claim tap water is fine for this, but as we want to use this for bread, you may have better success by starting with filtered water from the beginning.
- Add 3 cups of room-temperature water to the jar
- Add Kefir grains to the jar (up to 22 grams)
- Cover and let the jar sit in a warm area up to 48 hours
- Strain the Kefir out and retain the yeast water
- You don’t have to discard the grain and can use it to immediately start a new batch
Once you have your Water Kefir, here’s how to make a Kefir Bread Starter:
- In a jar, combine 1/3 cup of flour with 3 tablespoons water kefir
- A blend of whole wheat and all-purpose flour works well
- Cover the jar and leave it in a warm place for 24 hours
- After 24 hours, feed the starter:
- Discard half
- Add 1/3 cup flour and 3 tablespoons water kefir
- Repeat feeding every 24 hours for 3 to 4 days
Once you’re seeing it start to double in-between feeding, your starter is ready!
Sauerkraut Bread Starter
This is going to make a pretty sour loaf, and it’ll only get stronger the longer you keep the starter going. People who’ve tried this method also report that your kitchen will smell like sauerkraut unless you put a plastic bag over your starter.
While similar to a traditional sourdough starter, this method produces a usable, highly sour starter a bit faster.
How to make a Sauerkraut Bread Starter:
- Add 30g flour and 40g sauerkraut juice to a tall jar, mix until smooth
- Cover the jar with a plastic bag (deflated), and seal with a rubber band or tie
- After 48 hours, feed your starter:
- Remove a third to half of the starter
- Mix in 15g flour and 30g water
- Repeat feeding every 24 hours until the starter is doubling in between feeds
Tea Bread Starter
Yes, even your morning cup of tea has yeast in it! And harvesting that yeast is fairly simple.
How to make a Tea Bread Starter:
- In a jar, mix 1 tablespoon tea with 1 cup filtered water and 1 tablespoon of honey
- Loosely close the jar and let it rest in a warm area
- Once a day, lightly shake the jar to re-distribute the ingredients
- After 4 to 7 days, start checking for bubbles
- Once you’re seeing highly active bubbling, combine 100g tea yeast water with 100g whole wheat flour
- Set aside your starter for 12 to 24 hours to let it ferment
From there you can make a larger sponge from your starter and make bread, biscuits, or whatever you please. The flavor will largely depend on the tea used, so feel free to experiment or combine the tea yeast water with another yeast water.
Ginger Bug Bread Starter
Ginger ale came about thanks to the popularity of using ginger bugs to make natural soda. As the carbonation is a result of yeast activity, we can definitely use it to make bread!
Here’s how to make your own Ginger Bug:
- Grate or finely chop 1 tablespoon organic ginger (unpeeled)
- Non-organic ginger is often irradiated and won’t have living yeast
- In a jar, combine your ginger with 1 tablespoon sugar and 1 ½ cups water
- Cover your jar and set it aside
- Every day, feed your bug:
- Add in 1 tablespoon grated or diced ginger and 1 tablespoon sugar
- Stir vigorously
- After 5 days, it should be ready—you’ll see bubbling and smell yeast
Ginger bug is extremely active and stores well. So you’ll more likely want to keep it on hand rather than a bread-specific starter.
On a day you’d like to bake, do the following:
- Mix ¾ cup strained ginger bug with ¾ cup flour
- Set it aside, lightly covered, for a few hours until it doubles
- Use as you would another bread starter
If 3 cups of starter is too much (or too little) for your project, adjust your ratios so you’re mixing together half of what you need.
More Bread Yeast Options
For those that can’t manage to keep a cactus alive, there is another easy packet option. Keeping a starter alive isn’t required!
There is a thriving industry that grows, cultivates, and dehydrates yeast for specific purposes. We’ve talked a lot about the commercial bread yeasts, and we’ve mentioned that while you can use it to ferment alcohol, it’ll make it taste like bread. But you can also do the reverse!
Online you’ll find a wide collection of yeasts for the homebrew industry: beer yeast, wine yeast, distiller’s yeast, and so on. Take one of these packets and substitute it for packeted bread yeast in any recipe.
People who use this method report the bread doesn’t taste like any alcohol in specific, but neither does it have that distinct “bread” taste. Instead, it tastes “different.” Not bad, just not what you might expect.
Of course, we’ve already mentioned the strangely fascinating (and gross) beard yeast. The group in question actually sent some of their brew master’s beard hair for lab testing and culturing before trying their experiment. It turns out much of the brewer’s yeast he worked with was captured in his beard—so it’s unlikely the average guy on the street could replicate this, even if he wanted to.
One other ancient method of capturing wild yeast actually involves cultivating a little bacterium to get your bread growing. Showcased by John Townsends, it involves mixing a grain, water, and salt together in an unwashed dough bowl and letting it sit for 24 hours. That’s right, if you can’t keep a hydrated starter alive, letting scraps of old dough stick to a wooden bowl will help leaven your next batch.
Caring for a Wild Yeast Culture
So, you’ve made yourself a bread starter, now what?
You probably noticed the recipes here assume you’re making enough starter to use some and keep a bit on-hand. Wild yeast cultures aren’t like the little dried packets—they’ll need to be cared for on an on-going basis to keep them alive.
Feeding your Wild Yeast Culture
This will be the most time-intensive part of keeping a culture alive.
Having made it this far, you’ve likely noticed most of these recipes come with feeding instructions. You may think following them ad-infinitum will keep your culture happy—and while you’re not wrong, there’s a bit more to consider.
To get your yeast culture started, it was stored in a warm place and fed on a daily basis (or more). On a month-to-month basis, that’s a lot of discard to work with or throw away! You’ll be using so much flour, you might run out before you get to the end of the first week.
Most people get around this issue by sealing their starter in an air-tight jar and stashing it in the fridge. Chilled starters only need to be fed about once a week, which is far more manageable!
But you’ll find cold starters don’t help raise bread very well. Refrigerating your starter essentially causes it to go dormant and it’ll need to be “woken up” before it’ll bake like it did before.
To wake up a starter, pull it out of the fridge a day or two before you plan on baking. Feed it and let it warm slowly up to room temperature. Once you’re seeing it double daily, it’s ready for baking!
Propagating your Wild Yeast Culture
You might be planning to do a lot of baking and want a large amount of starter on hand. Or you may have friends and family who want to try their hand at keeping a culture alive. Or, you might just want to experiment with the starter you already have.
Turns out, it’s pretty easy to propagate your cultures! It all comes down to what you do with your discard.
As you prepare to feed your cultures, you usually need to remove a portion—the discard. Anyone who’s baked with a discard can tell you it doesn’t rise as well as the retained starter. And that’s because the discard is pulled from the starter when it’s at its least active.
But that doesn’t mean the discard can’t be used as a starter, it just needs a little feeding. Set aside your discard in a separate container and follow the same process you would for the original starter.
Now is a great time to add in a different type of flour, or replace your water with an alternative (water kefir, pickle juice, raisin yeast culture, etc). Isn’t experimenting half the fun of baking after all?
Storing your Wild Yeast Culture
Going on a trip? Taking a break from baking for a while?
Well, the good news is, you don’t have to scrap or give away all of your starters. You can try either freezing or drying them.
Which route you choose should depend on how long you’d like to store your starter. Frozen wet starters will stay good for about 2 weeks. But dried starters will stay viable for years, especially if frozen!
Note that the yeast waters in this list will store best if made into a bread starter first. The flour will help dry the yeast enough that it won’t expand as much while freezing, making it more likely to survive until thawing. And so far I haven’t found that it’s possible to dry a fully liquid culture into something usable.
Freezing Wild Yeast Cultures
To begin, pull out any chilled starters and feed them at room temperature until they’re bubbling again. You want your culture at its most active right before it heads into the freezer.
Spoon 1 cup (or desired amount) of starter into a plastic bag or freezer-safe container. Silicone molds are a great option, as are muffin pans lined with plastic wrap or cupcake holders.
Freeze completely, about 3 to 4 hours. If using a mold, pop the starter out at this point and put it in a bag for long-term storage.
To thaw your starter, pull out as much as you want and set it in a jar at room temperature, covered with a towel. After 12 hours, feed it equal parts water and flour (e.g. 1 cup starter plus 1 cup flour and 1 cup water).
Leave it alone for another 12 hours before discarding half. Feed the starter enough to replace the removed amount. Repeat this process until the starter is doubling in-between feeds. It’s now re-activated and ready-to-go!
Drying Wild Yeast Cultures
Feed your starter about 5 hours before you start the drying process. You want it really active, so you’ll need to take a little more time with chilled starters to make sure they’re at peak bubbling greatness.
The simplest method is to air dry your starter. Spread it out in a thin, even layer on some parchment paper or a baking mat. Set the starter out of the way where it will get some air flow. Once it’s dry (about 24 to 48 hours), set it in an air-tight container in a cool place. That’s it! You can also blend it into a powder if desired.
Dehydrating starter is also an option. You’ll follow a very similar process to air drying. Spread the starter out in a thin layer on some parchment paper that will fit onto your dehydrator’s trays. Set it to the lowest setting you can (95 to 100 degrees if possible) and leave it for 4 to 6 hours. Crumble and stash it in an air-tight container.
After it’s dried, freezing your starter is a great way to ensure it’ll stay viable for a long time. Though that’s completely optional.