Affiliate disclosure: This post may contain affiliate links. Please see our Privacy Policy.
Danish aebleskiver are traditional holiday dish in Scandinavian countries, and they’re sold as a street food during the busy holiday shopping season. Also known as Æbleskiver, ebleskiver, danish pancake puffs or simply pancake balls, these light as a feather round pancakes are impressive enough for big gatherings but simple enough for weekday mornings at home with my toddlers.
Learning to make them was easy, and after my first batch, we’ve had them at least once a week since, no holidays required.

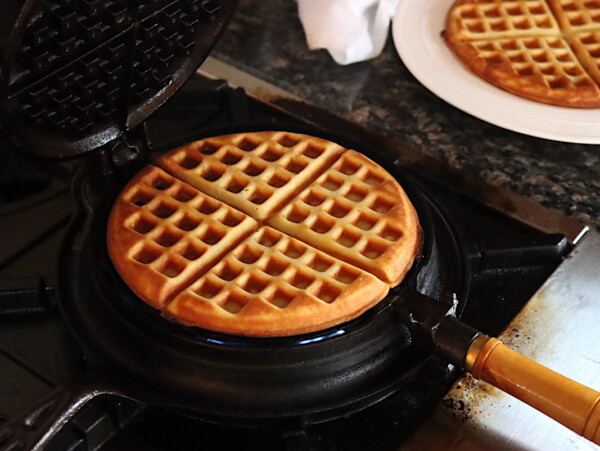
I’ll admit I have a thing for cast iron pans. We gave up Teflon more than a decade ago, and all our meals are cooked on cast iron pans. We don’t have a lot of specialty gadgets in our kitchen, but I’ve made an exception for our cast iron Danish aebleskiver pan.
Or at least I thought I did…now that I have one, I’ve learned that there are many cultures that have some type of traditional dish cooked in a pan like this. The Japanese have savory takoyaki, India has coconut flavored Neyyappam and Indonesia has cute little milk cakes called Kue Cubit.
I’ve since found 8 wildly different traditional recipes from around the world that require an aebleskiver pan, and I’m slowly working my way through them. We also really love the Dutch version of these little pancakes called Poffertjes.
Even without all the other exotic options we still get plenty of use out of this little pan. With two young pancake-loving toddlers in the house, we make pancakes several times a week.
Once you’ve made them once to get the process down, homemade aebleskiver don’t require any more work than plain flat pancakes, with the exception of whipping the egg whites. I’m happy to put in that extra two minutes when the little ones are begging, “Make us pancake puffs mama!”
Looking at an aebleskiver pan I know you’re thinking, how on earth do you flip those things without making an unholy mess? The simple answer, you don’t.
There’s no “flipping” when you’re making aebleskiver. A well-seasoned cast-iron pan has plenty of natural slip to it, and the pancake balls are slowly slid around in a circle in the depression until they make a full sphere of cooked dough.
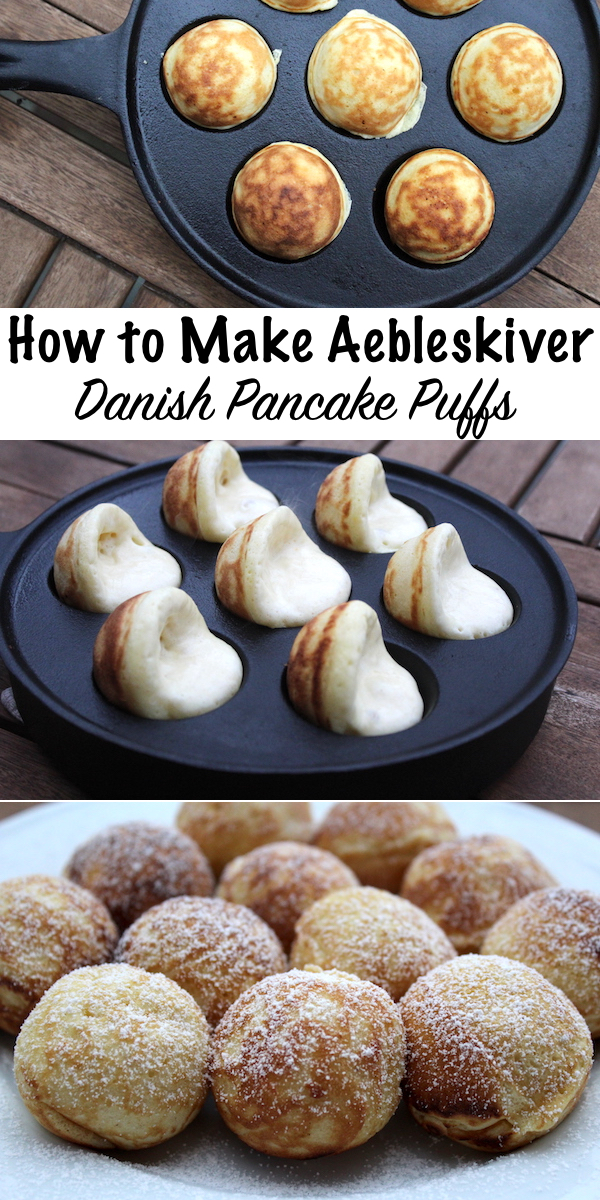
How to Make Aebleskiver
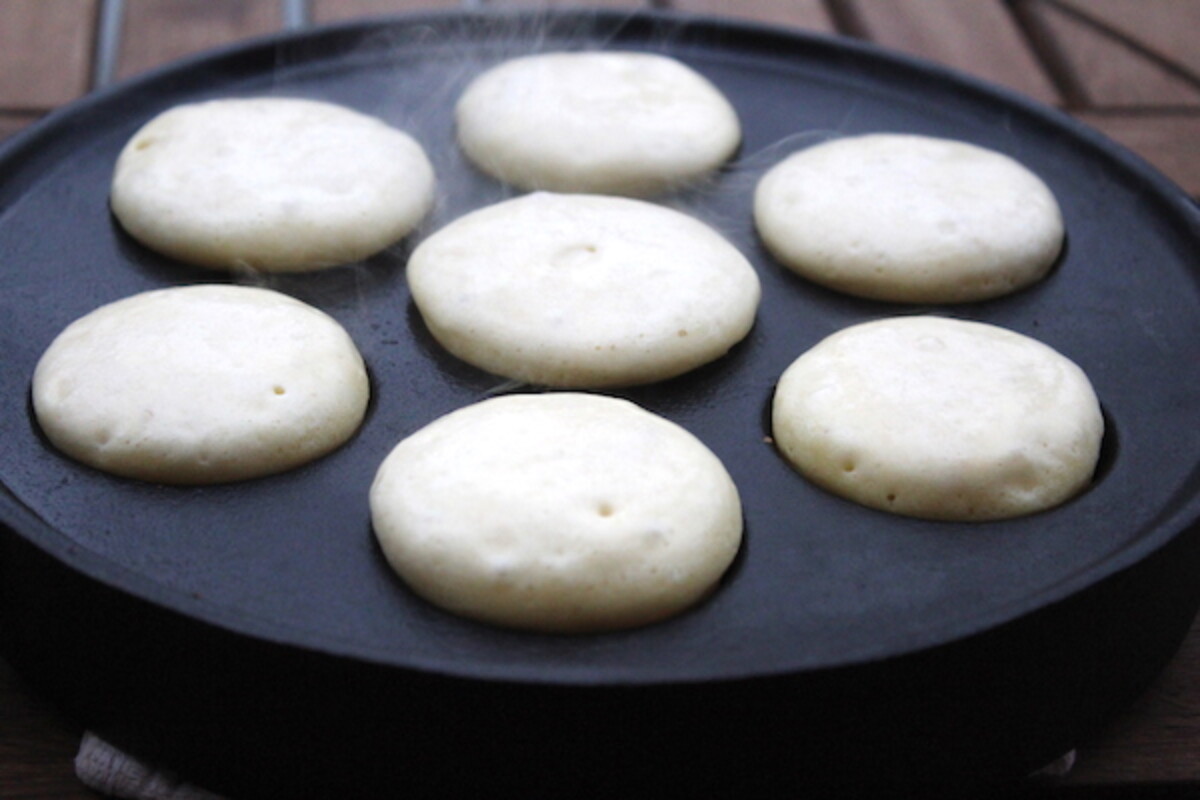
Start by heating the pan to quite hot (but not smoking) and then painting the depressions with a bit of butter. This helps the aebleskiver develop a crisp outside, and ensures that there’s no sticking. I use a silicone pastry brush to paint the pan with melted butter, but you can also just drop pats of butter into each depression.
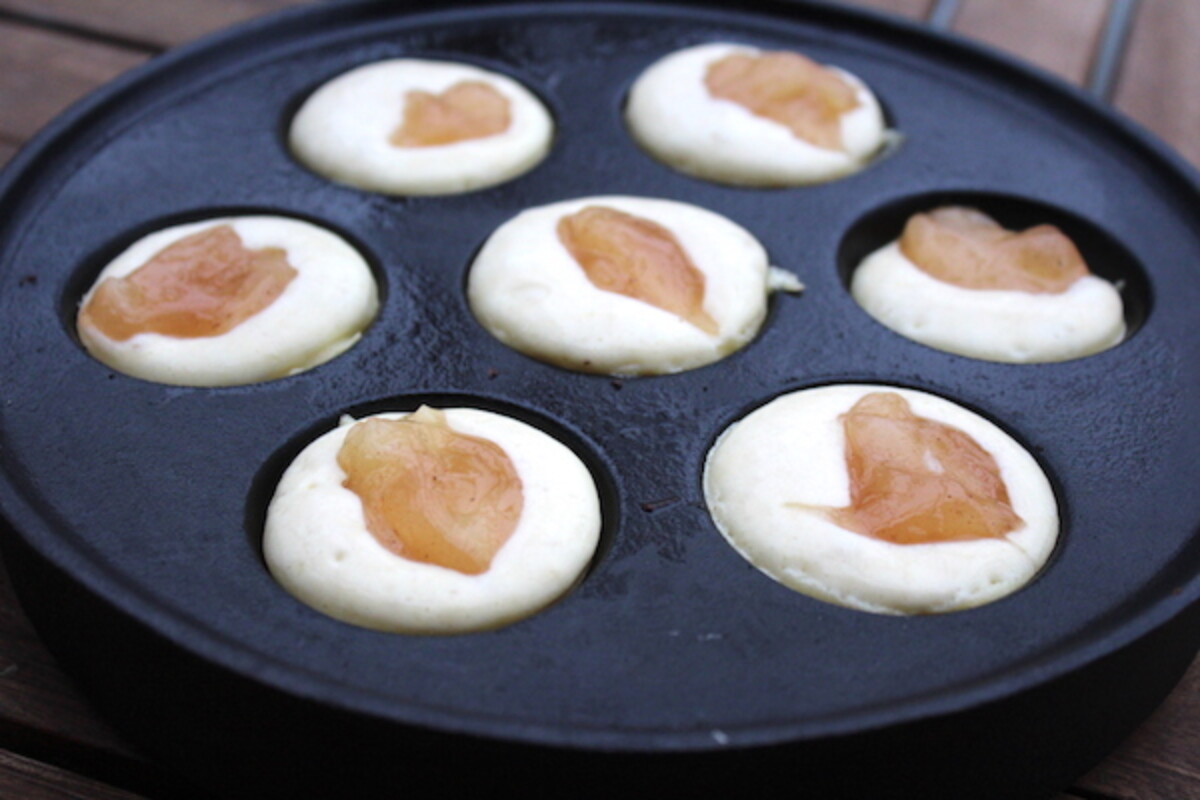
After the butter, fill the cups about 3/4 the way full with aebleskiver batter and allow them to cook for about 1-2 minutes on the bottom. The batter will begin to puff and bubble, just like a flat pancake does.
The next step is where the real magic happens. Traditionally, Danish grandmas use a knitting needle to stab the aebleskiver and slide it 90 degrees in the pan.
I’m a crocheter, not a knitter, so I don’t keep knitting needles handly. I’ve used bamboo skewers or the tip of a cooking thermometer, or a steak knife in a pinch.
Really, you just want a long stabbing implement that can go through the loose uncooked batter, pierce into the crust developing on the bottom for grip and then slide the aebleskiver up the side of the pan. If the pan was hot, the bottom will have cooked into a golden-brown crust and the raw aebleskiver batter will now pour out of that cup into the hot pan and cook more of the pancake ball.
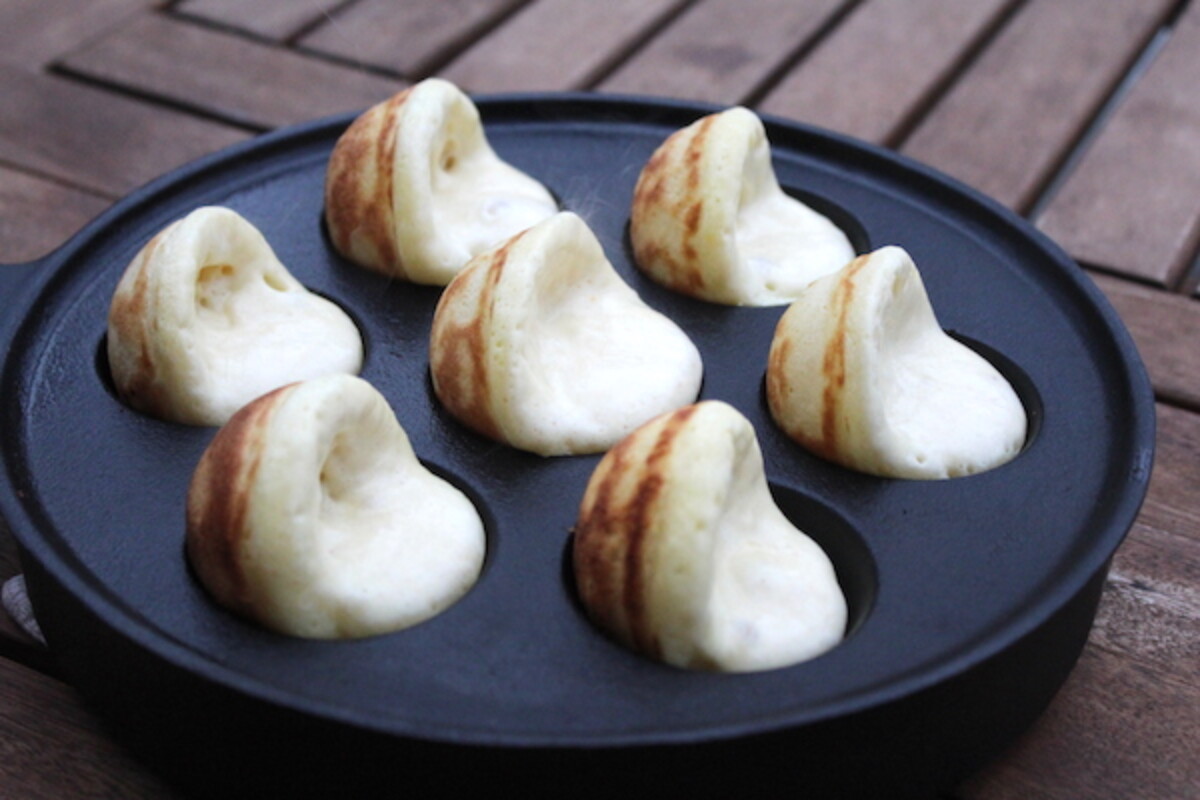
As soon as you’ve finished your first 90-degree turn, go back around and turn them another 90 degrees. If you wait too long, the original cup from the bottom will collapse back in on itself and you’ll have a lopsided pancake ball.
I know it sounds tricky, but trust me, it’s easy. Go through and turn them 90 degrees, and then immediately slide them another 90 degrees so that they’re now upside down. Sometimes it helps to turn them ever so slightly past upside down so that the final seam seals completely.
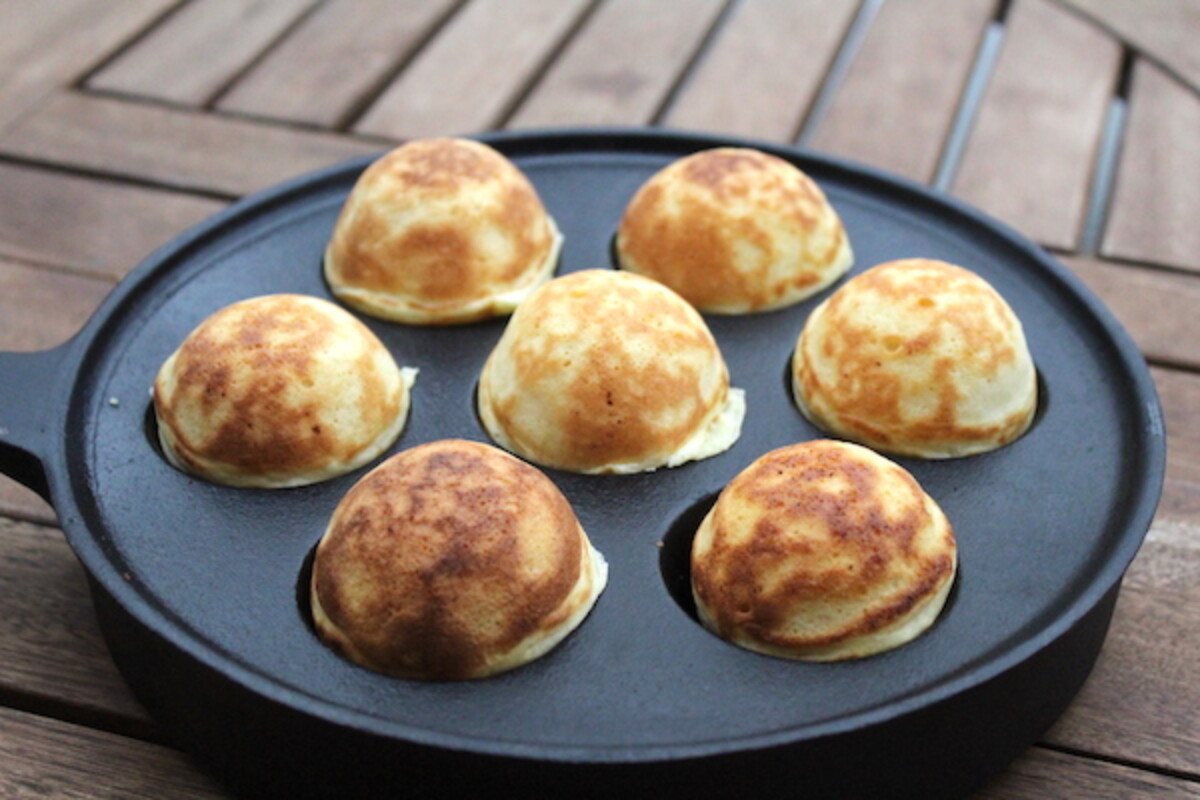
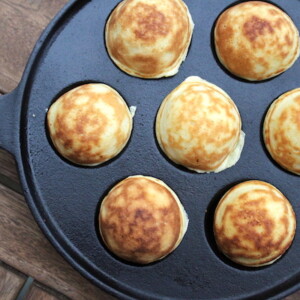
At this point, you have a complete pancake ball outer crust, but the batter in the center isn’t completely cooked. Allow the aebleskiver to cook for another minute or so on the other side before removing them from the pan onto a plate.
This recipe makes 4 pans of aebleskiver, or about 28 pancake balls. That’s plenty for my family of 4, but two of us are toddlers, so adjust to your own family size.
Aebleskiver Fillings and Toppings
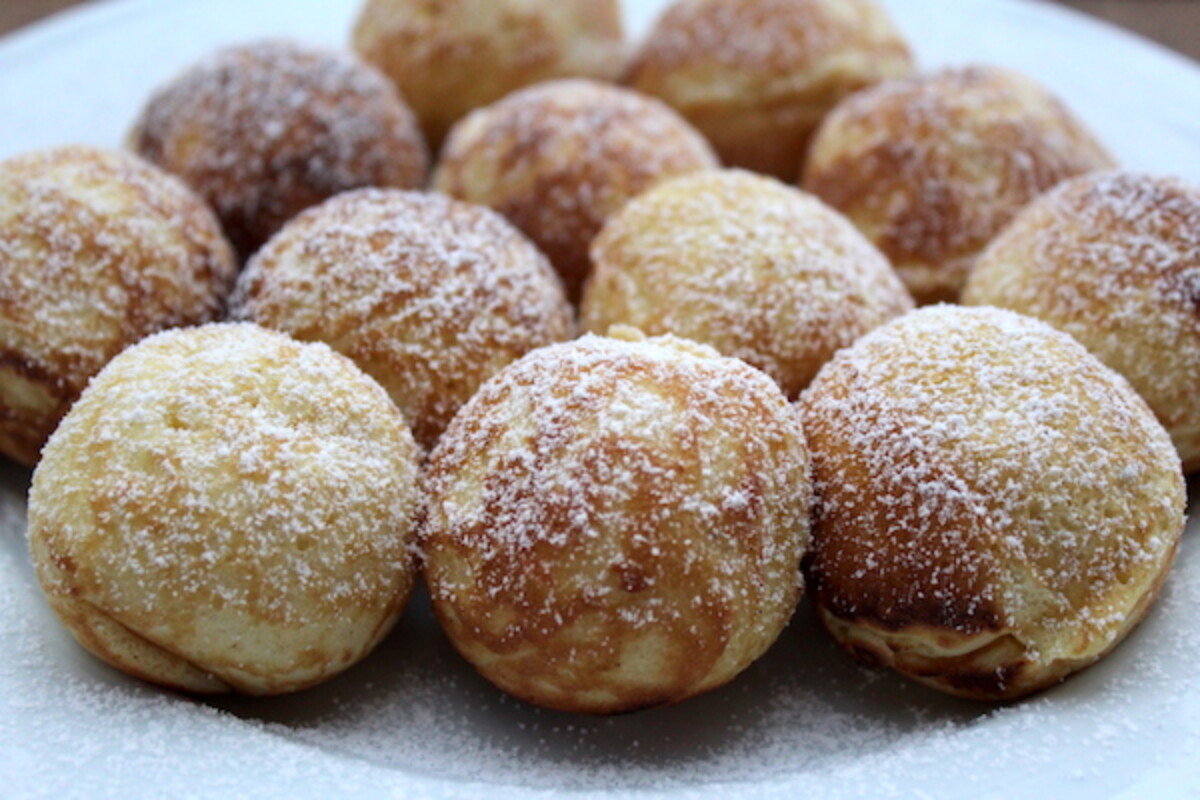
The name “aebleskiver” actually means apple slices, and originally these were apple-filled pancake balls. These days they’re often made plain without filling and just covered in powdered sugar, jam or syrup.
I’ve filled them with my own home-canned apple pie filling, which is a real treat, but finely diced apple pieces are traditional. The trick is to use a very small amount of filling, no more than 1/2 teaspoon so that the aebleskiver can cook completely around the filling.
Lingonberry jam is also a traditional accompaniment, but it can be tricky to find. Lingonberries are very similar to cranberries, and we use our own homemade whole berry cranberry sauce around the holidays. It helps to warm it up slightly before pouring a bit over the hot aebleskiver.
Really though, aebleskiver are heaven on their own or topped with a dusting of powdered sugar. The whipped egg whites mean that these little pancake balls are light and fluffy, and nowhere near as heavy as a standard pancake. It’s a bit like eating a warm, buttery cloud of happiness.

Danish Aebleskiver
Ingredients
- 2 1/4 cups flour
- 1/4 tsp salt
- 1/2 tsp baking soda
- 1 tbsp sugar
- 1 3/4 cups buttermilk
- 1/4 cup butter, melted
- 1 tsp vanilla
- 3 large eggs, separated
- melted butter for greasing pan
- apples or jam, optional for filling
- powdered sugar or maple syrup, optional for topping
Instructions
- In a large bowl, mix the flour, salt, baking soda and sugar.
- Add in the buttermilk, vanilla and egg yolks (reserving the whites). Mix until just combined. Melt the butter and allow it to cool slightly, then add the butter in and mix.
- Whip the egg whites using a hand mixer until they hold stiff peaks. Fold the egg whites into the batter.
- Place the aebleskiver pan on the heat and allow it to get quite hot, but not smoking. Use a silicone pasty brush to paint melted butter onto the depressions, and then fill each one about 3/4 full with aebleskiver batter.
- Cook the batter for 1-2 minutes, until it begins to puff. Use a kitchen skewer or knitting needle to stab into each cup and slide the pancakes about 90 degrees spilling a bit of the raw dough into the pastry.
- As soon as you’ve turned the whole pan 90 degrees, immediately go through and turn them another 90 degrees so that they’re fully upside down. Once they’ve formed a cooked surface all the way around, allow them to cook another minute or two, turning occasionally until they’re cooked through.
- Remove from the pan to a plate and repeat until the batter is all cooked.
- If you’re using filling, add batter until the cups are about 1/3 full, then add a very small amount of filling and then top with more batter on top of the filling. Proceed with the turning process in the same way.
- Serve topped with powdered sugar, maple syrup or jam.
Nutrition
Nutrition information is automatically calculated, so should only be used as an approximation.


I needed to use up some buttermilk and aebelskievers sounded great. Used your recipe, except I skipped separating the eggs. They worked out just fine!
That’s good to know. Thanks for sharing.
OMG I have been looking for HELP on how to make these and here U are
THNK YOU
You’re very welcome. We’re so glad it was helpful.
I received my Aebleskiver pan years ago, Pre Pintrest, and made a total mess! Your recipe was spot on and they turned out great! I used strawberry pie filling for my innards, and scooped the batter with an ice cream scoop and the filling with a melon baller/cookie scoop. Feeling very accomplished thanks to your directions and pics…Thanks!
You’re very welcome. So glad the recipe was helpful for you.
Fillings can also be plum marmalade or other not-too-sweet filling.
BR from the Viking
I make them ahead and cool them and then freeze them in small batches. I can pull out a package and stick them in the oven a few minutes ……they are perfect. My grandkids love them, we make them in big quantities and serve them for special events at church.
Can these be made ahead and given as gifts?
They’re really best fresh, or no more than a few hours old (like pancakes).
Wow this looks fun and reminds me of the Japanese Takoyaki!
May I know what is the size of one pancake?
Thanks for sharing! 🙂
They’re roughly golf ball sized?
My family is Danish so Aebelskiver were extra special, but not reserved for holidays. One difference that our family recipe has from yours is that it contains both baking soda and baking powder, in equal quantities. The buttermilk was split in two parts in different bowls, and the baking soda was added to one half, while the baking powder was added to the other half. It gets very interesting because the buttermilk reacts with both leavening agents and foams up (fun for the kids). Then you begin to build the batter by gradually adding egg yolk (with butter and vanilla), buttermilk mix, and dry ingredients in stages, and after that is all mixed, then you fold in the egg whites. I know it sounds harder and may end up the same, but it was always exciting as a kid to watch the buttermilk foam up. It made it more fun than making plain old pancakes. To me, the reaction is part of making Aebelskiver. That, and the contest to see who could eat the most. I think my cousin held the record with 23. If you want to try it, I would just split your buttermilk and add 1/2 t. baking soda to one half, and 1/2 t. baking powder to the other half. I would not go down to 1/4 t. I think our recipe had even more leavening, possibly even 1 t. of each.
Sounds like a really fun way to make these. Thanks so much for sharing your tradition, I’ll try it out next time we make a batch =)
How do you complete the hole in the bottom while cooking if the batter has already cooked up? After I take them out of the pan, they deflate and are flat circles and some under cooked, some don’t complete the circle. Ugh! Help!
Hmmm…Mine cook into full circles and I think the trick is to not let them cook too much on the first side. Just barely let the batter form a solid half circle and start turning them quick. There’s plenty of batter to pour over on that last turn to complete the circle, and then there’s still raw batter to expand inside and fill it in. Mine are always solid dough all the way through, no hole.