Affiliate disclosure: This post may contain affiliate links. Please see our Privacy Policy.
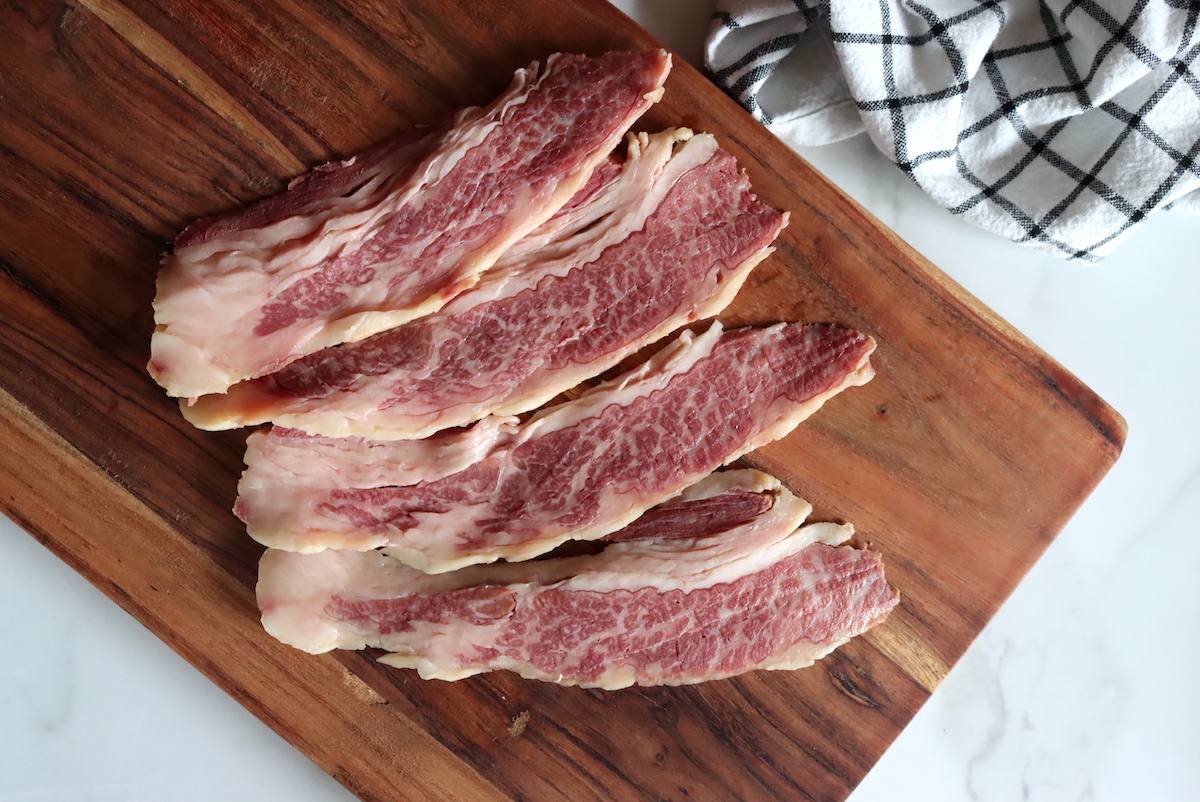
Beef bacon is an incredibly delicious alternative to pork bacon, and it’s surprisingly easy to make at home (even without a smoker).
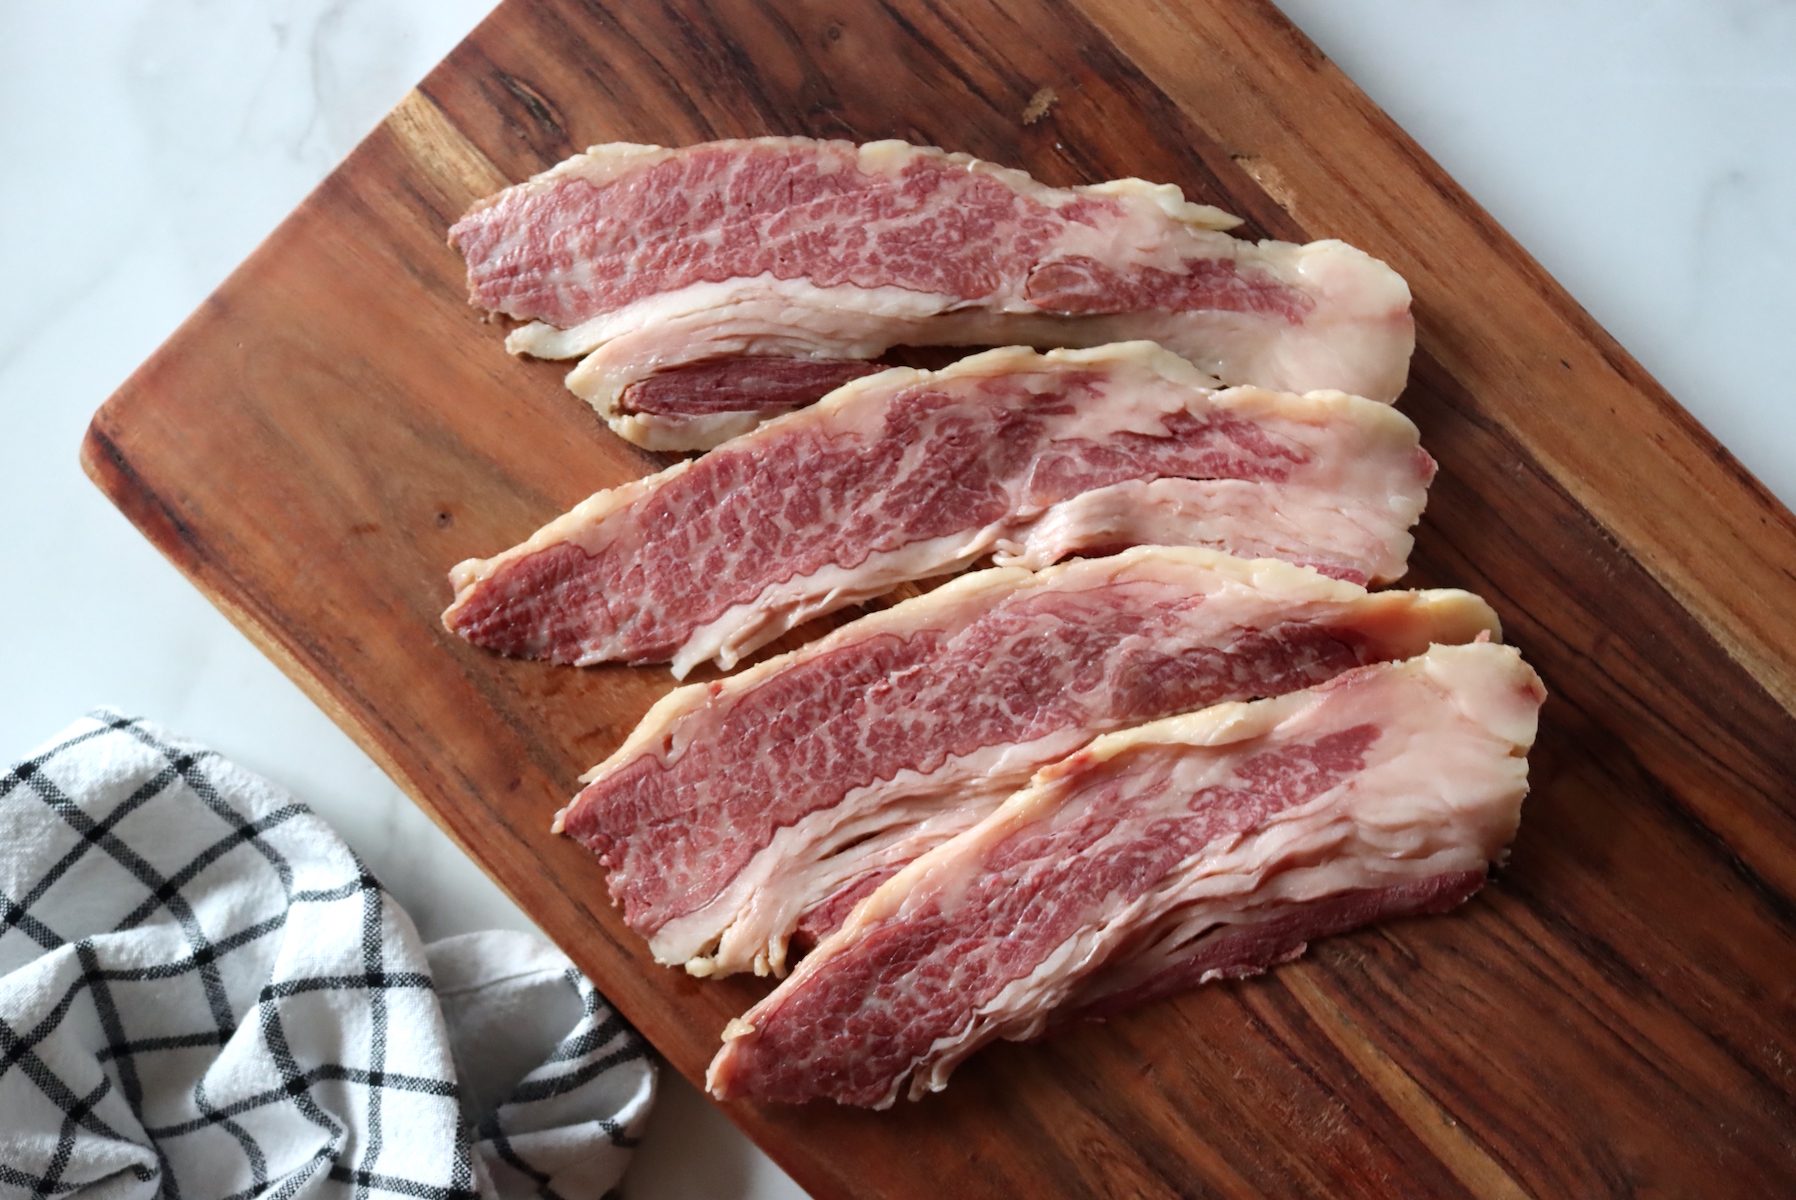
I’ve had my eye on making beef bacon for a while now, ever since a friend gifted me a few pounds of this amazing beef bacon from an online butcher shop.
It’s like pork bacon, but surprisingly much more full of flavor and deliciously beefy.
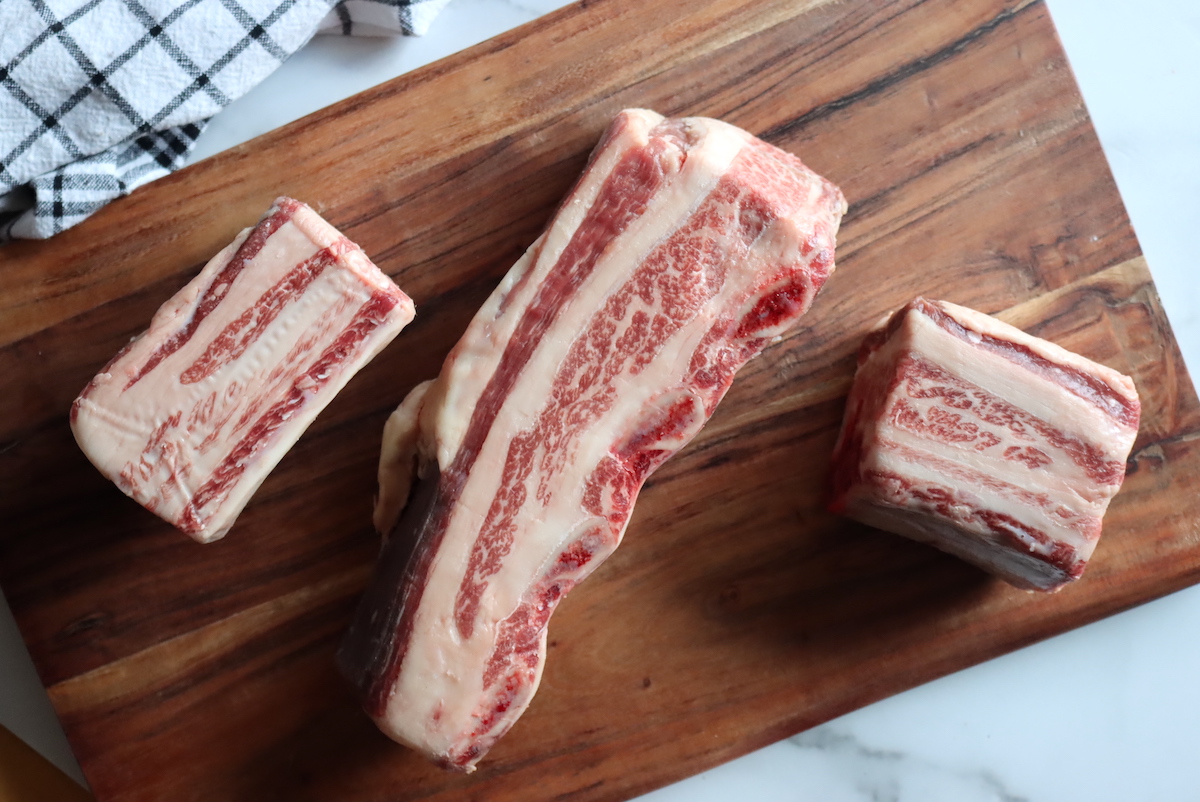
The trick is, for good beef bacon, you need a well-marbled cut of high-quality grass-fed beef. When Vermont Waygy sent me a sample box of locally raised grass-fed Wagyu meat, I took one look at the beautiful stripey marbling on their short ribs and knew I’d found the perfect fit.
Why Make Beef Bacon?
Around 40% of the world doesn’t eat pork, for various cultural, religious, or health reasons. That’s not even counting vegetarians, just meat-eaters that avoid pork for one reason or another. There are even pork allergies, believe it or not.
Plenty of people can’t eat pork but love beef.
Making beef bacon means that a bacon evangelist (like myself) can help spread a bit more bacon joy to more of the world.
As a child, there was someone in the family with a pork allergy. No other allergies to speak of anywhere, just pork…so pork bacon was banned from my house. I grew up on some truly disgusting turkey bacon, and assumed that pork bacon was the only one worth bothering with.
I’ve since tried duck bacon, and it was better than turkey, but still pretty disappointing. (Duck Prosciutto, on the other hand, is amazing, but totally different, and definitely not bacon.)
I wish we’d known about beef bacon back then, as it’s just as magical as pork bacon (but with its own unique flavor). Bacon-y, but subtly beefy at the same time.
Lamb bacon is also delicious too and can be made by substituting lamb into this recipe in place of beef.
Best Cut for Making Beef Bacon
Pork bacon is made from the belly of the animal, at least here in the US. Other places (Canada, UK, etc) use pork loin and some places even use pork shoulder. Still, as a general rule, bacon means belly.
You can’t exactly buy a “beef belly” cut at the butcher shop, but cows do still of course have bellies.
There is one cut, known by the auspicious name of “beef navel” that is roughly equivalent to pork belly, but it’s almost impossible to find. Usually, it’s ground into hamburger, and you’d be hard-pressed to find it in any butcher shop.
If you’ve ever worked with a whole pork belly, as we do when we’re butchering pigs at home, you realize that “pork belly” stretches past what any normal person would consider a “belly,” largely because bacon is in such high demand.
Recently when I ordered a whole bone-in skin-on pork belly for making pancetta, I got a really good look at what goes into bacon at the butchers’ shop. The “bone-in” part is the rib bones, which are stripped out to cure the bacon.
The cut “pork belly” actually includes all the beautifully marbled meat that wraps around the side of the pig and lays over the ribs.
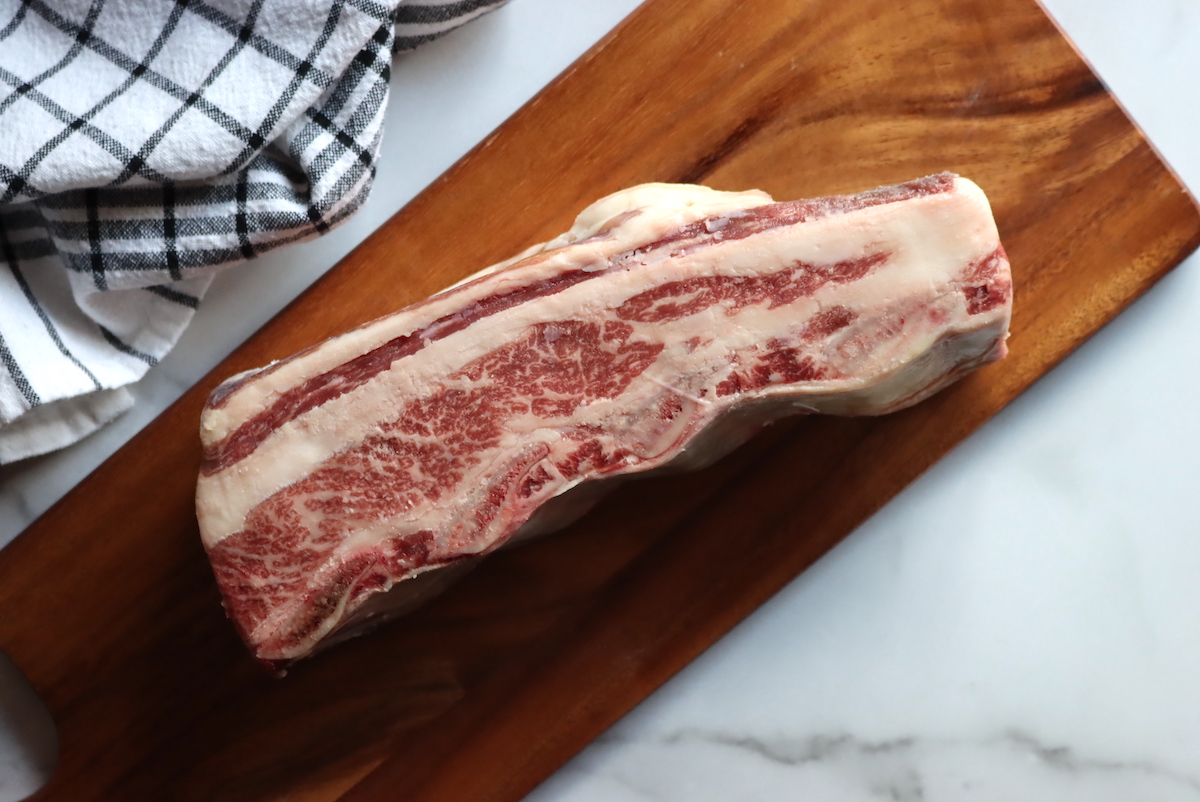
You know, more or less exactly like this beautifully marbled hunk of wagyu short rib.
In a pinch, you could also use a well-marbled hunk of beef brisket, either high-quality grass-fed brisket (or really go all in and use wagyu brisket for the best marbling).
A whole “beef belly” is gigantic, as you might imagine, so working with a small hunk of short rib (around 1-2 pounds), or a slightly bigger brisket (3 to 6 lbs), is much more manageable at home anyway.
Short rib and brisket are some of the most flavorful beef cuts and are well-marbled, so they’re ideal for making beef bacon.
If you’re substituting lamb for beef, lamb bacon is usually made from a cut known as “lamb breast.”
Ingredients for Beef Bacon
The ingredients for beef bacon can vary based on your tastes, much like the ingredients for regular bacon. At least, to an extent.
To make bacon of any kind you must have curing salts, regular salt, and sugar. The sugar can be skipped if you really just can’t have any at all, but the flavor will suffer. (Brown sugar and maple sugar are fine choices too, as a substitution.)
Beyond those basic three ingredients, you can add whatever spices suit your tastes. Black pepper, paprika, or whatever you choose.
I actually really like to keep it simple, so that I can taste the actual meat, rather than just the spices. I stick with just the three basic ingredients.
The actual amounts are based on the weight of the meat, and you should weigh both the meat and all the ingredients in the cure. Volume measurements like tablespoons can vary based on the actual ingredients you use, and a tablespoon of table salt is about 19 grams, and the same volume of fine sea salt is 15 grams…while diamond crystal kosher salt is only about 10 grams.
That said, bacon is much less finicky than most cured meats since it’s not hung for years (like prosciutto) and it’s cooked before you eat it. You don’t have to be absolutely exact with your measurements, at least not salt and sugar. You do want to be pretty spot on when it comes to curing salt, as too much can cause problems.
As a rough guide, for each pound of meat, you’ll want:
- 1 Tbsp. Salt (fine sea salt)
- 3/4 Tbsp. Sugar
- scant 1/4 tsp Instant Cure #1
In this particular case, you can get away with approximations if you don’t have an accurate gram scale at home. Provided you know the weight of your trimmed piece of meat.
If you want to do it the right way though, and you do have a scale, here are the finicky measurements for all the meat-curing nerds out there (like me).
For 5 pounds of trimmed meat (2270 g, or 2.27 kg), you’ll need:
- 68 g Salt, or 3% weight of the meat (about 4 1/2 Tbsp. fine sea salt)
- 34 g Sugar, or 1.5% weight of meat (about 3 scant Tbsp.)
- 5 g Instant Cure #1, or .25% weight of meat (about 1 tsp.)
If you have a different weight of meat, just multiply the weight of meat (in grams) by the percentage used to get the grams of cure. For 2 pounds meat (908 g), for example, multiply by 3% (or .03) to get just over 27 grams salt.
Do You Have to Use Curing Salts?
Salt and curing salt cannot be skipped, as that’s what cures fresh meat to cause it to become bacon. It gives it a wonderful pink color, instead of the tan, grey, or brown that normally happens when you cook meat (beef or pork). It also affects the flavor, and bacon just doesn’t taste like bacon unless it’s cured.
Lastly, it’s added for food safety.
When you’re preparing bacon, you’re keeping it at low temperatures (under the safe threshold for killing bacteria) for extended periods. If you’re actually smoking it too (which is optional), the smoker causes the risk of other food-born illnesses (namely, botulism) unless you add nitrites (it’s an anaerobic chamber, more on the science behind that can be found here.)
Adding a very small amount of curing salts solves these problems, and results in delicious beef bacon. The number #1 dietary source of nitrites is fresh vegetables, namely leafy greens, so you actually get a lot more nitrites in your salad than you do in this homemade beef bacon.
I know, I’ve upset some of you at this point. I used to be all about “uncured bacon” in the past, and that’s all I’d buy thinking it was healthier. Stick with me here.
There are some “uncured” bacons in the grocery store, but that’s misleading. They can be labeled “uncured bacon” if they use other ingredients that contain nitrites instead of actual plain curing salts. Look closely at the ingredient list and you’ll likely see something like “celery powder.” Celery is naturally high in nitrates, so it’s processed until it’s basically a green plant-based nitrite powder.
It’s the exact same chemical formula with celery powder (NaNO2), and has the same effect. The meat stays pink and tastes like bacon. Concentrations can vary though, so it’s tricky to use celery powder for curing safely at home. Stick with curing salts, it’s the same, just not green…
How to Make Beef Bacon
Start by trimming the meat to remove any hanging bits or stray shreds, until you have a nice neat block. Any extra thin pieces will cure unevenly, so you really want one cohesive block of meat.
If you’re working with short ribs, I’d suggest very carefully removing the rib bones with a sharp filet knife at this point. That’s optional, and you can actually cure bacon (pork or beef) with the rib bones still attached to the slab of meat.
Many people actually opt to do that, especially on whole pork bellies where trimming out the ribs can lead to thin spots in the belly slab that will cure unevenly.
Working with small chunks of beef short ribs, it makes sense to remove the ribs first since you’ll still have an even chunk of meat, and it makes it a lot easier to slice the bacon later. One way or another, those ribs are coming out before you eat them, so the choice is up to you as to whether you do it before curing or right before slicing.
Next, mix up the cure.
I’d suggest using a small digital scale to weigh the curing salts, as they’re added in very small quantities. It’s literally 1 gram per pound of meat, or around one level teaspoon per 5 pounds of meat. If you have an even 5 pounds, you can get away with using a teaspoon, but for smaller quantities, you really want a digital scale that’s accurate down to a gram.
You also need to weigh the meat after it’s trimmed, so a scale really helps when curing meat.
Coat the outside of the meat evenly in the curing mixture, and then place the meat in a vacuum seal bag or Ziploc bag. Put the rest of the cure in the bag and then store it in the refrigerator for 5 days (flipping daily).
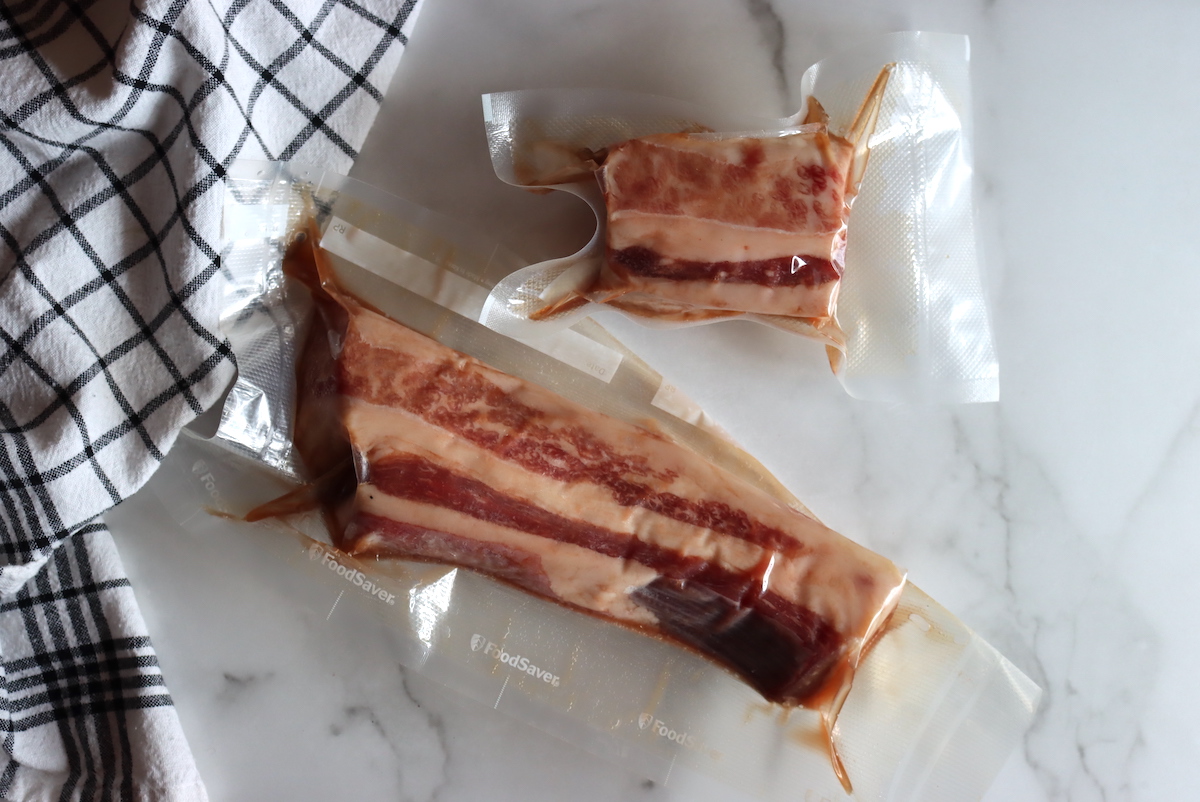
After curing, the texture of the meat will change and it should be notably firmer throughout. If there are any soft(er) spots on the cut, put the bag back in the refrigerator for another day so so that it finishes curing evenly.
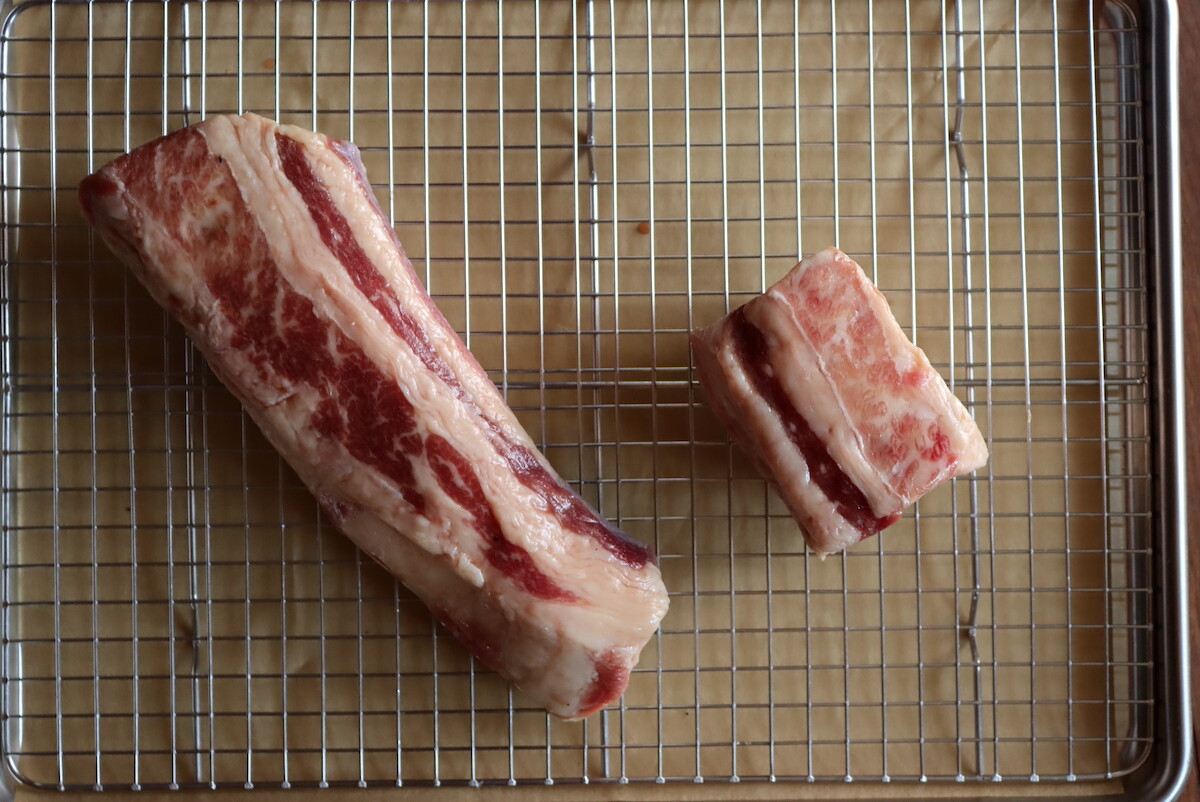
Once the meat is cured, take it out of the bag and rinse off any extra salt from the outside of the meat. This is important, as many recipes for dry-cured meats (capicola, etc) say that rinsing is optional. With bacon, you really want to rinse it as you’re not working with paper-thin charcuterie slices and if you leave cure on the outside it’ll be way too salty when you cook it.
The meat should be evenly cured all the way through, and any salt still on the outside is extra and needs to be removed.
Looking at the cured meat, it should be notably darker in color, with a pink/red hue and a glossy, almost translucent finish. (Kind of like cured salmon when you’re making gravlax.)
The next step really depends on the equipment you have available.
In an ideal circumstance, you’d smoke the beef bacon for several hours at around 200 degrees (93 C), until the meat reached an internal temperature of 150 degrees F (65 C).
That’d slow cook the bacon, all the while infusing it with a delightful smokey flavor. Cherry, applewood, and hickory smoke are the most traditional.
Beef Bacon without a Smoker
What if you don’t have a smoker?
Most people don’t have a smoker sitting around at home, though if you’re really into DIY meat projects they’re really not that expensive. Still, it’s perfectly fine to make bacon without a smoker, and you can make it either on the grill or in the oven.
Beef Bacon on the Grill
To make it on the grill, soak wood chips in water and then drain.
Preheat your charcoal grill and let the coals burn down until they have an even red glow and a steady heat (no flare-ups). Then push the coals all the way to one side, as far from the meat as possible.
In a gas grill, just turn the burner farthest from the meat all to its lowest setting.
On charcoal, place the damp wood chips right on the coals and it should give you a nice even white smoke. In a gas grill, you’ll need one of these cast-iron smoking boxes to hold the chips (but they work great).
Slow cook the bacon until it reaches an internal temperature of 150 degrees.
Beef Bacon in the Oven
Actually the easiest method by far, making beef bacon in the oven results in exceptional flavor too. If you want the smoke flavor, you can add a dash of liquid smoke to your cure, but that’s optional. I think beef bacon in particular comes out lovely, even not smoked.
Simply place the bacon on a rack with a tray underneath. I like to use these stainless steel oven-safe racks that come with trays, and they work well for all manner of other things too (like homemade beef jerky).
Turn the oven to 200 degrees F and cook the bacon until it reaches an internal temperature of 150 degrees F.
For a small chunk, that should take about 4 hours if placed in the oven directly from the refrigerator. More like 3 hours if it’s room temperature first (more ideal).
Larger pieces will take longer, maybe 5 to 6 hours.
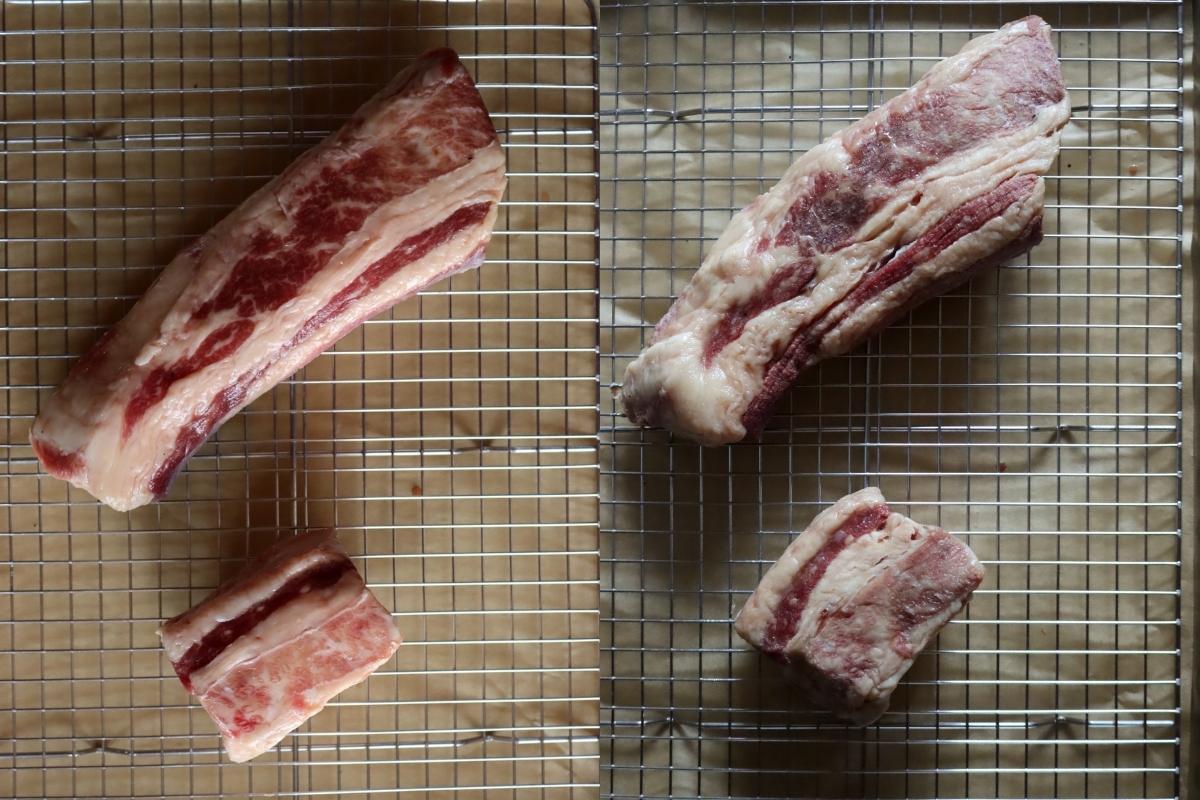
Once fully cooked, the beef bacon slab will no longer be quite so red in color and it’ll have shrunk slightly. It’ll still be a nice pink thanks to the curing salts, rather than the brown color that cooked beef normally has.
At this point, the bacon is cured and cooked, just like bacon from the store. It’s just not sliced.
To slice, cool the bacon completely, ideally 24 hours in the refrigerator. This helps firm up the fat and makes it much easier to slice.
If you have the option, just leave it on the tray while it cools in the fridge so it has good air circulation on all sides. (This helps it dry out slightly on the surface, which is ideal for bacon.)
Slice very thin.
Unlike pork bacon, which does well in thick slices, you really want it as thin as possible. That’s because the fat profile is a bit different than pork fat, and it doesn’t melt/render as easily. If the slices are too thick they’ll be really chewy and won’t ever crisp.
With Wagyu, I noticed that the melting point of the fat was much lower than when working with regular beef fat (or tallow), almost like pork. In that case, you have a bit more leeway with slightly thicker slices.
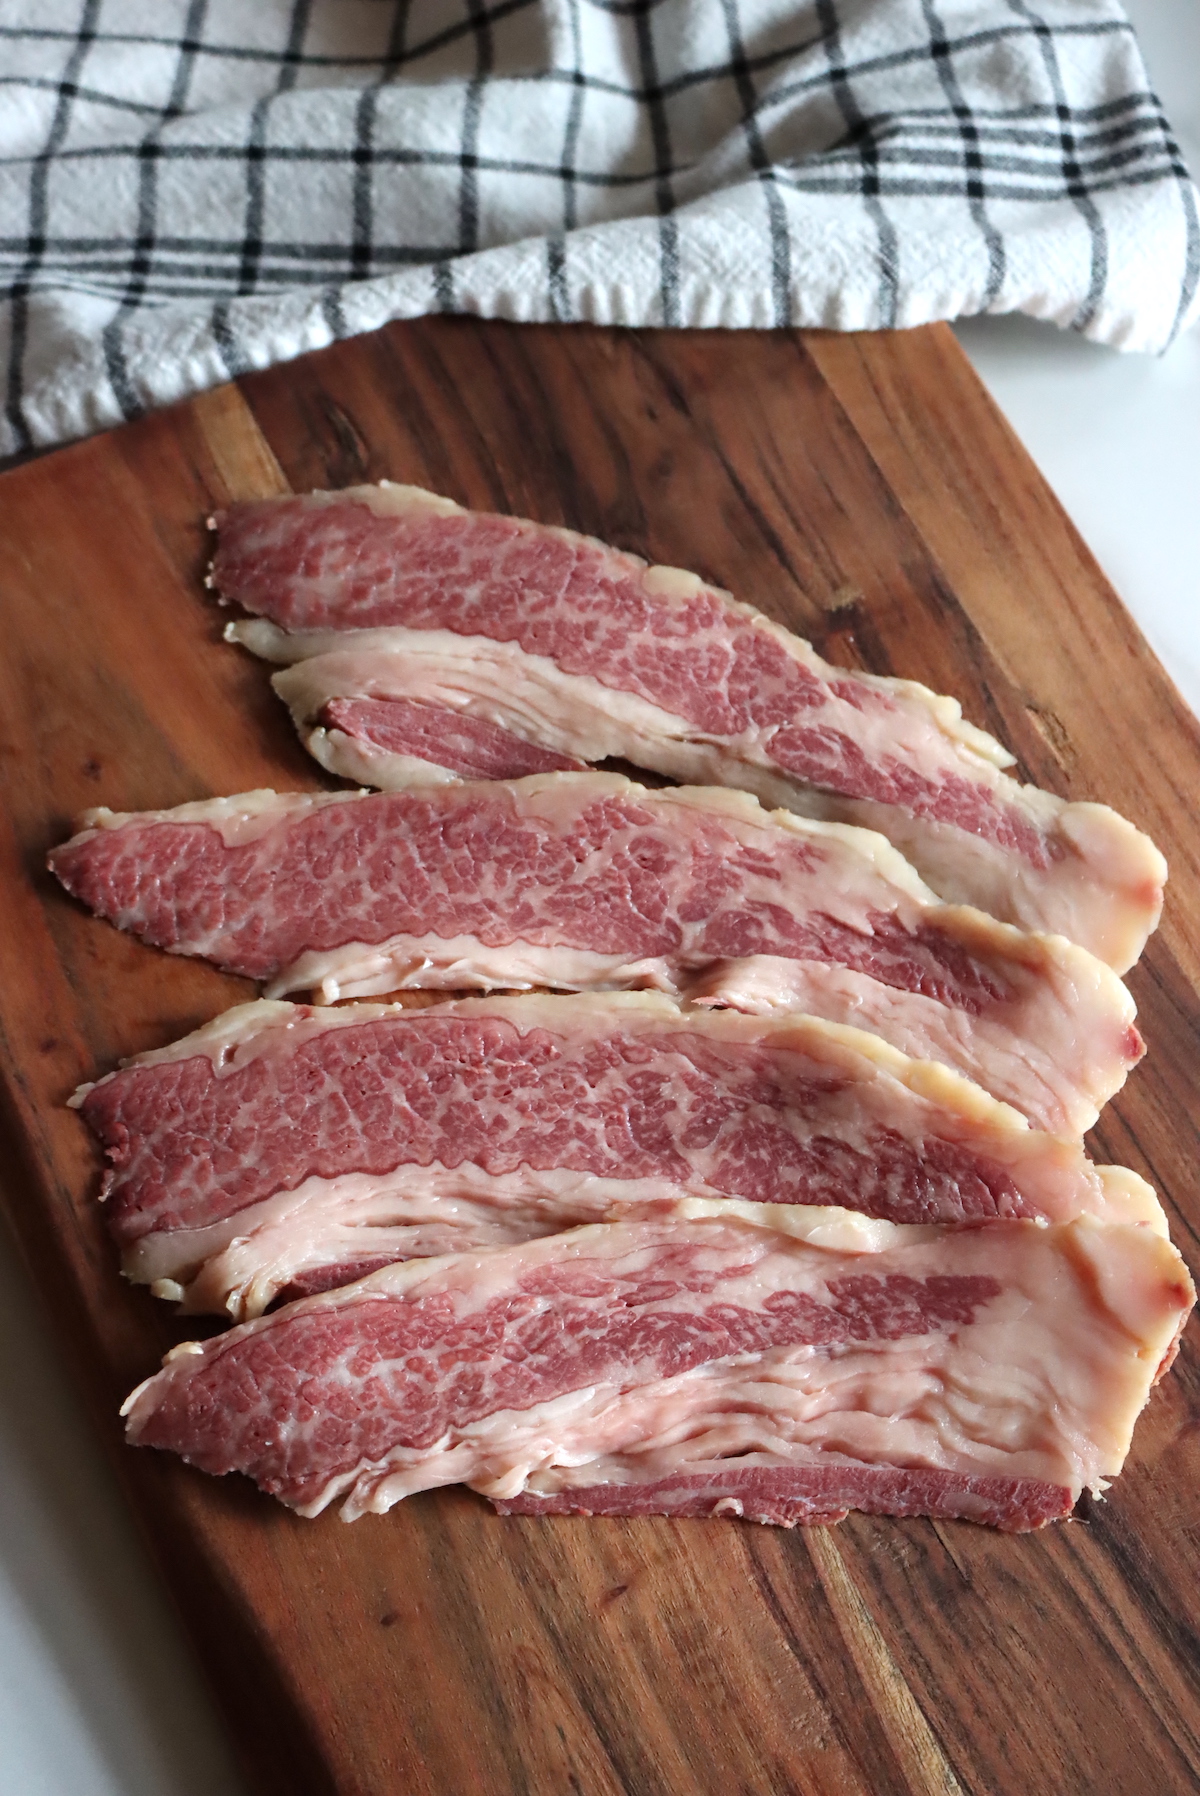
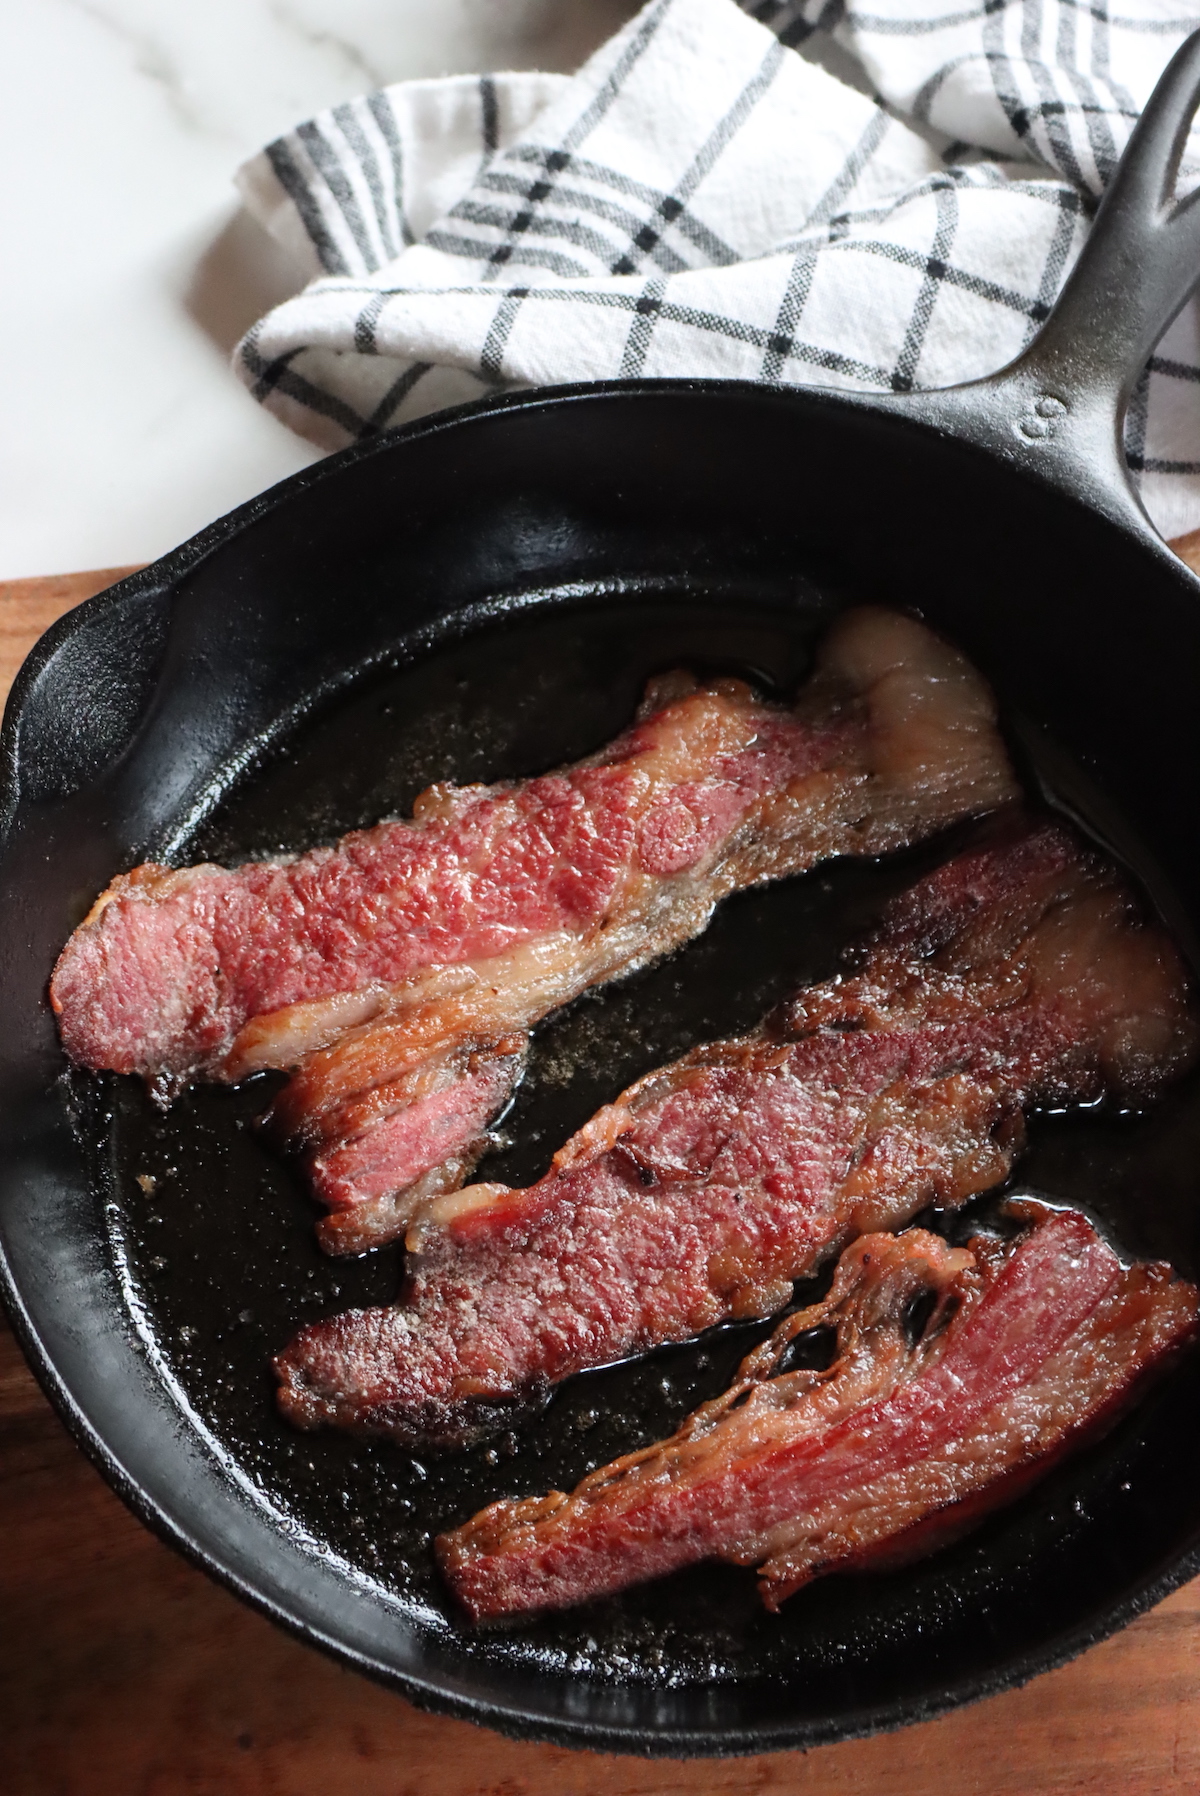
Once the beef bacon is sliced, fry until crisp in a very hot pan…you know, just like cooking bacon.
I know there are other methods of cooking bacon, be it in the microwave or on a tray in the oven, but I don’t suggest them. You’ve gone through all the effort of making your own beef bacon from scratch, don’t make me cry by putting it in the microwave.
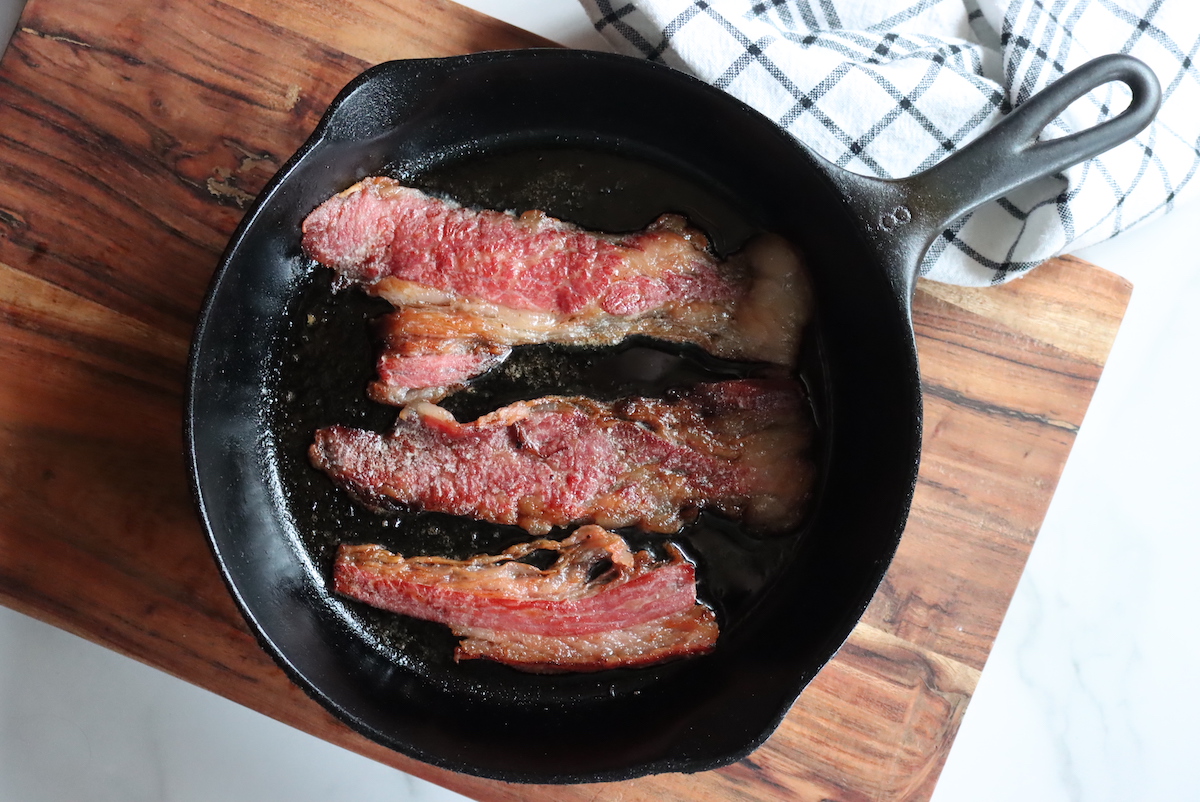
Heat a cast-iron skillet to very hot, and then sear until crisp on both sides. It should brown just a bit, as the sugars from the cure caramelize on the outside.
Cook it to your desired level of “doneness.”
I know some people prefer very crispy, but personally, I’m all about browned but still relatively flexible. You can choose to go the Tyrion Lannister route and make it “burned black” if you really must, but I think you’ll lose much of the subtle flavor that way.
How Does Beef Bacon Taste?
The finished flavor profile will depend a bit on the seasonings you use. If you make it like I did, with just 3 simple ingredients in your cure, then you’ll get to taste it in its simplicity.
Honestly, beef bacon is a lot like pork bacon. It doesn’t taste quite as sweet as store-bought pork bacon, largely because pork brings out the sweetness in the surrounding meal (but also because store-bought pork bacon is often over-sweetened).
There is a subtle beef-iness there, but it’s not overwhelming. Subtle, and pleasant, but you’re definitely tasting a delicious cured meat that includes all the wonderful flavors you’d get with any cured meat.
Ways to Use Beef Bacon
You can use beef bacon just about anywhere you’d use pork bacon. It has both the flavor of bacon and a bit of beef-iness as well.
Fry it up and eat it alongside your breakfast, as we do typically here in the US.
It works wonderfully in a BLT or on top of a really nice homemade hamburger (especially if you add in pickled onions and tomato jam).
Later this week I’ll be canning baked beans, and I’m planning on adding some of the beef bacon to that batch for a really rich flavor.
Really, as I said, any recipe where you’d use regular bacon, be it a soup, salad, sandwich or anything else will be delicious with beef bacon.
How Long Does Beef Bacon Keep?
Pork bacon keeps for a very long time, literally months in the refrigerator. Beef bacon, on the other hand, isn’t made for that kind of storage.
There’s a reason pork is cured for storage, not beef, as the fat tends to go rancid in long storage. Either way, this is cured for flavor, not long keeping. You’re hopefully not planning on riding across the Oregon trail with this hunk of beef bacon.
Still, it’ll last about several weeks to a month in the refrigerator or 6 to 8 months in the freezer.
Most people are going to demolish this chunk of beef bacon in a few days, so you’ll still have plenty of time.
Homemade Beef Bacon
Ingredients
For 5 pounds of trimmed meat (2270 g, or 2.27 kg), you'll need:
- 4 1/2 Tbsp. Fine Sea Salt, 68 g, or 3% weight of the meat
- 3 Tbsp. Sugar, 34 g, or 1.5% weight of meat
- 1 tsp. Instant Cure #1, 5 g, or .25% weight of meat
Instructions
- Start by trimming the meat to remove any hanging pieces, leaving a nice even chunk. Weigh the meat to calculate the amount of cure needed.
- Mix the cure.
- Cover the meat on all sides with the cure. Place the cure in a ziplock bag or vacuum sealer bag and add any remaining cure to the bag.
- Place the meat in the refrigerator for 5 days to cure, flipping daily.
- After curing, remove the meat from the refrigerator and rinse off any remaining cure.
- (Oven Instructions) Preheat your oven to 200 degrees F (93 C). Place the meat on a tray in the oven with a drip tray underneath. Cook until the internal temperature of the meat reaches 150 F (65 C). This should take 4 to 6 hours, depending on the size/shape of the meat. (Grill and Smoker instructions in notes.)
- Remove the meat from the oven and cool completely before slicing. Ideally, place it in the refrigerator for 24 hours.
- Slice the meat as thin as possible. (Beef bacon, unlike pork bacon, doesn't do well in thick slices.)
- Fry the bacon until crisp (or your desired level of doneness).
Notes
Cure Amounts
While I would suggest weighing the cure for best results, you can approximate. As a rough guide, for each pound of meat, you'll want:- 1 Tbsp. Salt (fine sea salt)
- 3/4 Tbsp. Sugar
- scant 1/4 tsp Instant Cure #1
Beef Bacon on the Grill
To make it on the grill, soak wood chips in water and then drain. Preheat your charcoal grill and let the coals burn down until they have an even red glow and a steady heat (no flare-ups). Then push the coals all the way to one side, as far from the meat as possible. In a gas grill, just turn the burner farthest from the meat all to its lowest setting. On charcoal, place the damp wood chips right on the coals and it should give you a nice even white smoke. In a gas grill, you'll need one of these cast-iron smoking boxes to hold the chips (but they work great). Slow cook the bacon until it reaches an internal temperature of 150 degrees.Smoker
If you happen to have a smoker, that's the traditional way to make bacon (though oven or grill work well too). Smoke the beef bacon for several hours at around 200 degrees (93 C), until the meat reached an internal temperature of 150 degrees F (65 C).Meat Curing Recipes
Looking for more home meat curing recipes?
- Salt Cured Duck Breast (Duck Prosciutto)
- Guanciale (Cured Pork Jowl)
- Homemade Pancetta (Cured Pork Belly)
- Homemade Lonzino (Cured Pork Loin)
Food Preservation Tutorials
Preserving more than beef this season?
- How to Freeze Dry Food at Home
- Freezing Fruit (A to Z Guide)
- 50+ Pressure Canning Recipes
- How to Can Meat at Home



You ro not need anywhere close to 3% salt. You can use anywhere from 1.5% up. Curing salt is additive to the regular salt. Check out any of the sodium content on commercial bacon. Remember thatspure sodium not salt /sodium chloride. Sodium is between 38-40% of salt. Sodium on the label needs to add 60% to get actual salt amount. You will find its between 1.25-1.5% as this accounts for the amounts that get washed off thats left onnthe outside. Commercial pork is wet brined and injected cured.. In terms of shel life there is zero difference between beef and pork. Its all about the cure and use of sodium nitrite (cure #1). The best method for dry cure where a zip lock or vacuum sealed bag can be used is the equalibrium method. Its where youonky add the amount of salts you want in the actual meat. You really can not over salt it by curing longer times as there is only that amount of salt to be drawn into the meat.
The way traditional bacon is smoked is with cold smoking which is perfectly safe if you are using actual curing salt (cure #1) @ 00.25% or 0.0025 on your calculator for basic multiplication. Hot smoking is basically cooking your meat 2x or tye same as that precooked bacon in the stores. How long cured meats last innthe frig has much more to do with moisture levels left in the meat which is why uncooked cured meats like salami are dried to at least 35% of the weight as that is all water loss in drying. But of course the easiest way for most home cooks is to hit smoke till you get 140F internal temp.
One thing is after the intial rinse cut the slabe in half if its larger piece and cut a test strip and fry it up. This is to test its salinity for your taste. If its too salty soak the entire slab in ice cold water for 30 mins replacingnthe water 1-2x. Test again. You should be good with 1-2x this process so 30-60 min soak. Then next time reduce the salt % by 00.25%. Curing salt cure #1 % must stay fixed @ 0.25%.
Spot on about cutting beef bacon thinner. Even if you use finishing high heat to get a crisp curst its still gojng to be more chewy. Keep it thin. Best is a deli slicer or careful cutting as you want it aboutlike standard not thick cut bacon. Put it innthe freezer for 15-20 mins to firm it up good will help curring it thin. Not only that but the thicker you cut it the more salty it will taste. This is true of any cured meat.
Oh before smoking the bacon after its rinsed and patted dry put it uncovered back into the frig overnight to 24hrs as this allows a mild pecullie to form. Theoutside becomes tacky. This allows for better smoke adhertion to the meat surface. If you want any kind of seasoned crust (black pepper, paprika, maple syrup) it needs to go on before the the smoke preferably after you pat dry but prior to the drying back in the frig for overnight-24hr. This is not the seasoning added to the cure that is typical of all bacon. Its for more pronounced flavor much like the crust on brisket etc. Black pepper crust vacon is I thinkmthe most popu,ar you will find in stored. Sured crusts like maple syrup will cause the edgesto blacken sooner so just an fyi.
Cooking beef bacon use a medium heat vs a high heat. This will give the higher melt temp fat (vs pork) more time to soften melt and form a crispy edges rather than soggy gelatinous. It goes with the cut thin idea. They complement each other.
We are wondering what the purpose of baking it (in the Oven) ? Several recipes don’t prebake. Just cooking it when you’re ready to eat.
Love your recipe!
The main purpose of baking it in the oven is all about creating that smokey flavor in the bacon.
I recently did the pork loin Lonzino excellent. I would love to connect with you as a source of Heritage Vermont Raised Mangalitsa https://www.facebook.com/Vermontcurlypig?mibextid=LQQJ4d
Hi Betsy, I’m sorry I missed this comment earlier. I would love to connect, as I’ve been looking for a source for Mangalitsa! I’ll send you an email in a minute.
Wow, I never knew about beef bacon until now! This article on Practical Self Reliance is both informative and mouth-watering. Exploring alternative options like beef bacon opens up new possibilities for those with dietary restrictions or looking for unique flavors. Excited to try this recipe and add a tasty twist to traditional bacon dishes!
We’re so glad you enjoyed the post. Thanks so much for sharing.
I need to be sugar free, do you think xylitol could be substituted for the sugar? Also, is the cure you list the only way to do this? We trying to be chemical free in everything possible. Thank you
The salt is what’s nessisary for preservation here, and the sugar is just for flavor. I have no idea how xylitol would impact the recipe, but I’d guess it’d work? That’s just a guess though. For the nitrites, you can skip them, knowing the bacon will turn brown and be less visually appealing, and the flavor will be very different. Bacon is a cured product, and the flavor, believe it or not, actually comes a lot from its reaction with the nitrites.
If you want a more natural alternative, celery powder naturally contains nitrites and you can use that in place of the cure. I do not know exactly how much, but I’m sure that information is available somewhere (likely the celery powder package, if it’s made for curing as many of them are).
The shelf life will also not be quite the same without the nitrites, but just keep it frozen in portions until you want to use it.
Hi, was reading through this piece and realized you were from VT also, small world. I have been curing pork loin in salt and #2 prague powder to make an ersatz back bacon for a few months and that works semi satisfactorily.
Local Pricechopper periodically sells a strip roast which is essentially a 4-6 lb chunk of what would be cut into NY strip steaks cut off the bone and then tied back on. I’m toying with the idea of trying to cure one sometime, wondering if you think that would be a suitable cut for a beef bacon experiment?
It’s certainly worth a try.
I bought a large package of sliced (about 1/4″) beef short ribs thinking they would make wonderful bacon and then found your site. Should I keep the short ribs all tightly together to do this? Not sure how to put the curing mix on them if I separate them.
Yes, I think I would just keep them together in one large piece.
I’ve done this same recipe with corned beef briskets when I could find them on sale. It’s a whole different flavor but like your recipe its worth it. Corned beef is usually not as marbleized as belly cuts but I leave the fat on and it helps.
That’s very interesting, I might have to try that out. Thanks so much for sharing.