Affiliate disclosure: This post may contain affiliate links. Please see our Privacy Policy.
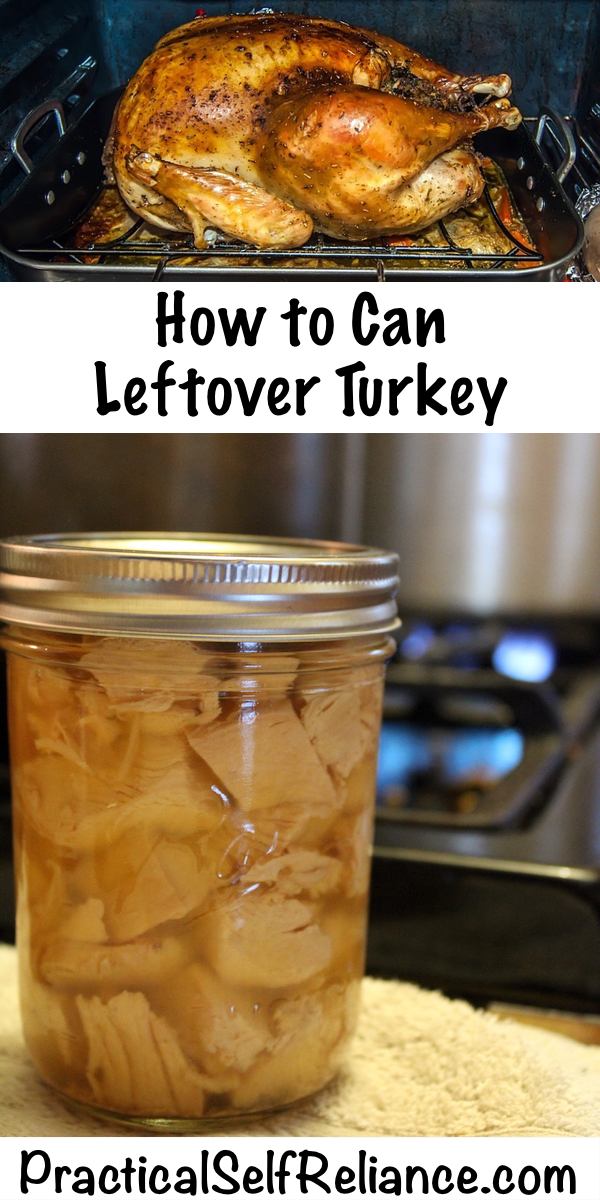
Canning turkey at home saves a lot of freezer space and allows you to put ready-to-eat, home-cooked meals right on your pantry shelf.
It doesn’t matter whether you’re canning leftover turkey after Thanksgiving or raw packing turkey meat directly into canning jars, the process is simple and straightforward.
We raise our own heritage birds, and they grow quickly with the abundant forage on our land. Since heat lamps use a lot of electricity, we raise our chicks without heat lamps to avoid overtaxing our off-grid infrastructure.
That means we pick up polts as late as possible, usually in early June. By the time they’re 6 months old around Thanksgiving, those birds can be near 40 pounds, even with minimal supplemental feed. That’s way more than our family of 4 can eat, even with dedication.
Most of the birds are cut up and packaged as cutlets with a food saver vacuum sealer, but our Thanksgiving bird is roasted whole. A bird that big means a lot of leftover turkey. Thankfully, canning leftover turkey is easy and allows us to save much-needed freezer space.
Canning Turkey Leftovers
If you’re preparing turkey for canning, usually the meat is cooked to about 2/3 done before packing into jars. Fully cooked turkey has a tendency to be a bit dry since it’s a low-fat meat, and it’s commonly over-cooked. No one likes the thought of giving their family salmonella on Thanksgiving, and it’s easier to slather dry turkey in gravy or cranberry sauce than worry about undercooked meat.
If you’re planning to can fully-cooked leftover turkey, here are a few ways to prevent the canned turkey from being too dry:
- Do your best not to overcook it!
- Brine the turkey before cooking to maintain moisture
- Rub butter under the skin to add a bit of extra fat to an otherwise lean meat
- Serve the white meat, and save the richer, fattier dark meat for canning
- Add salt to the canning jars along with the turkey meat
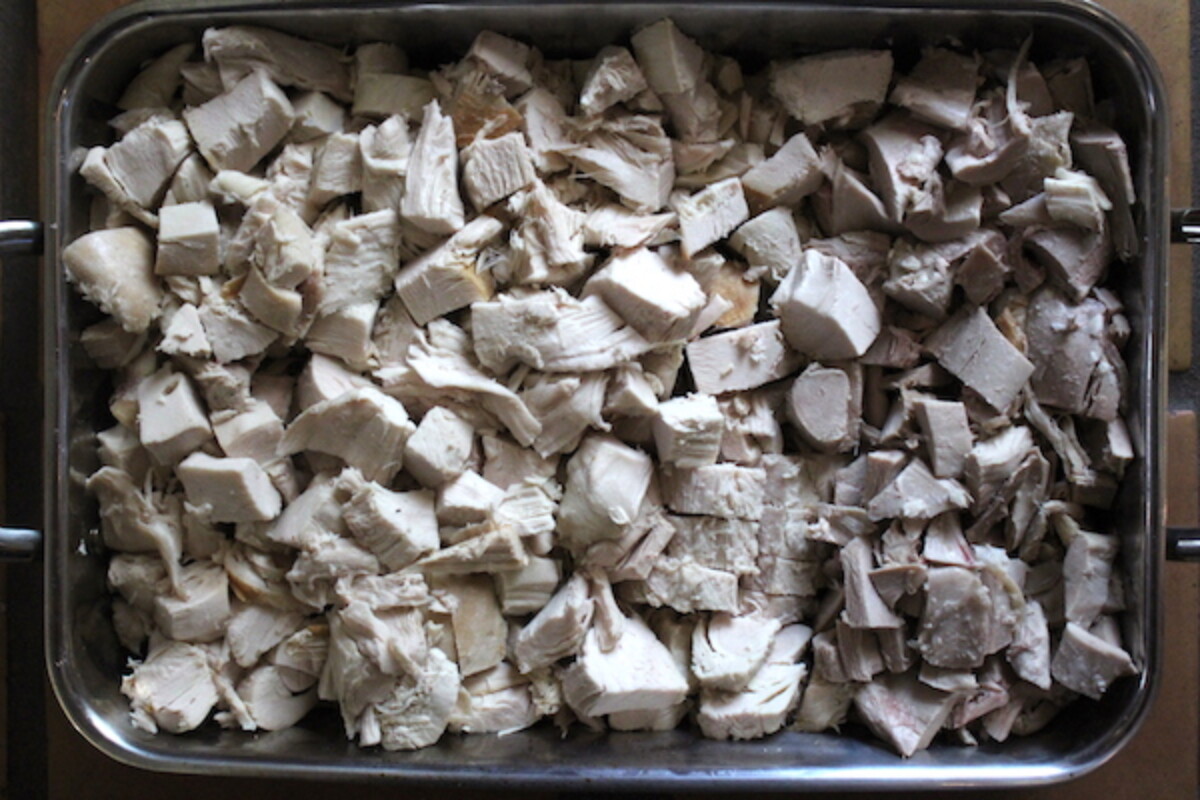
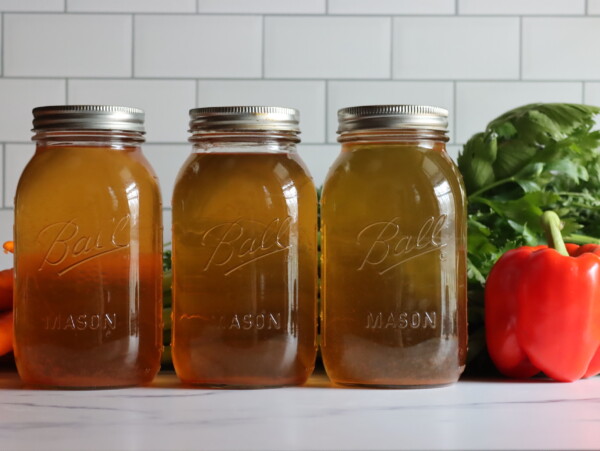
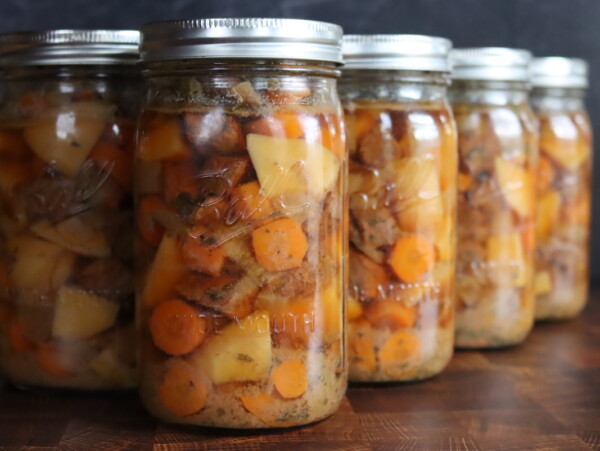
Start by picking the turkey carcass of any remaining meat, and then make a flavorful turkey bone broth by simmering the turkey carcass in water, along with carrots, onions and aromatic herbs. We allow ours to simmer for at least 4-6 hours, and sometimes overnight on very low heat.
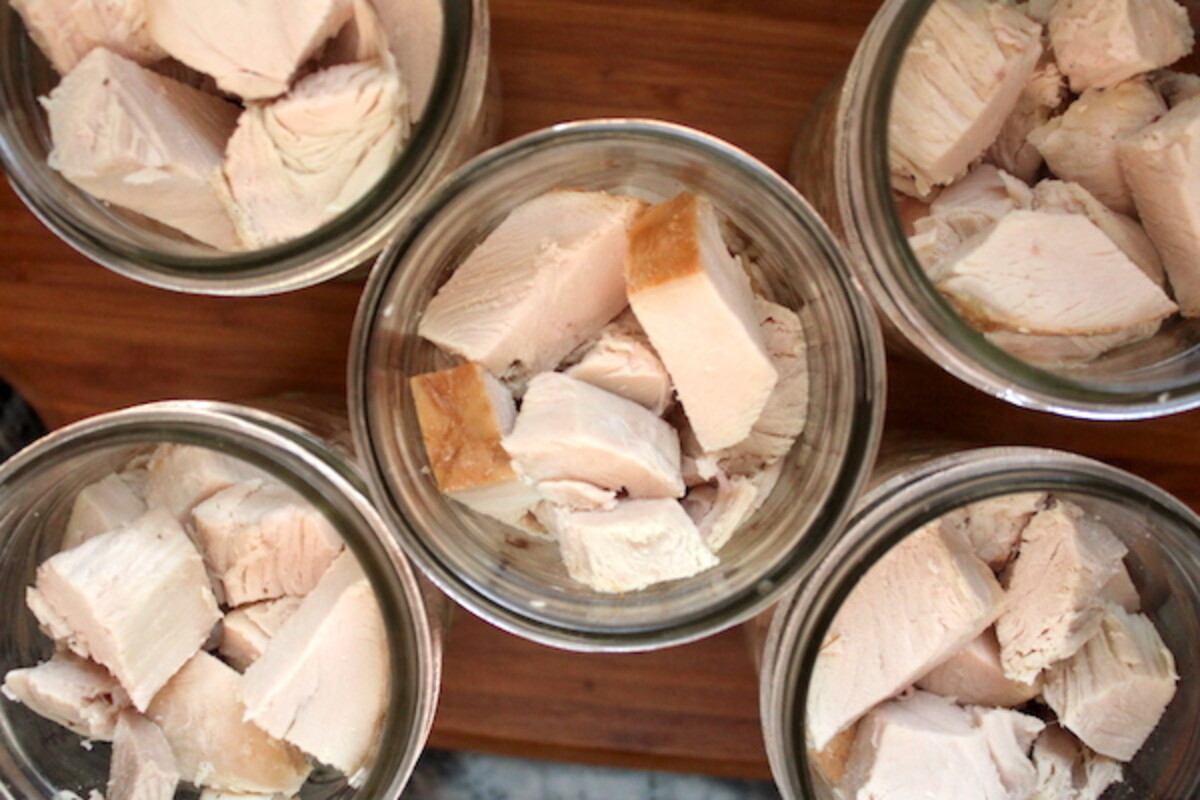
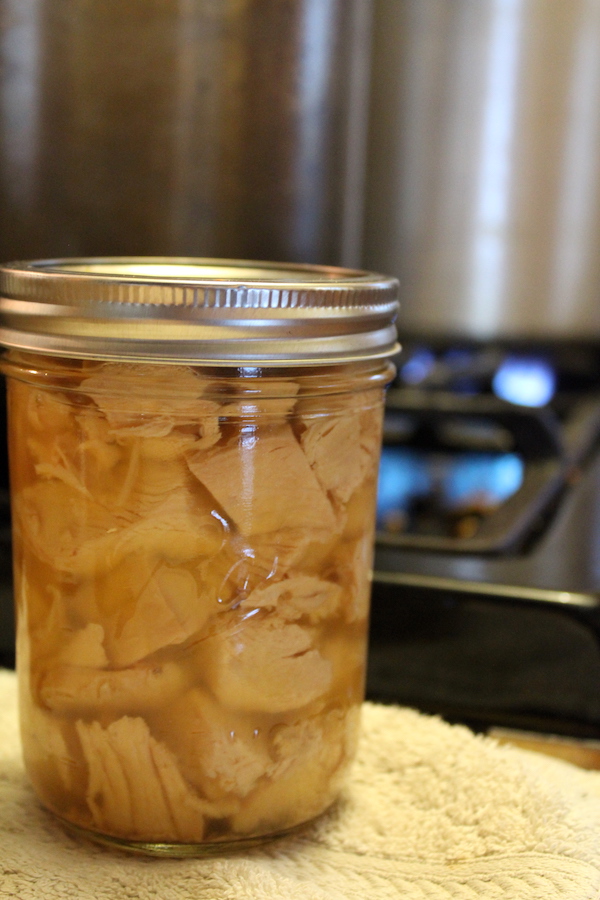
Chop the leftover turkey meat into pieces, based on your preference. We chop them into roughly 1-inch pieces because that allows for more versatility when serving.
You can pack whole breasts or thighs into the jars, bone and all if that’s your preference. Leaving the bone in just creates a chore for later and is a waste of jar space in my opinion. Nonetheless, the size of the pieces is not important, it’s totally up to your family’s preference.
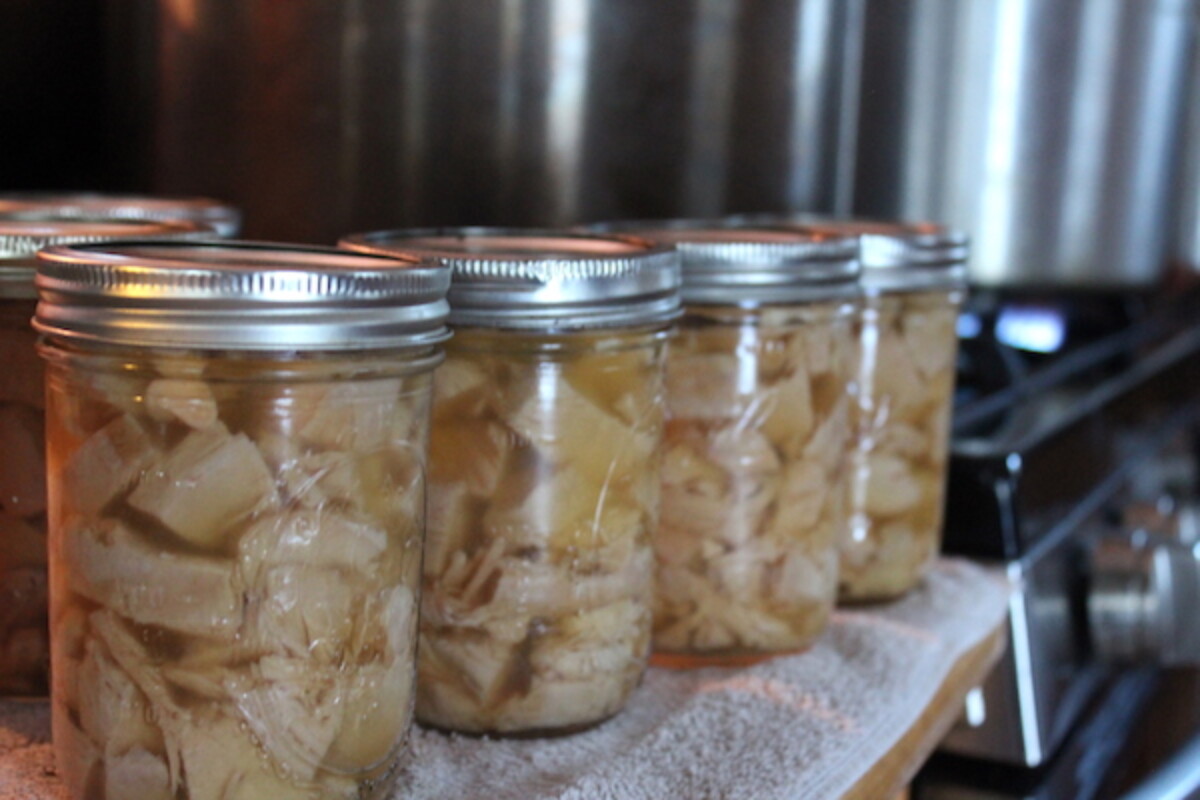
Food shrinks during the canning process, and pre-cooked turkey is no exception. Since it’s cooked it will shrink less than raw meat, but still be sure to pack the turkey tightly into canning jars.
Your goal is to get as much meat as possible into each jar while still leaving a full 1 1/4 inch headspace at the top of the jar.
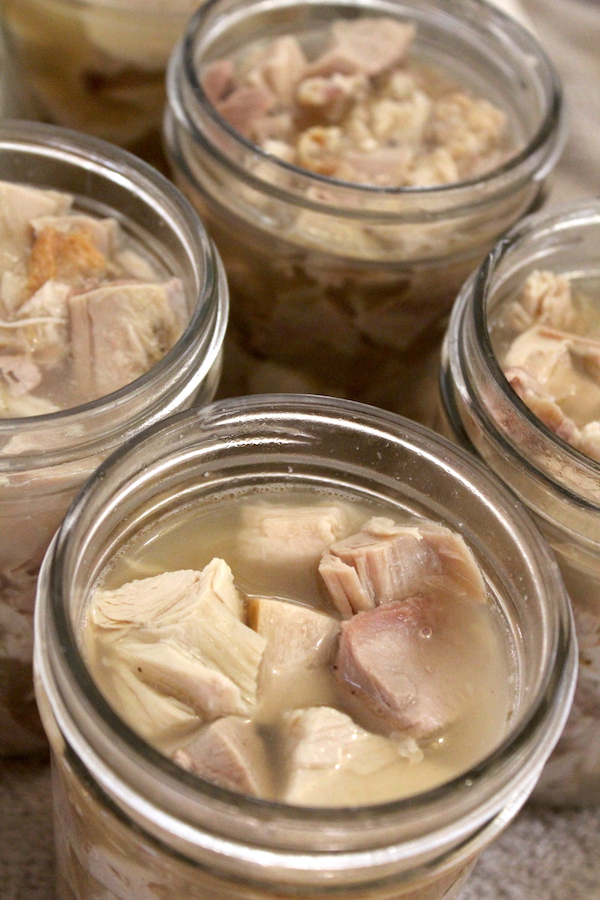
Pour boiling turkey stock over the meat, and use a nonmetal implement to remove air bubbles. Check around the sides of the jar, and give the center of the meat a little press to try to shove out any remaining air bubbles.
Air bubbles left in the canning jars mean that there may be meat left exposed to air inside the jar after canning. Though that’s perfectly safe, the meat will discolor over time and dry out.
Top of the jars with extra stock after removing bubbles, but still maintain 1 1/4 inch of headspace.
Canning Turkey ~ Raw Pack
If you’re trying to put up a lot of turkey on harvest day without taking up freezer space, raw pack might be tempting. Raw turkey meat can be packed into canning jars, with or without bones. All that goes into the jars is turkey meat, and the meat will produce its own liquid during the canning process.
Raw pack saves the extra work of cooking the turkey and making turkey stock for packing, but it produces an inferior product. Often raw turkey doesn’t have enough liquid in the meat to properly fill the canning jar with flavorful liquid, leaving meat exposed to air in the jar. You’ll also miss out on the chance to add the extra flavor that a well-made bone broth can contribute.
Even if you’re not canning leftover turkey, I’d still recommend cooking the turkey before you pack it into jars for canning. It’s also a lot easier to debone a turkey that’s been cooked, even if it’s only partially cooked before canning.
Turkey Canning Timetables
The canning time for turkey meat is the same, regardless of whether the turkey is cooked or raw before canning. I know, it seems strange, but the total canning time is more about sterilization than cooking and it takes the same amount of time to safely can turkey meat whether it’s raw or cooked.
The main considerations that determine canning time are the size of the canning jar and whether the meat is bone-in or boneless. While you’d assume that bone-in turkey would require more canning time, it’s actually just the opposite.
Bones are great conductors of heat, and canning jars packed with bone-in turkey will be less densely packed. That means that the heat of the pressure canner can more easily penetrate the contents of the jar, reducing canning time.
Canning Boneless Turkey (Raw or Hot Pack)
- Pint Jars – 75 Minutes
- Quart Jars – 90 Minutes
Canning Bone In Turkey (Raw or Hot Pack)
- Pint Jars – 65 Minutes at 10 lbs pressure (below 1,000 feet)
- Quart Jars – 75 Minutes at 10 lbs pressure (below 1,000 feet)
Altitude Adjustments for Canning Turkey
Pressure canning time remains the same regardless of altitude. However, the processing pressure increases as the altitude increases. Use the following table to determine the correct processing pressure if you’re above 1,000 feet in elevation.
For dial gauge pressure canners:
- 0 to 2,000 feet in elevation – 11 lbs pressure
- 2,001 to 4,000 feet in elevation – 12 lbs pressure
- 4,001 to 6,000 feet in elevation – 13 lbs pressure
- 6,001 to 8,000 feet in elevation – 14 lbs pressure
For weighted gauge pressure canners:
- 0 to 1,000 feet in elevation – 10 lbs pressure
- Above 1,000 feet – 15 lbs pressure

Canning Turkey
Equipment
- Pressure Canner
Ingredients
For Raw Pack:
- Fresh Turkey, cut into pieces, such as breasts, thighs, or chunks
- Salt, optional: 1 tsp per quart jar for seasoning
For Leftover Cooked Turkey
- Leftover Turkey, cooked, shredded, or in chunks
- Salt, optional: 1 tsp per quart jar for seasoning
Instructions
Prepare the Turkey & Jars
- For raw turkey: Trim skin, excess fat, and any unwanted parts. Cut the meat into chunks or pieces that fit easily into your canning jars.
- For cooked turkey: Remove skin and bones. Shred or chop the turkey into bite-sized pieces.
- Wash Jars: Wash canning jars, lids, and rings with hot soapy water. No need to sterilize jars or lids before pressure canning, just ensure they’re clean and warm.
Pack the Jars
- Pack either raw or pre-cooked turkey tightly into sterilized jars, leaving a 1.25 inch (one and a quarter inch) headspace at the top.
- Optionally, add 1 tsp of salt to each quart jar for flavor.
- If using raw turkey, no liquid is necessary, but for cooked turkey, you may add a small amount of turkey broth or water to help cover the meat, ensuring you maintain the one and a quarter inch headspace.
Seal the Jars
- Wipe the rims of each jar with a clean, damp cloth to remove any residue.
- Place sterilized lids on each jar, then screw the metal rings on just finger-tight.
Prepare the Pressure Canner
- Add 2-3 inches of water to the bottom of your pressure canner, and prepare according to the manufacturers instructions.
- Set your canner to 10 pounds of pressure (adjust according to your altitude as needed).
Process the Jars
- Once the canner reaches the appropriate pressure, process:Pint jars for 75 minutes.Quart jars for 90 minutes.
Cool and Store
- After the processing time is complete, allow the pressure canner to naturally cool and release pressure.
- Carefully remove the jars, and let them cool completely on a clean towel or cooling rack.
- Check seals by pressing the center of each lid. If it doesn’t pop back, the jar is sealed.
- Store sealed jars in a cool, dark place. Properly sealed jars can be stored for up to a year.
Notes
Storage & Usage:
- Once opened, refrigerate any leftover turkey and use within 3-4 days.
- Canned turkey is perfect for quick meals, soups, stews, or sandwiches throughout the year.
Altitude Adjustments for Canning Turkey
Pressure canning time remains the same regardless of altitude. However, the processing pressure increases as the altitude increases. Use the following table to determine the correct processing pressure if you’re above 1,000 feet in elevation.For dial gauge pressure canners:
- 0 to 2,000 feet in elevation – 11 lbs pressure
- 2,001 to 4,000 feet in elevation – 12 lbs pressure
- 4,001 to 6,000 feet in elevation – 13 lbs pressure
- 6,001 to 8,000 feet in elevation – 14 lbs pressure
For weighted gauge pressure canners:
- 0 to 1,000 feet in elevation – 10 lbs pressure
- Above 1,000 feet – 15 lbs pressure
Nutrition
Nutrition information is automatically calculated, so should only be used as an approximation.


Is the headspace 1 inch or 1.25 inches? Your text directions have 1.25 inches but the recipe card states 1 inch. If you only do 1 inch, will you just have some possible siphoning if overfilled? Thank you!
The current recommendation for headspace is 1 1/4 inches. The national center for food preservation just changed it from 1 inch this year, and though I updated the post, it looks like I missed the recipe card. The recommendation was 1 inch for 50 years, so if you do 1 inch it’s fine. They only changed it to lower the chance of siphoning in meats. Really, it’s mostly an issue with fatty meats like sausage, but they just blanket changed the recommendation for all meats at the same time.
I’ll go in and fix that to make it consistent.
Your site is amazing, so many great tips.
Thanks Bob!
Wow I’ve never even considered the possibility of a 40lb turkey! What a blessing
What an awesome article! The only information I could find on canning leftovers was DON’T. But WHY? You can roast a turkey and pressure can it immediately, but you can’t eat part of the turkey and can the rest the next day? Absurd. Due to your intelligent, practical guidance I’m no longer afraid to (safely) can next-day meat. Thank you so much!
You’re very welcome. So glad you enjoyed the post.
Wow this is absolutely amazing information! Thank you so much and so perfectly step by step. Thank you
I read the National Center for Home Food Preservation soup guidelines and it mentions no dairy products. My turkey was basted with butter. I cooked it as stock with approved vegetables, but I am concerned about the butter. I did store it at 34 degrees and then I skimmed all fat. I am not certain that there are no butter particles in the stock. Should I freeze it instead of pressure canning? I want to be safe. Thanks.
It should be fine, especially if you skimmed the fat off the top but if you’re unsure and are able to freeze it then that might be a better option.
I have two bags of shredded frozen turkey leftovers but they are taking up too much room in my small freezer. Is it safe if I defrosted that turkey, heated it to boiling with water or flavored broth and then, canned the brined turkey in pint jars?
Yes, that should be fine. You can put up turkey that’s fully cooked, and yes, you can defrost food from the freezer and can it. Just be sure to follow the processing times and pressures listed in the article, and pack everything hot.
Can you can the turkey in gravy or is that a no no because of the flour or cornstarch used to make the gravy?
It is not safe to use flour or cornstarch in your canning recipe so no gravy.
I recognize your picture so have been to your site before, but reading this post helped me understand more about the cooking, canning process. I’ve done a turkey before, canning breast chunks raw and partial cooking the legs and thighs, but I am about to approach it again and your post helped me. Thank you.
You’re very welcome. We are so glad that the post helped you.
How do you use your canned Turkey? Recipies? TIA
Anywhere you’d use cooked leftover turkey from the fridge. We make sandwiches, turkey soup, chili, season it for tacos, etc.
Hi from Albany Ga. I am so glad I saw your post. I have always frozen the leftover turkey meat and by the time I got it out for a casserole, it was dried up. I will be canning it from now on. Thank you for this great idea.
That’s great! So glad to hear that you enjoyed the post.
Perfect, thank you Ashley. I cubed some potatoes to go in with the Turkey cat food and am about to can this now 🙂
I am new to this site and so very excited to have found you! SO much information! I truly appreciate how you explain everything simply. Cannot wait to try EVERYTHING! God Bless You!
I don’t own a pressure cooker but will purchase one now! I was always intimidated…. but no longer because I can refer back to your instructions! I have only water bath canned in the past so I cannot wait!!!!
Wonderful, I’m so glad you’re taking the plunge!
Me too! I want to try Turkey!
You Need a PRESSURE CANNER – NOT a Pressure Cooker. They are different.
I have a leftover turkey in my freezer, and want to make cat food out of it. I will be using a pressure canner and have plenty of experience with canning, just not for pets! My concern is about leaving most of the salt out. Thanks!
The salt is completely optional, for humans or for animals. It’s not for preservation, just for flavor. Just can it without the salt and it’ll be great for your cat.
What temperature should the turkey be when it’s 2/3 cooked?
Turkey should be cooked to a minimum internal temperature of 165 degrees Fahrenheit so 2/3 of that would be 110.
Can this be done without a pressure canner?
Nope. All low acid foods, including meat, must be canned in a pressure canner. Without one, I’d suggest freezing.
I was wondering the same thing. We haven’t always had the ability to pressure can foods so how did they can low acid foods before pressure canning and why can’t we still do it that way?
So canning is a relatively new food preservation process, as far as history goes. When canning first started, they did water bath can low acid foods like meat, by processing them for 3+ hours in a water bath. This will keep them from spoiling in the jar, but it doesn’t prevent botulism from proliferating. The thing is, botulism isn’t always around, so most the time that’s fine, but you know, every once in a while somebody just misteriously died (and botulism isn’t a fun way to die).
Later, people recognized the cause and started recommending that water bath canned low acid foods were boiled hard for at least 10 minutes after they come out of the canning jars. This, in theory, destroys the botulism toxin if it is present and renders the food safe to eat. When people say “my grandma water bath canned everything and nobody ever died” they don’t realize that grandma also knew that she had to first water bath can it for 3+ hours AND then boil it for 10 minutes after it came out of the jar before serving. Some people do still do this, and they water bath can everything, but in my book it’s not worth the risk.
Pressure canning is incredibly easy, and a heck of a lot simpler than tending a boiling kettle for 3+ hours and then worrying that someone may take it off the shelf and eat it raw right out of the can not knowing that it must be boiled before eating.
Now that I have a pressure canner, I actually pressure can things that can be water bath canned because believe it or not it’s quicker and easier, heats up the kitchen less, and is faster to clean up. Seems hard to believe, since pressure canning is so intimidating to people, but it really is a game-changer once you start using one.
Anyhow, that’s a long answer, but the short answer is this…don’t water bath can low acid foods, it’s not worth the risk when pressure canning is simple these days.
They mostly used salting and drying meat.
Thanks for this! I am always looking for ways to can things or forage things as we live off-grid in BC, Canada. You never disappoint ! I quite enjoy your site, you give me lots of ideas and address specifics for my personal situation. Thanks so much – this kind of living is not for everyone and not for the faint of heart!
Wonderful, glad you’re enjoying it!
Great information! What is the shelf life for the canned turkey and could I substitute chicken for the turkey!
The shelf life (according to ball canning) is 12-18 months, but practically speaking it’s likely much longer. After 12-18 months you’ll lose quality though. Yes, you can use chicken instead of turkey. Enjoy!
Thank you for your very useful information