Affiliate disclosure: This post may contain affiliate links. Please see our Privacy Policy.
Freezing fruit is one of my favorite ways to preserve all of the fresh goodness that I grow and harvest all summer long. Frozen fruit is versatile, lasting up to one year. I like to freeze our excess fruits so that I can make winter batches of jam or jellies once the main harvest time dies down in the fall.
Freezing fruit is different from freezing vegetables. Instead of blanching the fruits, most fruits only need to be washed and sliced into appropriate sizes before freezing. Fruits have other options as well; they might be frozen in a sugar pack, syrup pack, juiced or pureed. You can’t do these for veggies!
Let’s take a look at how you freeze all different kinds of fruits. Don’t let your summer harvest go to waste!
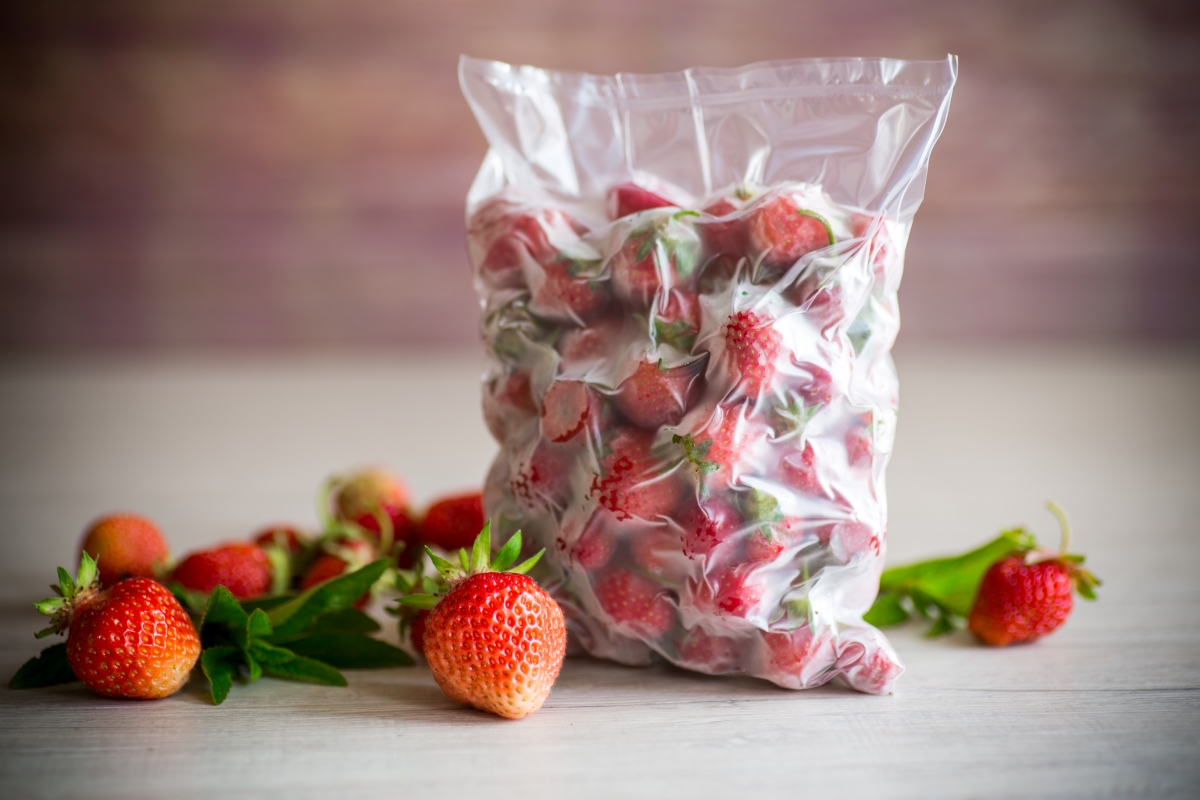
How to Freeze Fruit Properly
Freezing fruit is different from freezing vegetables. Unlike vegetables, you have several options for freezing fruit, such as syrup packing, sugar packing, dry packing, and unsweetened packing.
Believe it or not, some fruits have a better texture and flavor if you freeze them in syrup or sugar, but it’s not a necessity. You can freeze fruits chopped or diced without any added sugar, or you can use artificial sweeteners if you need to watch your sugar intake.
First, think about how you plan to use the fruit in the future. Syrup-packed fruit is best for uncooked desserts, and sugar-packed or unsweetened fruits are best for cooking because there will be less liquid.
Personally, I usually flash-freeze fruit on a tray (without sugar) and then seal it in bags for the freezer.
Flash freezing helps keep the fruit from sticking together in the bag, since you’re freezing everything separate on a tray first. That’s especially handy for fruits like strawberries and blueberries, which tend to freeze into a single block if just tossed into a bag before freezing.
That said, there are lots of ways to freeze fruit, and I’ll walk you through all the options.
Freezing in Syrup
When you make a syrup pack, you make a syrup out of water and syrup. The amount of sugar to water depends on how sweet you want the fruit to be when frozen. Typically, a syrup made with 40% sugar is considered light and ideal for all fruits. You can make a heavier syrup with more sugar than water for sour fruits.
Freezing in Sugar
Another option is to make a sugar pack. All you have to do is sprinkle sugar over the fruit and mix until juice comes out. Sugar draws out the natural liquid in fruit.
Sugar packing works best for soft, sliced fruits, like peaches, strawberries, grapes, plums, cherries, and any type of berries. It usually takes around 15 minutes for the sugar to sit on the fruit to create a liquid.
Freezing Dry or Unsweetened
Dry packing is excellent for small, whole fruits, or chopped-up fruit. You can pack all of the fruit into a container and freeze it. I prefer to flash freeze all of my fruits on a baking sheet and then move them to the storage container. It makes it easier to remove the amount of fruit needed for whatever you’re creating.
Puree and Juice
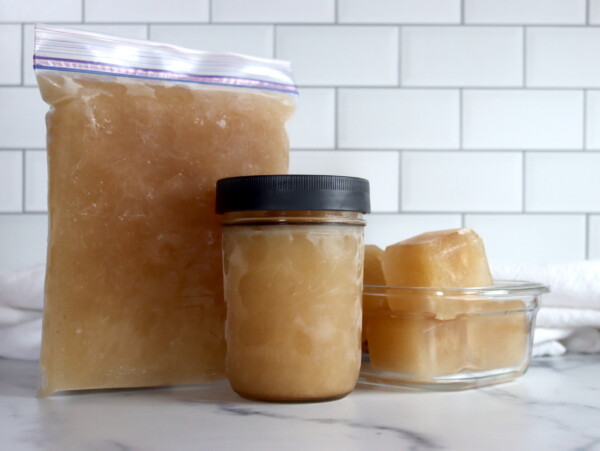
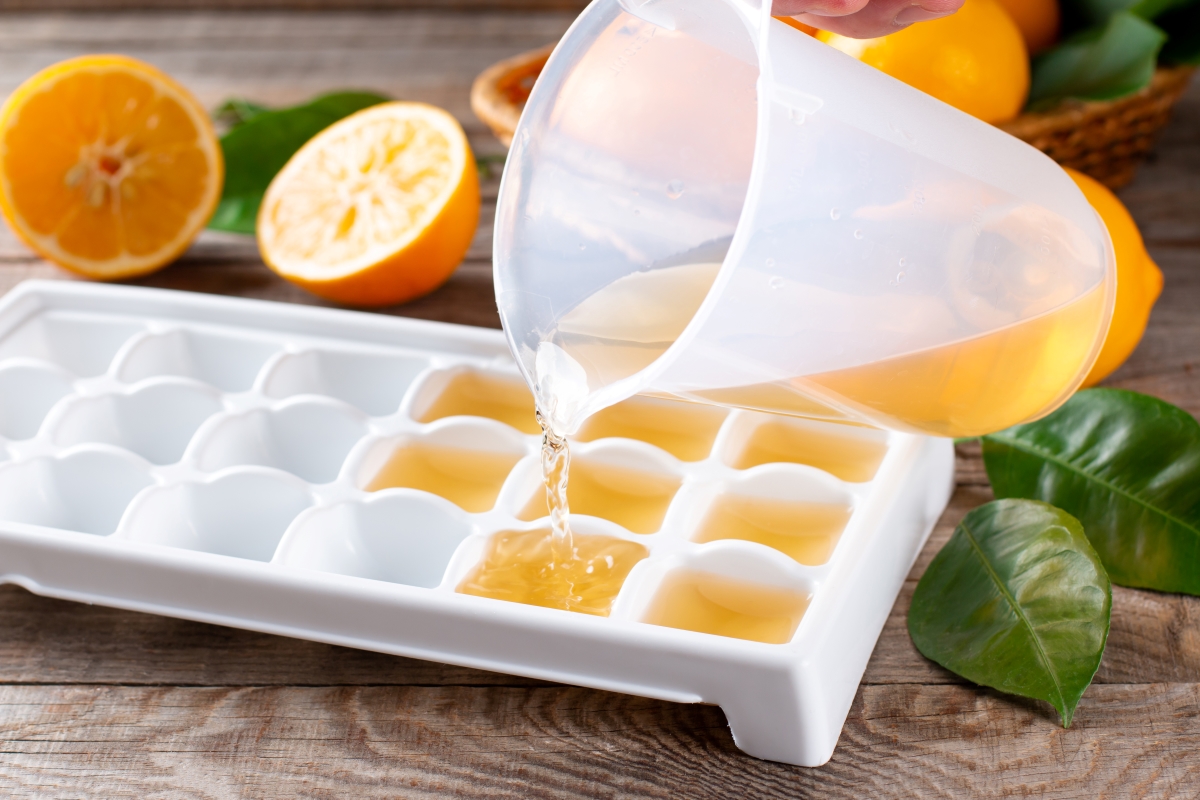
Another option is to make a puree of the fruit that you want to freeze and pour it into an ice cube tray. Then, once frozen, you can pop out the cubes and store them in a plastic bag.
Juice is freezable as well. You can freeze it in containers or ice cube trays as well.
The Best Containers to Store Frozen Fruit
Before you start freezing fruit, make sure you have the containers you want to use for storage. The storage containers you use depends on the type of fruit you’re freezing and your personal preference, but they should all be moisture-vapor resistant, durable, and easy to seal.
Here are a few acceptable options.
- Freezer Bags – The most common storage option for frozen fruit is freezer bags, such as the ones made by Ziploc. It’s important to look for plastic bags designed for the freezer because they use thicker plastic that prevents leaks and stops freezer burn.
- Plastic Freezer Containers – Another option is to use freezer-safe plastic containers. Make sure you look for containers labeled “freezer safe” because some become brittle and crack in the freezer.
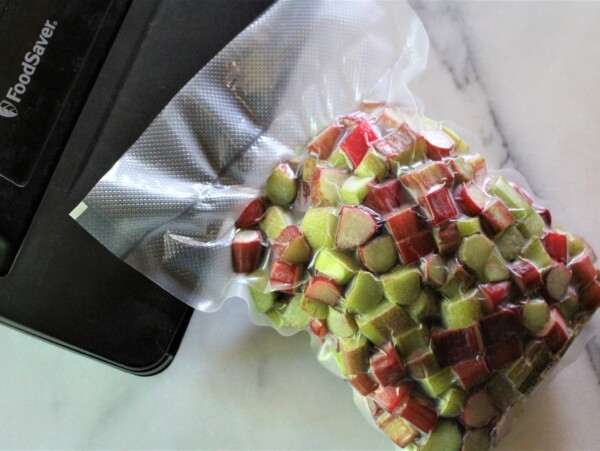
- Food Saver Vacuum Sealer Bags – If you want to store your frozen fruit for the long term, using vacuum sealer bags is a better option because it removes all of the air around the fruit. This reduces the risk of freezer burn. So, if you plan to freeze the fruit for longer than one or two months, I suggest you use vacuum sealer bags.
- Freezer-Safe Glass Jars – Some glass jars are freezer safe as well; you’ll see a line that shows how much to fill each jar. These work for pureed fruits or jams; some prefer to make freezer jam or jelly than canning it.
Leave Headspace and Label
When you freeze fruits, you typically need to include headspace between the packaged food and closure because food expands when it freezes. Always make sure to clean off the edges of the container before closing it; the edges need to be free of food particles and moisture.
It’s essential to label the containers properly with the name of the food and the date.
How to Make Syrup for Freezing Fruits
Before you get started, you need to know how to make syrup for freezing fruits. The amount of sugar increases as you create a heavier syrup. Here are the general recommendations for creating syrup:
| Type of Syrup | Percent Sugar | Cups of Sugar | Cups of Water | Syrup Yield |
| Very Light | 10% | 1/2 | 4 | 4 ½ |
| Light | 20% | 1 | 4 | 4 ¾ |
| Medium | 30% | 1 ¾ | 4 | 5 |
| Heavy | 40% | 2 ¾ | 4 | 5 ⅓ |
| Very Heavy | 50% | 4 | 4 | 6 |
Freezing Fruit Guide – A to Z Guide
Apples
Most people think about canning apples rather than freezing them. I love to can applesauce, apple butter, apple jam, and even whole canned apple slices – they’re all so good – but freezing apples is possible as well.
First, you have to wash, peel, core, and slice the apples. Make sure they’re firm without bruises or bad spots, and then cut the apples into slices. They thaw the best in slices rather than diced. Apples are one of the fruits that benefit from ascorbic acid because it reduces the browning of the fruit when exposed to oxygen. All you need is ½ teaspoon per quart of apples.
Once prepared, you have to decide if you want to freeze apples in a syrup pack, sugar pack, or dry pack.
Apples taste best when frozen in a 40% syrup, and if you use a sugar pack, cover the apples with ½ cup sugar per quart of apples. Steaming or boiling the apples for two minutes before adding the sugar helps to prevent browning.
Dry packing is easy, but if frozen plain the fruits tend to get a bit rubbery. Still, it is a healthier option for smoothies or using them cooked into oatmeal later.
Slice the apples and lay them on a baking sheet in a single layer; it works best if you cover the baking sheet with parchment paper. Freeze for one to two hours before transferring to a freezer bag or container.
Apricots
Apricots are one of the fruits that don’t last too long, so if you want to preserve their color and juiciness, one of the best preservation methods is freezing. These fruits continue to ripen if left at room temperature, and they store for no more than four to five days in the refrigerator.
Start by washing your apricots and cutting them in half, removing the pit. The pit imparts a bitter flavor into the fruit, so it’s necessary to remove it. Now is the perfect time to dip the slices into an ascorbic acid solution to stop discoloration. Some varieties need a simple blanching to remove the tough skin; that depends entirely on the type of apricot you buy.
If you’re dry freezing, lay the slices of apricots on a baking sheet and freeze for one to two hours before storing them in freezer containers. Apricots freeze best in a 40% syrup; if you want to try sugar packing, use ½ cup of sugar per quart of apricots.
I prefer to dry freeze my apricots so that I can make apricot jam later. You also might also try making freezer apricot jam instead of canning it, if you have the freezer space.
Bananas
We seem to end up with extra bananas all the time. My kids go through spurts when they love to eat bananas, so I keep buying them. Then, one week, they decide they no longer want to eat them, so the entire bunch starts to become too ripe. That’s when I have to freeze bananas.
We use frozen bananas for muffins, bread, and smoothies; they’re a staple! Freezing bananas is so easy, but it’s only possible to dry freeze bananas. It’s not possible to freeze in a syrup or sugar pack.
My problem was that I never seemed to use frozen bananas if I tossed them into the freezer whole in the peel. I would tell myself that I would make smoothies or a batch of banana muffins later, but I never did. So, in an effort to reduce our food waste, I tried slicing and freezing them. That was the solution.
First, slice your bananas into even pieces. Never toss the bananas into the freezer bag without flash-freezing first; they turn into a huge clump of nastiness. Instead, line a baking sheet with parchment paper and lay your banana slices on the paper flat. Freeze them before transferring them to the storage container you prefer.
Blackberries
Frozen blackberries are perfect for making blackberry jam later in the season, baking blackberry pies, yogurt mixes, and smoothies. Blackberries are full of vitamin C, fiber, antioxidants, and plenty of other vitamins, so don’t let a big harvest or sale go to waste.
Blackberries only stay fresh and good for a short period. After a few days in the fridge, you might find that your berries start to mold or turn mushy, so freezing them is the best way to stop any food waste from occurring.
I prefer to dry pack our berries because I never know how I’ll use them in the future, but it’s possible to use a syrup or sugar pack for blackberries. No matter how you plan to freeze them, start by washing and sorting your berries. Remove any berries that are going bad or overripe; you want fully ripe, firm berries. Be careful because blackberries are delicate, so they squish easily.
Gently air dry your blackberries and spread them out on a towel. Then, spread them out on a parchment-lined baking sheet; make sure the berries aren’t touching. Freeze for a minimum of three hours before transferring to a freezer storage container.
If you prefer syrup packing, use a 40-50% syrup. For sugar packing, use ¾ cup of sugar per quart of berries.
(Besides freezing, you can also can whole blackberries in syrup, and they hold their shape and flavor beautifully.)
Blueberries
Believe it or not, people debate over the “right” way to freeze blueberries, but I’ve tried them all, and I can tell you it doesn’t seem like any particular method makes a huge difference in the quality of the frozen fruit. You could simply toss the container of blueberries into the freezer and call it good; they would be good, but it wouldn’t be so easy to remove a cup of blueberries for pancakes.
One major difference you need to know when freezing blueberries is that they shouldn’t be washed before freezing. Blueberries have a natural protective coating called bloom; that’s why the berries have a waxy look. The bloom protects the berries from pests and bacteria, but it prevents the berries from sticking.
That means all you need to do is spread your blueberries out on a baking sheet and flash freeze before transferring to a freezer container. When you’re ready to use the blueberries, give them a quick rinse and use them.
Blueberries typically aren’t frozen in a syrup or a sugar pack, but you’re free to try. Instead, people recommend freezing blueberry puree mixed with 1 cup of sugar per quart of pureed berries.
Cherries
Cherries are divided into two categories: sour and sweet. They freeze similarly, but if you want to freeze them in a syrup, the difference is the type of syrup used.
Having containers full of frozen cherries gives you plenty of future recipes. You can eat frozen cherries right out of the freezer – they’re a delicious snack. They work as a thickener for smoothies, taste great in cherry pies, and bake well in muffins, loaves of bread, and other goodies.
First, wash your cherries, inspecting for any bruises because they’ll become mushy in the freezing process. Pat the cherries dry. Then, the longest step begins – pitting the cherries. Both sour and sweet cherries need to be pitted to properly freeze.
Spread the pitted cherries on a lined baking sheet and freeze for several hours. Don’t stack the cherries on top of each other. After they’re frozen, transfer them into a freezer container.
If you want to use a syrup pack, use a 60-65% syrup for sour cherries to help cancel out some of the sour flavors. They need ¾ cups of sugar for a sugar pack. Sweet cherries should be frozen in a 40% syrup; sugar packing generally isn’t recommended for sweet cherries.
Citrus Fruits
Most citrus fruits freeze the same way, so that’s why I grouped them together for simplicity. The same method works for grapefruits, lemons, limes, oranges, and mandarins.
Start by washing and peeling the ripened citrus fruits, making sure that they are firm and tasty. Divide the fruit into proper sections, removing the seeds and membranes to the best of your ability.
The best way to freeze citrus fruits is in a syrup pack; a dry pack doesn’t yield the best results. Use a 40% syrup made from excess juice or water from the fruits. Another option is to juice the citrus fruits, making sure to be gentle and not press any oil from the rind. Freeze as it is or add the desired amount of sugar you want for the flavor you like.
Cranberries
Cranberries only come into season during the fall and winter, so it’s necessary to learn how to freeze cranberries for later. I personally love cranberries; I use them in muffins, cookies, and jam. One of my favorite jam recipes is a holiday jam that I make with cranberries, orange zest, and a few strawberries to temper the bite.
Most people don’t grow their cranberries, although it’s possible, and they’re typically only available fresh for a short period in the stores. That’s when you need to stock up on them and keep the cranberries in the freezer for future recipes. Frozen cranberries work for cranberry sauces, relish, jams, and baked goods.
Start by rinsing the fresh cranberries in cold water and letting them drain, removing any mushy, green, or shriveled berry out of the pile. Then, let them air dry for 15-20 minutes. Spread the cranberries on a baking sheet in a single layer and stick the sheet into the freezer for 2-8 hours until the berries are frozen. Then, transfer to a freezer bag or container.
Dry packing is the recommended choice for cranberries, but you also can freeze these berries in a 50% syrup to reduce the bitterness.
Currants
Fresh currants only are available for a short period in the late spring and early summer, depending on your location. Currants are a delicious, tart fruit that makes delicious pies and preserves. They have high levels of pectin, so they can be mixed with low-pectin fruits to make homemade jams and jellies.
It’s recommended that you freeze currants before trying to de-stem them because it makes the job easier. Start by snipping these fruits off of the bushes and rinsing them under cool water, removing debris, and picking out any mushy or unripe fruits. Then, spread out the currants on a towel and gently tap dry.
Spread the currants out on a baking sheet in a single layer, avoiding any clumps of fruits together. Freeze for one to two hours and remove out of the freezer; this is the best time to remove the stems because they come out the easiest. After de-stemming, place the frozen currants into a freezer bag and store them.
Figs
Growing figs in Vermont is hard because they’re warm-weather trees, but a few of my friends grow these trees in containers and have decent harvests. Figs are easy to freeze using both the dry and syrup pack methods.
Start by selecting only the fully ripe fruit, wash, and peel them, if you prefer. Figs darken when exposed to oxygen, so it’s recommended to dissolve ¾ tsp of ascorbic acid in water and sprinkle it over one quart of peeled figs.
It’s best to freeze figs on a baking sheet first and then pack them into freezer containers, but it’s possible to put them into the container without freezing first. That’s a personal preference and depends on how you use them.
If you want to use a syrup pack, make a 40% syrup with ¾ tsp of ascorbic acid or ½ cup of lemon juice per quart of syrup. This helps with discoloration. Pack the figs into freezer containers, cover with the syrup, seal, and freeze, remembering to leave adequate headspace to allow expansion.
Grapes
Grapes are one of the best fruits for freezing. They make a delicious snack on hot days and taste great in smoothies. You can use them to make grape jelly later when you have extra time after the harvest season.
What you don’t want to do is stick the grapes, stems and all, into the freezer. It adds pulling the grapes off the stem while frozen to your to-do list. I prefer to remove the grapes first and freeze, allowing me to take out what I need quickly from the freezer.
Here’s how to freeze grapes.
Remove the grapes from their stems, discarding them, and put all of the fruits into a strainer, rinsing well. Spread out a towel and dry the grapes. Then, lay the grapes out on a baking sheet in a single layer, and place the baking sheet in the freezer, freezing until the grapes are solid.
Another option is to juice the grapes and freeze the homemade grape juice. Use a juicer to remove the juice, freezing in containers with or without added sugar. You also can freeze grapes in a 40% syrup; these are a yummy snack!
Huckleberries
Huckleberries have a short summer season, and they’re one of our favorite summer berries. They aren’t as popular as blackberries or other berries, but they taste wonderful. Huckleberry pies are a delicious summer treat for the entire family.
Freezing is the easiest way to preserve huckleberries. Frozen huckleberries can be used to make jams, pies, smoothies, and other treats.
Use the same method for freezing blackberries when you freeze huckleberries. Wash the berries and dry them in a colander; be careful because they squish easily. Remove any unripened berries or mushy ones that won’t freeze well. Spread the berries out on a baking sheet and flash freeze before transferring them into a freezer container.
Another option is to puree huckleberries and freeze them in containers or ice cube trays. It’s optional to add one cup of sugar per quart of pureed berries if you want to sweeten the puree. Freezing berry puree makes it easy to add to smoothies and recipes.
Kiwis
Kiwis are a Chinese gooseberry, and they’re one of my kids’ favorite treats. Growing kiwis in Vermont isn’t possible, so I grab them when they’re on sale at the store for my kids to enjoy. They’re known for having brown, fuzzy skin with bright green flesh with tiny black seeds that are edible.
Most people never consider freezing kiwis, but it’s possible if done correctly. Don’t toss whole kiwis to the freezer and expect it to turn out well; it won’t. It’s best to slice them up before freezing.
Let’s look at the best way to freeze kiwis.
Start by washing the fruit before cutting off the ends and peeling off the skin. Then, slice the kiwis into even pieces. If you want to flash freeze the kiwis first, it’s a great idea because the slices freeze together. Another option is to put parchment paper in between the layers of kiwi in the containers.
Frozen kiwis don’t thaw well; they become mushy. So, they work best in smoothies.
Mangoes
Mangoes taste great in smoothie recipes, but if you don’t buy them on sale, they’re expensive. I buy mangoes in the bulk and plan to freeze half to use later.
Wash the fruits thoroughly and peel the mango, removing the skin. Slice off the top and the bottom of the fruit and cut the flesh off of the pit. Then, slice or cube your mango into bite-sized fruits. Place them in a baking tray and spread out the cube, freezing for 3-5 hours until firm. Then, transfer the mango pieces into a freezer container.
Melons
All types of melons freeze in the same way, like cantaloupe, crenshaw, honeydew, and watermelons. Pick melons that have firm flesh and are well-colored. They should be ripe without any blemishes or soft spots. Make sure you remove the seeds and peel them before freezing.
Melons can be frozen in slices, cubes, or balls. Some people like to take a melon baller scoop to make small melon balls for desserts. After you cut or scoop the melons into your desired shape, you have to decide if you want a dry pack or a syrup pack.
Here’s how to do both.
For dry packing, all you have to do is spread the cubed or balls of melons in a single layer on a cookie sheet and freeze until firm. Then, transfer to containers, leaving headspace for expansion. Some like to add sugar to the melons for a sugar pack. You need one pound of sugar per five pounds of fruit.
Syrup packing is excellent if you want to preserve the melons for a future dessert or fruit cocktail; it preserves the flavor of the melons well. A light syrup works best; aim for a 30% syrup mixture.
Peaches
Kids love peaches; I think everyone does, but the peach season is short. I prefer canning peaches when I get my hands on a large amount, but it’s time-consuming to can peaches. It’s right in the middle of my primary harvest season, so I often pick to freeze peaches instead of canning to save some time.
Some people say that you don’t have to peel peaches before freezing, but I prefer to peel them because my kids don’t like the skins at all. No matter whether you peel or not, it’s best to wash your peaches first before getting started.
Use a small paring knife and run it around the peach, pulling the two halves apart, exposing the pit. Remove the pit and then cut the peaches into slices. I recommend soaking the peaches in a juice batch that is water and lemon juice for several minutes to reduce discoloration. Then, let the peaches drain before freezing in a single layer on a baking sheet before transferring to a freezer container.
Peaches also freeze well in a syrup pack. Use a 40% syrup and ascorbic acid. Another option is to make a peach puree after peeling and pitting the fruits, mixed with or without sugar.
Pears
Freezing pears at their peak ripeness is one of the best ways to preserve their delicious flavor all year round. The process is similar to freezing apples, but you definitely want to use ascorbic acid or some method to reduce discoloration because pears discolor more than apples.
I truly enjoy eating pears, but they have an incredibly short growing season compared to other fruits. Typically, the peak harvest comes when I’m busy with the end of the garden season, so I like to freeze pears for later use.
Start with freezing only firm, ripe fruits for the best results. Wash whole, fresh pears with cold water, and then peel, halve, and core the pears. Soak the cored pears in acidic water made with ascorbic acid or lemon juice.
Pears freeze well in a syrup because it preserves their natural sweetness the best. While it’s possible to use a heavy syrup, I prefer to use a 40% syrup, heating the pears in the syrup for up to two minutes.
If you plan to use your pears for pies or other cooked dishes, freezing them dry or in a sugar pack is the best option. Freezing them in a sugar pack requires sprinkling ½ cup of sugar per quart of pears over them, letting the sugar sit for 10-15 minutes. The easiest method is dry packing; all you have to do is spread sliced pears over a cookie sheet and flash freezer before transferring to freezer containers.
Pineapples
Growing pineapples isn’t possible when you live in Vermont, but we still like to enjoy the delicious pineapple taste from time to time. I wait until I find a good sale and take several home to eat and freeze.
Most people have no idea that you can freeze pineapples; they freeze well!
Start with a ripe pineapple that smells sweet when whole. That’s when you know the fruit is ready to eat. Use a knife to cut off the top, bottom, and peel off the pineapple. Then, cut out the core or use a pineapple corer.
Next, cut the pineapple into slices and chunks. Spread the chunks out on a baking sheet and put them in the freezer for up to eight hours. It’s best to use parchment paper or a silicone baking mat to stop the pineapples from freezing to the baking sheet.
Plums
Freezing plums is so easy; you can use frozen plums to make jam, preserves, smoothies, or a cold treat. Make sure you pick plums that are at their peak of freshness; they should be tasty and juicy. Eat one before freezing the whole batch to make sure they taste delicious.
Start by wash your plums and cutting into the fruits, removing the pits. Keeping the skins on is a personal preference; peeling takes time, so you might opt not to do so. That’s entirely up to you, but if you want to peel them, do so after washing.
Slice the plums and place the wedges on a baking sheet that’s lined with parchment paper. Make sure the plums aren’t touching and stick the sheet in the freezer for an hour or two until the fruits are solid. After the plums feel firm, remove the slices and put them in a freezer bag.
Freezing plums in a syrup pack is another great option. Use a 40 or 50% syrup; ascorbic acid is optional, requiring ½ tsp per quart.
Raspberries
Our family loves fresh raspberries; we have bushes in our backyard, and they eat as many as possible before I gather them. The ones that I manage to harvest end up in our freezer for future smoothies and batches of jam.
The problem with raspberries is their shelf life. They only stay juicy and delicious in the refrigerator for two to three days before they start to turn too mushy. Freezing is the easiest way to preserve these fruits for future use. If you properly freeze raspberries, they store for up to 18 months, giving you plenty of time to find ways to use them.
Start by sorting through the batch of berries, looking for any that are discolored or unripe. Place the berries in a colander and gently rinse in cold water, but don’t allow them to soak. Then, spread the raspberries out on a paper towel to remove excess water, gently patting them with a towel. However, be sure not to squish them.
Arrange the berries on a baking sheet lined with wax paper, making sure they don’t touch. Stick the sheet into the freezer and check every hour until the berries are hard and frozen thoroughly. Transfer to a freezer-safe container.
That’s not the only way you can freeze raspberries.
Some prefer to freeze raspberries in a syrup pack, using a 40% syrup. Sugar packing is another option with ¾ cup of sugar per quart of berries. Another option is to puree raspberries with or without sugar and freeze them in a container or ice cube trays.
Strawberries
Every spring, our strawberry patch goes crazy, producing tons of berries. I look forward to this time of year so that I can make batches of strawberry jam, strawberry rhubarb jam, and so many other delicious recipes. I also like to freeze strawberries so that I can make smoothies and more jam later in the year.
My kids eat strawberry jam and strawberry sauce almost as fast as I make it!
Start by washing your strawberries, discarding any mushy or discolored berries. Then, cut off the green tops and core them, removing the white tops out of the berries. Now, slice or dice them into the size that you desire. Arrange the sliced berries on a baking sheet that’s lined with wax paper or parchment paper. Freeze for several hours before transferring to a freezer-safe bag or container.
There are other ways to freeze strawberries.
Try pureeing strawberries and freezing in ice cube trays; these can be tossed into smoothies or thawed to use in yogurt. Another option is to use a syrup pack made with 50% syrup or use a sugar pack with ¾ cup of sugar per quart of strawberries.
Food Preservation Guides
Looking for more ways to preserve the harvest?
