Affiliate disclosure: This post may contain affiliate links. Please see our Privacy Policy.
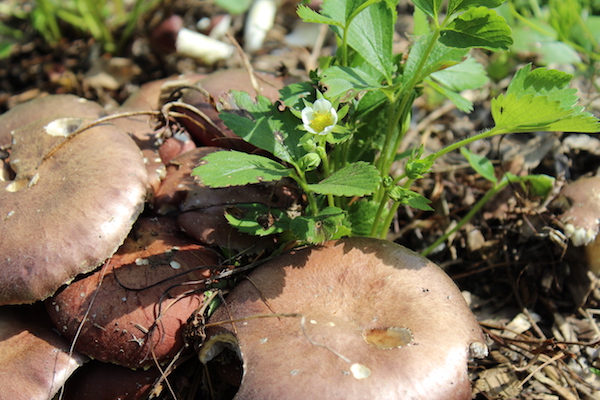
Growing mushrooms at home is surprisingly easy, especially if you start with any of these 10 beginner-friendly varieties. Low-maintenance and easy to grow in limited space, mushrooms are a garden-corner powerhouse! From choosing your containers to inoculating your substrate, I’ll walk you through what you need to know to grow your own mushrooms.
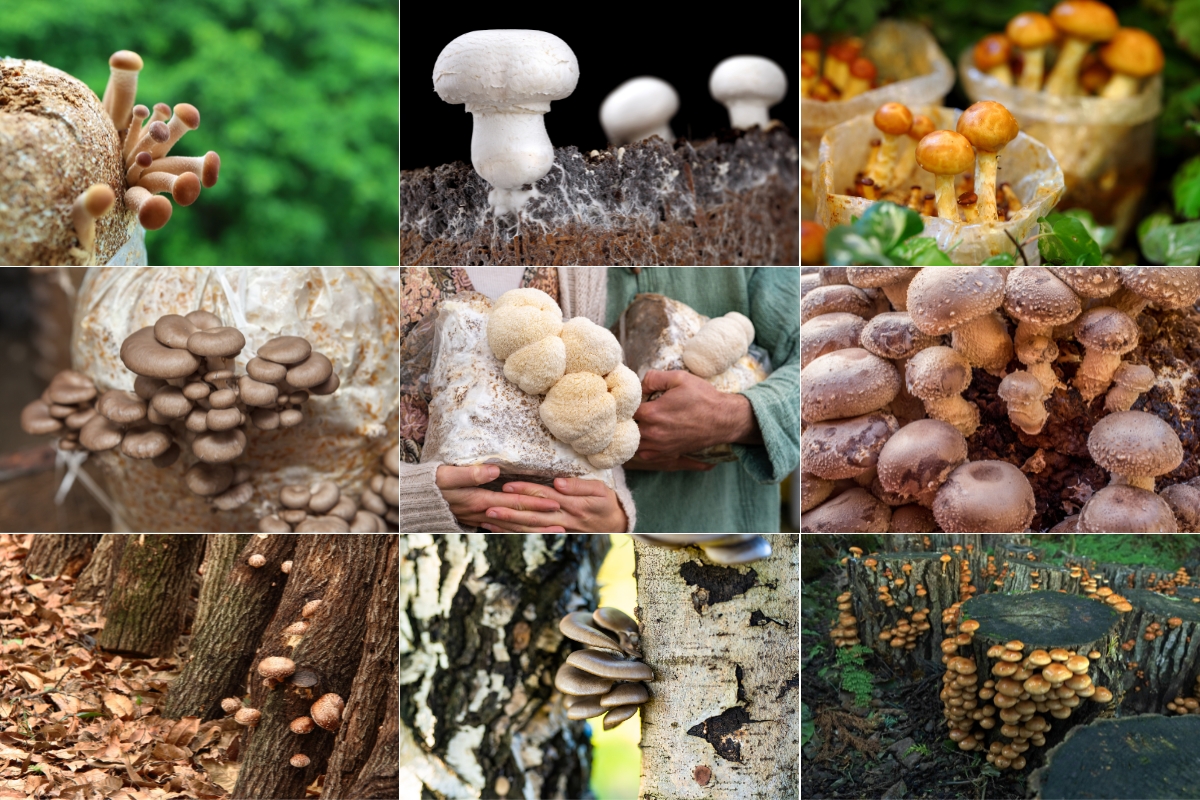
Table of Contents
- What Mushrooms can you Grow at Home?
- Materials for Growing Mushrooms
- Choosing your Mushrooms
- Lion’s Mane (Hericium Erinaceus)
- Maitake (Grifola frondose)
- Nameko (Pholiota microspora)
- Pearl Oyster (Pleurotus ostreatus)
- Red Reishi (Ganoderma lucidum)
- Shiitake (Lentinula edodes)
- Velvet Pioppini (Agrocybe aegerita)
- White Cap (Agaricus bisporus)
- Wine Cap (Stropharia rugosoannulata)
- Wood Blewit (Lepista nuda)
- Preparing your Container
- Sterilizing you Medium
- Growing your own Mushrooms
- Signs of Contamination
- Harvesting and Re-Growing your Mushrooms
- Author Bio
Mushrooms are an incredible plant to add to your garden. Not only can they help fill out the shady nooks in your yard, they’re packed with nutrients, and co-planting them in garden beds will help you establish your own permaculture.
Most mushrooms are low-maintenance and will only require some initial set-up and watering. While there are trickier species out there, starting with one of the mushrooms on this list will give you the experience you need to tackle those tastier and more elusive varieties!
What Mushrooms can you Grow at Home?
Most of them!
While some mushrooms are certainly easier to grow than others, you should be able to grow at least a few mushrooms with every attempt. And as you learn what each variety prefers you’ll start to find more popping up every time!
Keep in mind that Black Truffles, White Truffles, Chanterelles, Porcinis, and Morels all require trees to grow—the tree roots provide sugars to the mushrooms and the mushrooms symbiotically provide water and nutrients to the roots. You can purchase trees that have already been inoculated with their spores. Birch, Beechnut, and Hazelnut trees can be grown in pots or as bonsais and are excellent choices for anyone hoping to grow mycorrhizal mushrooms indoors.
Here, we’ll mostly focus on small-scale mushroom farming that anyone can do from home, so the mycorrhizal mushrooms, sadly, aren’t listed.
Below is a short list of some of the mushrooms you can learn to grow at home. In the following sections I’ll walk you through what you’ll need to consider in general and what each of these mushrooms specifically needs to thrive.
List of Mushrooms to Grow at Home:
- Lion’s Mane (Hericium Erinaceus)
- Maitake (Grifola frondose)
- Nameko (Pholiota nameko)
- Pearl Oyster (Pleurotus ostreatus)
- Red Reishi (Ganoderma lucidum)
- Shiitake (Lentinula edodes)
- Velvet Pioppini (Agrocybe aegerita)
- White Cap (Agaricus bisporus)
- Wine Cap (Stropharia rugosoannulata)
- Wood Blewit (Lepista nuda)
Materials for Growing Mushrooms
One of the neat things about growing mushrooms is that you have your choice of materials (mostly). What specific materials you choose should be informed by your mushroom variety and what it prefers.
Regardless of what you’re growing, here are the main items you’ll need in order to grow your own mushrooms:
- Location: whether indoor or out, mushrooms need a cool, damp, shady location. Pick the darkest spot in your garden or the least-used part of your basement to get started. Closets, cabinets, and unused tool sheds also will work wonderfully.
- Containers: jars, bags, buckets, logs, terrariums—take your pick! Containers need to be at least 6 inches deep to allow the mushroom root system to form. Your container will also need a few holes. Holes should be big enough and plentiful enough to allow your mushrooms to fruit from them, but not so big as to allow your medium to dry out. See the Preparing your Container section for info on setting up a few popular containers.
- Mediums/Substrates: here you get a little less choice. Your medium will completely depend on your mushroom type. A mushroom might want to grow in pure manure, straw, wood chips, coffee grounds, or a blend. See the Choosing your Mushrooms section below for specific recommendations.
- Spores or Spawn: these will become your mushrooms. Think of them as seeds vs. sprouts. Spawn will be easier for beginners as they’re a blend of the spores and the nutrients they need. Make sure to only buy spawn from reputable sources—local growers are a wonderful place to start.
- Spray Bottle/Hose/Watering Can: your mushrooms need moisture! Depending on the size of your farm and how often it rains, you’ll need to either mist or water your spawn regularly.
Optional Materials
As you get more experienced at growing your own mushrooms, the tools below may come in handy. None of them are required to get you started and you can always evaluate later if one or more of these could help you grow an even larger crop:
- Soil Thermometer: most mushrooms want to germinate in soil that’s 60⁰F to 70⁰F. While not required, a thermometer will help you pinpoint how close your medium is to ideal temperature.
- Hygrometer: mushrooms like moisture, but don’t usually like being fully saturated. A hygrometer will help you measure the humidity around your mushroom farm.
- Tents: you can source several varieties of manufactured tents online. But many people find that loosely resting some plastic (like a grocery bag) over their containers does a good job of retaining humidity while allowing airflow.
- Fans/Air Filters: if you’re growing mushrooms in an area without regular airflow (a windowless shed, a closet, etc.) you may want a fan. Most mushrooms grow best with regular fresh air but don’t do well with chilly drafts.
- Mushroom Grow Chambers: these come with a vast array of options, some of which automatically regulate the humidity and airflow around your spores. Chambers are a great option for those living in climates ill-suited to mushrooms, but aren’t required for getting started.
Mushroom Kits
Mushroom Kits are the easiest way to get started with cultivating your own farm. They come in containers with a substrate that already has mycelium (the mushroom root structure) growing in it. All you need to do is break the air-tight seal and water your mushrooms regularly. Done!
However, ease of use comes with one major drawback: cost.
You can buy budget Oyster Mushroom kits for about $20. While this is reasonable, you’ll likely find you’re paying more per mushroom than you would at a grocery store or a farmer’s market. These kits can produce up to 2 lbs of mushrooms if they’re well cared for and well built—and you can’t guarantee that last point.
Some kits, often referred to as Inoculated Fruiting Blocks, are capable of producing more crops than your average kit. Costs get higher the bigger your pre-prepared kit gets, but so will your yield.
All told, kits are an excellent option for beginners or anyone who doesn’t want to prepare their own substrate. They make good gifts and are an easy way to introduce kids to growing their own food.
But for anyone looking to regularly plop mushrooms into the frying pan, this may not be what you’re looking for.
Choosing your Mushrooms
Selecting what mushroom you want to grow should be your first step. From there you can choose a good location, select a container, and prepare the ideal substrate to germinate your mushrooms.
If you aren’t sure where to start, jump down to the Pearl Oyster listing—they’re definitely the easiest mushrooms to grow and enjoy.
Lion’s Mane (Hericium Erinaceus)
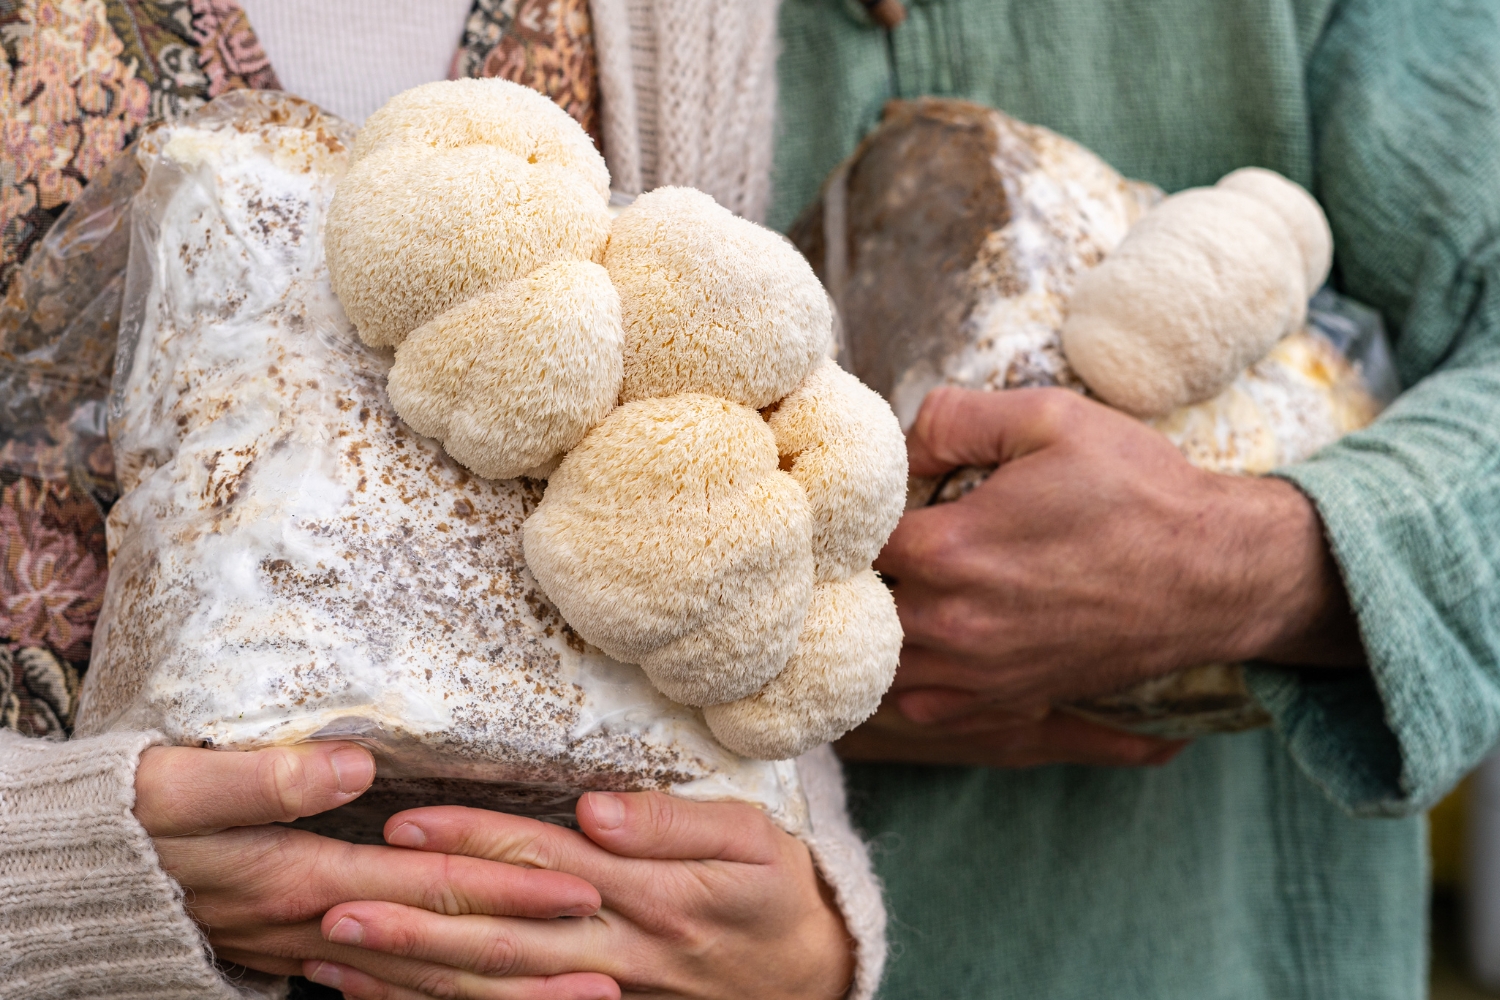
A mushroom that has been creeping into popularity, Lion’s Mane mushrooms are also known as Pom Pom Blancs or Monkey’s Heads. They grow in little white puffs (pom poms) that have a fuzzy texture (like fur).
Raw Lion’s Mane mushrooms have the same texture as cauliflower, but tend to be a bit sweeter in flavor. When cooked, they tend to become meaty, and are a great substitute for red meat as they can help lower inflammation.
Lion’s Mane mushrooms aren’t ideal for beginners– it takes a long time for them to incubate. Longer incubation periods increase the chances of both contamination and boredom with the project. It takes an especially long time to grow these mushrooms outside. But, if you can get them to fruit on a log, you can harvest them from that same log for the next 6 years!
Growing details for Lion’s Mane Mushrooms:
- Ideal Substrate: hardwood chips/pellets, or oat bran
- Germination Temperature: 70⁰F
- Fruiting Temperature: 59⁰F to 68⁰F
- Relative Humidity: 85% to 95%
- Light Requirement: none
- Time from Spore to Harvest:
- Indoors: 6 to 8 weeks
- Outdoors: 1 to 2 years
Maitake (Grifola frondose)
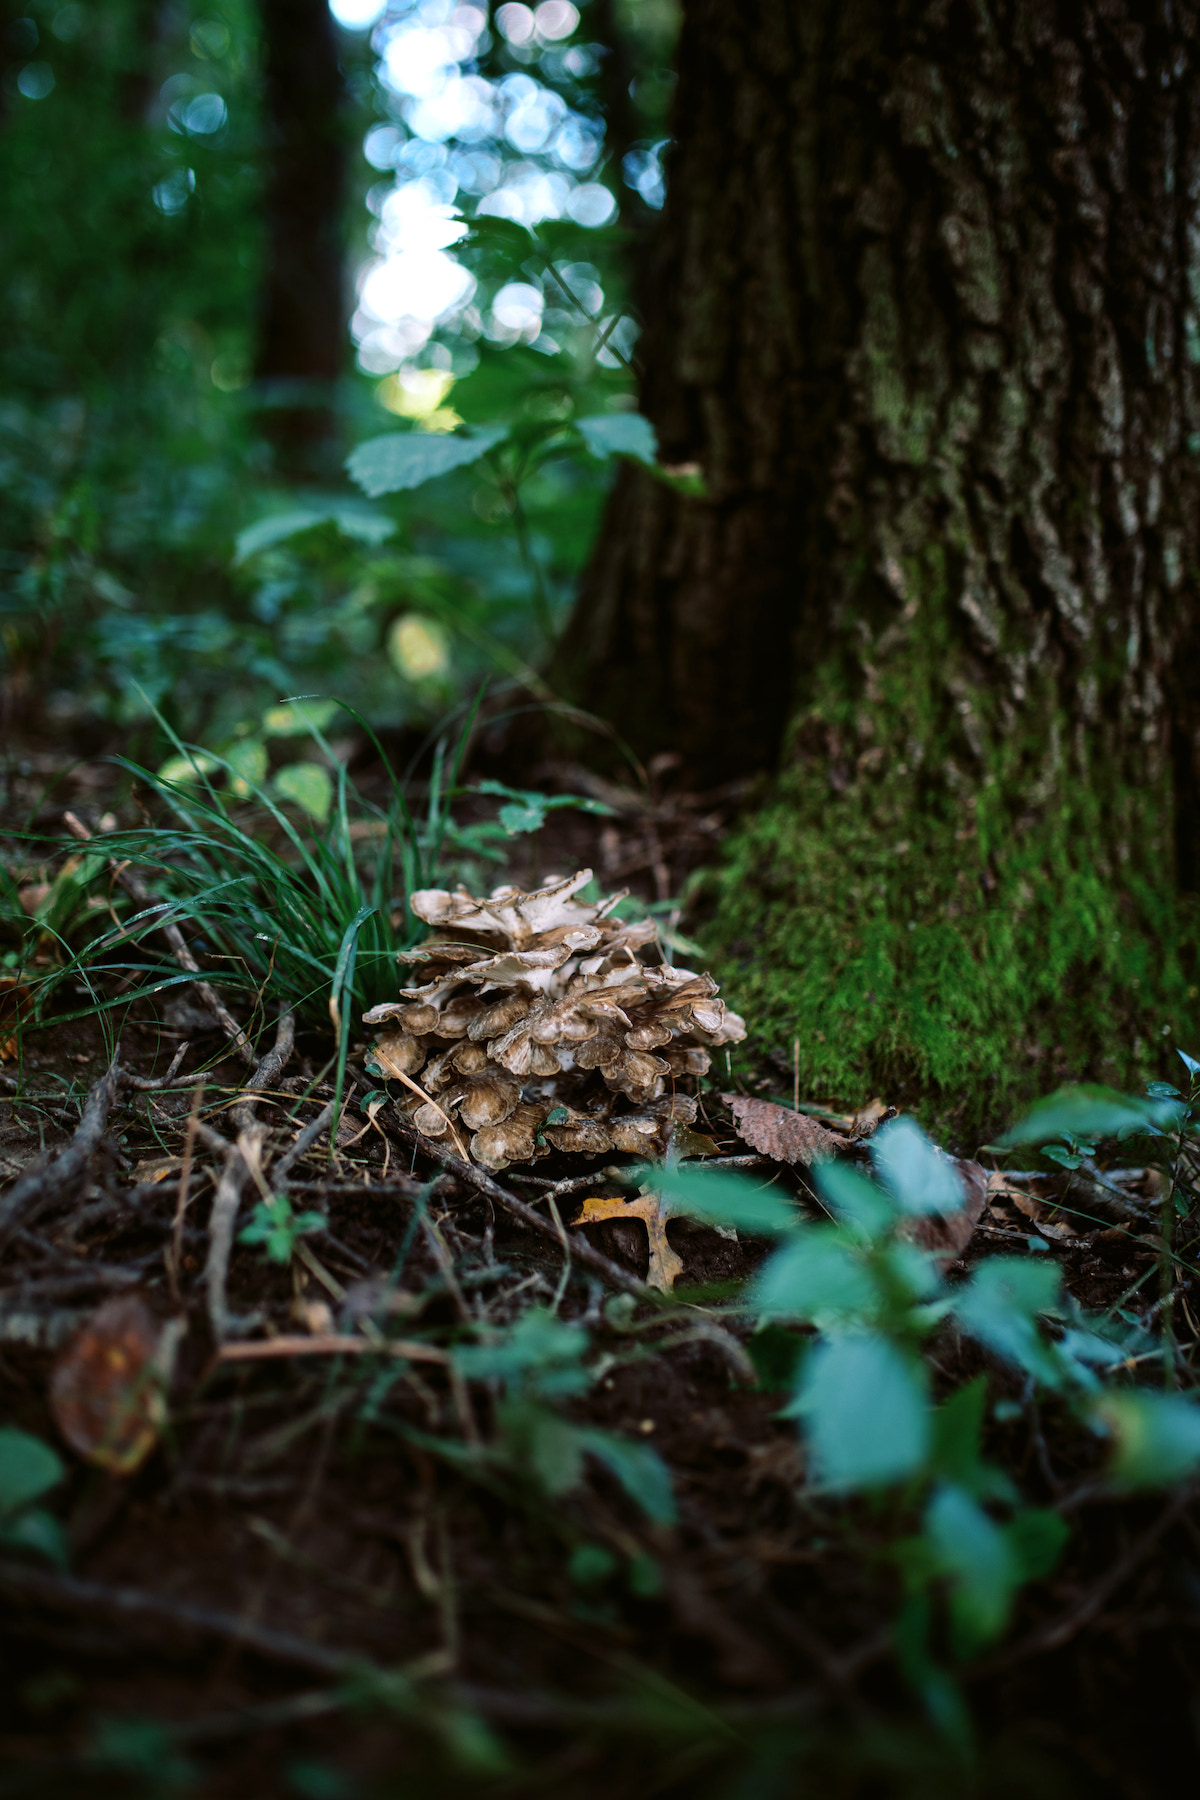
If you’ve ever spotted a mushroom growing in brown feathery clusters, you might have seen a Maitake! Also called “Hen of the Woods,” Maitakes enjoy growing among oak, elm, and maple groves. They have a nice woodsy flavor and are juicy when you bite into them. Grilling, sauteing, or putting them in soups and stews are all excellent ways to enjoy Maitakes.
While you can grow Maitakes indoors, you’ll want to create an environment that mimics a forest floor. Allow them a little indirect light, low airflow, and a substrate that includes hardwood. Maitakes prefer temperate climates where the temperature is relatively stable– drastic temperature changes can cause them to grow more slowly or die off.
Garden beds or logs are excellent choices for Maitake mushrooms. Partly for the above reasons, but also because they get big. You can expect to harvest mushrooms close to 3 feet across that weigh up to 50 lbs!
Growing details for Maitake Mushrooms:
- Ideal Substrate: hardwood logs, hardwood mulched garden beds, hardwood sawdust, or wheat bran
- Germination Temperature: 60⁰F
- Fruiting Temperature: 50⁰F to 70⁰F
- Relative Humidity: 80% to 90%
- Light Requirement: low
- Time from Spore to Harvest:
- Indoors: 4 to 6 weeks
- Outdoors: 1 to 1½ years
Nameko (Pholiota microspora)
Bright, rusty orange with a shiny exterior, Nameko mushrooms look like little clusters of candy when they’re young. Sweet they are not, however, though they are crunchy and have a wonderfully nutty flavor.
You’ll find these a tricky mushroom to grow. Preferring lower temperatures, higher humidity, and a growth timeline dependent on the season, Nameko mushrooms are a labor of love. When grown outside, you’ll need to wait a full year from inoculation and then wait a little longer until fall swings in to harvest your mushrooms.
Nameko mushrooms do need a solid temperature drop to begin fruiting. If the drop is too slight, or if temperatures aren’t low enough, you may end up with small and stringy mushrooms. Similarly, just before they experience their temperature drop, you’ll want to raise the humidity levels close to 100% for a day to simulate the autumn rains these mushrooms expect.
Growing details for Nameko Mushrooms:
- Ideal Substrate: soft or hardwood logs, soft or hardwood sawdust, or wheat bran
- Germination Temperature: 78⁰F
- Fruiting Temperature: 45⁰F to 65⁰F
- Relative Humidity: 70% to 85%
- Light Requirement: low
- Time from Spore to Harvest:
- Indoors: 3 to 6 months (depending on planting time and substrate used)
- Outdoors: in the fall, 1 year after sowing

Pearl Oyster (Pleurotus ostreatus)
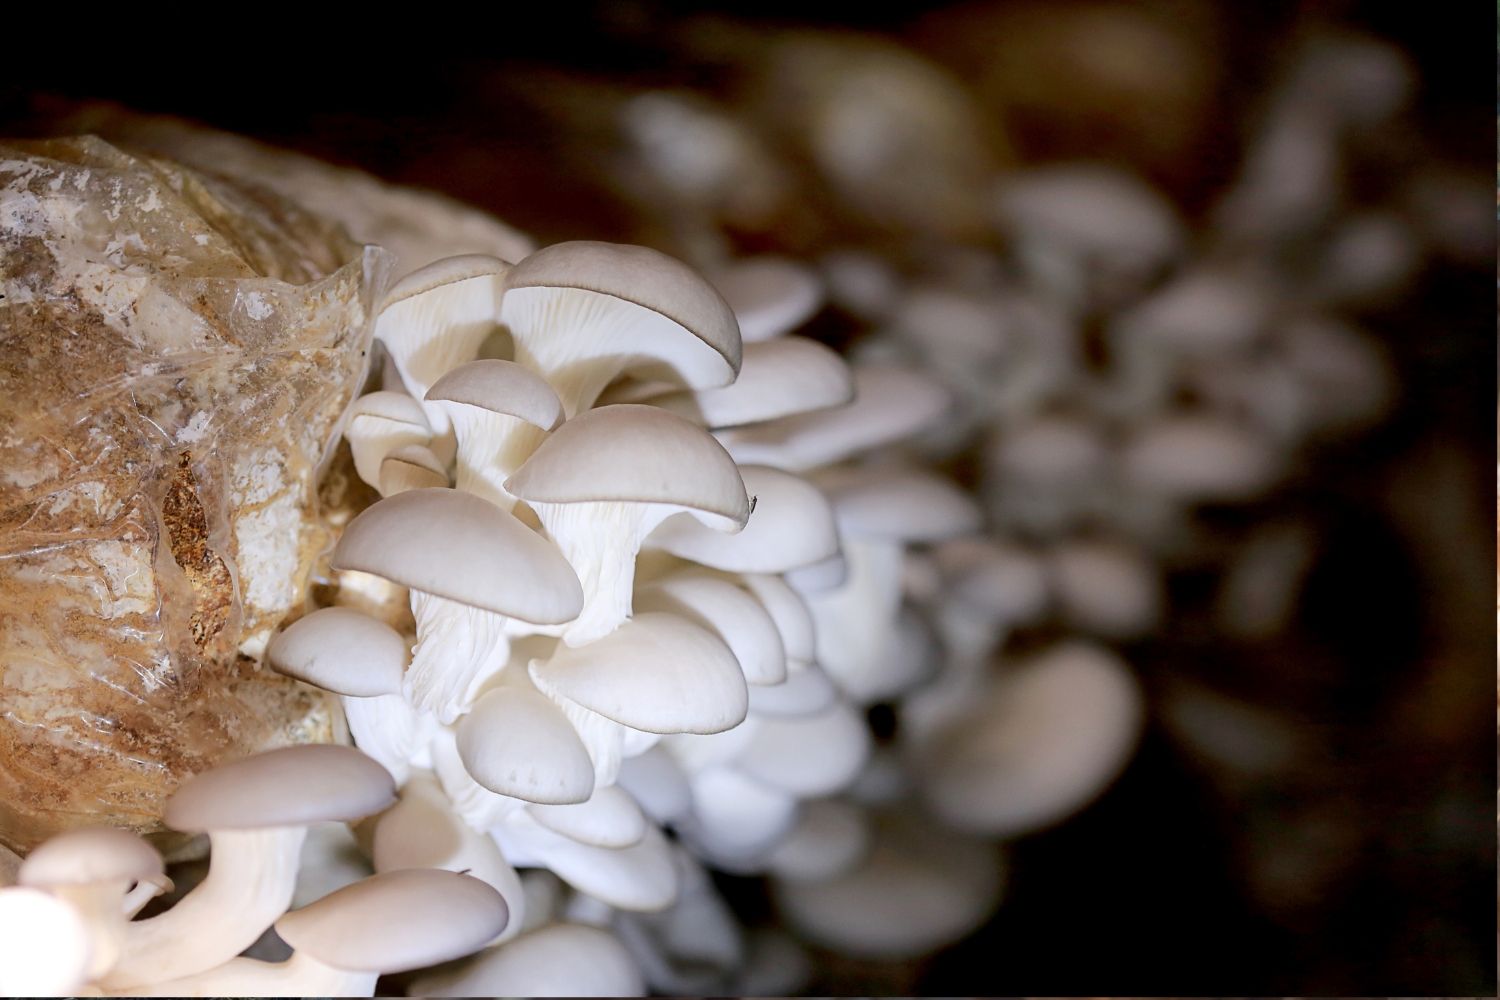
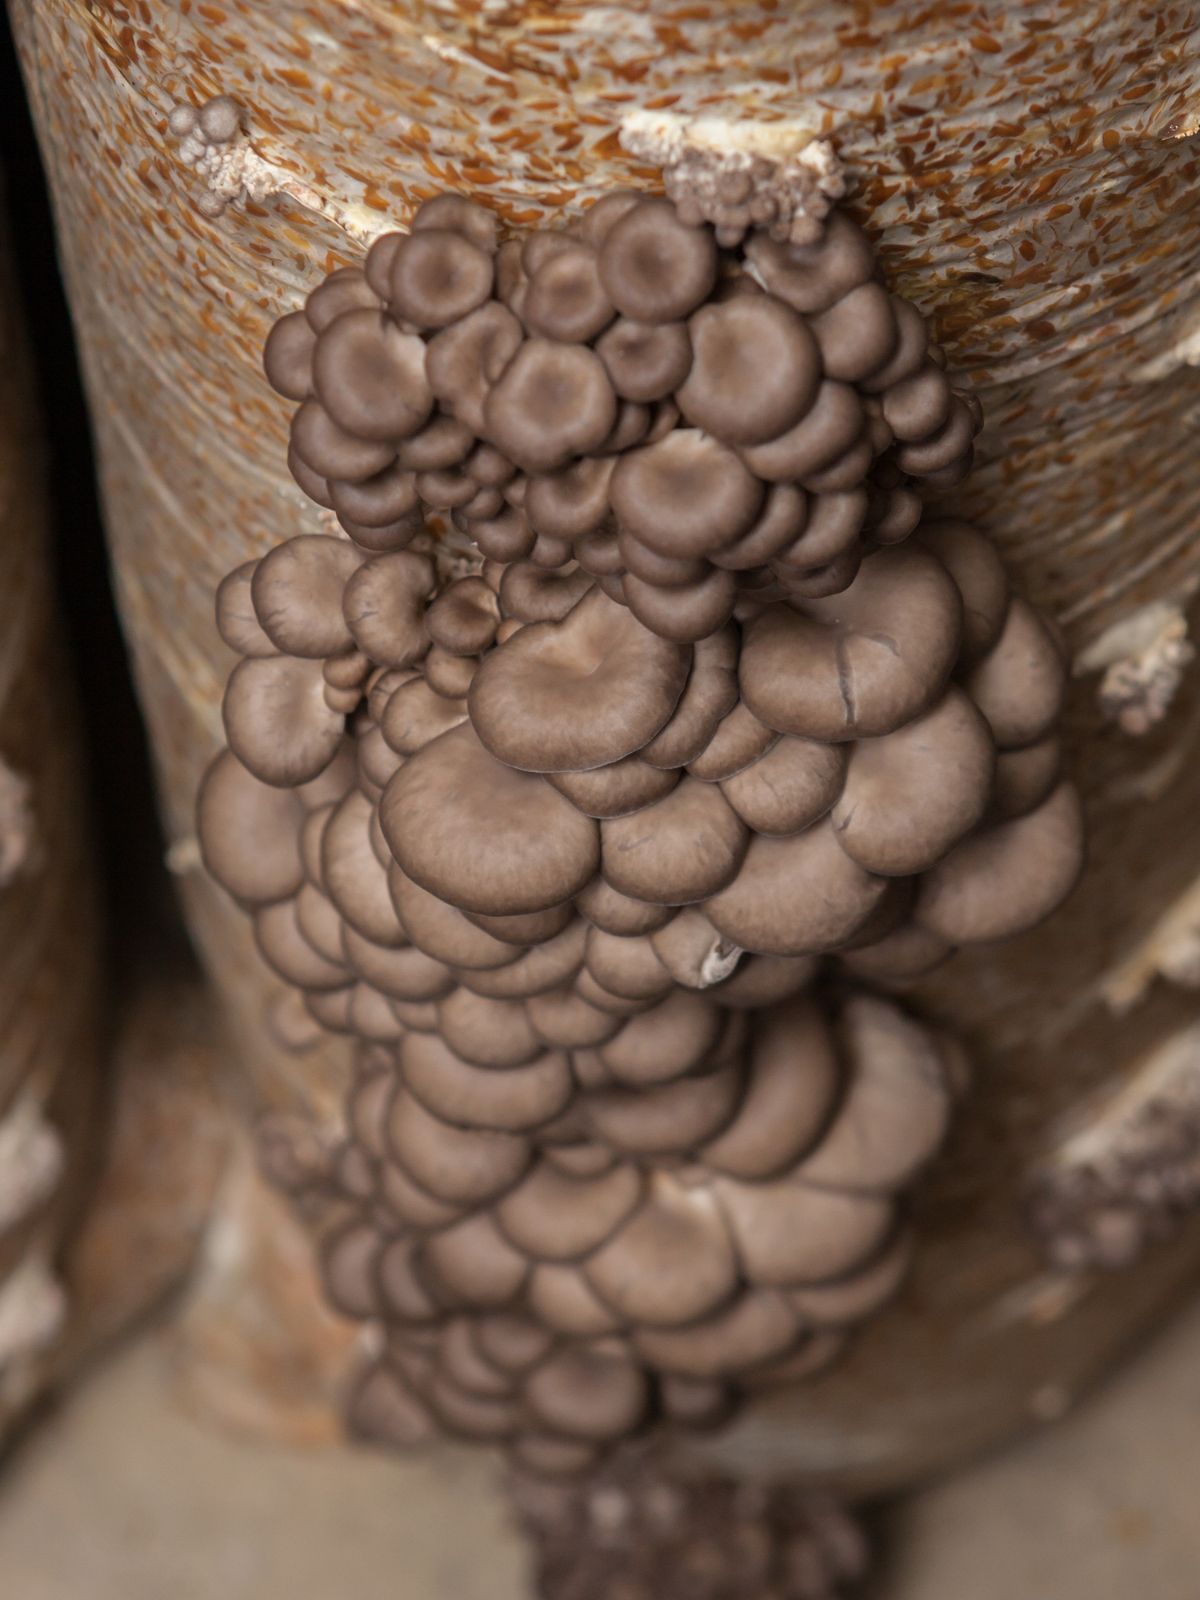
This is the beginner mushroom of choice. In fact, most mushroom kits use Oyster mushrooms because they’re that easy to germinate.
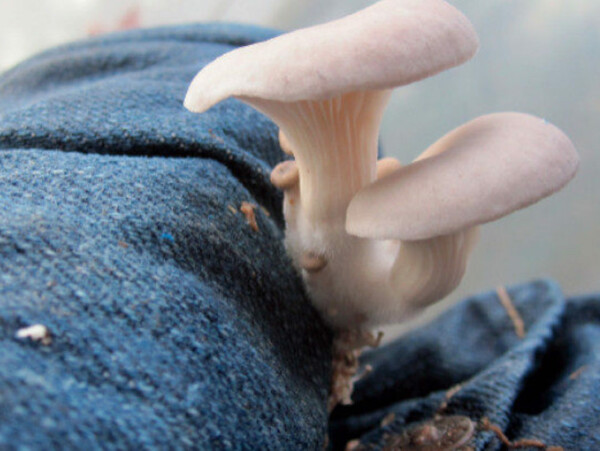
Oyster mushrooms like to grow as “shelves.” Each mushroom has a small stalk that’s usually hidden by its neighbors, leaving the thin, broad cap to almost float in the air. You’ll find they taste earthy with a hint of seafood about them.
Many different species of Oyster mushrooms are available, but the Pearl Oyster is the most consistent and common. Once you’ve mastered it, consider trying out Pink Oysters (Pleurotus djamor), King Oysters (Pleurotus eryngii), or Golden Oysters (Pleurotus citrinopileatus).
Growing details for Pearl Oyster Mushrooms:
- Ideal Substrate: straw, hardwood sawdust, hardwood logs, or fresh coffee grounds
- Germination Temperature: 70⁰F
- Fruiting Temperature: 60⁰F to 86⁰F
- Relative Humidity: 80% to 90%
- Light Requirement: low
- Time from Spore to Harvest:
- Indoors: 2 to 3 weeks
- Outdoors: 1 to 5 months
Red Reishi (Ganoderma lucidum)
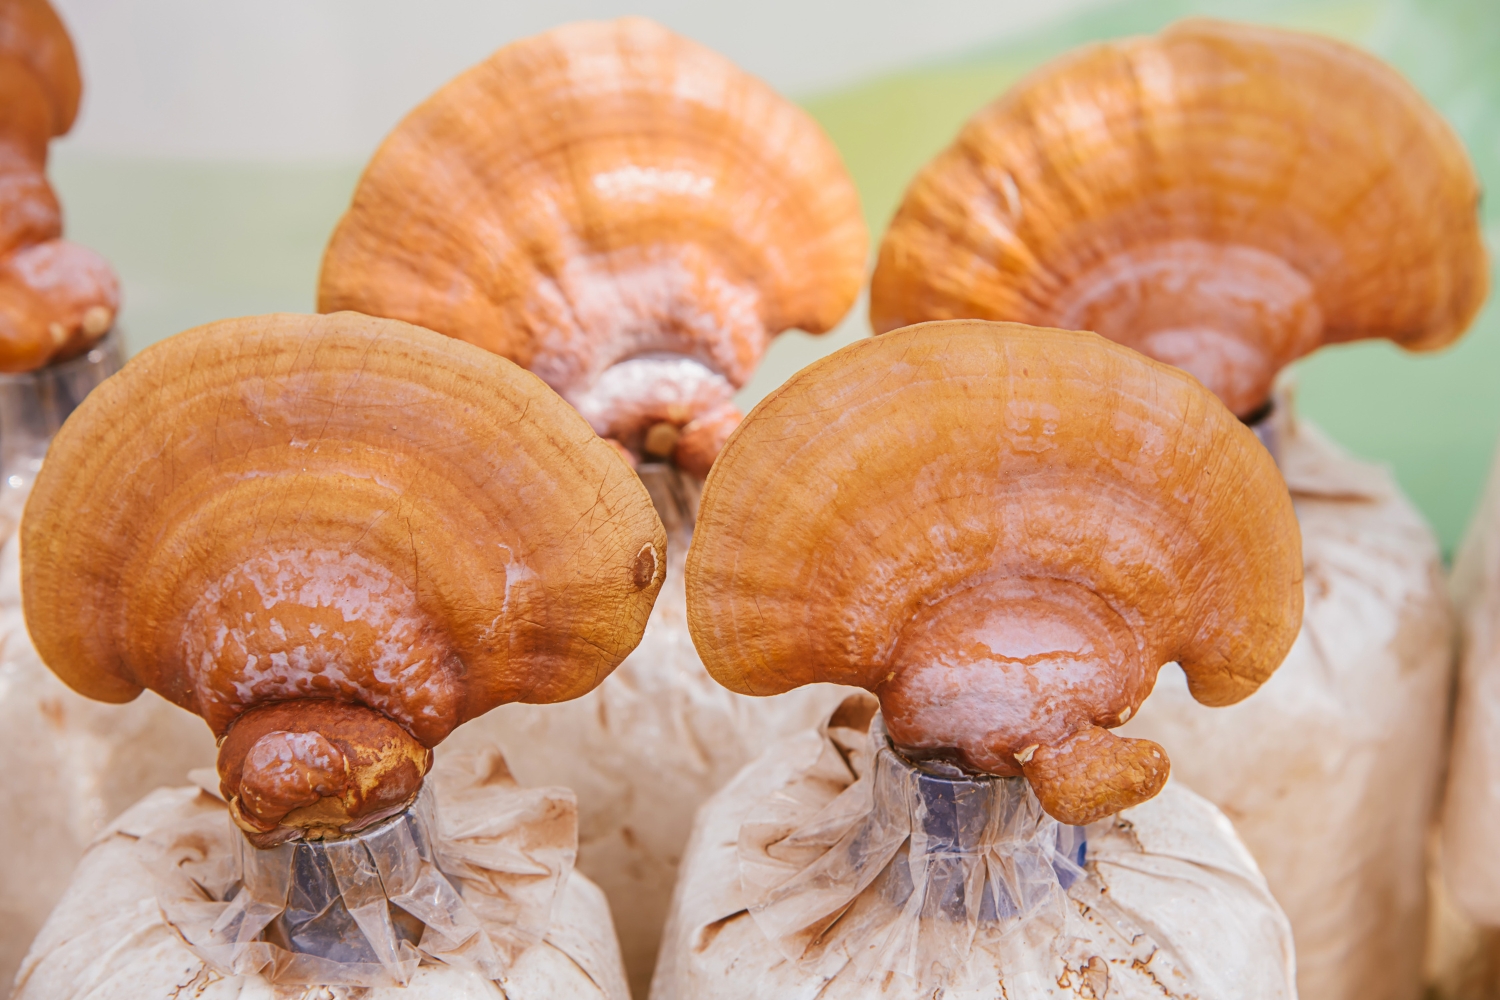
Red Reishi mushrooms have boomed in popularity recently as a remedy for stress. Often dried and made into teas thanks to their tough structure, Red Reishis have a strong woody and bitter taste that takes some getting used to.
Depending on how much oxygen they receive, you may see Red Reishis growing in shelf-like structures or in thin “antlers” poking up out of the soil. Both forms have a shiny red exterior that might be lightly striped.
All instructions you’ll find online will guide you to grow these mushrooms outside on a log or a buried fruiting block. Experienced growers might be able to find a method of indoor cultivation they prefer, but beginners should choose to grow these outdoors.
If you aren’t interested in the medicinal aspect of Red Reishis, there are several other species in the genus you can explore instead. For example, Hemlock Reishi (Ganoderma tsugae), actually grows well on coniferous trees and is a great choice for anyone with a lot of pine branches to use up. Be careful when choosing a variant: the growing conditions are likely different!
Growing details for Red Reishi Mushrooms:
- Ideal Substrate: hardwood logs or fruiting blocks
- Germination Temperature: 70⁰F
- Fruiting Temperature: 75⁰F to 85⁰F
- Relative Humidity: 85% to 90%
- Light Requirement: low
- Time from Spore to Harvest:
- Indoors: NA
- Outdoors: 14 to 17 months
Shiitake (Lentinula edodes)
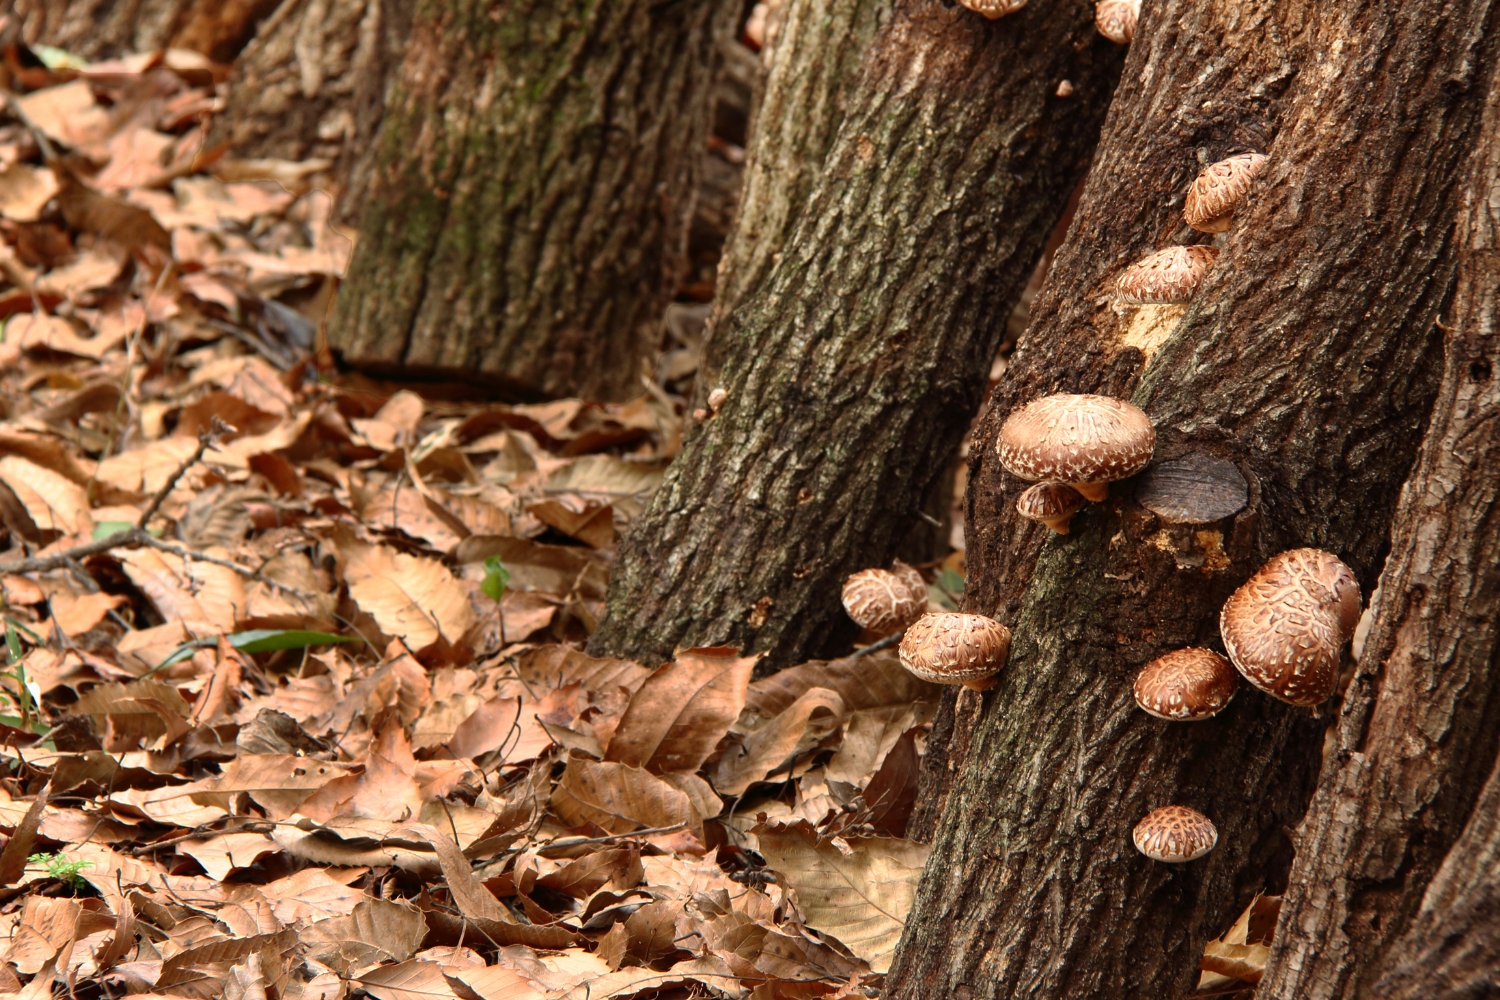
If you’re new to mushroom farming and want to try starting outside, Shiitakes are the mushrooms for you! They’re fairly easy to maintain and definitely prefer to be grown on logs outdoors. Many people sow Shiitake mushrooms once per season so they can enjoy a continual harvest throughout the year.
Smoky with a meaty or buttery texture, Shiitake mushrooms have been a popular addition to everything from salads to pasta sauces for centuries. However, you may want to avoid eating them raw. While rare, some people may develop a rash after eating undercooked Shiitake mushrooms.
Growing details for Shiitake Mushrooms:
- Ideal Substrate: hardwood logs, or hardwood sawdust
- Germination Temperature: 70⁰F
- Fruiting Temperature: 45⁰F to 70⁰F
- Relative Humidity: 80% to 90%
- Light Requirement: low
- Time from Spore to Harvest:
- Indoors: 7 to 10 weeks
- Outdoors: 6 to 12 months
Velvet Pioppini (Agrocybe aegerita)
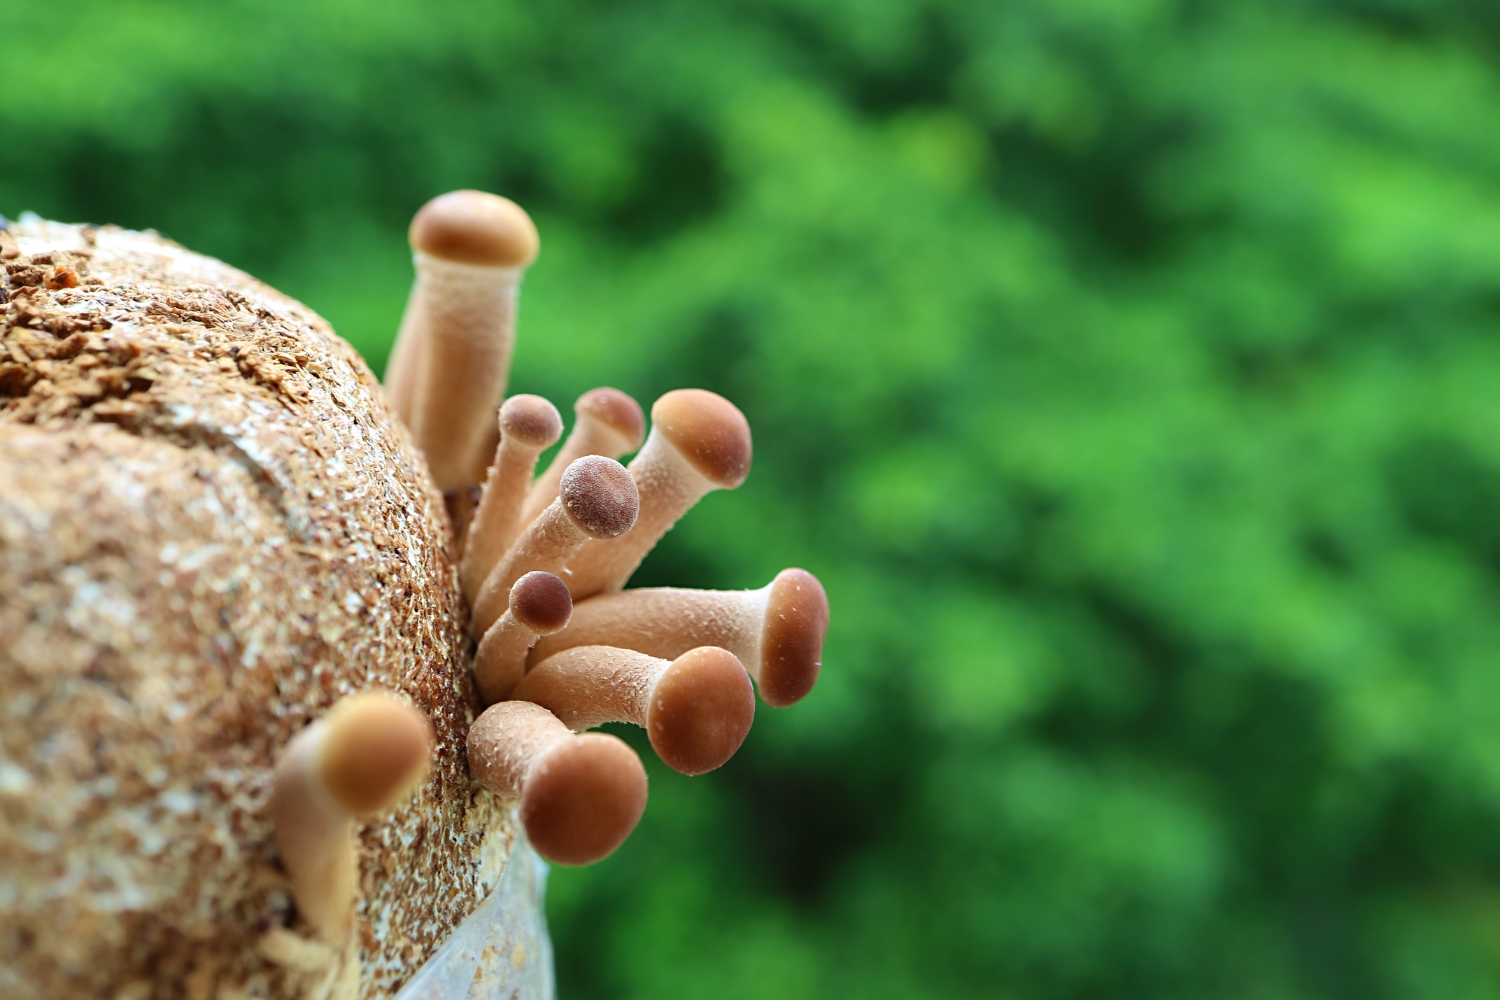
Native to poplar groves, you may know the Velvet Pioppini as the Black Poplar mushroom– or you may never have heard of them at all. You’re not likely to see these in stores, but they’re popping up at more farmer’s markets these days.
Nutty with a noticeable umami taste, Velvet Pioppini is an excellent substitute for more expensive gourmet mushrooms. While they grow particularly well outside, they also are the best choice for growing in jars!
Growing details for Velvet Pioppini Mushrooms:
- Ideal Substrate: hardwood sawdust, or hardwood logs
- Germination Temperature: 70⁰F
- Fruiting Temperature: 46⁰F to 64⁰F
- Relative Humidity: 90% to 95%
- Light Requirement: none
- Time from Spore to Harvest:
- Indoors: 6 weeks
- Outdoors: 8 to 12 weeks
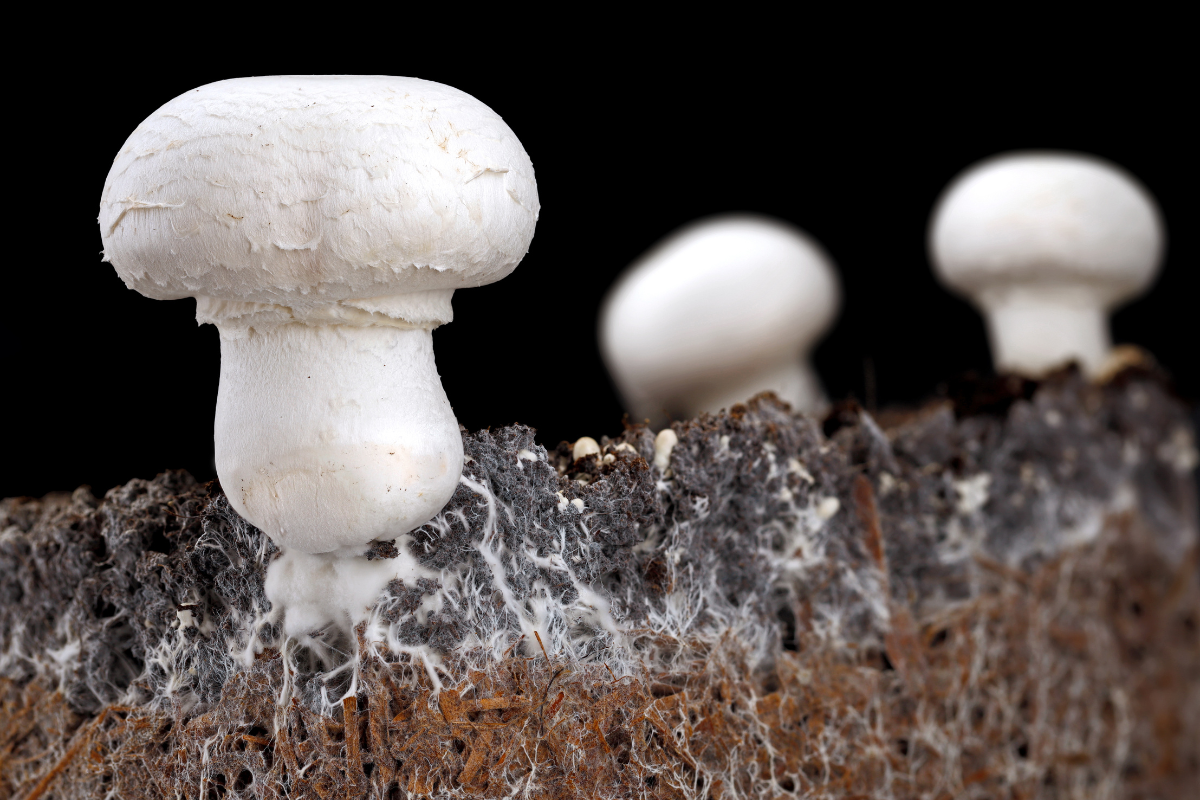
White Cap (Agaricus bisporus)
At first glance, you likely think you don’t know this mushroom. But I bet you not only know what this is, you can name 3 of its fruiting stages!
White Cap mushrooms are more commonly known as Portobello, Cremini, and Button mushrooms. Yep, the 3 are the same mushrooms at different sizes! You’ll harvest early for Buttons, late for Portobellos, and somewhere in between for Cremini mushrooms (the teenagers, if you will).
Portobello mushrooms (the adults) have the most flavor as they have the least water content. Button mushrooms (the babies) hold a lot of water and an almost neutral taste. As they mature these mushrooms also gain a higher concentration of nutrients, so pick the harvest that works best for your table goals.
During germination, keep the humidity a bit higher for your White Caps. They prefer to fruit at 70% relative humidity, but will incubate better closer to 85% humidity.
Growing details for White Cap Mushrooms:
- Ideal Substrate: composted manure, or straw
- Germination Temperature: 65⁰F to 75⁰F
- Fruiting Temperature: 55⁰F to 65⁰F
- Relative Humidity: 70%
- Light Requirement: none
- Time from Spore to Harvest:
- Indoors: 5 to 7 weeks
- Outdoors: 4 to 6 weeks (for buttons)
Wine Cap (Stropharia rugosoannulata)
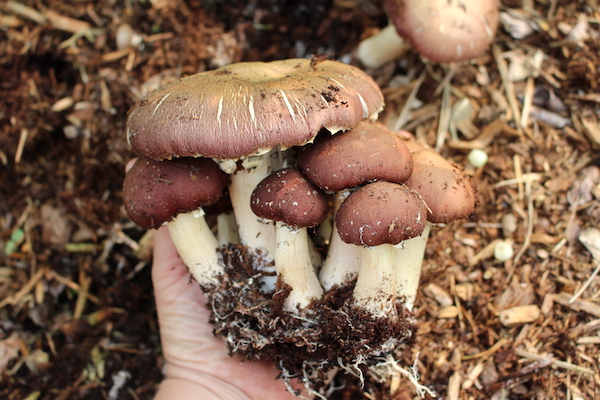
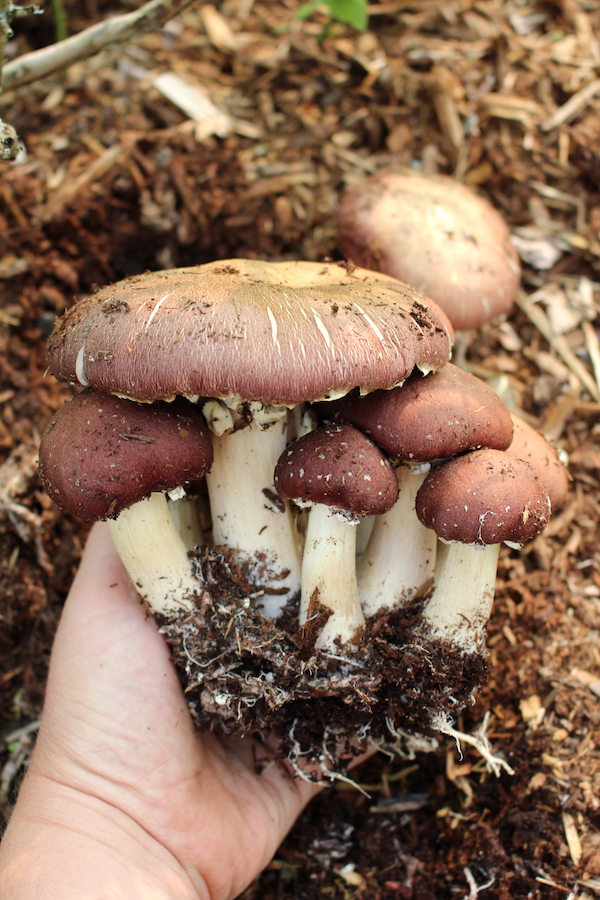
Also known as King Stropharia or Garden Giants, Wine Cap mushrooms are excellent for permaculture setups. Often grown directly in garden beds, Wine Caps help kill pathogens in the soil and breakdown organic matter.
Any gardens they’re added to will need to be well composted and mulched—all of which will only benefit your plants! Once sown, they’ll grow quickly and spread out. They have a mild flavor, making them ideal for a wide variety of dishes.
You’ll notice that Wine Cap mushrooms planted in sunnier areas won’t develop bright red caps. While these mushrooms can handle the sun decently well, the stress of direct sunlight will cause them to fade a little as they grow.
Growing details for Wine Cap Mushrooms:
- Ideal Substrate: hardwood chips, straw, or leaf litter
- Germination Temperature: 70⁰F
- Fruiting Temperature: 41⁰F to 95⁰F
- Relative Humidity: 70% to 90%
- Light Requirement: low to none
- Time from Spore to Harvest:
- Indoors: 2 to 4 months
- Outdoors: 3 to 12 months
Wood Blewit (Lepista nuda)
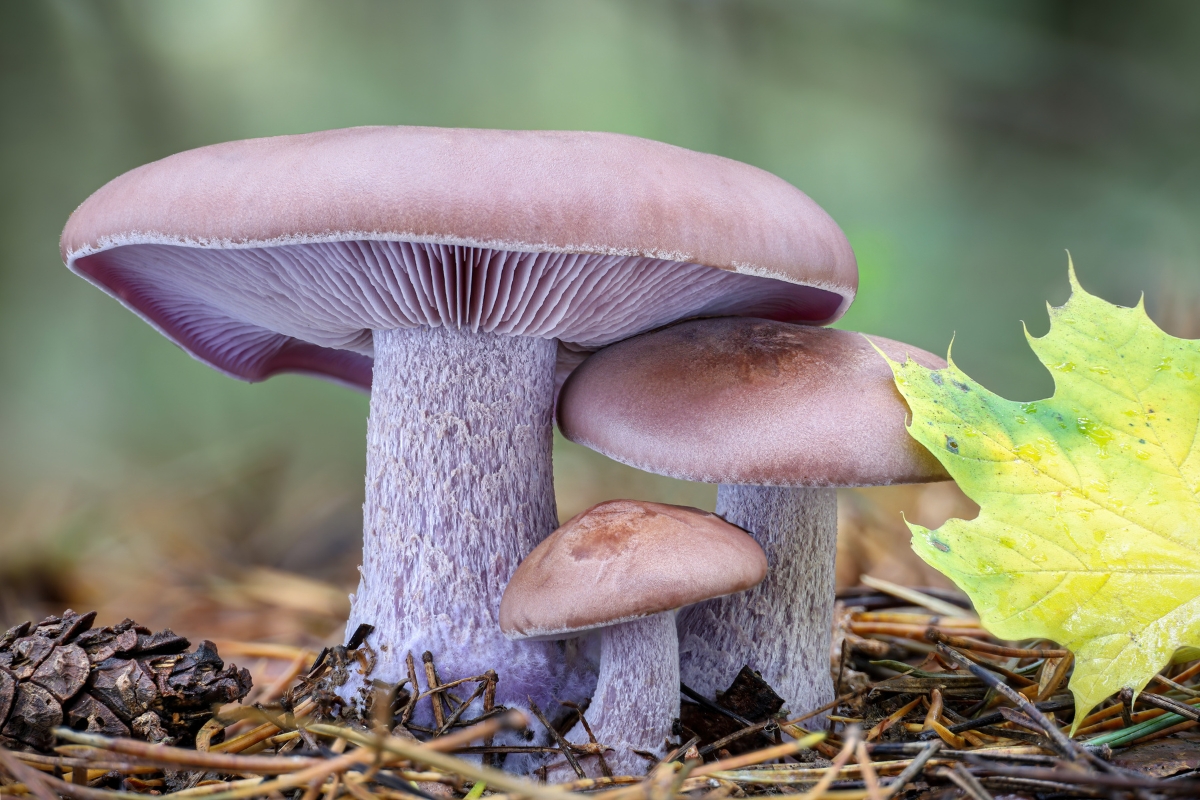
Another non-beginner mushroom, Wood Blewits are needy and will want a lot of attention. But they’re worth it! Young Wood Blewits have a distinctive violet color that fades to tan as they mature, making them one of the most colorful species around.
Additionally, they smell a bit like lilacs and have a mild peppery taste (that is too strong for some). When dried or cooked Wood Blewits have a meaty texture that works well with almost any dish you’re making. Be sure to cook them, though, as they can cause indigestion when raw. Some people can’t handle them at all, so try a small sample first!
If you’re nervous about eating them, don’t worry– Wood Blewits can also be used to dye cloth and paper a nice grass green color.
Growing details for Wood Blewit Mushrooms:
- Ideal Substrate: compost, garden beds, hardwood chips, straw, or leaf litter
- Germination Temperature: 65⁰F
- Fruiting Temperature: 45⁰F to 70⁰F
- Relative Humidity: High
- Light Requirement: Low
- Time from Spore to Harvest:
- Indoors: 6 to 12 months
- Outdoors: in the fall, 1 year after sowing
Preparing your Container
Now that you know what mushroom to grow, decide on your location and choose a container. So long as your container of choice is 6 inches deep, you can easily prepare for it to hold your mushrooms!
Fully Open Containers
Whether you’re recycling a salad container or grabbing an old milk crate, all you need to do is sterilize your open containers. Rubbing alcohol and boiling water will both work, so pick whichever makes sense for your container.
Buckets and Closed Containers
Smaller closed containers need a bit of space left in them to allow the mushrooms to fruit. Terrariums may need to have a hinged lid to allow airflow. Jars will need to have a wide enough mouth to allow your mushrooms to fruit.
When using larger containers, like 5-gallon buckets, you may even want to just add your own holes. Grab a drill and place holes in the sides following a diamond pattern. With the holes in place, you can add your substrate in and put the lid back on your bucket.
After adjusting your container, sterilize it as you would a fully open container.
Logs
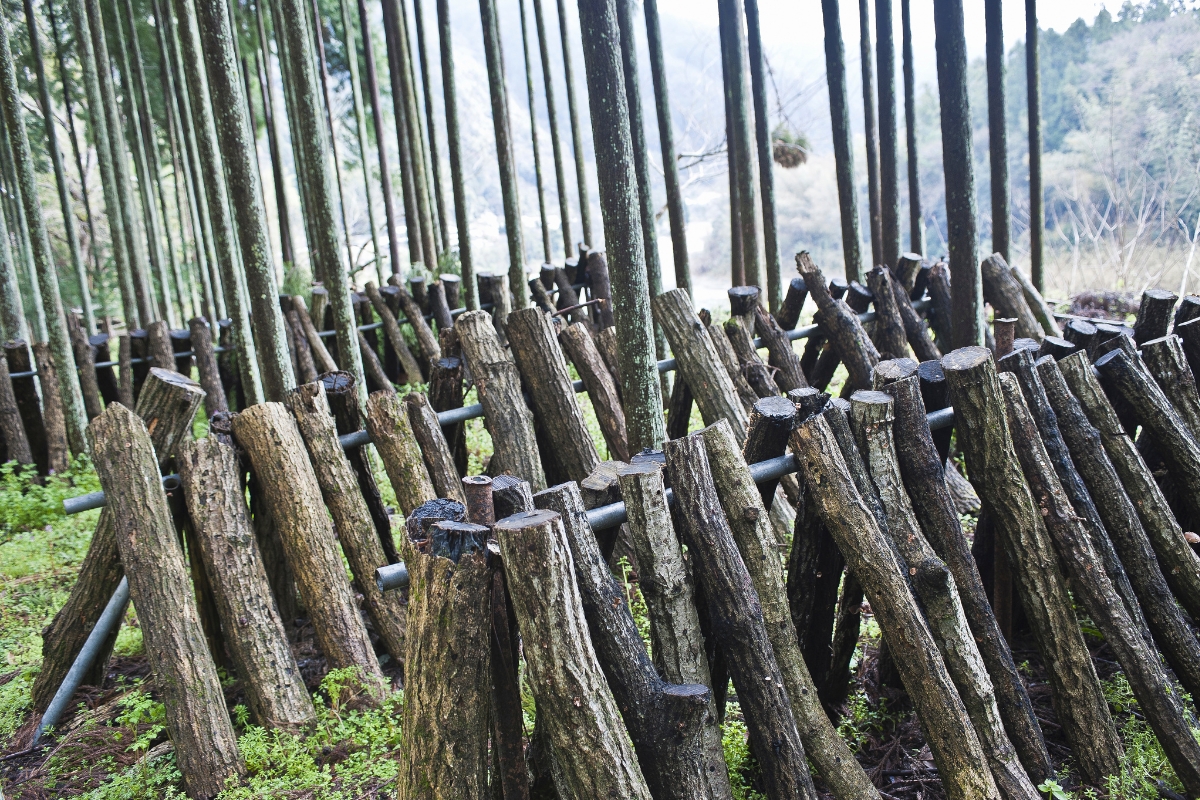
While you can theoretically grow mushrooms on any scrap piece of wood in your yard, taking time to choose the right log will yield you better results.
For most mushrooms, you’ll want to choose a hardwood branch about 6in in diameter. Which type of hardwood you choose depends on the mushroom and how you want to harvest. Oak and hard maple are good for longer harvests. Poplars, being softer, will cause your mushrooms to fruit faster but for less time.
There are a few mushroom to wood charts you can check to fine-tune your choice, but don’t be afraid to experiment a little.
To prepare a log, cut it from a tree or pick it up right after it’s fallen. Logs that were taken from their tree in late winter when the sap content is low will serve you better, but any wood prepared well should work great.
Store the log somewhere it can be slightly elevated for 3 weeks—this will allow the tree’s natural antifungal protections to die off. But be sure to inoculate the wood within the next 3 weeks to make sure no other fungus has the chance to dig in.
Once you’re ready to inoculate your log, grab a drill with a 1/2-inch bit. Drill into your log in a diamond pattern, keeping your holes about 5 inches apart.
You’re ready to inoculate your log!
Sterilizing you Medium
You don’t want weeds or mold popping up in your mushroom farm. Anything else that’s growing in your container is in competition with your mushrooms and can potentially push them out or contaminate them.
Sterilizing your medium before adding in your mushroom spores will help kill off the competition and promote a good harvest. However, many mushrooms—like Wine Caps—need bacteria in the soil to grow and shouldn’t be planted in fully sterilized substrate. Garden beds shouldn’t be sterilized before you plant mushrooms in them.
Prioritize sterilizing substrate for indoor farms or substrate that’s high in nutrients like manure and grains. Substrate that’s less nutrient dense, like straw or sawdust, only needs to be pasteurized.
Sterilizing your Medium
There’s really only one method for sterilizing substrate, and that’s to use a pressure cooker. While using a barrel steamer or something like it will come close to sterilization, really you’re just super-pasteurizing your substrate.
For every method listed here, you’ll want your substrate to end up moist but not soaking. Ideally you should be able to grab a handful and squeeze out a few drops.
Using a Pressure Cooker
The idea of placing manure inside a pressure cooker is…gross. But don’t worry! It won’t be touching the interior of the pressure cooker.
You’ll need a pressure cooker that can maintain pressure at 15 PSI. When ready, place your medium in a jar or mushroom grow bag that can handle sterilization temperatures. Fold the bags or place foil over the jars to limit how much moisture is entering them. Grab a metal rack or a trivet that can fit inside your pressure cooker—you’ll need to separate your containers from the bottom and the sides of the cooker.
Add in 3 quarts of water, or just enough to cover 2 to 3 inches of your containers. If using grow bags, weigh them down with something heavy, like a plate, to prevent them from floating up and blocking the pressure relief valve.
Bring the pressure cooker up to 15 PSI and start a timer for at least 1 hour. If sterilizing a small amount of substrate, don’t exceed 1 hour. Larger amounts will need 3-4 hours. In the beginning, opt for less time as you can over-saturate your substrate if it’s in the cooker for too long.
When your timer goes off, remove the cooker from heat and let it sit for 8 hours to depressurize.
Pasteurizing your Medium
There are many methods for pasteurizing substrate, so pick whichever option suits your setup best!
Using Hot Water
Likely the simplest method on this list, using hot water to pasteurize substrate is ideal for a small-scale home mushroom grower.
Take a large pot and mostly fill it with water. Bring it up to a boil and let it drop down to about 150⁰F (anything between 149⁰F and 167⁰F will work).
Grab a net bag or a pillowcase if you have one as it will make straining out the medium easier. Fill the bag with substrate and place it in the water. Weigh it down with something that can keep the bag fully submerged—a small rock or two should work.
Let the substrate cook for about 2 hours. When it’s done, you can pull the bag out and hang it up somewhere to drain on its own. Loose substrate will need to be strained through a mesh sieve once it’s cooled down.
Using Cold Water Fermentation
Cold water fermentation is smelly, to put it kindly. I’d recommend finding a space on the edge of your yard to work in.
Take a sterilized container, like a 5-gallon bucket, and fill it with non-chlorinated water. Submerge your substrate in the water, using weights to keep it from floating up to the surface.
Cover and leave your substrate to soak for a full week. It will begin to ferment, killing off the bacteria that needs oxygen to survive. After a week, drain and sift it to allow air to flow through the substrate to kill off the remaining bacteria that doesn’t thrive in oxygen.
Using an Acidic Cold-Water Bath
This may sound identical to the previous method, but this time you won’t only use water. Instead, you’ll add lime, wood ash, or vinegar to the bucket. All 3 work to change the pH of the solution, making it uninhabitable for most organisms.
Not all lime sources will work to create alkalinity in your solution fast enough to be effective. Choose hydrated lime (calcium hydroxide) with lots of calcium and very little magnesium. Most lime sold in garden stores is actually calcium carbonate and has a very high level of magnesium that will inhibit your mushroom growth.
Additionally, you’ll want to be sure you’re using 5% white vinegar. Many stores have started selling 4% vinegar and you aren’t guaranteed to get the acidity you need unless you check what you’re buying.
Wood ash will need to come from untreated hardwood logs, which can be a bit hard to source depending on where you live. However, of the 3, it will produce the best mushroom flushes and is worth the effort to find.
While it isn’t required, purchasing a pH meter will help make sure you’re adjusting the pH to the correct range.
Once you’ve collected your materials, take a clean bucket and follow one of the following ratios:
- Add 30g wood ash per 1 liter of water for a pH of 11 to 14
- Add 20g vinegar per 1 liter of water for a pH of 3.5 to 4
- Add 2g lime per 1 liter of water for a pH of 11 to 13
Place your substrate in a net bag or pillowcase if you have one. Submerge the whole thing in the solution, weighing it down to prevent it from floating to the surface. Let it soak for 16 to 20 hours.
After it’s soaked, pull the bag out and let it drip dry—it’s now ready to be inoculated!
Using the Oven
This is not an ideal method for pasteurizing your substrate. Using the oven means there’s a high chance you’re burning and killing off nutrients in addition to other fungus and bacteria. But this method does make use of an appliance you probably have on hand.
You’ll need jars or containers that are oven-safe. Mushroom grow bags will melt if placed in the oven and can’t be used in this method.
Place a large tray with about ½inch of water into the oven and preheat it to 250⁰F. Clean and fill your container with substrate, and place it in the oven on a rack above the water tray. Pasteurize for 30 minutes. When the timer goes off, remove your substrate from the oven immediately to avoid burning your substrate or overly drying it out.
If your substrate comes out very dry, rehydrate it with distilled water before inoculating it. Let it cool down to about 70⁰F and add your spores or spawn in.
Growing your own Mushrooms
One thing to remember about mushrooms is that they aren’t vegetables and will behave differently. If you have experience with sourdough starters, you’ll find the experience of growing mushrooms a bit similar.
After prepping your container, sterilizing your medium, and obtaining the spores/spawn of your choice, you need to inoculate (aka infect) your medium.
Check how warm your medium is—you’ll usually want it between 60⁰F and 70⁰F. If the substrate is too cold, you can place the container on a heating pad until it reaches the right temperature. For garden beds, you may need to wait until a little later in the season for the soil to warm up.
Next, you’ll add your spawn to your medium (see Harvesting and Re-Growing your Mushrooms for inoculating with spores).
Spawn is usually sold as either grain spawn or plug spawn. Grain spawn is a cereal (think rye or millet) that has been inoculated with spores. Plug spawn is a hardwood dowel inoculated with spores and is ideal for starting mushrooms on logs.
For grain spawn, mix the grain with your substrate so that 10% to 20% of the mixture is made up of grain. This should work out to 1.78oz to 3.55oz of grain per 1lb of substrate.
Plugs should be inserted into holes drilled into your logs. Use a hammer or mallet to tap them into place and seal them in using a small amount of melted wax. Angle your logs so that very little of the log is making contact with the ground.
While your mushrooms are germinating, avoid disturbing your mushrooms with heat, drafts, or light. Keep the humidity up by regularly misting the substrate. Avoid drenching the substrate as this may encourage unwanted bacterial growth.
Your logs will be subject to changing temperatures, light, and humidity, meaning your mushrooms may take longer to germinate. Water them regularly and avoid fussing with the logs too much.
Once you’re beginning to see the root system take off, you can stop warming your container (if you were) and allow the temperature to drop to your mushroom’s ideal range. Continue watering and misting your mushrooms as they begin to form caps and stalks.
Signs of Contamination
None of us enjoy sending our hard grown labor to the compost bin. Unless you’re willing to set up a perfectly sterile environment while prepping your farms, you’ll likely run into contamination at some point.
What is contamination? Really, it’s anything that prevents your mushrooms from growing well. Most commonly, it’s mold. But you may also run into issues with bacterial growth and pests.
Check your farms regularly, at least every other time you water them. Look for:
- Mold: specifically look for blue-green or white growths on your substrate or mushrooms
- Insects: check for flies, gnats, or mites crawling around in the medium or on your mushrooms
- Discoloration: while some mushrooms are colorful, any change in color from normal should be treated as contamination
- Smell: if your farm stinks, something has likely gone wrong
- Odd growth: stunted or weirdly growing mushrooms are a sign your farm is contaminated
- Slimy patches: overwatered substrate can occasionally form slick, slimy patches on its surface
What isn’t a sign of contamination? If you’re new to growing mushrooms, or growing a variety you’re not familiar with, take time to get to know what their mycelium (mushroom root structure) should look like. Commonly, mycelium is a series of thin, pale, branching hyphae. Each mushroom will have its own texture and some can be clear or opaque.
Mushrooms also excrete a substance known as “exudate” often referred to as “mushroom pee” (yes, really). This is a yellow liquid that shouldn’t have any smell to it. Both healthy and distressed mushrooms may push out exudate. If the amount you’re seeing changes (either lessens or increases), this may be a sign your mushrooms are in distress. Adjust their growing conditions and keep a close eye out for contamination.
What to do with contamination? Unfortunately, the remedy for contamination is usually to throw away the whole farm in its entirety—container, substrate, mushrooms, etc. Containers don’t have to be thrown away if you’re able to completely sterilize them. But you should never attempt to reuse any contaminated substrate or mushrooms.
Once you’ve discarded the farm, take some time to disinfect the area where it was kept. You don’t want the contamination to spread to any other farms, so really dig into the nooks and crannies.
Harvesting and Re-Growing your Mushrooms
Seeing the first tiny caps pushing up out of the soil is thrilling—but don’t harvest them just yet! Wait until the cap has fully opened and separated from the stem on an individual mushroom. For many mushrooms, including Oysters, the caps of fully mature mushrooms will begin to curl upward.
Carefully twist individual mushrooms to break them away without damaging their neighbors. If any mushrooms don’t break away easily, cut them away at the base of their stems. Any leftover stems will rot when the mushrooms are harvested, returning some nutrients to their medium.
You may see a fine “dust” coating the ground around your mature mushrooms. These are the spores! For garden beds or log-grown mushrooms, you don’t need to do anything else to sow more mushrooms, they’ve already done the work for you.
However, if you’re working with an indoor farm that needs its medium replaced each year, you’ll want to harvest your spores.
Harvesting Spores
Find a mushroom with a fully open cap that isn’t curling upward yet. Check if you can easily see the gills. If so, carefully harvest the mushroom and separate the head from the stalk. Gently remove any skirting covering the gills.
Grab a piece of paper and a glass cup. Set your mushroom cap on the paper, gills down, and cover it with the glass. Leave it alone for about 24 hours.
After 24 hours, carefully remove the glass and lift away the mushroom cap. You should see marks on the paper that mirror the gill pattern on your mushroom—this is a spore print and it’s what you’ll need to create more mushrooms.
If you’re not planning on immediately transferring the spores to a new medium, place the paper with your spore print in an airtight bag. Set the bag in a cool, dark, and (most importantly) dry place until you’re ready to use it.
Preparing a Spore Syringe
This technically isn’t a necessary step. It is, however, a good way to prevent your mushrooms from being contaminated by mold or other mushrooms. Spore syringes are also an excellent way to rehydrate mushroom spores that have been sitting in storage for a while.
First, you’ll want to sterilize your tools and your water: boil at least 10 ml of distilled water per syringe 2 to 3 times (letting the water cool in between boils); run a flame along the metal length of your syringe; sterilize any cups or containers you want to use; and finally, wipe your work area down with a disinfectant of your choice.
Allow the water to cool and use it to fill your syringe. Into a sterilized glass, gently scrape some of the spores off of your print (you can use the syringe for this). Empty half of the syringe into the glass, swirl it, and refill the syringe with the spore water.
You should see a slight change to the color of your syringe’s water. If you don’t, that’s alright, but plan on repeating the process a few times to make sure you have enough spores to inoculate your medium.
Inoculating the Medium
There are 2 methods you can follow to transfer spores to their substrate. One uses just your spore print and the other uses a prepped spore syringe:
Inoculating with a spore print: fill a container with the appropriate medium for your mushrooms. Wet but don’t drench the medium (feel free to get your hands in there to do a squeeze test). Scrape the spores off the paper into the container. Or, simply rub the spore print across the top of your medium.
Inoculating with a spore syringe: prepare a container with the appropriate medium for your mushrooms but don’t wet it just yet. Take your spore syringe and gently dribble the spore water over the top of your medium. Water your medium and you’re done!
Once you’ve inoculated your medium, follow the same steps above to grow your new batch of mushrooms!
Author Bio
This article is written by Morgan Hyde, a former reference librarian from Arizona. Working for the library refined her passion for learning and deep research—a passion that began in her rural AZ upbringing and continues in her work as a writer and editor. If it’s something she can do on her own, it’s something wants know about.
