Affiliate disclosure: This post may contain affiliate links. Please see our Privacy Policy.
Homemade Pancetta is cured pork belly (un-smoked bacon) made with salt and spices. It’s incredibly easy to make at home, and the hardest part is waiting for your first taste!
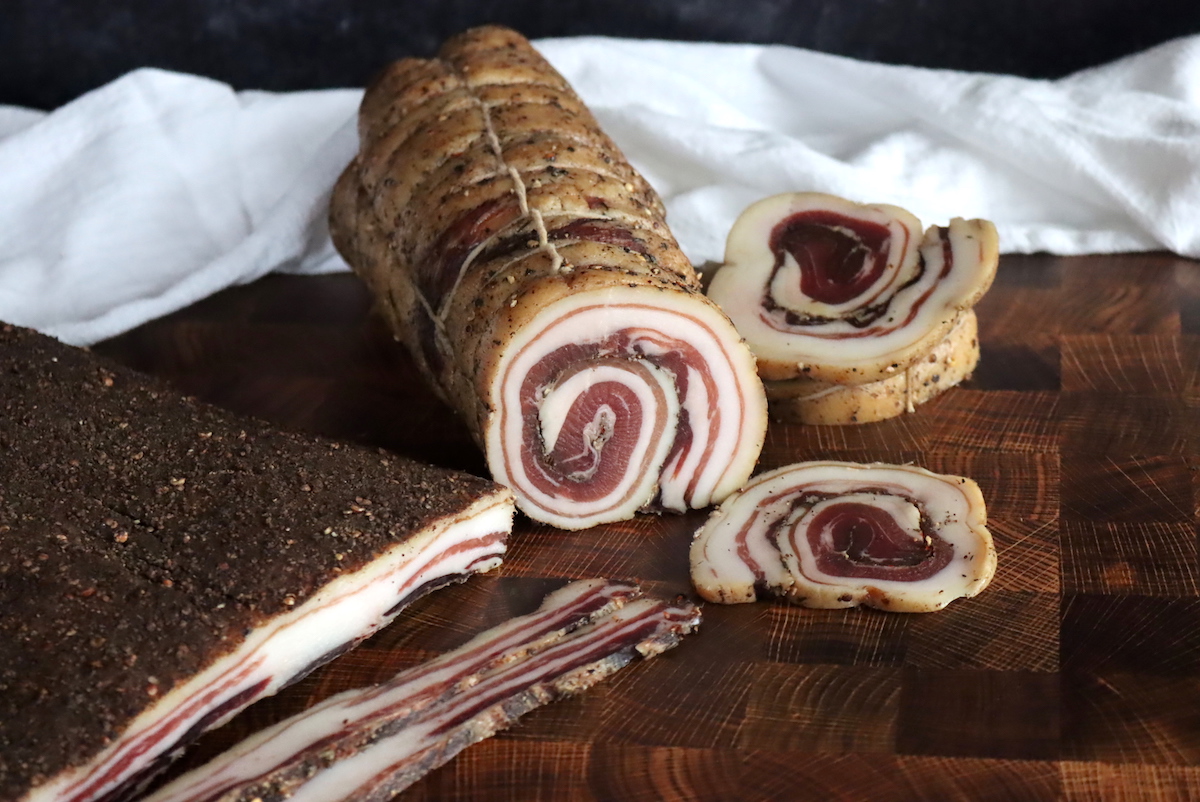
Table of Contents
- Steps for Making Pancetta
- Sourcing Pork for Homemade Pancetta
- Types of Pancetta
- Pancetta Tesa (Flat)
- Pancetta Arrotolata (Rolled)
- Pancetta Steccata (Rolled and Pressed Between Sticks)
- How to Make Pancetta
- Cure for Pancetta
- Do You Need Nitrites for Making Pancetta?
- Trussing Pancetta Arrollata
- Aging Pancetta
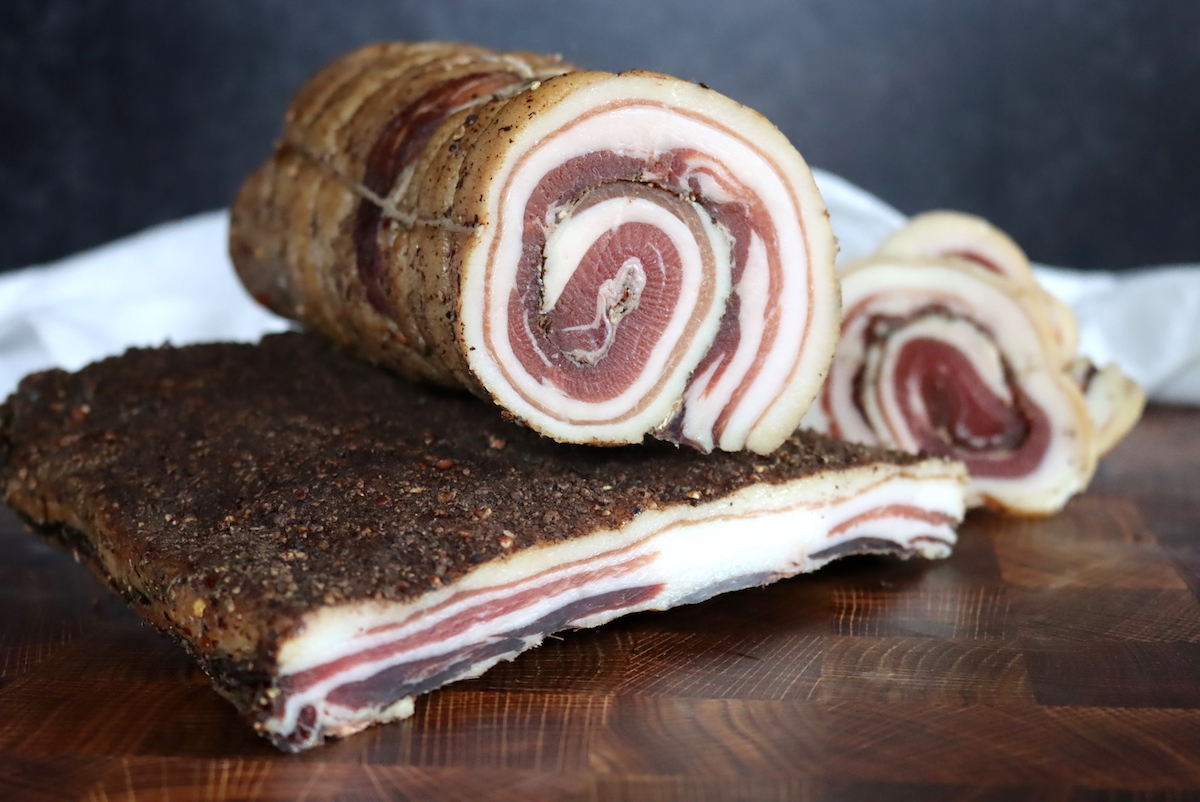
- Finished Pancetta
- Ways to Use Pancetta
- Homemade Pancetta Recipe
- Charcuterie Books
- Charcuterie Tutorials
Pancetta is often thought of as the Italian version of bacon. The cures are similar, though bacon often has quite a bit of sugar, while pancetta is often made without sugar or with minimal sugar. Bacon is usually smoked after curing, and pancetta hung to dry age for several weeks instead.
The result is delectable homemade charcuterie with an incredibly complex flavor, perfect for dicing fine and including in traditional Italian recipes. My personal favorite is Spaghetti Alla Carbonara, which I learned to make during a semester abroad in Italy. When I came home, I had the hardest time finding pancetta, so I decided to make it myself.
Believe it or not, homemade pancetta is surprisingly easy to make, even as a broke college student. Since pancetta isn’t smoked, it’s actually a lot easier for beginners to make at home (with minimal equipment).
Steps for Making Pancetta
The basic process for making pancetta is quite simple. It’s really just three steps:
- Cure the pork belly in salt in the refrigerator, flipping daily
- Rinse the Cure and coat with black pepper
- Hang to dry in a cool, relatively humid place until it’s lost 30% of its weight (around 2-3 weeks)
Of course, the details of the cure, sourcing the pork, and preparing the meat to hang can be a bit more complicated. Nonetheless, the basic process is quite simple, and now that you understand the steps, I’ll take you through in detail.
Sourcing Pork for Homemade Pancetta
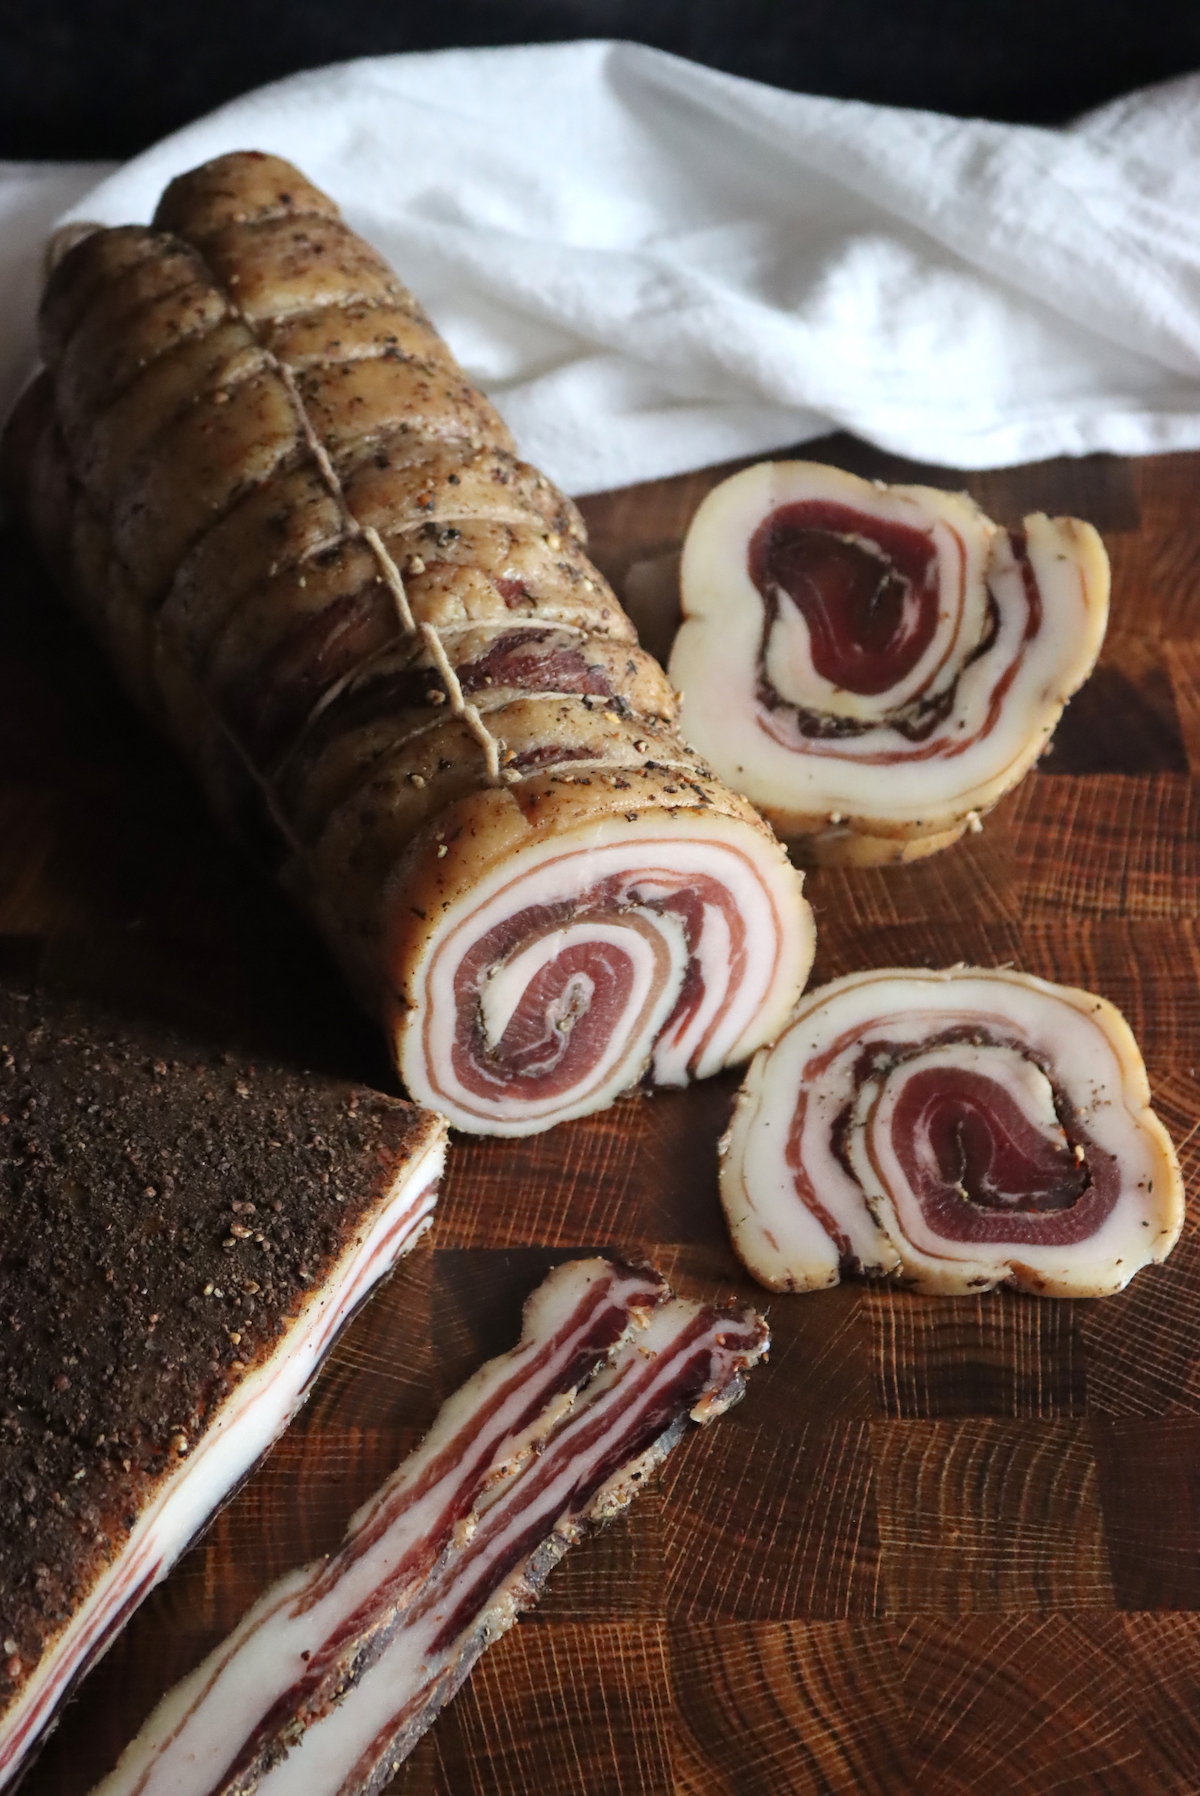
Now that we raise our own pigs, I’ve had plenty of opportunities to practice my pancetta making, but homegrown pork is by no means a requirement. It’s easy enough to make in an apartment…all you need is access to a high-quality, fresh pork belly.
Generally, pork belly is sold either in small blocks (about 1 lb) for small recipes where it’s cooked fresh, but it’s also sold as a “whole belly” to make pancetta. It can be tricky to source large pieces, and you may need to work directly with a farmer to get the cut you want. (Still, they’re often reluctant to part with the whole belly because it’s a lot more profitable to sell it as cured meat since it’ll sell for literally double the price after curing into bacon or other value-added products.)
If you can’t find a local source for sustainably raised fresh pork belly, I’d suggest ordering it direct from D’artagnan. They have a number of different options for fresh pork belly, all sustainably raised from heritage breeds, which are perfect for making pancetta.
You can choose either a boneless, skinless whole pork belly, or you can opt for bone-in and skin-on pork belly.
The skin on is actually traditional, especially for flat pancetta, but these days it’s often made with the skin off pork belly for simplicity. Either way, if it’s not boneless you’ll need to quickly strip out the rib bones in one rack, which is simple to do…and then you get bonus pork ribs to enjoy while the pancetta is curing.
Types of Pancetta
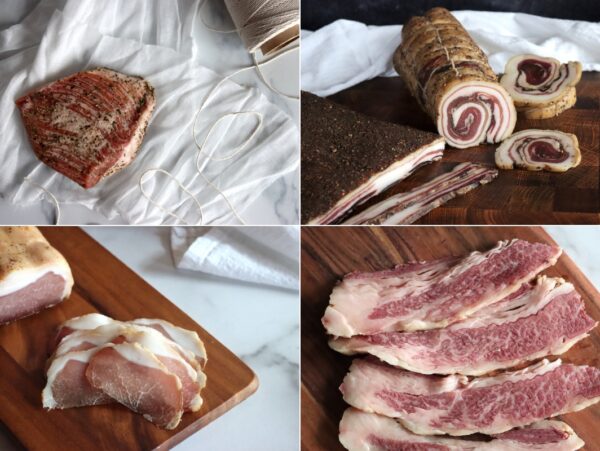
Though the cures for pancetta can vary slightly, which I’ll discuss in a moment, the types are mostly differentiated by shape. That is, the shape it’s cured in, either flat, rolled or rolled and pressed.
Pancetta Tesa (Flat)
These days, most people choose to make flat or slab pancetta, also known “Pancetta Tesa” and you can often find it sold in small squares (6 to 12 oz, or 4-6” square), cut from the whole cured pork belly. If you’ve never had pancetta, I’d recommend buying a well-made piece to try so you know what you’re aiming for, though be aware that buying it costs about 3-4 times as much as making it yourself…so if you want more than a small piece, it’s much more economical to put in the time and cure a whole pork belly.
This is by far the easiest type of pancetta to make at home, as it requires no complicated trussing with string, and you don’t technically have to use curing salt or nitrites (more on that later).
Pancetta Arrotolata (Rolled)
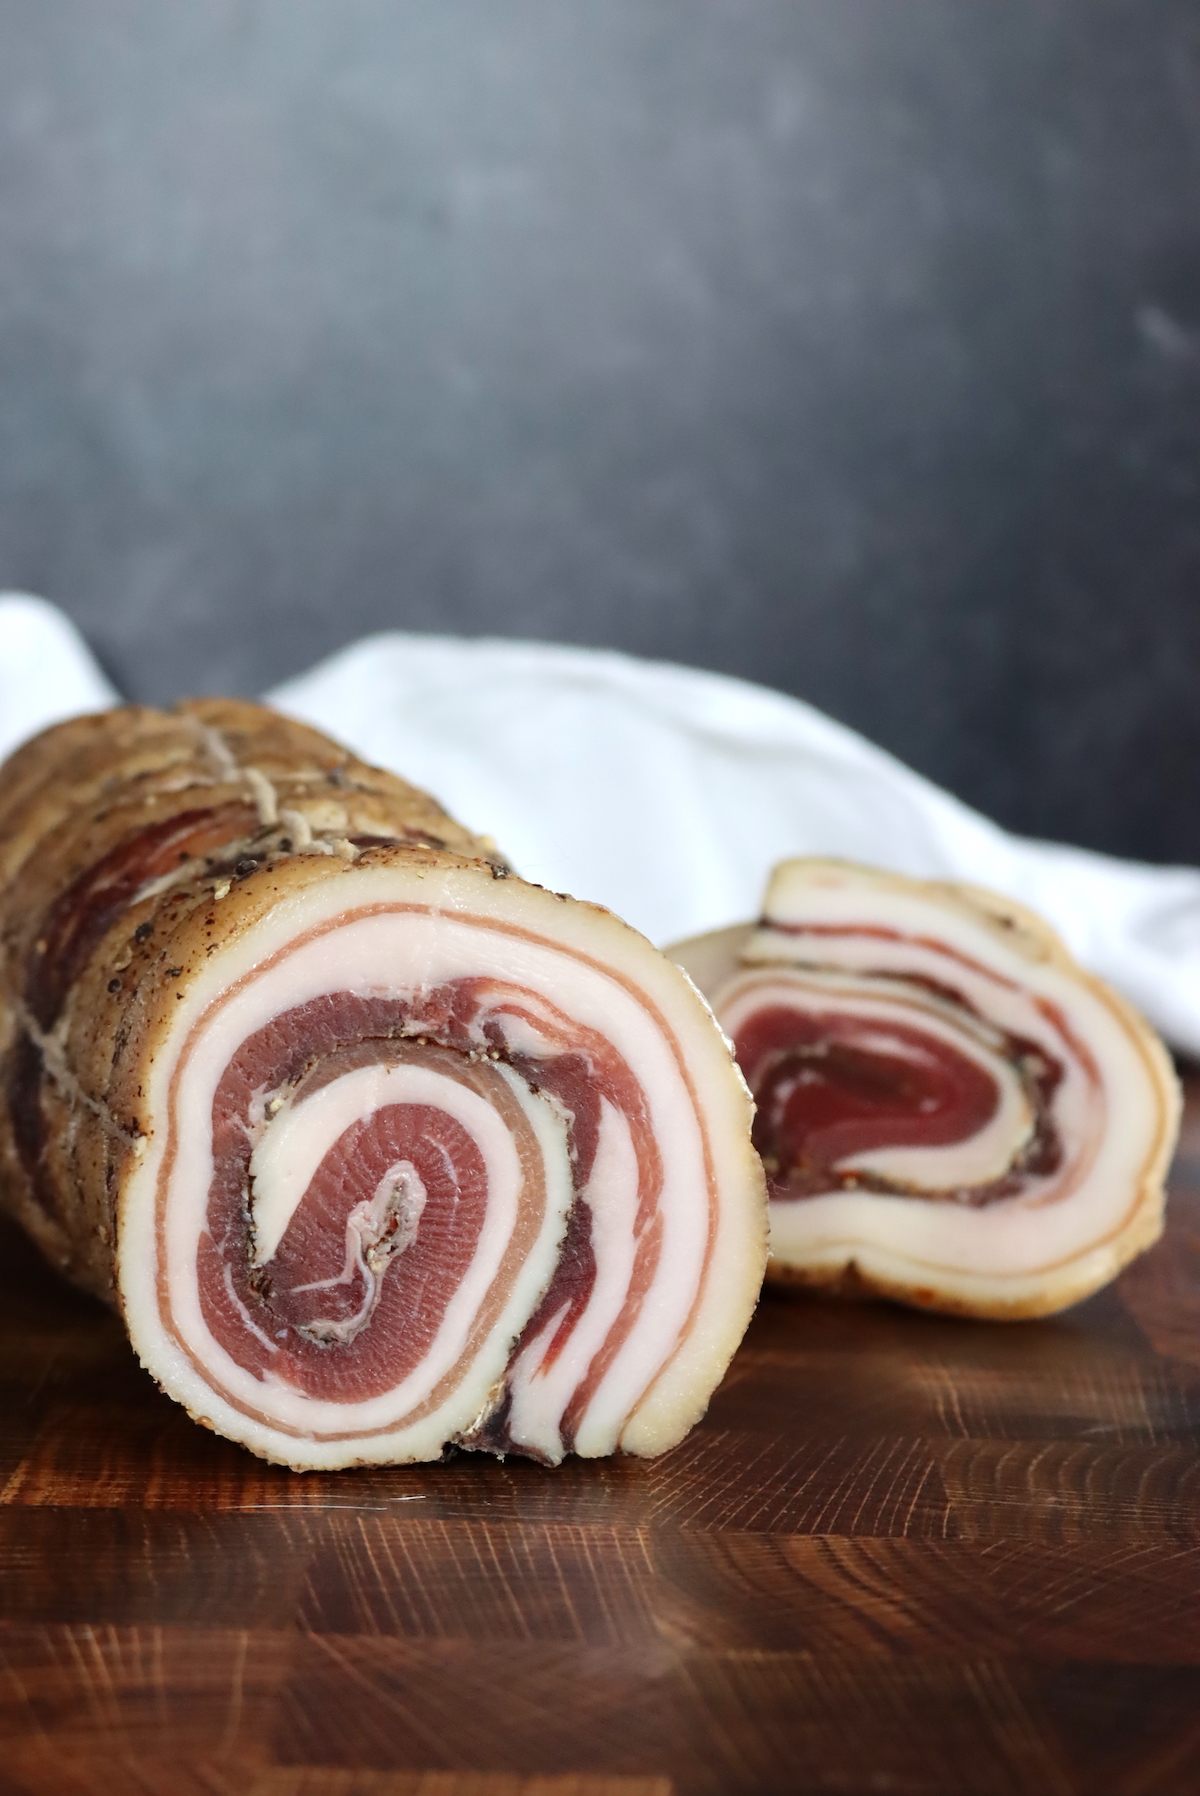
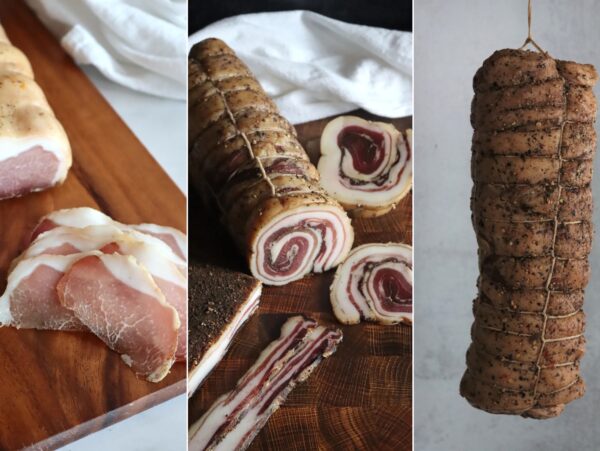
Rolled pancetta is a bit more complicated to make, and needs to cure for longer. It makes for a much more dramatic presentation, and you’ll often see imported pancetta direct from Italy sold in rolls (or sections of rolls, since a pork belly is so large).
By rolling it, the pork is able to retain moisture longer during curing. That means it can cure for an extended period without drying out, and it develops much more complex flavors. Sometimes it’s made with skin-on pork belly, and the skin is trimmed just right so that it isn’t rolled into the inside, but just covers the exterior of the meat to protect the exterior during curing.
This version is much more complicated to make, as any air pockets inside a rolled pancetta can cause spoilage. It’s very important to tightly roll it and truss it well, to make sure it’s a solid log of meat.
Rolled pancetta also absolutely requires pink salt (aka. curing salt, or nitrites) because you’re creating an anaerobic space inside the roll which could potentially result in botulism (nasty stuff) without nitrites.
Pancetta Steccata (Rolled and Pressed Between Sticks)
This pancetta variation is specific to Bologna, where whole pancettas are first rolled and then pressed between two sticks. It creates a distinctive oval shape, and it’s sort of a happy medium between arrotolata and tesa. It’s cured for slightly longer but it can still be sliced into thick strips (rather than round rolls).
Steccata isn’t usually made at home, except by die-hard charcuterie aficionados.
I’d suggest starting with flat, then after you have several successful cures, graduating to arrotolata. Odds are, unless you’re incredibly devoted to making every type of charcuterie, you’ll never encounter Steccata outside of a few parts of Italy.
How to Make Pancetta
Start with a slab of pork belly, either a whole pork belly (around 10 lbs), or trim it smaller so it’s more manageable. You could even just start with 1 or 2 pounds to cure flat for a small batch.
I’m working with two 5 lbs pieces, which are a lot easier to fit in the refrigerator. Simply trim the belly to whatever size suits your purpose (and adjust the cure ingredients accordingly). It’s best to trim the belly into a neat rectangle so that the whole piece cures evenly.
Place the meat in the dry cure (salt, spices, etc) and turn to coat. It’s often easier if you put it in a Ziploc or vacuum seal bag for this, but a non-reactive dish (like a baking pan) will work too.
Refrigerate the meat in the cure for 5 days, flipping daily, until it’s firm all the way through.
Rinse the excess cure off the outside, and coat with coarse ground black pepper (optional, but tasty).
Roll the meat (if making rolled pancetta) or leave it flat, and loosely wrap it in cheesecloth (to keep bugs/dust off).
Hang the meat to dry in a cool, relatively humid place for 2-3 weeks. Ideally, it’d be around 50 to 60 degrees F (10 to 15 C), and 60 to 75% humidity. A cool, humid basement works just fine, as does a cool back closet provided you have enough humidity.
Generally, 2 to 3 weeks is sufficient, but you’re hoping for a 30% loss in weight from the starting weight of the meat. If you had a 10 lb pork belly, it should weigh 7 pounds when fully cured.
That’s it! Just cure the meat in salt, rinse and hang to dry.
Cure for Pancetta
Once you’ve sourced the pork, the next step is deciding on a cure for pancetta. The spices are completely up to you, but there are specific requirements for the salt cure.
This basic recipe is for a 10 lb pork belly but can be reduced for smaller portions. It’s adapted from the book Salumi: The Craft of Italian Dry Curing. They used juniper berries, garlic, thyme, and bay leaves. I’m using red pepper flakes in place of the juniper since more people have that in their kitchens and it’s still traditional. Otherwise, the recipe and cure are the same.
These quantities are for a single 10 lb pork belly. Scale the recipe accordingly for smaller (or larger) amounts of meat:
- 4.8 ounces/135 grams sea salt (or at least 3% the weight of the meat)
- 2 teaspoons/12 grams pink curing salt (Instacure no. 1) * see notes
- 1/4 cup/50 grams packed brown sugar **see notes
- 1/4 cup/20 grams red pepper flakes, crushed
- 3 Tablespoons/18 grams black peppercorns, toasted and coarsely cracked
- 2 Tablespoons/10 grams garlic powder (or 8-10 fresh cloves, peeled and crushed)
- 2 Tablespoons/10 grams dried thyme leaves (or 10 sprigs fresh thyme)
- 8 bay leaves, crumbled
For aging, you’ll also need another 1/2 cup (48 grams) of cracked black pepper to coat the pork after the curing stage in the refrigerator.
If you’d like to adjust this pancetta recipe to a different weight in pork belly, it’s helpful to have the ingredients in scaled percentages of the total meat weight. I’ve created this quick table where the total weight of the pork is 100% and each of the cure ingredients is scaled as a percentage of that total.
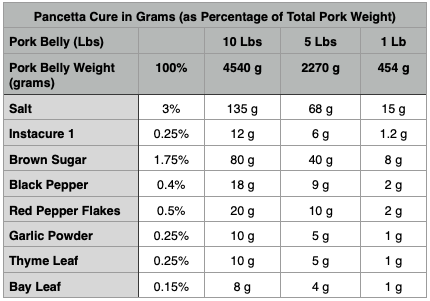
The only thing in this recipe that is absolutely mandatory is the salt, and you MUST have at least 3% of the weight of the meat in salt to properly cure the meat. The sugar is optional, and you can make sugar-free pancetta without compromising safety. However, the sugar helps balance the flavor and natural saltiness, and I’d recommend it unless you absolutely cannot have sugar in your diet (keto, diabetic, etc).
All the spices are optional, though recommended. Feel free to adjust proportions as you see fit, but I’d recommend keeping the black pepper as it really adds a lovely flavor.
The curing salt is technically optional if you are making a flat (or slab style) pancetta, but it is MANDATORY if you are making a rolled style pancetta. I’ll discuss why in the next section.
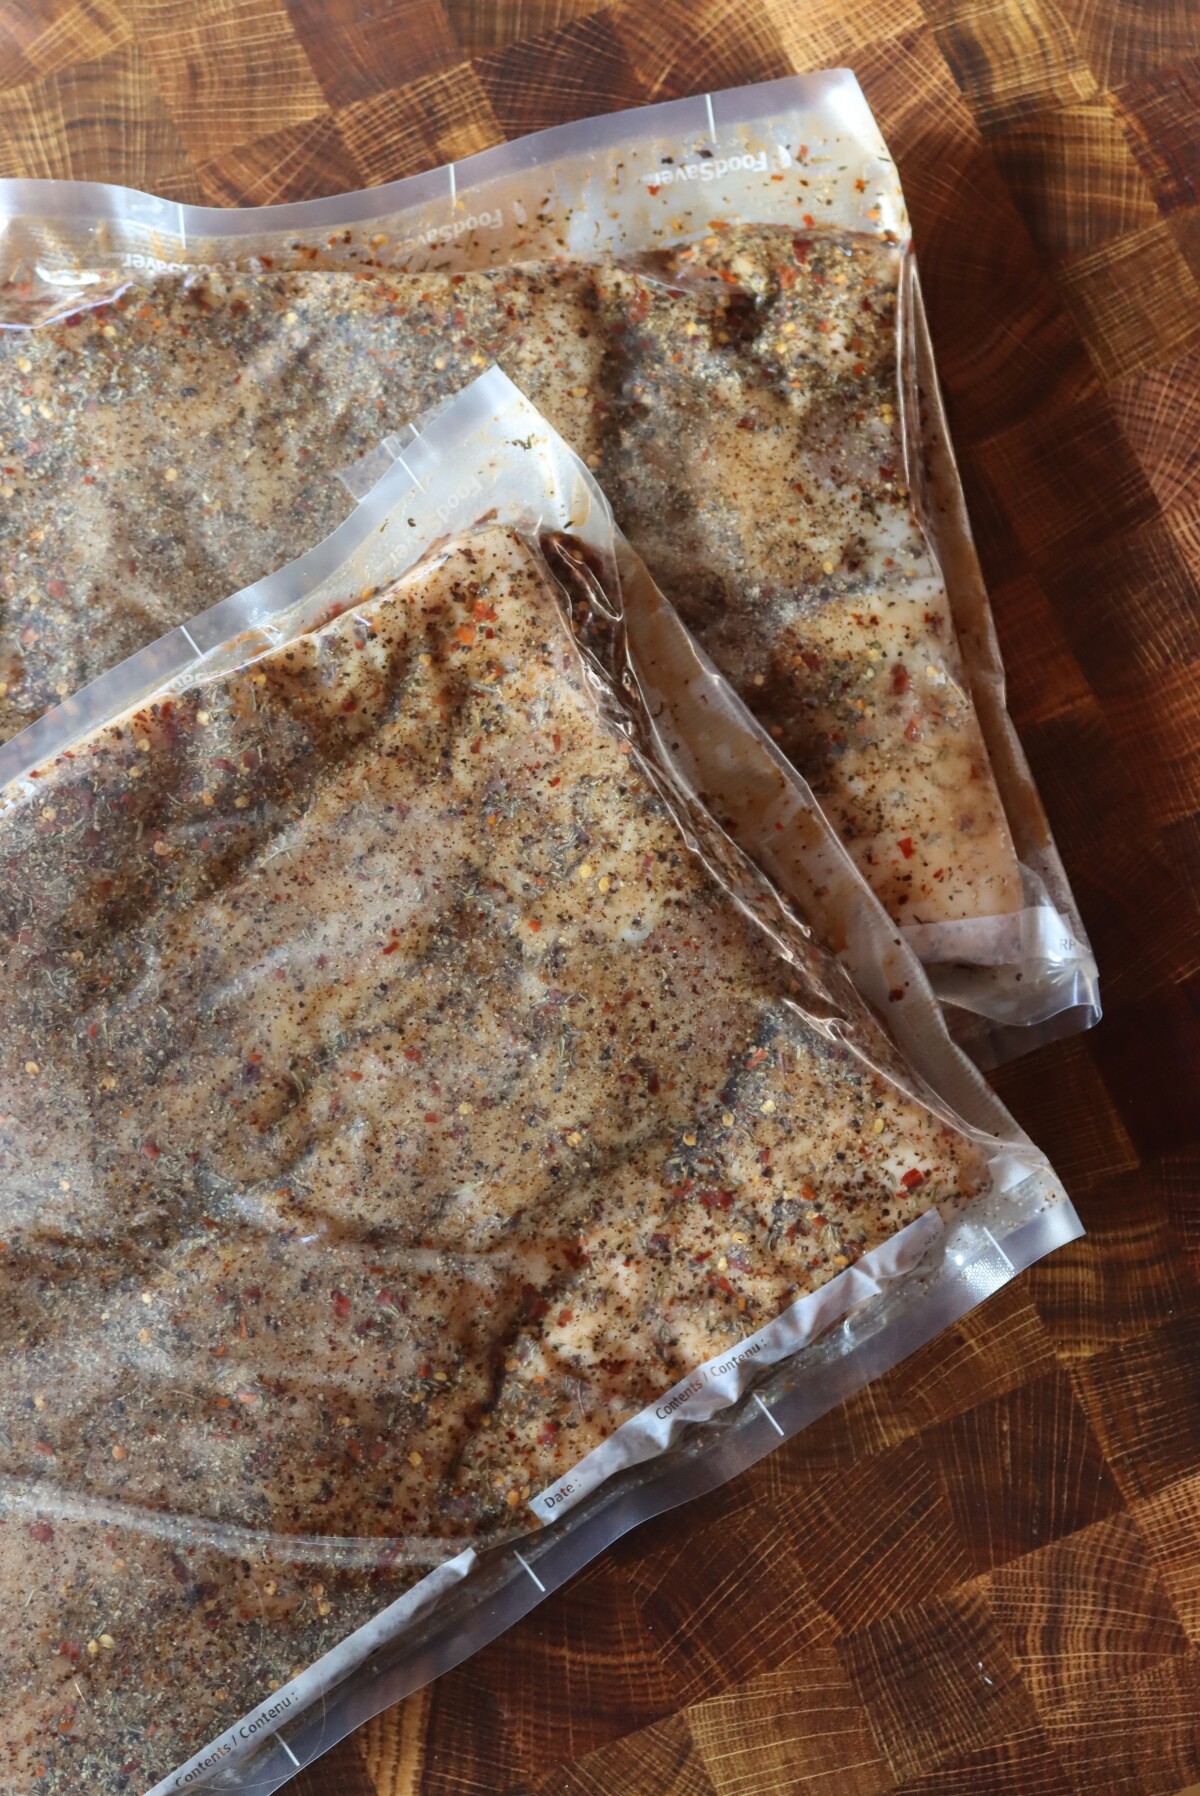
Mix up the cure and rub it into both sides of the pork belly. I’ve sealed the meat and cure in food saver vacuum seal bags because it keeps things tidy in the fridge, but Ziploc bags or simply a deep baking dish that can accommodate the meat slab flat in one layer will work too.
Place the meat/cure into the refrigerator for 5 days, turning daily to ensure the cure penetrates both sides evenly.
Do You Need Nitrites for Making Pancetta?
Most people choose to add nitrites to homemade pancetta, largely because nitrites aren’t purely for food safety.
Beyond fending off spoilage, nitrites add a distinctive, pleasantly sharp taste to cured meats, and they also help cured meats retain an attractive pink color.
Sometimes, nitrites are optional in charcuterie, and other times, they’re mandatory. Nitrites prevent botulism poisoning, an incredibly rare, but serious and potentially fatal health issue. It’s caused when botulism spores are both present, and allowed to proliferate in a specific environment, namely:
- warm (above 40 degrees F)
- low acid (pH above 4.6)
- anaerobic environment (without oxygen)
Botulism generally comes from the soil and they’re not present inside intact muscles. When working with whole muscle cures, nitrites are optional. (For example, traditional Prosciutto made from a whole hog leg is only made with salt, no nitrites…even though it’s going to be cured for over a year since it’s a whole muscle charcuterie recipe.)
Once the outside of a piece of meat is moved to a low oxygen environment, then you’ll almost always need nitrites for safety. That’s the case when working with dry-cured sausages, like salami, as well as rolled pancetta. In both cases, the outside is turned inward (either by grinding or by rolling and trussing) which means you’ve taken a surface that could have botulism spores on it and placed it in an anaerobic environment.
There is a lot more information on using nitrites and curing salts in the book Salumi: The Craft of Italian Dry Curing, which is by far the best resource I’ve found on home charcuterie. It really covers the ins and outs of food safety related to home-cured meats, and I’d highly recommend it if you’re at all interested in making charcuterie. (If you’ve made it this far, you should have a copy on your shelf.)
Botulism is rare but potentially fatal, so it’s not something to play around with. I’d always recommend adding nitrites to homemade charcuterie when you’re a beginner, especially aged charcuterie that’s hung for any period of time. It’s just an extra piece of insurance.
If you’re dead set on making pancetta without nitrites, be sure to only make flat or slab pancetta, where nitrites are usually included, but technically optional. For rolled pancetta, you must use nitrites, it is not optional.
There are a number of types of nitrites for home charcuterie, but for this recipe, you’ll want InstaCure no. 1, also known as sodium nitrite, DC Curing Salt, Prague Powder no 1, or simply pink salt or curing salt. It contains 6.25% sodium nitrite and 93.75% salt, and it’s usually added at a rate of 1 teaspoon (6 grams) for every 5 lbs of meat (2 1/4 kg).
(Note that pink salt is colored pink for safety, so you don’t accidentally use it in place of salt. Do not use more than the recommended amount! Be aware that though it’s called “pink salt,” it’s very different from pink Himalayan salt, which does not contain nitrates.)
Preparing Pancetta for Aging
At this point, after the 5-day cure in the refrigerator, you could simply cook and eat the pancetta uncured. It’ll be a rich sweet/salty cured meat, but it won’t have the depth of flavor of true pancetta.
To continue the process, rinse off the excess cure from the outside of the meat and then pat it dry. The meat should be firm to the touch throughout.
Apply 1/2 cup (48 grams) of cracked black pepper evenly over the surface of the cured (and rinsed) pork belly.
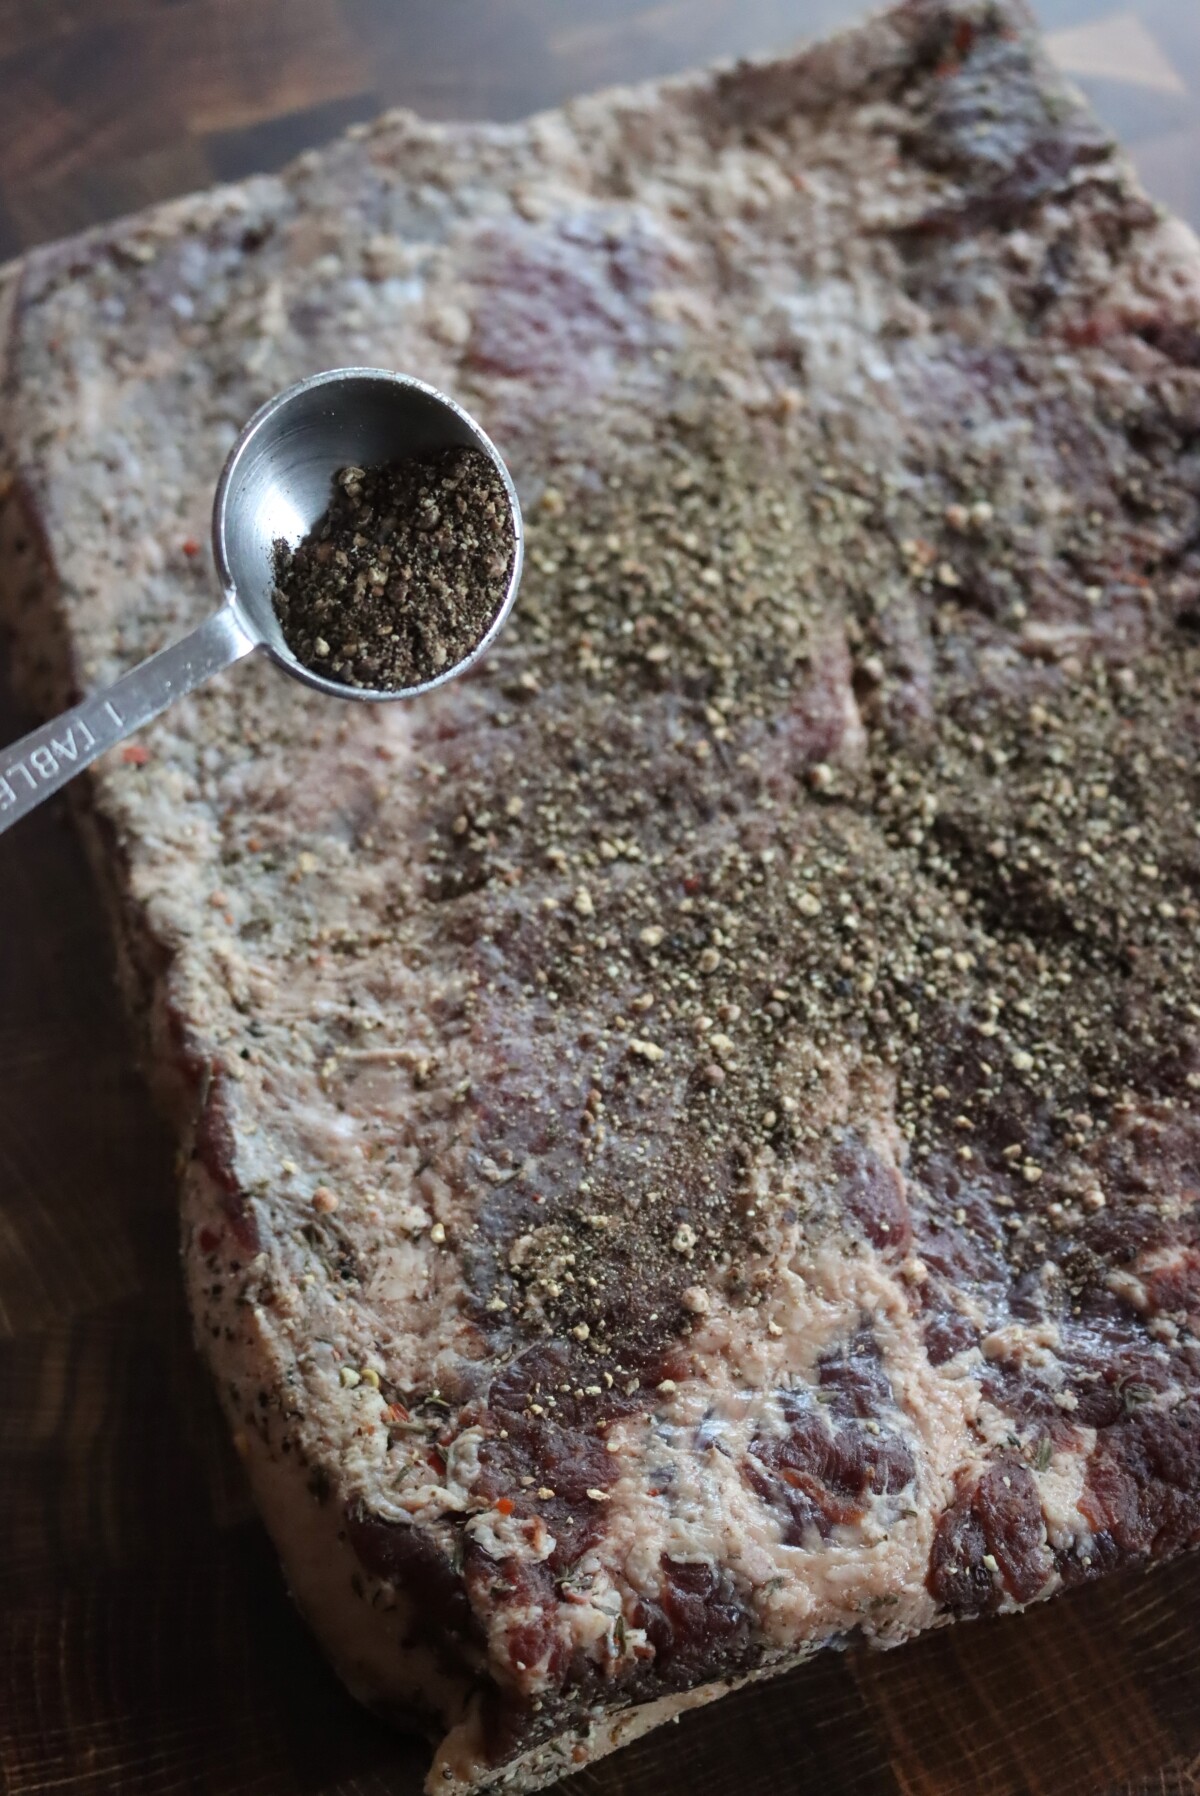
Once you’ve coated the cured meat in pepper, you have a choice of leaving the pancetta flat for pancetta tesa, or rolling it. Reminder: you can only roll the pancetta if you used the appropriate quantity of Instacure no. 1 during curing (that’s 1 teaspoon or 6 grams for every 5 lbs meat).
To hang flat pancetta for aging, you can use meat hooks, or just poke a hole through two top corners and tie in a loop of butchers twine. Wrap it loosely in cheesecloth to keep dust/bugs off of the meat and then hang it to age.
Trussing Pancetta Arrollata
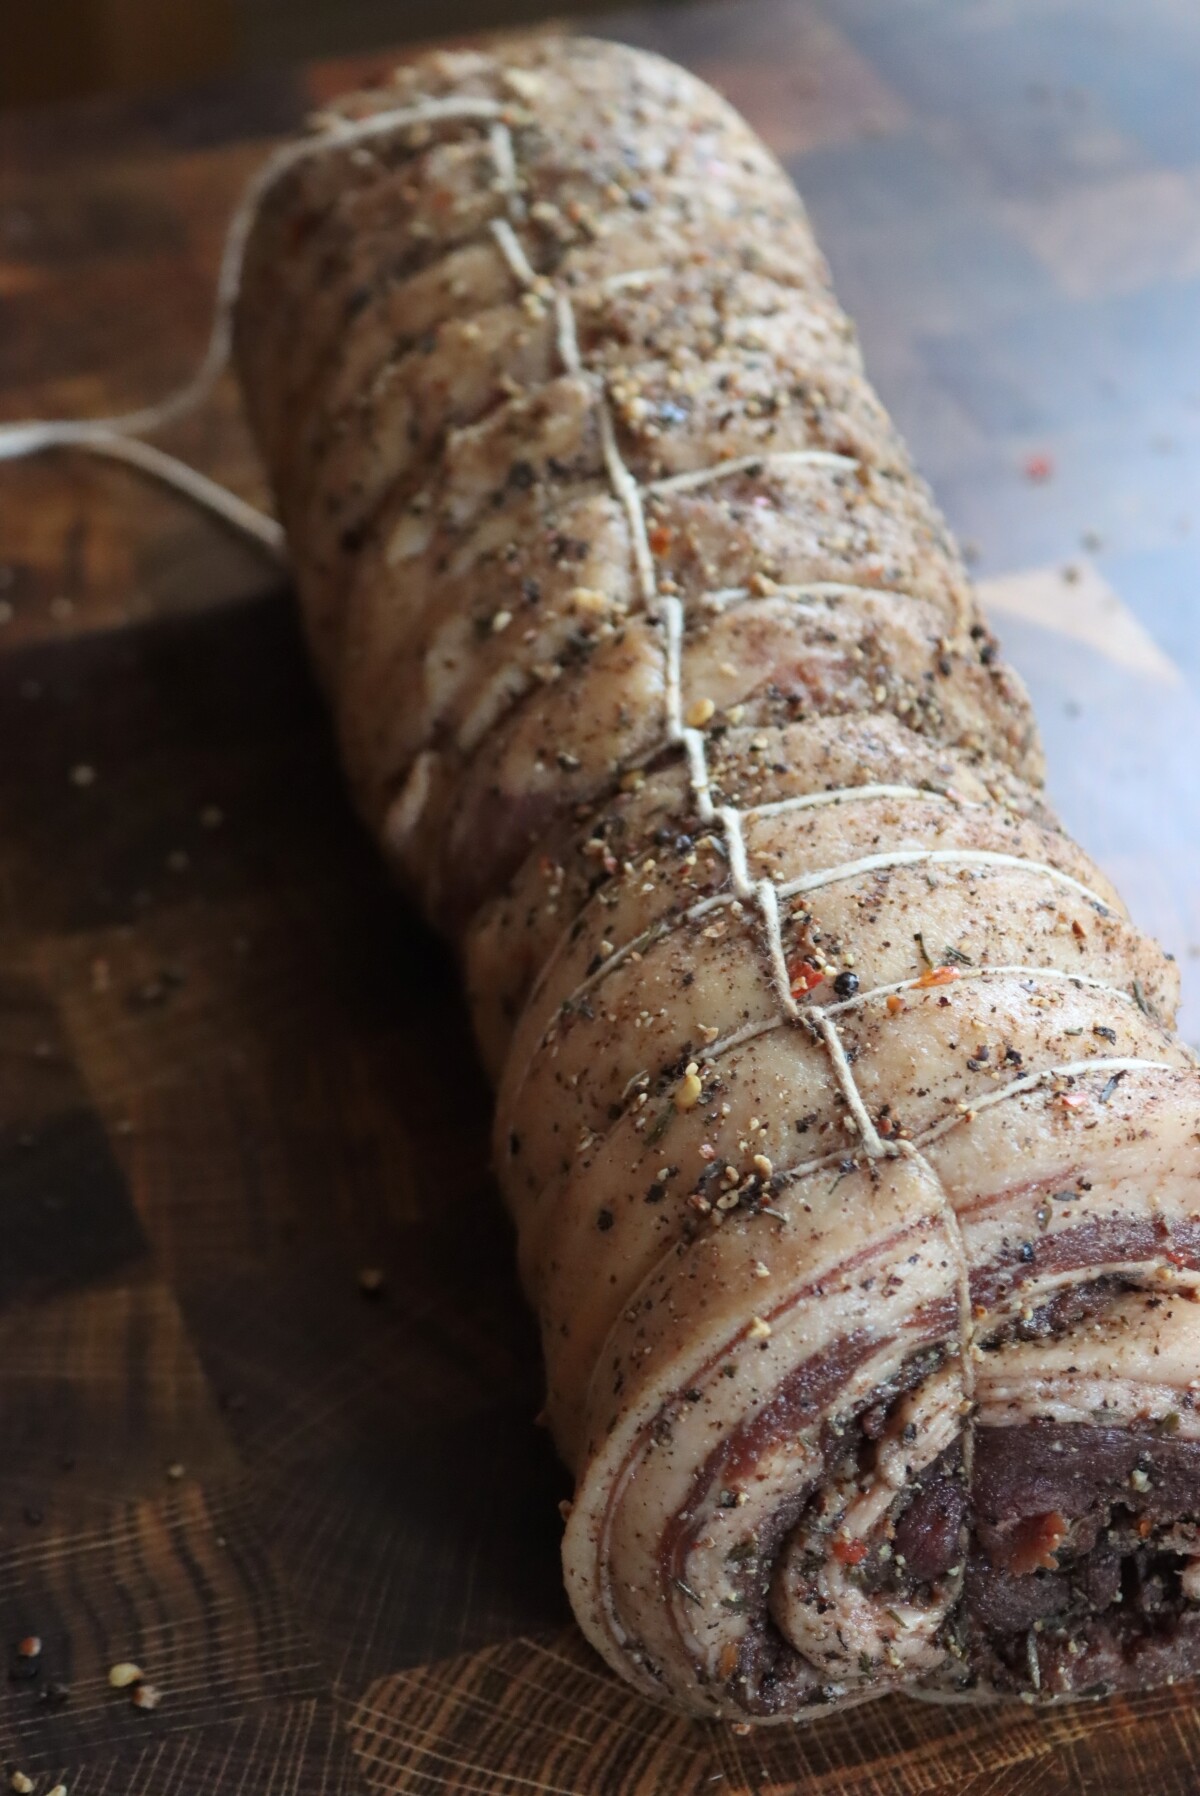
If you’d like to make rolled pancetta, start by rolling the rectangle of pork belly as tightly as you can. This is important, as any remaining air pockets can lead to spoilage.
Once it’s rolled tightly, tie a piece of butchers twine around one end to hold it there temporarily, and then flip it around to start the trussing on the other end.
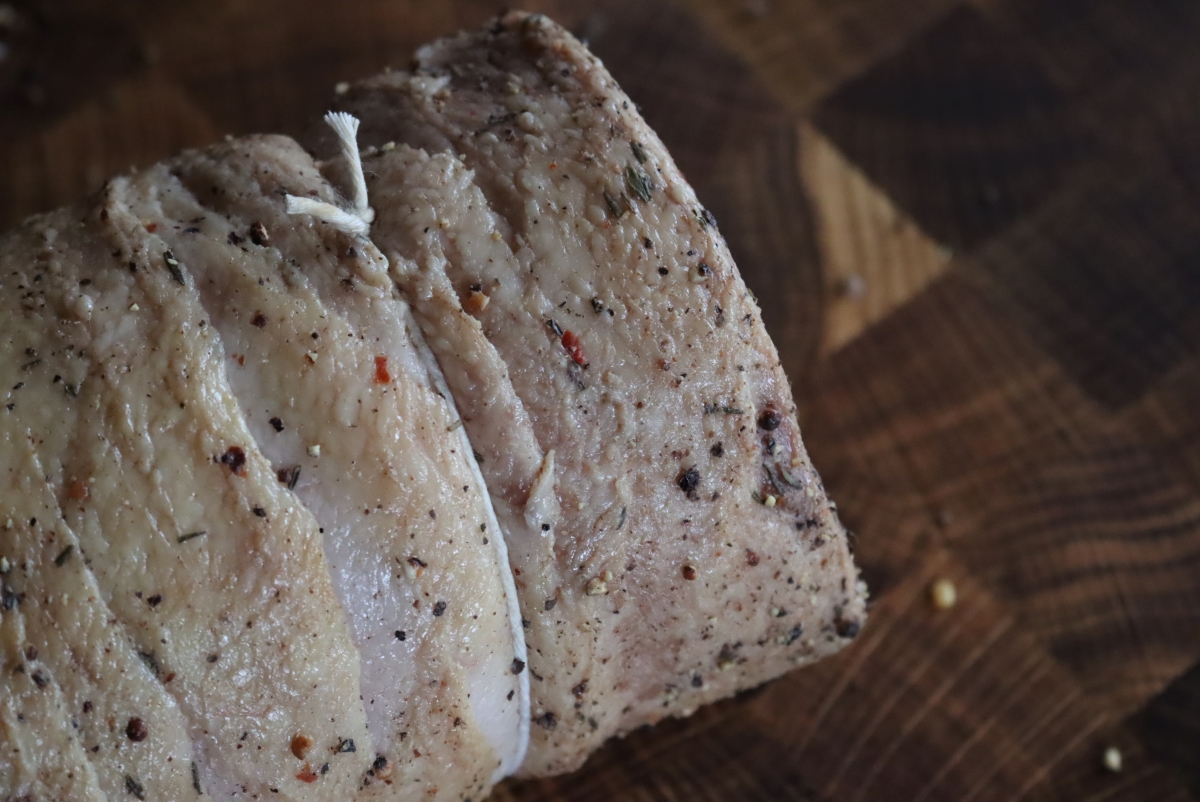
You’ll be doing a continuous lacing with butchers twine from the other side, and though it looks complicated, it’s actually not that bad once you get the steps.
I’ve found that verbal descriptions of the process don’t really get the nuance necessary to fully explain what’s going on. This video shows how to truss a rolled pancetta in detail, and it’s what I used to truss mine.
Start at the far from your place holder knot, and work back towards the initial tie until you’ve fully trussed the entire roll tightly.
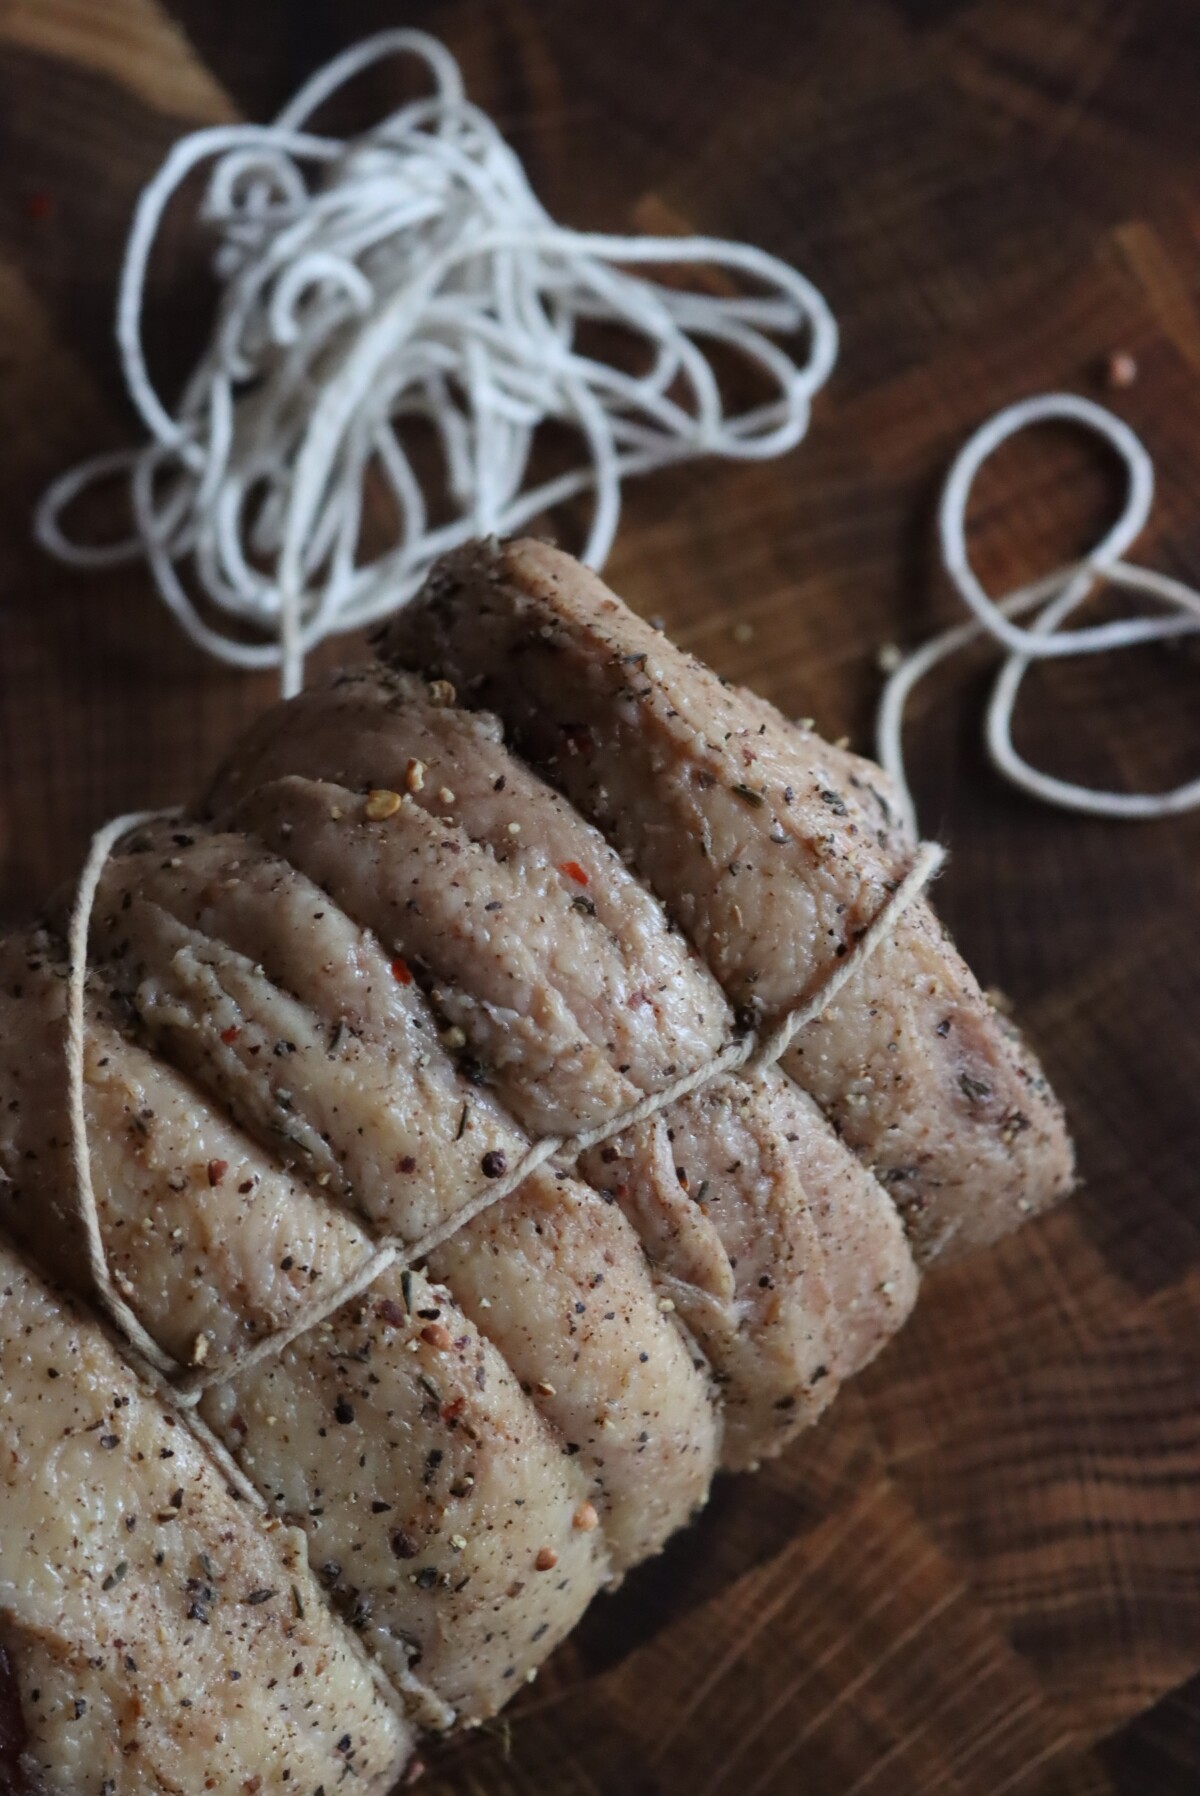
Once you’ve fully trussed the pancetta, you can loop the rope over the “bottom” end and bring it back around, lacing it up the second side so that it’s nicely supported at the bottom.
That’ll leave you two loose ends at the top to hang the pancetta. The entire process is in the video, and shows that extra lacing and making the extra loose end to hang the pancetta for aging.
Aging Pancetta
The final step to making pancetta is aging, which is where it loses moisture to concentrate the flavors, but also where it becomes tender and develops the characteristic “cured” taste.
Ideally, it’s around 50 to 60 degrees F (10 to 15 C), and 60 to 75% humidity. A cool, humid basement works just fine, as does a cool back closet provided you have enough humidity. My basement is the perfect aging room, as it holds that environment year-round.
Hang the pancetta for about 2-3 weeks, until it’s lost around 30% of its original weight. If you started with a 10 lb piece of pork belly, the finished pancetta should weigh 7 pounds.
In more humid conditions, it may take more time to dry to a 30% weight loss, and that’s perfectly fine. In dryer conditions, you may experience “case hardening” where the pancetta drys faster on the outside than in the center. If you don’t have quite enough humidity, opt for flat pancetta in smaller pieces so that it can dry cure more evenly from the outside in.
With reasonable humidity, however, a rolled pancetta will cure slowly over an extended period and develop wonderfully complex flavors.
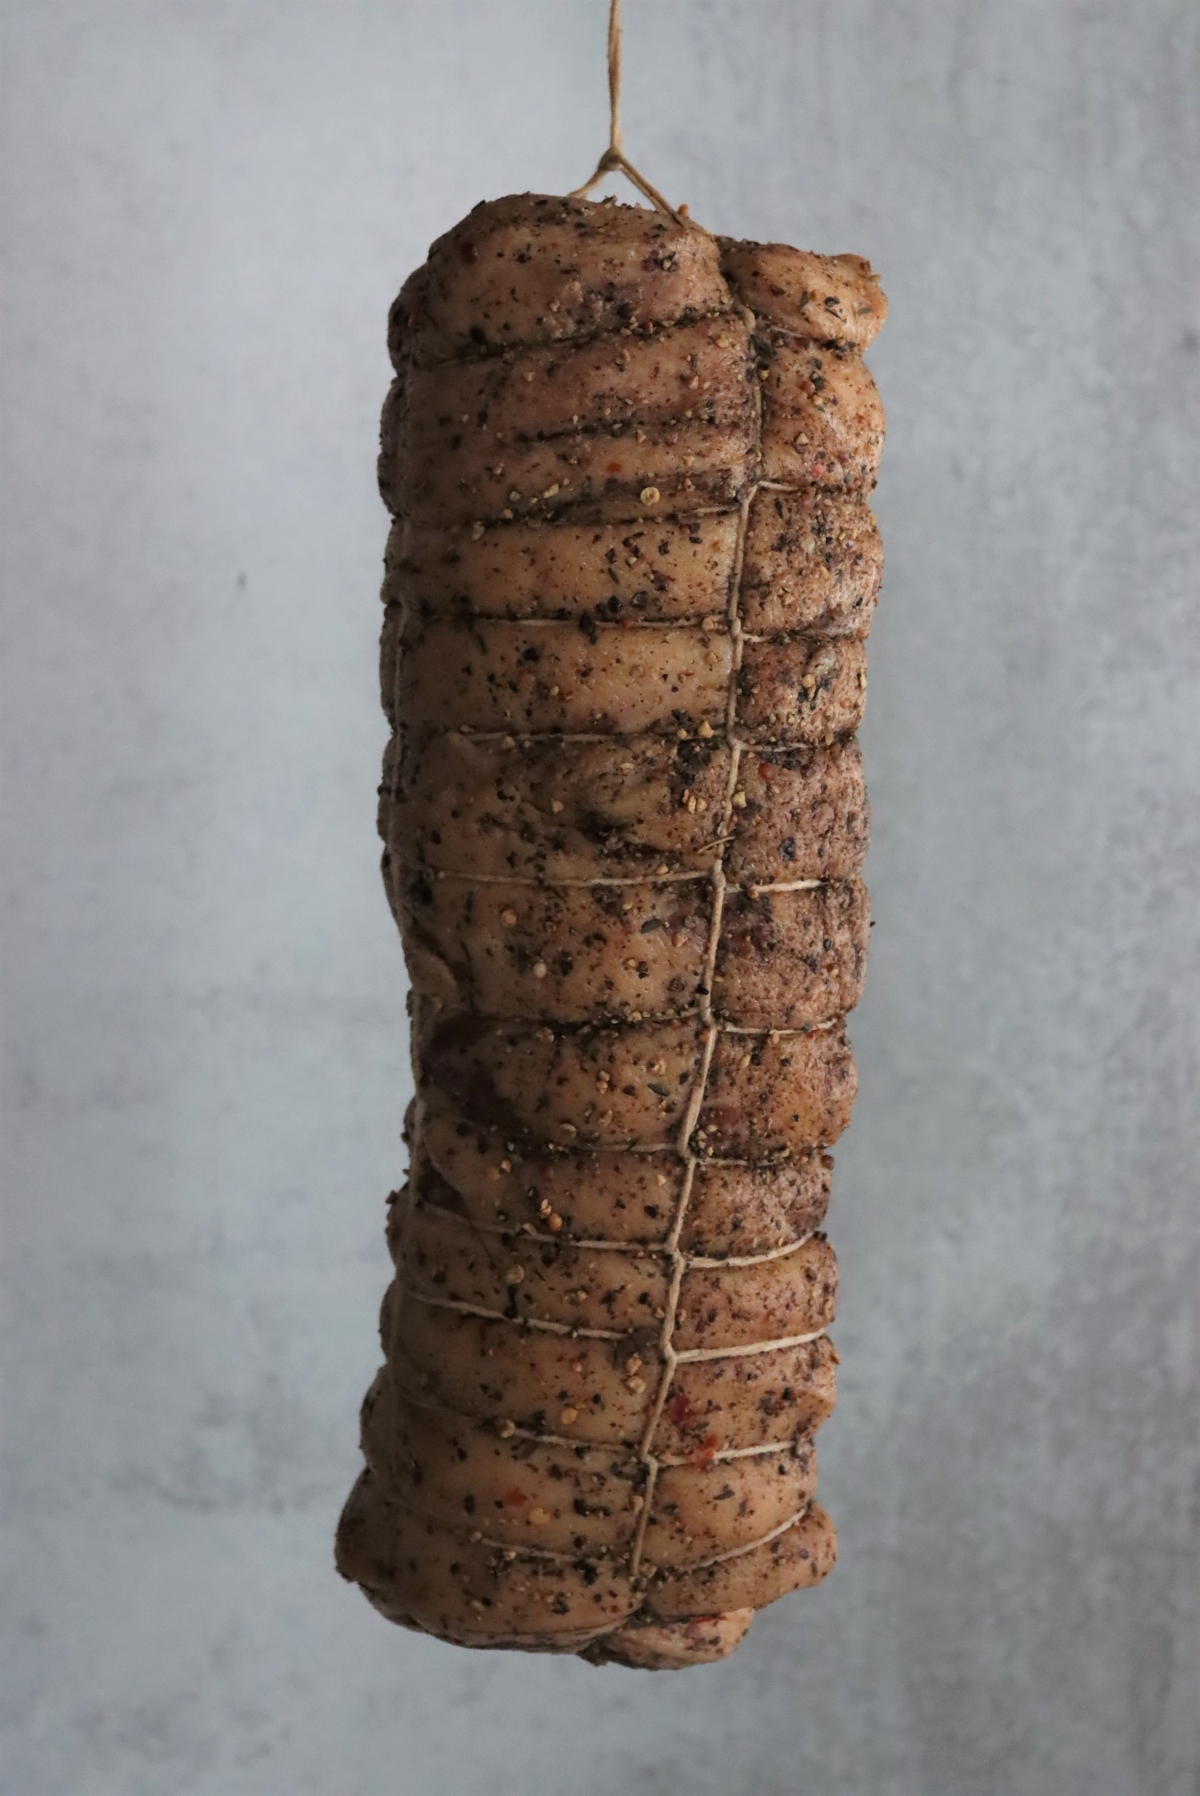
You can simply hang the meat as it is, uncovered if you’d like. It’ll allow for good air circulation, and works well if your aging space is good and humid.
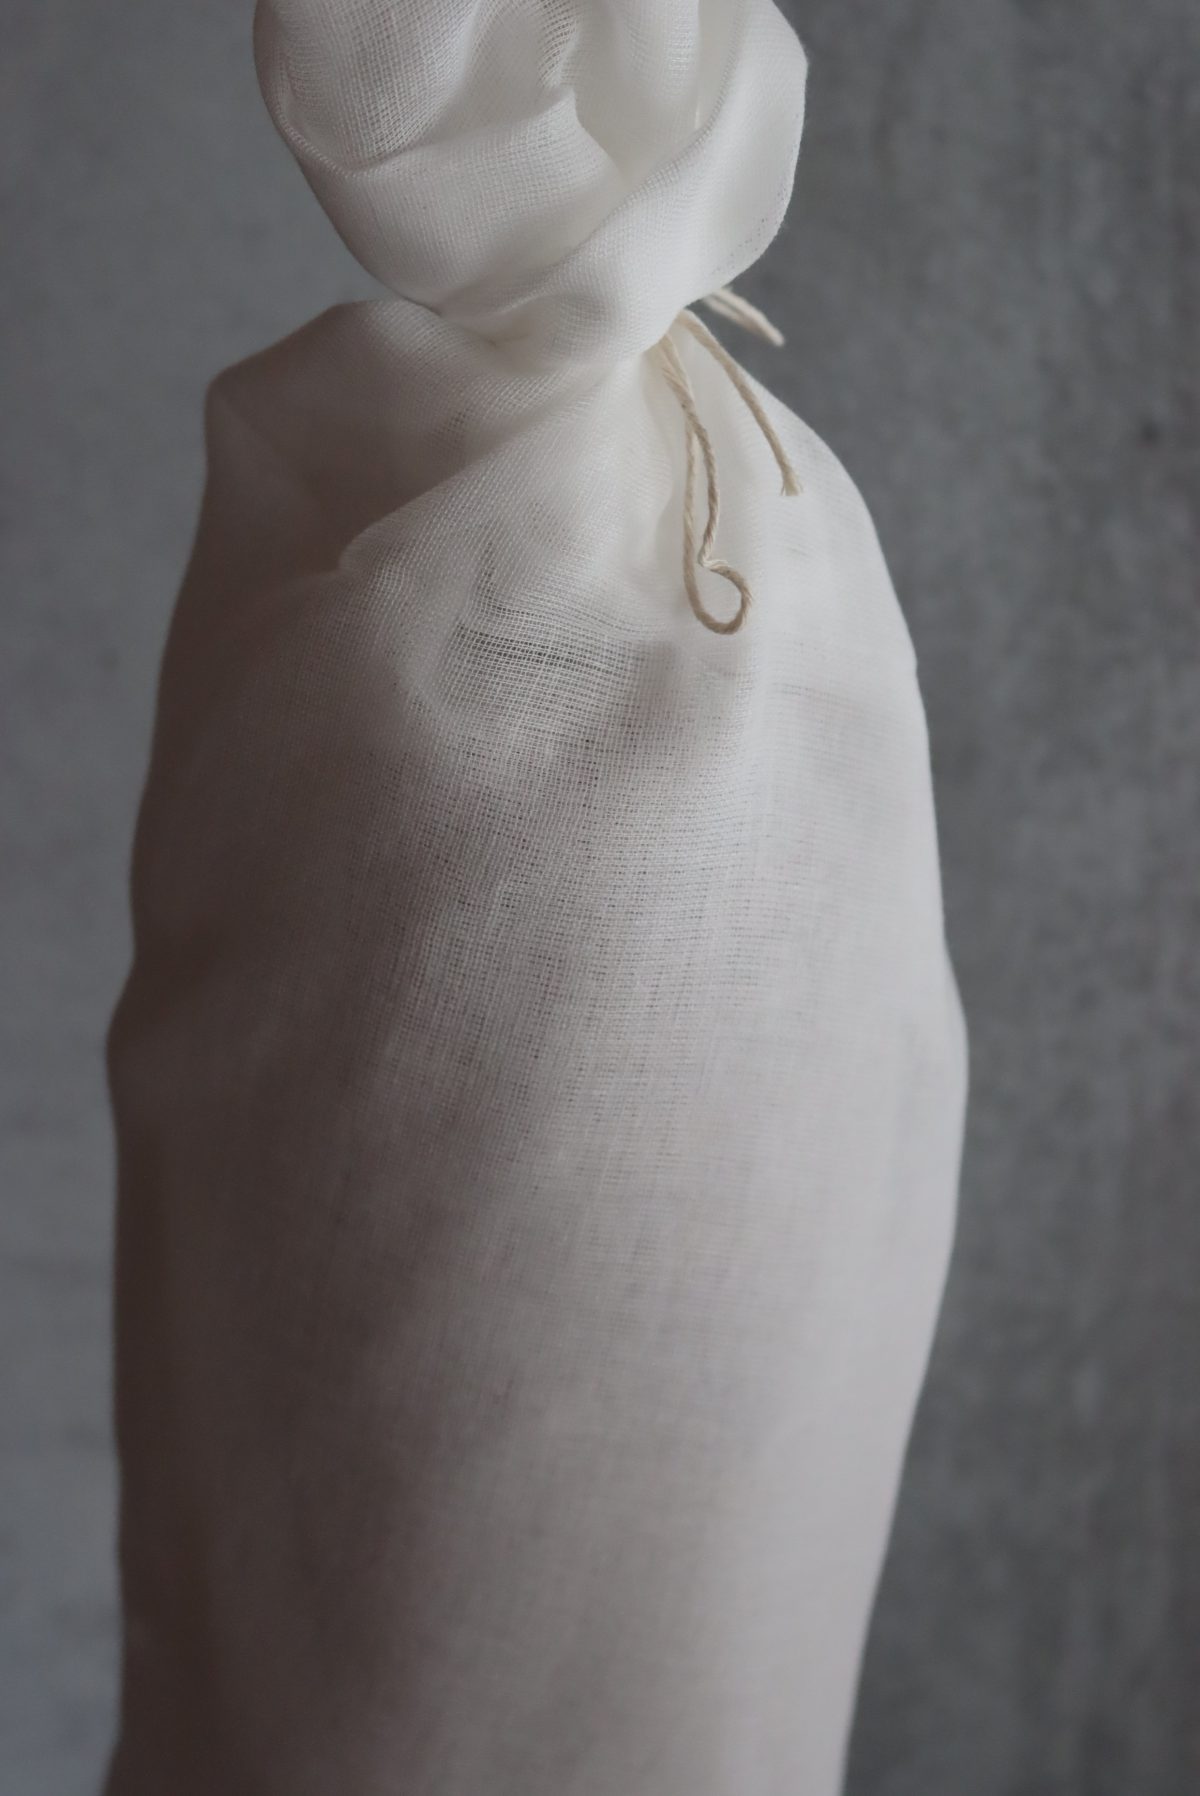
For dryer aging rooms, and for areas where you’re concerned about flies or dust, it’s helpful to wrap the pancetta. This helps create a slightly more humid environment right around the meat to slow weight loss.
Wrap the meat loosely in cheesecloth, trying to create a “balloon” around the meat so that the cheesecloth touches the meat as little as possible.
If it was wrapped in cheesecloth, remove that wrapping to check on the pancetta periodically throughout the curing process. There shouldn’t be any surface mold in a proper aging environment, but it’s not uncommon to have some small amounts of surface mold develop. It’s not a big deal if caught early, just wipe the surface with a clean cloth dipped in vinegar to remove the mold.
As a general rule, white mold is totally fine, green mold is problematic and black mold is dangerous. Remove white mold, but don’t worry if there’s quite a bit. Green mold needs to be cleaned with vinegar as soon as it develops, but if caught early, the meat can still be saved.
Black mold is rare but means you need to toss the meat and start over.
Finished Pancetta
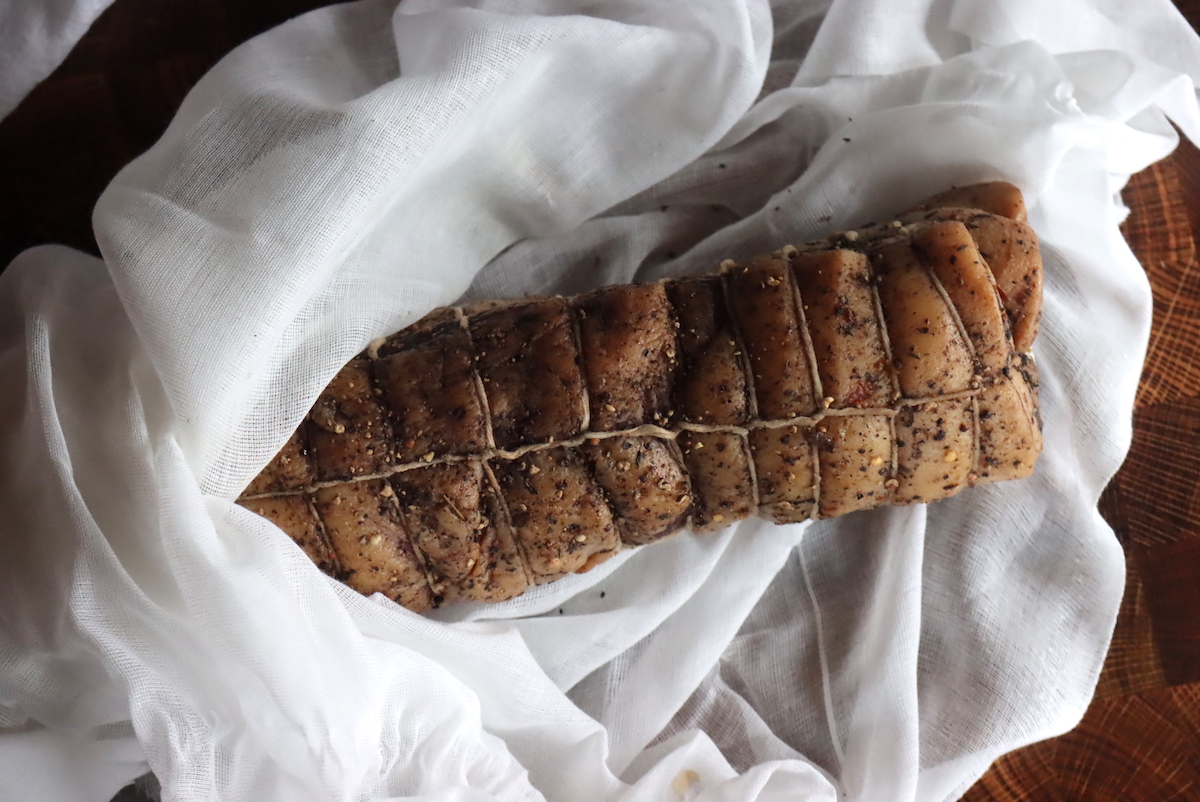
Once your pancetta has lost 30% of its original weight, it’s time for the big reveal.
At this point, it’s going to look a lot like it did when aging began, but obviously, dryer and smaller.
Storing Finished Pancetta
Once the pancetta has fully cured, it’s important to wrap it and refrigerate (or freeze) so that it doesn’t continue curing and drying. If it drys out too much, it’ll be too hard to slice and you’ll only be able to grate it finely with a Microplane (like a well-aged parmesan). It’s still tasty, but kind of a shame.
Slice off what you intend to use in the next few weeks and place that in the refrigerator, wrapped tightly. The rest can be frozen for up to a year if well wrapped.
The same is true regardless of the type of pancetta you’ve made, be it flat or rolled.
Ways to Use Pancetta
First and foremost, it’s important to note that pancetta is traditionally cooked. Unlike long-aged prosciutto which is sliced thin and eaten raw, pancetta is meant to be diced and crisped in a frying pan like bacon.
It’s often added to pasta dishes, or fried quickly before adding richness to soups. Here are some ideas to get you cooking:
- Risi e Bisi (Italian Rice and Peas) ~ Bon Appetit
- Pasta Bolognese ~ BBC Food
- Greens with Braised Pancetta and Garlic ~ Bon Appetit
- Pasta with Mushrooms and Pancetta ~ Serious Eats
Homemade Pancetta
Ingredients
- 10 lbs 4.5 kg Pork Belly, with or without skin
Pancetta Cure
- 4.8 ounces/135 grams sea salt, or at least 3% the weight of the meat
- 2 teaspoons/12 grams pink curing salt, Instacure no. 1 * see notes
- 1/4 cup/50 grams packed brown sugar **see notes
- 1/4 cup/20 grams red pepper flakes, crushed
- 3 Tablespoons/18 grams black peppercorns, toasted and coarsely cracked
- 2 Tablespoons/10 grams garlic powder, or 8-10 fresh cloves, peeled and crushed
- 2 Tablespoons/10 grams dried thyme leaves, or 10 sprigs fresh thyme
- 8 bay leaves, crumbled
For Aging
- 1/2 cup 48 grams cracked black pepper
Instructions
- Prepare the pork belly by removing the rib bones (if still attached), and trimming it to square. The skin can be intact or removed, depending on your preference. The starting weight for this recipe should include 10 lbs prepared pork belly, ready to go into the cure. If you have more or less, adjust the quantity of cure accordingly. Be sure to use at least 3% salt, calculating 3% of the weight of the pork belly.
- Combine all the cure ingredients in a non-reactive container large enough to hold the belly flat (or in a plastic Ziploc bag or vacuum sealer bag).
- Add the belly, and rub the cure into all sides of the meat.
- Refrigerate for 5 days, flipping each day and ensuring that all sides remain evenly coated in cure.
- Remove the belly from the cure and rinse the excess cure off the meat in cool, running water. Pat dry.
- Cover the meat on all sides with coarsely ground black pepper. (Use roughly 1/2 cup total or as much as you need to get the job done.)
- If rolling, roll according to the instructions in the article, using a continuous tie of butcher twine. Roll tightly to make sure all air is removed from the roll before hanging.
- Hang the belly to dry for 2-3 weeks. It should be kept at 50 to 60 degrees F (10-15 C) and 60-75% relative humidity.
- After 2-3 weeks, weigh the meat. It should have lost 30% of its original weight. If not, continue the drying a bit longer.
- Once done, tightly wrap the pancetta and store it in the refrigerator for short-term storage (or freeze for up to a year, tightly wrapped). Do not leave it hanging, it will continue to dry further.
Notes
Charcuterie Books
If you’re interested in reading more about home charcuterie, I’d strongly recommend investing in a few quality manuals. These are incredibly helpful when you want to troubleshoot a recipe, or when you just want to understand why each step is important.
For beginner’s, I’d recommend:
- Salumi: The Craft of Italian Dry Curing by Michael Ruhlman and Bryan Polcyn ~ My recipe for pancetta is adapted from this book. It really covers everything you need to know about preserving pork, and takes you nose to tail through preserving a whole pig with charcuterie.
- Charcuterie: The Craft of Salting, Smoking and Curing by Michael Ruhlman and Bryan Polcyn ~ While the Salumi book covers Italian charcuterie with just pork, this manual covers more styles and meat types. It also includes things like duck confit and charcuterie with other animals.
- The River Cottage Curing and Smoking Handbook ~ A great beginners guide full of simple, easy-to-follow recipes.

Charcuterie Tutorials
Looking for more salt cures to try at home?
- Salt Cured Egg Yolks
- Salt Cured Duck Breast
- Guanciale (Cured Pork Jowl)
- How to Make Gravlax (Salt Cured Salmon)



Can you explain the difference between trying to age pancetta for cooking versus aging pancetta to be eaten raw? It seems that both are looking for 30% weight loss. Is it the difference in how many months you need to draw out that process for, that allows it to be able to be eaten raw? Of course I am aware of the using of instacure#2 instead of instacure#1.
Pancetta is traditionally cooked. Prosciutto is what is typically eaten raw and it is long-aged.
Hey so I followed your recipe for the cure, sorry let me correct myself, I thought I followed your cure. I ended up using the amount of cure ingredients that you had listed for 10 lbs on a 5 lb piece. Aside from now being very salty do I need to worry about the extra nitrates? Should I let it sit in the fridge for less time?
You’re not supposed to use more than the recommended amount but I’m not sure how to fix it if you do. You could contact the manufacturer of the curing salt and ask for their recommendation.
I have been looking for this recipe for some time, I had followed your recipe today and added the #2 curing salt as I’d like to consume it raw ( I am assuming I can after the week I’m the fridge plus the few weeks hanging in my wine cellar) where the temp is 12-15 degrees and the humidity is 67-78. The hardest thing is to wait until or had lost 30% of its weight.
Thank you again , I will rewrite when it’s done .
You’re welcome. Let us know how it turns out.
So glad I found this help.on making panchetta, thanks. Its my next project
You’re very welcome. Let us know how it goes.
Hi, i have a dry aging fridge thats currently set at 3degree celcius and at 80% humidity.
Can i put the pancetta in their? How would the different temperature and humidity level affect the process?
Would it take longer?
Thanks
Tom
I’m not quite sure but you could definitely try it. Let us know how it goes.
Hi there Tom – I’m curious if you used your aging fridge for this recipe and if so, what the results were? I have an empty cheese aging fridge that I’d like to use for this also. Thanks!
This article comes right on time for me! I just picked up my half pork at the farm! :))) I do have a question: my farm freezes it’s meat before selling it. Can I thaw a belly piece (around 5 pounds) and cure it as if it was fresh? Thanks a bunch and Hi! from Quebec!
Yes! In fact, some sources recommend freezing ALL meat of any type for 20 days in at 5 degrees F (or -15 c) before doing anything with it (cooking, curing, etc). There are a number of parasites that are killed with that treatment. Super rare things, but you can never be too careful really.
Thawing it out after works just fine for curing.
Oh wow! Didn’t know this! Many thanks! I’ll be making pancetta this weekend! 🙂
Wonderful! Let me know how it turns out!