Affiliate disclosure: This post may contain affiliate links. Please see our Privacy Policy.
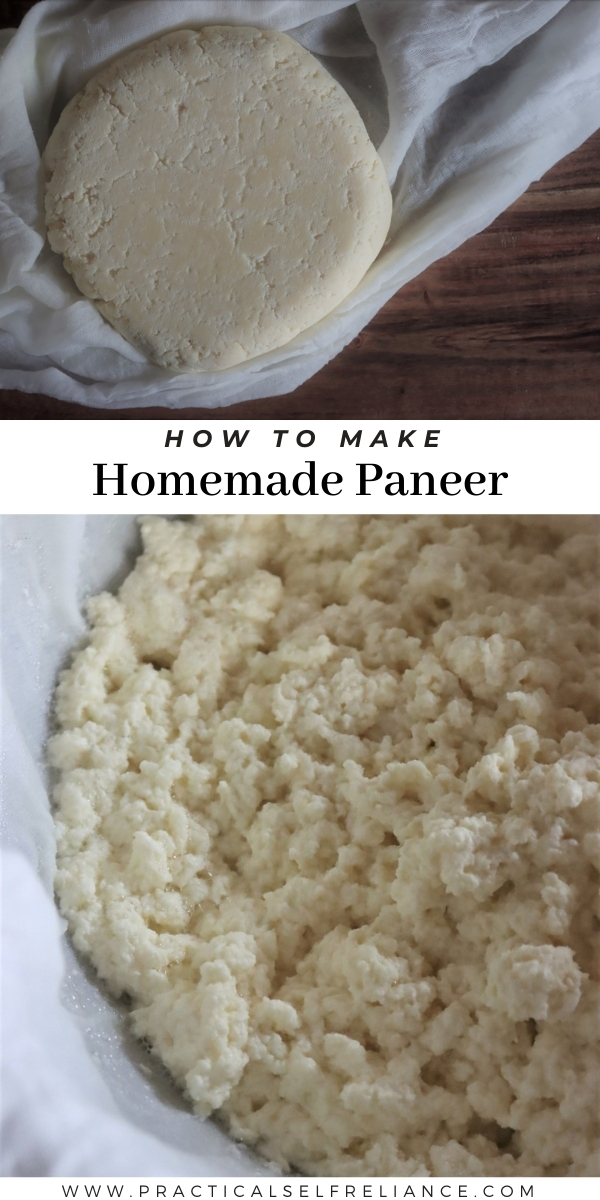
Paneer is an easy homemade cheese that comes together quickly with just a few ingredients. If you have milk and lemon juice, you have everything you need to make delicious homemade paneer.
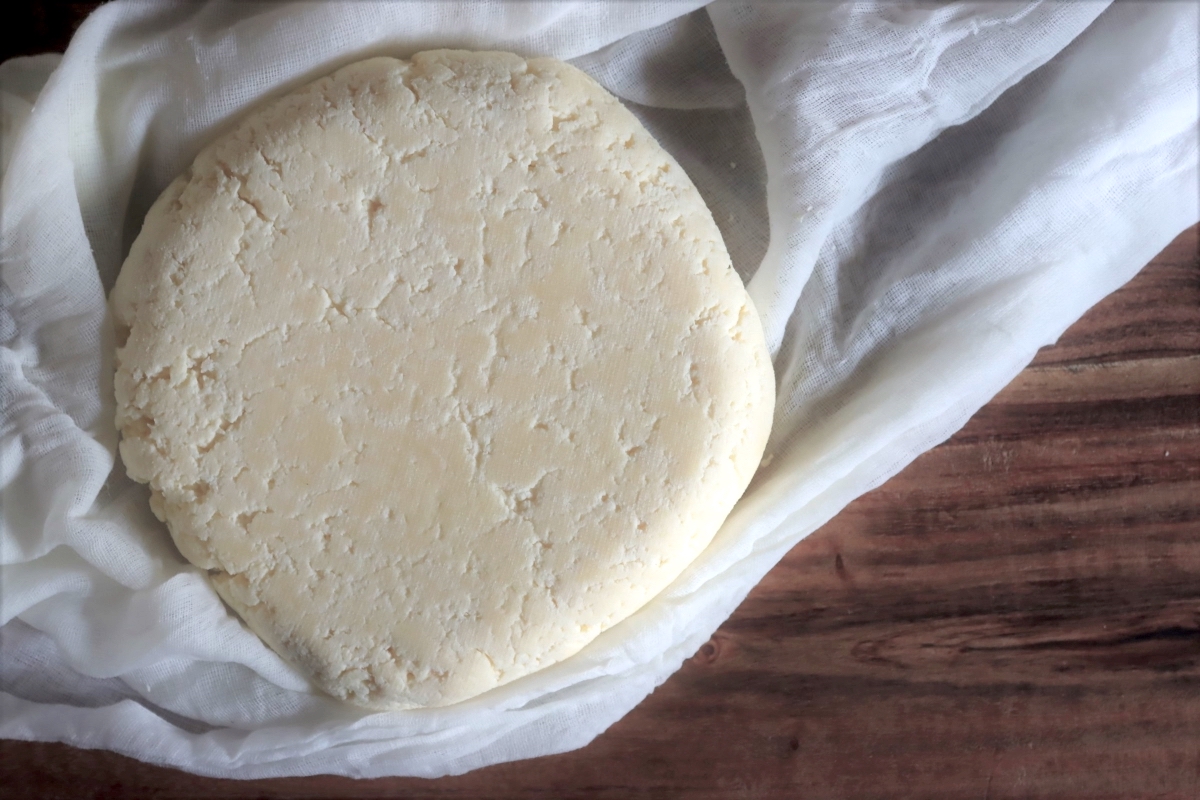
Paneer is a simple cheese from India (and the surrounding regions in Southeast Asia) that’s absolutely delicious and incredibly easy to make at home.
While fresh milk would spoil in hours in the hot tropical sun, this simple cheese uses lemon juice to form protein-rich curds that are pressed into a solid block of cheese.
Since paneer doesn’t melt, it’s perfect for high heat cooking, adding nutrition and delicious flavor to curries and stir-fries. It’s often fried as well, making for delicious, high-protein vegetarian snacks.
Paneer is available pre-made in well-stocked markets, but it’s really best the day it’s made. If you’ve never made cheese, you’ll be amazed at how easy and flavorful this simple homemade cheese really is.
Ingredients for Paneer
Paneer only requires two ingredients: milk and lemon juice. (Sometimes salt is added too, but that’s optional.)
For a more neutral flavor, it’s often made with citric acid instead of lemon juice. The citric acid is dissolved in a bit of water, and it adds the necessary acidity to form the cheese (without adding any lemon-y flavor).
Obviously historically an acidic fruit juice (or vinegar) was added, since citric acid is a modern invention. Still, it’s a nice option for the modern kitchen.
Originally paneer was made with high-fat water buffalo milk (6% milkfat), which resulted in a rich, full-flavored cheese. I’d suggest using whole milk (usually around 3.75% milkfat), which will give you great flavor and texture.
I don’t suggest using skim milk, as the cheese tends to be very dry (and it’s not traditional anyway).
If you want to make the cheese more like the original buffalo milk version, try adding a pint or so of half & half to the milk. (About a cup of light cream or a few tablespoons of heavy cream works too.)
Whatever you choose, try to find the freshest milk possible. Modern pasteurized milk can be stored for weeks without spoiling, but the pasteurization process only inhibits bacteria.
Natural enzymes in the milk break down the proteins in storage, and older milk won’t work quite as well. Choose milk with the farthest outdate you can find.
(Note: Do not use UHT or ultra-pasteurized milk. The high heat denatures the proteins completely and it won’t work in this recipe. Regular pasteurization is fine, just not ultra-pasteurized.)
How to Make Paneer
Making paneer starts with gently heating the milk to around 185 to 194 F (85 to 90 C). Don’t turn the heat up too high, that can cause scorching. Just gently bring it up to temperature.
Many people assume this is to pasteurize the milk, but that’s not the reason. Heating, specifically to just before the milk starts to simmer, conditions the proteins in the milk and helps them form firm curds.
You actually do the same thing when making yogurt at home, and if you don’t, the yogurt will be very runny.
Yogurt is only briefly brought to 185 to 190 and then rapidly cooled, since it just needs a little help to firm up. When making paneer, on the other hand, you need to hold the milk in this temperature range for 20 to 30 minutes.
Usually just turning off the heat (but leaving the pot on a warm burner with a lid) is enough to hold it at temp, but that’ll depend on your stove.
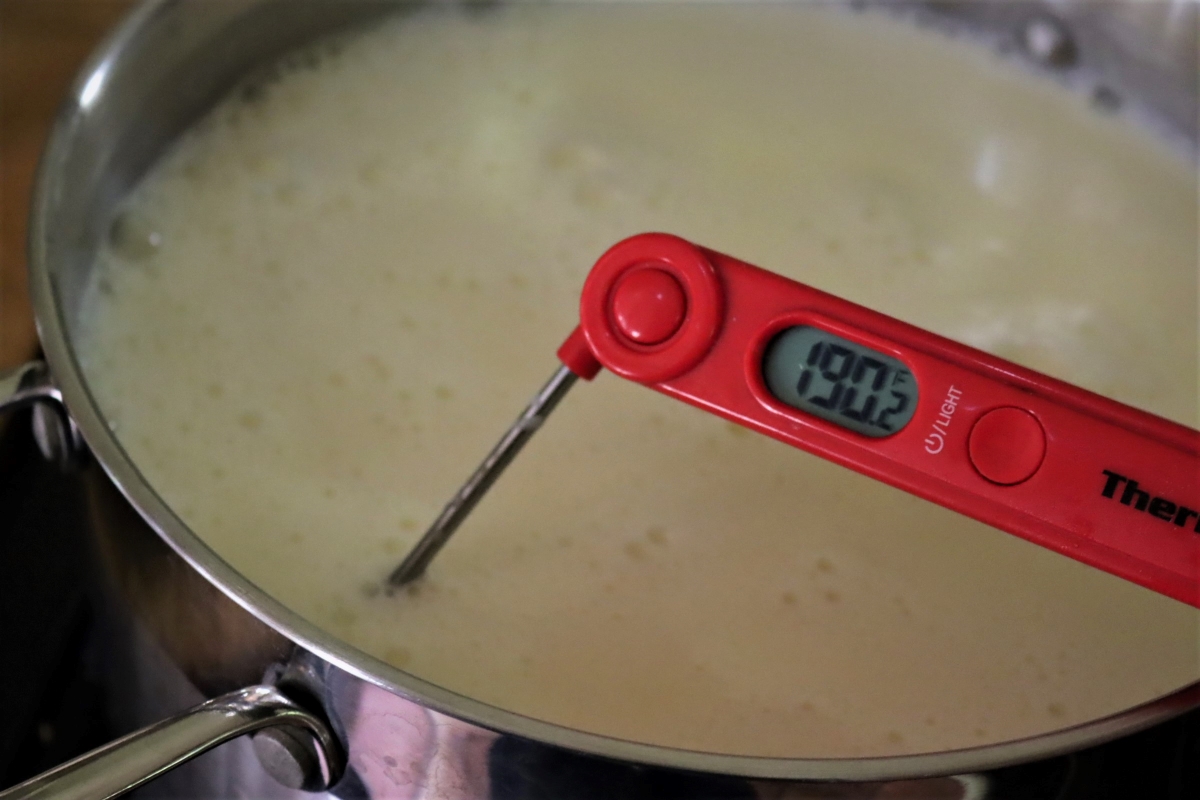
After 20-30 minutes, remove the milk from heat and allow it to cool to around 170 degrees. You can do this slowly by just letting the milk sit, or you can set it in a basin of cool water.
(Some people skip this step and just use the warm 185+ degree milk, but cooling slightly before adding the acid results in a better quality finished paneer.)
The next step is to add the acid. Ideally, it’s close to the same temperature as the milk so it doesn’t drop the temperature when it’s added (around 170 degrees).
If using lemon juice, add about 1/4 cup of gently warmed lemon juice to a gallon of milk.
If using citric acid, dissolve 1 teaspoon of citric acid in 2 cups warm water and add it to the milk.
Give the milk a gentle stir to incorporate the acid, but then leave it to sit undisturbed for 10 to 20 minutes so curds can form.
After about 10 minutes, take a look at the pot. The whey should already have cleared and should be a light yellow, but not cloudy. If it’s still cloudy, add a tiny bit more lemon juice (or citric acid).
If this is necessary, wait 10 more minutes before straining.
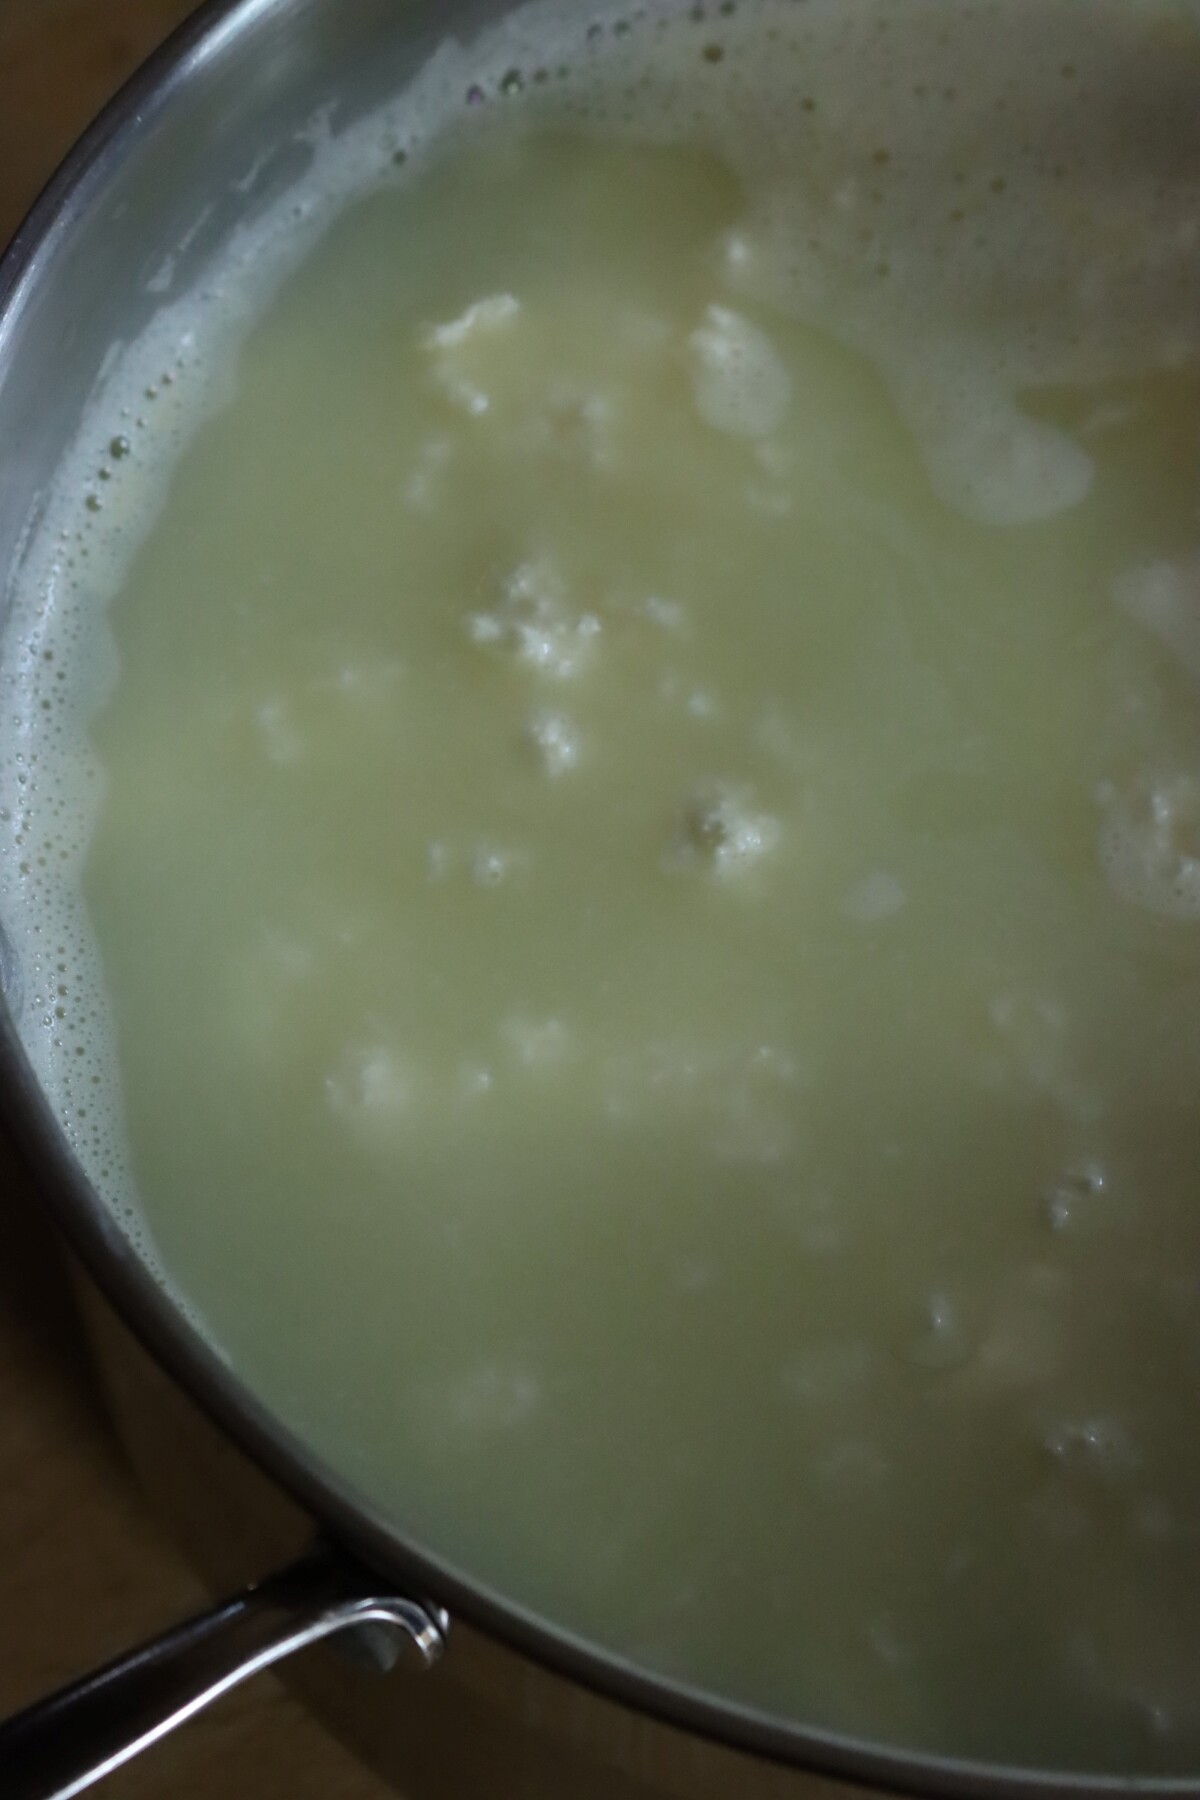
The next step is straining.
Line a colander with a double layer of dampened cheesecloth. Pour the curds and whey mixture through the cheesecloth, reserving the whey for another purpose (or discarding).
The curds should be firm, but still quite wet at this point.
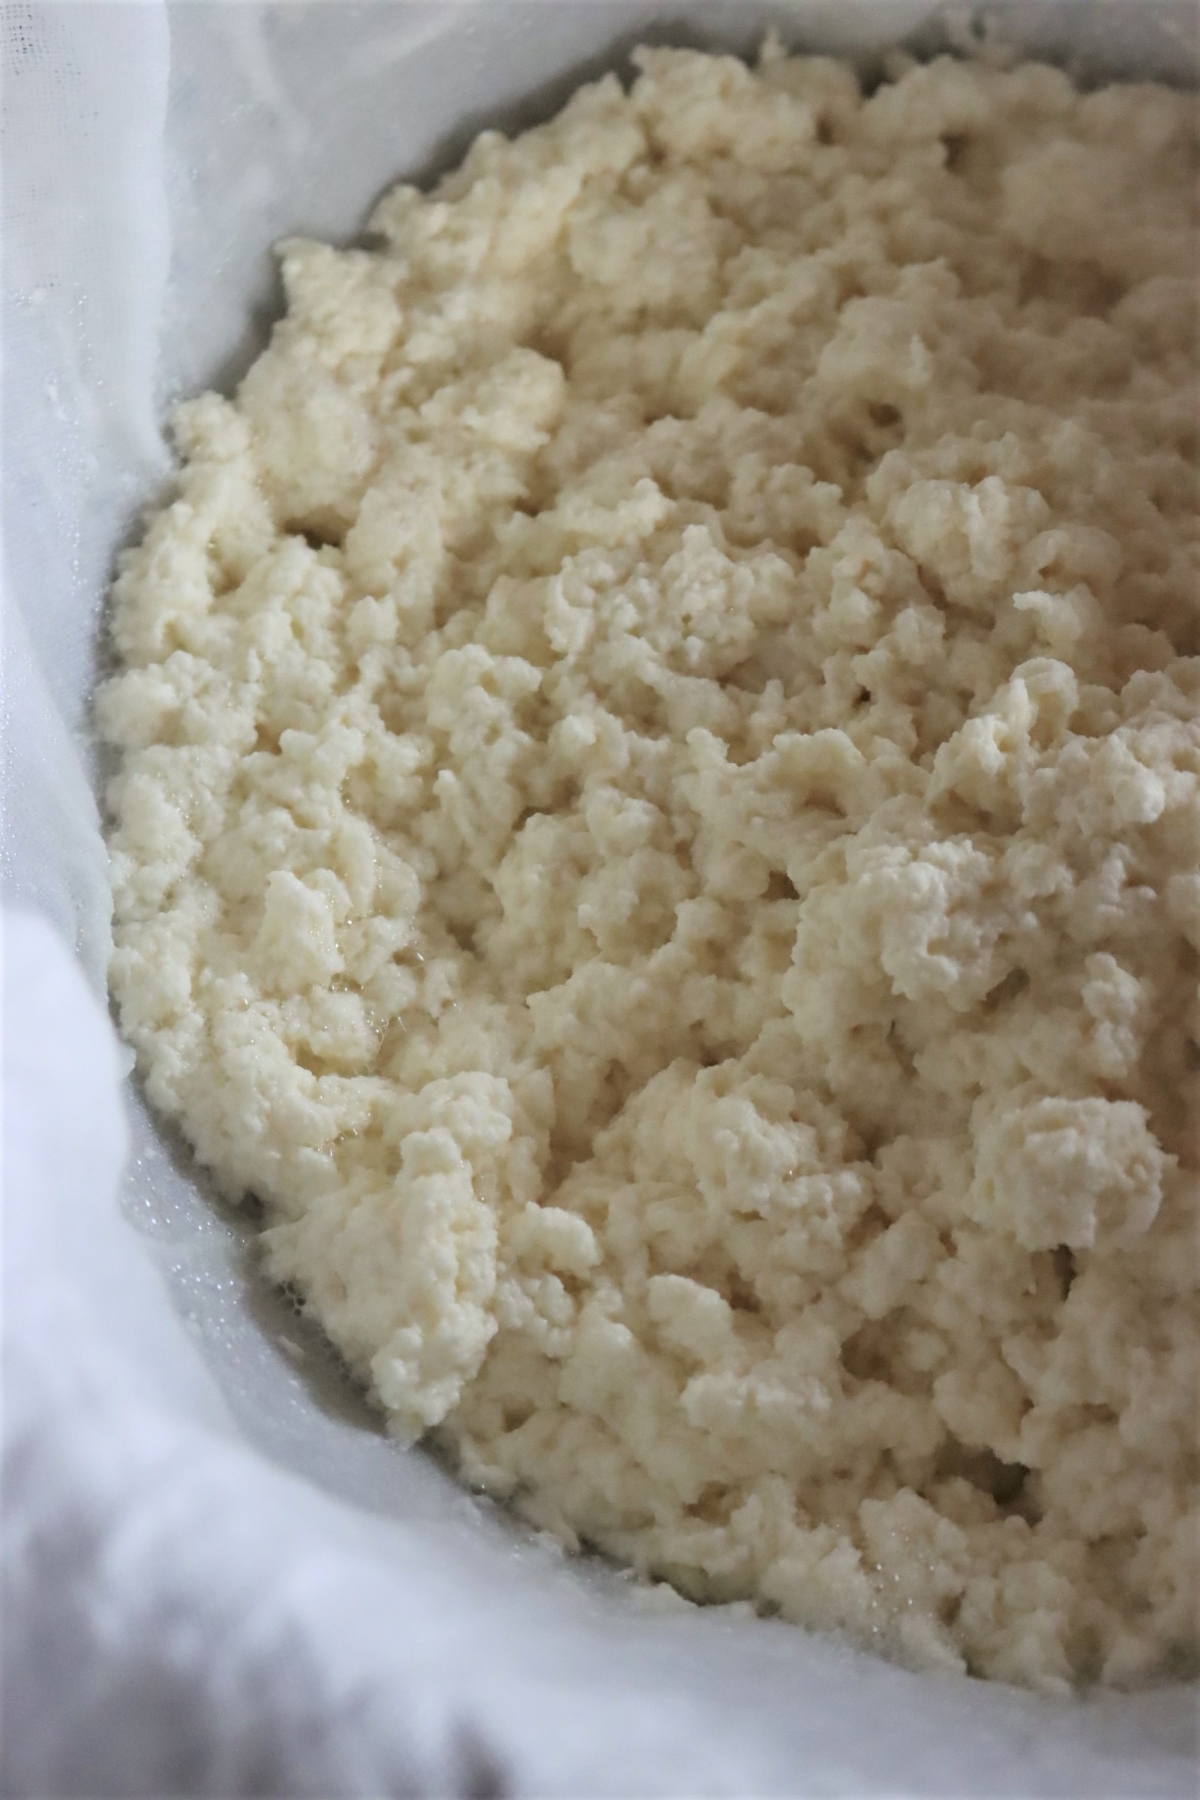
At this point, this simple curd cheese is known as chenna or un-pressed paneer. It can be used as is if you want chenna, and there are a number of recipes that use this simple curd cheese.
If you’re adding salt, this is when you’d salt the curds to taste. I’d suggest just a small amount, around 1/4 teaspoon.
If you want actual paneer instead of chenna, you’ll need to first drain the curds completely and then press them.
Start by hanging the curds to drain for about 30 minutes.
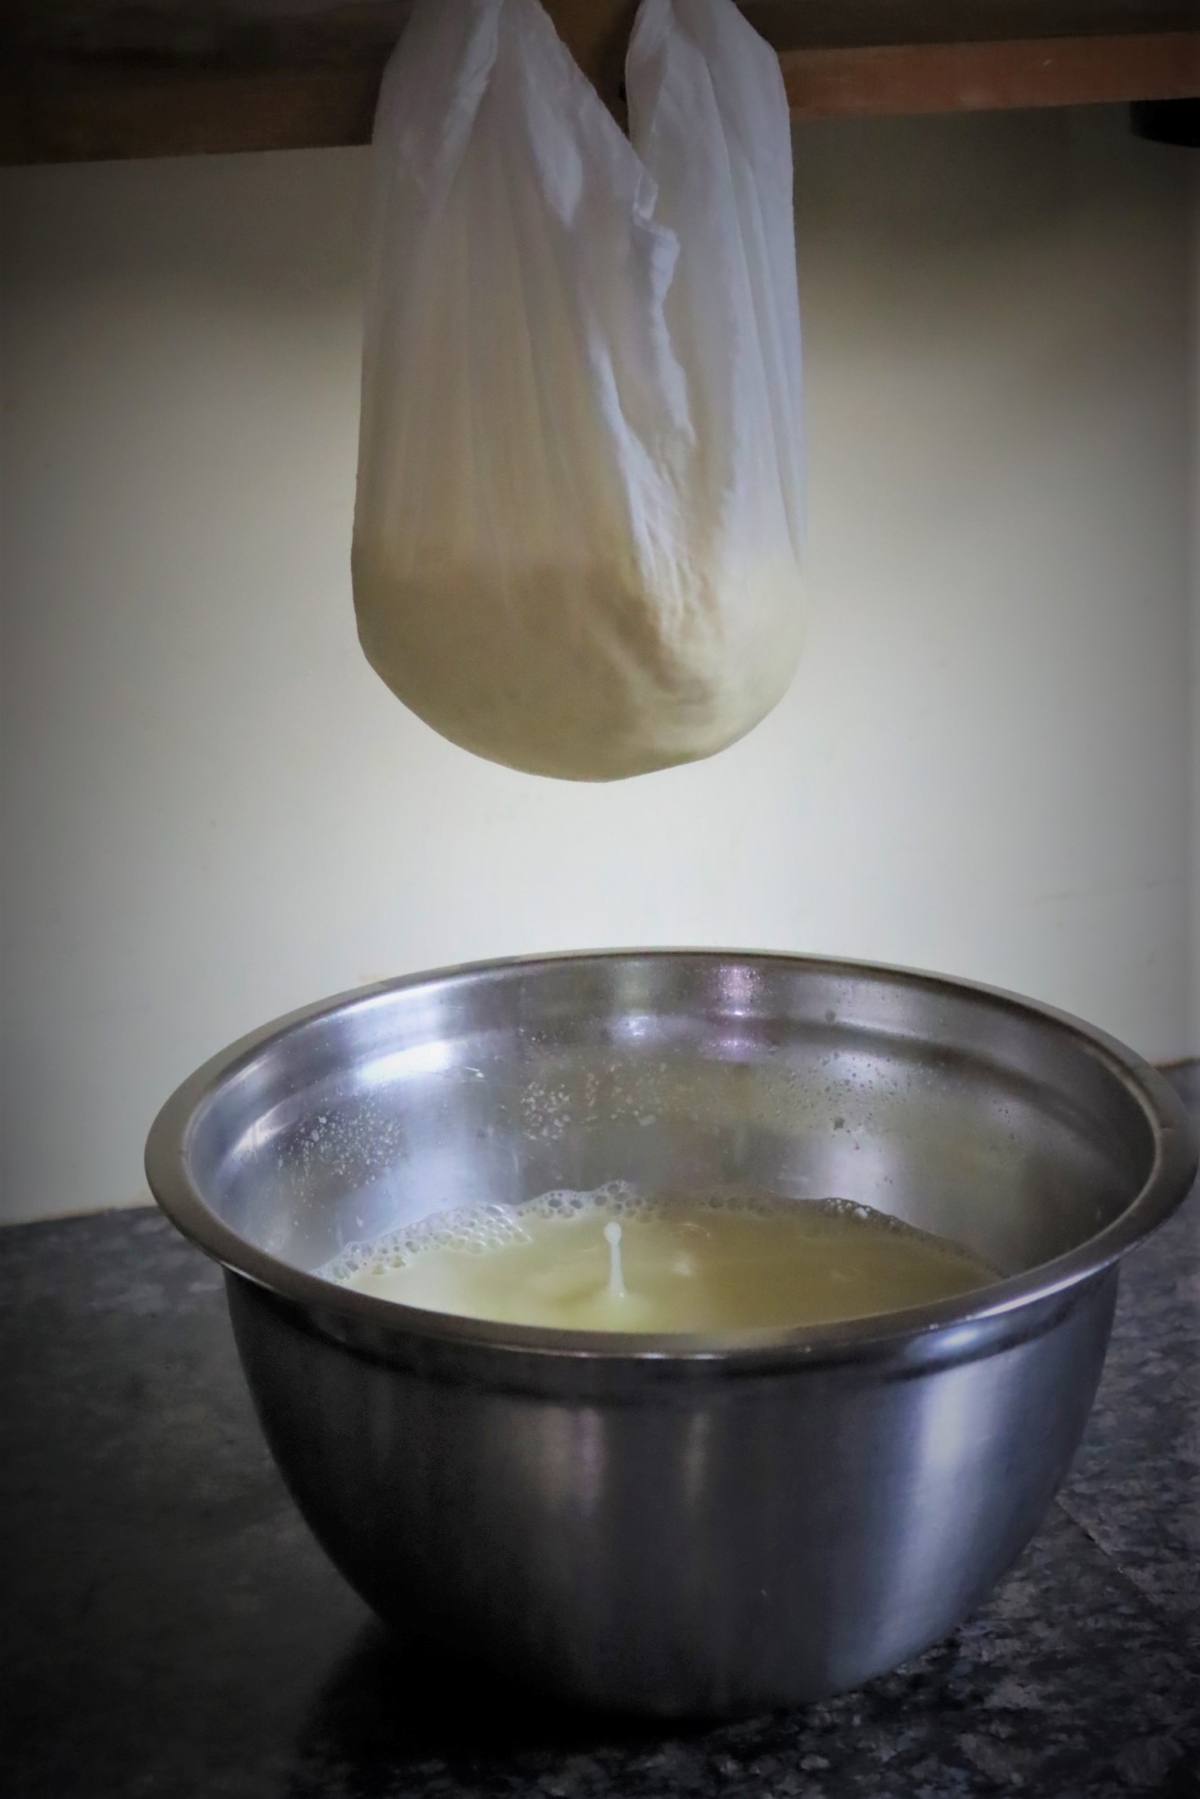
Since paneer is a quick cheese that only needs light pressure to drain, it doesn’t require a true “cheese press.” You can work up something simple in your own kitchen.
I have a nice cheese press that I use in my cheesemaking recipes, namely homemade cheddar, and Colby cheese. That big cheese press is totally overkill for making paneer.
I’m just using two cutting boards for this recipe, and sandwiching the paneer between them. I’ve placed a few jars of home-canned tomatoes on top as a weight.
Ideally, you want about 8 to 12 pounds of weight on top of the paneer (which is still wrapped in cheesecloth).
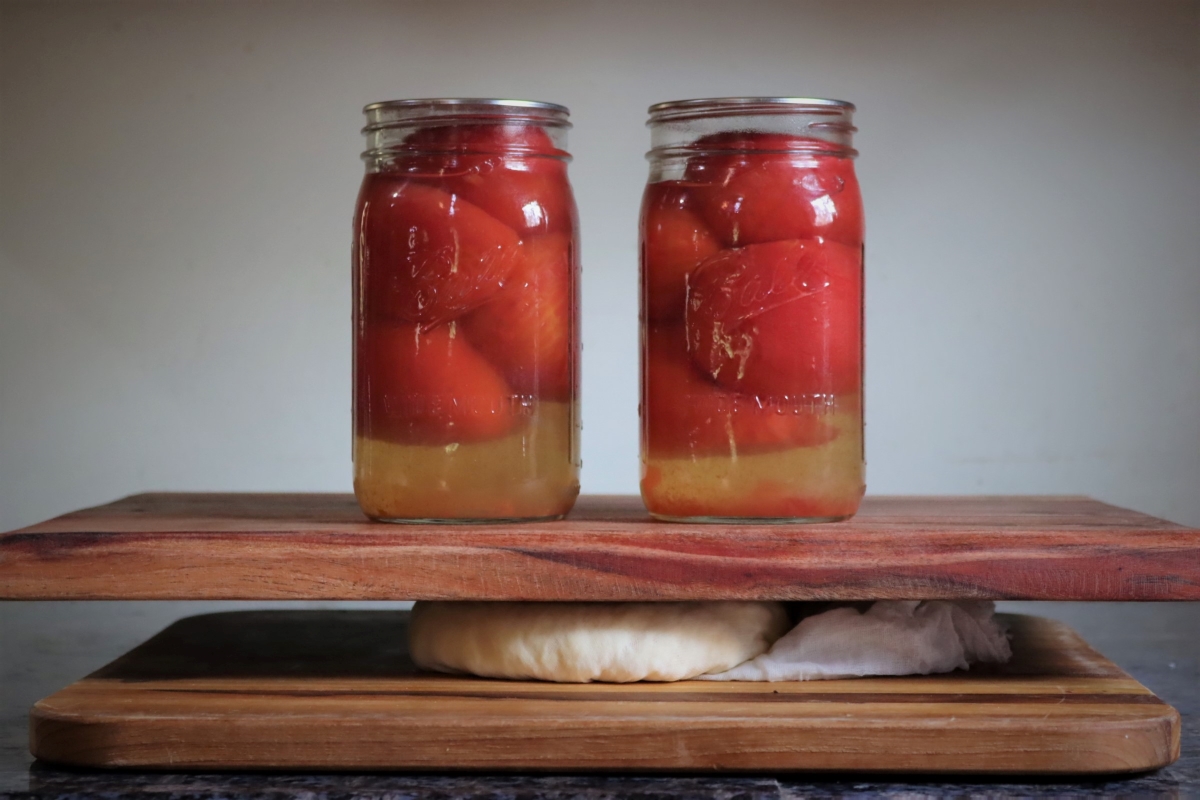
For weight, canned goods work really well, even just soup cans from the pantry. You can also just fill a bowl with water and place it on top, just be sure it’s steady so it doesn’t tip (that gets messy).
Press the curds for about 15 to 20 minutes.
The total pressing time depends on how dry (and firm) you want the curds. They’ll be just barely firm after 15 minutes, but enough to hold together.
If you leave it for a few hours, it’ll get very firm. A short pressing is traditional, but everyone has their own texture preferences.
Once the cheese is pressed, unwrap it from the cheesecloth. It’s now ready to use, or you can store it in the refrigerator for later.
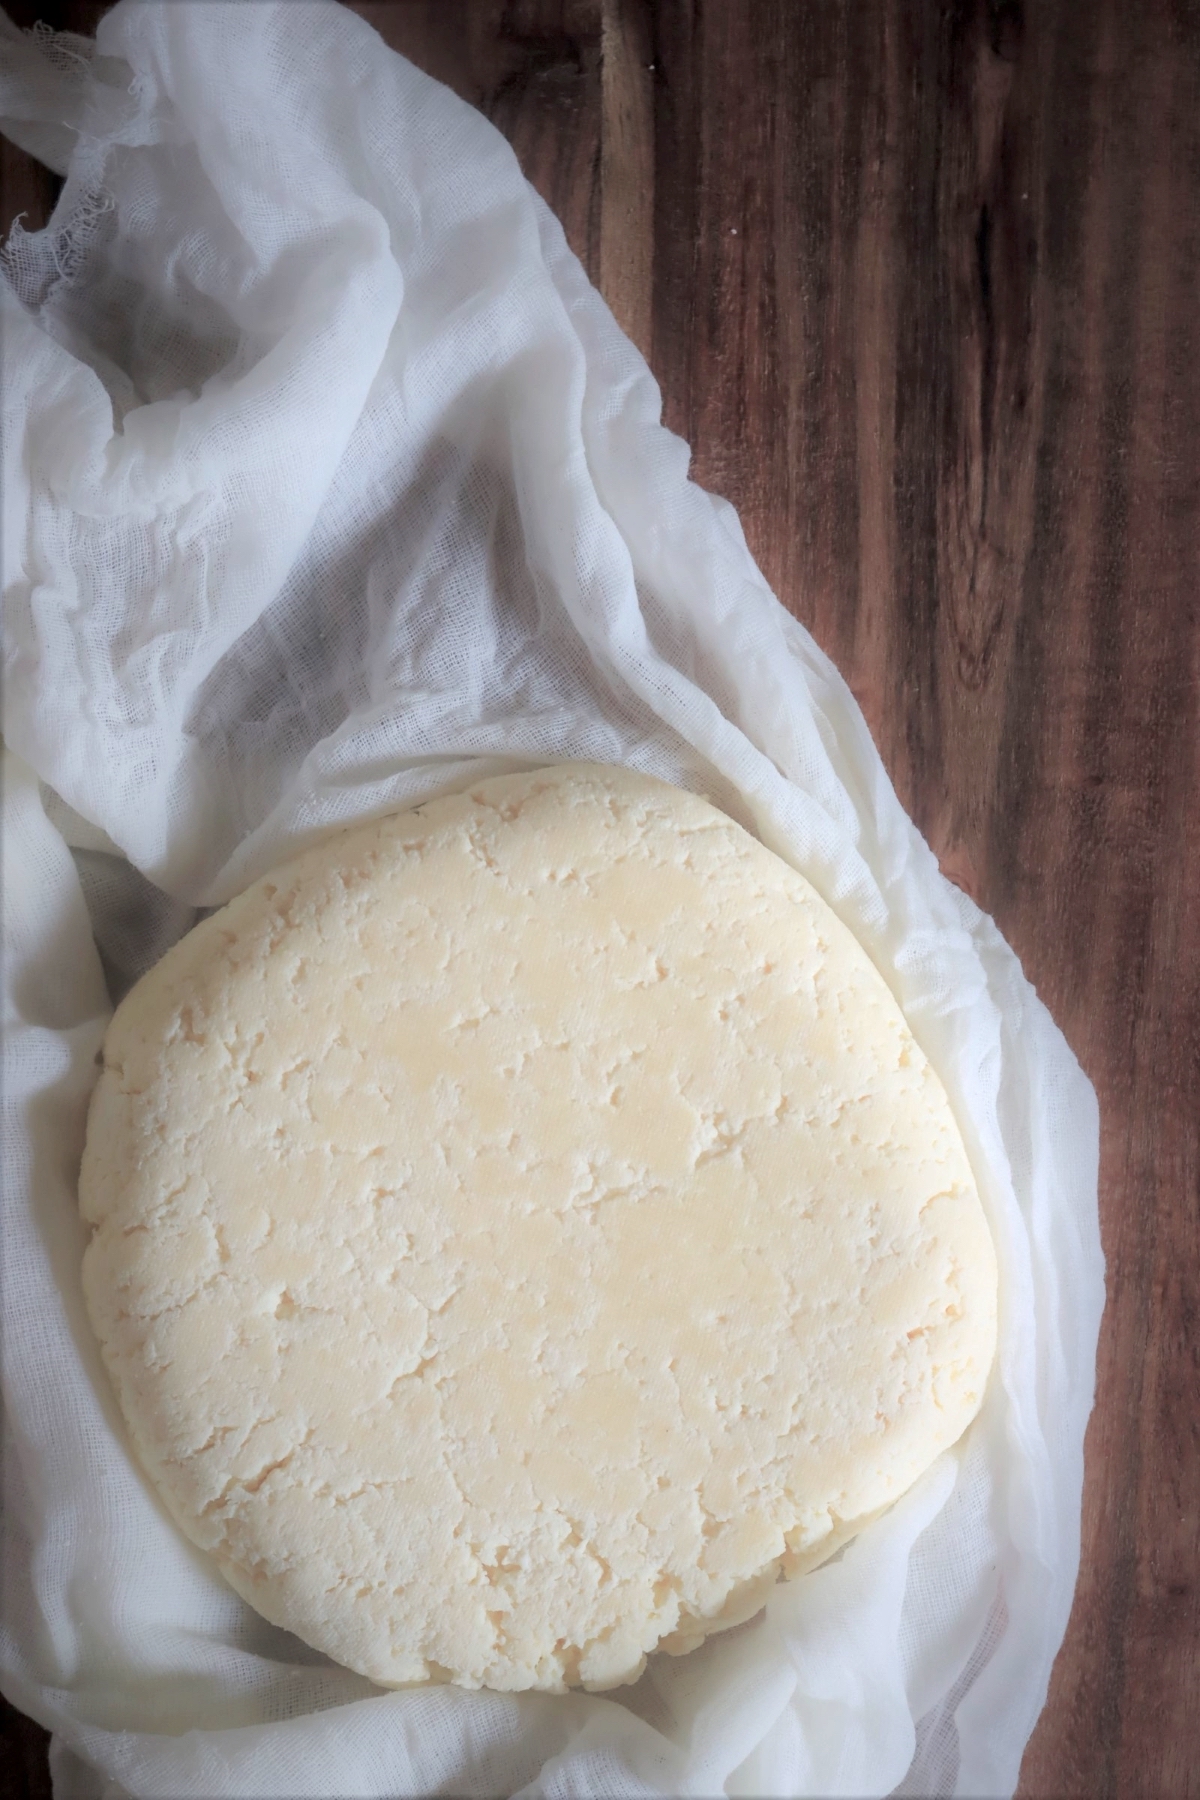
Storing Paneer
Keep in mind that paneer is best fresh, so try to use it within 2-3 days for the best flavor. (It will keep for 1-2 weeks in the refrigerator before spoiling.)
Be sure to tightly wrap the paneer to keep it from drying out further on the surface.
Using Paneer
Paneer is a staple of Indian and Southeast Asian cooking, where quickly preserving milk is important. It’s usually made with fresh milk and used within 24 to 48 hours.
Paneer can be eaten as is, sliced into chunks as a snack, or quickly fried for a real treat.
These paneer recipes use it as a neutral vegetarian protein source, like tofu, but with a lot more character in my opinion.
Homemade Paneer
Ingredients
- 1 gallon whole milk
- 1/4 cup lemon juice, plus more if needed (or 1 tsp citric acid)
- 1/4 tsp salt, optional
Instructions
- Slowly and gently bring the milk to 185 to 194 degrees F (85 to 90 C). Hold the milk at temperature for about 20 to 30 minutes, then cool to 170 F (77 C).
- If using lemon juice, gently warm it to around 170 F and then add it to the warm milk. Stir to incorporate.
- If using citric acid, dissolve 1 tsp citric acid in 2 cups warm water (170 F). Add the solution to the milk and stir to incorporate.
- Allow the milk to sit undisturbed for about 10 to 15 minutes. After about 10 minutes, check to see that the whey is clear. If it's still cloudy, add another tablespoon of lemon juice or a pinch of citric acid dissolved in water. Stir gently to incorporate and wait a few more minutes before straining.
- To strain, pour the curds and whey into a colander that's lined with a double layer of damp cheesecloth. (Reserve the whey for another use or discard.) If you're adding salt, stir it into the curds at this point.
- Wrap the cheesecloth around the cheese and hang to drain for about for about 30 minutes.
- Once drained, place the curds (still wrapped in cheesecloth) between two cutting boards or plates. Place 8 to 12 pounds of weight on top (about a gallon of water or a few canned goods). Press the cheese for 15 to 20 minutes, or longer if you prefer a firmer cheese.
- Remove the weight and unwrap the cheese from the cheesecloth. The cheese is now ready for use, or it can be stored tightly wrapped in the fridge for later.
- Paneer is best fresh and I'd suggest using it within 2-3 days. It will keep for 1 to 2 weeks if tightly wrapped in the refrigerator.
Cheesemaking Recipes
Don’t stop at paneer, there are so many more tasty cheesemaking recipes to try…
Food Preservation Recipes
Homemade cheese is just the beginning, and there are so many wonderful ways to preserve food at home!
- How to Make Apple Cider Vinegar
- How to Make Mead (Honey Wine)
- 30+ Soup Canning Recipes
- Salt Cured Egg Yolks
- How to Make Pancetta (Cured Pork Belly)


If you’re doubling this recipe, do you need 4 cups of water for diluting the citric acid or can it just be left at 2 cups of water and increase the citric acid?
Either way works fine. You just need a bit of water to get it dissolved, but since all that extra whey is drained off it doesn’t matter if it’s 2 cups or 4 cups of water going in, so long as it’s enough to dissolve the citric acid. Enjoy!
Sorry, I thought my comment took when I tried to post it yesterday. I got a msg that said I already posted it, so I let it go.
In any case, I reheated and added citric acid (although my lemon juice is pretty new, maybe it wasn’t potent enough), and the curds started forming.
So, it seems to have worked. Thanks for your time and the fabulous instructions
You’re very welcome.
Hello Ashley, I came across your website and paneer recipe a few days ago and was excited to try it. Today was the day.
Unfortunately, no curds are forming, and I’m wondering if it’s because I used bottled lemon juice.
I heated the milk to 190+F, kept it at that temp for the 30 minutes specified. Cooled to 170, during this cooling, I heated the lemon juice.
Poured the juice into the milk, stirred to incorporate and let it sit for 10 min. Nothing. Added another tbsp of juice and let it go for another 10 minutes. There is a bit of skin-looking something.
So I put in about 1/4tsp citric acid in water (heated to 170F) and stirred again. It is now another 10-20 minutes and the milk still looks “custardy” (but not custard consistence) in the pot.
I’m really disappointed. (The kefir I made last week was perfect!!!)
I used Walmart’s Great Value Whole (4% milk)
Any thoughts? I could use help from anyone who is reading this.
Thanks, Barb
Thanks ever so much!
Was the milk ultra-pasteurized?
No, just regular.
Is it possible that I should have kept it at 170F during the curding process?
In any case, I reheated to about 125F and added the full amount of citric acid, and it did curd pretty fast, but the whey never got really clear.
Please don’t take a lot of time to figure this out. It’s not worth it. I will have my little round of cheese and am happy.
Thanks!
You’re welcome. You really just want to leave it undisturbed during that time. It should stay around the same temperature as long as your acid is as close to the same temperature when you add it.
Love this!!! I’m curious how long it can be left out unrefrigerated? I drained it for 40 min, and want to press it longer to make it more firm. How long can it safely be left out to be pressed?
You should be able to safely leave it for several hours if you’re wanting a firmer cheese.
Do you have any suggestions on how to use the whey? I hate to throw anything away. Thanks, Elizabeth
New England Cheesemaking Company has a great article on ways to use whey.
I love your website and especially your recipes! Can you tell me how much paneer this makes? I love Indian food and usually buy paneer for Costco that not very expensive. Milk is expensive where I live and I want to know whether it’s worth it to make it myself. Thank you.
This makes about a pound of cheese from one gallon of milk. The yield is higher if you use whole milk (and/or part half and half). Where we live, it’s ever so slightly cheaper to make it yourself, but not a whole lot. It’s more for quality/flavor than cost savings.
Could this work using reconstituted full-fat powdered milk?
That is a darn good question…and I don’t know the answer. I’ll have to try it. I’ve seen mozzarella cheese made with dried milk, and apparently, that works just fine. I’d imagine this would work, but it’s hard to say for sure without trying it. Motz is made with rennet, while this is only citrus, so it might be different in terms of getting curds to form from powdered milk.