Affiliate disclosure: This post may contain affiliate links. Please see our Privacy Policy.
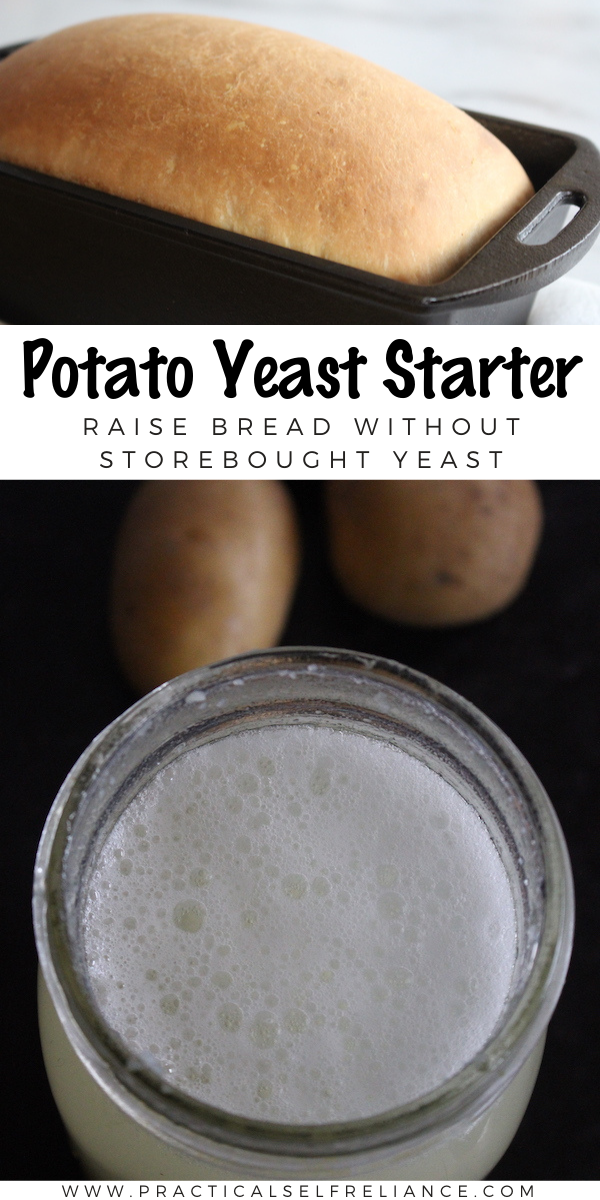
No yeast at home? Try culturing your own wild yeast on potatoes! All you need is one medium-sized potato, a bit of water and a smidge of patience.

Believe it or not, commercial yeast has only been available in well-stocked grocery stores for the past 100 years or so. Leavened bread, however, has been baked for millennia.
It’s convenient to be sure, but yeast packets are not the only way to leaven bread.
In times past, bakers cultured their own wild yeast for raising bread. Sourdough is one version, and it’s a community of yeast and lactic acid bacteria (like in yogurt) that give the bread a characteristic sour taste.
But what if you don’t like sourdough (or don’t have the patience to maintain one)?
There are literally dozens of ways to culture a wild yeast starter, using everything from raisins to beer to wild apples.
This simple method cultures wild yeast on boiled potatoes and was originally used by vodka distillers making high-quality potato vodka. The idea is to just culture yeast, without encouraging the lactic acid bacteria that are part of sourdough.
(If you’d rather just skip the potato yeast culture experiment and master homemade sourdough, I’d recommend The Art of Sourdough E-Course. It’ll take you through everything you need to know to bake high-quality sourdough bread without commercial yeast.)
DIY Potato Yeast Starter for Bread
Potatoes are high in starch, which is ideal for culturing yeast. They also contain plenty of micro-nutrients, making them a better yeast starter than sugar alone.
There are a number of different potato yeast starter recipes circulating on the internet at the moment, ever since yeast disappeared from store shelves this spring.
Guess what…they all work.
Some add sugar, others add a bit of flour and some are just a mashed potato and the starchy water used to boil it.
Mash it all together, and then leave it open on the counter for 2-3 days. Yeast floating by in the air will settle on your starchy yeast trap, and quickly go to work reproducing.
The simplest method, and the one originally used for vodka production, was just a single potato.
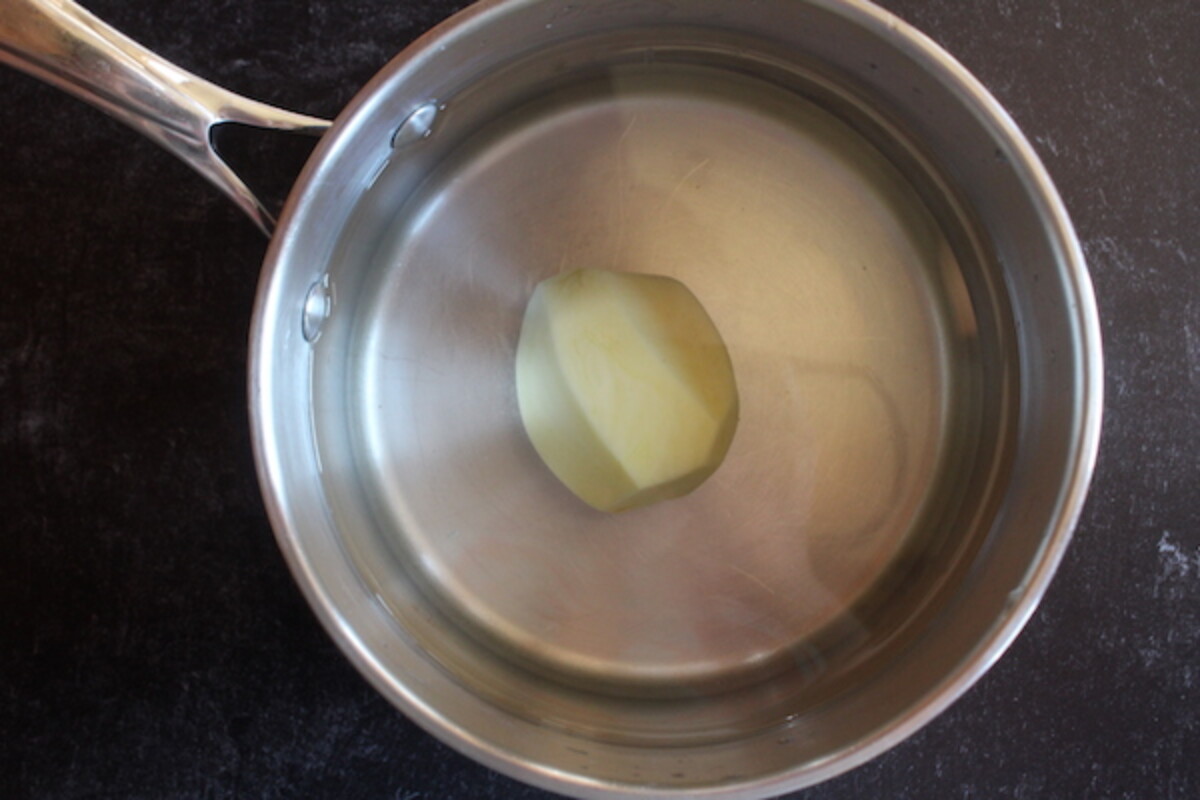
Peel the potato and place it in a pot of water. Bring the water to a boil, and then simmer for 35-45 minutes, until the potato is completely soft. Test it with a fork to ensure that it’s cooked and soft all the way to the center.
Pour the cooking water into a container, and allow it to cool. Meanwhile, thoroughly mash the potato.
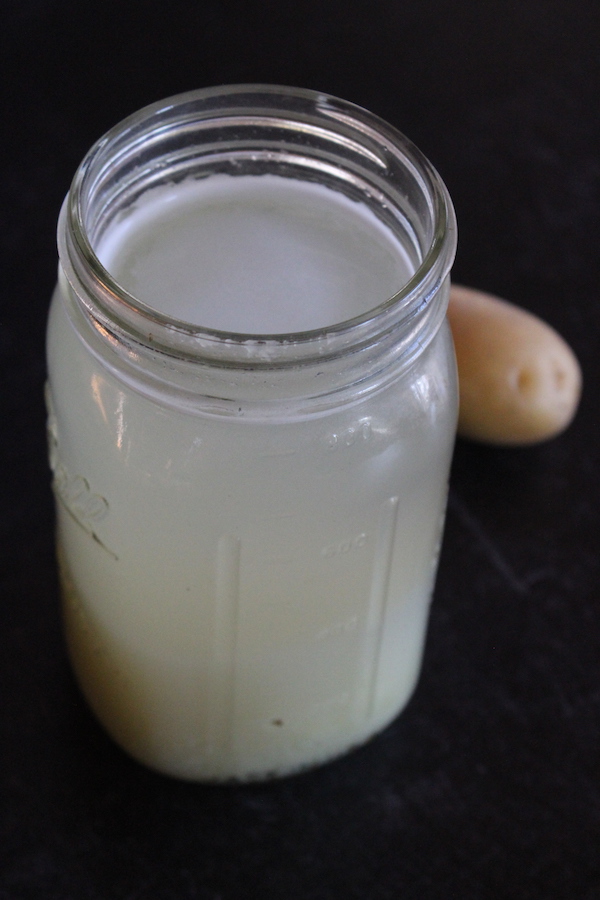
Place the mashed potato into a one-quart mason jar, and then pour the starchy potato cooking water in to fill the jar. If you’re a bit short on cooking water, just add clean, chlorine-free drinking water.
Set the jar on the counter (open or covered with a towel), and wait.
In about 24 – 36 hours, you should see the first tiny bubble on the surface. (Look closely at the potato layer below, and you’ll see tiny bubbles forming there too.)
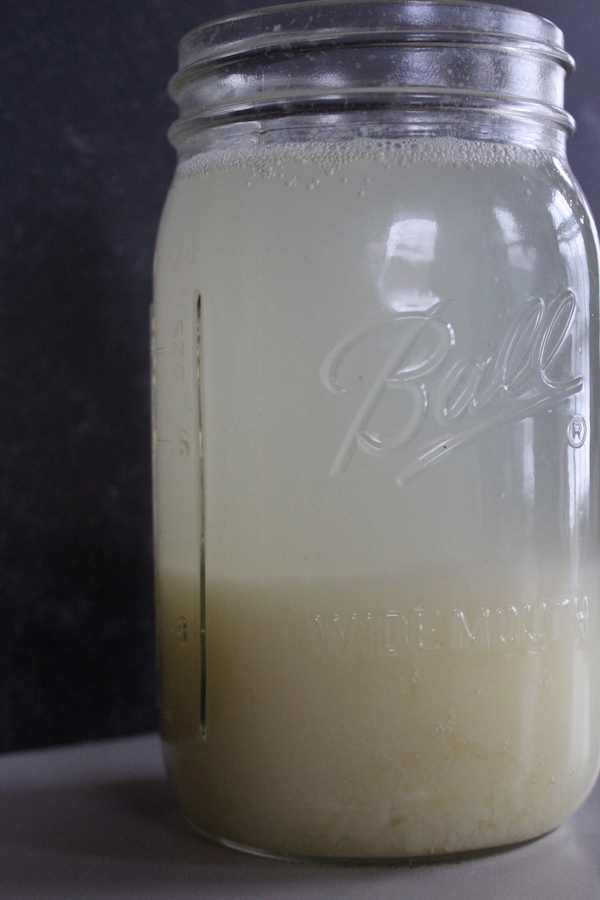
Cap up the jar, give it a vigorous shake to distribute the yeast and then open it up and leave the jar on the counter again.
In another 24 to 36 hours the jar should really be bubbling. At this point, you can bake your first loaf of bread (or wait another 2-3 days, your choice).
Alternate Potato Yeast Starters
The idea of culturing yeast on boiled potatoes isn’t just for emergencies or vodka bootleggers. Perhaps you’ve heard of Amish Friendship Bread? It’s a loaf of bread that’s like a chain letter that you pass onto unwitting friends.
Friendship bread starts with a home cultured starter, slow cultured over many days. After you bake the bread, a portion of the starter is passed on to friends with instructions so they can bake their own.
These days, a friendship bread starter is made with a few tablespoons of dried potato flakes and a pinch of storebought yeast.
Historically though, I doubt the Amish were buying instant mashed potatoes to make their starter. More likely the original recipe comes from a simple potato yeast starter, and these days potato flakes and yeast approximate the traditional (slower) method.
As I said, there are a number of variations for culturing yeast on potato starch, and they all work fine. Some are faster (the ones with sugar) and others are a bit slower, but they’ll all get you natural yeast for baking bread.
One method involves adding salt to the mix, which actually inhibits yeast a bit and selects for sourdough. That’s more properly a “potato sourdough starter” rather than a straight yeast starter.
To try that method, add 1 tsp salt and 1 tsp sugar to a quart jar containing potato water and a mashed potato. That said, it’s not one I’d suggest. If you want a sourdough culture, it’s much easier to just make a normal one with flour and water.
Another simple method adds both flour and sugar to the starter. This method has been shared on social channels like crazy, and yes, it does work:

Still, I chose to go with the simple potato method. Why? Because it’s the easiest to incorporate into existing bread recipes.
Baking with a Potato Yeast Starter
To use a potato yeast starter, simply pour off the starchy water at the top and use it in place of the water in your bread recipe. You can use it in any bread recipe, but know that wild cultured yeast will likely be a good bit less vigorous than commercially cultured yeast.
The ones they culture in labs take our impatience into account and raise the bread in just a few hours. Wild yeast, however, work on their own time table. Expect rise times to take 2-3 times longer with home cultured yeast, unless it happens to be very warm in your house.
Since we’re already working with potato, I’ve chosen to expand on the theme and make potato bread!
Most potato bread recipes actually only use the starchy potato water, rather than actual potatoes themselves. The resulting bread is soft and tender and makes an excellent sandwich loaf.
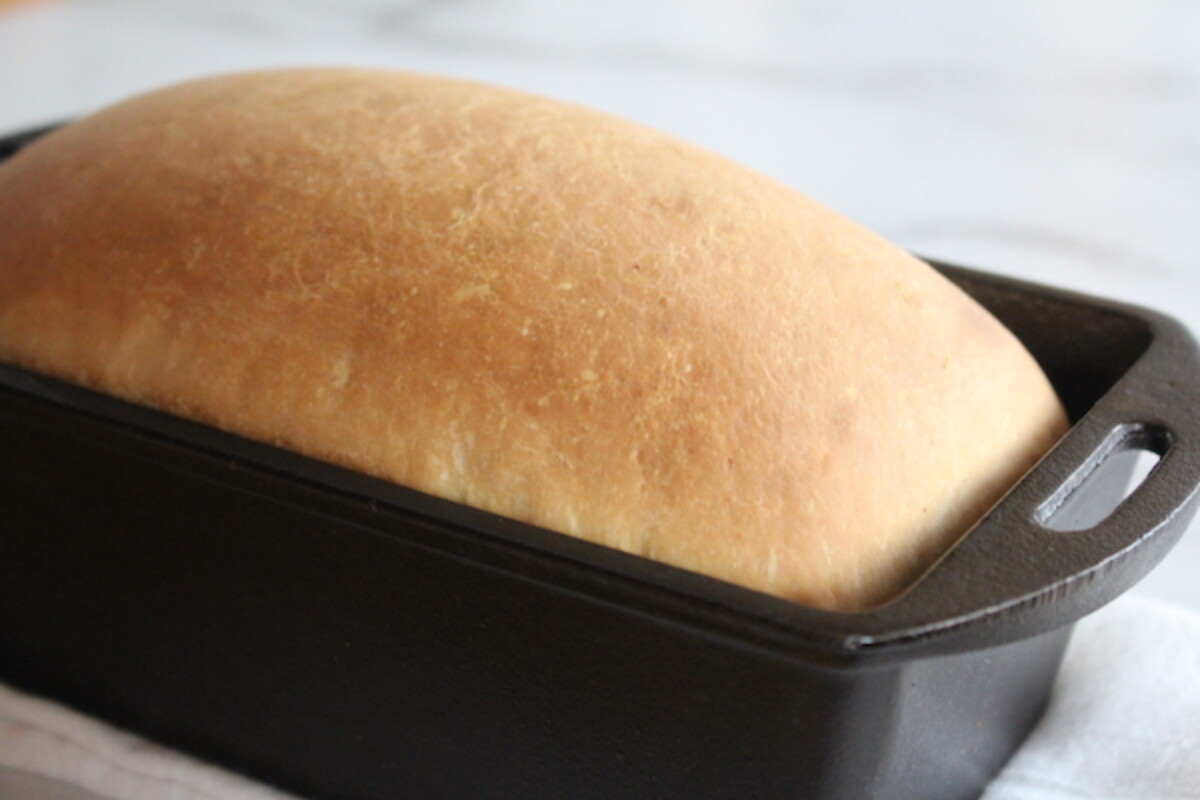
I happened to find a potato bread recipe from King Arthur Flour that uses both mashed potatoes and potato water. That allowed me to incorporate the cultured mashed potatoes at the bottom of the jar, and get more of the yeast culture into the final loaf.
Since the potatoes in the jar are soaking wet, I reduced the liquid in the recipe by 1/4 cup. I also doubled all the rise times.
Just look at the beautiful rise on that loaf…
Maintaining A Potato Yeast Starter
While you can just make a new potato yeast starter for each loaf of bread, it’s a lot simpler if you just maintain the culture.
To make my potato bread loaves, I started by pouring off 2 cups of the yeast/potato water to continue the culture and then used 1 cup potato water and 1 cup mashed potatoes from the bottom of the jar for the recipe.
The culture will need to be fed at this point, and the simplest way is to just boil another potato, mash it and allow it to cool completely. Add the yeast culture to the potato, and then top with cooled potato cooking water.
Alternately, if your bread recipe doesn’t use the mashed potato at the bottom of the jar, just add 1-2 tablespoons of sugar to the jar and fill with more water.
If you’re not planning on baking again in the next few days, store the starter in the refrigerator for later. The culture should last a few weeks in the refrigerator, just bring it back to room temperature before using it.
Troubleshooting
Like any new kitchen project, there are lots of ways this can go wrong.
The finished yeast starter should smell pleasant, very lightly of yeast, like rising bread. Possibly ever so slightly sour like sourdough, but mostly like yeast.
If your culture smells nasty….something went wrong.
Just like a home cultured sourdough starter, if the setup is wrong or it’s not tended, it’s always possible that you culture something besides yeast. To help ensure success, keep these things in mind:
- Make sure the container is open to the air, not capped. Yeast need surface area to land on, and you won’t be able to culture them in a closed container.
- Be sure to vigorously stir the jar (or briefly cap it to shake vigorously). This helps distribute the yeast and their food/substrate, and it also oxygenates the water which will help prevent anaerobic bacteria.
- Peel the potato. The peel will give off-flavors to the culture. Also, make sure it’s really thoroughly cooked through to the center before mashing.
- Use unchlorinated drinking water. Chlorinated tap water can prevent the yeast from culturing, but may not prevent other bacteria tolerant of low levels of chlorine.
- Once the culture is vigorously bubbling, put it in the refrigerator. If left on the counter for weeks on end, it will mold and spoil. Your goal is to catch the yeast, and then bake immediately, or push “pause” to hold the culture in a ready state in the fridge until you’re ready to use it.
Use your best judgment. As always, when in doubt, throw it out. Stay safe and don’t eat any food you believe may be spoiled.
If for some reason you just can’t get it to work, try a traditional sourdough starter (with flour and water).
(And If you do choose to go that route, I’d recommend The Art of Sourdough E-Course for sourdough beginners looking for great video tutorials covering every aspect of making sourdough bread.)
More Useful links for These Challenging Times
Looking for more things to help with the current crisis? Read on…
- Best (and Worst) Survival Food Kits
- Survival Gardening: Our Real Life Trial Run
- How to Make Soap
- 20+ Immune Boosting Herbs (and Mushrooms)
More Easy Bread Recipes
Looking for more baking inspiration?
- 100% Rye Sourdough Starter
- Sourdough Rye Hearth Bread
- Yeasted Banana Bread
- Amish White Bread
- Whole Wheat Honey Bread


How do you use the version with flour? I don’t see any instructions for that.
Are you referring to the method that adds flour and sugar to the starter?
Hello, I’m very interested in getting this to work. I got a nice bubbly starter with the potatoes but then my dough never rose. It’s been over 12 hours with almost no difference. Any idea what I’m doing wrong?
How long after the mixture started bubbling did you bake the bread?
It took 4 days to see the bubbles start and I used it on the 5th day to make bread.
I would probably wait 2 to 3 days after you start seeing bubbles to make the bread. Usually the longer it sits, the stronger it will be.
Hi! My name is Molly and I am a student at UNC Chapel Hill taking a fermentation class. For my final project, I am investigating the origin of my grandmother’s sourdough. Her recipe is remarkably similar to yours — potato flakes, sugar, warm water, no milk (like Amish friendship bread) and I have yet to find many other like it! She has been making it since the 60s and lives in Boone, NC. She has no idea where it came from, other than probably NC. I am curious if you know anything about the origin of your starter or recipe. Any and all tips welcome!
I’m sorry but I don’t have any idea of the history or origin of this particular recipe. Let us know if you’re able to find any more information on it.
Novice bread baker here..with PERFECTIONISM tendencies! What should my starter look likeon day 3-4? I kept looking at it..hoping for ‘something’ to happen..🤷♀️🤷♀️..?? This afternoon..it startec to grow. Has a beautiful yeasty smell! But..it has the layer of growing stuff (yeast’ on top..then a layer of ‘liquid’..then the potaty stuff in the bottom. Is this what I am looking for to use to bake bread?
It should be ready for bread making anytime after 24 to 36 hours when it starts bubbling.
Thank you for this very useful article. I love to make bread but I’ve never heard of using anything but commercially bought yeast. I’m excited to try these ideas!
You’re very welcome. Let us know how it turns out.
I have tried twice. First time it didn’t rise, so I made pizza crust (crunchy like crackers but good flavor). Second batch is on the counter now. I followed King Arthur’s recipe that was linked, except to put it in the refrigerator overnight. Instead I put it on my counter after mixing ingredients at 6 am. It is now 4 pm and no sign of the dough rising. My starter had bubbles. I don’t understand what is happening.
You may just need to let your starter sit for a few more days before making the bread. It may be bubbling but just not have enough strength yet to let the bread rise. How long did you leave the starter out before attempting to make bread?