Affiliate disclosure: This post may contain affiliate links. Please see our Privacy Policy.
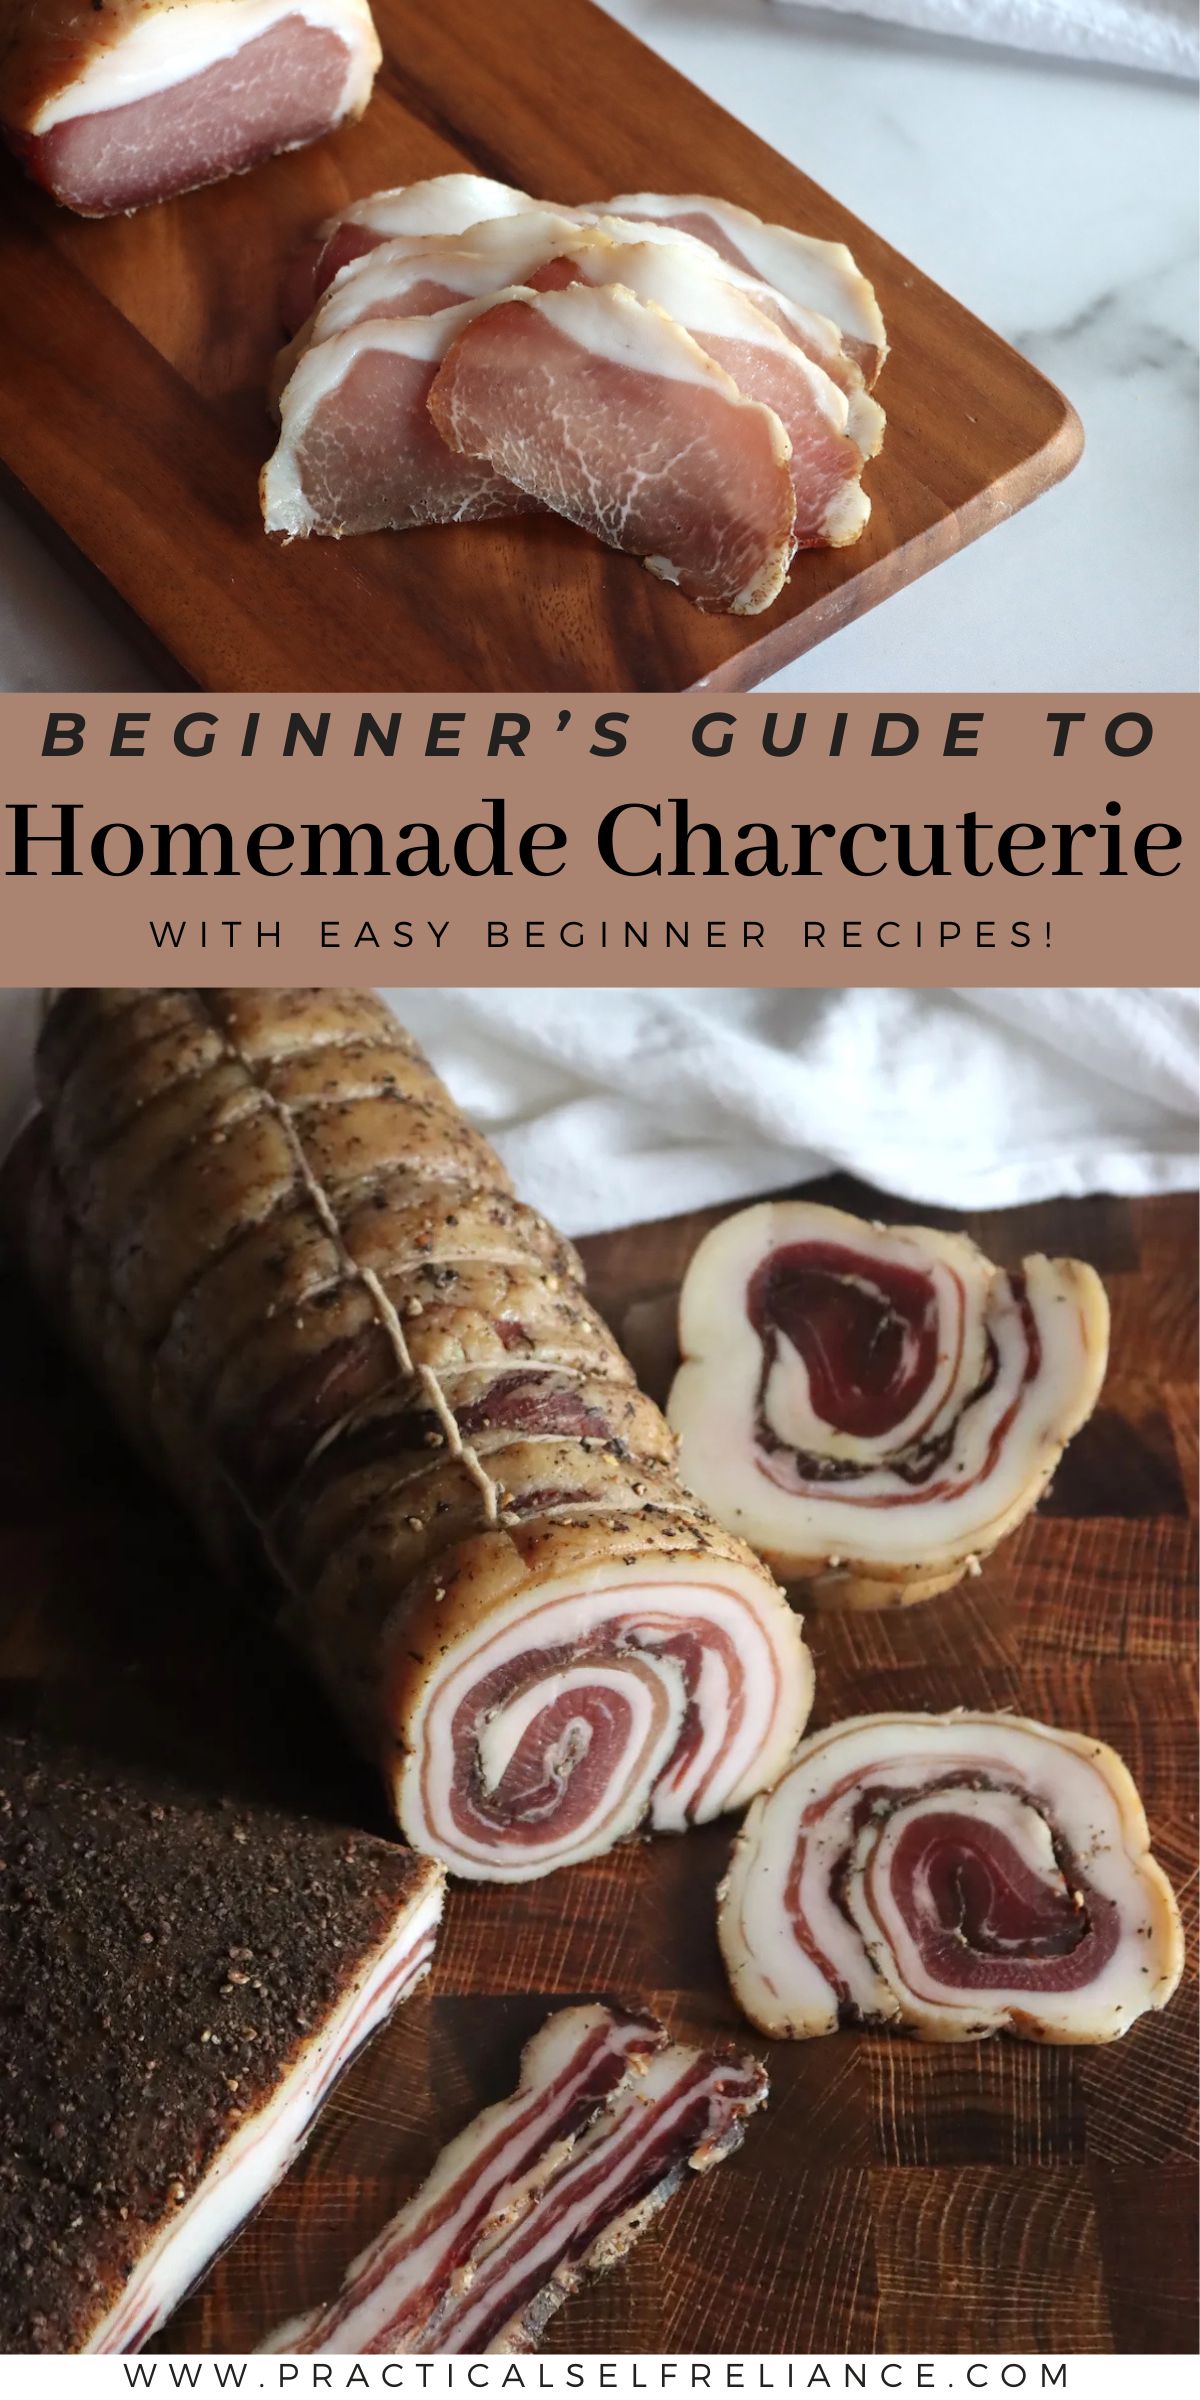
Homemade charcuterie is easier than you think, and in many cases, all you need is a bit of meat, salt and patience!
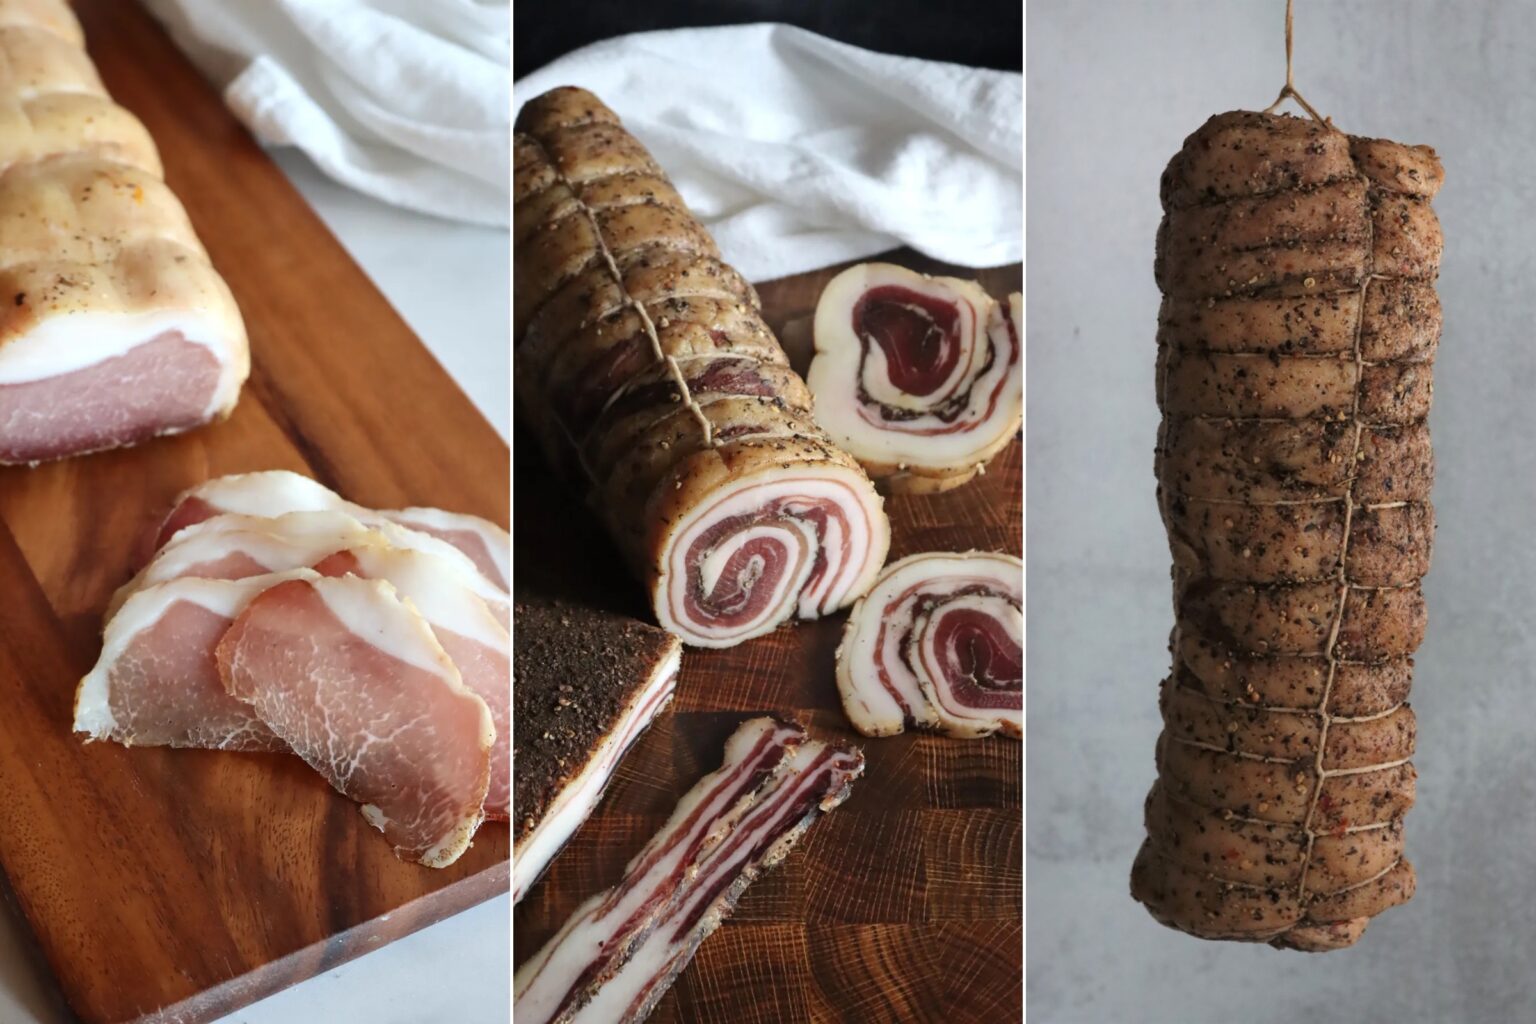
Table of Contents
- What is Charcuterie?
- Whole Muscle Cures vs. Salami
- How Does Curing Preserve Meat without Refrigeration?
- Basic Charcuterie Process
- Supplies & Equipment for Charcuterie
- Choosing Meat for Charcuterie
- Methods of Whole Muscle Curing
- Hanging Time for Cured Meats
- Basic Instructions Whole Muscle Charcuterie Recipe
- Beginner Charcuterie Recipes
- Beginner Cured Meats (No hanging)
- Simple Beginner Cured Meats (No Specialized Equipment)
- Intermediate to Advanced Cured Meats
Charcuterie is a traditional preservation method that has endured through the ages, and its enduring popularity is a testament to just how good it tastes. While many older preservation techniques have fallen out of favor with the advent of refrigeration—hard-tack being a prime example—charcuterie remains highly sought after. In fact, well-crafted charcuterie is often a centerpiece of elegant gatherings, and some of the most expensive and sought after ways to set a nice table include well made charcuterie.
This ancient craft has evolved to include a wide range of products, from whole muscle cures like prosciutto and ham to ground meat products like salami and chorizo. Each type of charcuterie offers a unique taste and rich history.
In this guide, we’ll explore the basics of charcuterie, focusing on whole muscle cures that are perfect for beginners. These recipes require minimal specialized equipment and are generally safer than ground meat cures, making them an ideal starting point for those new to charcuterie. We’ll cover essential techniques such as salt curing, nitrite usage, and the importance of controlled environments for drying.
Whether you’re interested in making pancetta, guanciale, or other cured meats, this guide will walk you through the process step by step, providing you with the knowledge and confidence to create delicious charcuterie at home.
What is Charcuterie?
Charcuterie is the art of preserving and curing meats to create a wide range of delicious and visually appealing products. It encompasses various techniques, from dry curing to fermentation, to transform raw meats into savory, flavorful delicacies. Charcuterie includes both whole muscle cures, such as prosciutto and ham, and ground meat products like salami and chorizo. These cured meats are often characterized by their rich flavors, firm textures, and vibrant colors.
Examples of charcuterie include the iconic Italian prosciutto, Spanish jamón ibérico, and French saucisson sec. Each type of charcuterie offers a unique taste experience, from the sweet, melting texture of prosciutto to the spicy kick of chorizo.
Whole Muscle Cures vs. Salami
In the realm of charcuterie, two primary categories stand out: whole muscle cures and salami.
Whole muscle cures involve preserving large cuts of meat, such as hams or prosciutto, without grinding or stuffing into casings. These cures typically use a dry cure or equilibrium cure method, where salt and sometimes nitrites are applied directly to the meat surface. The final product retains the texture of the original muscle, often becoming tender and firm, with flavors developed through the curing process. Examples of whole muscle cures include Prosciutto di Parma and Jamón Ibérico.
Salami, on the other hand, involves grinding meat, mixing it with spices and curing agents, and stuffing it into casings. This process creates a more complex product with a higher risk of contamination due to the grinding and stuffing process. Salami requires fermentation and drying, which contributes to its distinctive taste and aroma. However, because of the grinding and stuffing process, there is a higher risk of contamination, particularly from Clostridium botulinum. Therefore, using nitrites and maintaining proper fermentation conditions are crucial to ensure safety.
For beginners, whole muscle cures are an ideal starting point. They are generally safer and less complicated than salami, requiring minimal specialized equipment. In contrast, salami and other ground meat cures demand more complex setups, including specialized equipment and cultures, which can be daunting for those new to charcuterie.
Plus, the risk of contamination is higher with ground meats, making whole muscle cures a more forgiving and safer choice for learning the basics. This article will focus on whole muscle cures, providing a solid foundation for those interested in exploring the world of charcuterie.
How Does Curing Preserve Meat without Refrigeration?
Curing preserves meat by controlling water activity, acidity, and using fermentation or smoking to create an antimicrobial environment. This process prevents the growth of harmful bacteria, allowing the meat to be stored safely without refrigeration.
It’s important that the salt concentrations are correct in the initial cure, as the salt is what’s creating the proper conditions for preservation.
Basic Charcuterie Process
While specific recipes vary depending on the cut of meat and desired flavor, the basic steps for making charcuterie are similar across different types:
- Acid Wash (Optional): Some recipes start with an acid wash to help preserve the meat. For whole muscle cuts, the main source of contamination is the exterior, and creating an acidic environment right from the start helps prevent issues. It’s often traditionally done with wine.
- Salting & Spicing: This involves a dry cure or wet cure, sometimes using nitrites, and the time can range from a few hours to weeks. Basically, the meat is surrounded by salt and spices and allowed to “cure” until the flavor and salt has evenly penetrated the cut of meat. The total time is usually around 1 day for every ¼ inch of thickness on the piece of meat, plus 2 days.
- Washing: Remove excess salt to prevent over-salting. At the end of the curing process, all the extra salt and spices are washed off the outside of the meat, so that it doesn’t keep getting saltier. This again is sometimes done with wine for traditional reasons, but also to maintain an acidic environment.
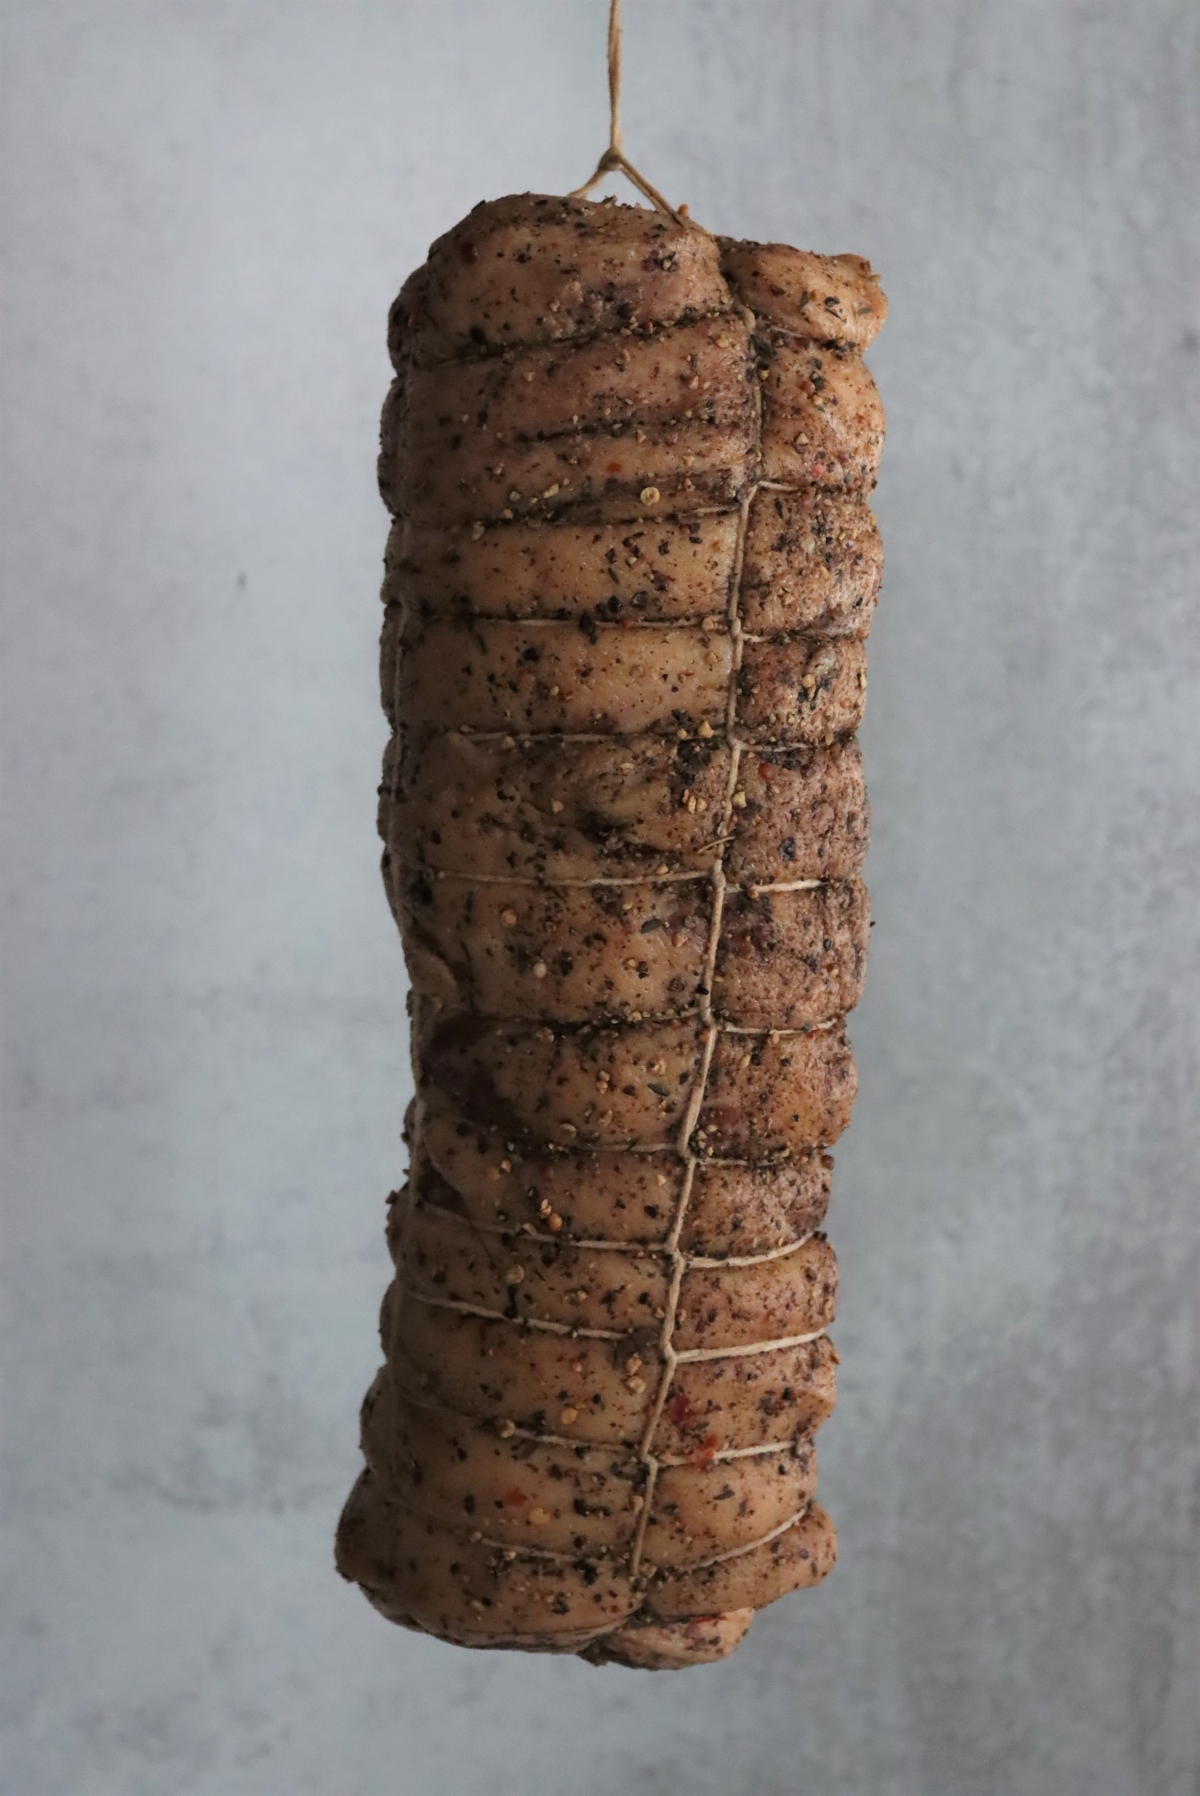
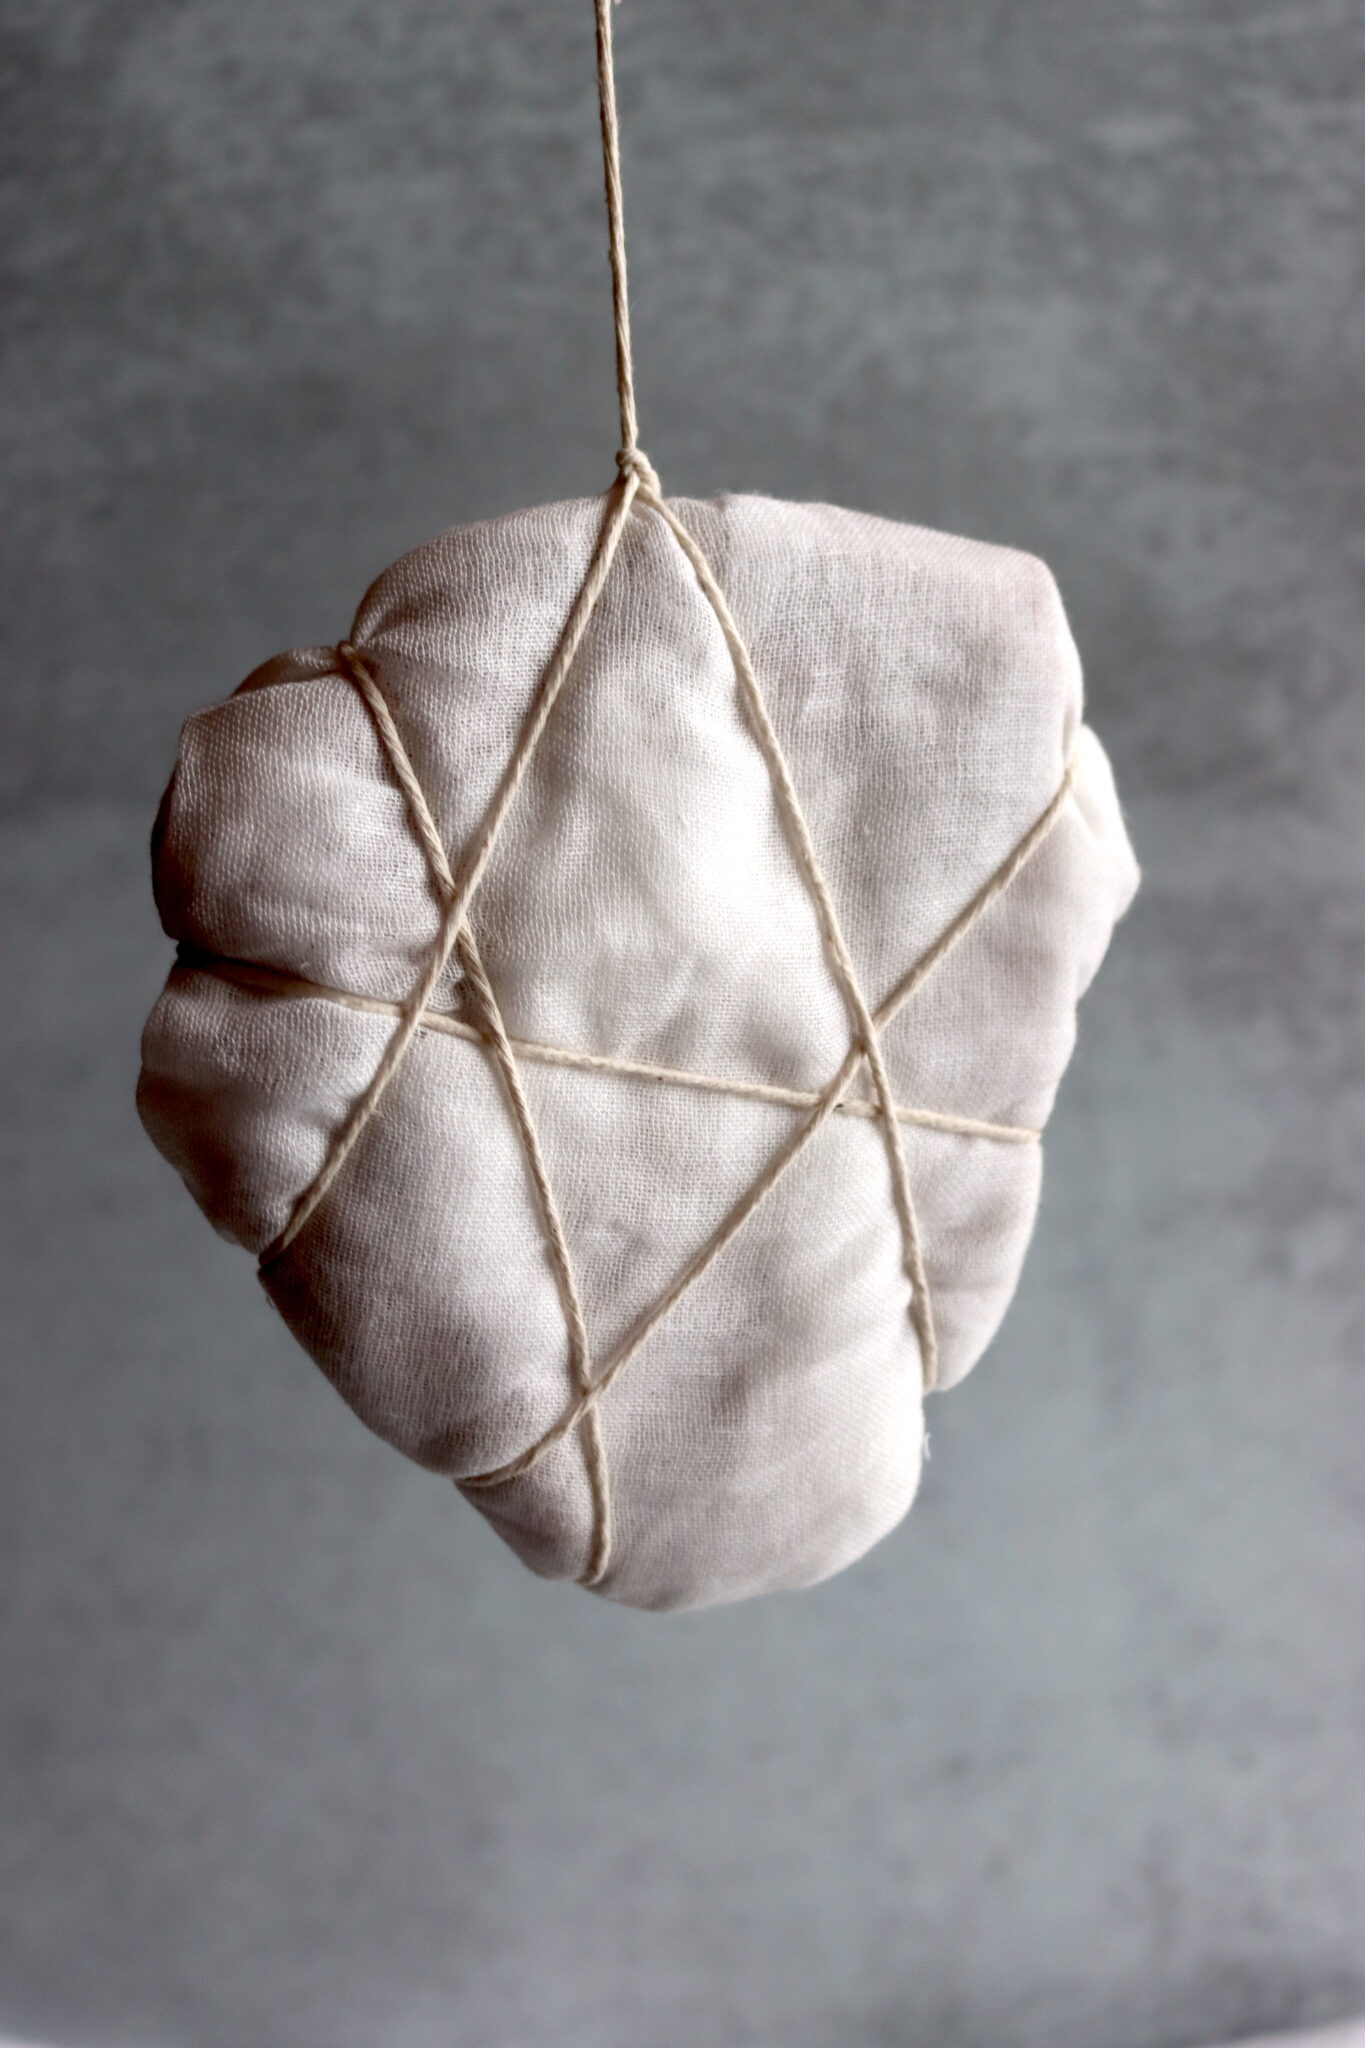
- Hanging/Curing: Meat is often hung in a controlled environment, sometimes wrapped in cheesecloth or animal intestine, and rubbed with protective coatings. For most cures, that means 65 to 80% humidity, and 50 to 60 degrees F. These days, they have specialty charcuterie wraps you can use to help maintain humidity to allow you to cure meat in your standard home refrigerator.
- Finishing: Some charcuterie is cooked lightly, while others are eaten raw after curing.
Supplies & Equipment for Charcuterie
Many types of charcuterie can be made with just meat and salt, but some require specialized equipment:
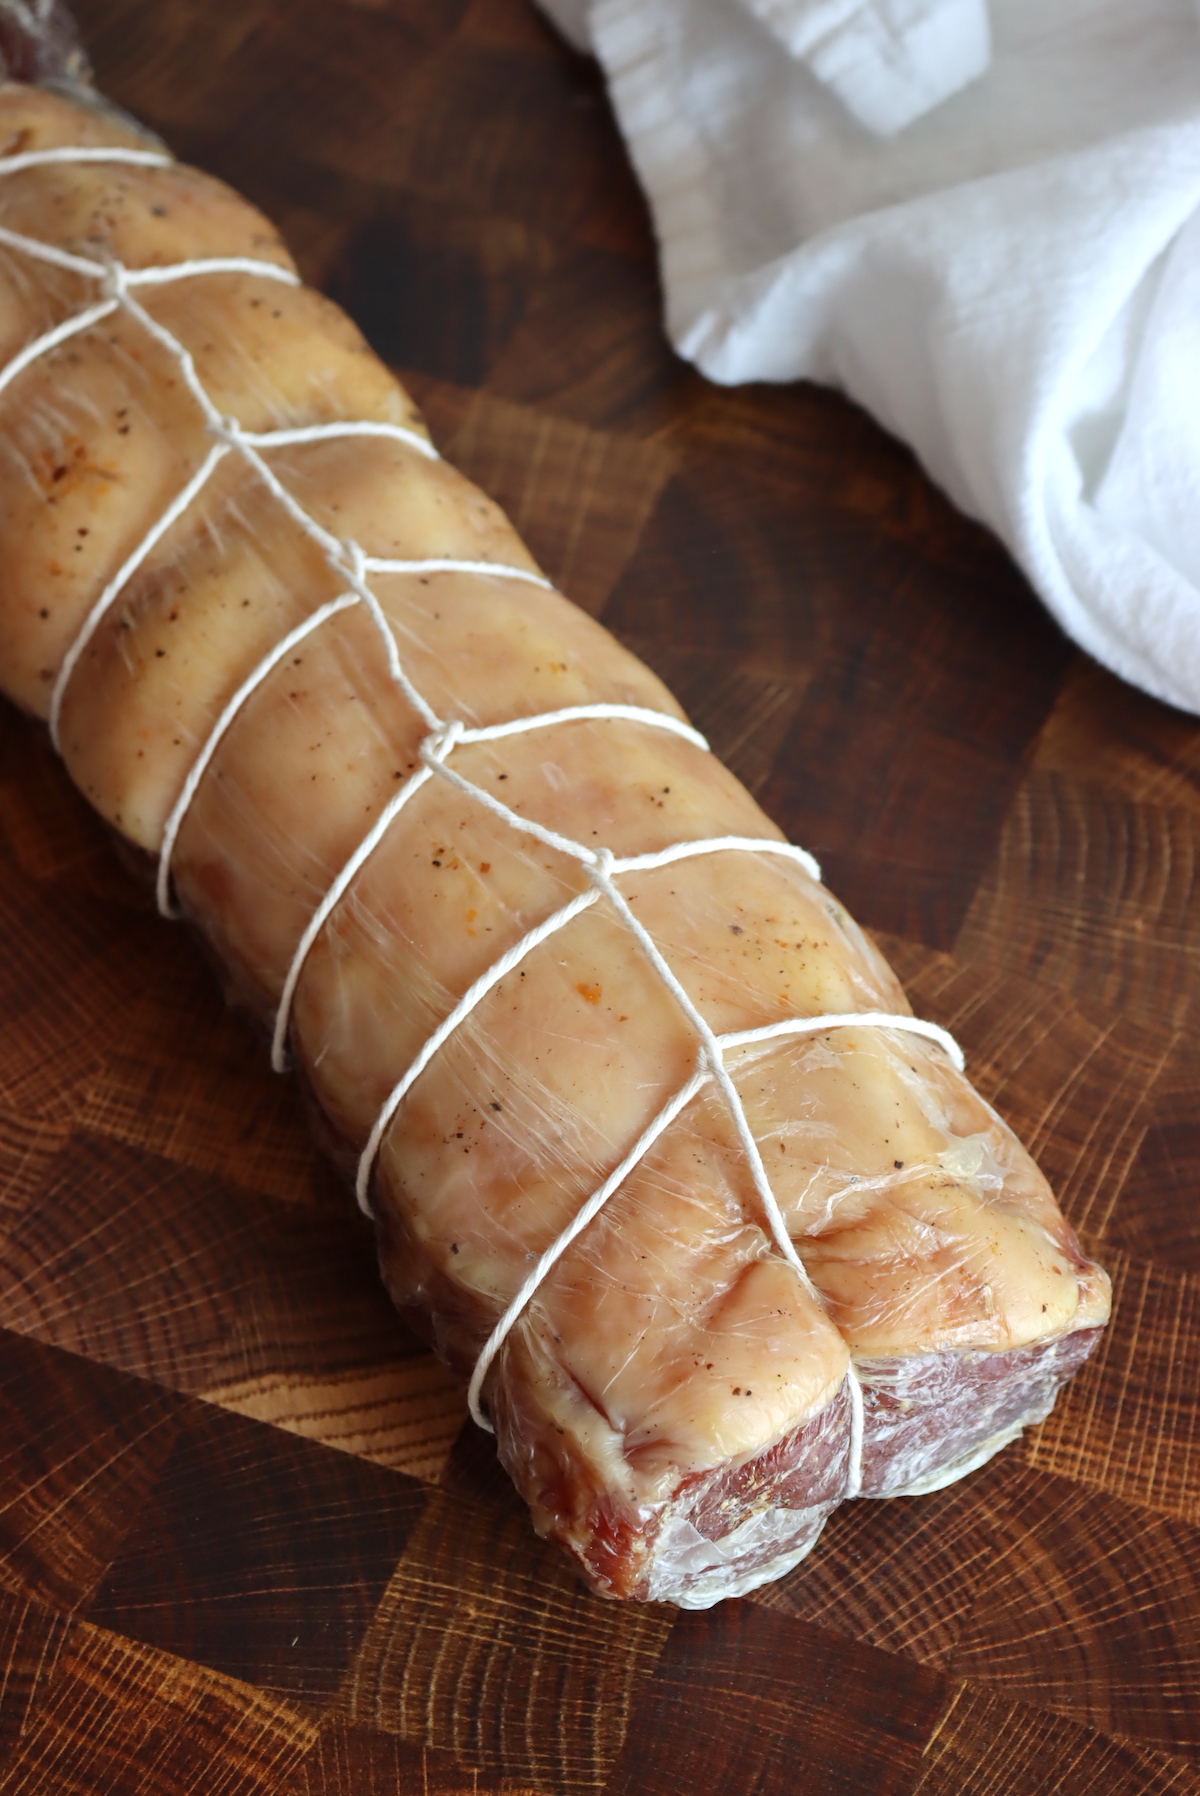
- Twine: For hanging and securing meat during curing. Any butchers twine or meat trussing twine will do. It comes in rolls for a few dollars.
- Meat Slicer: For slicing cured meats thinly. This is totally optional, and kind of a luxury item. I just use a sharp knife.
- Curing Chamber: A controlled environment for curing, which can be as simple as a temperature-controlled room or as complex as a dedicated curing cabinet. Or just a cool basement or back closet with a humidifier will work in a pinch. You can also use charcuterie wraps, which control humidity.
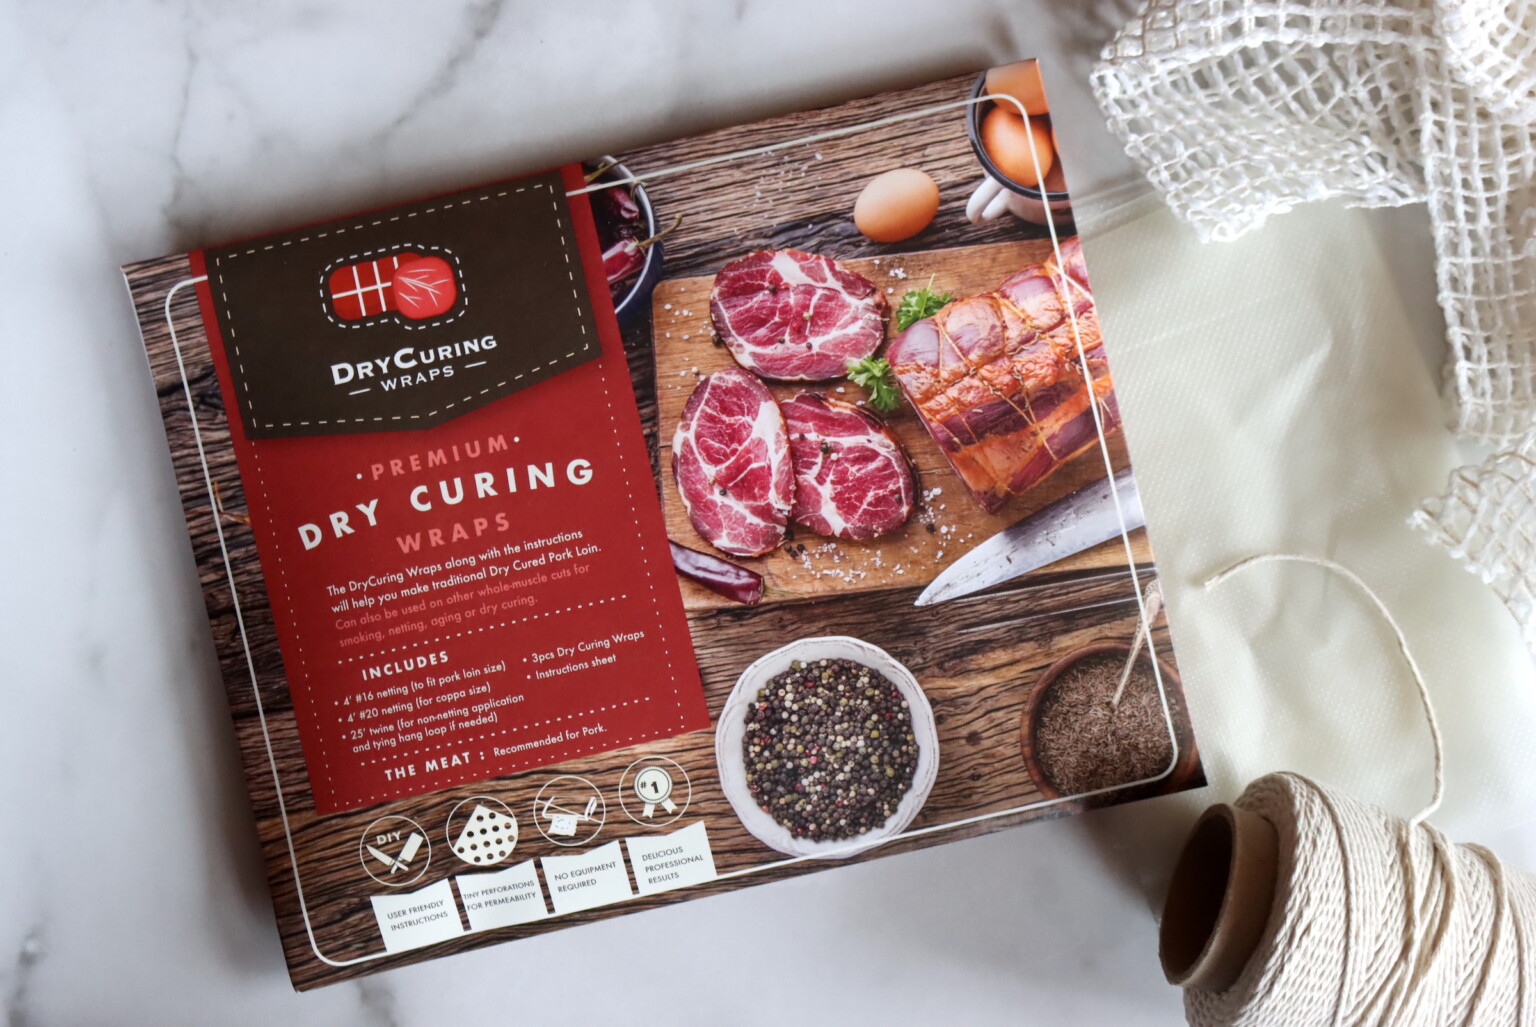
- Charcuterie Wraps: These specialty meat wraps control humidity and allow you to dry and age your charcuterie right in your refrigerator. A fridge is a bit cooler than a normal cooling chamber, so it takes a bit longer, but it’s a safe dependable way to get the job done, especially if you live in a hot climate.
- Meat Grinder: For grinding meat, especially for sausages. I won’t be covering sausages or salami in this guide, as they’re much more difficult and prone to contamination. Still, if you’re looking for a good grinder, we use a nice one from LEM.
- Curing Salts: While not necessary for many types of whole muscle cures, there are a few types that cannot be made without nitrites. Those include anything that’s in a casing or smoked. They come in two types, Prague Powder #1 and Prague Powder #2, and I’ll describe them in detail in a moment.
Choosing Meat for Charcuterie
As with any artisanal product, the end result is often only as good as what goes in. Choose highest quality meats available, freshest spices.
Some types of traditional charcuterie actually have specific feeding regimens for the animals to change the proportion and type of fats in the meat. Acorn fed pork, for example, has fat types that prevent rancidity over many year age times and help to create some of the highest quality cured meats anywhere.
Even without “acorn fed” or specific types of meat, most traditional charcuterie just uses the family pig, raised on the farm with plenty of space, high quality feed and back scratches from the kids. Any high quality humanely raised meat has the potential to create incredible home charcuterie.
Freshness is key, and sometimes meat from the local butcher has been in the case for a while. If you can, get it straight from the source.
When we’re not processing our own meat, I order specific cuts from Porter Road because they’re high quality, fresh and often they have cuts you just can’t get anywhere else.
Methods of Whole Muscle Curing
Salt is crucial in charcuterie for its preservative and flavor-enhancing properties. It works by reducing water activity, which inhibits bacterial growth, and by adding flavor to the meat. The concentration of salt is important to prevent over-salting or under-salting, which can affect the final product’s taste and safety.
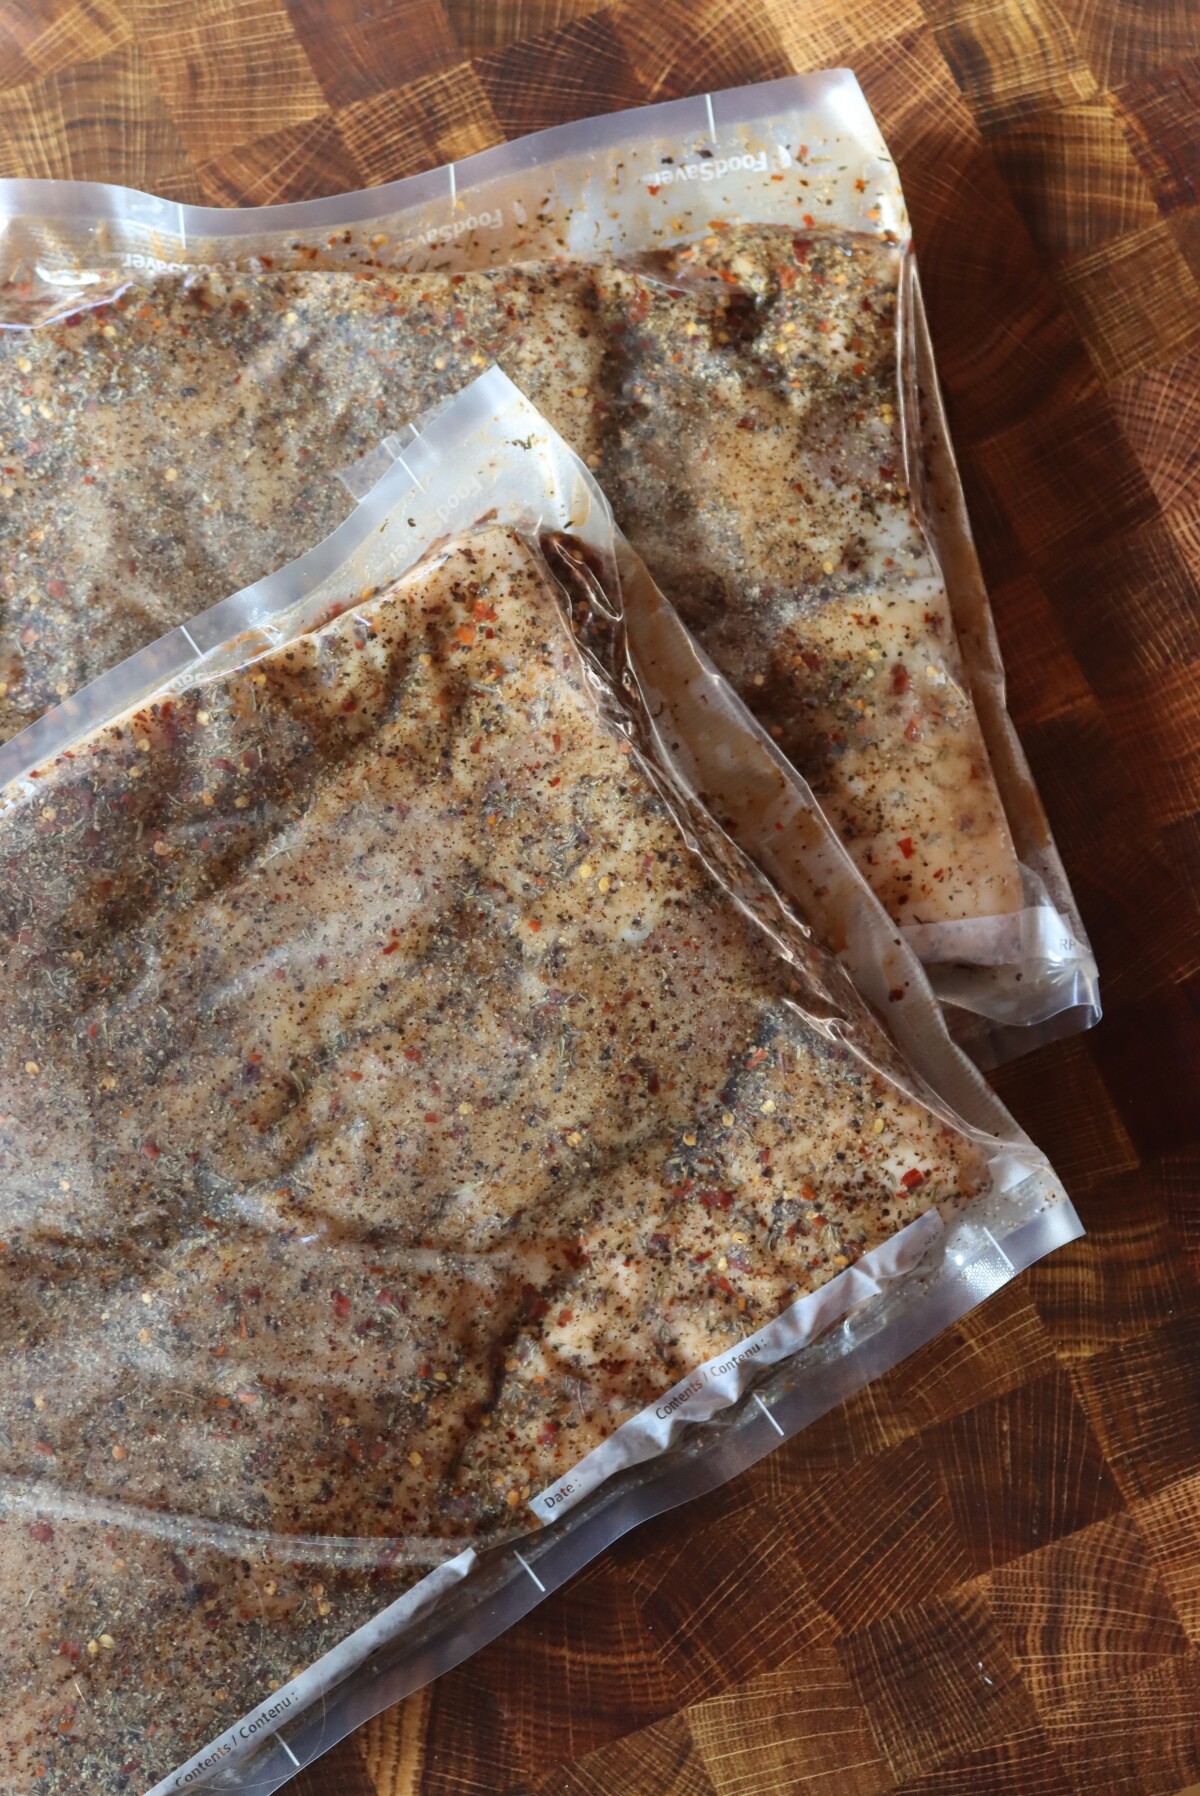
- Equilibrium Cure: This method involves applying a specific amount of salt to the meat, typically between 3% and 3.5% of the meat’s weight, to achieve equilibrium. The meat is usually placed in a sealed bag and refrigerated, with regular flipping to ensure even distribution of the brine formed by the salt pulling out moisture from the meat.
- Salt Box Cure: This method involves covering the meat in a layer of salt, which can result in a higher salt concentration than the equilibrium method. It’s often used for larger cuts of meat such as whole ham legs for prosciutto, as they won’t easily fit in bags in the refrigerator but they can be packed in a box of salt and stored in a cool basement to cure.
The equilibrium method often resulted in a more controlled cure and prevents the cut from getting too salty, but it’s a bit more finicky and you need a digital scale. The salt box method is quick and easy, but doesn’t work if you’re using nitrites as those MUST be carefully measured.
Nitrites in Charcuterie
Nitrites are essential for preventing bacterial growth, particularly Clostridium botulinum, which causes botulism. They also contribute to the characteristic pink color and flavor of cured meats.
They are not strictly required in many types of whole muscle cures, provided the muscle remains whole and is left flat (not rolled). Cures that involve smoking or grinding the meat cannot be cured without nitrites.
Types of Nitrites
Commercially produced nitrite powders are almost all regular salt, with just a small amount of nitrites by weight. That’s because you need so little to get the job done, and it can be impossible to measure such small quantities. A little dilution with regular salt, and they’re much easier to work with (but you still only need a very small amount to get the job done).
Common curing salts include Prague Powder #1 (6.25% sodium nitrite) for short-term cures where the meat will be hanging for and Prague Powder #2 (6.25% sodium nitrite and 4% sodium nitrate) for longer cures.
As cured meats age, the sodium nitrite in the cure breaks down, losing its preservative effect over time. For longer cures, sodium nitrate is essential because it slowly converts to sodium nitrite, providing a sustained preservative action. This is crucial for preventing bacterial growth and ensuring safety and flavor in meats cured for several weeks or months.
How Much Nitrites to Use
When working with nitrites in charcuterie, it’s crucial to understand how to calculate the correct concentration based on the weight of the meat. Typically, Prague Powder #1, which contains 6.25% sodium nitrite, is used at a concentration of about 0.25% of the meat’s weight. This means for every 100 pounds of meat, you would use ¼ pound of Prague Powder. A small pouch of prague powder goes a long way!
To illustrate this with a practical example, consider curing 5 pounds of meat. For this amount, you would need just under 6 grams of Prague Powder #1 for 5 pounds of meat. It’s important to note that nitrites are used in addition to salt for their preservative effects, not as a replacement for salt. Always ensure that you’re using the correct type of curing salt for your specific application, as substituting one type for another can affect both safety and flavor.
Prague Powder #2 is a curing salt used for dry curing meats that require prolonged curing times or are smoked, such as hard salami and country ham. It contains 6.25% sodium nitrite, 4% sodium nitrate, and 89.75% salt. It’s used at the same rate (0.25% of the meat weight).
You have to refer to the specific recipe to determine which to use, but in general, #1 is used with short cures and where the meat will be cooked after curing. Prague Powder #2 is used for meats that air dry for months, and with salami.
Since Prague Powder #2 has all the same stuff as #1, plus a few extra things, you’d never use both in the same recipe.
Salt Curing Time
When using the equilibrium curing method, the curing time is generally determined by the thickness of the meat rather than its weight. A common guideline is to cure for about 1 day per 1/4 inch (6 mm) of meat thickness, plus two days to ensure thorough penetration of the cure. For example, if you have a piece of meat that is 1 inch (25 mm) thick, you would cure it for approximately 3-4 days per inch, which translates to about 7-10 days for a 1-inch thick piece.
This method is quite forgiving, and the cure will distribute evenly throughout the meat as long as it is properly sealed in a bag and refrigerated. After the curing period, the meat is rinsed to remove excess salt and then hung to dry in a controlled environment until it reaches the desired level of dryness.
For thicker cuts, you might extend the curing time accordingly. For instance, a piece that is 2 inches thick would typically require about 14 days of curing (2 inches x 3-4 days per inch, plus any additional days for safety).
Hanging Time for Cured Meats
After the curing process, the next step in creating delicious charcuterie is the drying phase, where the meat is hung in a controlled environment to lose moisture and develop its characteristic texture and flavor. The hanging time is typically determined by the amount of weight loss the meat undergoes, rather than a fixed duration.
A common guideline for hanging cured meats is to continue the drying process until the meat has lost about 30% to 40% of its initial weight. This weight loss ensures that the meat reaches a safe moisture level, which is crucial for preventing bacterial growth and achieving the desired texture.
For example, if you start with a piece of meat weighing 10 pounds (4.5 kg), you would aim for it to lose about 3 to 4 pounds (1.36 to 1.82 kg) during the drying phase. The exact percentage of weight loss can vary depending on the type of meat and the desired final product. For instance, prosciutto might be dried to a higher weight loss percentage than a ham.
The ideal conditions for hanging cured meats are typically between 50°F and 60°F (10°C to 15°C) with a relative humidity of 60% to 80%. Maintaining these conditions is crucial to prevent the meat from drying too quickly on the outside, which can lead to case hardening, or becoming too moist, which can promote unwanted mold growth.
Temperature and humidity play critical roles in ensuring that the meat dries evenly and safely. Too high a temperature can encourage the growth of harmful bacteria, while too low a temperature can slow down the drying process. Similarly, humidity levels that are too low can cause the outside of the meat to dry too quickly, while levels that are too high can lead to mold growth.
Basic Instructions Whole Muscle Charcuterie Recipe
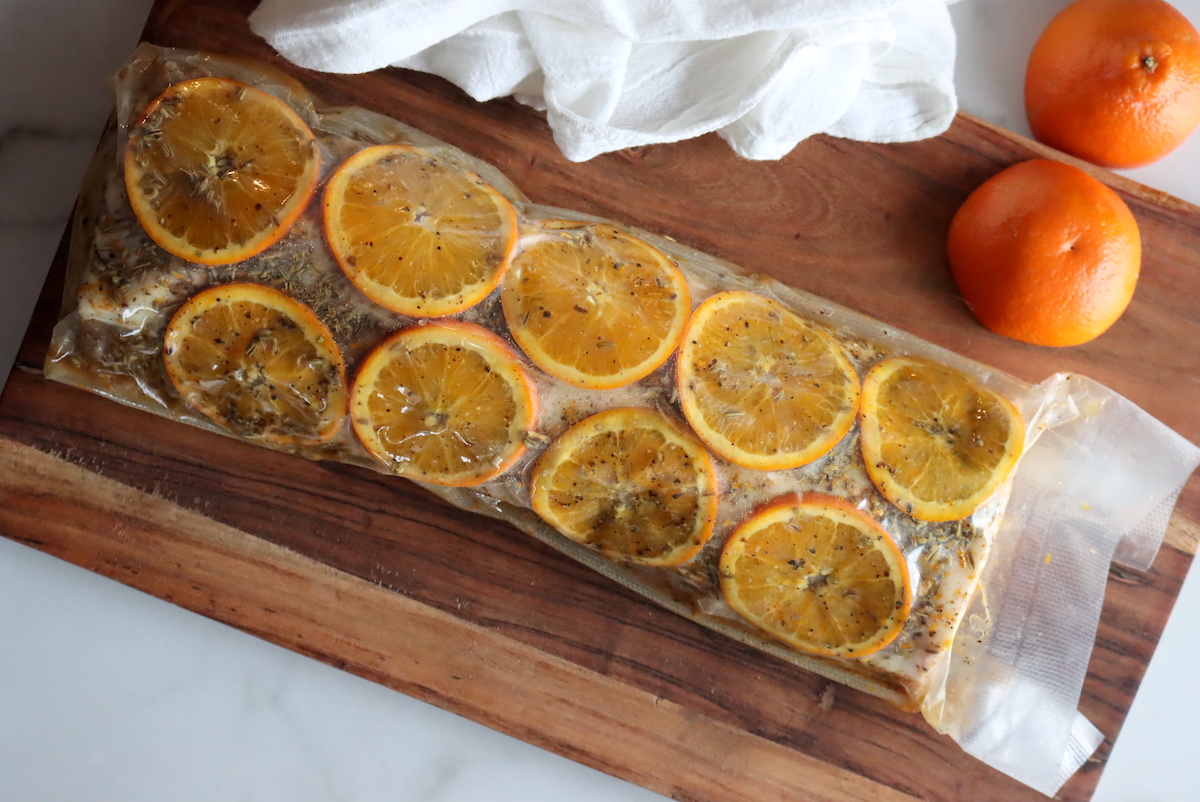
To cure a 5-pound cut of meat, such as pork belly for pancetta, you’ll start by preparing a cure mixture. For pancetta, the cure typically includes salt, which must be at least 3% of the meat’s weight to ensure proper curing, but sometimes 3.5 to 4% based on personal tastes. Other ingredients like sugar, spices, and nitrites can be added for flavor.
For a 5-pound piece of meat, you would need about 2.5 to 3.5 ounces (70 to 100 grams) of salt. If using nitrites, such as InstaCure #1, you would add about 1 teaspoon (6 grams) for every 5 pounds of meat.
Once the cure is mixed, apply it evenly to both sides of the meat. You can place the meat in a non-reactive container or a ziplock bag to keep it tidy and ensure the cure penetrates evenly. Refrigerate the meat at a consistent temperature below 40°F (4°C) for about 5 to 14 days, depending on the thickness of the piece of meat. (It needs about 1 day per ¼ inch of thickness, plus 2 days. A 1 inch piece of meat would be equilibrium cured for 5-6 days.) Make sure you’re flipping it daily to ensure the cure distributes evenly throughout the meat.
After the curing period, rinse off the excess cure under cold running water and pat the meat dry with paper towels. If desired, coat the meat with additional spices, such as black pepper. You can also use white or red wine to rinse the meat, as is traditional in some countries.
Hang the meat in a cool, relatively humid environment, ideally between 50°F and 60°F (10°C to 15°C) with a humidity of 60% to 75%. The goal is for the cut of meat to lose about 30% of its initial weight, which usually takes 2 to 3 weeks. Regularly check the weight loss to determine when it has reached the desired level of dryness. Once it has lost the appropriate amount of weight, your meat is ready to be sliced and enjoyed.
Beginner Charcuterie Recipes
Now we’ve reached the fun part: Recipes!
For beginners, we focus on simple salt-cured meats that don’t require hanging, such as bacon and corned beef, which can be easily smoked or cooked after curing. For those with a bit more space and patience, we also cover recipes that involve air-drying, like pancetta and guanciale, which can be made with minimal specialized equipment. Finally, we delve into more advanced recipes that require specialized techniques or larger cuts of meat, such as prosciutto and speck.
Beginner Cured Meats (No hanging)
In general, I’m focusing on charcuterie recipes that are first cured in salt and spices, and then hung to dry age. While most people have a refrigerator to cure the meat, not everyone has a space to hang and age the meat at the appropriate temperature and humidity.
Specialty charcuterie wraps allow you to age it in the refrigerator, but still, it’s easier to start your curing journey with recipes that are not hung. These recipes are salt cured, and then either smoked immediately or cooked.
- Cured Pork Bacon: Made by salting pork belly and sometimes using nitrites for preservation. You can smoke it in a smoker, or simply slow cook it in the oven.
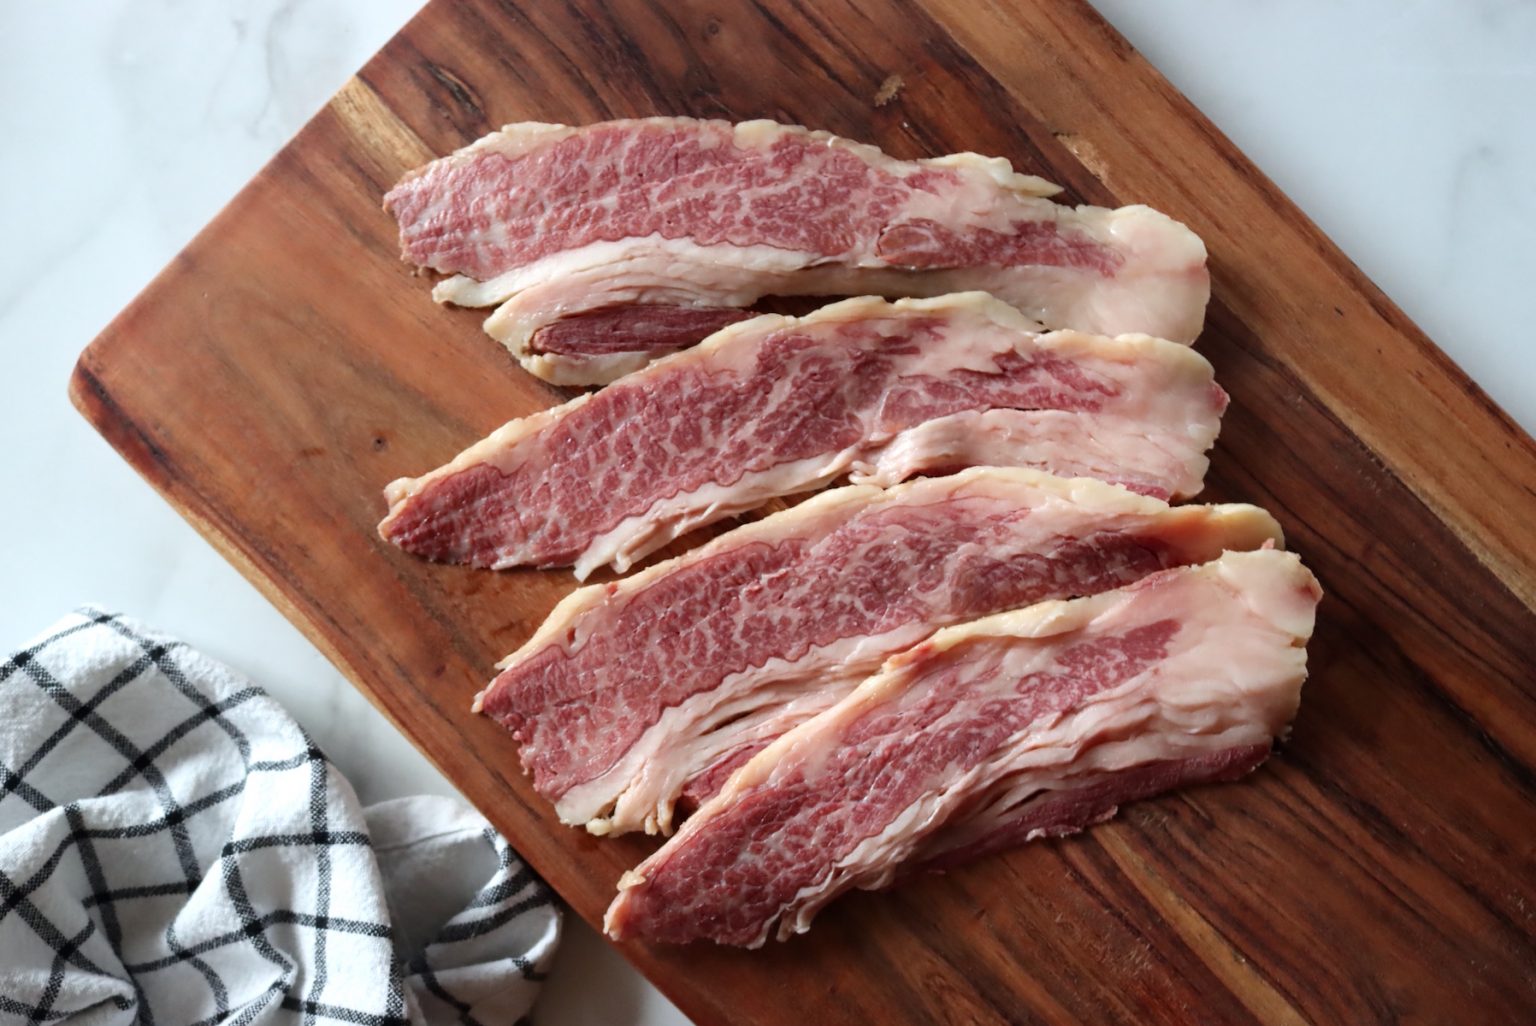
- Cured Beef Bacon: The exact same as pork bacon, but made with a fatty well marbled cut of beef like beef belly or brisket.
- Corned Beef: Traditionally served in the US for St. Patrick’s day, this cured beef brisket is cured in salt and spices and then slow cooked.
- Pastrami: A similar recipe to corned beef, but the meat is first cured and then smoked.
Simple Beginner Cured Meats (No Specialized Equipment)
This next group of recipes requires salt curing, and then the meats are hung to air dry. For most, a cool back closet or basement will do, provided it has enough humidity. A small humidifier in the cool room can help maintain the right conditions.
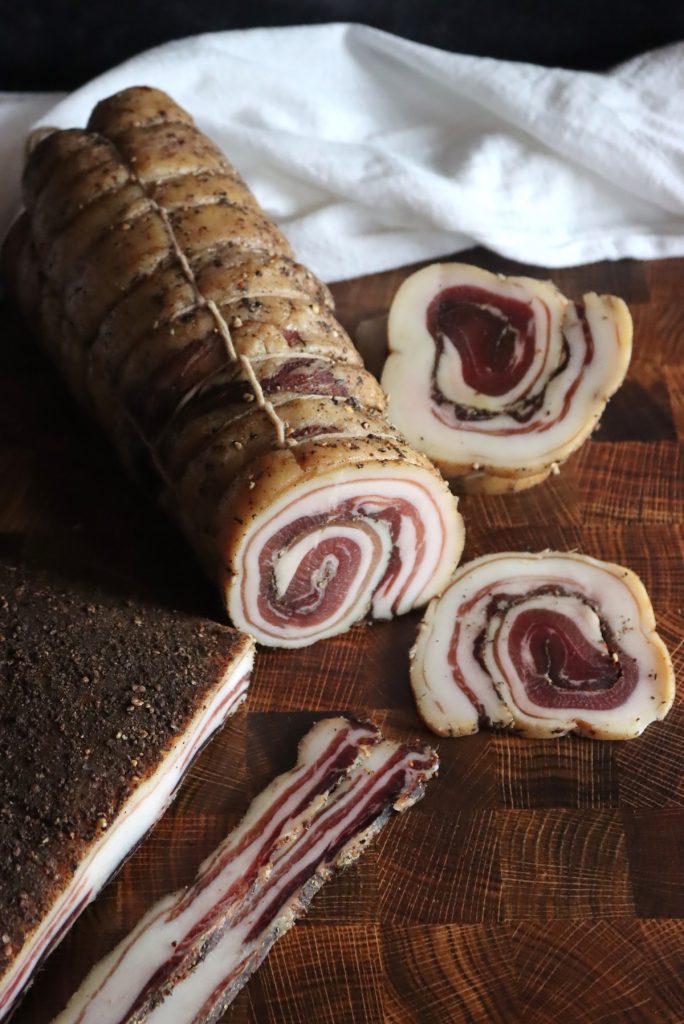
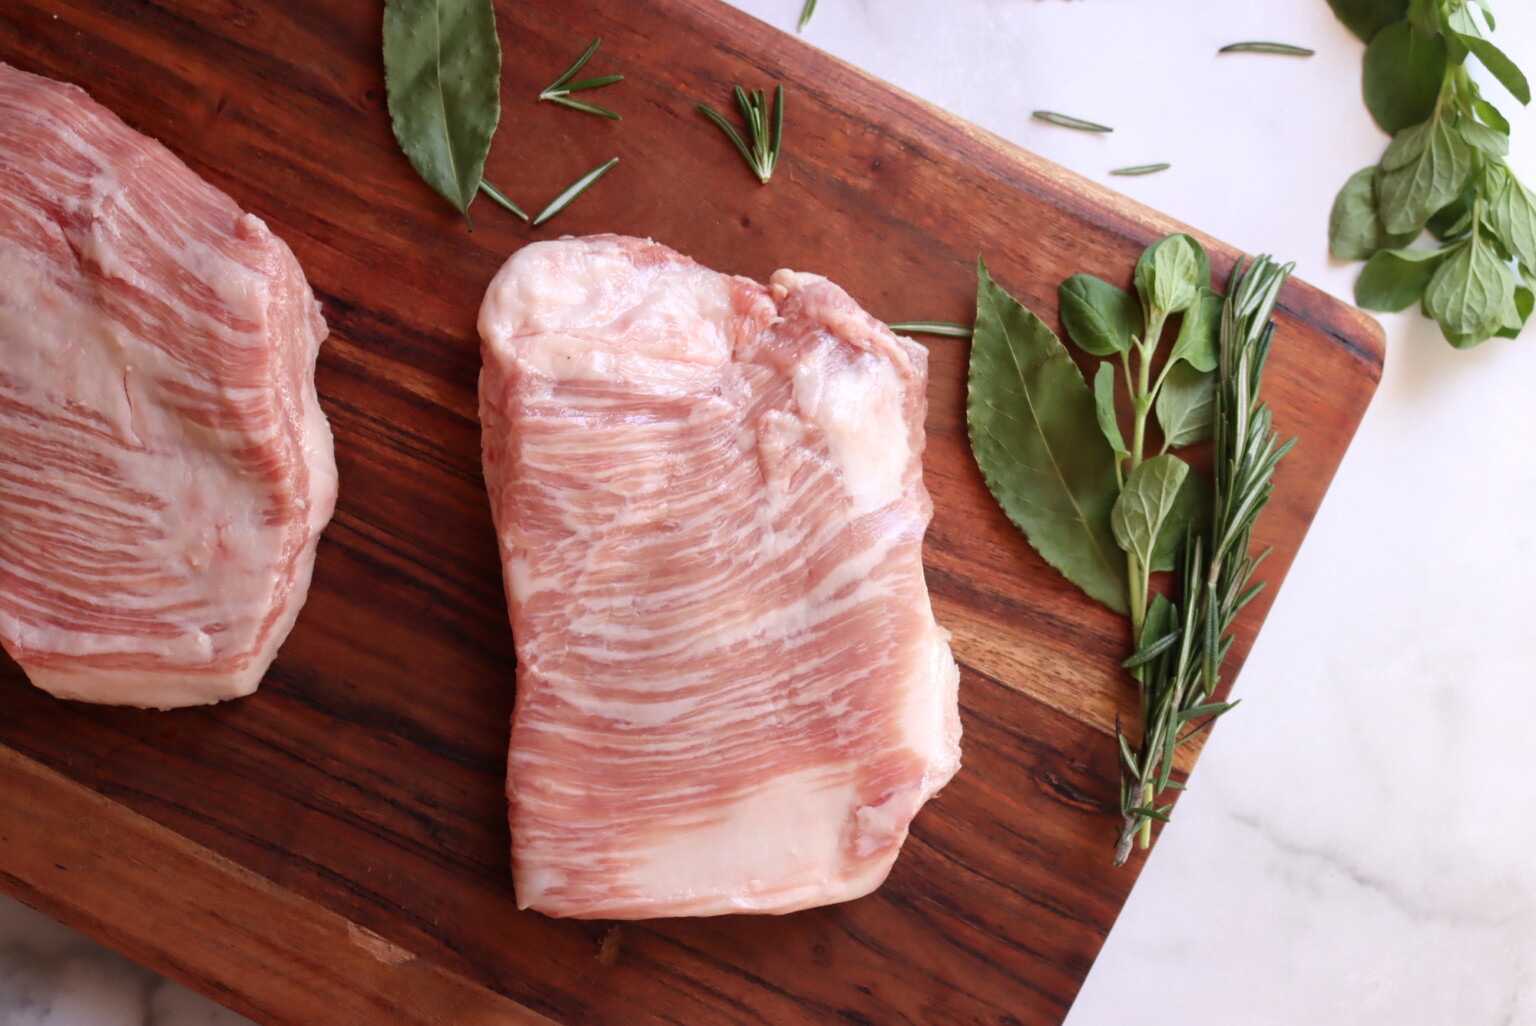
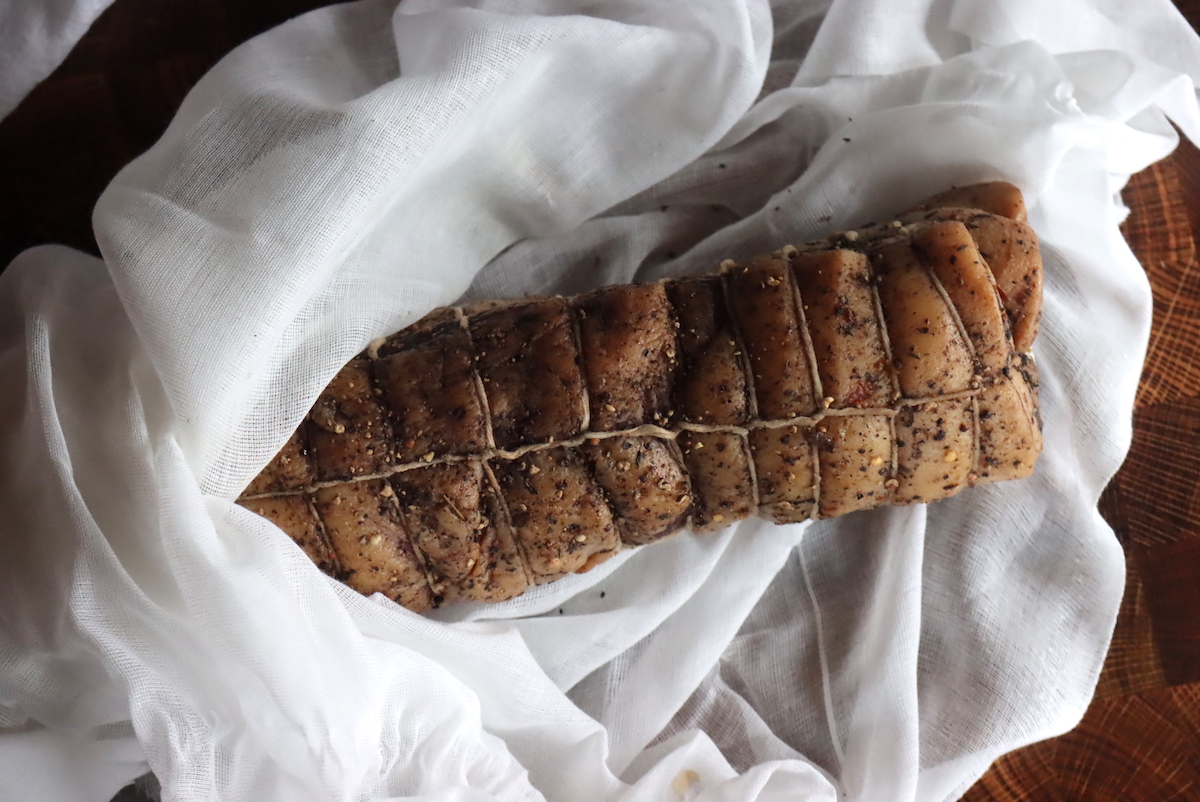
- Pancetta: An Italian cured pork belly, often flavored with salt, pepper, and herbs like rosemary and thyme. It can be made flat or rolled into a pinwheel.
- Guanciale: An Italian cured meat made from pork jowl or cheek, requiring careful seasoning and air-drying.
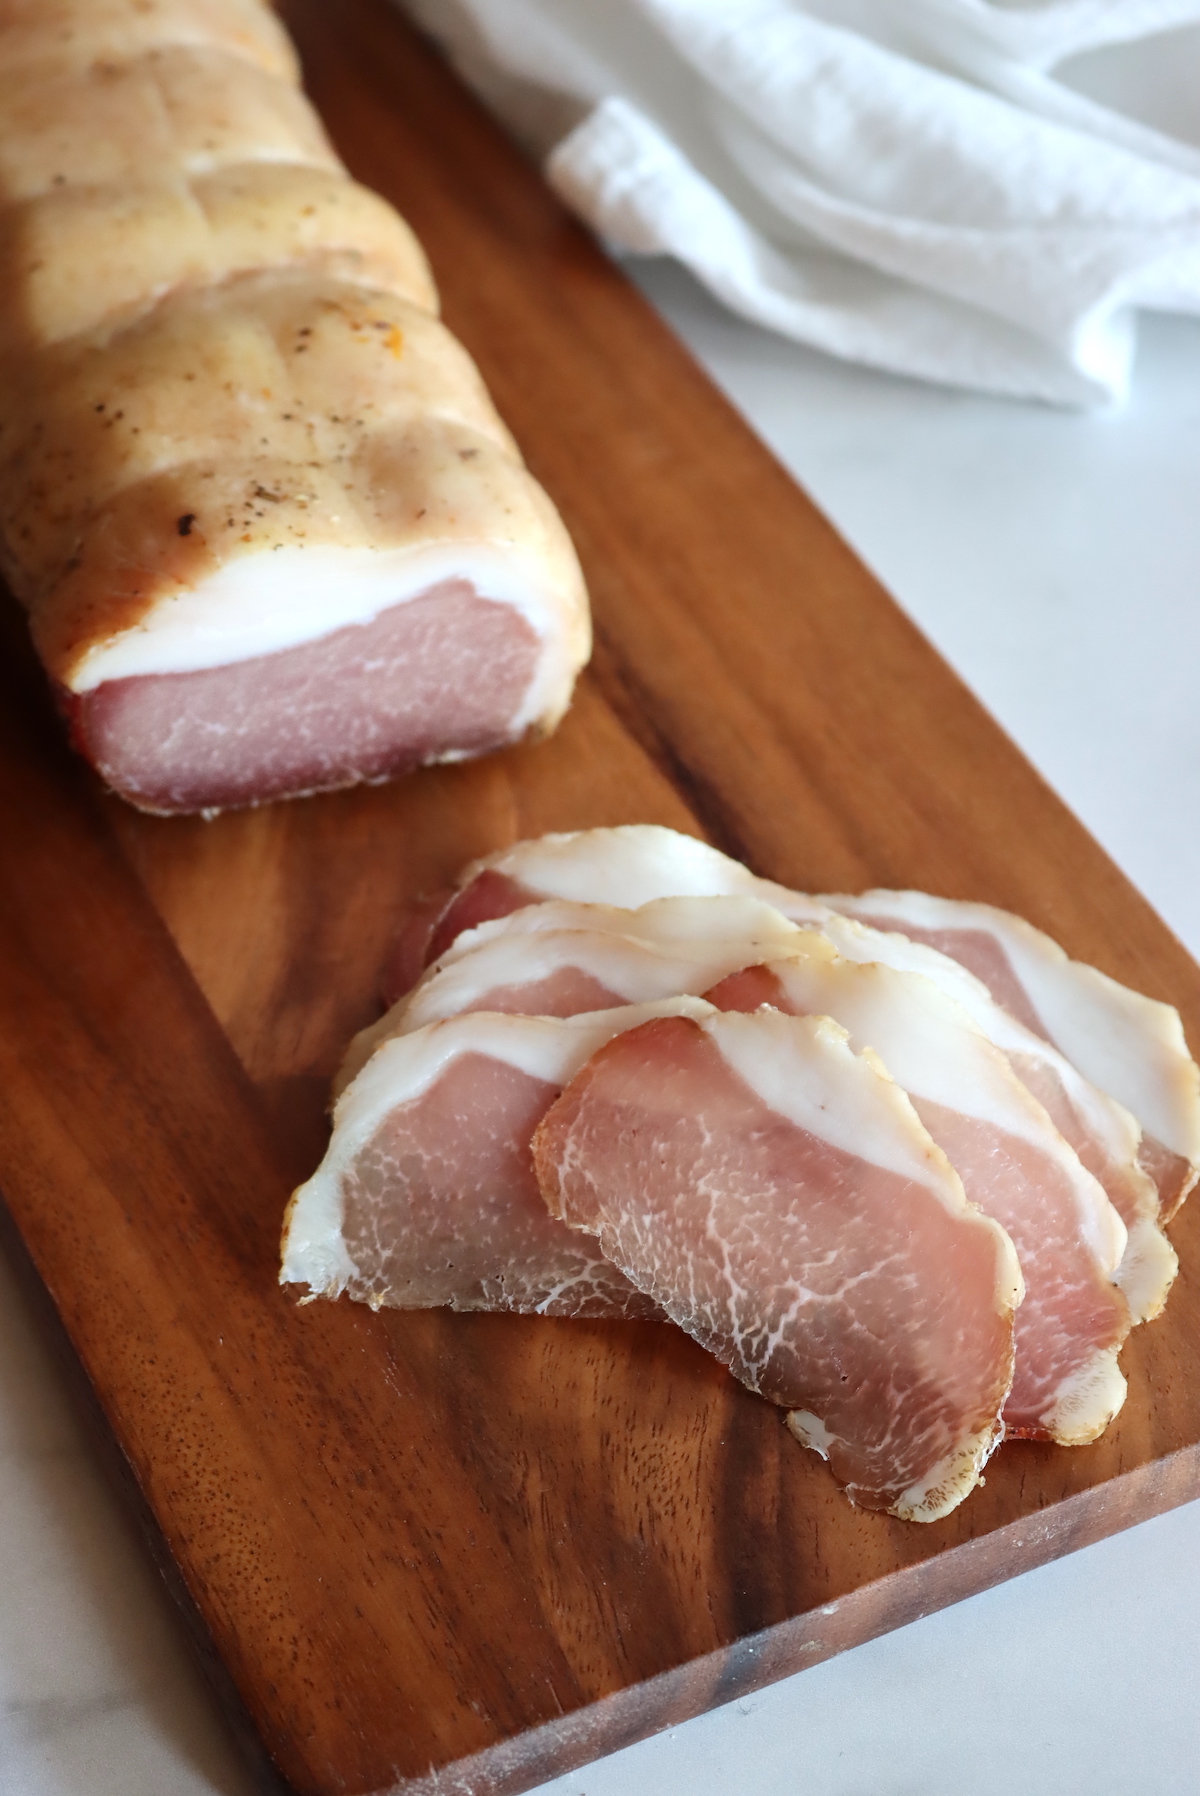
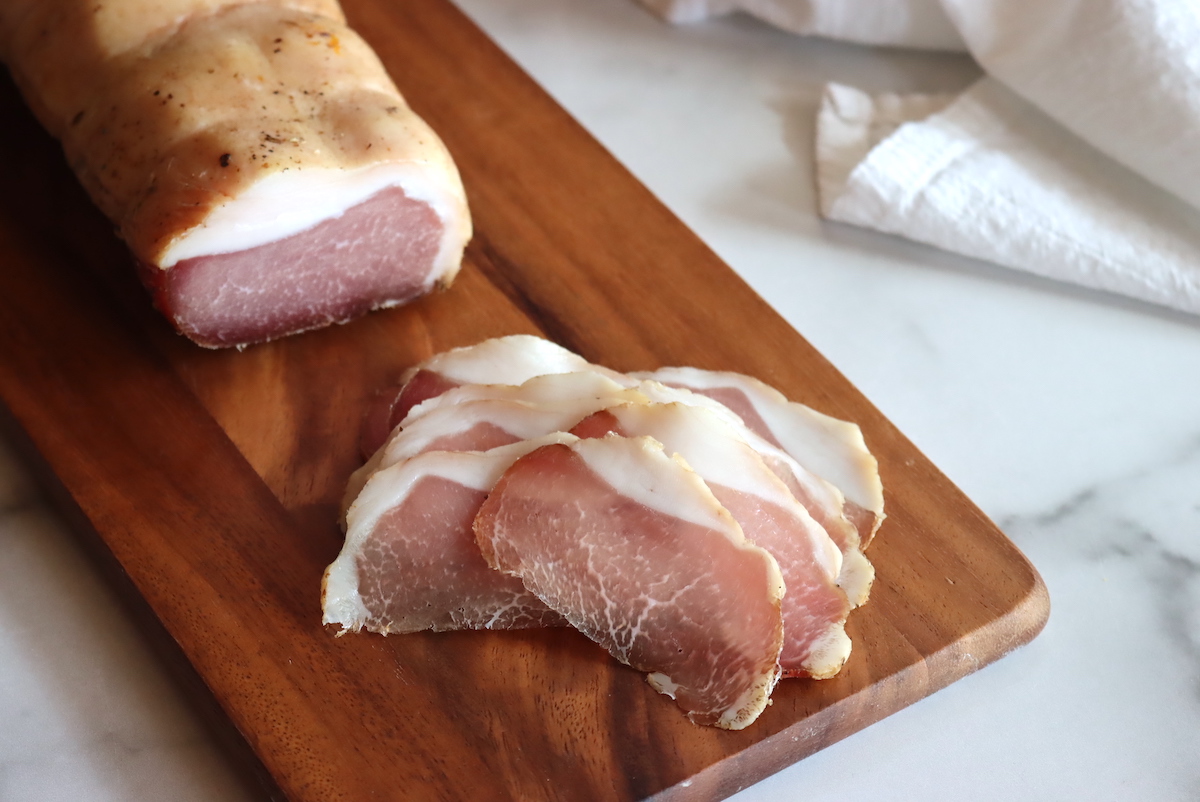
- Lonzino: A simple cured pork loin that’s incredibly rich and flavorful, and makes great sandwiches.
- Buckboard Bacon: A bacon like cure made from pork shoulder or neck, with a meatier richer flavor than belly bacon.
- Ventreche: Also known as French Bacon, but it has its own unique flavor.
- Lardo: An Italian delicacy made from pork fatback, cured with salt, herbs, garlic, and sometimes spices.
- Bresaola: An Italian-style air-dried beef, seasoned with spices and herbs.
- Basturma (or pastirma): A traditional air-dried cured meat, typically made from beef, that is coated with a spice mixture including garlic, paprika, and fenugreek.
- Duck or Goose Breast Prosciutto: A simple project that can be done in a fridge, ideal for beginners.
Intermediate to Advanced Cured Meats
These recipes require specialized techniques or equipment, or are simply made using giant cuts of meat (like prosciutto). You’ll need more space, equipment and dedication to make these recipes.
- Culatello: A premium Italian cured meat from the hind leg of the pig, requiring meticulous curing and aging.
- Fiocco: Made from the muscle in the back leg of a pig, it involves careful seasoning and air-drying.
- Prosciutto: Traditionally made by salting and air-drying the ham for several months.
- Capicola (Copa): An Italian dry-cured pork shoulder or neck, seasoned with garlic, wine, and herbs before air-drying. It’s often cured inside a casing, making nitrites essential to preservation.
- Tasso Ham: A smoked and cured venison ham, often used in Creole cuisine.
- Speck: A smoked and cured pork leg, requiring precise curing, smoking, and aging techniques.
- Tyrol Karreespeck: A traditional smoked pork loin from Austria, requiring careful salting, seasoning, and smoking over beechwood.
- Fenalår: A traditional Nordic cured mutton leg, primarily associated with Norway. It involves salting and seasoning a whole mutton leg with herbs and spices, followed by air-drying for several months.
- Biltong: A traditional South African dried meat that’s a bit like jerkey, but much more complex. It needs a specialized curing chamber with a lot of heat and air circulation, so it’s a bit tricky to make at home without building one yourself.
The art of charcuterie offers a fascinating journey into the world of cured meats, where traditional techniques meet modern creativity. By focusing on whole muscle cures, beginners can safely and effectively create delicious products like pancetta and guanciale at home.
Understanding the basics of curing, including salt concentration, nitrite usage, and controlled drying environments, is key to producing high-quality charcuterie.
Whether you’re just starting out with simple recipes or advancing to more complex projects, the world of charcuterie provides endless opportunities to explore new flavors and techniques. With patience and practice, you can master the art of transforming raw meats into unforgettable homemade charcuterie!