Affiliate disclosure: This post may contain affiliate links. Please see our Privacy Policy.
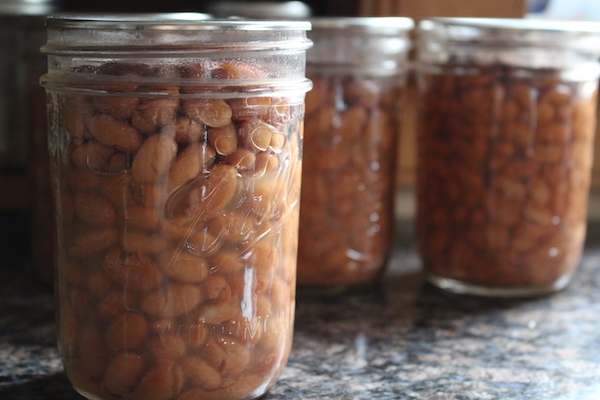
Canning beans is an easy way to prepare quick weeknight meals in advance. Home-canned beans taste infinitely better than storebought tinned beans, and it takes about the same amount of time to can them as it does to cook them. Make a big batch, and you’ve got dozens of quick meals just waiting in your pantry.
We eat a lot of beans. Like literally bucket loads of beans.
To save money, we started buying pinto beans and black beans in bulk from our local food coop, by the 25 and 50-pound sack. I’d store the dry beans in 5-gallon buckets sealed with airtight gamma seal lids, and stored that way they’ll keep a long time.
Years, in fact, even decades. But they never last more than a few months at my house.
The problem is, it takes a lot of time and energy to cook dry beans. Every other week I’d cook up a big pot of beans for our meals throughout the week, spending half the day steaming up the house. Then they’d take up half the fridge until we ate them all.
I figured that there had to be a better way, and there is!
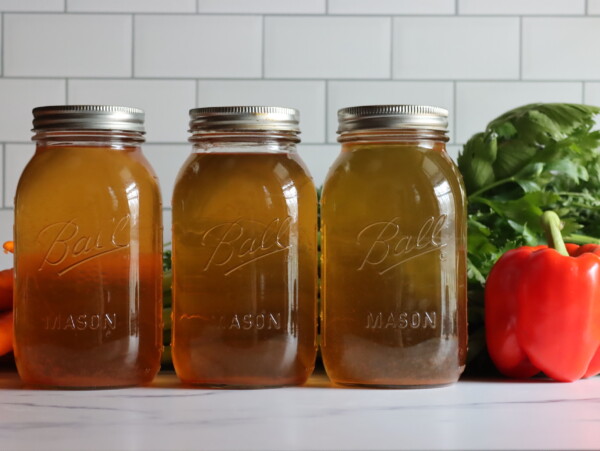
We already pressure can bone broth on a regular basis, so I’m no stranger to a pressure canner. Given that dry beans store well on their own, it just never seemed to make sense to can them.
After my first batch, I was hooked. It takes about the same amount of time to can beans at home as it does to cook them, and instead of them taking up the whole fridge they’re not neatly stored in meal-sized portions on my pantry shelf!
Home-canned beans cost just pennies a jar, and they taste a lot better than storebought canned beans. Now that I’ve started canning beans at home, that takes care of my family’s bean habit for next to nothing cost-wise and the process is incredibly simple.
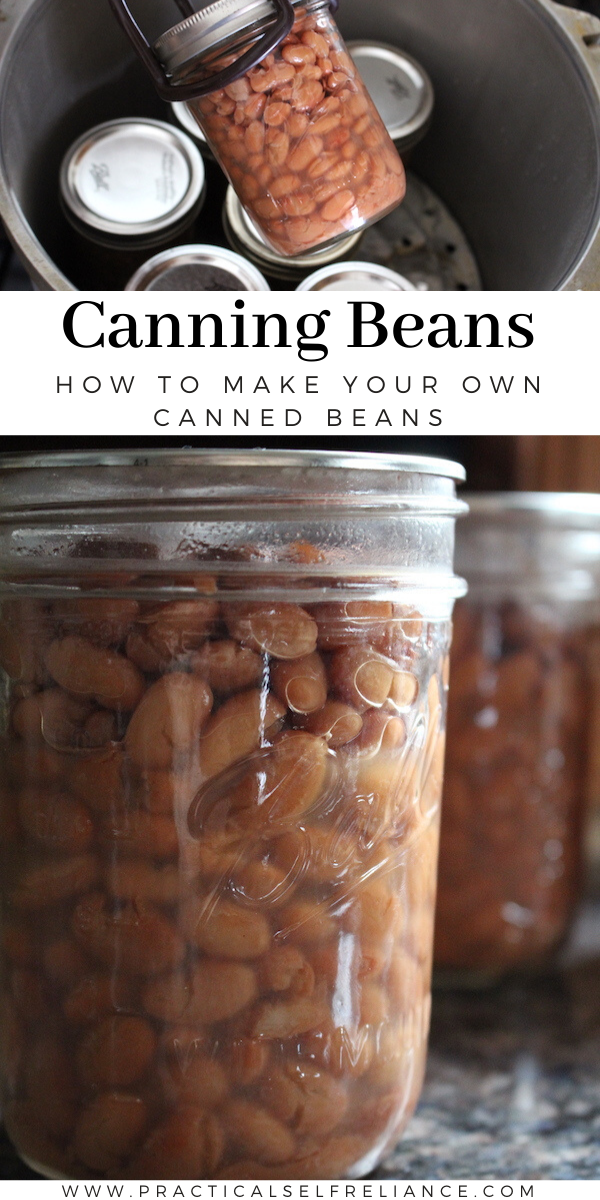
How to Can Dry Beans
The process sounds complicated if you’ve never pressure canned before, but I promise it’s not all that hard.
Here are the basic steps:
- Soak the beans overnight (12-24 hours)
- Strain and add fresh water to a pot with the beans
- Bring to a boil and simmer 30 minutes while you prepare your pressure canner.
- Pack the partially cooked beans into canning jars, seal with 2 part canning lids and load into your pressure canner.
- Process the beans in the pressure canner for 75 minutes (pints) or 90 minutes (quarts). Pressure will depend on your altitude, and I’ll discuss that shortly.
- Turn off the heat and allow the canner to come to room temperature before unloading. Check jar seals, and store sealed jars in the pantry until needed.
Preparing Dry Beans for Canning
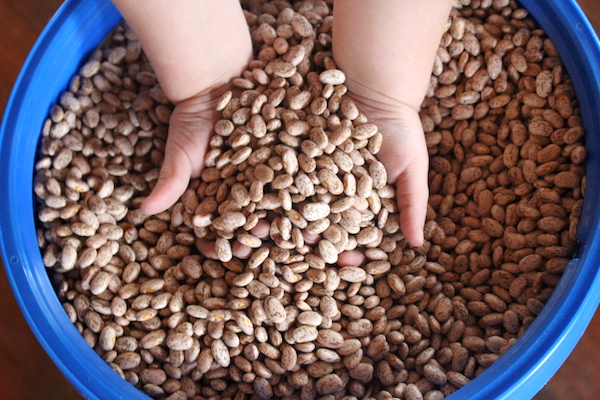
The first step in canning beans is soaking the beans.
This serves a couple of purposes. First, it helps to leach out compounds in the beans (indigestible starches) that cause gas. People are divided on this, and many don’t think it helps, but with my bean-eating family I can tell you it makes a world of difference.
Even if you don’t believe soaking beans is necessary generally, it is mandatory if you’re canning beans. The beans need to absorb as much water as possible before canning so that they don’t expand too much in the canning jar.
Start with a 12 to 24-hour soak in cool water.
How Many Dry Beans fit in a Canner Batch?
The obvious next question is, how many beans do you need to soak for a canner batch?
I’ve found it takes 8 pounds of dry pinto beans to fill a 14-quart canner batch in my 30 Quart All American Canner. That works out to a bit over 1/2 pound of dry beans per quart jar (about 0.6 lbs).
The national center for food preservation recommends 5 pounds for a 7-quart batch, and 10 pounds for a 14-quart batch. I’ve found that’s way too much, and I end up what a huge pot of leftover beans. Not the end of the world, I just keep cooking them on the stove while the pressure canner is running, but then I’ve got about 12-15 cups of cooked beans in the fridge (on top of a full canner batch in the pantry).
If you’re canning beans in pints, the total amount is a bit less. These days, with a family of 4 I tend to can in quarts because it’s a lot more efficient.
My canner will hold 19 narrow mouth pints (or 18 wide mouth), but it’ll hold 14-quart jars. Canning in quarts means I can put up a lot more food faster, and we eat a quart per meal anyway.
I’ve written the recipe below for a standard canner batch of 7 quarts. I use a larger canner that can accommodate 14 quarts at a time, so I start with double the beans (8 lbs total).
For a standard canner batch of 9 pints, start with roughly 2 3/4 to 3 pounds of beans. In my canner, a pint batch is 19 narrow mouth pints and I use 5 1/2 to 6 pounds of dry beans.
If you don’t have a scale, a pound of beans is roughly 2 cups. That means that you need a heaping cup of dry beans for each quart jar.
Pre-Cooking Beans for Canning
I know what you’re thinking.
Why on earth do you need to partially cook the beans if you’re going to be putting them into a pressure canner?
The pre-cooking step is less about “cooking” and more about getting them to their final cooked size. By first soaking the beans for at least 12 hours, and then simmering them for about 30 minutes, they absorb water and reach their final cooked size.
This will help keep them from expanding too much in the canning jars. Or, more specifically, absorbing all of their canning jar liquid leaving them in a dry jar.
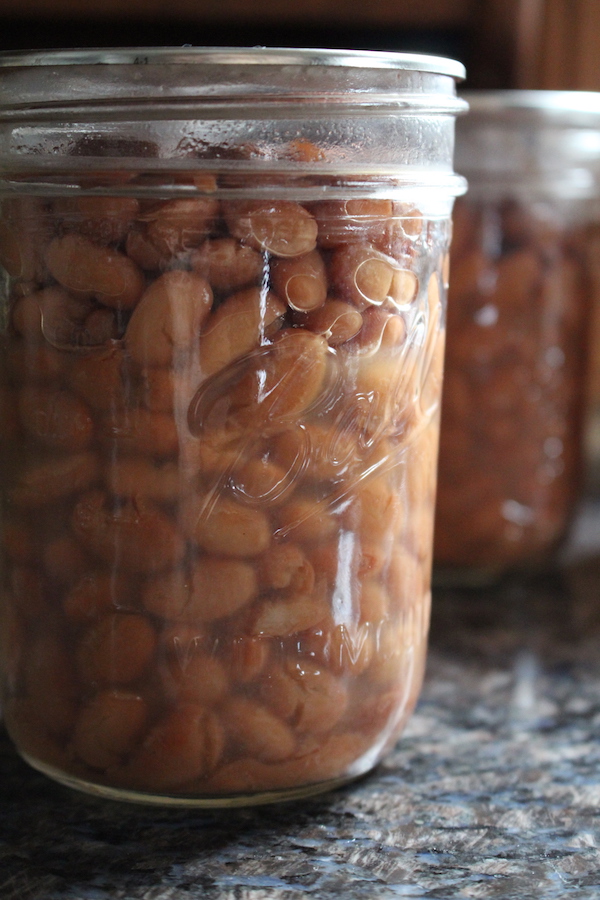
Even still, they’re going to absorb some water inside their canning jars when you take the jars out of the pressure canner the water level will have dropped. Here’s an example…
That’s some water level drop is perfectly fine in the jar, but a pre-cooking ensures that the beans will be fully cooked during the canning process and that they have enough water in a given jar to finish their cook while canning.
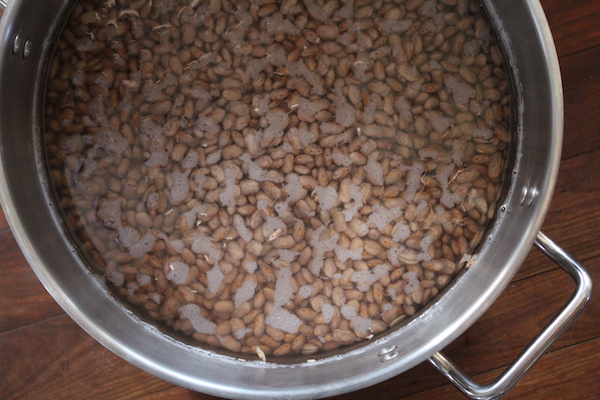
Strain out the soaking water. This will remove the starches they’ve released during soaking and result in higher quality home-canned beans.
Fill a large pot with water and add the soaked beans into the pot. Bring the pot to a boil and simmer the beans for 30 minutes to partially pre-cook them before canning.
Loading the Pressure Canner
While your beans are pre-cooking, prepare the pressure canner.
Follow the instructions that come from the manufacturer, as pressure canners sometimes have slightly different steps required based on the model.
For my All American Pressure Canner, I start by adding a thin coat of oil to the rim of the lid to ensure a good metal on metal seal at the top.
Then I add 2-3 inches of water to the bottom, along with the bottom trivet, and bring it to a boil alongside the pot that’s pre-cooking the beans.
I’ll also prepare canning jars, making sure I have enough jars and lids on the counter ready to go.
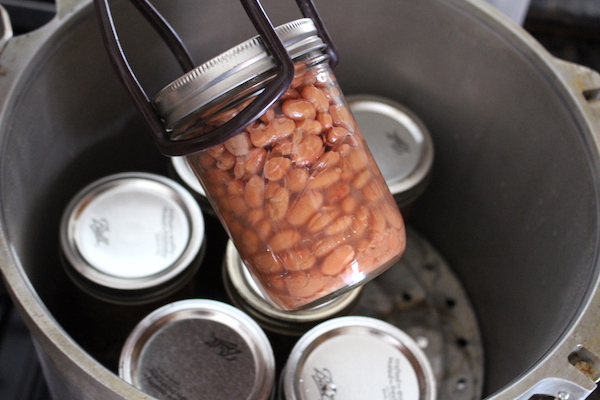
When the beans have finished their 30-minute pre-cook, use a canning funnel to load them into the canning jars leaving 1-inch headspace. Cover the beans with boiling cooking water before sealing with 2 part canning lids and loading into the pressure canner.
(Sometimes it helps to have a kettle of water boiling on the side just in case there’s not enough cooking liquid to fill the jars.)
Pressure Canning Dry Beans
Once the beans have been loaded into the pressure canner, seal up the lid according to the manufacturer’s instructions.
For mine, I tighten all the bolts and then allow the unit to steam out the vent pipe for 10 minutes before adding the canning weight. This ensures that the chamber is completely filled with steam and will heat to an even temperature (without any colder air pockets).
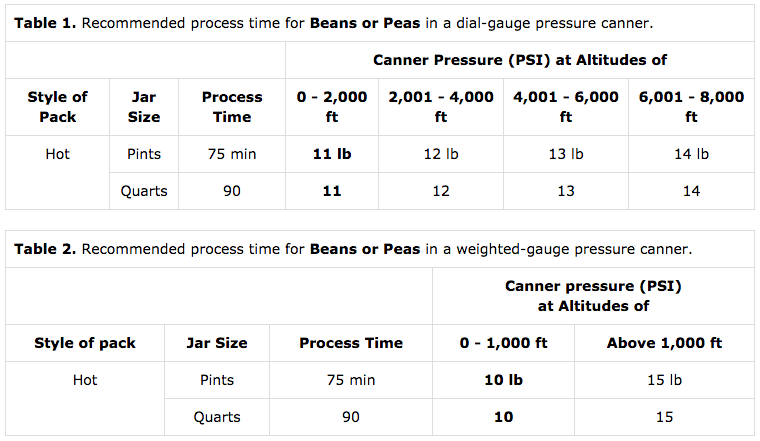
After steam release, I add the canning weight to the pressure appropriate for my altitude and then process for 75 minutes for pints or 90 minutes for quarts.
Pounds Pressure for Canning Beans
The total pounds pressure required varies based on your altitude, and whether you’re using a weighted gauge or dial gauge pressure canner. I use a weighted gauge, which is much easier to work with, but it only has 3 pressure settings (5, 10, and 15 lbs).
Use the table below to determine the appropriate canning pressure based on your altitude and the canner you’re using.
Checking Seals and Storage
After the processing time is over, turn off the heat, and allow the pressure canner to come to room temperature before opening.
Once cooled, I remove the jars from the canner check their seals and give them a quick rinse in the sink.
Remove the canning rings. They’re no longer holding the lids on the jars because the jars should be completely vacuum-sealed. If a jar’s not sealed to the point where the ring is pointless, then it’s not properly canned. The ring is only there to hold the lid in place during canning, not during storage.
Leaving the rings on might actually cause trouble, because they may trap water/bean juice underneath which can either mold (nasty) or simply rust the jar lid shut. Either way, while the beans inside may still be perfectly fine, it makes it hard to get to them. Much easier to remove the rings after canning and save yourself frustration later.
How Long do Canned Beans Last?
General recommendations suggest eating home-canned goods within 1 year. Ball canning recently revised those guidelines using their modern lids, and they now suggest quality will be maintained for 18 months.
After 12-18 months, the canned goods will begin to degrade in quality, but they may be safe for much longer than that initial storage period. You’ll have to use your best judgment.
Canning Beans
Equipment
- Pressure Canner
Ingredients
- 4 Pounds Dry Beans, about 8 cups
- Water
- Salt, Optional, see note
Instructions
- Pick over dried beans, removing any discolored beans or non-bean debris.
- Place the beans in a large pot or bowl and cover with cool water. Allow the beans to soak for 12-24 hours, ensuring that they always stay submerged.
- Drain the soaking water.
- Place beans in a large stockpot with fresh water. Bring the pot to a boil and cook 30 minutes.
- While the beans are cooking, prepare a pressure canner according to the manufacturer's instructions. (This usually means adding the bottom trivet and heating 2-3 inches of water in the bottom.)
- Put a kettle of water on and bring to a boil. (This will help top off the liquid in the jars if there's not enough water in the bean pot.)
- Hot pack the partially cooked beans into quart or pint jars. Top with boiling water, either from the bean pot or from the kettle. Be sure to leave 1-inch headspace.
- If adding salt, use 1/2 tsp per pint or 1 teaspoon per quart (optional, adjust to your taste).
- Seal jars with 2 part canning lids and load them into the pressure canner, following the manufacturer's instructions on loading/spacing/etc.
- Place the lid on the pressure canner and secure it. Allow the unit to vent steam for 10 minutes before adding the pressure weight to allow it to begin pressurizing.
- Process jars at pressure for 75 minutes (pints) or 90 minutes (quarts) for locations under 1000 feet in elevation. Be sure to adjust times based on your elevation. (Wait until the unit is up to pressure before starting a timer.)
- Once the processing time is over, turn off the heat and allow the unit to come to room temperature before opening (this can be several hours, I usually let it sit overnight).
- Unload the canner and check seals. Store any unsealed jars in the refrigerator for immediate use.
- Remove canning bands from sealed jars, and clean off the outsides before storing in the pantry.
- Home-canned beans should last 12-18 months in the pantry if properly canned and sealed.
Notes
Pressure Canning Recipes
Looking for more pressure canner recipes to keep your canning weight rocking?
Adding baking soda changes the pH of the water, making it less acid and more alkaline. If your water is acidic, adding baking soda will help break down the pectin in the beans. They will cook faster and be creamier. However, if you add too much, they will become mushy.
As far as whether it will affect the digestibility of the beans, I can’t say that I have that issue but it might be worth the experiment if you do.
I read on a blog that you are able to add a good pinch of baking soda to a pot of dry beans to be soaked overnight to help with the gassy issue plus to lightly tenderize the beans if they are on the older side. Wondering what you think about it .
I haven’t personally tried it but I definitely don’t think it would hurt anything. It would be interesting to do a side by side comparison to see how much of a difference it would make.
Today i will can some fresh, not dried beans, the cold is coming and they did not mature in time, I would normally put them in the freezer, to boil when needed, and they are delicous this way (not dried first) the textrue is different, but the freezer is full. I have friends who hate the texture of beans, but love the unripe ones that have not dried.
I have not decided if I give them a preboil before canning.
Thinking about the amount of beans i can put in each jar.
Will most like give them a 20 minute boil befor I can. – normally a total of 25 minute boil is enough for the non matured beans.
Question on seasonings! How would cooking the beans in a seasoned broth affect this recipe? Would it still be safe to can the beans in chicken broth?
You want to be careful with seasonings in canning because sometimes they can produce off flavors after they’re canned. If you can find a good tested recipe that would be fine. I prefer to can them plain and then season or add broth etc. when it’s time to prepare them for eating.
I canned beans last night. This morning the bean juice was thick like syrup and the beans don’t budge when I tilt the jar. Very tightly packed. They are still submerged though. Are they ok to store?
Yup, that’s normal. The liquid thickens because of the starches in the beans, and you’ll need to spoon them out of the jar. Enough liquid still covering them is ideal, since it prevents discoloration and ensures that they’re fully hydrated (but even that’s not strictly required).
What you have is exactly what you’re looking for. Well done!
Thanks so much. And thanks for your recipe!!! I am a new homesteader.
You’re quite welcome!
Why soak overnight? I’ve always just measured 1/2C per pint, 1C per quart jar, topped off with water or broth and pressure canned them. They don’t have to be soaked.
Doing an overnight soak results in a very very very soft (mush) bean. Skipping the overnight soak gives you a bean that still holds it’s shape and is usable for things like bean salads, etc..
The soak is so they get to their full size before you put them in the jar. Without soaking, it’s easier to overfill the jars and either have them expand so much that they cause damage to the jars or just don’t soak up enough liquid to cook properly. If you’ve had luck with it, congrats, but the “approved” method wants to make sure that the beans are fully rehydrated before canning so they stay canned in water. Ours always end up firm, so I’ve never had an issue.
Canning beans that haven’t been soaked overnight can result in an explosion in your canner. That’s why overnight soaking is recommended.
I only bring my beans to a boil then jar them . 30 mins of boiling then 90 mins in the canner makes the beans too mushy .
This nugget may be hidden in myriad of comments above, but when doing the overnight soak of dried beans, add a “glug” of lemon juice to the water and stir it around. Let the beans soak and the percussive quality they give inside human GI systems will not be an issue.
I haven’t ever heard that tip before. Thanks for sharing.
Just pressure canned a pint-size batch of spicey pinto beans. I use for refried beans or chili. They are very very good. MY PROBLEM IS:
THE WATER CAME OUT OF THE JARS DURING THE STEAMING . I did an overnight presoak and packed the beans with spices and topped with boiling water.
Leaving the required 1″ of headspace. I follow all the directions for using the canner to a T and am a very careful and thorough about all the canning steps.
Any help with this issue is very much appreciated. Oh, and the jars all sealed almost immediately.
Also, I have canned chicken breasts that I boned and skinless. Turned out really well. Used only a bit of salt in each pint and of course the boiling water.
No water boiled out with canning process with the chicken.
It sounds like you had some siphoning. This often happens if there is an extreme temperature change. One way to prevent this is to leave the jars in the canner until they are completely cooled.
Can you make “baked beans” and then can that? basically taking your beans, adding the ingredients you would use to make baked beans, and adding to the jar and then canning? So when open the jar you have already sweetened and seasoned baked beans to just heat and eat?
Yes, you can. Here is a recipe that I found on the National Center for Home Food Preservation Website. https://nchfp.uga.edu/how/can_04/beans_baked.html You may be able to find other tested recipes online as well.
Thank you for your wonderful website. Your detailed instructions are THE BEST I have ever read. I have been canning for many years. If I have a question, or want to refresh on something I have not done in a while…you cover it so well. I realize you put a LOT of time into writing out instructions, rewriting them for clarification, and modifying again to add bits of info here and there…..and I want you to know I APPRECIATE IT VERY MUCH. 🙂 Keep up the great work.
Thank you so much! I do put A LOT of time into writing everything out, but I enjoy it. It’s helpful for me to be able to look back later too, when I haven’t done something in a while. It’s always lovely to be appreciated, thank you so much =)
Thank you for the excellent, detailed step by step instructions!
I canned some white navy beans a few weeks back “just because” and I can’t say I am thrilled with the end results. The instructions I followed were very similar to yours but I found the beans in my jars to be very soft, and more or less broke down after I added them to my casserole. I can imagine canning chickpeas or some other bean that I ultimately plan to puree, but I wouldn’t do it again for anywhere I want whole beans.
I wondered if a few factors might have had an adverse affect on my end result. I soaked my beans for 12 hrs – perhaps I should have tried 16 or 24 hrs. I also packed my jars tightly – leaving the appropriate head space – although I guess further expansion shouldn’t be a problem if I had soaked them long enough in the first place.
Is there a variety of bean that stays firmer after pressure canning?
Did you fully cook the beans before canning them?
I did do the recommended 12 hour soak, and the 30 minute simmer before putting the beans in the jars – if that’s what you mean by “fully cook”. Next time I’ll try soaking the beans longer and using a higher liquid to bean ratio in the jars.
I have heard of others who skip the 30 minute simmer step to get a firmer bean. You just want to soak the beans, rinse them, put them in jars and top with boiling water. With this method you do run the risk of them expanding too much during the canning process but there are others who have had success with it. Let us know if you decide to try this method.
Can you please share where you’ve found the info that cooking is about getting the final volume of beans and not so much about safety? I completely agree but would like some documentation if possible. Thank you! (ps., great article!)
I am not really sure exactly where that information came from. The logic behind it is that the beans will be cooked in the pressure canner so some might not understand the reason why you would need to partially cook them before canning. This was just a way of explaining the process but I don’t have any specific documentation for it.
Glad I found your site. There are lots of different info and recipes out there, so I’m never sure which one to trust. I haven’t tried any of yours yet, but they are well explained, so I will trust your techniques and try them.
Question about filling the quart jars with the soaked, pre-cooked beans. How much do I fill the jars? I pre-measured the dry beans – 1 heaping cup / 1/2 LB per quart jar, plus a little extra just in case. Do I still measure out 1/2lb of the soaked/precooked beans per quart jar? But I’m guessing the weight/volume will be different for the dry vs. soaked/precooked beans?
Once you have soaked and partially cooked your beans you will divide them up among the jars and top each jar with boiling water. When you are measuring food in jars for canning it isn’t measured by weight or volume but by headspace which is the amount of space between the food and the top of the jar. Once you have added your beans and boiling water to the jars you should have 1″ of headspace.
I have a fabulous recipe for Cowboy (Borracho) Beans. The only “solid” ingredient besides the beans is chopped, cooked bacon. Your recipe for green beans with bacon is processed for no longer than green beans without bacon. Can I assume that my bean recipe can be canned for the same amount of time as just beans?
The rule of thumb for processing multiple ingredients is to process for the amount of time required for the ingredient that requires the longest processing time. Here is an article on canning soups that might give you some more information. https://nchfp.uga.edu/how/can_04/soups.html The other major factor to consider is whether or not there are any thickeners added to your recipe. You do not want to try and can anything that has added thickening ingredients.
After soaking and precooking the beans, can ingredients such as maple syrup, molasses, pepper, onions and dry mustard that I would normally use in making baked beans, be added to the jars with the beans and salt and then processed for the 75minutes for pints?
Here is a tested recipe for canning baked beans which includes a molasses sauce.
So for those that are new to canning, where does one start?
Learning the difference between water bath and pressure canning?
Learning about canning in an instant pot?
I want to have some food readily available from my pantry because store bought usually doesn’t come close to tasting good if they don’t have junk in the ingredients.
Please help!
Thank you,
Lili
You are in a great place to start learning about canning. Here is an article that explains water bath canning for beginners https://practicalselfreliance.com/water-bath-canning-beginners/ and also one for pressure canning
https://practicalselfreliance.com/pressure-canning/ The main difference between the two is the acidity of your food. More acidic foods can be canned in a water bath canner and less acidic foods need to be pressure canned. My best suggestion would be to follow a tested recipe. You can find tested recipes here on this website.
I would like to recommend that you tell all these people who are new to canning to purchase a Ball Blue Book. I grew up with canning and have done it every year of my 30yrs marriage and every time I can, I pull it out. This book is readily available most places that sell canning supplies. It is the old standard, has great info and while not every recipe a must for understanding food preservation basics.
Good point!
I was glad to see your post. Thanks for sharing
Hello from New Zealand!
In the three countries we have lived – New Zealand, Australia and UK – people buy cans of “Baked Beans” which are haricot (navy?) beans in a slightly thickened sauce made from tomatoes, sugar, spices, water and usually a starch. There is a similar product called simply “Spaghetti” which is basically white wheat spaghetti in the same sauce as the Baked Beans.
Can Baked Beans and Spaghetti look alikes be made in a pressure canner? The bit I’m not sure about is the slightly thickened sauce, and the starchy spaghetti??
We have a large garden and water bath the usual – tomatoes, apples, peaches etc. In New Zealand, if people preserve at all, the most common way is still the “overflow” method, with no water bathing. I am far more comfortable with water bathing.
We are NEARLY at the point of buying a pressure canner, so we can do more “ready meals”, and low acid foods.
As you probably know, most things in New Zealand are expensive to buy, and the wages lower. So our option at this point is a Presto 23 quart pressure canner with a stainless steel base and bringing it in from Australia, which works out at about $350 New Zealand dollars. I’m excited, but nervous too!
Thank you!
I know pressure canners are really hard to find outside of the states, and expensive too…sorry I don’t have good news for you.
Beans of any sort are low acid, and MUST be pressure canned, unfortunately. More bad news, starchy things like pasta can’t be canned at home, which can only be done in an industrial process.
If you get a pressure canner though, you can make baked beans for canning (without the pasta). This is a tested canning recipe for baked beans: https://nchfp.uga.edu/how/can_04/beans_baked.html
Thank you Ashley and Jill, both such helpful replies.
We did it! Bought a brand new 23 Quart Presto Pressure Canner! A company called Ozfarmer, also the official Ball Distributor in Australia, had a deal to ship to New Zealand, and just happened to have a Black Friday sale.
I’ve continued reading, researching and learning, and also looking at books to buy.
To buy and ship the Ball Book here costs aout NZD$50, But if that is the recommendation from Jill, who has been canning for 30 years, then so be it.
The Ball Complete Book of Home Preserving is an incredibly complete guide, as is the Ball Blue Book of Home preserving. Both are excellent first canning books. You can find most tested recipes you’d need on the national center for food preservation’s website here for free: https://nchfp.uga.edu/how/can_home.html
Good luck!
I bought the All New Ball Book of Canning and Preserving as a .pdf on ebay for a little over $3 if you’re interested. It’s not a hardcover book but it’s a big savings over the paperback price for you. The U.S. National Center for Home Food Preservation website also has a lot of good basic information. Happy Canning!
Thank you PNWJEN. I’ve had a look and the PDF’s are indeed on offer on ebay. Works out to about NZD$10, a huge saving.
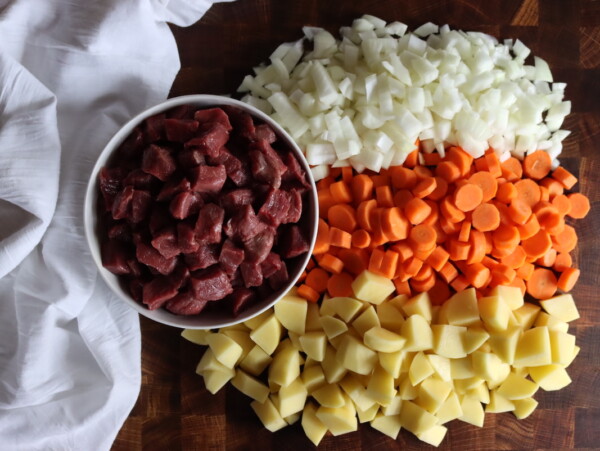
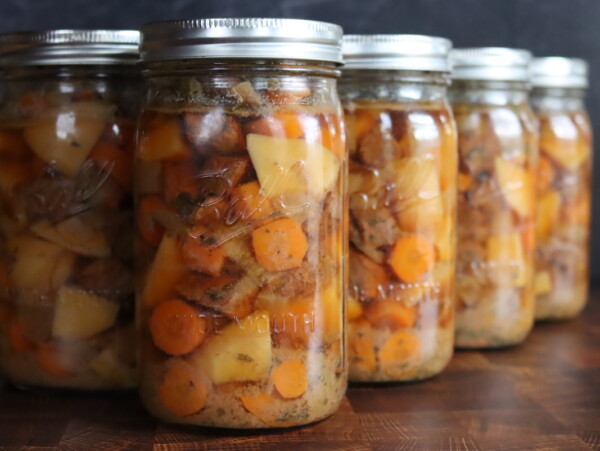
My husband tried a jar of canned chicken leg with potato, in chicken stock. He said it was good for a meal, and also said it was different. Whatever that means. When I can some quality chicken, I’ll try some too. The first batches were for our youngest son, out flatting and working a physical job. He is paying for the ingredients, so he opted out of organic as it is pricey. But my liver is a prima donna, and has a hissy fit unless fed the best!
Try going to the Ball website for instructions on anything canning. You can also telephone them and ask any question you may have. In fact, I have emailed them with questions and they get back to you within 48 hours. This would save you a lot of dollars.
Did you check Amazom?
Great article! I have only one suggestion. When I’m done filling the jars, using the bubble tool to get bubbles out, and adding a bit of water if needed to get the proper head space, I wipe the rim of my jars clean with a paper towel moistened with white vinegar before putting the lid on. Also, I only screw the rings on hand tight.
Oh, adding two tbsps of white vinegar to the 3″ of water in your canner helps prevent water spots on your jars.
Those are all really great tips. Thanks for sharing.