Affiliate disclosure: This post may contain affiliate links. Please see our Privacy Policy.
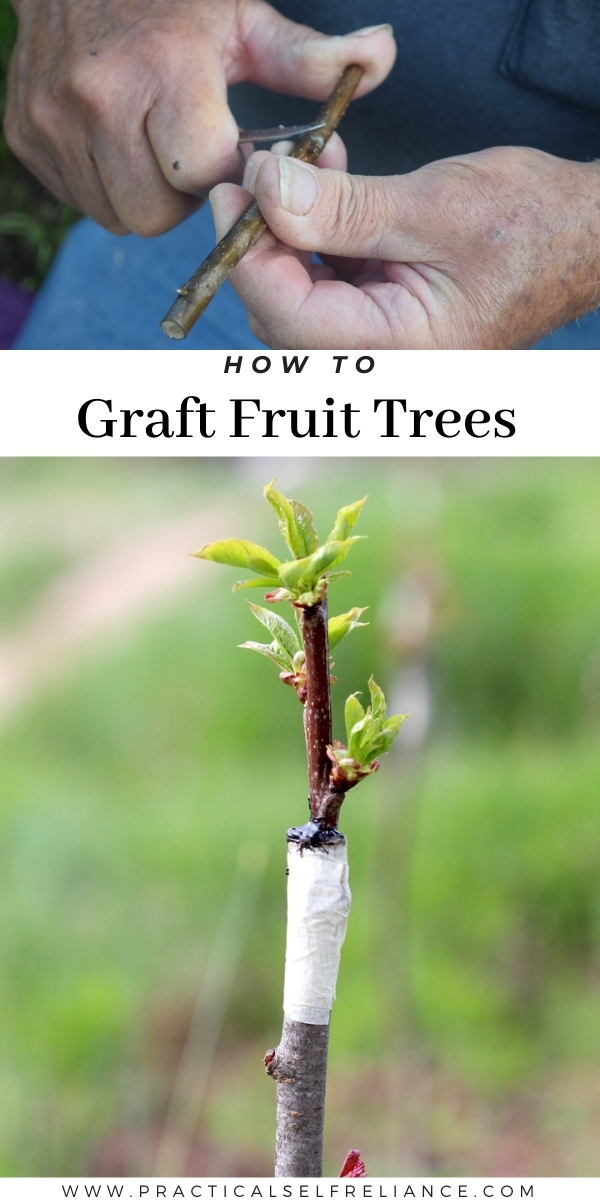
Grafting fruit trees is a simple way to propagate fruit trees for a home orchard without spending a lot of money. These simple techniques to graft trees can be used for both bench grafting (indoors in spring) and top working trees outdoors to change varieties or reinvigorate historical orchards.
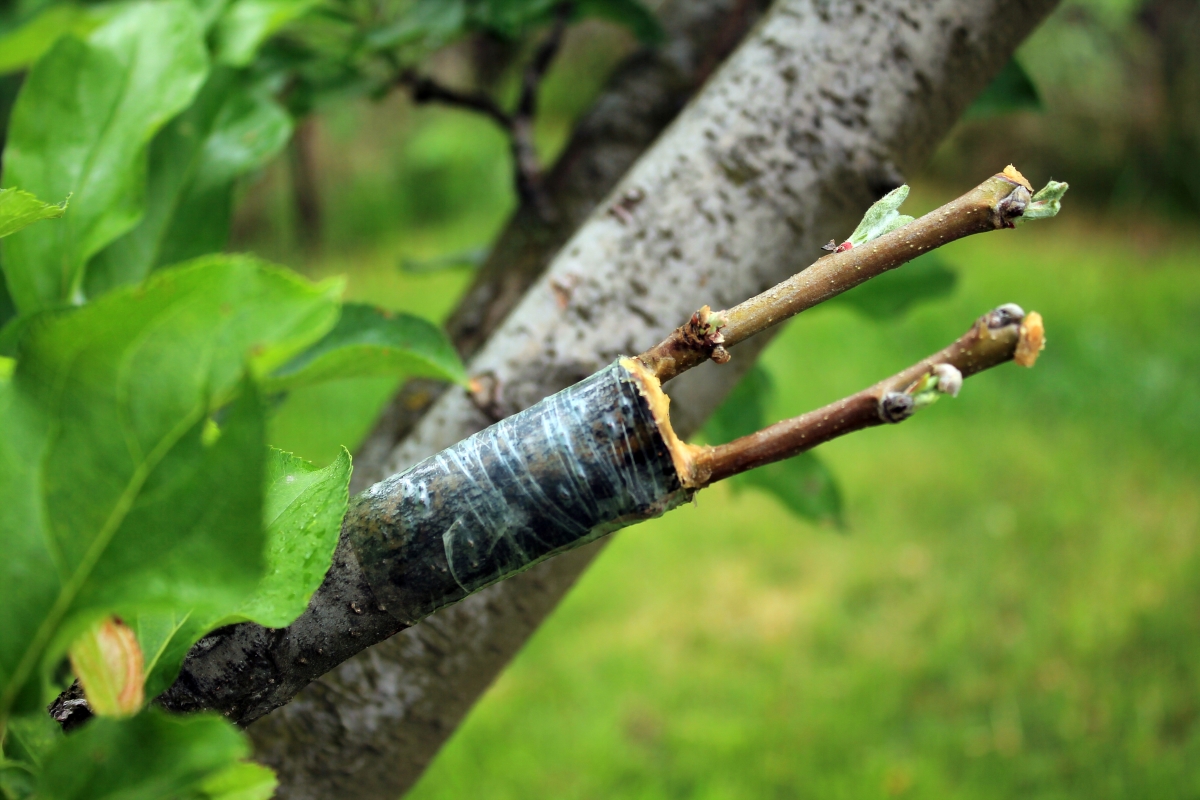
About a decade ago I took my first grafting class and after about an hour of hands-on instruction, everyone went home with a few grafted apple trees that they’d done themselves. Most people also went home with a few spare bandaids on their hands, covering cuts they hadn’t had when the class began.
If you’re careful though, grafting is actually pretty simple, and these days they have specialized grafting pruners that mean you can work without risking cuts from razor-sharp grafting knives.
This grafting tutorial takes you through everything you’d need to know to graft fruit trees at home, including grafting apple trees, as well as pear, cherry, plum, and peach. Beyond the basics of bench grafting to create new trees, I’ll also walk you through top working trees in an existing orchard to change their variety or repair damage caused by animals or weather.
What is Grafting?
Grafting is the practice that joins two plants into one, usually taking the roots of one tree and attaching a growing shoot from another.
Apple trees, and many species of fruit tree, don’t come “true to seed.” That means if you plant Honeycrisp apple seed, you won’t grow a Honeycrisp tree in the next generation. The only way to ensure that the new tree will have the same flavor, disease resistance, and growth habit is to graft a piece of an existing tree onto compatible rootstock.
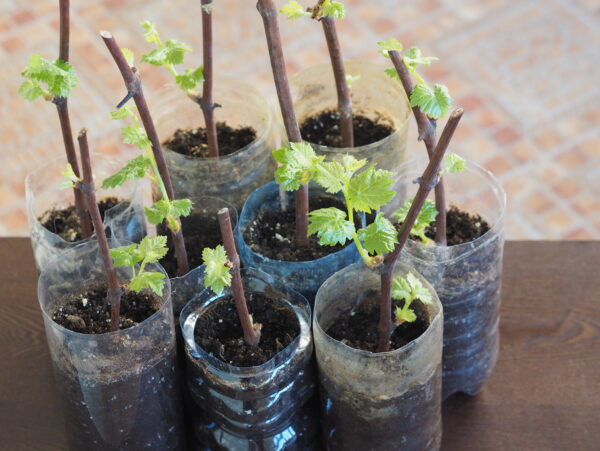
Some plants are easy to root without grafting, and you can just dip a twig into a bit of rooting hormone to induce root formation. Propagating elderberries and blueberries is incredibly easy, and grape prunings can be used to propagate literally hundreds of new grape plants a year.
Most trees don’t root easily, and this process won’t work for apple trees and other fruit trees. The best way to create a new fruit tree is grafting wood (known as scion wood) onto another tree’s roots (rootstock).
How Does Grafting Work?
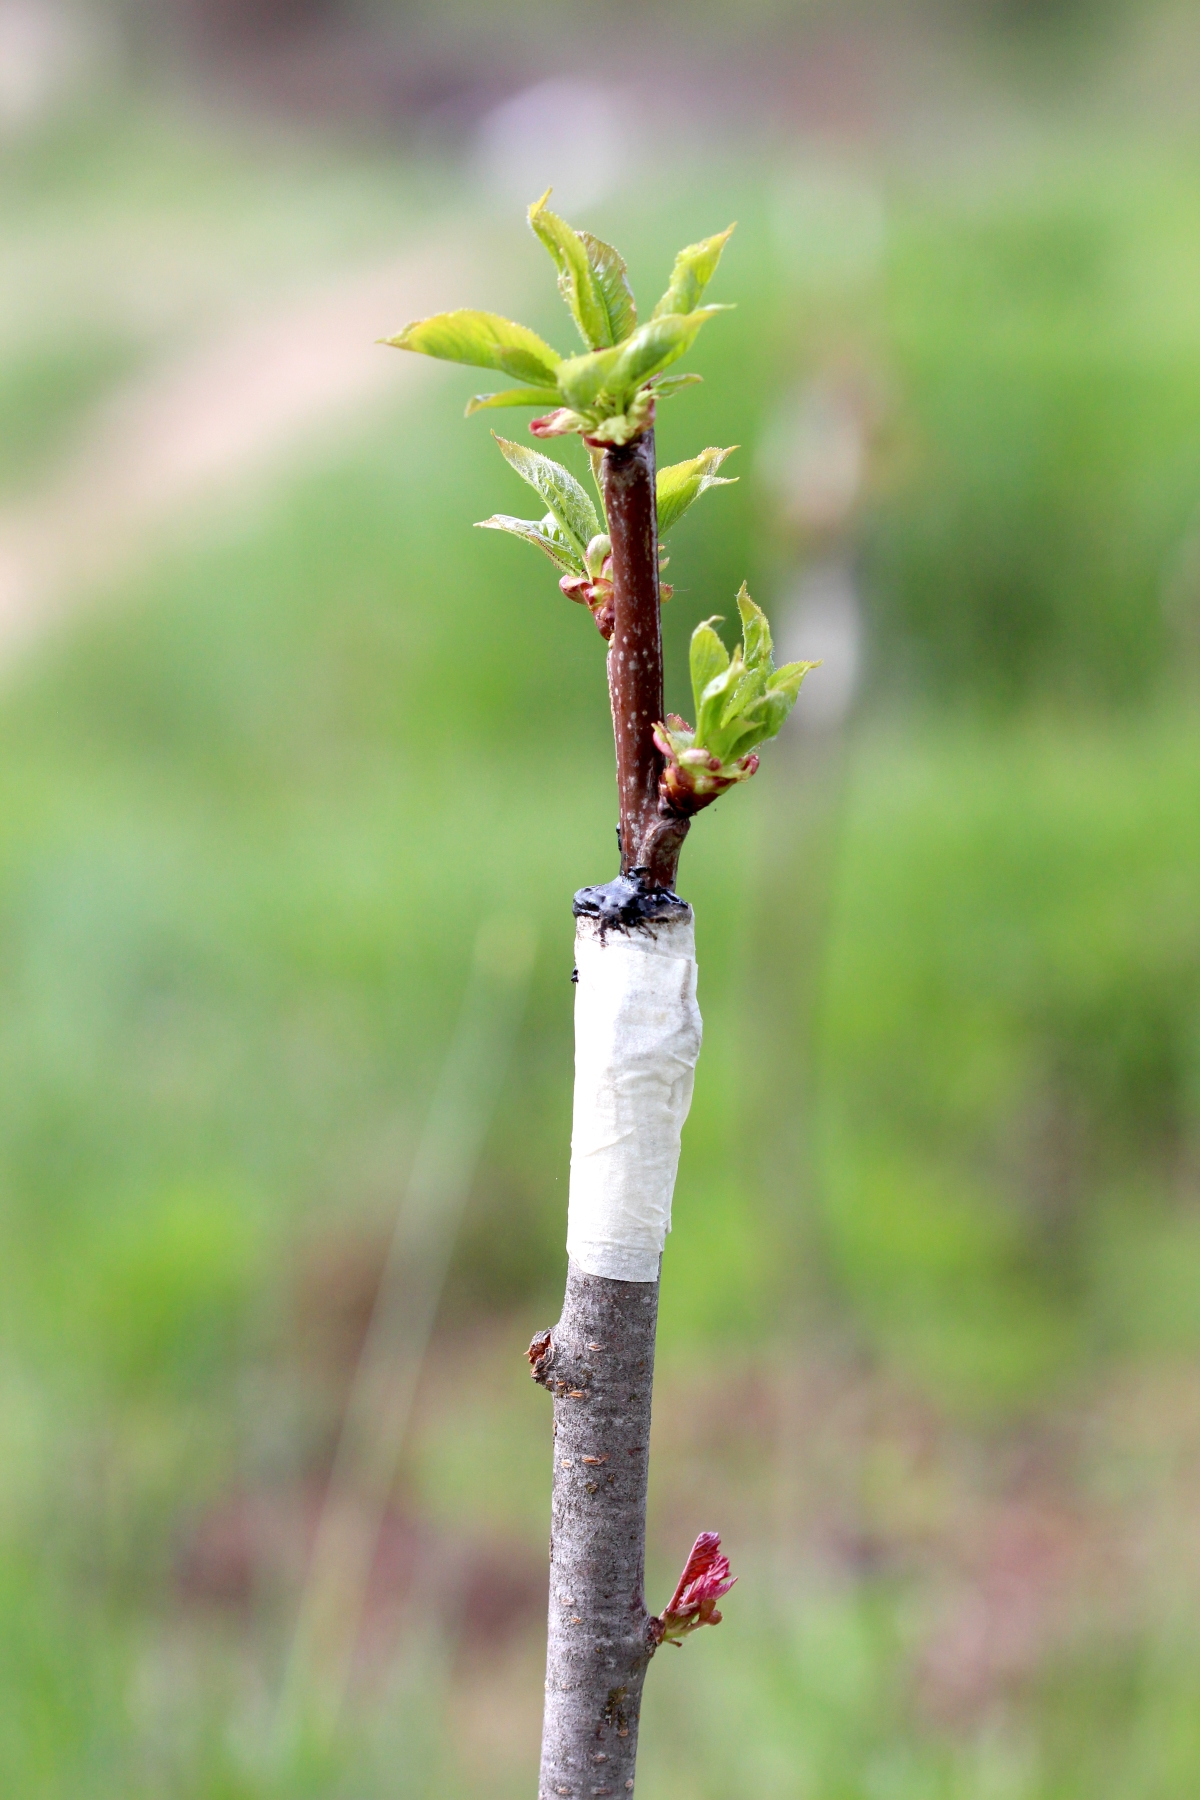
Grafting works because trees are exceptionally good at healing wounds, and so long as the cambium is lined up and connected, the tree will quickly repair what it believes is a simple cut in its nutrient transport system.
The cambium or inner bark of the tree is right under the protective outer bark and just outside the woody core of a branch. This is how the tree transports nutrients back and forth between the leaves and roots. Anytime it’s damaged, the tree will immediately go to work repairing the injury and will fuse with any cambium nearby.
In nature, the nearest cambium would always be the tree’s own branch, so simply doesn’t know to reject a piece of scion wood from another apple variety.
Compatible Rootstock
Though an apple tree won’t reject applewood grafted onto its roots, it will reject tree branches from other tree types. In order to graft successfully, you need to graft trees onto compatible rootstock.
Apple trees are generally grafted onto apple rootstock, and pears onto pear rootstock. Some closely related fruits can be grafted onto the same rootstock, and both cherries and plums are grafted onto the rootstock varieties.
Bench Grafting v. Field Grafting
Most new grafters assume that grafting is something you do indoors in the winter or spring months to create new trees. That’s true, to an extent, but that’s only one type of grafting known as “bench grafting.”
Grafting can also happen out in the orchard, and instead of creating a new tree on purchased root stock, you’ll be grafting new scion wood onto existing trees.
This technique can be used to create a multi-variety apple tree, or more often, to change the tree variety altogether.
In commercial orchards, established trees are a treasured commodity, but sometimes apple varieties go out of fashion as tastes change. While red delicious was popular for generations, many orchards are converting to crisp high sugar varieties like Honeycrisp or Zestar.
If you have an established orchard, there’s no need to start fresh with new trees, simply prune the tree down to just above the main trunk and graft new scion wood to the top. Since the roots are established, the scion wood will grow vigorously. Believe it or not, in 2-3 years the tree will be back to its original size and productivity.
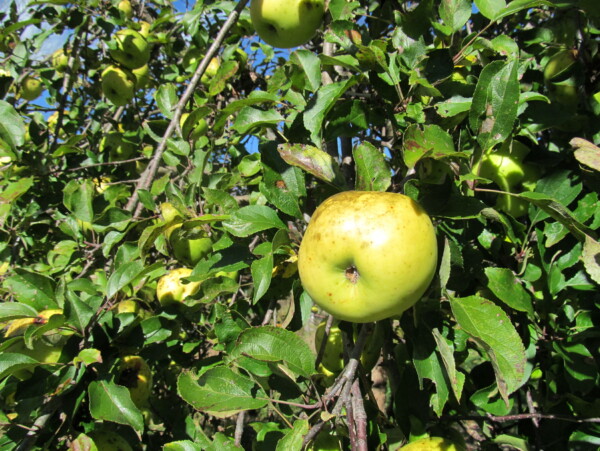
I’m going to demonstrate both bench grafting, which we’re using to create new trees, as well as field grafting. We have a 30-year-old yellow transparent tree that produces bushels of apples in mid-July. Unfortunately, they only keep a few days and we just can’t use them fast enough. (They’re also pretty mealy and insipid for my tastes).
We’re converting it to a 3 variety tree, leaving some yellow transparent’s for the kids, and then adding Wickson and Ashmead’s Kernel to the mix. Both of these varieties have much better flavor, and there some of the best storage apples so we can enjoy them all winter long. (They also make excellent homemade hard cider…)
Grafting Tools
The tools for grafting don’t have to be complicated. Literally, any sharp knife will work, and a box knife with a new blade is a great choice. The graft union can be held together with rubber bands or twine until it fuses, and you can use a screwdriver and mallet for slitting larger branches in the field (though that’s not necessary if you’re bench grafting). In truth, you can accomplish your goals more or less for free with simple tools that most people have readily at hand.
That said, there are a number of specialized grafting tools that make the job a lot easier.
- Grafting Knife – I’m using a Victorinox grafting knife that has a sharp blade on one side and a bud grafting knife on the other. It’s not strictly necessary, and you could get away with a sharp box knife or utility knife instead.
- Grafting Tape – Parafilm grafting tape is incredibly useful for holding grafts together and sealing them at the same time. It’s made of paraffin wax and naturally breaks down, so you don’t have to remember to remove it later so the tree doesn’t strangle as it grows. I use 1” grafting tape to hold together bench grafts, and then 4” wide parafilm tape to help seal bark grafts when I’m top working trees.
- Tree Wound Dressing – A grafting sealant is incredibly important if you’re top working trees, as you must seal off wounds where you’ve cut branches. You can make your own (though that’s messy, recipe later), or it comes in ready-made tins for a few dollars. For bench grafting, you can skip this if you’re using 1” parafilm grafting tape to seal the small cuts.
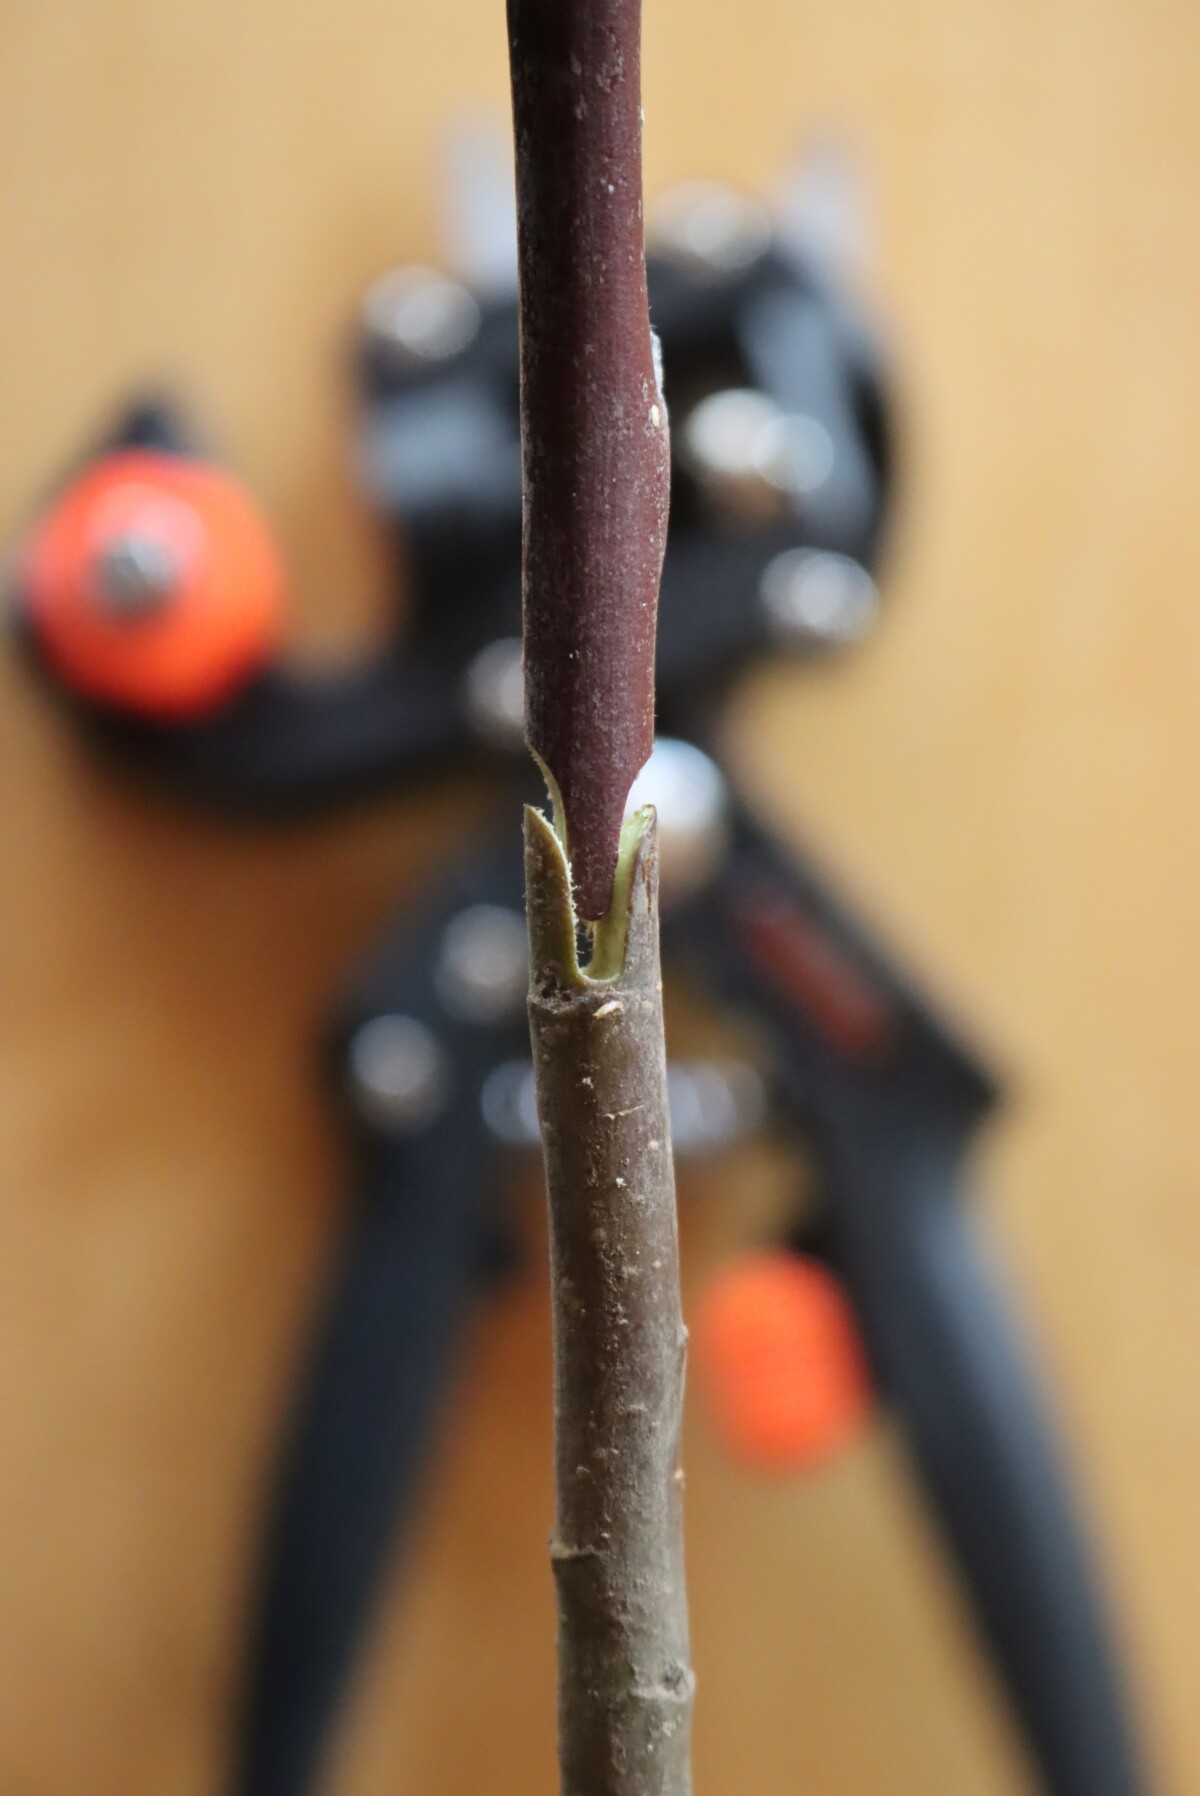
- Grafting Pruners – These are relatively new, but make bench grafting a breeze. They cut the scion wood and rootstock into matching shapes that assemble easily, and it means you can successfully graft quickly (and without risk to your fingers from a grafting knife). I’d highly recommend an inexpensive grafting pruner for new grafters, and anyone that’s going to do a good bit of bench grafting.
Sourcing Scion or Bud Wood
For the most part, fresh wood for grafting (known as scion wood) can be sourced from friends and neighbors, or from trees on your own land. Cut a 1st-year branch when the tree is dormant during the winter and store it in a moist paper towel in the refrigerator until you’re ready to graft.
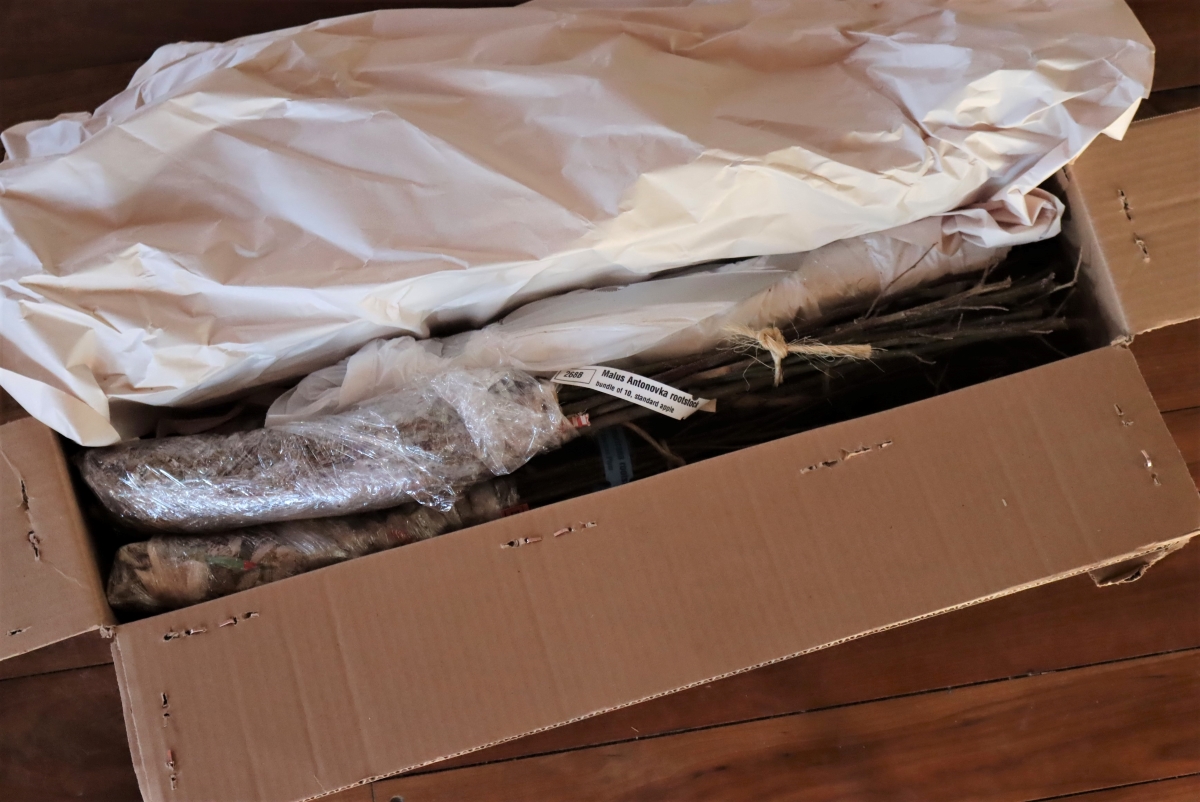
Sometimes though, you’re choosing to graft fruit trees at home because you want a truly specialty variety that can’t be found locally. There are a number of places online where you can order scion wood. The wood is generally shipped wrapped in moist sawdust or paper, in the late winter or very early spring.
Fedco Trees (Northeast US) and Burnt Ridge Nursery (Pacific Northwest) are two places I’d recommend, but a simple google search will yield plenty of choices. Seed Savers has a scion wood exchange forum where you can find some really unique varieties, and local garden clubs will often host scion wood sales and exchanges locally too.
Fedco and burnt ridge are also good sources for rootstock if you’re bench grafting, and they both carry a number of different species (apple, pear, cherry, etc) as well as full-sized and dwarfing rootstock.
Types of Rootstock for Grafting
Choosing the right type of compatible rootstock is important to ensuring that your graft takes, as I mentioned before. That said, there are a number of rootstock choices even within a single tree variety.
Some will be better adapted to cold temperatures, others will withstand drought better, and others will control the size of the tree to create dwarf, semi-dwarf, or full-sized trees.
You’ll find some of the most common rootstock choices below, but it’s far from all of them. There are dozens of options, and many are regionally adapted.
I’d suggest ordering rootstock from a producer in your region as they’re most likely to have rootstock varieties to suit your climate and soil type.
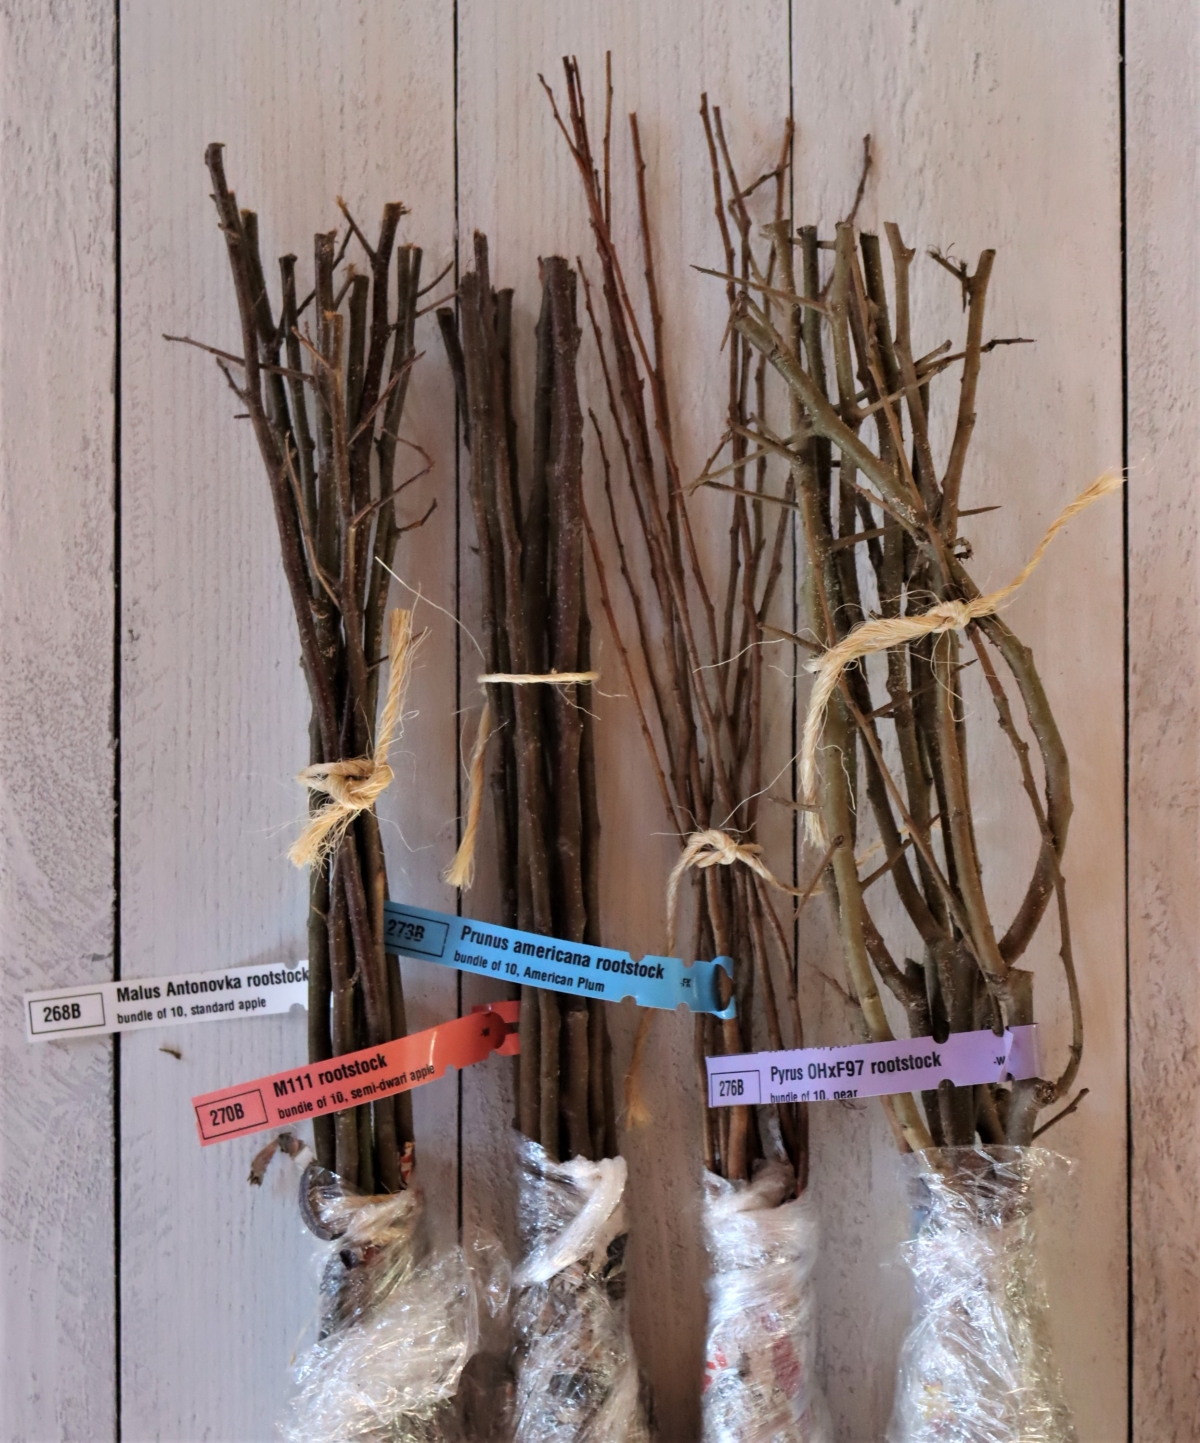
Apple Rootstock Varieties
- Malus Antonovka Rootstock – An extremely hardy apple rootstock developed from heirloom Russian varieties. Creates standard-sized trees that will need to be planted 20 to 30 feet apart. Creates long-lived trees that can live for centuries.
- Malus Budagovsky 118 Rootstock – Creates trees that are just slightly smaller than standard (85 to 90%), but are more vigorous and bear fruit earlier. Hardy and disease resistant. Trees should be planted 20 to 25 feet apart.
- Malus MM111 Rootstock – Semi-Dwarfing rootstock for trees 65 to 80% of standard size. Fruits sooner than standard trees, but won’t live nearly as long. Trees are sturdier than dwarf trees, and generally don’t require staking. One of the most popular rootstocks, and the base of many nursery-grown trees.
- Malus Geneva 11 Rootstock (M11) – Dwarf rootstock that creates a tree 30% of standard size. Moderate hardiness, generally down to zone 5 or a warm zone 4. Trees usually require staking and supplemental watering. Plant 8 to 10 feet apart.
- Malus Budagovsky 9 Rootstock (Bud 9) – Dwarf rootstock that creates very small trees at about 25% of standard size. They can be planted 5 to 10 feet apart and will bear fruit very quickly after grafting. Trees are not as hardy or sturdy as standard apples and will require extra care in the form of staking, watering, fertilizer, and mulching.
Pear Rootstock Varieties
- Pyrus OHxF97 Rootsock – A popular standard-sized pear rootstock suitable for both European and Asian pears. Hardy to zone 3/4.
Peach, Plum, and Cherry Rootstock Varieties
- Prunus Americana Rootstock – A seedling rootstock that’s suitable for grafting European, Japanese and Hybrid plums, as well as peaches. Rootstock grown out without grafting produces decent fruit suitable for preserves and is an excellent pollinator for hybrid plums.
- Prunus avium Mazzard Rootstock – Used for grafting both sweet and pie cherries. Not as hardy as other cherry rootstocks (zone 3/5), but longer lived. Doesn’t adapt well to wet or clay soils.
How to Graft Fruit Trees
For the most part, when beginners start grafting fruit trees, they’ll be bench grafting indoors in the spring to propagate new fruit trees.
(You can also graft onto existing trees in the field, to either change the tree variety or repair wind, ice, and rodent damage. That’s known as “top working” and I’ll cover that in the next section.)
Bench Grafting
Bench grafting starts by sourcing living scion wood and rootstock. Working indoors at your table or potting bench, start by matching scion wood to rootstock of a similar diameter. They don’t have to be exact, but the closer the match the better the union and cambium contact, thus a better chance the graft will take.
For a simple graft, uniform sloping cuts are made in both the scion and rootstock. They’re mirrored, so that one slopes down and the other up, which allows them to be joined into a straight line.
They’re sloped (rather than a straight cut) to maximize the cambium contact, as a piece of scion wood cut at an angle can have over an inch of exposed cambium even if it’s only 1/4 inch in diameter.
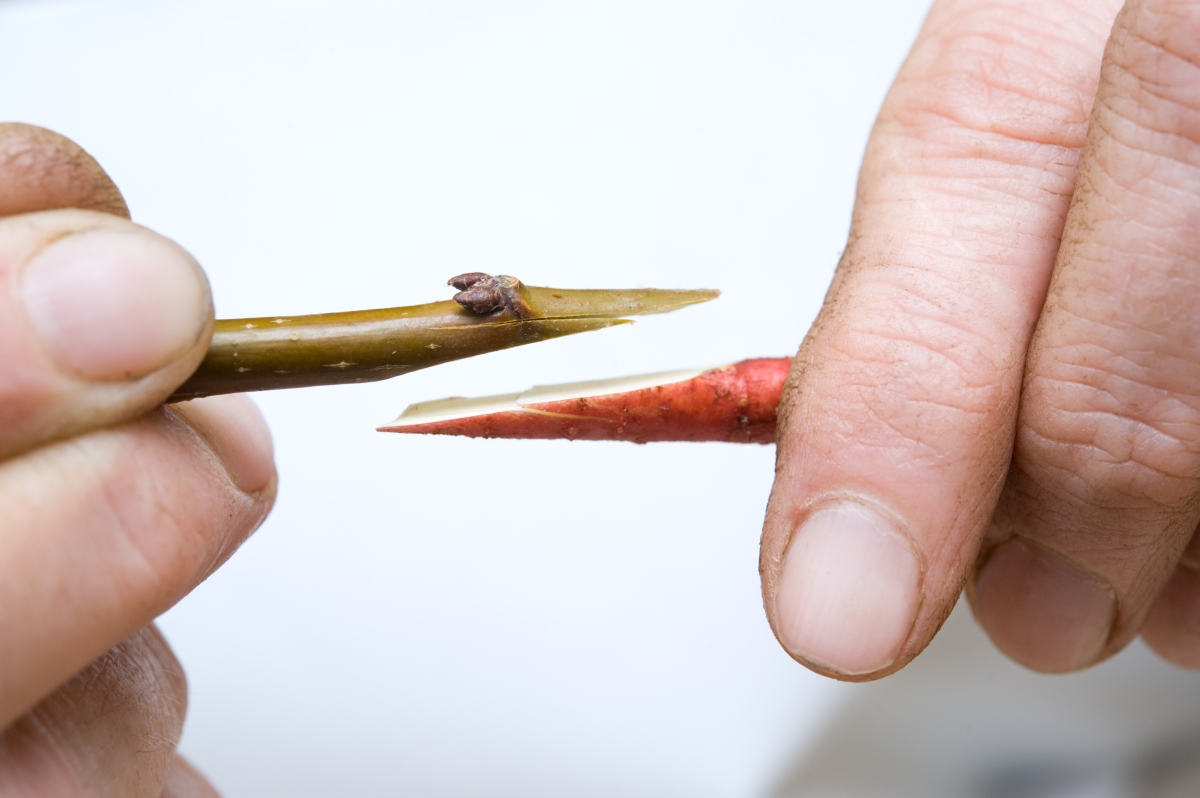
The two cuts are then matched up and held together with parafilm grafting tape.
This type of graft isn’t all that strong, since the only thing holding it together is the parafilm. I don’t recommend trying this method without parafilm, as simple twine isn’t likely to hold the cambium in perfect contact.
Whip and Tongue Graft
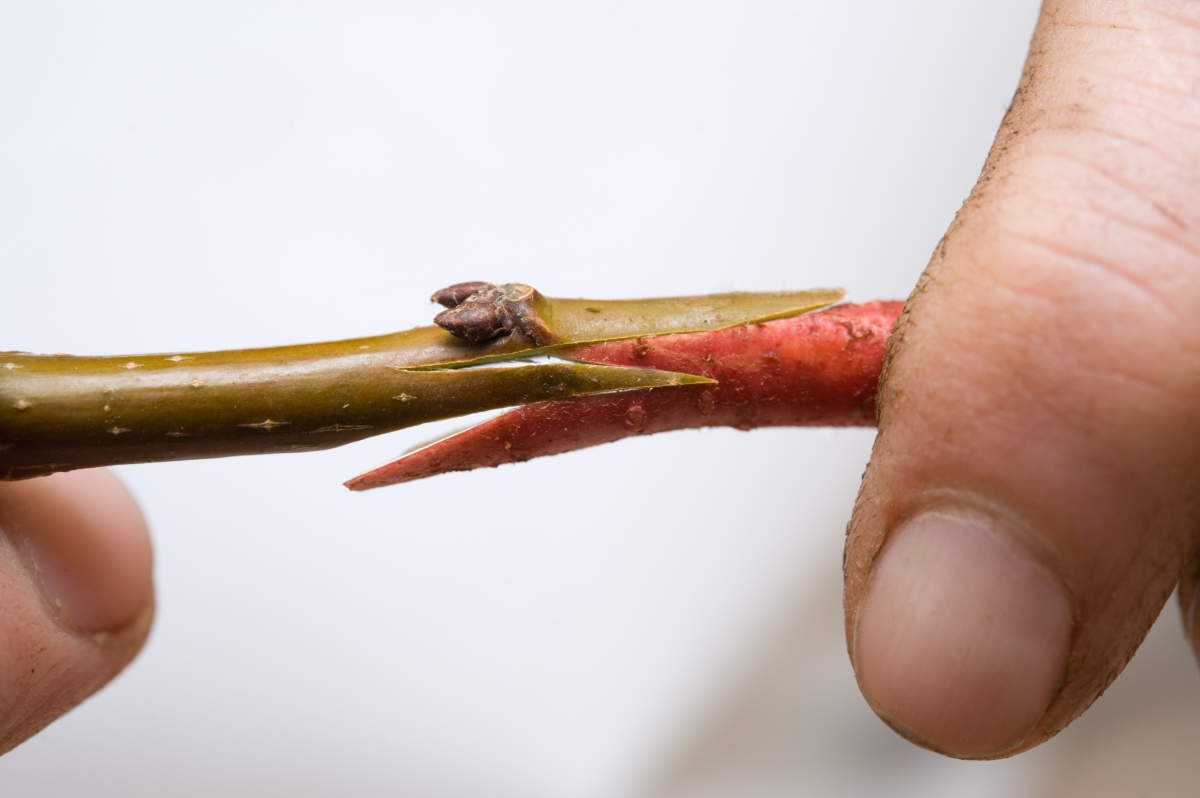
A better option is known as a whip and tongue graft. The scion wood and rootstock are still cut at mirrored sloping angles to maximize cambium contact, but a small cut is added that allows tension to hold the two pieces together.
All you’re doing here is creating a split down both sides, creating a little nook that will allow the pieces to hold together. The finished whip and tongue graft should look like this before wrapping:
Cleft Graft
A bit simpler than a whip and tongue graft, a cleft graft just creates a crevice or cleft in the rootstock. The scion wood is then cut into a fine point and inserted into the cleft.
So long as the diameter of the pieces match, and you cut long unions that taper to a sharp point, this is a secure form of bench grafting that will hold a lot better than a simple slant cut. It’s not quite as tight as a well-done whip and tongue graft, but it’s a lot easier for beginners to master.
The video below starts with cleft grafting on rootstock as a bench graft, then moves onto the same technique but as it’d be done out in the orchard with a large branch and a small piece of scion. About halfway through at the 8:50 minute mark, he switches to whip and tongue grafting and provides a detailed visual tutorial on that as well:
Grafting Pruners
For absolute beginners, you can invest in a pair of grafting pruners to make this process really easy. You don’t have to worry about making cuts that line up perfectly, since the pruners do that work for you.
It’s also a bit safer on the hands, since you’re not working with a razor-sharp grafting knife.
To use a grafting pruner, simply cut each side into a matching shape and then fit the cuts together.
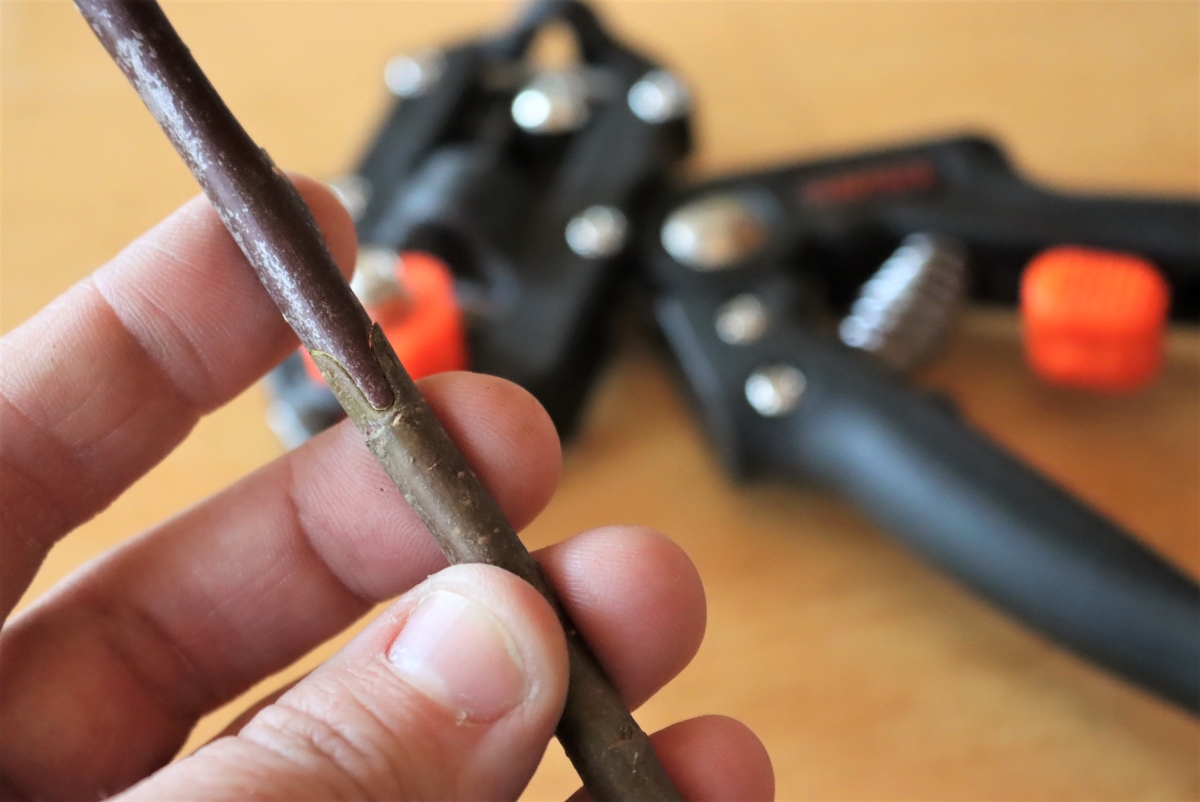
I really love using grafting pruners because it means you’re done start to finish in just a few minutes. I bench grafted 40 trees start to finish in about half an hour with these (without risking cuts to my hands from a grafting knife).
Sealing Bench Grafts
Regardless of the type of bench graft, it’s important to wrap them tightly so they hold firm.
Old grafting books will simply tie a whip and tongue graft with twine to hold it, and not seal it in any way. You’ll get a higher success rate if it’s wrapped with 1” wide parafilm grafting tape or a stretchy plastic wrap. Parafilm will degrade naturally, and plastic wrap will need to be removed in a few months once the graft is secure and the tree is actively growing.
(I use parafilm wax tape so I don’t have to remove it later as I would with plastic wrap.)
At this point, the bare root tree is complete and ready to pot up in potting soil or plant directly outdoors. In our climate, there’s still snow on the ground at grafting time so the trees go into pots with potting soil until spring.
Top working Trees (Field Grafting)
Out in the orchard, you can “top work” trees to change their variety, alter their shape or growth habit, or repair damage from insects, sapsuckers, or deer. Top working trees is similar to bench grafting, but you’re usually grafting small scion wood onto large established branches (or tree trunks).
That means you use different techniques to effectively join cambium, given they won’t easily line up as they do with matched size rootstock and scion wood.
Cleft Grafting
With cleft grafting, you’re creating a split or cleft in a branch to insert scion wood. It’s most successful with existing branches around 2 inches in diameter and works best with apple and pear trees.
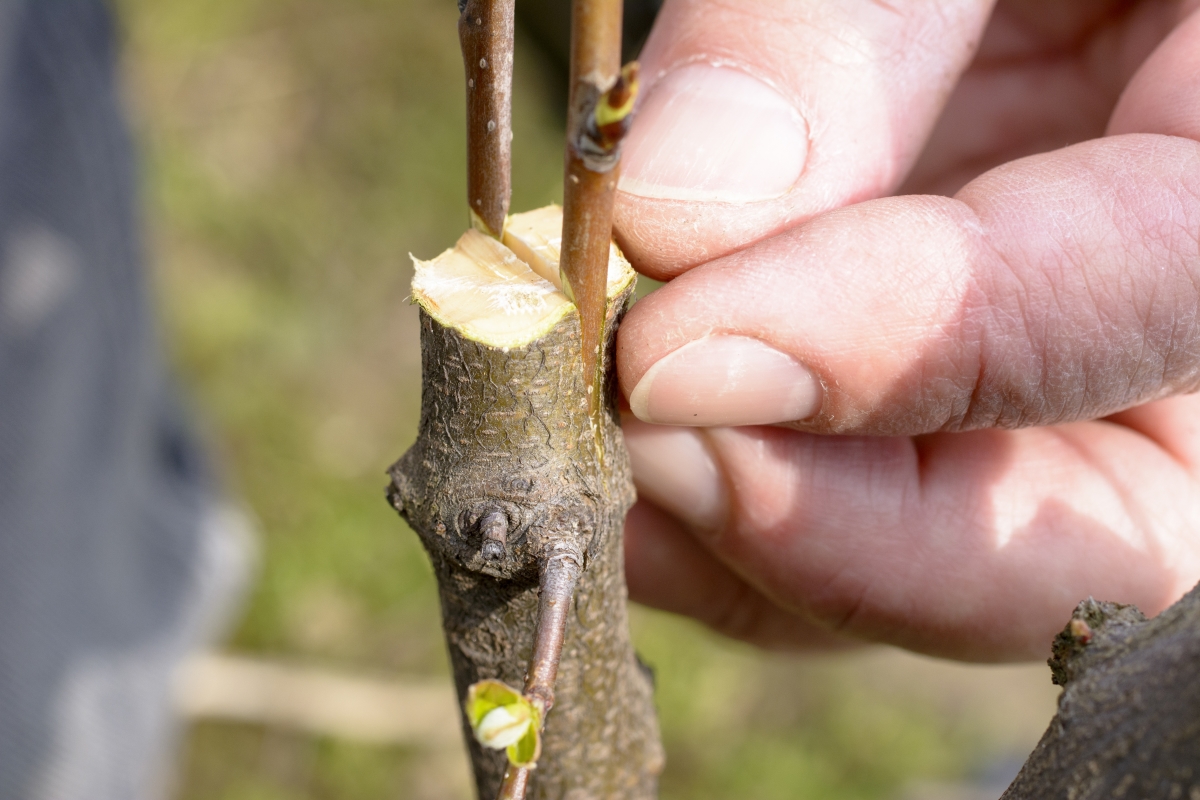
Start by choosing a healthy existing tree branch and then carefully sawing it off. Be careful not to let the bark strip as the branch comes off. Sometimes it’s helpful to cut the bark on the underside of the branch first, then finish the cut from the top so that the bark doesn’t peel as the branch falls.
Use an ax and a mallet to split the branch in the center of the cut about 2-3 inches deep, creating a cleft.
Prepare scion wood by cutting the bottom end into a long “V” shape that’s about 2 inches long. Hold the cleft open and insert the scion wood, lining up one side of the cambium with the outer edge of the cleft. Repeat the process on the other side, so that there are two pieces of scion wood in each cleft.
Seal the entire wound with grafting sealant to prevent moisture loss.
Bark Graft
A bark graft is similar in some ways to a cleft graft, but it allows you to insert more than two pieces of scion wood. This can be helpful when you’re top working larger branches.
Instead of splitting the wood, only the bark is split and the scion wood is inserted between the wood and bark.
Cut off a branch from an existing tree, again being careful not to let the bark strip as the branch comes off. Take a sharp knife and make a 2 to 3-inch slit down the bark, starting at the branch cut.
From there, use a knife to pry the bark back to create an open pocket where you can insert scion wood.
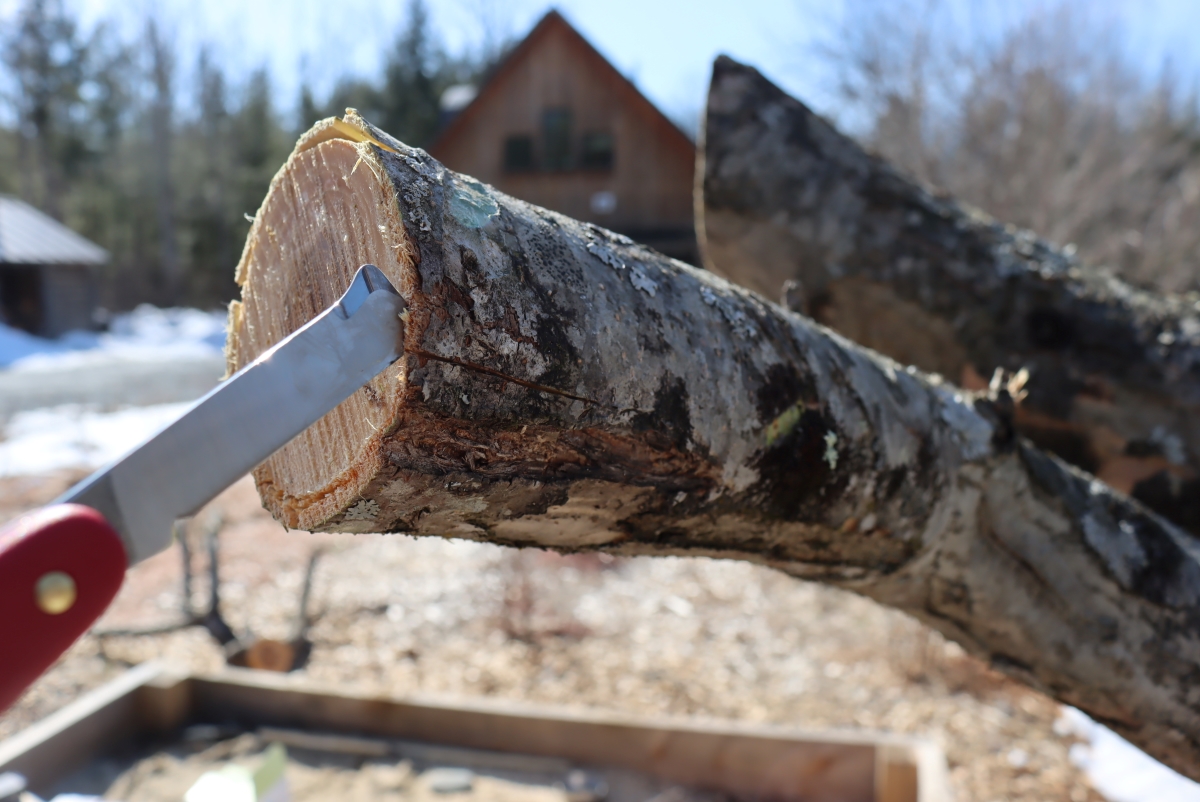
On the scion wood, make a sloping cut on one side of the bottom of the scion wood, creating a single angle cut that’s about 1 1/2 inches long. Insert the sloped scion wood into the bark cut, with the cut edge facing in. Tie the scion wood in place, or tack it in place with a small brad nail.
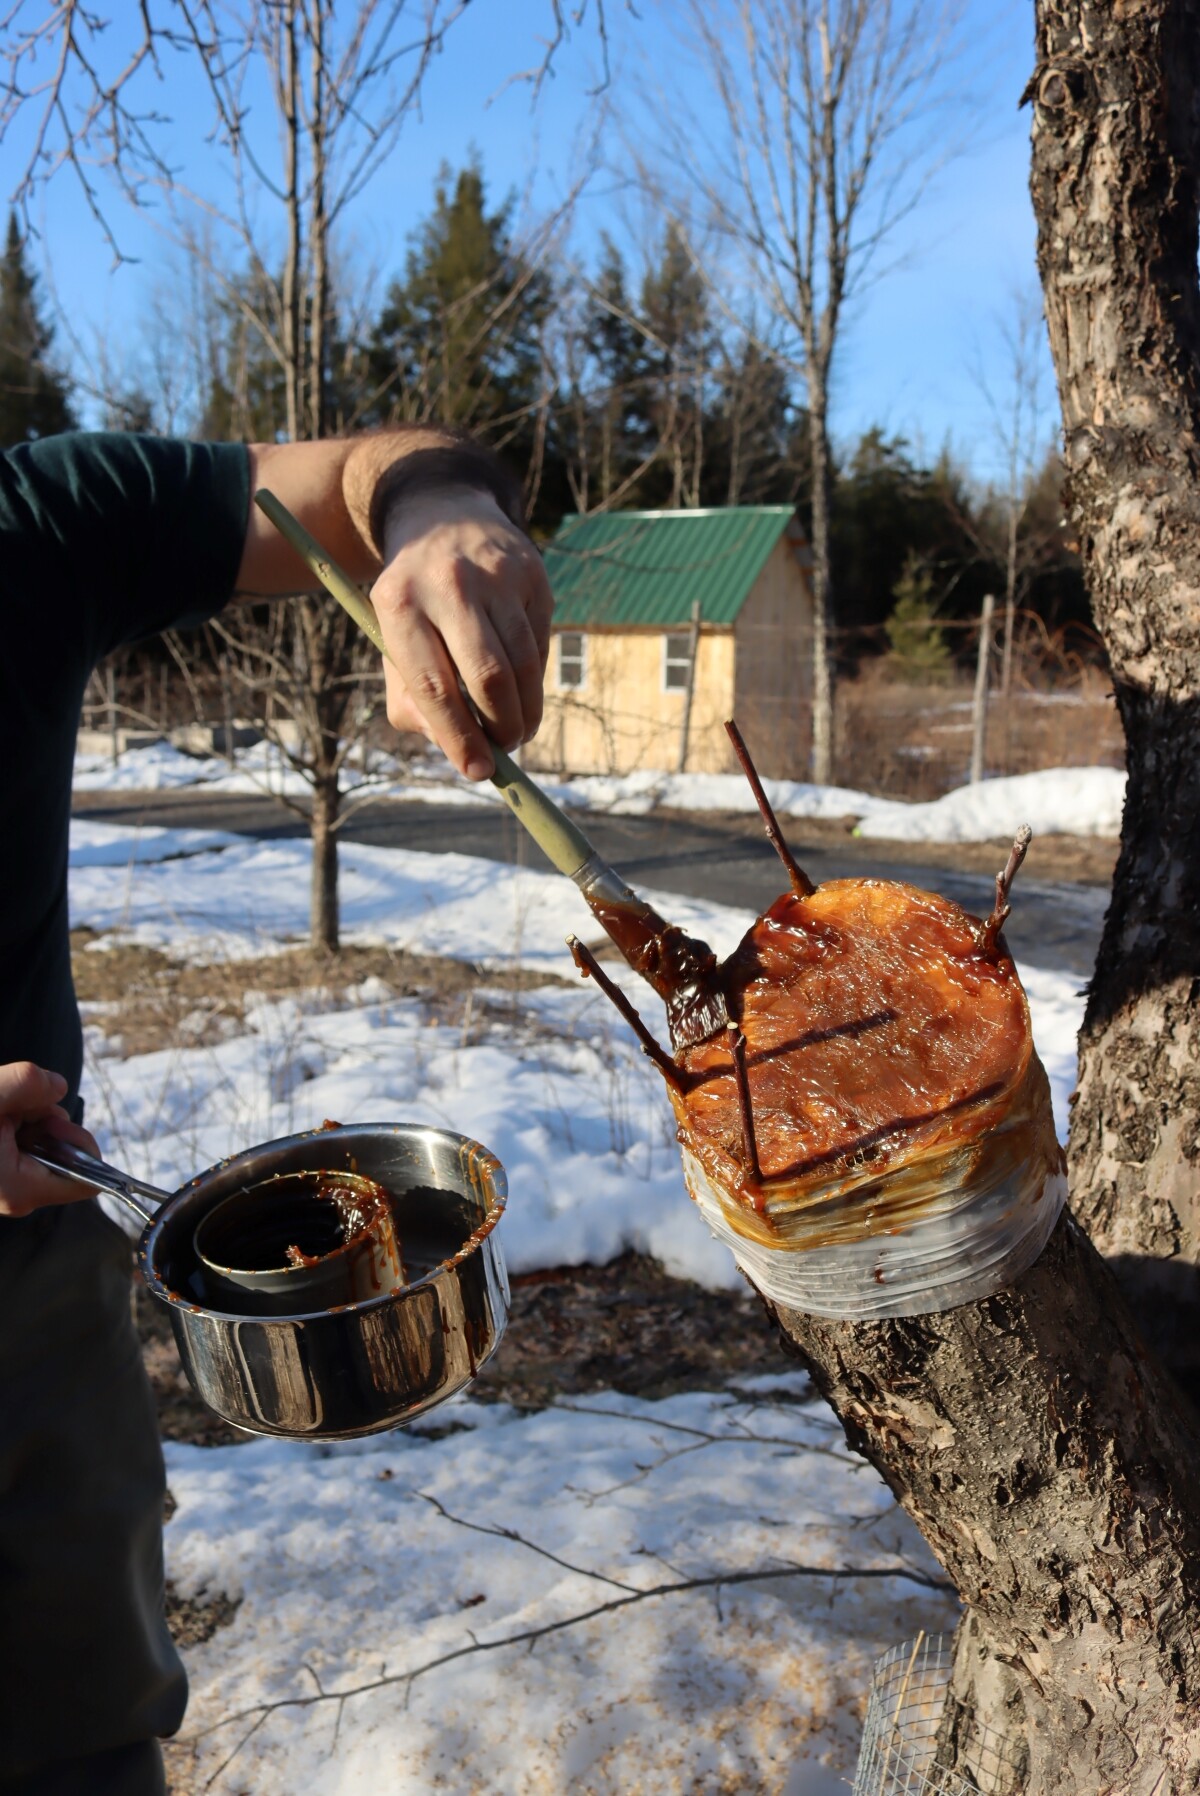
I actually like to use 4” wide parafilm tape to wrap the branches instead of tying or nailing them together. That helps seal off the wounds in the bark (though the cut branch will still need sealant) and holds everything in place nicely.
Add more scion wood as necessary, creating 2 to 6 pieces on each cut.
Seal the wounds with grafting sealant so that the tree doesn’t lose too much moisture from the cut.
Dressing Tree Wounds
It’s important to dress tree wounds, especially when you’re top working existing trees.
When bench grafting, parafilm is a simple and inexpensive option, and I just wrap each graft with 1” paraffin wax film. It’s sold for a few dollars per 50 ft roll, and one roll will be good for hundreds of trees. It’s a lot more effective and less messy than grafting wax.
On existing trees, you’ll need to use some type of grafting sealant to ensure that the tree doesn’t lose too much moisture from the cut before it can send energy to incorporate the new scion wood. Commercial grafting wax is inexpensive and comes in little metal tins.
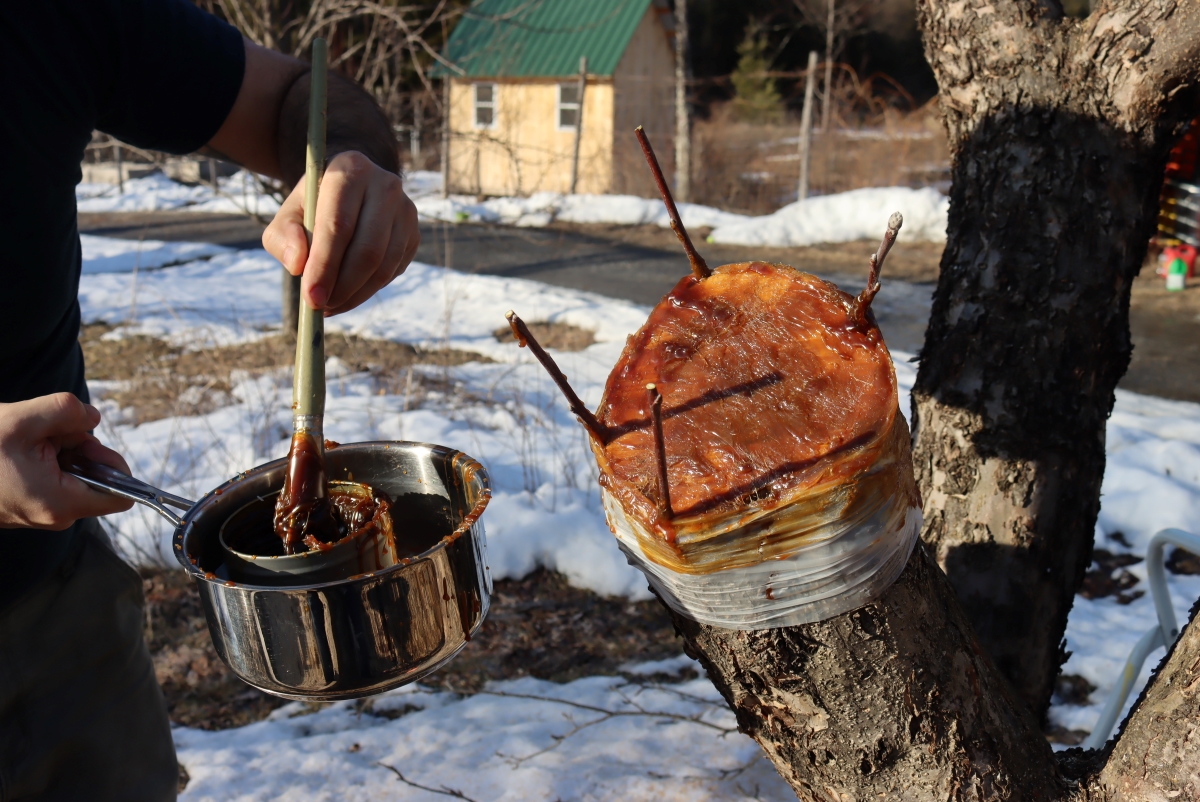
The instructions say to apply by hand after greasing your hands with oil so you don’t get too sticky, but it’s actaully quite stiff unless it’s very warm. We found that it was unworkable on the cool early spring day and opted to melt it in a double boiler and apply the wax with a stiff brush. That worked much better, though we had to keep it in the actual double boiler pot during application since it solidified quite quickly.
You can make homemade grafting wax by mixing the following (measured by weight):
- 4 parts gum rosin powder
- 2 parts beeswax
- 1 part tallow
Place all the ingredients in a double boiler and warm slowly, stirring constantly to incorporate everything together.
Gum rosin powder is just pine pitch, and it’s there to help prevent disease and to help the wax stick. Pine trees use it naturally to seal wounds, and it’s sold these days in powder because people use it for making homemade beeswax food wrap. In those, and in grafting wax, the gum resin makes the mix tacky so that it’ll stay in place.
The beeswax is for sealing the wound, but it won’t stay well on its own without the resin. The tallow is in there to make the mixture smoother and lower the melting point. You could also use another saturated fat, like coconut oil if you’d like.
Either way, I’d suggest making it and then applying it warm to the fresh cuts with a brush. It’ll cool and harden rapidly.
Bridge Grafting
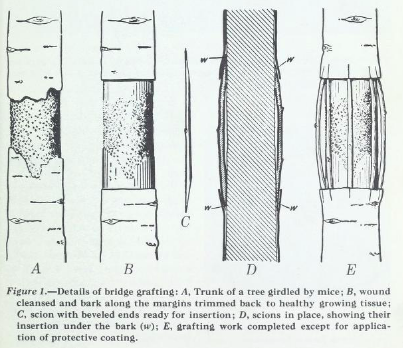
There’s one more good reason to learn to graft fruit trees, even if you don’t intend to propagate fruit trees of change varieties in the field. Insect and rodent damage are incredibly common orchard problems, and rodents are known to completely girdle trees in the winter months.
If the bark is completely eaten all the way around the tree, it’s only a matter of time before the tree dies without a means to transport nutrients between the leaves and roots. The cambium must be touching or the tree can’t repair wounds.
You can help prevent this by wrapping trees with hardware cloth, or by shoveling around the base of trees in the winter months. This happens most often when rodent populations are high, and/or when there’s deep persistent snow cover that prevents owls and other predators from accessing rodents in the winter months. Keeping snow away from trees also keeps rodents away, as they’d have to expose themselves to predators to eat the bark.
Even with prevention, tree girdling or rodent damage is likely to happen at some point, and learning how to bridge graft will allow you to save established trees.
I don’t happen to have any rodent-damaged trees at the moment, or I’d walk you through the process. I will, however, give you the best resource I’ve found. It’s an old agricultural bulletin from 1968 titled “Bridge Grafting and Inarching Damaged Fruit Trees, Agricultural Bulletin No. 508.” Copies are readily available online electronically, or for order in print.
Grafting Frequently Asked Questions
I hope I’ve covered everything you need to know to graft fruit trees at home, but here are a few common tree grafting questions as well. If you don’t see your question here, feel free to ask it in the comments and I’ll add an answer for you.
Is Waxing or Sealing Tree Graft Cuts Necessary?
Yes! At least when you’re top working a tree. Grafting out in the orchard implies large cuts into established wood that will be open to the air and elements. This will cause the wood to dry out, and the tree will choose to cut its losses on that branch rather than continuing to send resources to establish a new piece of scion wood. Too much moisture loss from too many cuts can even kill an established tree.
When bench grafting, the graft union is usually tight and there’s little or no exposed wood. In this case, sealing the joint isn’t strictly necessary, and you can just tie them together with twine to support the union until it takes. Still, using something like parafilm tape is a better option, as this both seals the cut and holds the union at the same time.
Parafilm also degrades naturally over time, so it won’t harm the tree if you forget to take it off. Twine, on the other hand, can choke out a new graft as the tree grows if you fail to remove it later in the season.
What Causes Grafts to Fail?
There are a number of answers here, but the most common are:
- Allowing the wood to dry out too much after grafting, usually by not sealing grafts.
- Grafting at the wrong time of year. Grafting should happen in the later winter, while trees are still dormant, but shortly before they begin actively growing again.
- Choosing poor scion wood can be a problem if you cut old, damaged, or diseased wood and attempt to use it as scion wood.
- Grafting upside down was, believe it or not, the biggest problem in the first grafting class I attended. Many of the students grafted the scion wood on backward so that the buds were facing down. Cambium transports nutrients in one direction, and if you graft upside down the graft will not take.
Grafting Books
I’ve covered the basics of grafting for beginners, but honestly, this just scratches the surface. From a professional point of view, there are more than 40 types of grafts and innumerable techniques that you could master if you really want to dive down the rabbit hole and become a master grafter.
- Grafting Fruit Trees – This quick Storey Guide covers the basics in just slightly more detail than I’ve done here, and it’s a good pocket reference. It’s only about $3 to $4 and well worth the investment so you can have an offline guide handy at your grafting bench.
- The Grafter’s Handbook – One of the most comprehensive guides to grafting available anywhere, but sadly out of print. Used copies sell for around $700! They’re recently released a Kindle version to make it more accessible, and now you can have it as an e-book for about $4. I highly recommend this one if you’d like to dive deeper into grafting fruit trees (or other types of plants).
- Reference Manual of Woody Plant Propagation – Not really a book that you’d just casually read in an armchair, this is a reference manual that covers all manner of plant propagation, beyond just grafting fruit trees.
- So You Want to Start a Plant Nursery – If you’re planning on starting a small backyard business rather than just grafting trees for a home orchard, this covers the basics of turning your grafting hobby into a business.
Plant Propagation
Beyond grafting, you can also propagate fruiting plants through cuttings, layering, and all manner of other methods. Grafting is best for fruit trees, but try these methods for other types of fruiting plants.
- Propagating Blueberries from Cuttings
- Propagating Elderberries from Cuttings
- Propagating Grapes (5 Ways)


I have a tulip poplar, the top got broken of, then it made a curve and went up. The top is beautiful but right where it curves the limbs have died. Is it possible to cut the top off and graft to the bottom of the same tree. It is about 15-20 feet tall. The curve is about half up.
That’s a good question…and I don’t have a definitive answer for you. Not all trees do well with grafting, and I’m not personally familiar with Tulip Poplar. A quick google search says it’s a vigorous tree and even cuttings tend to grow just stuck into the ground without grafting, so I’d assume it’d do fine as a grafted tree. But, I honestly have no idea. I do wish you the best of luck and I hope it works if you try it.
We moved to a property that has a beautiful established ornamental apple tree. Is it possible to graft an eating apple successfully unto it?
Yup! That should work just fine. Enjoy!
Thank you for this great introductory article. I’ve had successes and failures along the way over the past ten years with grafting and sometimes it’s just hit or miss. My latest challenge will be to regenerate apricot, plum, kumquat and lemon trees in my orchard that died off by using cleft and bud grafting techniques onto the vigorous remaining rootstocks. I might try several this summer in some of the multiple new shoots just to see what happens.
Thank you. We’re so glad you enjoyed the article. Let us know how the trees turn out.
I just thought I’d do a follow-up on what I’ve found with my Apple grafting question. It was an unusually prolonged wet, cold spring here in the Willamette Valley so I don’t know how a typical year with grafting would preform. However, it took about 4 months for about half of my grafts to start pushing leaves from their scions. I see the most new leaf growth on HOT days too which I find interesting! I’m hoping the rest will come around shortly but I’m just soooo happy with my Apple trees I created! Cheers!
That’s a wonderful update on your apple grafting. Thanks so much for coming back to share.
Thanks for your previous response, I’m also wondering if I wrap the rootstock portion in duct tape or seal it with wax to keep the rootstock leaves from growing would it push the nutrients up to the scions and help them take?
I don’t think that’s necessary and it could possibly damage the rootstock portion and cause other problems.
I live in the Pacific Northwest and grafted 25 new Apple trees in the beginning of March this year into 10 gallon pots. So far I don’t see any changes in the new grafts. I’m wondering how long it takes to know if they’re successful? The rootstock part keeps making new leaves (which I remove) but there’s no change in the scions.
It really depends. They can start sprouting in a few days but can also take up to a year. You will know the graft has failed if it shows signs of drying out.
Whenever I read grafting blogs or watch YouTube videos, they always say “fruit” but then use apple as the example because it’s the easiest. I can’t find practical advice on bench grafting or top working plums or peaches successfully – proper pre and post tree indicators and temperatures for example. They are harder and normally chip budded, but surely someone can do it with some success?
If you graft more than one scion into a cut off branch, do you later prune it down to one?
Most tutorials I have seen only show one scion being grafted on a single branch. Is there a reason why you would want to do more than one?
Grafting fruit trees is a great article as I have bought several fruit trees to put in my new yard. I’m finding out how the deer are also liking the fruit trees. Along with grafting is there a certain age a tree can be before grafting and if the deer chews on the buds of new trees will I need to wax the ends?
I think the age of the tree depends on the variety and the grafting method being used. I don’t think you would need to wax the ends of the trees but I would definitely find some protection from the deer to keep that from happening in the future. Otherwise they may completely destroy the tree.
Hi Ashley, and thaks a lot!!
You covered most of the grafting methods, it will be most useful for my small orchard. I have a lot of sour cherry trees (wild cherries), I am thinking of grafting cherry trees on them, they have very sustainable roots.
Best wishes for your blog and you homestead.
Wonderful, good luck!