Affiliate disclosure: This post may contain affiliate links. Please see our Privacy Policy.
I was skeptical about growing ginger in Vermont. Isn’t ginger a tropical plant? But none the less, a decade ago I was gifted a ginger rhizome from a friend that had recently traveled to Hawaii so I decided to give it a try. To my surprise, it not only grew, it thrived!
In a shady corner of my drafty 1850’s schoolhouse home, my ginger plant completely took over a 20-inch pot in just a few months. Tall stalks reached 4 to 5 feet tall even in a shady corner during the winter months. That ginger lived 5 years with minimal care and lasted through many harvests.
I was sad to lose it when we moved to our off-grid homestead. In the chaos of the move, it was left outside during a frost. While ginger can take a lot of neglect, a frost is asking a bit much.
I later learned that ginger is being grown outdoors as a profitable cash crop by farmers in Vermont and Maine. Local coops and farm stands are starting to carry fresh ginger roots from local farms that are growing it on a large market scale.
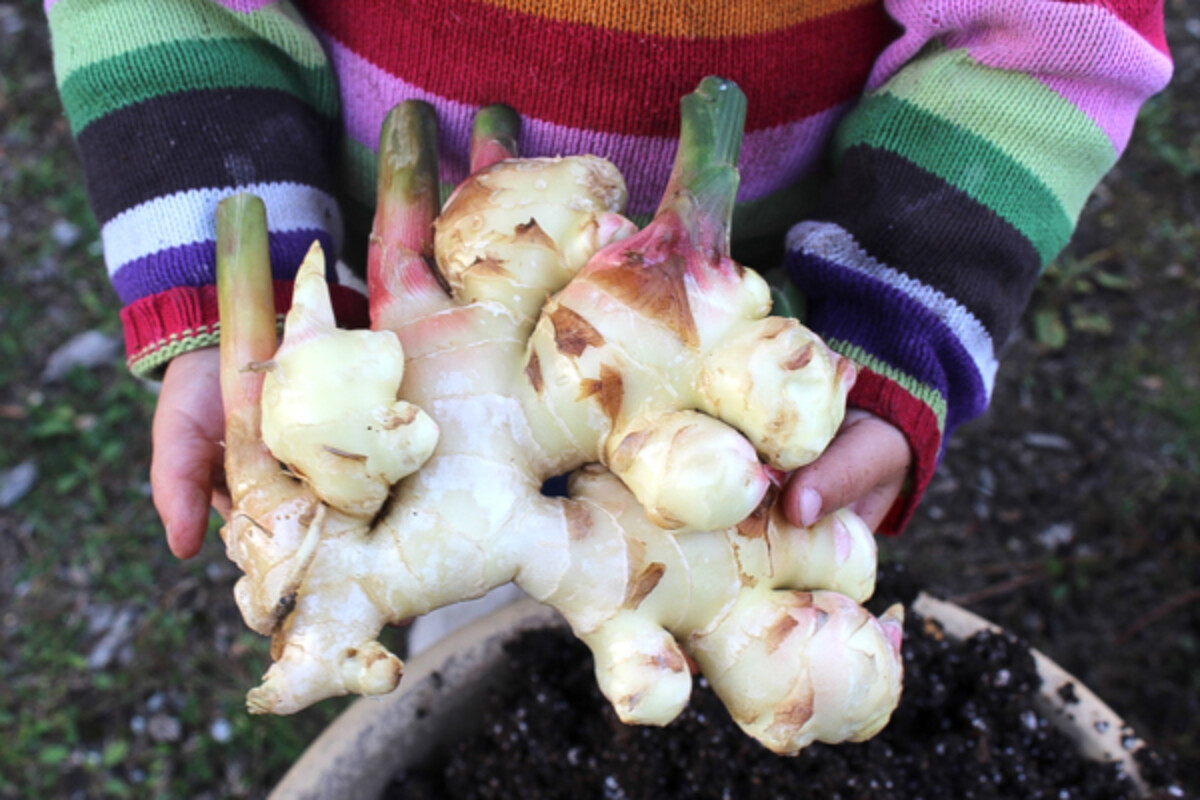
I was ecstatic when my friends at Green Mountain Girls Farm recently gifted me a number of freshly harvested ginger rhizomes. Time to get planting!
(You can buy ginger for planting here, and they have Turmeric for planting as well. Both grow in similar conditions and do well indoors year round, or outdoors in summer.)
For science, I decided to plant two of the largest rhizomes of locally grown Vermont ginger, alongside a store-bought organic ginger. Unless you’re planning on growing ginger commercially, expensive seed ginger rhizomes aren’t necessary.
Start with any organic ginger root. Organic is important, as conventional ginger is often treated with chemicals to prevent sprouting.
If you’re looking for a particularly striking houseplant (that you can still eat) try growing a ginger cultivar that has been selected for beautiful flowers. This package of 4 flowering gingers includes a red, blue, white and yellow variety.

Regardless of the source of your ginger, begin by soaking it in warm water for 24 hours.
I’ve had better success starting ginger that I’ve had sitting on a windowsill in direct sunlight for a few weeks before soaking, as the sunlight helps stimulate bud formation. That’s not strictly necessary, but it can help.
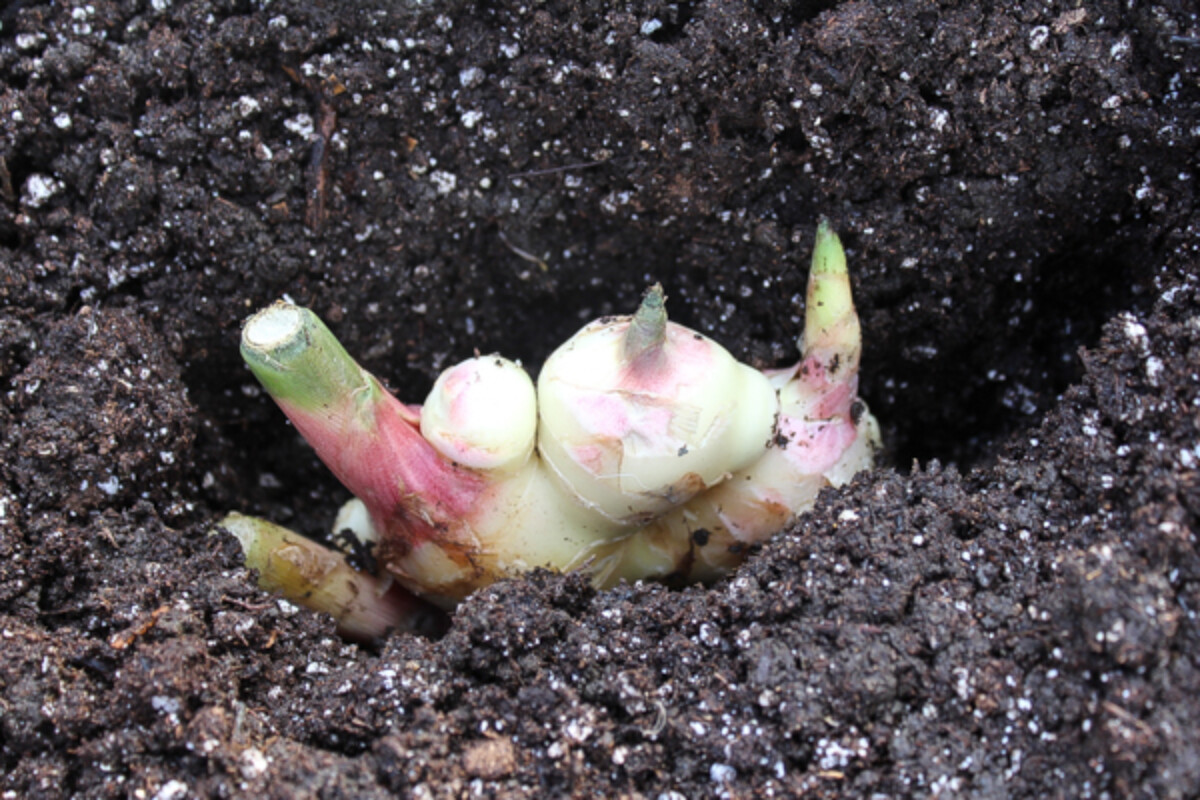
After 24 hours of soaking in warm water, plant your ginger rhizome with the buds pointed upward. Use a relatively shallow, wide pot if you have one available, but just about any pot will do to get you started.
Ginger wants to grow horizontally, so the wider the pot the better your ginger will fare. For indoor growing, windowsill planters tend to work well because they’re wide and relatively shallow.
If you want to really produce ginger in quantity indoors, try growing your ginger in a wide flat bonsai planter. This 18” shallow bonsai pot is ideal. The size will let your ginger grow unchecked, and allow for bigger indoor harvests.
Plant your ginger in a rich potting mix, amended with compost.
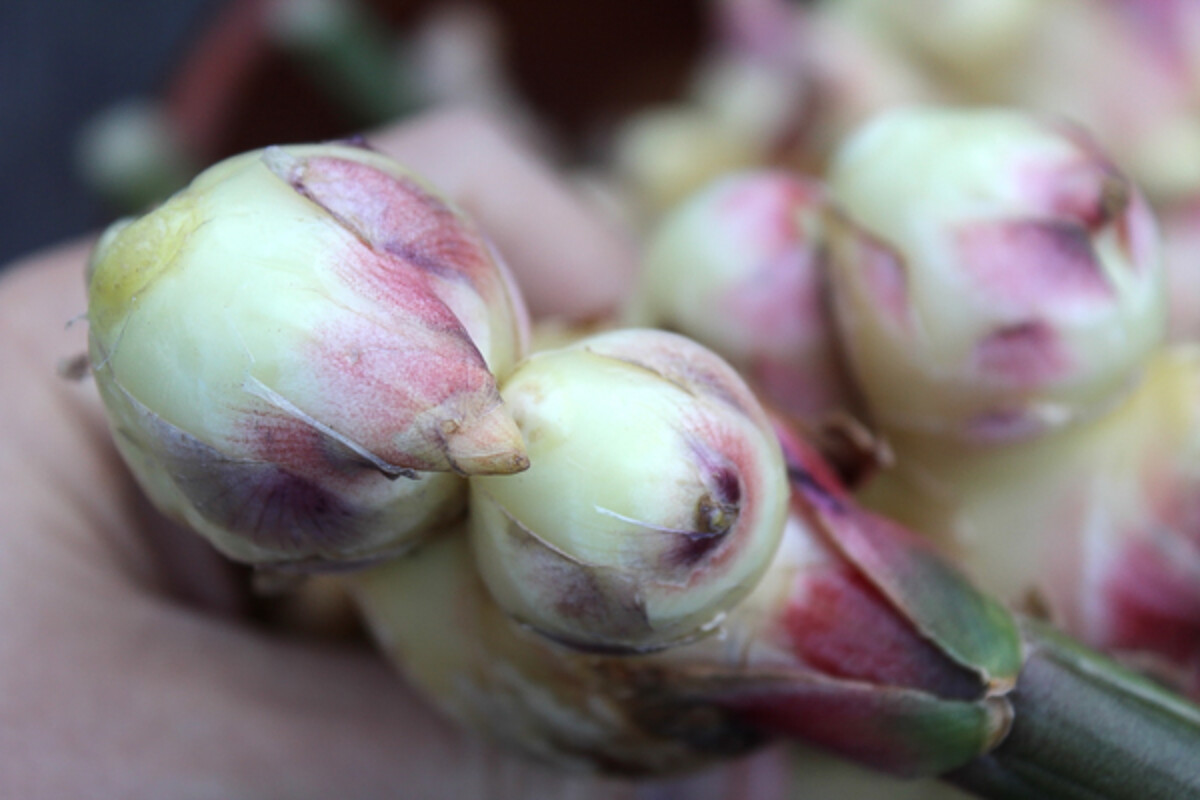
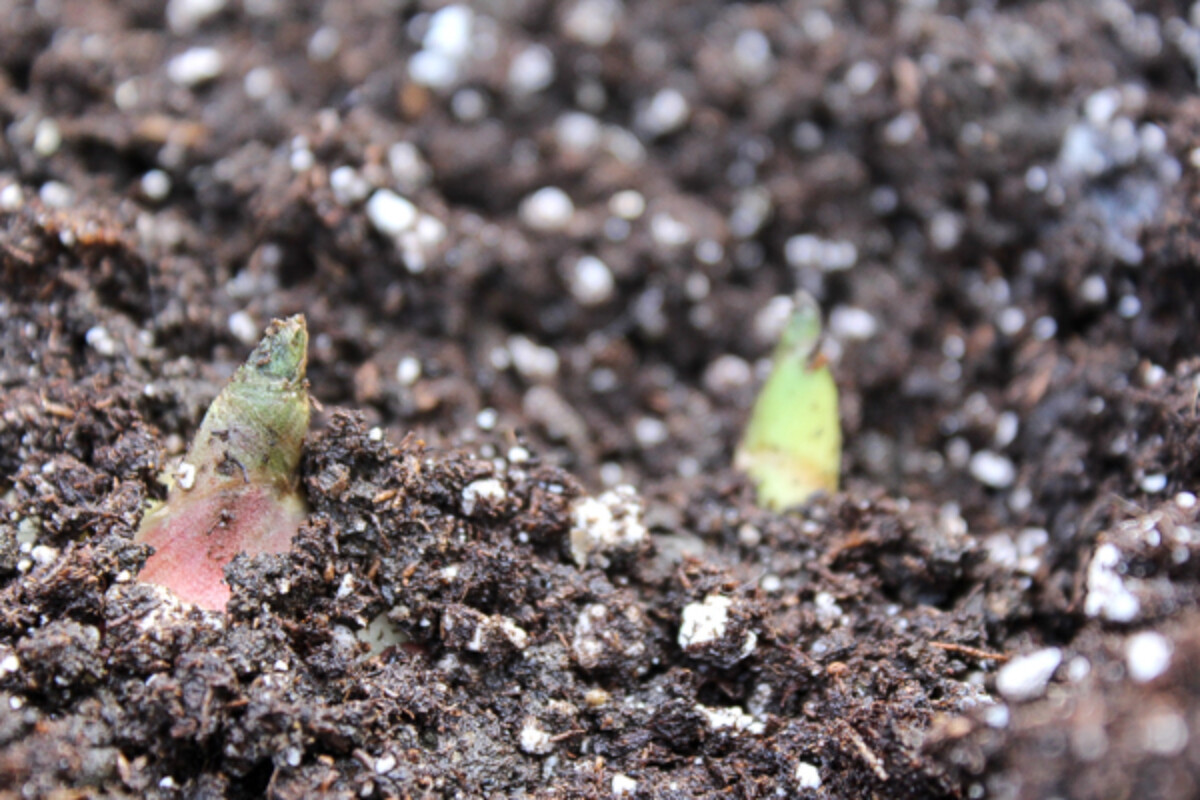
Be sure that the sprouting buds are pointing upwards and very near the surface. I like to pull the soil back from the bud tips to allow them a bit of sunlight to help stimulate growth.
Be patient, it can take ginger roots 2 to 4 weeks to get going even in optimal conditions. Ideally, keep your pot in a warm space, 75 to 80 degrees, and water lightly. The soil should be moist, but not soaking.
If you’re in a particularly cold region and you just can’t keep your house warm, consider a seedling heat mat to keep the soil temperature up just for sprouting. Heat mats are great for getting any garden seeds off to a good start, so you’ll be able to use them, again and again, to get things growing.
In the long term, indoor ginger wants filtered sunlight through a south-facing window. They don’t need anything particularly strong, and indoor light is plenty to keep them healthy so long as they’re kept warm.
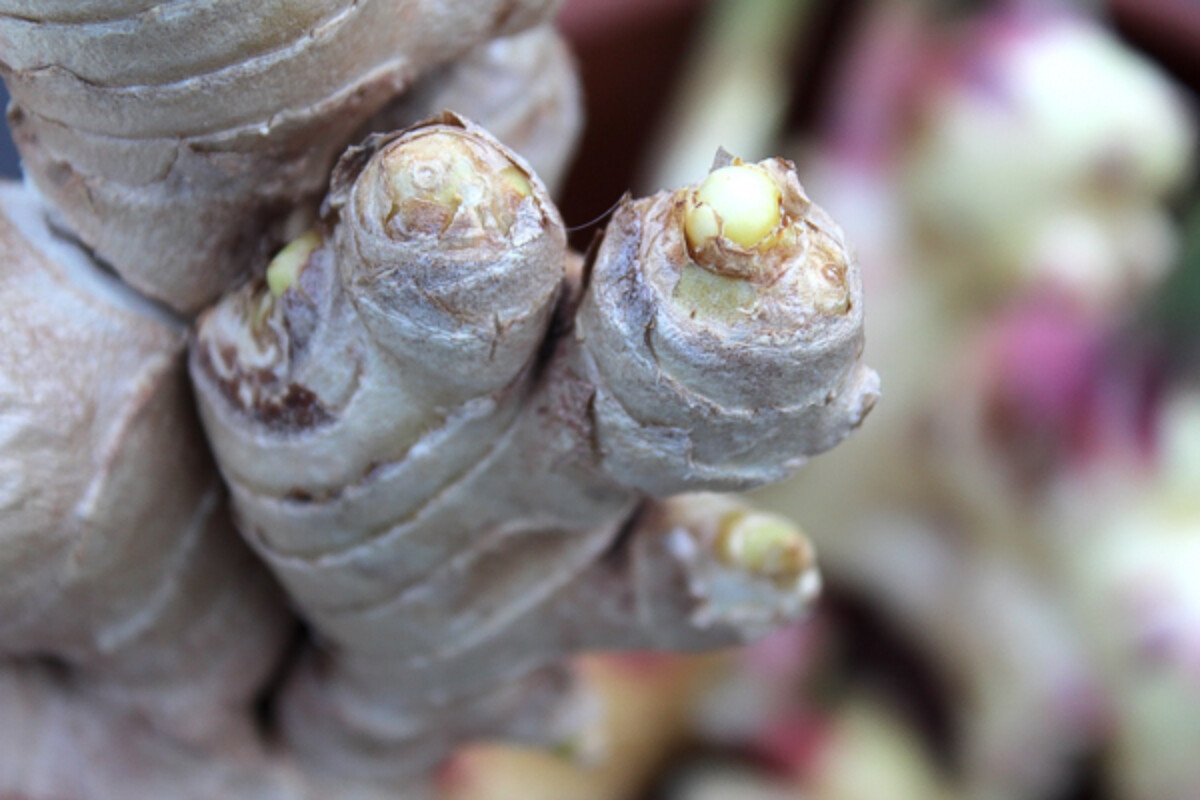
After a few months, once your ginger is established, you can begin harvesting around the edges of your pot. Use your fingers to unearth a bit of rhizome, and cut a small portion off with a sharp knife. Replace with potting soil or compost, and allow your ginger to continue to grow. In this way, you can harvest ginger from a single pot forever.
If for some reason you just can’t get ginger to sprout, you can always start with pre-sprouted ginger in a pot. This ginger plant comes pre-sprouted in a pot and has striking red flowers.
To see how farmers in the northeast are growing ginger commercially in high tunnels outdoors, follow these instructions from Fedco Seeds.


I read this a few weeks back (thanks!), went away with the general idea, got the ginger, and in my excitement, forgot about the ‘let it sit in the sunlight’ part and went straight to soaking. 🙁
Is it possible to go backward and give it sun AFTER soaking to stimulate the bud growth?
Or is it now a lost cause, and I should start over with a fresh knob?
Thanks for all of the content and ideas. I LOVE your stuff!
Cheers-
Jen in WI
You can go back and forth, no problem. Take it out of the water and put it in sun, it’ll still grow just fine.
Very informative and appreciated! I’m getting organic horseradish wondering if this system of growing would also apply to it?
Horseradish and ginger are both very different plants. Horseradish is a very hardy perennial plant unlike ginger which is tropical. Horseradish actually needs to live in a climate where the fall and winter get fairly cold. Growing it indoors wouldn’t be ideal since it wouldn’t experience the cold temperatures as it would if it were outside. The roots also grow very differently. Ginger grows very shallow and wide and horseradish grows a very deep taproot. It can even grow as big as 10 ft deep if left undisturbed.
Such a helpful article Ashley! I’m wondering if I can plant organic horseradish root the same way? Soak & plant? I live NW we are cold for another month into April/May
The cold shouldn’t really bother them. The best time to plant them is in early spring as soon as the ground is workable.
Thanks for another great post.
You’re very welcome.