Affiliate disclosure: This post may contain affiliate links. Please see our Privacy Policy.
Processing a pig at home is a big job, but it’s one of the most rewarding skills you can develop on a homestead. From the first cut to the final pack of sausage in the freezer, handling every step yourself means nothing goes to waste—and you know exactly how your food was raised and prepared. In this guide, I’ll walk you through our home butchering process, including how we slaughter, skin, break down the carcass, and make sausage from scratch.
Harvest day is one of the most important—and intense—days on a homestead. It starts with sharpening knives, prepping the tractor, and clearing the kitchen for a full day of work. For us, processing pigs at home isn’t just about food. It’s about responsibility, self-reliance, and making use of every part of the animal we’ve raised.
We butcher our own pigs for several reasons. It gives us full control over the process from start to finish, avoids stressful transport for the animal, and keeps the entire harvest on the homestead. Since we don’t sell any meat, home butchering is fully legal in Vermont when it’s for personal consumption.
I’ll be honest—this part of homesteading is never easy. We spend nearly a year raising each pig, and we get to know them well. But if I’m going to eat meat, I’d rather take on the moral responsibility myself than outsource it. Maybe I watched Old Yeller too young, but I believe this process deserves intention and respect.
How to Slaughter a Pig at Home
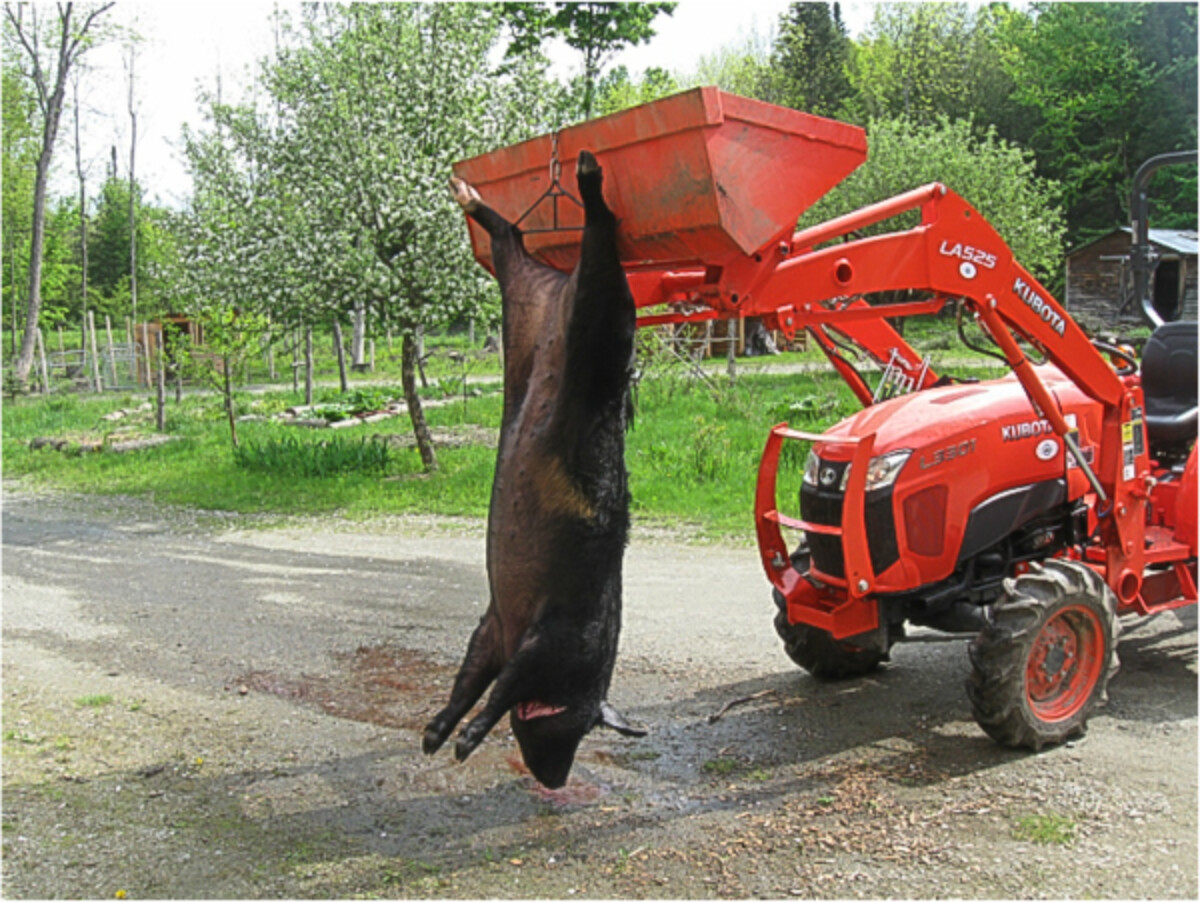
The process begins with a clean, humane kill. We use a firearm to stun the pig with a single shot to the head. Once the pig is fully down, we cut the throat to bleed it out quickly. Some traditional European methods skip the stun and go straight to the cut, but after doing this myself, I can’t imagine the skill and strength that would take. Even with the pig fully stunned, it takes real effort to get through 1–2 inches of thick hide and fat to reach the main arteries.
After the cut, we hoist the pig using the tendons in the back legs and hang it from our tractor bucket. Before we had the tractor, we did this by hand—and that’s not a process I’m eager to repeat. A fully grown pig can weigh 300 to 350 pounds, and getting it elevated quickly and safely is crucial for proper bleeding and cleanliness.
Scalding vs. Skinning a Pig
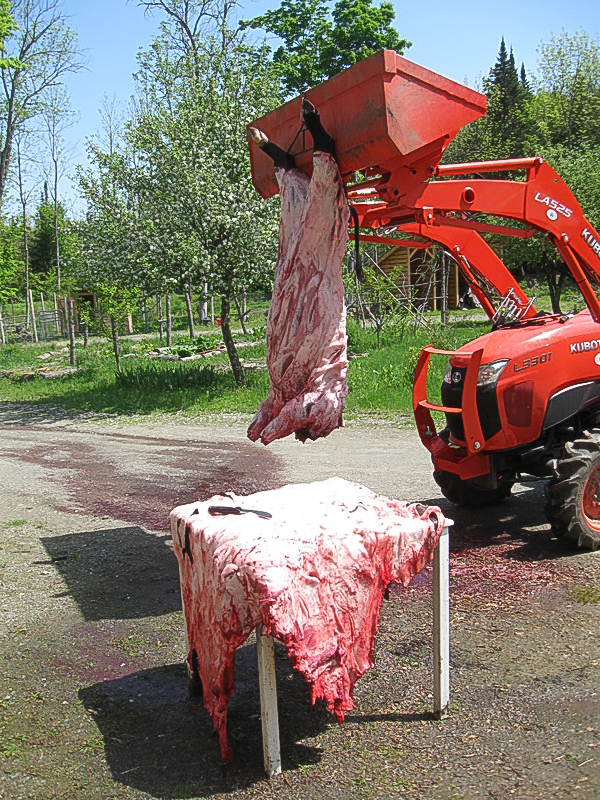
The next step is to either scald and scrape the pig to remove the hair or skin it entirely. Scalding preserves the skin and yields a more traditional finish (especially if you’re making cured hams or cracklings), but it requires a large vessel of near-boiling water and a way to keep it hot. Our neighbor uses a fire under an old oil drum, which works, but we haven’t set up a system like that yet.
Instead, we choose to skin our pigs. It’s simpler with the equipment we have and still results in high-quality cuts. The main loss is the skin and a small layer of fat. A proper skinning knife with a rounded tip makes a big difference—it helps avoid puncturing the hide or meat while allowing controlled cuts across large areas.
Gutting and Breaking Down the Carcass
Once the pig is skinned, we open the abdominal cavity and remove the internal organs. This part takes care and practice, especially if you want to keep the organs clean and usable for stock or cooking. From start to finish—shooting, bleeding, skinning, and gutting—this part of the process takes us about an hour.
At that point, we move the carcass into a cold place to chill overnight if possible. A fully chilled pig is easier to cut and less prone to spoilage. If temperatures are above 40°F, we begin butchering immediately.
Butchering and Sausage Making
The butchering process involves breaking the pig down into primal cuts and then into smaller roasts, chops, ribs, and trim for sausage. This part takes another 3–4 hours, depending on how much we’re grinding.
Our first year, we used the meat grinder attachment for a KitchenAid stand mixer. It worked, but it was painfully slow—about 5 minutes per pound. Eventually, we upgraded to a LEM 3/4 hp meat grinder, and that changed everything. The new grinder processes 7 pounds per minute and produces clean, well-textured sausage without mashing the meat.
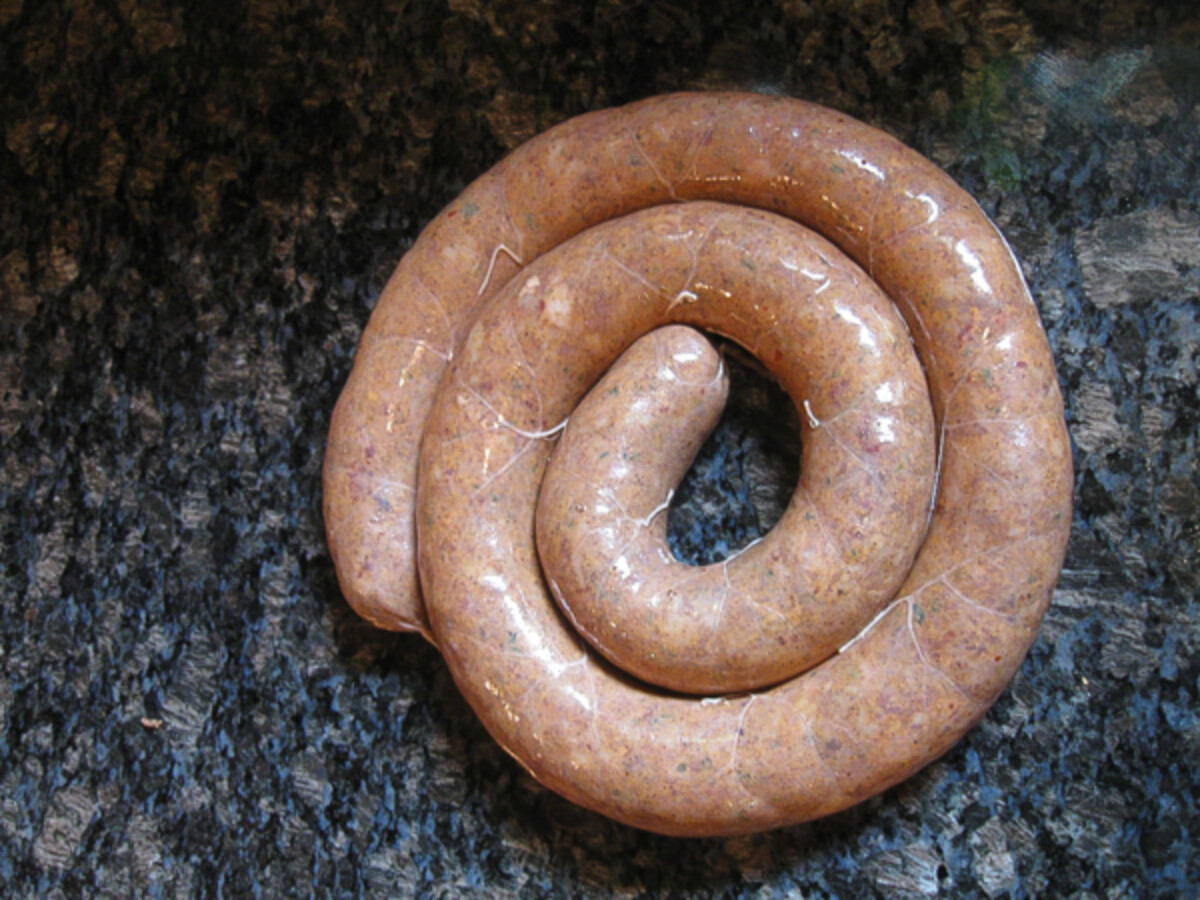
This year, we focused heavily on sausage. Instead of leaving whole shoulders, we boned everything out into small roasts and ground the rest for sausage.
Perhaps someday we’ll go through the process of cleaning our own sausage casings, but for now, we buy natural sausage casings ready to use. They come pre-packaged in salt. Soak them to remove the salt and moisten them, and they’re ready to use in about half an hour. The process was much simpler than expected.
How Much Meat Does a Pig Yield?
After processing, we ended up with about 175 pounds of marketable cuts from a pig we estimated at 350 pounds live weight. That’s about 50% yield, which is typical for home-processed pigs. In addition to meat, we made full use of the bones, organs, and fat:
- 90 lbs sausage
- 40 lbs ham roasts
- 15 lbs shoulder roasts
- 15 lbs ribs
- 8 lbs chops
- 5 lbs shank
- 4 lbs tenderloin
- 42 quarts pressure-canned stock
- 5 gallons rendered lard
The stock alone filled our pressure canner three times over—each run yielding 14 quarts in our 30 quart All-American Pressure Canner.
Beyond meat and stock, we were able to render 5 full gallons of lard. Yes, that’s right. Five full gallons of rendered lard.
Pigs are usually harvested much younger than 1 year old because feed conversion is better. We planned to breed this pig, but plans changed and into the freezer she went.
We first grind the fat to make it easier to render, and then slow process it on the stove at low heat. It’s an all-day process, properly rendered pork lard tastes clean enough to bake into a pie crust without the slightest hint of pork flavor.

We rendered the fat slowly over low heat after grinding it to increase surface area and yield. The result was clean, white lard suitable for pie crusts, cooking, and even soapmaking.
Home Pork Processing Videos
Processing a pig at home isn’t easy work, but it’s deeply rewarding. You build skills, take full responsibility for your food, and waste nothing. Every part of the animal—from the bones to the fat to the organs—can be put to good use.
If you’re new to butchering, I highly recommend watching instructional videos like those from Scott Rea, a true artist and educator in traditional butchery techniques. His clear demonstrations gave us the confidence to take the next step and make our own cased sausages this year.
With each pig we process, we get better at using every cut, managing our time, and making the most of the harvest. It’s hard work, but worth every minute.
Pork Processing Resources
For more on what to expect from your home harvest, check out Estimating Your Pork Harvest: From Live Weight to Cooked Yield.
Looking to preserve your stock? Don’t miss my guide to Canning Bone Broth or Making Organ Meat Stock. You can also learn How Much It Costs to Raise a Pig and plan your next season of homegrown pork.


Hello, this is my first time indulging in fresh pork processing so I have some questions. I live in Albania and just purchased a 20kg piglet, well actually my cousin did 🙂 at an animal fair and had it cleaned. He brought it home and we cut it up into various pieces, which look fine but after seeing your video I see where our methods might need improvement. The concern in any Balkan state when it comes to fresh meat is that they want to boil everything to ensure the meat will be free of any possible contamination, which I can understand. However, I’m not sure if that’s necessary when I want to roast it. I just would like some advice on the handling of farm-raised pork for cooking. Should I boil it all before roasting or cooking on the stovetop? Any suggestions you have would be greatly appreciated it. Thank you and I love your site. I have also started making homemade cheese from fresh cow’s milk, and jams. Originally from a city, in NY and Rome, I feel out of sorts when delving into homemade foods but am beginning to appreciate it!
We typically do not boil the meat before cooking it. One factor that you might want to take into consideration is where the pig was raised. When we’re raising our own meat, we know that the animals are raised in a healthy environment which can affect the quality of the meat.
Trichinosis is always a concern.
When you say that it hasn’t been detected in many years, that is in a controlled commercial farm environment where what they eat is very
Regulated.
In your average home farm operation pigs can have access to to rodents that carry tric.
You definitely want to treat your pork like it does have trichinosis.
The university of Montana has a great study on trichinosis, it’s definitely worth a read.
Not hard to protect yourself from.
But a real pia to recover from once you get it.
We happen to believe that livestock raised in a healthy manner on the homestead is actually much better than commercial farming practices. The animals are much cleaner and much healthier and therefore are much less likely to carry disease. I’m also pretty certain that they most likely have access to rodents in a commercial farming application as well. Thanks for the information. We will definitely check it out.
How did you render your lard? I’m doing it in a crockpot. It is quick and easy but does have just a slight pork snell to it. Good for biscuits and cooking but not real sure about baking and pastries
It’s more about the kind of lard that you are using. Pigs have different types of lard. You want to use leaf lard for baking and pastries because it does not have any pork smell or taste at all. Here is an article that might help. https://practicalselfreliance.com/leaf-lard/
Do you let them hang for 5 days or week?
My husband and I butcher our own deer, and the first year we ground it up we used a kitchen aid attachment also, and it was terrible!! the person who let us use his kitchen aid ended up giving us his older electric Grinder (not kitchen aid) because he was convinced the kitchen aid was nicer. Needless to say the next year we got all our meat done in a couple hours vs over 24 hours!
Do you use the lard for cooking only? And how do you store it? Have you ever used it for candle making?
A dedicated meat grinder is the way to go for sure, we don’t use our kitchenaid grinder anymore at all, even for small batches. Once you have a real grinder the difference is profound!
We store the lard either in our basement (which is cool) or in the freezer if we have space. I actually just wrote an article on making, using and storing lard just a bit ago here: https://practicalselfreliance.com/leaf-lard/
We haven’t tried making soap with it, but I hear that works really well.
We make our own lard soap which turns out to be the best option for washing our clothes… just make sure not to use fried lard… our first batch of soap did have a hint of bacon aroma in it! XD
Do you inspect the meat for Trichinosis?
No, and I wouldn’t trust my health or the health of my family to my being able to detect and identify it. Rather than trying to check for it, and potentially falsely identifying something as safe, I just make sure my food is prepared in a way that would neutralize them in the unlikely even that they’re present. As a rule, all pork in my household is frozen for a few weeks before use if it’s going to be used in any type of cured meat. Otherwise, it’s all thoroughly cooked.
Trichinosis has not been reported in farm-raised pork for like 60 years. It’s not an issue.