Affiliate disclosure: This post may contain affiliate links. Please see our Privacy Policy.
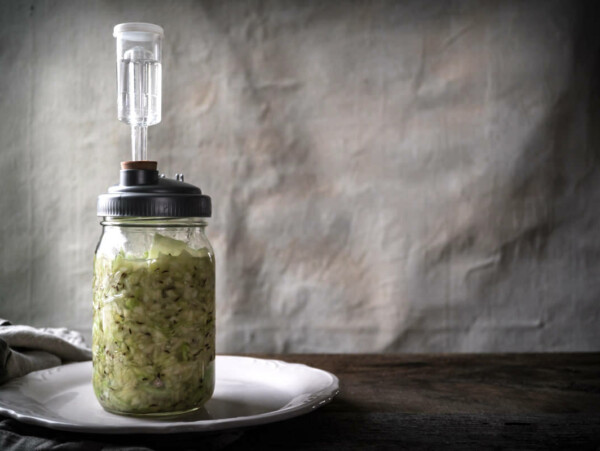
Making sauerkraut in a crock is the traditional way to prepare this probiotic vegetable ferment. While modern water locks make it easy to do small-batch sauerkraut in a mason jar, this old school method is still one of the easiest ways to make sauerkraut at home.

Basics of Homemade Sauerkraut
Homemade sauerkraut is incredibly easy, and all you really need is a bit of fresh cabbage, salt, and patience. There are many ways to make it, and all manner of modern appliances and tools designed to make a simple process even more foolproof.
Regardless of the tools used, the process of making sauerkraut is always the same.
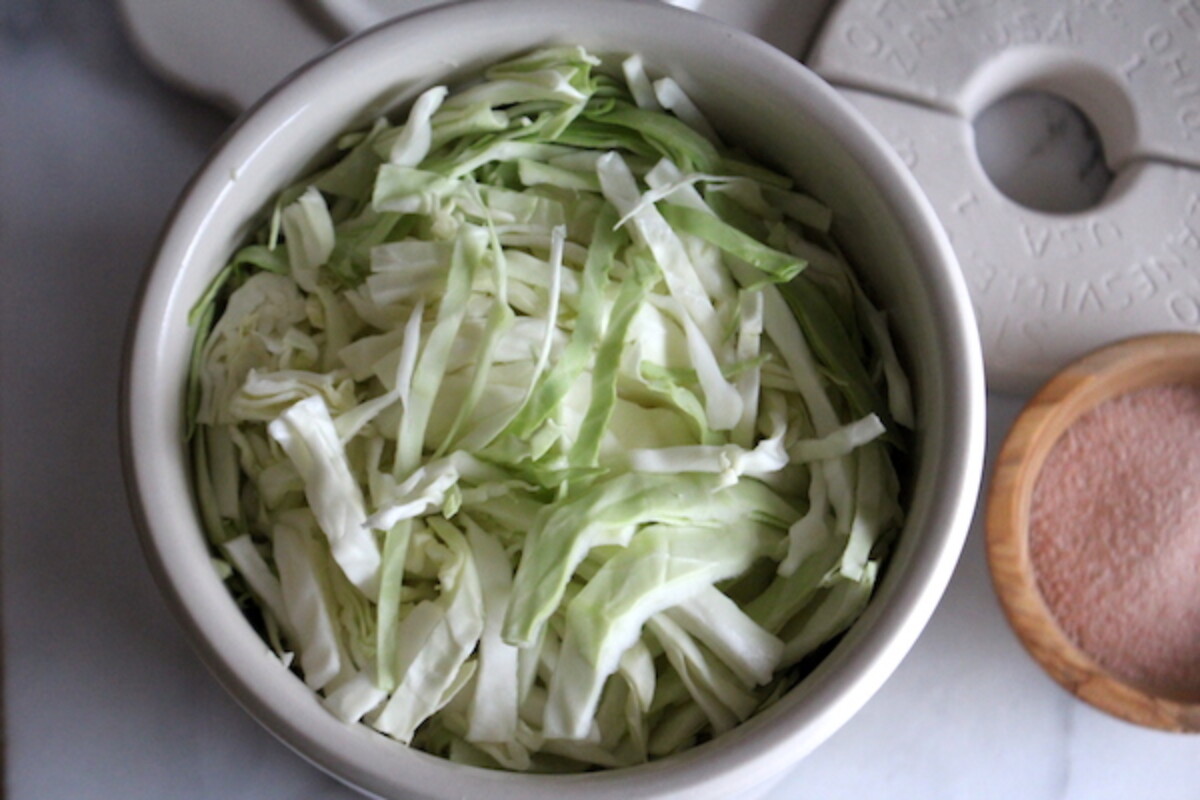
- Chop Cabbage ~ Fine or coarse chop, doesn’t matter. Red cabbage, green cabbage or napa cabbage, it makes no difference.
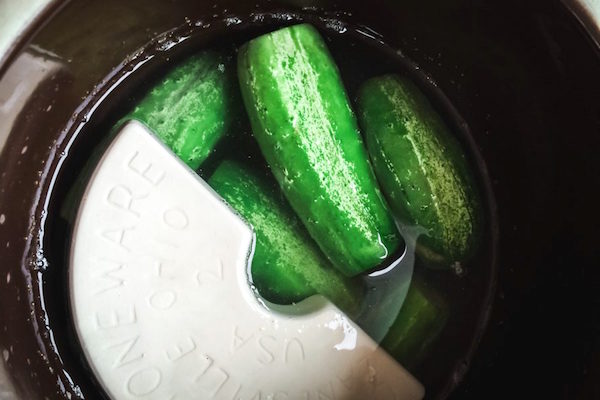
- Place in a Container ~ Anything that holds water will work. A bowl, jar, or in this case, an earthenware crock.
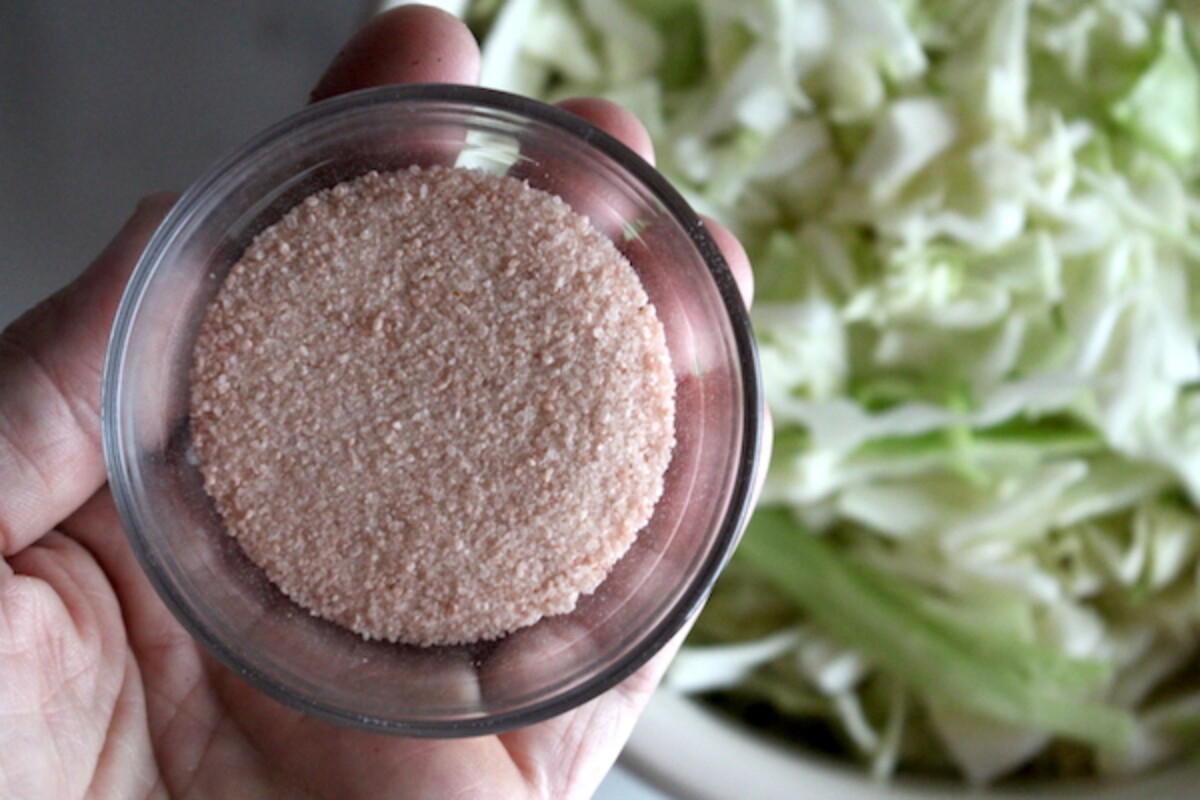
- Add Salt ~ Generally about 2% by weight. Weigh the cabbage, then multiply by 0.02. Some recipes use 1.5%, others use as much as 3%. Don’t have a scale, no worries. Exact amounts matter less than you think. More on this later.
- Pound the Cabbage and Salt Together ~ The salt, along with a bit of mechanical force helps the cabbage release its juices. I use a big wooden spoon, but they sell specialized sauerkraut pounders these days. Continue pounding until the cabbage is covered by its own juice, about 5-8 minutes.
- Weigh Down the Cabbage ~ Place some kind of weight on the cabbage to keep it submerged. Again, they sell fancy pickling weights for this, but a small saucer, jar, rock or even a Ziploc bag filled with water will work. Anything to hold the cabbage under the brine.
- Allow the Sauerkraut to Ferment ~ The total amount of time will depend on the temperature in your house and your own tastes. Recipes range from 3 to 6 weeks.
Once the sauerkraut has “finished,” it’s best to keep it in a cold environment to slow down the fermentation process. Raw sauerkraut will keep a long time, assuming it’s not contaminated and it’s kept under the brine.
Sauerkraut was traditionally made in an earthenware crock and kept in the root cellar or basement, where it would ferment during the last warm-ish days of fall after the harvest, and then keep all winter long. A sauerkraut crock is a natural preservation vessel, designed to both make and store the sauerkraut.
Choosing a Sauerkraut Crock
There are two main types of sauerkraut crock: Open Crocks and Water Sealed Crocks. In plain terms, one type is open with no meaningful seal or water lock, and the other has a rim that holds water and creates a one-way valve to seal the crock.
Each has its own advantages and disadvantages.
Open Sauerkraut Crocks
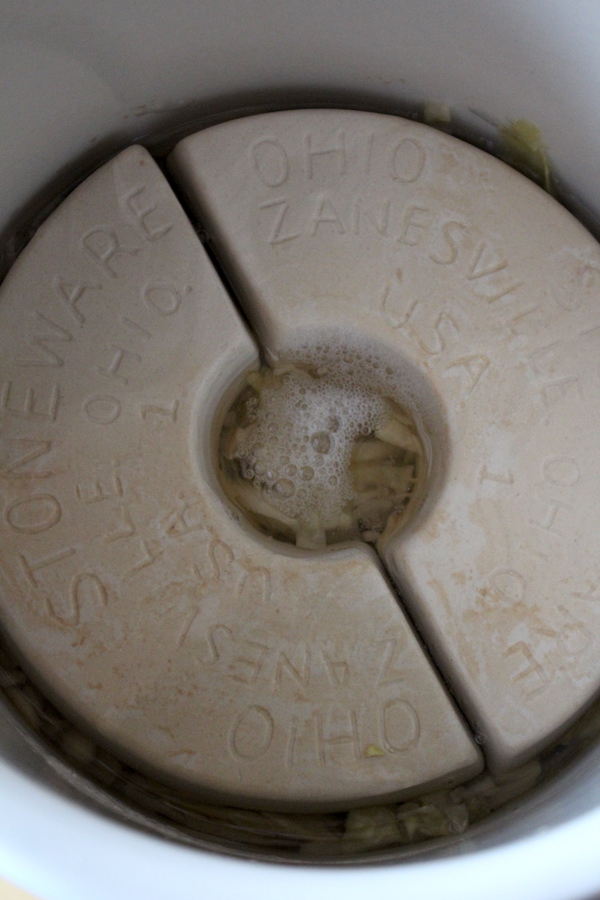
Open Crocks are just a glazed stoneware crock with straight sides and a lid that sits on top. While it’s not exactly “open” since it does have a ceramic lid, the lid doesn’t “seal” in any way, and more or less just keeps dust and critters out of the crock.
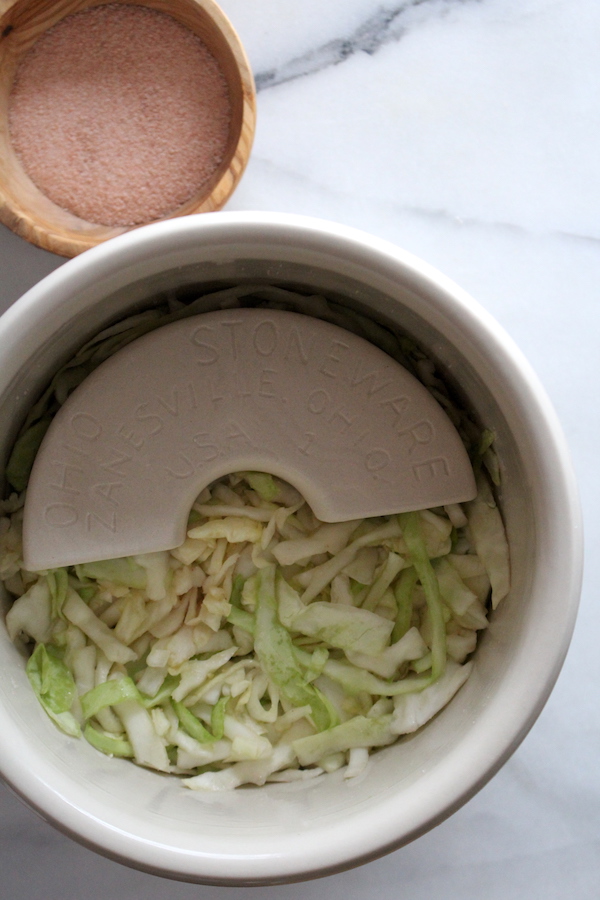
Inside the crock, the sauerkraut is weighed down by weight to keep it under the brine. This prevents mold from developing on the surface and keeps the cabbage in an anaerobic environment that’s necessary for sauerkraut fermentation.
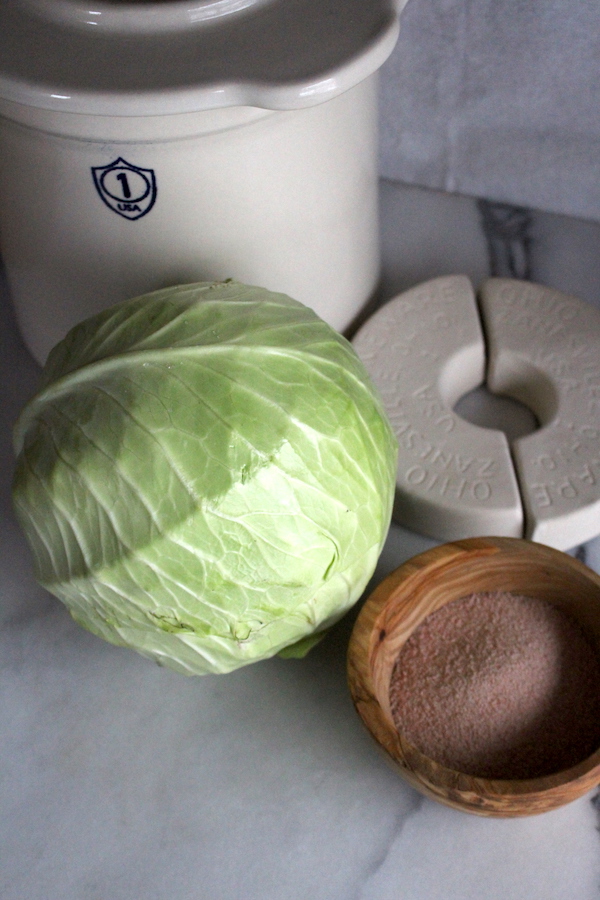
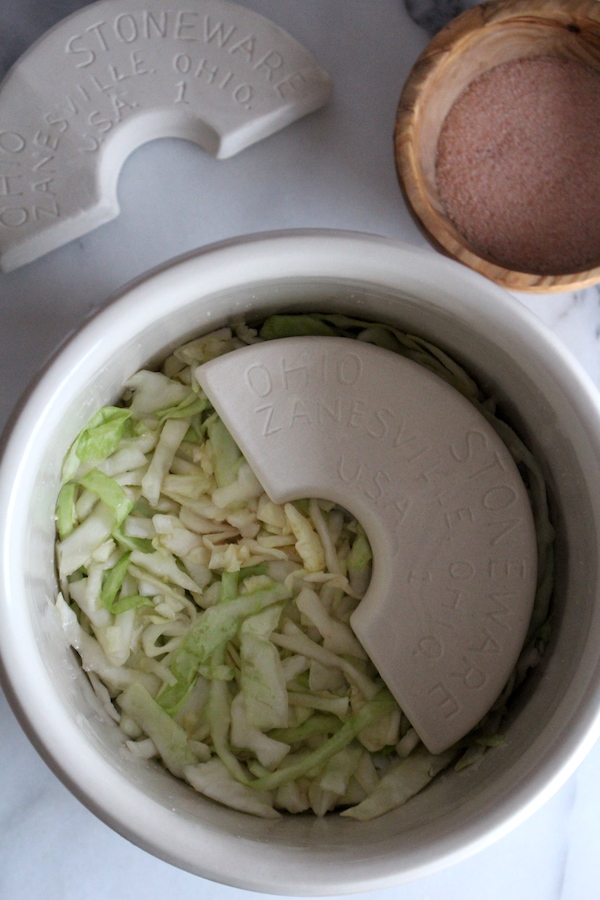
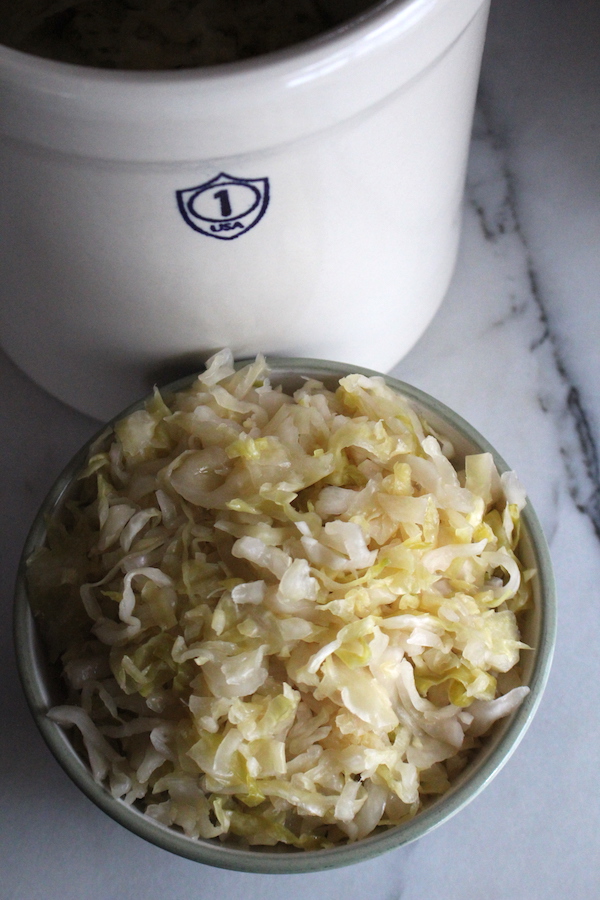
I use an open one-gallon crock from Ohio stoneware, but they also make a 2-gallon crock, a 3-gallon crock, and even a giant 5-gallon crock for serious fermenters.
I chose an open crock because I can use the crock for a number of other food preservation projects. Historically, they were used for egg preservation, preserving cheese in wood ash, potting meats or making duck confit.
As you can see, I get a lot of mileage out of my stoneware crock, and it’s not just for sauerkraut.
The downside is that without a seal, the sauerkraut is at a higher risk of developing kham yeasts (harmless, but ugly) on the surface, or surface mold if any sauerkraut floats above the brine (so keep it under the weight).
Water Sealed Sauerkraut Crocks
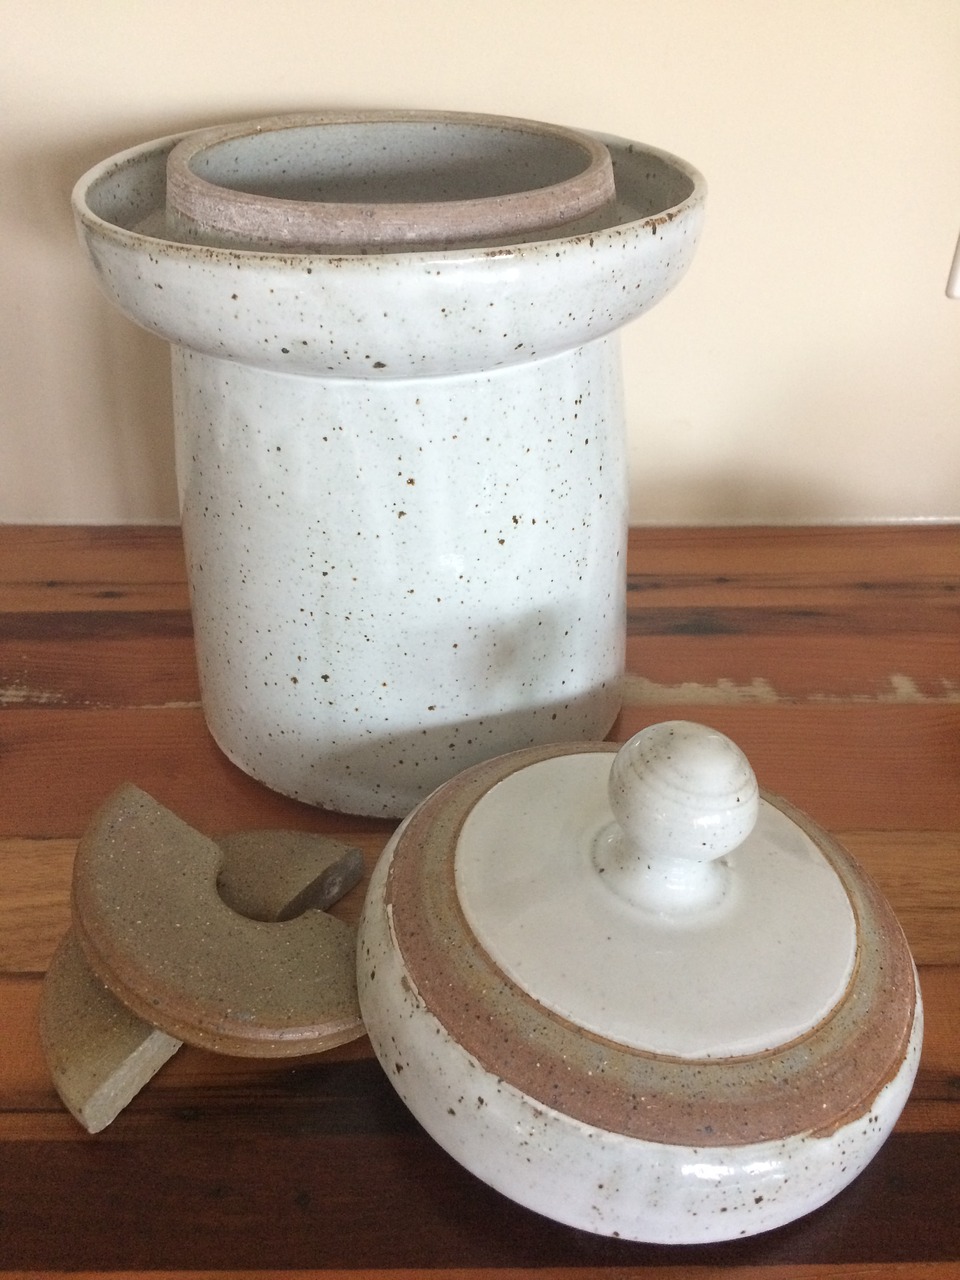
Many years ago in college, I used a water-sealed crock made by a potter roommate of mine. It was a huge handmade 5-gallon crock, elaborately painted and a true labor of love.
Back then, the only way to get a water-sealed sauerkraut crock was to commission one from a potter, since it was long before home fermentation came back into vogue.
These days, there are multiple brands of water-sealed sauerkraut crocks in all manner of sizes and colors. They used to be quite expensive as a specialty good, but now they’re about the same price as open crocks.
Water sealed crocks have a U-shaped well all along the top edge of the crock. Fill that well with about 1/2 inch of water and then put on the matching lid and you’ve created a water lock or one-way valve.
Bubbles from inside the sauerkraut crock can push their way out, but outside air cannot get into your ferment.
A water lock is an extra bit of protection against contamination by mold, yeast, and fruit flies. Many people will only make sauerkraut with a water-sealed crock, but personally, I don’t find it to be strictly necessary.
I love my versatile open crock, but if you’re only ever going to use your crock for sauerkraut, it makes sense to get a specialized water seal crock since they’re about the same amount of money.
How to Make Sauerkraut in a Crock
Regardless of the type of crock, the process of making sauerkraut is the same.
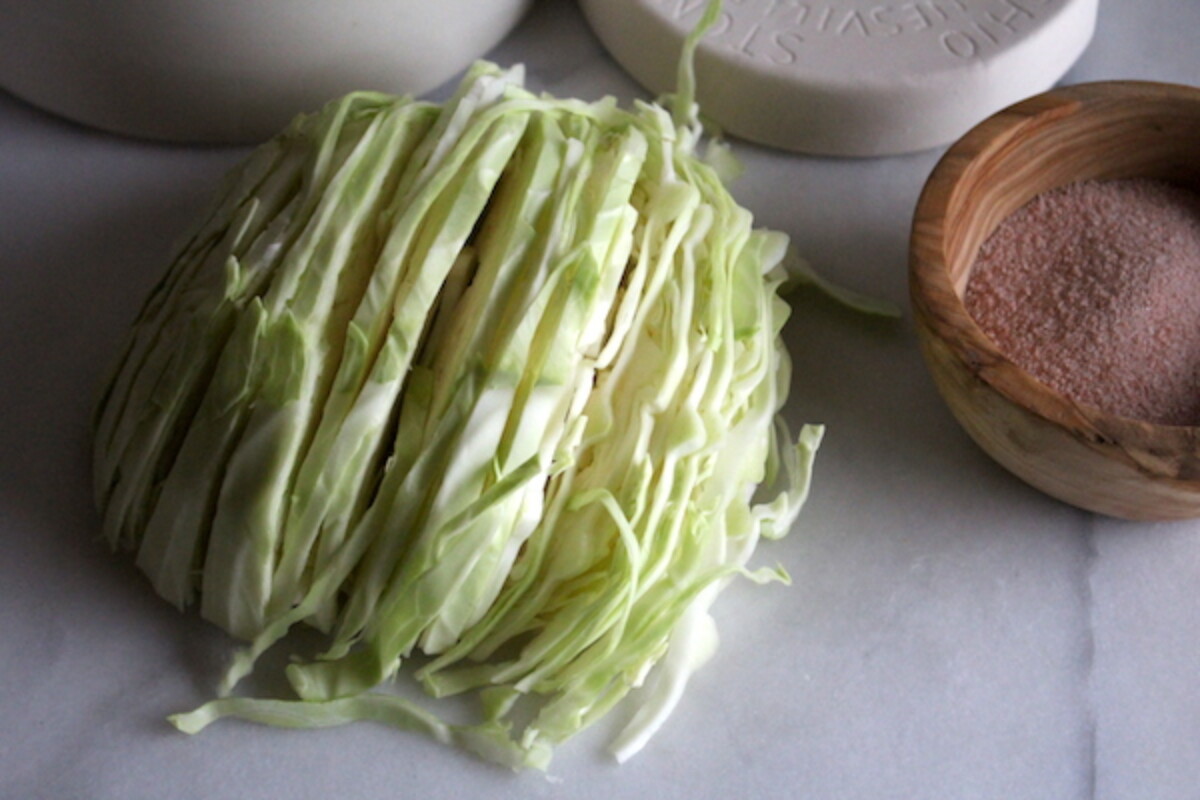
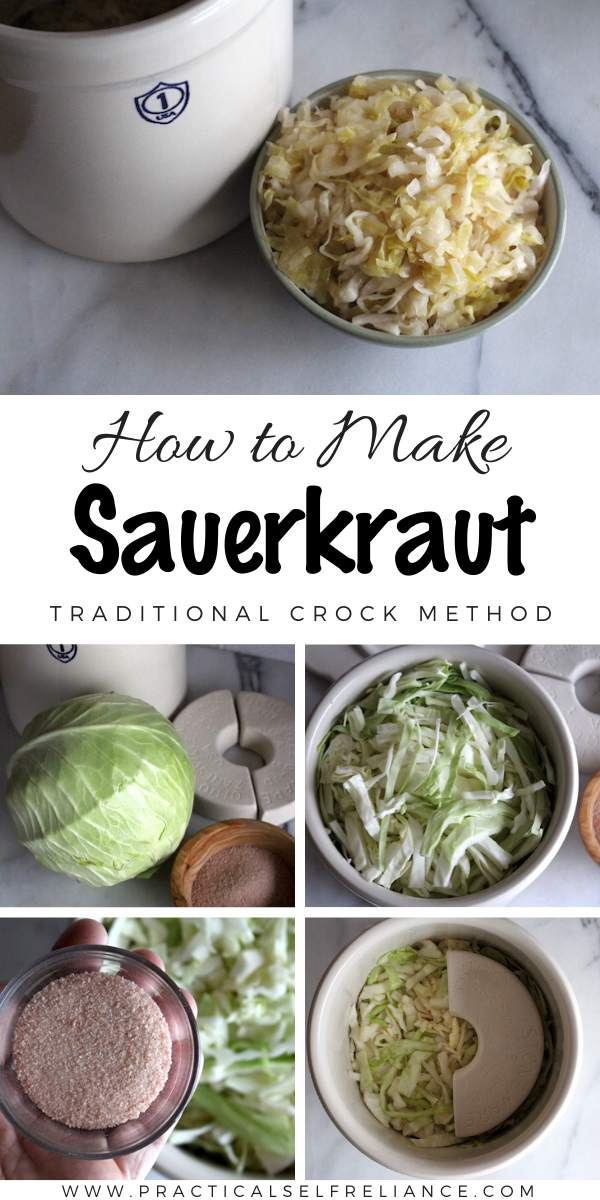
Start by shredding or chopping the cabbage. I generally slice the cabbage in half, take out the core and then slice it into long, thin strips. You can use a mandoline cabbage slicer or just a sharp chef’s knife.
That’s my preference, but there’s really no right way to do it.
Some eastern European methods dice it into 1 or 2” squares, which works well if you’re going to use it in sauerkraut soups later. Other methods toss whole cabbages into a giant crock, no chopping at all. (Though if you’re going to do cabbages whole, the process is a bit different because the brine needs to penetrate the whole cabbage.)
The reason I go with thin slices is because they’re versatile to use, easy to eat and the thin slices mean that the cabbage releases plenty of its own juices to create a flavorful brine.
Once the cabbage is sliced, add it to your fermentation crock. It takes about 3 lbs of sliced cabbage to fill my one-gallon crock to the top. Once muddled down and salted, the crock will only be about half full.
All in all, my one-gallon fermentation crock can hold about 5 to 6 pounds of cabbage for sauerkraut, provided that the only other ingredient is salt and no water is added. If I want a full crock, I’ll let my initial 3lb cabbage get started and then add more sliced cabbage and salt a few days later.
Add salt, and pound down the cabbage until it releases its juices and the salt is well incorporated. Use either a strong wooden spoon, your fist, or a sauerkraut pounder.
How Much Salt To Add to Sauerkraut
So here comes the million-dollar question…how much salt to add to sauerkraut?
In a recipe with just two ingredients, the amount of salt is the only real measurement. Use a digital scale to weigh the cabbage, and then add in 2% of that weight in salt.
I started with a medium-sized 3 1/2 pound cabbage, and trimmed off the outer leaves and core, leaving 3 pounds of shredded cabbage. That’s about 1360 grams. Multiply that by 0.02 and you get roughly 27 grams, which worked out to be exactly 4 tsp of fine pink Himalayan salt.
Salt measurements vary pretty widely in sauerkraut, and there are even some techniques for making vegetable ferments without added salt (but you’ll need a culture to get those off to a good start, and honestly, no salt is pretty bland).
Some recipes use as little as 1%, but those are at higher risk of spoilage. Others use 3% (or more), but they come out wicked salty. Starting with 2% salt by weight is a good middle ground, meaning a minimal risk of spoilage without being too salty.
If you don’t have a scale, really it’s not the end of the world. I imagine a babuska making sauerkraut in a crock a thousand years ago would have laughed at the thought of weighing the salt. Sauerkraut has enough salt when it naturally releases its juices, and those juices rise to cover the cabbage within 24 hours.
Add a bit of salt, pound the cabbage, then add a bit more. Once you’ve thoroughly pounded the salt into the cabbage, add the fermentation weights and give it some time.
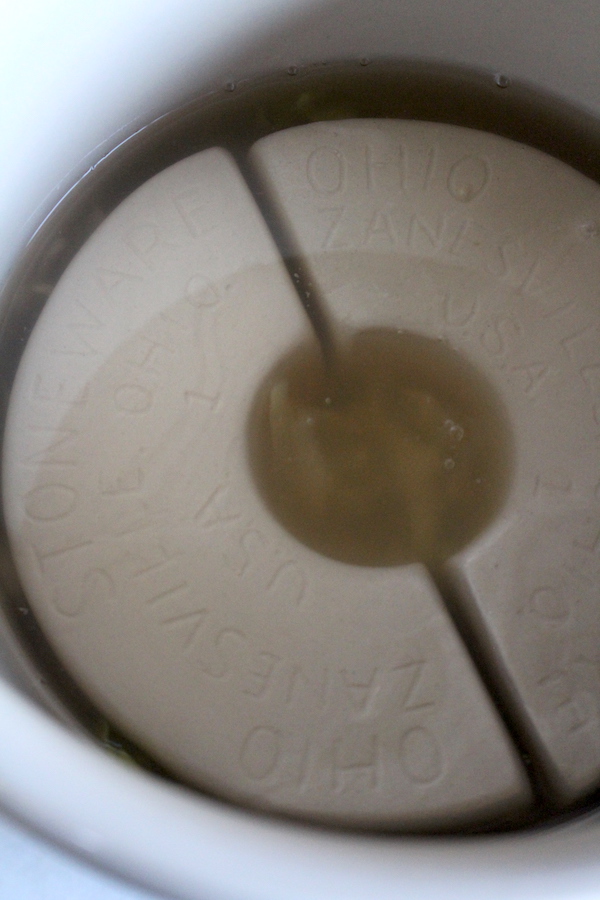
With 3 lbs of cabbage and 4 tsp of salt, it took about 6 hours for the brine level to rise up to fully submerge both the cabbage and the fermentation weight. No need to add extra water and then the cabbage is fermenting in its own nutrient-rich juice.
An alternate method suggests adding 1 tablespoon of salt to a quart of water and then pouring it over the top of the cabbage. This makes measuring the salt easy, as you’re just adding a brine over the cabbage, and there’s no need to weigh anything.
Lacking a scale, use the brine method, or just use your best judgment.
Within a week, perhaps a bit sooner, you should see small bubbles rising to the top of the ferment. It’s not like making homemade wine, where the bubbles froth like crazy. They’ll only be a few, and it’s easy to miss.
If you don’t see your sauerkraut bubbling, no worries. I’ve had plenty of great batches where I never once saw bubbles, especially if it was particularly cold in the house.
Be sure to check in on the water level though, and if it starts to get low, add water. Some people say to add brine, but water is the only thing that has evaporated from the crock. All the salt you originally added is still in there. Adding more brine will only result in a very salty sauerkraut.
I try to add water anytime the level drops below the top of the fermentation weights, and that ensures that everything says submerged.
Below you’ll see a photo of the sauerkraut crock after about 3 weeks of fermentation. There are visible bubbles, but the water level has dropped and I’m about to add more water to bring it up above the top of the weights.
My house stays pretty cool in the wintertime. Upstairs we usually keep it about 62, and our basement stays about 45 all year round. I’ll often allow my sauerkraut to go 6 or more weeks before sampling. Generally, if kept at room temperature (72 degrees) during the initial ferment, sauerkraut is finished to most people’s tastes in about 3ish weeks.
That said, when sauerkraut is finished is a matter of personal taste. It will continue to ferment with time, and the flavors will become more pronounced.
Generally, it’s started at room temperature for the first few weeks to ensure that it gets off to a good start and the lactobacillus outcompete any spoilage bacteria. After about 3-4 weeks, it’s moved somewhere cool for long-term storage.
If sauerkraut is stored in a cool place, like the refrigerator or my 45-degree basement, it should keep on its own for 3-5 months. Be sure to keep the water line above the cabbage, and check periodically for spoilage.
Other than that, feel free to pull out a serving of kraut whenever the mood strikes you. Remove the weights, and use clean implements to scoop out as much as you need before replacing the weights and lid.
The process for fermenting in a crock, open or water sealed, is pretty straightforward.
I’ve taken you through the basics of making sauerkraut in a crock, but that’s not the only lacto-fermented vegetable you can make in a fermenting crock. Traditionally, all manner of vegetables would have been fermented this way, often adding brine for less juicy vegetables that cannot provide all their own liquid.
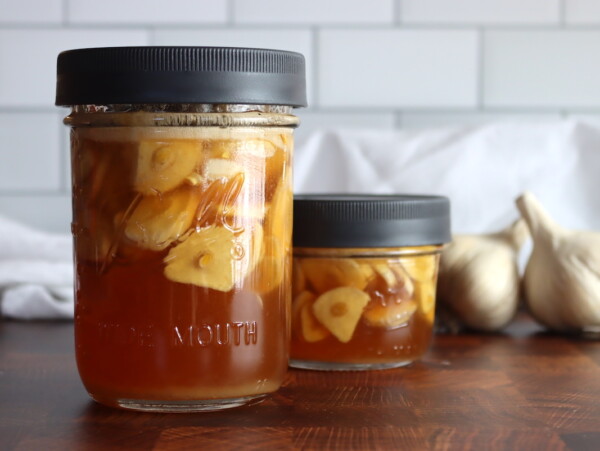
Feel free to experiment with other storage crops, like carrots or radishes, or add spices and turn your kraut into kimchi. If you want to get really adventurous, you can always try Russian Brined Apples for a unique treat.

Homemade Sauerkraut in a Crock
Equipment
Ingredients
- 3 lbs fresh cabbage, green, red, or napa
- 4 teaspoons salt, approximately 2% of the cabbage weight
Instructions
- Prepare the Cabbage: Slice or chop the cabbage into thin strips. Use a sharp knife, mandoline, or cabbage slicer for best results.
- Add Salt: For 3 lbs of cabbage, add about 4 teaspoons of salt. Mix the cabbage and salt together well, then pound the mixture with a wooden spoon or a sauerkraut pounder for 5-8 minutes to release the cabbage's natural juices.
- Pack the Crock: Transfer the salted cabbage into the 1-gallon fermentation crock, pressing it down as you add it. Continue adding cabbage until the crock is about halfway full.
- Weigh Down the Cabbage: Place a weight on top of the cabbage to keep it submerged. You can use a smaller jar, saucer, or a specialized fermentation weight. If the brine doesn’t fully cover the cabbage, add water until it does.
- Ferment the Sauerkraut: Cover the crock with its lid or a cloth to protect it from dust and pests. Allow the sauerkraut to ferment at room temperature for 3-6 weeks, depending on your taste preference. Warmer temperatures will speed up fermentation.
- Monitor the Brine: Check the sauerkraut daily to ensure the cabbage stays submerged. If needed, top off with water. You may notice small bubbles rising, which indicates fermentation.
- Taste and Store: After about 3 weeks, start tasting your sauerkraut. Once it reaches the flavor and sourness you prefer, move the crock to a cool, dark place (like a basement or refrigerator) to slow down fermentation. Sauerkraut will keep for several months in a cool environment as long as it stays submerged in brine.
Notes
Salt Amount
For a 1-gallon crock using 3 lbs of cabbage, 4 teaspoons of salt is a good starting point, which is approximately 2% of the cabbage’s weight. If you don’t have a scale, you can use the brine method instead, adding 1 tablespoon of salt per quart of water and pouring that over the cabbage. The exact amount of salt can be adjusted based on taste preferences—some people use as little as 1% salt for a milder flavor, while others go up to 3% for a saltier ferment.Too Much Salt?
If your sauerkraut tastes overly salty, it could be due to adding too much salt, which can inhibit proper fermentation or make the sauerkraut unpleasantly briny. In that case, you can dilute it slightly by adding more cabbage (if there’s room) or adjusting the brine level as needed.
Brine Level
Make sure the cabbage remains fully submerged under the brine to avoid exposure to air, which can lead to mold or spoilage. If the brine level drops over time, simply add more water to cover the cabbage. Avoid adding additional saltwater (brine) unless necessary, as this can make the sauerkraut too salty.Fermentation Issues
Slow Fermentation: If the sauerkraut is taking longer than expected to ferment (i.e., no bubbles after several days), it may be due to cool temperatures in the house. If it’s too cold, consider moving the crock to a warmer spot, around 65-72°F for optimal fermentation. No Bubbles or Activity: In some cases, you may not notice bubbling, especially in colder environments. This doesn’t necessarily mean the sauerkraut isn’t fermenting—it could still be fermenting without visible signs. Just be sure to check the water level and the taste periodically. Surface Mold: If any cabbage floats above the brine, it could develop kham yeast (harmless but unsightly) or mold. Make sure the cabbage stays fully submerged under the brine using weights. If mold does appear, scrape it off carefully, being sure the cabbage underneath is still submerged.Storage
After fermentation, store your sauerkraut in a cool place (around 45-60°F) to slow fermentation. A basement, root cellar, or refrigerator works well. Sauerkraut can be kept for 3-5 months in these conditions, as long as it remains under the brine.Nutrition
Nutrition information is automatically calculated, so should only be used as an approximation.
More Easy Fermentation Recipes
Want to keep your crock bubbling? Try any of these easy fermentation recipes:


I made you sauerkraut 2 years ago. It was the first time ever making any. It was fantastic. Since I only have one jar left, decided it was time to make it again. Please jog my memory. I followed your instructions but have forgotten how long it take for the juices from the cabbage to start? Do I just cover and wait?
Thanks for your help.
Merilee
Yup, just pound the cabbage with the salt and wait. It can take 24 to 48 hours for it to be fully covered with liquid, but cabbage should release enough liquid to cover. If for some reason it doesn’t after 48 hours, add a saltwater brine made at 1 tbsp salt to 1 quart of water. Add just enough to cover the veggies.
What if you get mold on the top can you remove it and the rest of batch be ok?
This is my first time making Kraut. Also used a wooden lid with holes in it to the the bubbles out.
I hope this should be fine but I am not sure.
I do have some cabbage floating and tried to remove it, I think I may have cut too thin, again I am not sure being the first time.
Any thoughts would be appreciated.
You will definitely want to find a way to keep your cabbage covered with the brine. Anything that is above the surface of the liquid will have a chance of growing mold. I have taken moldy product off the top in the past and have been comfortable with it as long as it doesn’t grow back again. It’s really a personal choice for you on what chance you want to take in regards to the mold.
I am using quart mason jars with an airlock. I use a piece of cabbage on top of the brine and a pickling pebble as a weight. I put a total of 800 grams of cabbage and whatever else (garlic, dill, caraway, etc.). Use a 2.2% solution by total weight. I mix everything in a large bowl and pound it a bit. After 20 minutes or so massage the whole thing some more with my hands. I slice the cabbage pretty fine. I get a lot of activity that starts within a day and goes pretty crazy for the next day or two. During that time, the brine goes up into the airlock and even leaks out. I pound the bottom of the jar on my cutting board to help get the gas out of the ferment. Only use organic produce.
I suspect that my cabbage leaf may be impeding the gas. Any thoughts? As an aside, I have been letting my ferments go about three weeks. The telltale sign that lets me know it is finished is when the cabbage starts to reabsorb water. Once it goes in the fridge, the cabbage really absorbs the water and leaves the kraut a bit dry (no observable brine), although it tastes good and is moist. I have topped up the finished kraut with a 1 percent brine (I needed less than a cup of this brine to top off 4 quarts. Gave each a final light pound with my wooden pounder.
Any comments or suggestions?
If the leaf is pushed up against the airlock, it’s definitely possible.
Am I packing the cabbage too hard in the crock if I have 3-4 inches of brine covering it? Wondering if too much liquid on the top is what’s making it mushy
I don’t think that’s it at all. I just responded to your initial comment. Check it out and let me know what you think.
I have been making sauerkraut for a few years now and always seem to have the same problem. The top 6 – 8 inches of finished kraut is always really mushy and has to be thrown out. I keep a plate with a gallon milk jug full of water on top to keep the cabbage under the liquid the whole time. Not sure what I’m doing wrong. Any idea what I can do to avoid so much waste?
This can happen when the bacteria that normally doesn’t start growing until later in the fermentation process grow earlier. This often happens because fermentation temperatures are too high or there is not enough salt.
I have a 5 gallon water crock can I use a clean cork to stop the drain or should I put the cork in a freezer bag then
stop the drain? It has a lid but would a linen kitchen towel be better or not?
I think a cork would work just fine. If it has a lid, then I would go ahead and use it.
I have been making sauerkraut in crocks for a few years now. It turns out good except the top 6 inches or so of cabbage turns to mush and I have to throw it out to get down to the good crisp cabbage. Any idea why this keeps happening?
Do you have the cabbage weighted down in the crock?
Yes, weighed down with pretty heavy weights and a plate to hold the cabbage under the water
This is my second year of doing kraut in a crock. I had mine on my enclosed back porch and it fermented for approximately 8 weeks.
I made sure it was completely covered. I filled the crock with kraut, covered with a layer of cheese cloth and tucked it in on sides. (keeps from having floaters)I then added my weights. It was covered well with liquid. It turned out nice and crispy. Maybe try covering with some cheese cloth next batch along with weights. I also had it covered with a towel.
Good luck with your next batch.
I had mine down in the basement for 7 weeks .the basement stays pretty warm. I’m wondering if I let it go for too long
What kind of salt should be used? Iodized?
Kosher or canning salt is best, as it doesn’t have any other additives. Iodized salt has anti-caking agents.
My sauerkraut was no good. It looked like sauerkraut but was bitter and didn’t smell like sauerkraut. I used 3 table salt per 5# cabbage and stomped it to get plenty of juice. I ended up with 45# of sauerkraut in a 10# crock I had weight on it to bring the brine to the top not sure if I had to much weight of 45#. I covered it with a towel and fermented it for 6 weeks at my house temperature which ranged between 67-70 degrees. I had green mold on top of the kraut. So not sure what went wrong if I fermented to long at that temp. Could you tell me what could have happened
If you have mold on the top then it sounds like you must have had some bits of cabbage float to the top which started to mold. The mold probably contaminated the batch. You want to be sure that there aren’t any pieces of cabbage floating on the surface of the brine.
My kraut is 2 weeks old. In the last 2 days it formed a crust of mold on top. Plenty of juice covering everything. Skimmed the mold. Is it still ok?
I would watch it and see what happens now that you have skimmed the mold off.
I have always pressured canned mine, I now read I shouldn’t due to the heat destroying it. Can I hot bath it and if so for how long.
Cabbage itself cannot be water bath canned because it is a low acid food. Fermenting it does allow it to be safely water bath canned although it does kill the beneficial bacteria in the kraut. It will still taste wonderful though. The processing time will depend on the size of jars you are using along with your altitude. The National Center for Home Food Preservation has a chart for canning kraut here. https://nchfp.uga.edu/how/can_06/sauerkraut.html
I started my first batch of kraut this evening. It is hard to find a crock in Alaska without giving up your first born child. I’ve heard of people using a 5 gallon plastic bucket so I decided to give it a try using your recipe. On the lid of the bucket it installed an air lock from my wine making equipment. Have you ever heard of anybody using this method?
Yup, that should work just fine. Just be sure to weight the kraut down so it stays under the waterline. You can even fill plastic ziploc bags with brine and use them as a weight. (Use brine in case they leak, if you use water to fill it’ll dilute the brine mixture). You’ll also want to make sure you leave plenty of headspace, like 6 inches or more. That’ll keep the kraut from rising up if CO2 gets trapped in it, because if that happens it can clog the water lock, which gets messy fast.
I routinely make sauerkraut every year. I use a huge water sealed crock with good fitting weights. I have found that layering grape leaves over the shredded cabbage helps keep all the small cabbage bits under the brine and away from the potential risk of spoiling. I am curious if you have tried this and what are your thoughts.
I am a fan and use your site as a reference for my preserving. I loved the ash cured cheese you posted some time ago. Always reading you…
Betsy
Thanks for sharing that. I have used leaves and other things to weigh down ferments in the past. I have found it to be very helpful especially when you have smaller pieces.
I have 3 ceramic crocks for sauerkraut- 2 water sealed and one open. When I make kraut in the open crock, after 3-4 weeks, I get a thin, whiteish mold over the top of the brine. Am I doing something wrong?
I think you’ve probably got kahm yeast. Here’s an article covering that: https://fermentools.com/what-is-kahm-yeast-is-it-safe/
While it could be mold, kahm yeast is more likely if everything is staying submerged below the brine line. (If stuff is up above the brine, then yes, it could be mold, just make sure you keed it submerged)
Curious as to when I should take off the water sealed top? And if I do take it off to take a peek do I just put it back on and make sure it has enough water to seal it again? If I do and it’s not done yet did I just gum up the works? Thx so much.
You can take the top off to check your sauerkraut. It won’t hurt a thing. As a matter of fact, you don’t actually have to have the water lock at all.
If you like your sauerkraut with caraway seeds, when should you add them? With the salt so they’re present during fermentation or once you deem it finished?
I would add the salt to the cabbage, massage it for a few minutes and then add in your spices and continue to massage for a few minutes more.
I am new to fermenting I have a crock but no lid is it ok to cover with cheesecloth or something?
Yes, it’s totally ok to do that.
I have always covered mine with cheesecloth, I do remove it and rinse it out every couple of days.
Thank you for your instructions and the links to purchase the crocks, etc. In 5 days my sauerkraut will be 2 weeks old. It is doing perfect. I retired 4/30/2020 so I now have time for gardening and canning and fermenting. Thanks again.
Wonderful! I hope it turns out for you!
Hi. I am making my first batch of sauerkraut. The brine is about 2 inches over the top of the weights. Smells good and has bubbles. Question is a few pieces of cabbage float to the top and get mold on them. I scoop them out. Is the sauerkraut still ok?
It should be fine. I would just keep an eye on it and make sure it doesn’t develop any more.
Just thought I would touch base and let you know that on my first attempt at making sauerkraut I was successful and it’s delicious. We fermented ours for 8 weeks and kept a close watch on it for fear of screwing up I canned 10 pint jars (hot bath method) and have gotten rave reviews from family. I can’t wait to do this again. Thank you so much for your blog
Rose