Affiliate disclosure: This post may contain affiliate links. Please see our Privacy Policy.
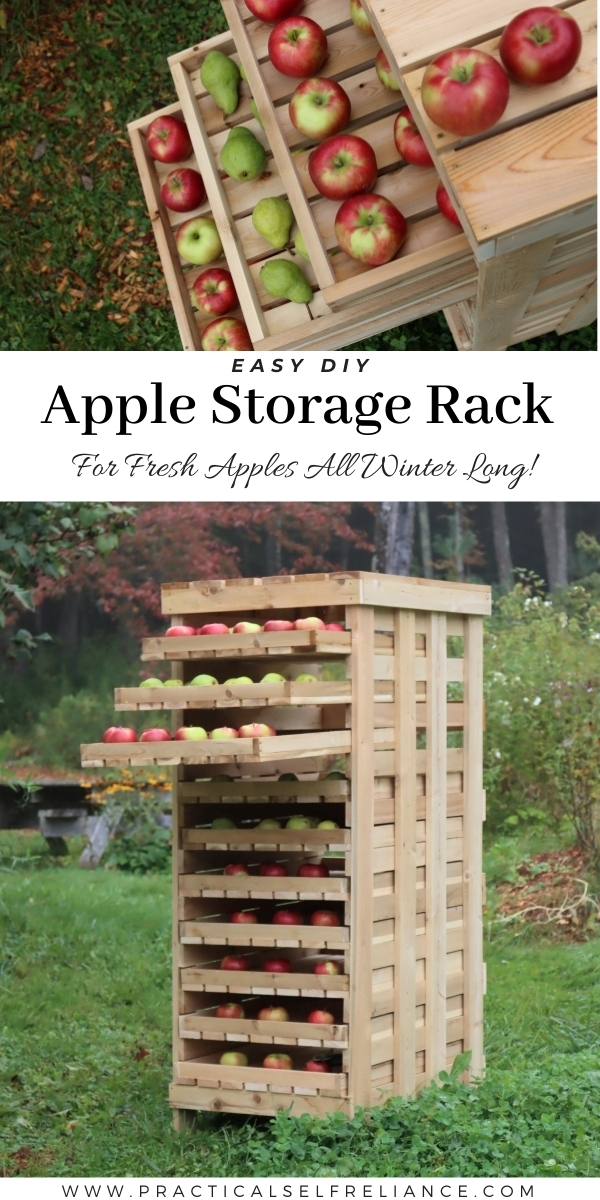
A homemade apple storage rack is the perfect way to store a winter’s worth of fresh fruit. Kept in a cool location (like a basement or back closet), many apple varieties will store for 6 months or more.
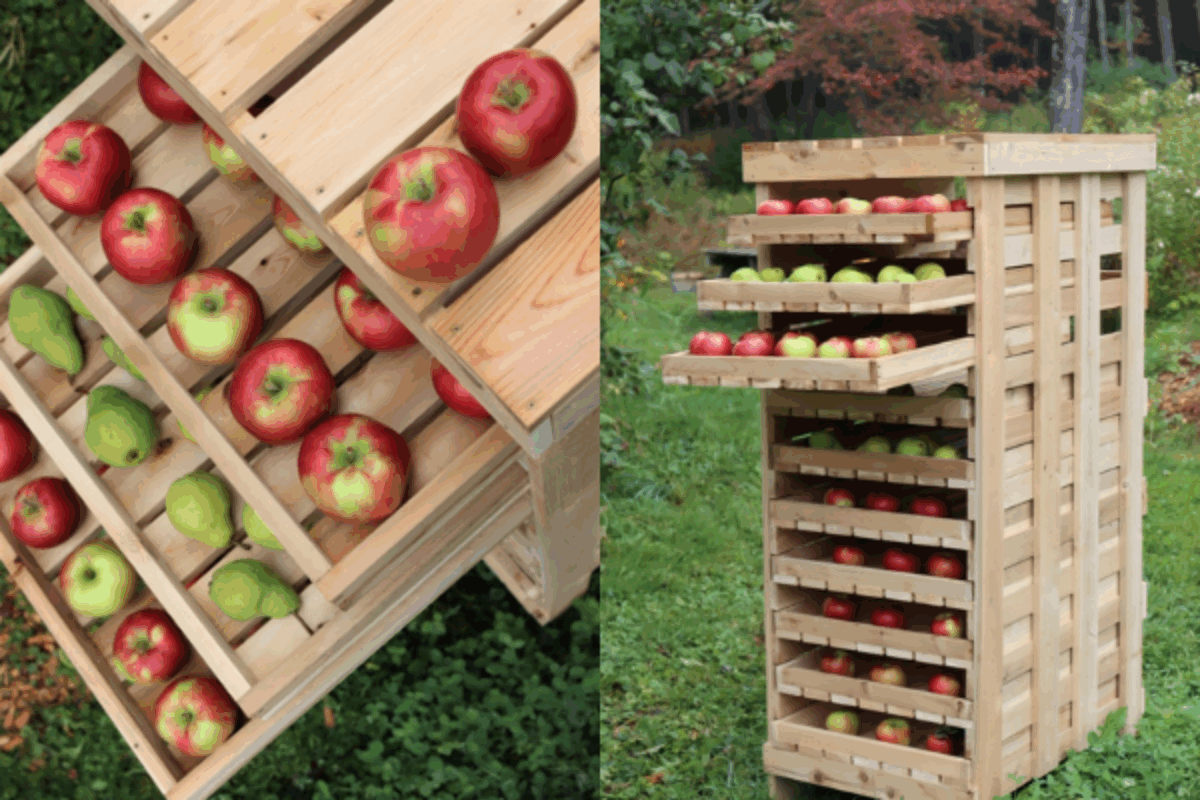
(This is a DIY guide to building your own apple storage rack at home. If you’re just looking to buy a completed rack that’s ready to use, they’re available here.)
When we moved to our homestead a decade ago, we more or less stumbled onto storage apples.
There were quite a few apple trees on the land, but two varieties really stood out. Definitely intentionally planted and tended by the previous owners, these trees were chosen for a reason.
One produced apples faster than I’d ever seen, going from blossom to fully formed fruit in about 6-8 weeks. The apples were in their prime in July and faded quickly after. This summer apple is known as Yellow Transparent. While it doesn’t store, historically it was an important part of growing fresh fruit year-round.
Just as the last of the winter storage apples are fading in the root cellar, this one gives you a shot of apple goodness right in the heat of summer (before the raspberries and other summer fruits).
Right next to it we found an apple with just the opposite characteristics. In late October, the fruits still weren’t quite ripe. We pulled them before the first snows and packed them into the basement. They tasted more or less like Styrofoam until January…and then they came into their own.
Known as Newton Pippin apples, they’re some of the very best storage apples and can keep for 12-14 months in the right conditions. In fact, they taste pretty darn horrible until they’ve been stored at least 3 months, and then they’re absolutely fabulous.
Other common apple and pear varieties also happen to store well, namely Honeycrisp apples (up to 8 months) and Bartlett pears (up to 5 months harvested under ripe). Even if you don’t happen to have a backyard tree, you can still head down to the pick your own and harvest a winter’s worth of apples.
For us though, Newton Pippins are prolific producers, we harvested literally hundreds of pounds from a single tree and had to find some way to store it for the winter. The first year, I simply used cardboard boxes, but this year I got inspired to try a more elegant solution…
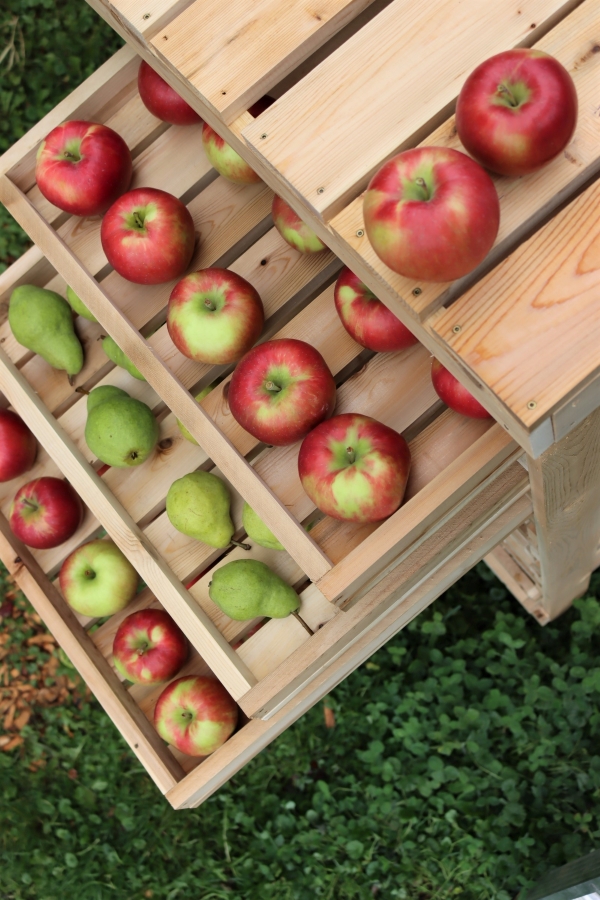
I spotted pictures of a really innovative storage rack in my friend Terry’s Root Cellaring Book, and I knew that I just had to build something like that for my own basement.
A few weeks later, I ran across a book with plans. What luck!
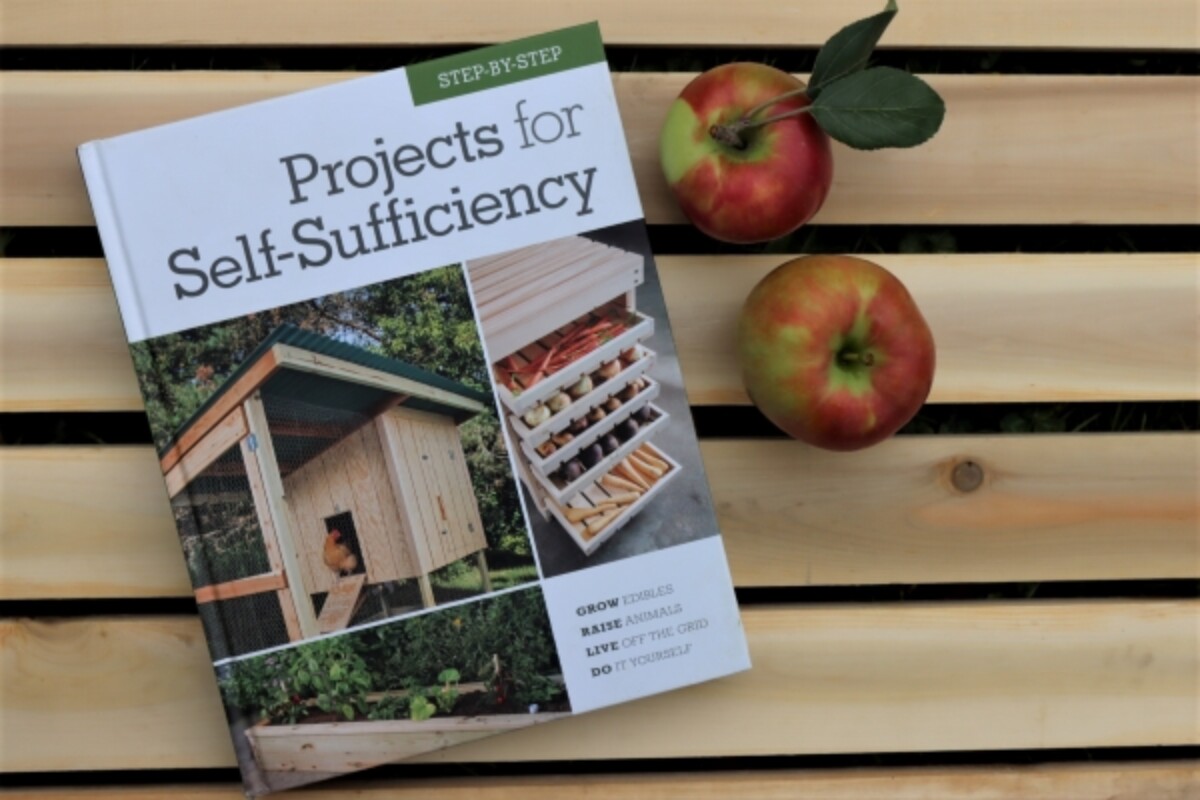
Projects for Self Sufficiency had a picture of the rack right on the cover, and flipping through I found plans for literally dozens of other handy things. Their compost sifter is really sleek, and I’m hoping to build their solar dehydrator too.
Of course, I couldn’t just follow their plans…
There’s this old quote, “I’ve never met a recipe I didn’t want to change” and it fits me perfectly. I’ve also never seen plans I didn’t want to futz with, so instead of a 5 drawer apple rack, I built a much larger 10 drawer behemoth.
It stands 5 feet tall, which is about as high as I can comfortably manage. At 5′ 8” I can just see into the top drawer, and comfortably reach all the way to the back.
Each drawer holds about 40 large apples like the monster Honeycrisps that weigh 1/2 pound each. With 10 drawers, that’s 200 pounds of apples or 400 big ones (or considerably more smaller ones). About perfect to supply my family of 4 for a long Vermont winter.
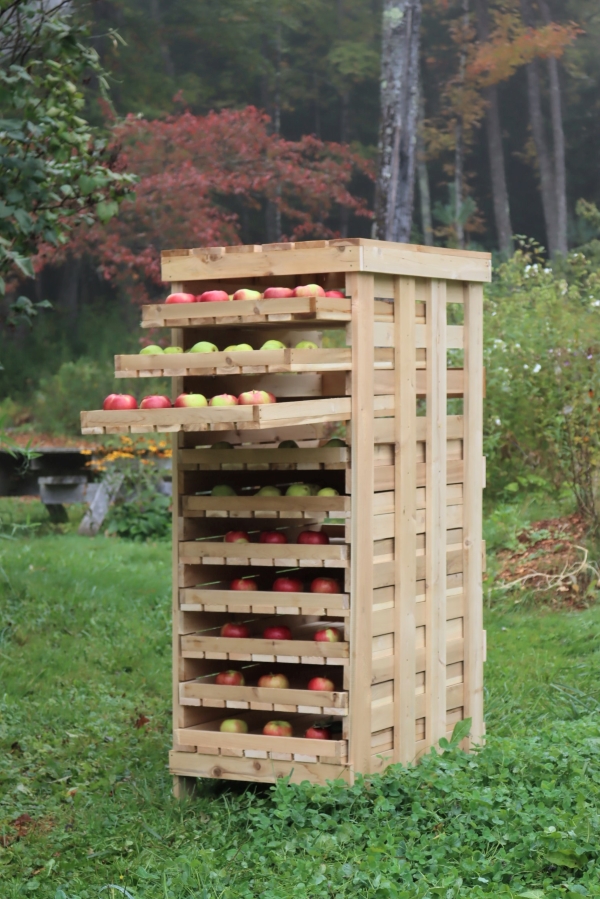
I snapped a few shots of it outdoors in good light, only sparsely loaded, but it’s now full of storage apples down in my cool basement.
How to Build an Apple Storage Rack
If you’re looking for detailed instructions and a piece by piece cut list, I’d suggest picking up Projects for Self Sufficiency. If you want the bigger 10 drawer model, just build 4 extra drawers and cut the legs to 5ft tall.
If you’re more of a “get ‘er done” type builder, here’s a quick rundown of the process. It’s pretty simple, and you should be able to put it together with little more than a saw and drill.
Start by building the side rails (drawer glides). The original plan had 6 drawers and was much shorter, but I cut the uprights to 5 ft tall so I could have 10 drawers. Using 1×3 dimensional lumber, cut 5ft uprights and lay them out before attaching 11 pieces of 1×3 wood at 30 inches long.
You can adjust the depth of the rack here if you’d like, as 30 inches deep is really quite deep. I can barely reach my hand to the back of the drawers, but it does ensure I can store plenty of apples in a small-ish space.
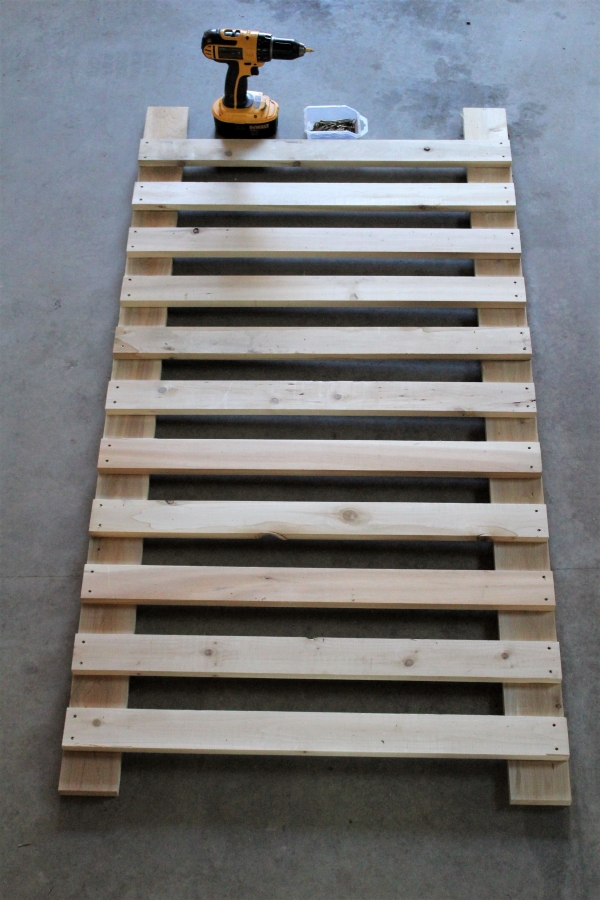
Drawer glide spacing is important, and you’ll need to have them level and evenly spaced so that the drawers will slide easily.
The drawers themselves will be sided with 1×2 boards, so using a spare 1×3 board is the perfect spacer for the drawer glides.

After I’d assembled the sides, I chose to add two more vertical supports to each side for stability (see below). This is optional, and the original plans didn’t include these extra supports.
With the extra height of the 10 drawer storage rack, I felt like it needed a bit more substance to keep things from shifting around.
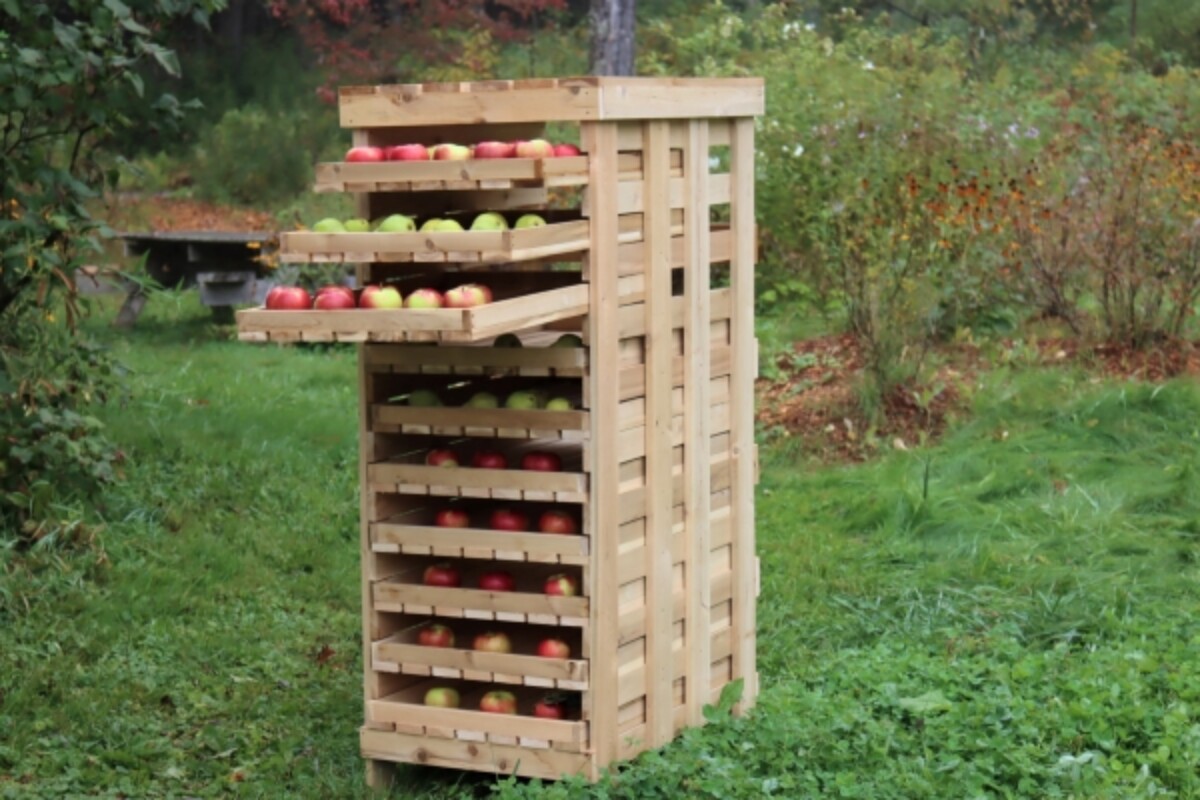
Once you’ve built the sides, attach them together to form a box. The top & bottom side trim is 30 inches, just like the drawers, but just attached to the outside instead of the inside. Then a trim pieces on the front and back (both top and bottom) are 23 3/4 inches and attach to overlap the side trim boards.
The top is then finished off with a full shelf, which holds everything together, and allows you to store things on top of the apple storage rack. You’ll need 10 top slats cut to 23 3/4 inches (just like the front/back trim), spaced 1/2 inch apart across the top of the rack.
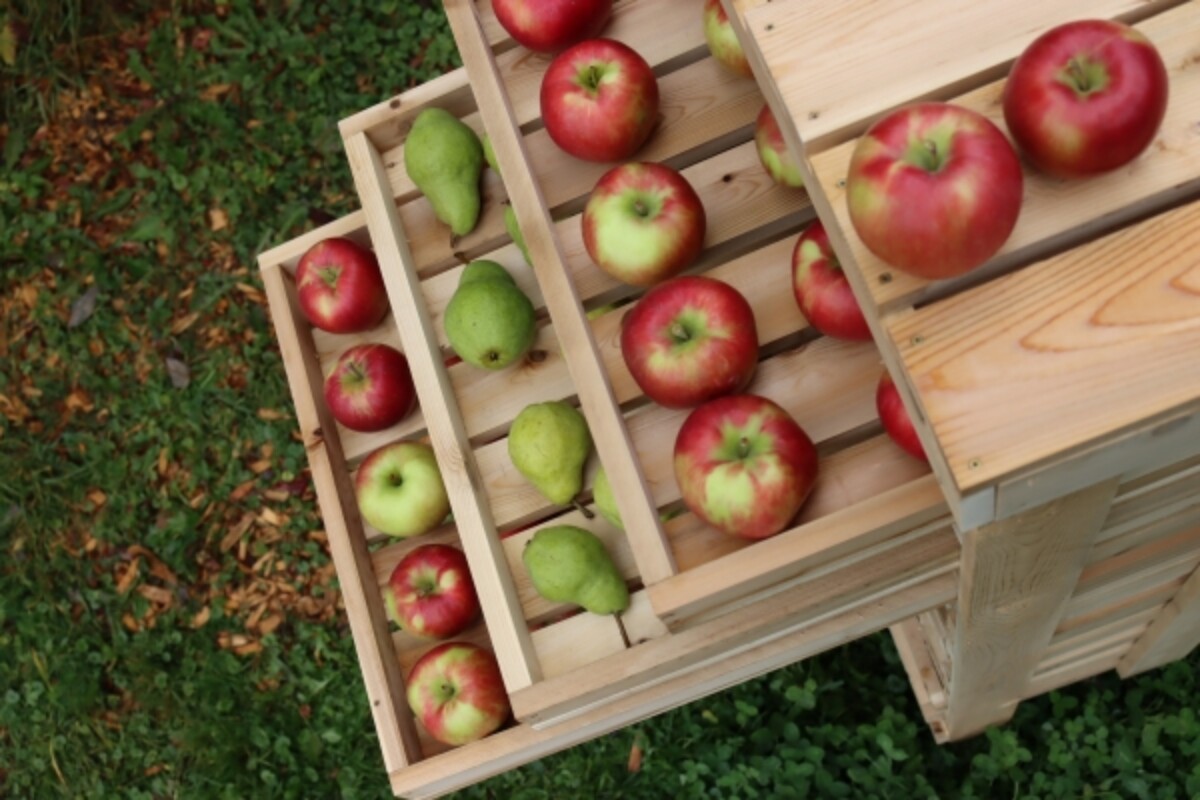
At this point, the “box” for the rack is complete, and all you need to build is a boatload of drawers. This is the time-consuming part, and it took me about 10-15 minutes to assemble each drawer. Still, even with 10 drawers, I was done in roughly 2 to 2 1/2 hours, and I had them all neatly slotted into the rack.
Start by building a box that will be the edge supports of each drawer. This is made from 1×2 dimensional lumber, which allows the drawers to slide neatly between the 1×3 supports.
The drawer sides are 30 inches (just like the drawer glide supports), and the fronts are 19 inches. Be sure to put the fronts/backs inside of the drawer sides, so the sides overlap the front. This keeps the whole drawer an even 30 inches deep.
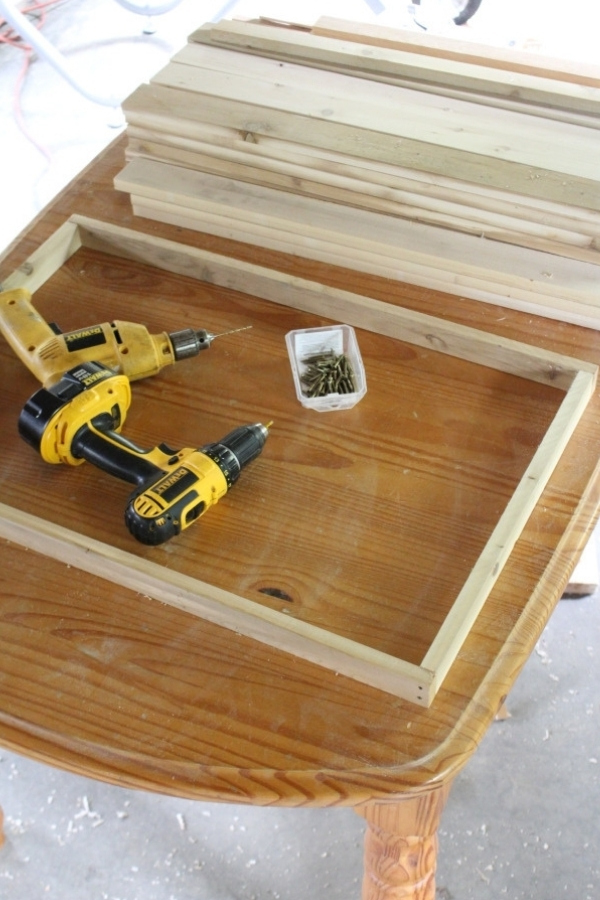
I should mention, when working with wood this small it’s important to pre-drill the holes so you don’t split the wood. I’m using 1 1/4 inch GRK Trim Screws to assemble everything, but the original plans suggest a nail gun.
Once the drawer frame is built, attach drawer slats across the bottom. The drawer slats go front to back and are cut to 30 inches long (from 1×2 lumber). Each drawer will need 7 slats (or 70 slats total for 10 drawers, so this is where most of the wood is).
The slats are spaced 1/2 inch apart, just like the slats on the top of the whole box. This allows for good airflow but also keeps anything from falling between the slats. You could space them further if you’d like, but I’m hoping to have the option of storing smaller vegetables like garlic as well.
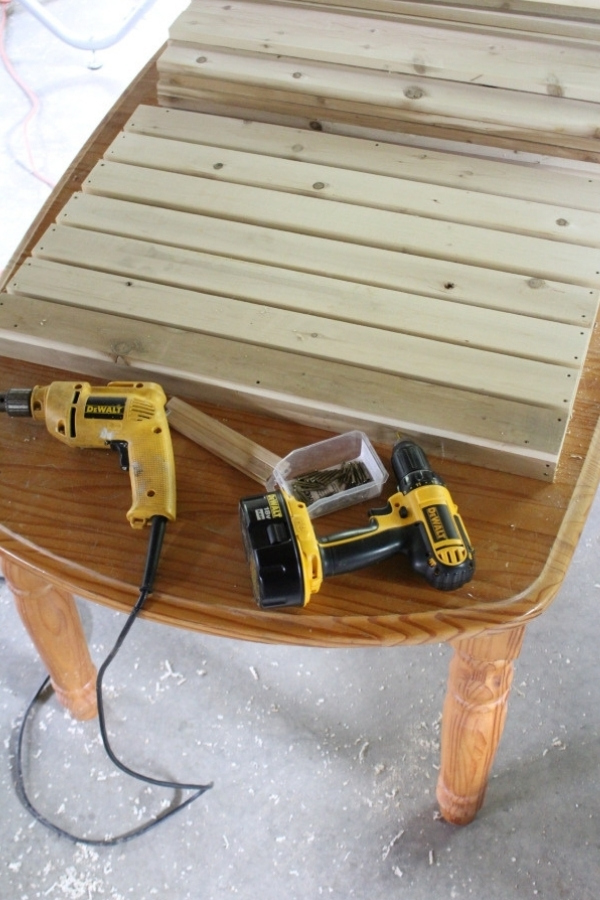
Once you’ve made a drawer, do it again and again until all the drawers are installed.
The finished rack is quite large, but with the drawers removed I was able to carry it by myself from the garage across the yard. I stopped near our front door to take some pictures in good light, and then removed the drawers again to carry it down into our basement.
Be sure to remove the drawers, and then it can be moved by one strong person while empty.
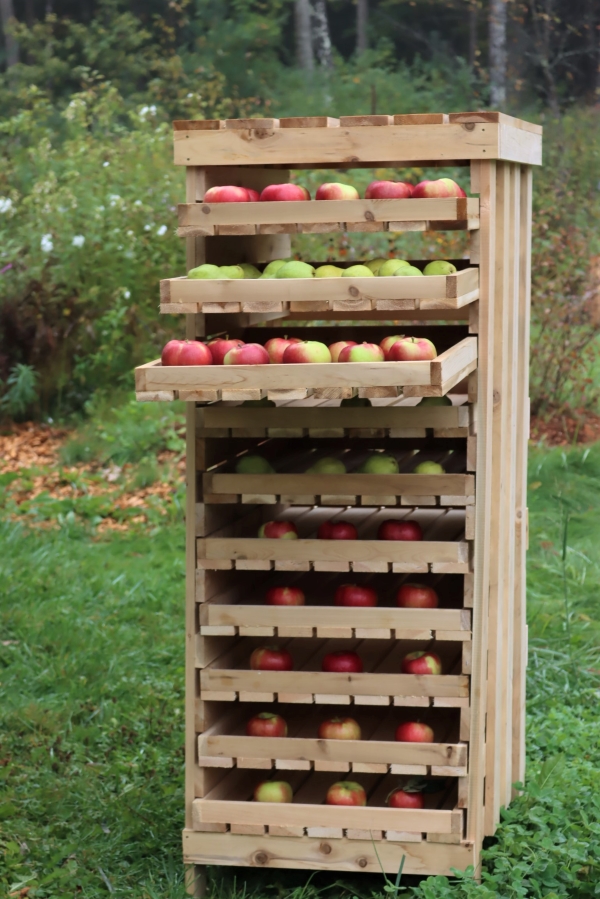
Now that it’s in my basement, I’ve loaded it full of a winter’s worth of apples.
My kids love Honeycrisp, and there are 4 shelves full of those (160 apples, about 80 lbs total).
My husband’s favorite storage apple is Ashmead’s Kernel, which has a sharp taste and a good bit of tannin. It’s often considered more of a storage apple, but he likes apples, not for the faint of heart. There are 2 shelves of those (40 lbs).
For me, I’ve got Cox Orange Pippin, which is full-flavored like Ashmead’s Kernel (but without the tannin). It’s a good balance, somewhere in-between a sweet Honeycrisp and a slightly bitter Ashmead’s. There are 2 shelves of those (40 lbs).
That’s a total of 8 shelves full, or 160lbs of apples. I filled the last two shelves with our homegrown garlic, worried that a full apple storage rack would be too much.
Now though, I’m writing this post 2 months later and we’ve eaten about half of the apples. We don’t buy grocery store fruit in the winter, so we’re limited to what we’ve stored or canned. Sure, I canned a lot of fresh blueberries and cherries to top our yogurt, but we still obviously crave the crisp crunch of fresh fruit.
Next year, I’m filling all 10 shelves for my family of 4.
Reader Reviews
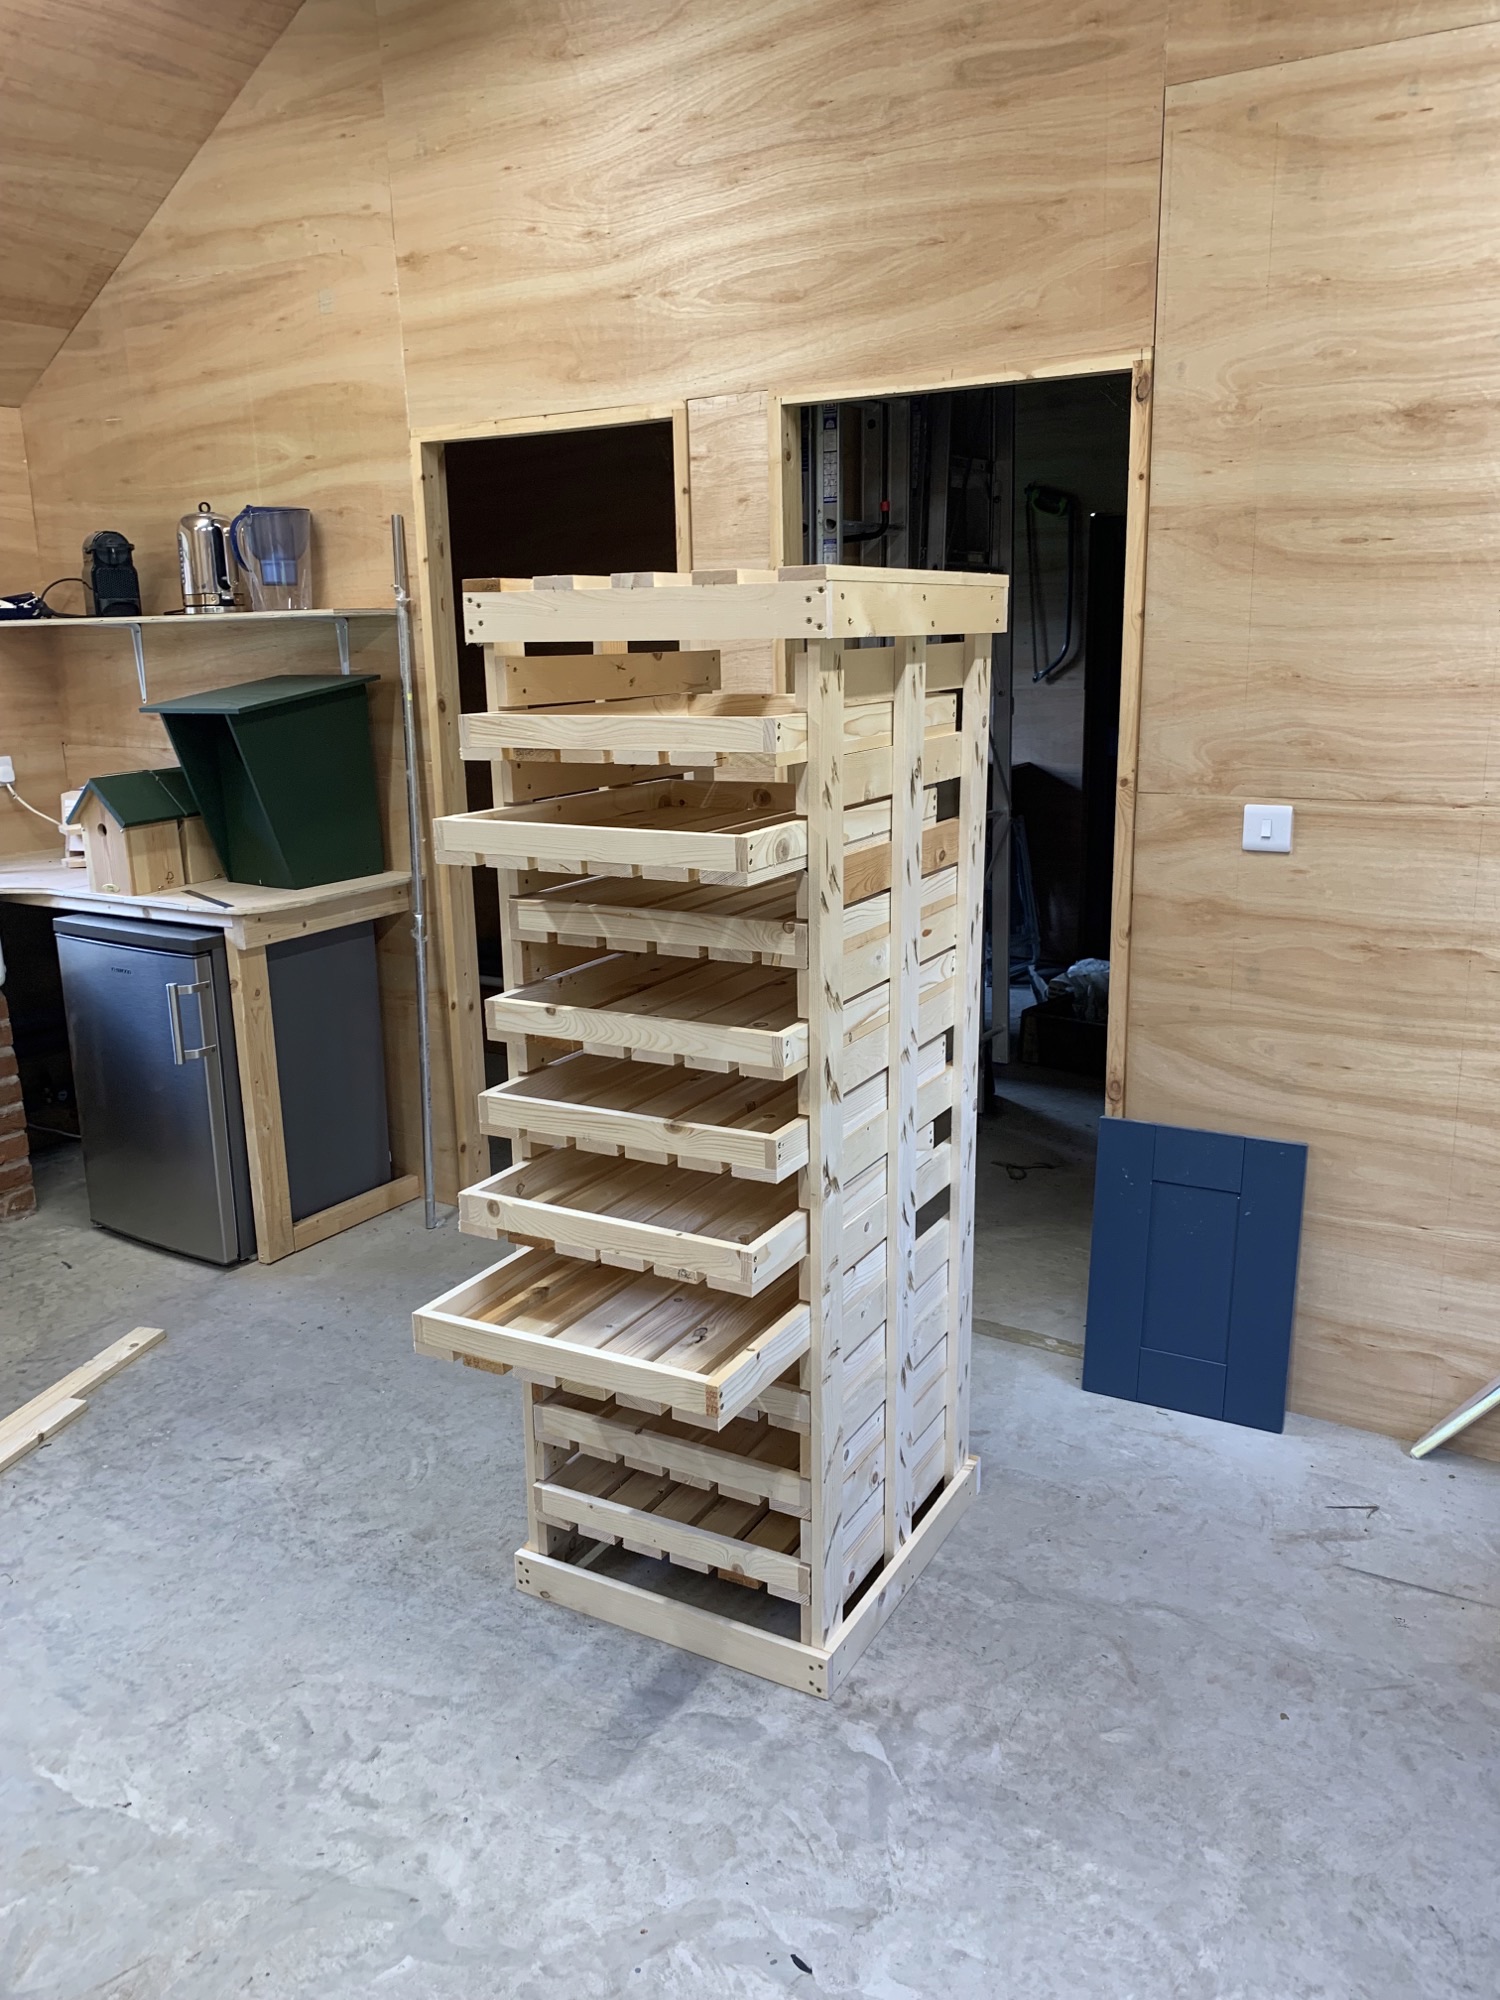
Two years after posting these plans, a number of people have replied with thanks and details on how they modified it to fit their particular space. In autumn 2022, I received a lovely not from Neil in Cheshire UK, with pictures of his homemade apple rack made entirely using this article as a resource.
I’m so happy that this has been useful o people that I just had to share his work. Neil graciously sent me pictures of his to add to the article, and this nice note:
“I just wanted to say thanks for your fabulous blog on building an apple store. I finished mine today following your instructions and it all came together perfectly. Very much appreciated! We’ve just moved into our new house that we’ve built and have an orchard, so I was keen to find a design for an apple store.”
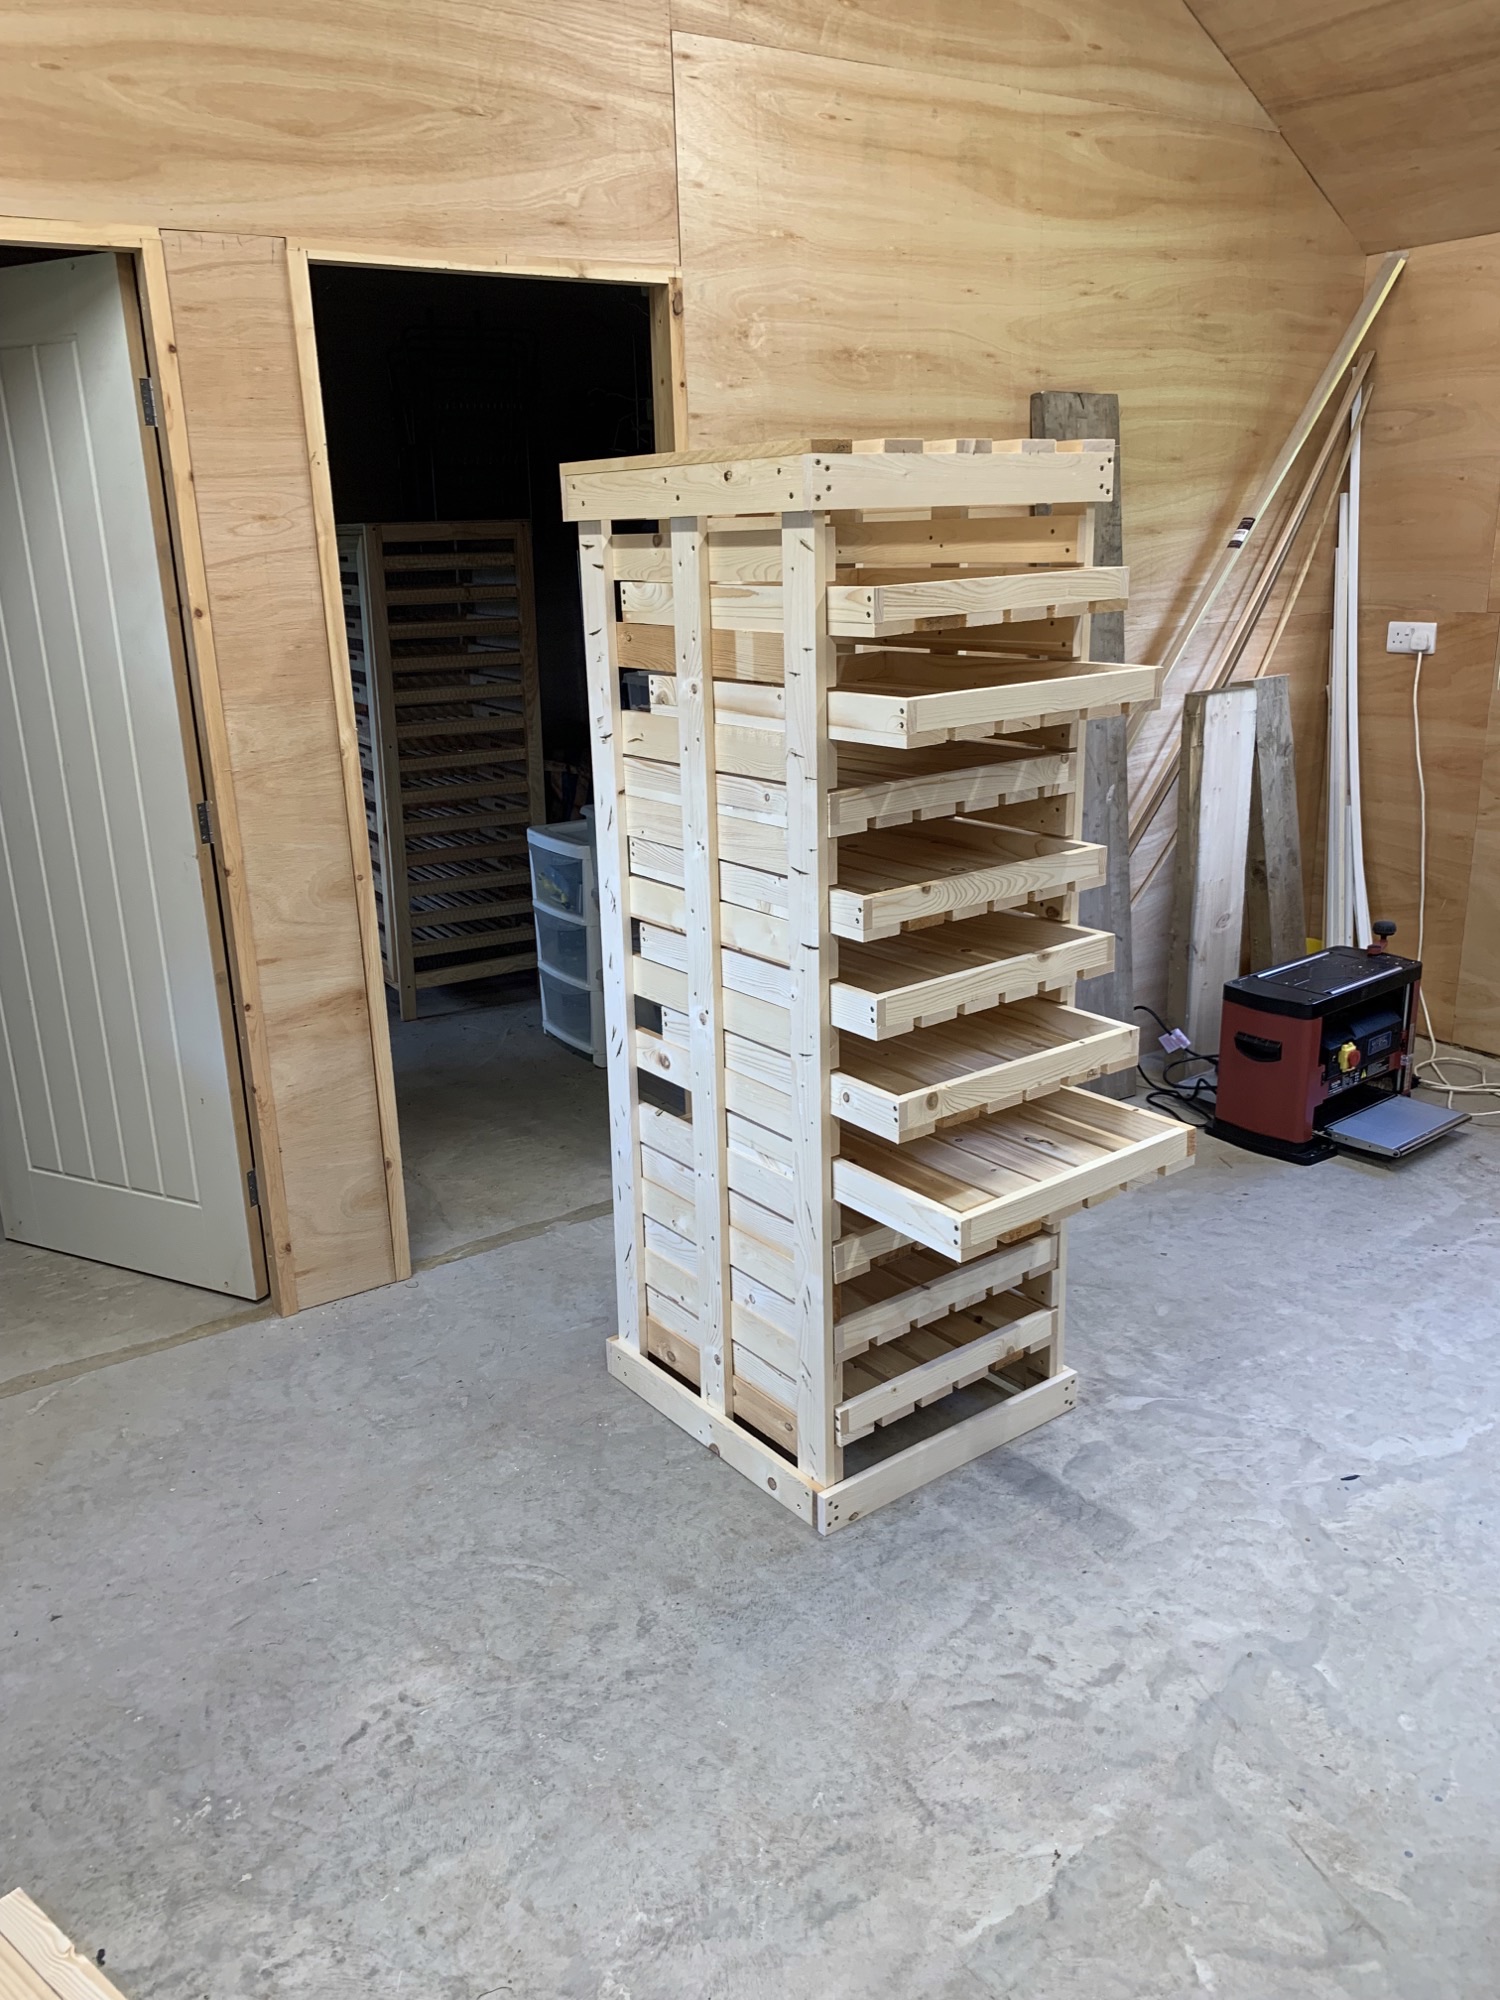
Neil’s came out wonderfully, and looks more or less exactly like my own. I’m so happy that someone an ocean away is storing apples just as we do.
If you complete this project, please to let me know!
I especially love knowing that this kind of information is reaching all corners of the globe as more people work to store and preserve their own food.
Ways to Preserve Apples
Looking for more ways to preserve apples?
- Homemade Hard Cider
- Apple Wine
- Canning Applesauce
- Homemade Apple Butter
- Canning Apple Pie Filling
- How to Make Apple Cider Vinegar
- Canning Apple Slices
Food Preservation Methods
Putting up more than apples this year?
- How to Make Sauerkraut
- Preserving Cheese in Wood Ash
- Preserving Eggs in Limewater (Keeps 12+ Months)


About how much did this end up costing you to build? I’m thinking about building one for myself. Yours turned out so nice!
I’m not totally sure to be honest and prices have probably changed considerably since this was written. I would just recommend making a supply list and price checking at your local lumber store.
I’m so excited to try this DIY project! I’ve been looking for a creative way to store my apples and this rack looks perfect. Can’t wait to see how it turns out
That’s great! We’re so glad! We hope you enjoy the project.
What type of wood do you recommend using for this?
The rack that is linked in the post is made from fir. I would recommend a wood that is untreated and that will stand up to moisture.
Hou would you advise storing apples in areas where you know you have mice? While you could easily wrap five of the sides in stainless 5mm (1/4″) mesh, needing to access the front easily would be quite the challenge.
You could maybe try creating some kind of panel that could be easily removed when you need access or set traps around the apples and check them on a regular basis.
Hi, when you say the front drawers are 19 inches is that just the width of the cross piece or is that including the 30 inch edges? It looks like the slats are 1×3 in your picture but I can’t figure out how your getting them in a 19 inch width. Even if they are 1 x 2 I can’t figure out how you’re getting 7 in there… So I guess I need clarification on slat width and width of cross piece. Thanks!
Ah, I think I figured it out. When visually compared to the 1×2 drawer frames the 1×2 slats look bigger but it must be an optical illusion because you said the slats were 1×2 as well as the drawer frames. So if that’s the case, when you said the front was 19 inches you meant the whole rack front which would make the drawer crosspiece be 17 inches. In this way, you can fit 7 2-inch frames with 1/2 an inch in-between. Yes?
Well, I guess you can tell I’m a newbie woodworker. Didn’t realize the actual lumber measurements were smaller than the specified size. I bought the book. The slats are actually from the 1 x 3 lumber. And the front and back edges are 19 inches for just the edge (does not include whole rack front like I thought).
I’m interested in doing this as well, once our apple trees get big enough to produce fruit. We have a big basement and only about 1/4 of it will be finished. The rest will be for storage. We do have hvac supply and returns throughout, so we can warm it up or cool it down if need be. But, I noticed that even during this summer with the vents closed, it still stayed pretty cool down there compared to upstairs. What is the average winter temp in your basement? I just want to make sure that ours will be cool enough. It feels like it would be okay, but I don’t really know. I need something else to compare it to. 🙂
Ideal root cellar temperatures are somewhere between 32 to 40 degrees Fahrenheit but Ashley’s is closer to 50 degrees and works just fine.
Great, thanks! I think my basement is probably around 50 degrees throughout the winter, so that should work.