Affiliate disclosure: This post may contain affiliate links. Please see our Privacy Policy.
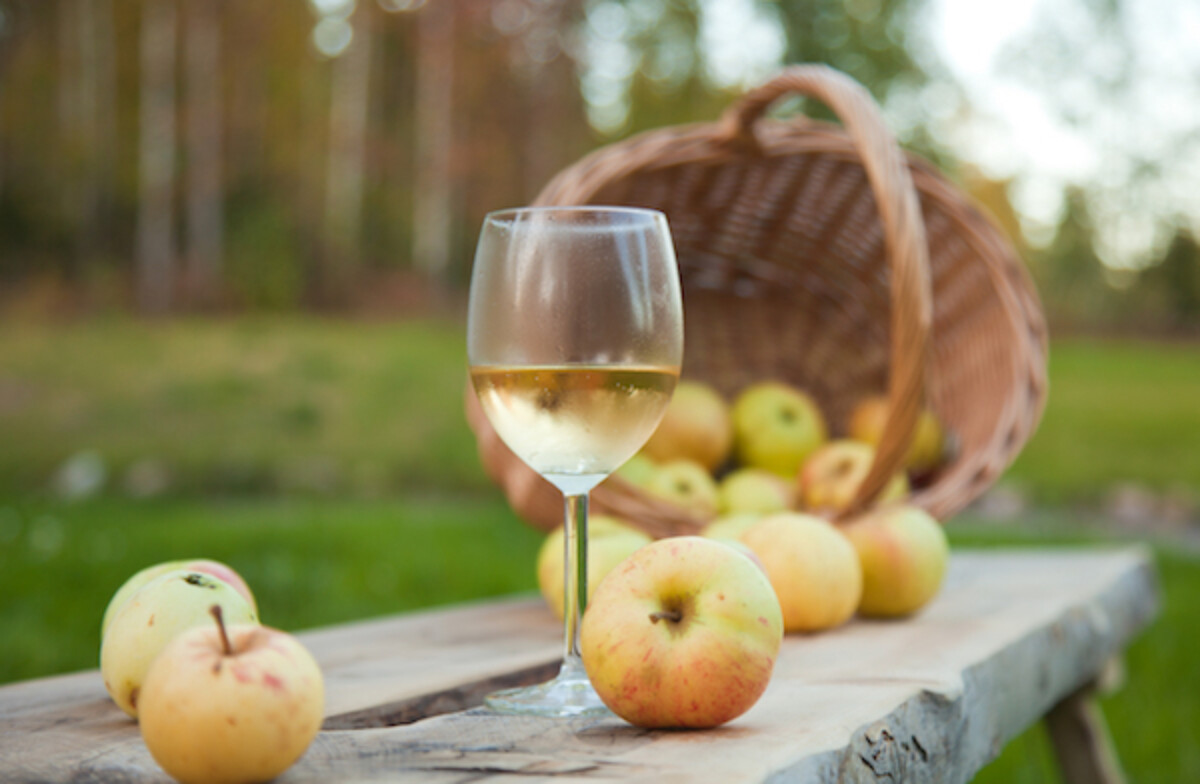
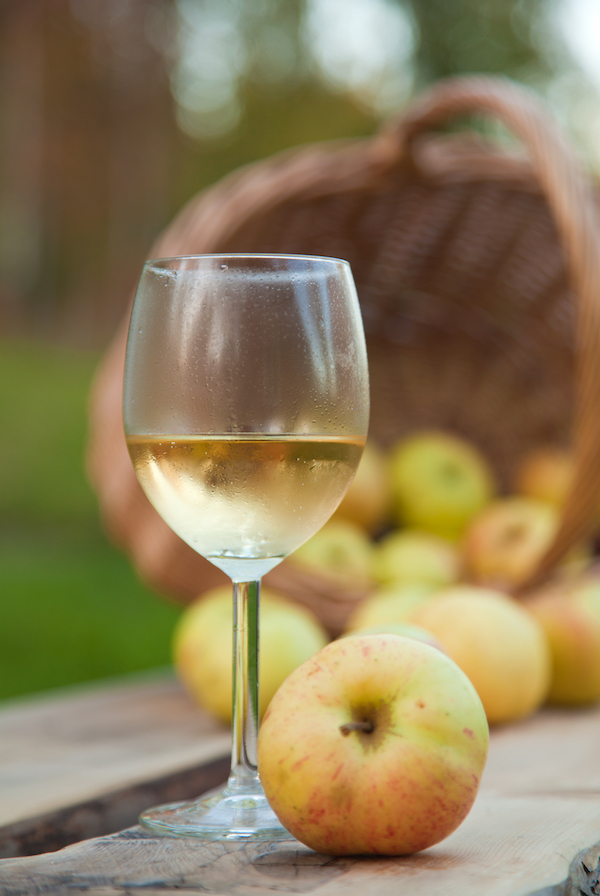
Apple wine is perfect for the beginning winemaker, and it’s easy to make at home with either fresh-pressed cider or storebought apple juice.
While making high-quality hard cider rather difficult, and apple wine is really easy.
True hard cider relies on choosing the right varieties of apples and then blending them to craft the perfect juice with enough acid, tannin, and sugar to make a well balanced hard cider.
Apple wine, on the other hand, takes any apple juice, even store-bought pasteurized jugs of generic juice, and turns it into a delicious apple wine.
Why is making apple wine so easy? It relies on winemaking additives to balance the juice, rather than careful blending.
These days, it’s hard to source high tannin cider apples, or “spitters” as they’re sometimes called. They just don’t taste good, but that natural astringency is actually needed in winemaking.
Tannins, in small amounts, help to create body, and a pleasant mouthfeel in wine. But they taste absolutely horrible in fresh fruit.
Acid apples, similarly, aren’t your generic grocery store varieties either.
Tannin and acid-rich apples would be mixed with sweet apples (as a sugar source) and carefully blended. The process is tricky, and since even the sweetest apples aren’t nearly as sweet as grapes, it’s often hard to make anything but very dry hard cider.
Apple wine is different, and the apple juice just provides the aromatic base and fragrant apple flavor, and the rest of the balancing act of acids, tannins, and sugars are accomplished with natural additives.
(Important: Do not use apple juice with preservatives added. If preservatives such as “Sodium Benzoate” and “Potassium Sorbate” are in the juice, it will not ferment into apple wine. Pasteurized juice and juice with added ascorbic acid are fine for winemaking.)
How to Make Apple Wine
The basic process for making apple wine is the same for any small-batch country wine.
Start with a juice of some sort, add in a bit of sugar for sweetness, along with other winemaking additives, and then a strain of winemaking yeast.
Allow the mixture to ferment for about 7 to 10 days, until most of the very active fermentation is complete. Then siphon the mixture over to a clean fermentation vessel (leaving sediment behind) and allow the mixture to ferment more slowly, in a cool dark place for another 6 weeks to 6 months.
At that point, bottle the wine, allow it to bottle age for at least a few weeks (preferably a few months) before drinking. Simple enough!
Additives for Apple Wine
Since the main difference between hard cider and apple wine lies in the additives, what is added to apple wine?
In all honesty, this is a bit subjective based on both your tastes and the starting juice.
If you’ve pressed the juice from wild apples, you may already have a bit of tannin present. Some backyard apple varieties are also sweet/tart, and contain plenty of acids. You’ll need to evaluate based on your starting juice.
For each additive, I’m providing a good range, to allow you to adjust the recipe.
(The base recipe I recommend, if you’re using generic store-bought juice, is somewhere right in the middle.)
- Cane Sugar or Brown Sugar ~ Cane sugar provides a clean sweetness, while brown sugar will enhance the apple flavor with warm caramel notes in the finished apple wine. The molasses also provides nutrients for the yeast, which is a good option if you’re not using added yeast nutrient. Add about 1lb of sugar for one gallon of wine, but up to 1 1/2 pounds for higher alcohol levels and/or more residual sweetness.
- Yeast Nutrient ~ Generally recommended for any type of country wine, yeast nutrient provides micro-nutrients that may not be available in wines not made from grapes. Add 1 tsp per gallon of wine. Lacking yeast nutrient, brown sugar as the sugar source, plus a handful of raisins added into the primary is a good substitute to nourish the yeasts.
- Acid Blend ~ A blend of different acid sources, usually including 50% malic acid, 40% citric acid, and 10% tartaric acid. A slightly acidic environment allows the yeast to work properly and balances flavors in the finished wine. Recipes for apple wine vary from 1/2 tsp to 1 1/2 tsp acid blend per gallon, and if you really want to nerd out you can titrate the juice to determine exactly how much to add…or you can just choose a middle of the road amount and call it good. I added 1 tsp acid blend per gallon. Lacking an acid blend, lemon juice is a good substitute, though it’s citric acid instead of a blend. One tablespoon of lemon juice will acidify as much as 1 teaspoon of acid blend powder.
- Wine Tannin ~ Powdered winemaking tannin takes the place of tannin-rich astringent apples and helps to improve flavor and balance the mouthfeel of the finished apple wine. Without it, the wine will have a one-dimensional sweetness and thin body. Apple wine recipes vary from 1/8 to 1/2 teaspoon per gallon, and I’m choosing to use 1/4 tsp wine tannin powder per gallon. Lacking tannin powder, add a cup of strongly brewed black tea, or a few grape or currant leaves. This is less exact, obviously, but it will add tannins to help balance the apple wine.
- Pectic Enzyme ~ Breaks down the natural pectin in apples and causes it to sink to the bottom of the fermentation vessel. Using a pectic enzyme is optional, but it’ll greatly improve the clarity of your apple wine. Add 1/2 teaspoon of pectic enzyme per gallon of juice at the start of the fermentation. Lacking pectic enzyme, you can improve wine clarity by racking it repeatedly. Once the wine is moved to secondary, rack it into a clean fermentation vessel every few weeks until it has good clarity.
You can buy pectic enzyme, acid blend and wine tannin together in a kit for just a few dollars, and then all you need is a small packet of yeast nutrient.

Yeast for Apple Wine
The yeast you select can significantly shape the flavor and character of your apple wine. Different yeast strains bring distinct qualities to the table—some infuse fruity notes, while others produce a cleaner, more neutral flavor. Yeasts with high alcohol tolerance, such as champagne yeast, can ferment very dry, so you may need to adjust sugar levels accordingly.
For apple wine, opt for a yeast with moderate alcohol tolerance that either ferments clean or imparts subtle fruity undertones.
Here are a few great yeast options:
- Lavin D47 ~ Known for its vibrant fruity and floral profile, D47 adds complexity to apple wine with hints of spice. It’s a moderate fermenter and may take some time to get going. Alcohol tolerance is around 15%.
- Lalvin QA23 ~ A popular choice for white wines, this yeast produces a crisp, clean fruit flavor. It ferments quickly and helps the wine clarify faster by settling out relatively quickly. Alcohol tolerance up to 16%.
- Red Star Premier Cuvee or Lavin EC-1118 ~ Often used in sparkling wines, these robust yeasts have a neutral flavor profile and an impressive alcohol tolerance (around 18%). However, they can result in a drier apple wine, as they ferment thoroughly unless you add extra sugar.
Selecting the right yeast for your apple wine will depend on the style you’re aiming for—whether you prefer a lighter, fruit-forward finish or a cleaner, more straightforward taste.
A single packet of wine yeast is sufficient for 5 gallons of wine, so you won’t need the entire packet. The exact amount is not crucial because the yeast will multiply rapidly, but you can use about 1/5 to 1/2 of the packet for every gallon of juice.
To start, dissolve the yeast in a small amount of water to rehydrate it. This step is important because adding dry yeast directly to the juice could shock the yeast with the high sugar content before it has fully rehydrated.
Most yeast packets come with clear instructions, and some types (like liquid yeast) may have slightly different requirements. Be sure to follow the guidelines provided on the packet.
It’s best to avoid using bread yeast, as it will impart a yeasty, bread-like flavor to your wine. Bread yeast isn’t designed for extended fermentation or winemaking, so it may produce unpleasant off-flavors as it struggles to adapt to the sugary environment.
Equipment for Making Apple Wine
If you’re an experienced winemaker, you likely have most of the equipment already. But if this is your first foray into homemade wine, you’ll need the following tools:
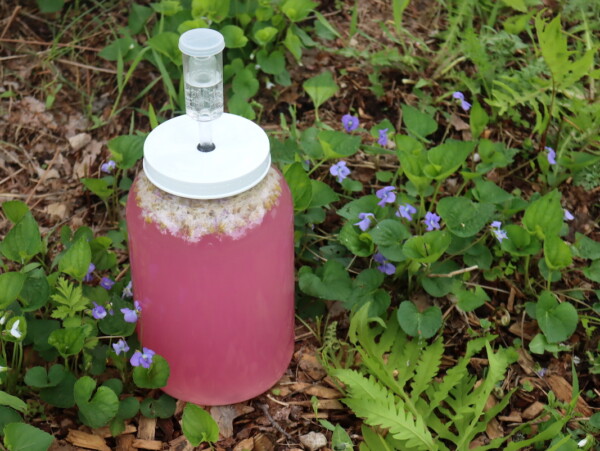
- One Gallon Glass Carboy (x2): These narrow-necked glass vessels are perfect for fermenting apple wine. You’ll need two because after the primary fermentation (around 7-10 days), the wine should be transferred into a clean container to leave behind the sediment. Carboys typically come in fermentation kits and often include a rubber stopper and a water lock.
- Rubber Stopper and Water Lock: This two-piece system is crucial for allowing CO2 to escape during fermentation while preventing air and contaminants from getting in. The water lock keeps your brew safe from turning into vinegar. While homemade apple cider vinegar is nice, it’s not the same as apple wine!
- Brewing Siphon: This handy tool helps you move the fermenting wine from one container to another without disturbing the sediment. While you could technically pour the wine carefully, using a siphon makes the process much smoother and results in a clearer wine.
- Wine bottles: For long-term storage, wine bottles are the best choice. Their sealed corks allow the wine to age gracefully, improving its flavor over time. Beer bottles can also work for shorter storage, though they’re less ideal for aging. If you’re looking for convenience, flip-top Grolsch bottles are a great option—they’re reusable and come with built-in caps for easy bottling.
- Bottle Corker: If you’re using wine bottles, a corker is necessary to securely seal your bottles with corks. Be sure to use new, clean corks for this step. If you opt for Grolsch bottles, you can skip the corker and corks, as these bottles come with their own caps.
- Brewing Sanitizer: A no-rinse, one-step brewing sanitizer is essential for cleaning and sanitizing your equipment before use. This ensures that your wine is free from contaminants, particularly acetic acid bacteria, which could turn your apple wine into vinegar. Using a sanitizer makes the process much more predictable and prevents unwanted infections.
Making Apple Wine from Store-Bought Juice
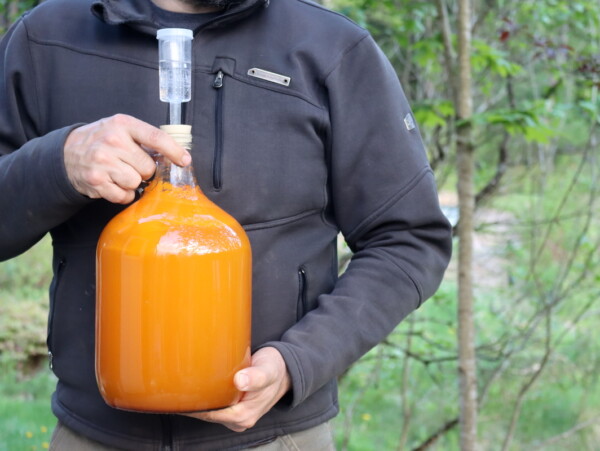
I’m starting with a jug of organic apple juice from our local coop, and it conveniently comes in a glass carboy. That saves money on buying a carboy, which even empty tends to cost around as much as this jug of juice.
You’ll need a bit under a full gallon, and in the end, I had 1 1/2 cups of spare juice from this gallon after I added the sugar and other additives.
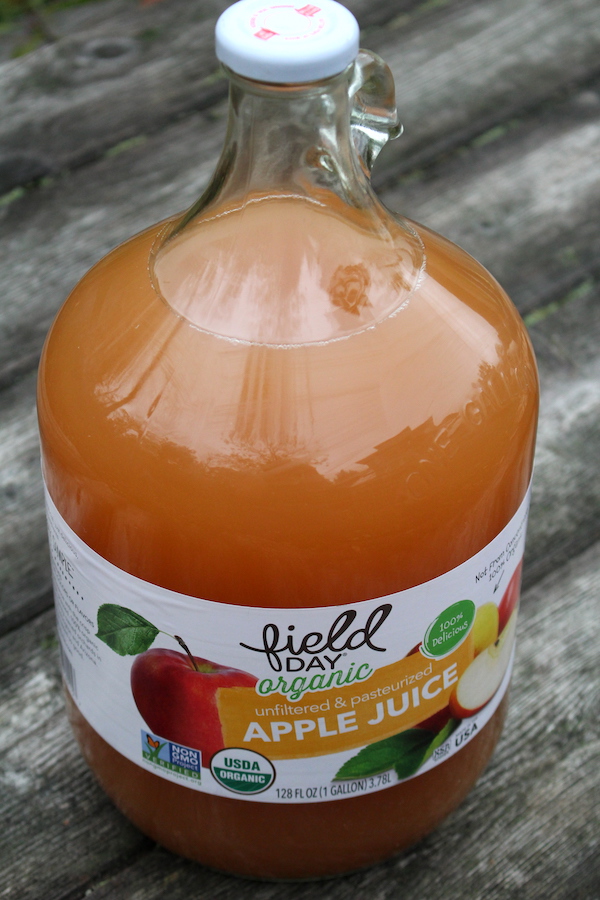
Start with about 3 quarts of apple juice in the carboy (or if you have a gallon like I do, pull off 1 quart of juice).
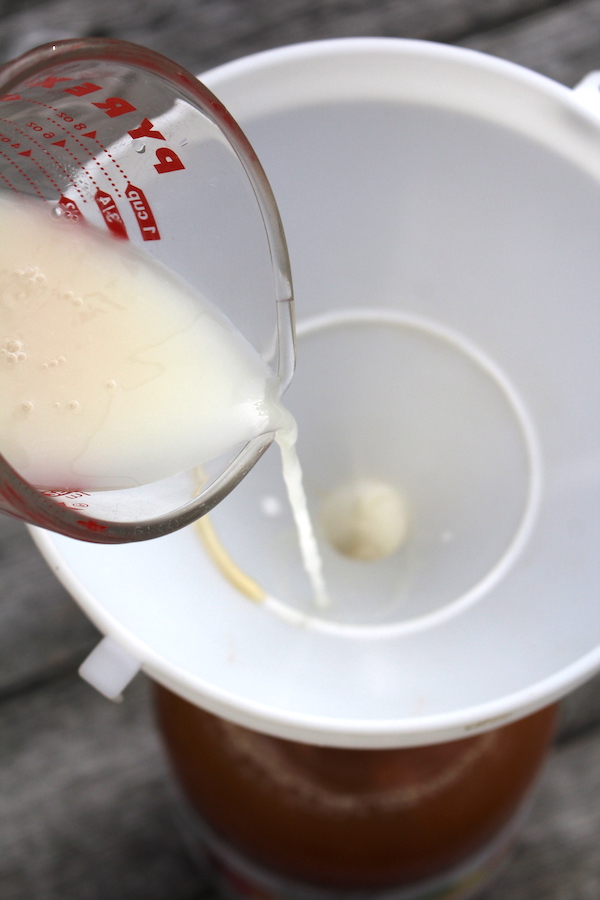
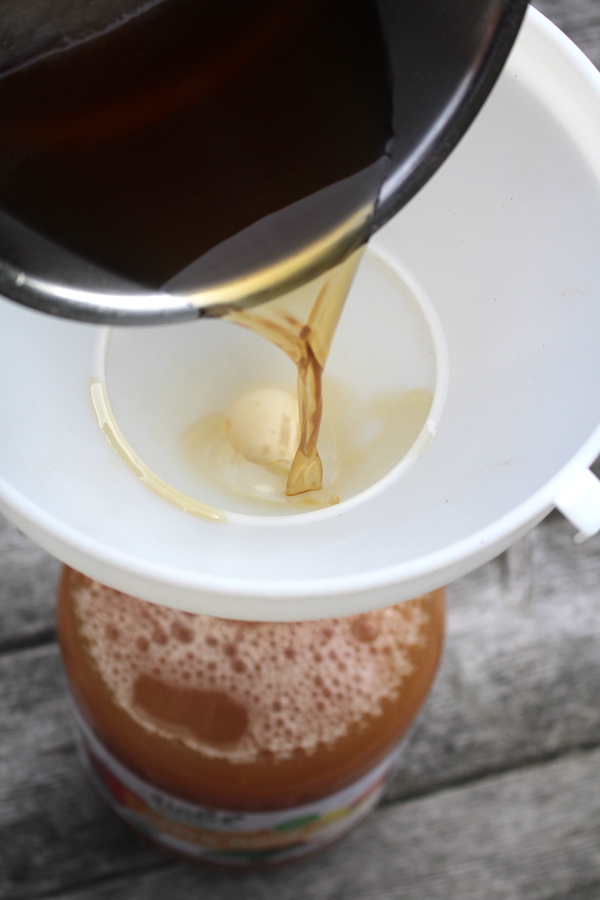
Place 2 cups of juice in a saucepan and start to warm it on the stove. Add cane sugar, yeast nutrient, pectic enzyme, acid blend and winemaking tannin (basically, everything but the yeast).
Whisk to dissolve.
It’s not necessary to boil it, just warm it until everything’s dissolved. Then allow the mixture to cool to room temperature before pouring it into the fermentation vessel with the other juice.
(You should still have 2 cups of juice set to the side for topping off the container.)
Dissolve a small amount of yeast, about 1/4 packet, in about 1/4 cup of water. The yeast needs to re-hydrate in water (not juice) so they’re not shocked as they wake up.
Allow the mixture to sit for about 10 minutes until the yeast is dissolved and it starts to visibly foam (slightly).
Pour the yeast into the fermentation vessel with the juice and all the other ingredients.
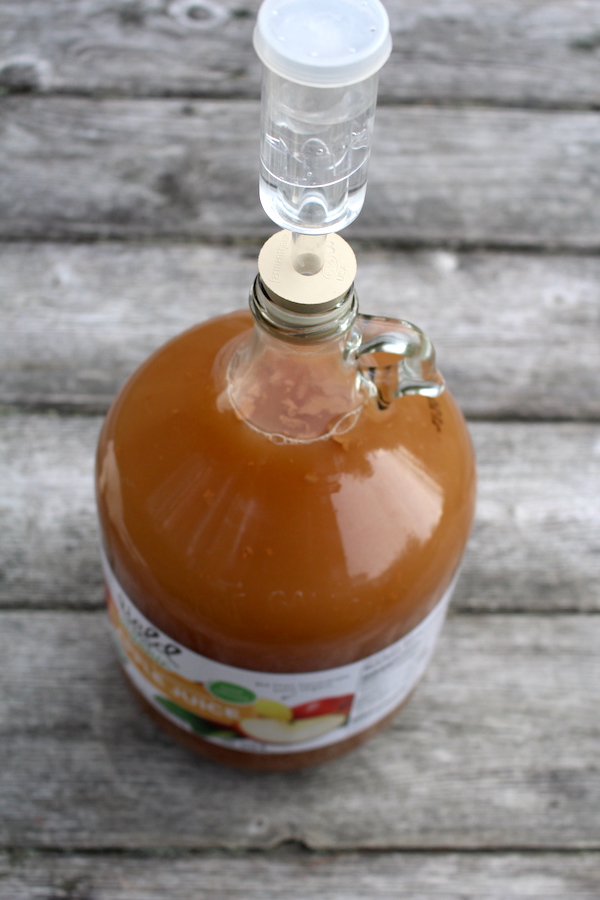
At this point, take a look at the fill level. The jug should be mostly full, and you’ll want to add a bit of the extra juice to bring it up to the neck of the fermentation jug.
A wine needs headspace to bubble, but at the same time, the smaller the area in contact with air at the top of the container the better. For that reason, fill the jug up to the base of the neck of the carboy.
This should leave around 2-3 inches of headspace, but minimize the air surface area. Cap the carboy with a water lock.
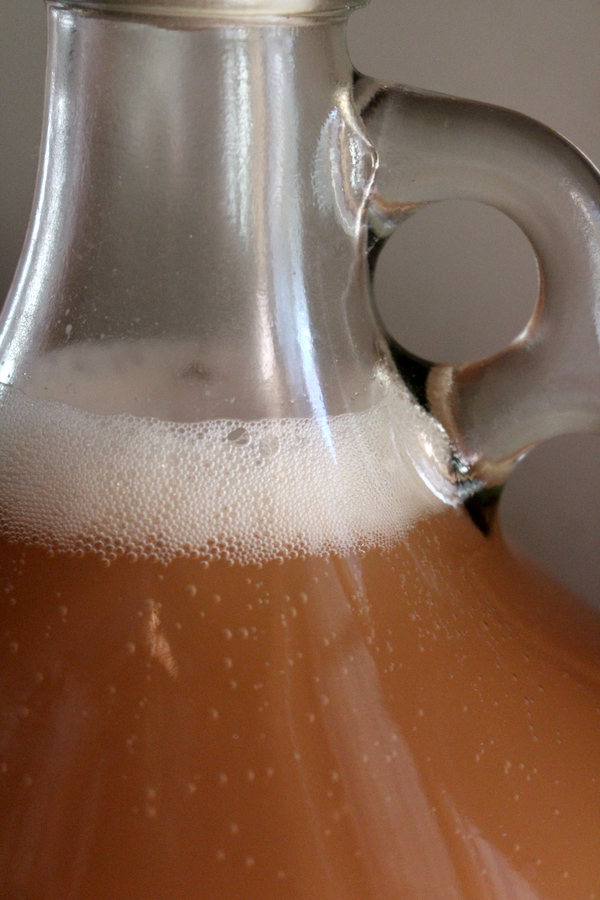
Fermentation should begin with 24 to 48 hours.
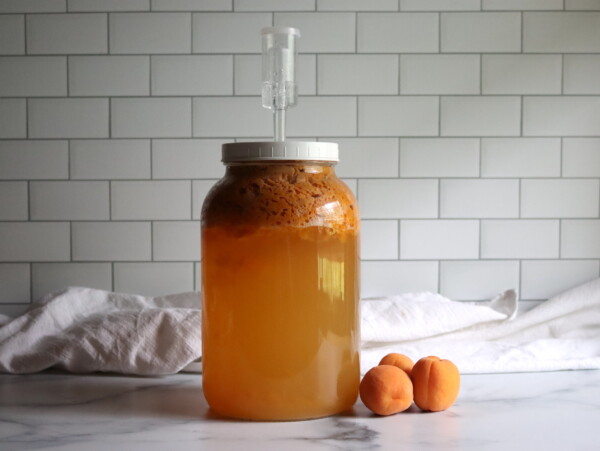
Allow the mixture to ferment in “primary” for about 7 to 10 days.
This should be a period of very active fermentation, and you’ll need to watch it to make sure that the wine doesn’t bubble up into the water lock. If it does, simply clean out the water lock, refill it with clean water and re-attach it.
At the end of the primary fermentation, use a brewing siphon to rack the wine over into a clean fermentation vessel, leaving the sediment behind. This step is important, both for the clarity of the apple wine and the flavor.
The length of primary fermentation depends on the temperature and your choice of yeast.
If it’s bubbling actively, leave it in the primary. Once things settle down, it’s time to move to secondary fermentation.
Why do you siphon the apple wine into a new container?
Leaving apple wine on the “lees” or yeast sediment at the bottom of the primary fermentation container can create off-flavors.
Since most of the sediment is produced in the primary fermentation, it’s good to move the wine to a clean container as soon as the active fermentation step is complete.
Re-apply the water lock and place the apple wine into a cool, dark place for secondary.
While it needs to be actively watched during the primary fermentation phase, secondary is much more sedate. You likely won’t see it bubble much, as the yeast is working much more slowly.
Time in secondary is based on your patience.
More time (to a point) will yield a better wine, with a mellow flavor complex flavor profile. Young wines can sometimes be harsh.
I’d recommend allowing the apple wine to spend at least 6 weeks in secondary, or as much as 6 months.
After secondary fermentation, bottle the wine in corked wine bottles (preferred), capped beer bottles (less optimal) or flip top Grolsch bottles (a good middle ground, and convenient).
Wine bottles allow the brew to “breathe” and are the best option if you’ll be storing the wine in the bottle for more than 1 year.
Allow the apple wine to bottle-condition for at least a month, but preferably longer, before drinking.
Sulfites and Stabilizing Wines
Most recipes for apple wine involve Campden tablets (potassium metabisulfite) to sterilize the juice before fermentation. Some involve adding both Campden tablets and potassium sorbate at bottling time to kill off the yeast and stabilize the wine.
Killing off the yeast at the end of fermentation ensures that the wine will be a still wine without bottle carbonation, and allows you to back sweeten the wine to your tastes without restarting fermentation.
Personally, I never use Campden tablets or potassium sorbate in winemaking because I consume enough chemical preservatives from modern food sources, and I’m not about to intentionally add them to my homemade goods.
That said, if you’re open to adding them, they’ll result in a more predictable final product.
To sterilize the juice before starting (optional):
Add one crushed Campden tablet per gallon of juice before adding any other ingredients, and allow the juice to sit for 24 hours before proceeding.
To stop fermentation and stabilize the wine at bottling time (optional):
Add BOTH one crushed Campden tablet and 1/2 teaspoon potassium sorbate per gallon.
Once stabilized, add sugar to taste. Make a simple syrup by dissolving equal parts sugar and water together in a saucepan, and then add that to the wine before bottling.
Amounts will vary based on your taste, but I’d suggest starting with about 1/2 cup of sugar for one gallon of apple wine.
For more information on back sweetening and adjusting flavors at bottling time, there’s an informative discussion on this winemaking forum.
Apple Wine
Equipment
Ingredients
- 1- gallon apple juice, see note
- 1 pound Sugar, about 2 cups
- 1 teaspoon yeast nutrient
- 1 teaspoon acid blend
- 1/2 teaspoon Pectic Enzyme
- 1/4 teaspoon tannin powder
- wine yeast, see note
- Optional ~ Campden Tablet and Potassium Sorbate for Stabilizing, I do not use these
Instructions
- Start by removing about 1 quart (4 cups) of juice from the gallon, then pour the remaining 3 quarts into your fermentation vessel.
- Take 2 cups of the juice you removed and place it in a small saucepan, setting aside the other 2 cups for later use. Gently warm the juice in the saucepan over low heat.
- Once warm, add all the other ingredients (except the yeast) to the saucepan and stir until everything dissolves completely. Turn off the heat and allow the mixture to cool to room temperature.
- When the juice mixture has cooled, pour it into the fermentation vessel with the rest of the apple juice.
- In a small container, dissolve the winemaking yeast in about 1/4 cup of unchlorinated water. You’ll only need 1/5 to 1/2 of the yeast packet for this batch, so set aside the rest. Let the yeast sit for about 10 minutes to rehydrate.
- Once the yeast has hydrated, add it to the fermentation vessel with the apple juice mixture.
- Top off the fermentation vessel with the remaining apple juice you set aside earlier, filling it until the juice reaches the base of the neck. Be sure to leave 2-3 inches of headspace to allow for bubbling during fermentation.
- Cap the vessel with a rubber bung and attach a water lock filled with water. Place the fermentation vessel in a cool, dark area and allow it to ferment for 7 to 10 days. You should see active bubbling. If the bubbling pushes juice into the water lock, clean it out and reattach the lock as needed.
- After primary fermentation, use a brewing siphon to transfer the wine into a clean vessel, leaving behind any sediment.
- Re-seal the new vessel with a water lock and let it continue fermenting in a cool, dark place for at least 6 weeks, though it’s better to allow it to ferment for several months, up to 6 months, for a smoother taste.
- Once fermentation has fully finished, carefully bottle the apple wine in clean wine bottles. Store the bottles in a cool, dark place and let them age for at least one month. The wine will improve with age, and if you prefer a sweeter wine, you may need to back-sweeten it at this point (see notes for back-sweetening instructions).
Notes
Country Winemaking Recipes
Looking for more easy country winemaking recipes? Try any of these homemade fruit wines:
Ways to Preserve Apples
Bumper crop of apples this year? Try any of these tasty ways to preserve apples:


My Dad used to make grape wine. I’ve tried apple cider wine before w/o a recipe. It was okay just not what I thought it would be. Going to try your recipe. Has to be better then anything I’ve made in the past.
Thanks for the help.
Hi am I able to use pear juice for this one?
Yes, that’d work just fine. Pears have more natural un-fermentable sugar, so it’ll end sweeter than an apple wine would, but it’ll be really delicious. I have a separate recipe for pear wine if you want to try that one too: https://practicalselfreliance.com/pear-wine/
How long after adding the camden tablet and potassium sorbate, can you proceed to back sweeten and then bottle?
I would recommend checking out this thread in the winemaking forum for more information on back sweetening. https://www.winemakingtalk.com/threads/back-sweetening-apple-wine.43184/ We don’t have a lot of personal experience in this area since we don’t use camden tablets or potassium sorbate.
Just wondering after I siphon off the wine after 10 days into second bottle does it need to be filled up to the neck once again because I don’t believe I would get enough out of the first bottle to fill the other one up to the top, just wondering if it matters if it’s totally filled to the bottom of the neck or not and if it needs to be filled up what should I use?
You can top it off with water or a neutral white wine.