Affiliate disclosure: This post may contain affiliate links. Please see our Privacy Policy.
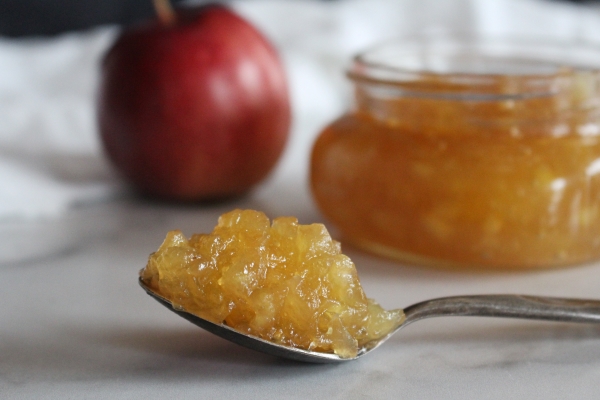
Canning apple pie filling at home means you’re just minutes away from having a pie in the oven. The apples are already peeled, chopped, seasoned and thickened. That allows you to just pour the pre-made apple pie filling into your favorite crust and bake.
Next time you need something quick for a potluck, you can still bring a homemade apple pie.
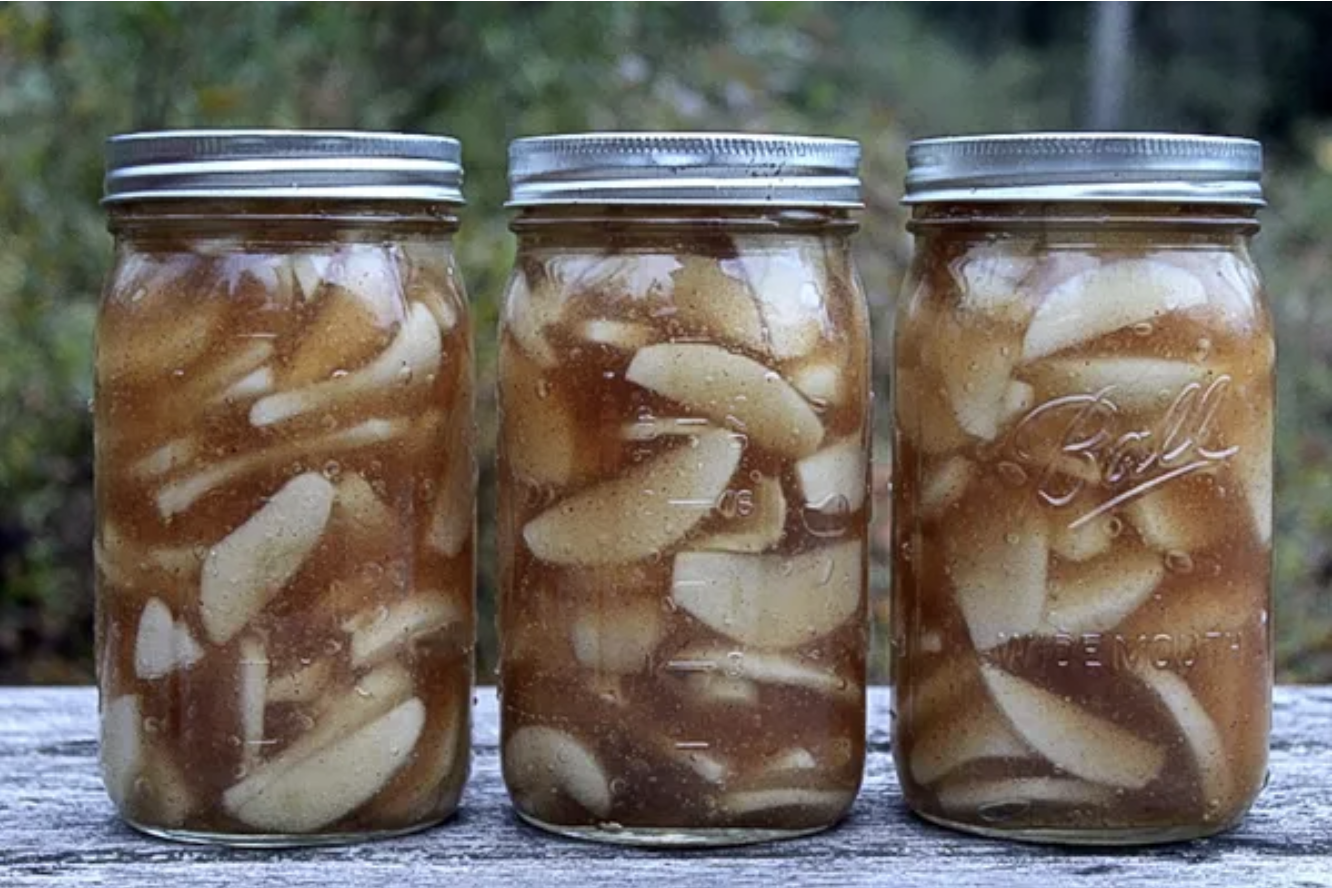
Table of Contents
Canning apple pie filling is my favorite way to turn a mountain of fall apples into instant desserts all winter long. One quart is basically “pie night in a jar,” and it’s just as good spooned over oatmeal, pancakes, and ice cream.
Apple pie filling is one of those pantry projects that feels a little bit magical: you do the peeling once, you do the mess once, and then you get to coast for months. The key is following a tested method, because pie fillings are thickened and that changes how heat moves through the jar.
It’s fancier than simply canning applesauce, a bit more versatile than apple jam, and more filling than canning apple juice or canning apple cider. And it has a brighter, fresher flavor than long cooked apple butter.
This version uses cook-type Clear Jel (the only thickener recommended for home-canned pie fillings) and bottled lemon juice for consistent acidity.
This tested apple pie filling canning recipe was developed by the National Center for Food Preservation, and it follows modern safe canning guidelines. They also have recipes for canning peach pie filling and canning cherry pie filling, but this one’s my favorite!

A Quick Look at the Recipe
- Recipe Name: Canning Apple Pie Filling
- Recipe Type: Pie Filling with Clear Jel
- Canning Method: Waterbath Canning
- Prep/Cook Time: 30 Minutes
- Canning Time: 25 Minutes for Pints and Quarts
- Yield: 7 quarts (see notes for pint instructions)
- Jar Sizes: Half Pint, Pint or Quart
- Headspace: 1 inch
- Ingredients Overview: Apples, Sugar, Juice, Clear Jel, and Spices.
- Safe Canning Recipe Source: National Center for Food Preservation
- Difficulty: Moderate. Working with clear jel has a learning curve, and it’s easy to make a mistake and clump or set the clear jel to early. Read the tips and directions thoroughly before beginning.
- Similar Recipes: The process is very similar to making other canned pie fillings, including Cherry Pie Filling and Peach Pie Filling.
SUMMARIZE & SAVE THIS CONTENT ON
Ingredients for Canning Apple Pie Filling
This recipe has all the classic elements of a homemade apple pie, and the main difference is the thickener. While you can use flour, corn starch or tapioca starch when making pies generally, those can’t be used in canning.
The only tested thickener for canning is Clear Jel, a specific type of corn starch that is thin when hot, and gels nicely when cooled. It can be heated and cooled repeatedly, and it’ll continue to gel when it cools and liquify when hot. This allows heat to penetrate the jars during canning, and ensures that the pie will still set when it’s baked again later.
Here’s what you need for canning apple pie filling:
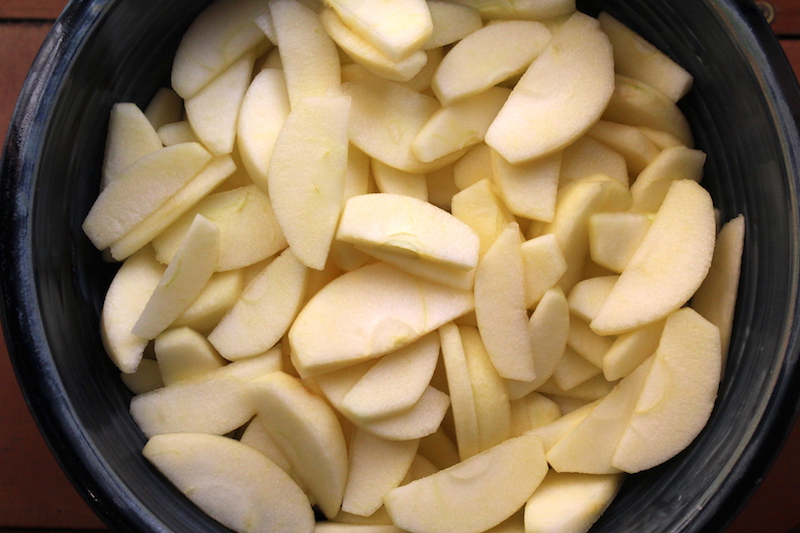
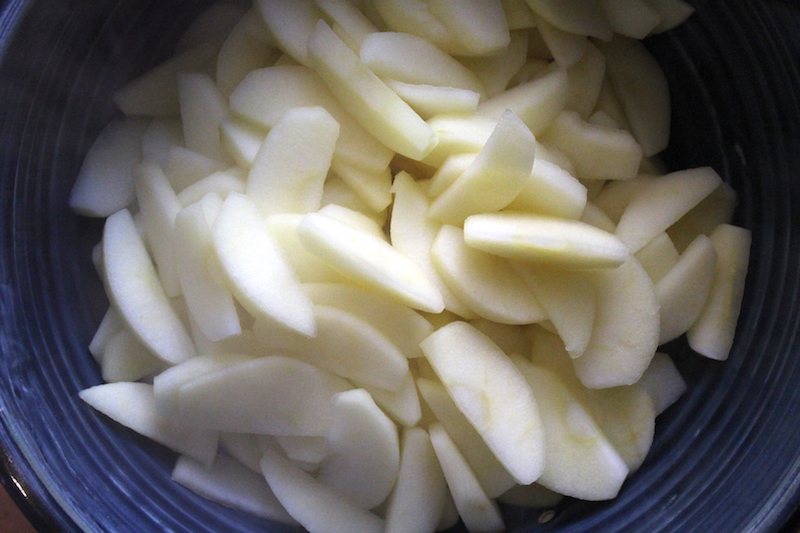
- Apples: Choose firm, crisp apples that hold their shape when heated. Honeycrisp, Braeburn, Golden Delicious, and Jonagold are all solid options, and I especially like mixing a tart apple (like Granny Smith) with something sweeter for a more “real pie” flavor. Slice them about ½-inch thick so they don’t turn mushy in the jar.
- Granulated sugar: Sugar sweetens the filling and helps create that classic glossy pie-filling syrup. You can adjust the sugar to taste, but keep in mind that less sugar will make the apple flavor taste sharper and the spices more pronounced.
- Clear Jel: Use regular (cook-type) Clear Jel, not instant. Cook-type Clear Jel is designed to thicken properly through the heat of canning and still bake well later. Other thickeners (flour, cornstarch, tapioca) aren’t tested and cannot be safely used in canning. If you’re purchasing clear jel, it usually comes in containers measured by the pound rather than volume. One pound of clear jel equals about 3 cups, so plan accordingly.
- Cold water: This is the liquid Clear Jel needs to hydrate smoothly before the pot ever hits the burner. Starting with cold water helps prevent lumps, which is especially important with Clear Jel because clumps won’t dissolve once the mixture begins to thicken.
- Apple juice: Apple juice gives the filling a fuller, fruit-forward taste (instead of a sauce that just tastes like sugar and cinnamon). Store-bought juice works fine, but homemade apple juice or fresh-pressed cider makes a noticeably more “apple-y” jar. Don’t use all apple juice, it makes the flavor kind of overwhelming, and not in a good way. A mix of water and apple juice or cider is best.
- Bottled lemon juice: Bottled lemon juice is used because its acidity is standardized. Fresh lemons can vary, and in this recipe the lemon juice isn’t just flavor, it’s part of the tested balance for a safe, shelf-stable filling.
- Cinnamon: Cinnamon is the main “apple pie” spice here, adding warmth without overpowering the fruit. Feel free to tweak the amount to your liking, especially if you prefer a more boldly spiced filling.
- Nutmeg (optional): Nutmeg adds that bakery-style depth that makes the filling smell like a pie the moment it warms up. A little goes a long way, which is why the amount is small—enough to round out the flavor without turning the filling into “nutmeg pie.”
Safe Recipe Changes
I like the recipe as written, but there are a few safe changes you can make if you’d like it a bit different.
You can safely adjust the spices (more cinnamon, add nutmeg, swap in a little allspice or ginger, etc.). I know some people are fond of a particular apple pie spice mix, and that’s perfectly fine. Use whatever dry spices suit your families taste.
The sugar is not for preservation, and it’s just there for flavor. You can adjust the sugar to suit your taste, especially after you’ve canned a test quart and baked a pie with it. Either add more sugar, or less, it’s up to you.
I find that this pie filling is quite sweet, so I don’t imagine you’ll need more sugar, but it’s perfectly fine to make a reduced sugar batch.
The clear jel can be reduced to make a less thick filling, but you cannot increase the total amount. The filling comes out quite thick, so increasing it isn’t really something I can imagine doing anyway.
Don’t substitute any other thickeners into this recipe. Cook Type Clear Jel is the only safe, tested thickener for canning pie fillings. It can be hard to find, unless you have an amish market nearby. I buy mine online in tubs from Hoosier Hill Farm and it’s just a few dollars a batch.
The lemon juice can be increased, but it cannot be decreased. You need to keep the minimum amount there the same.
So the main things you should not do are reduce the bottled lemon juice or increase the Clear Jel beyond what the recipe calls for. Those two need to stay in proportion to the total amount of apples in the recipe.
Just made this recipe. It worked out perfectly. I never blanched my apples first before but it really worked to solve the problem of the apples rising to the top and the gel settling on the bottom. This will be my go to recipe from now on!
Making Apple Pie Filling for Canning
Start by getting your canning setup ready: heat a boiling-water canner, wash your jars and lids, and keep the jars warm since hot pie filling should always go into hot jars.
Peel, core, and slice the apples into pieces about ½-inch thick so they hold their shape and stay pleasantly “pie-like” after processing. If you want to keep the slices looking bright, you can hold them in an ascorbic-acid solution to prevent browning while you work. A splash of lemon juice in water works too.
This step is purely cosmetic and won’t affect safety. Brown apples aren’t as pretty in a jar, but they’re just as tasty.
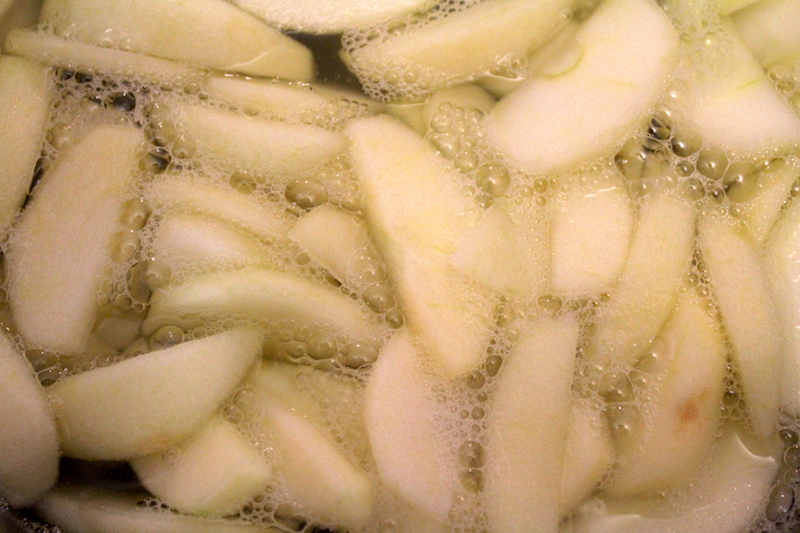
Bring a pot of water to a boil and blanch the apple slices for one minute, working in batches, then drain and keep the apples warm in a covered bowl or pot so they’re ready to go into the thickened syrup.
As they blanch, you’ll notice they bubble a good bit. That’s air being driven out of their tissues, which shrinks them so they can fit in the jar better and removes air so they float less.
To make the sauce, whisk the sugar and Clear Jel together in a large pot first, then add the cold or room temperature water, apple juice, and spices and whisk until completely smooth before turning on the heat.
Clear jel can clump if it’s dissolved in hot liquid, so don’t use your apple blanching water here. You need cool or room temperature water to get everything dissolved, and then you can start heating it once it’s whisked smooth.
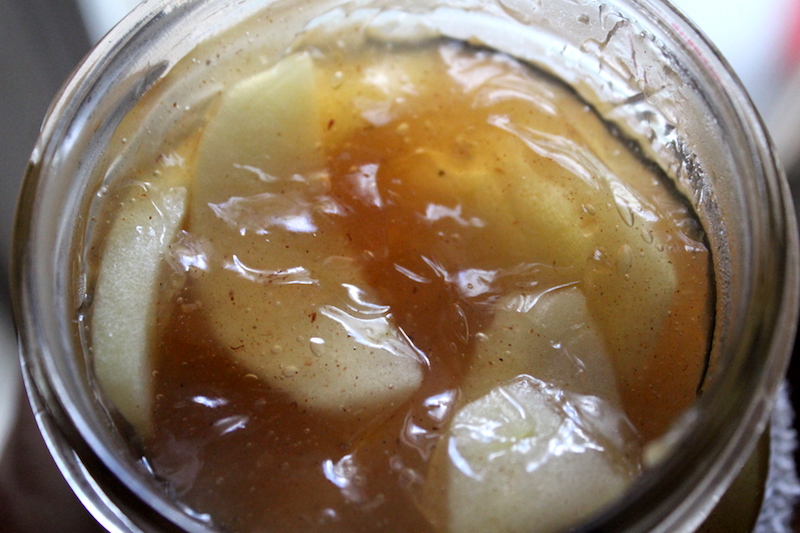
Cook the mixture over medium-high heat, stirring constantly, until it thickens and comes to a bubble. Once it’s bubbling, add the bottled lemon juice and continue boiling for one minute, stirring the entire time.
Remove from the heat, and turn back to your blanched apples that you’ve held warm while you made the sauce.
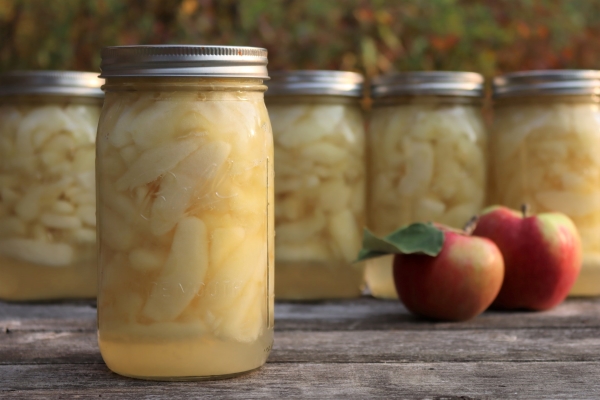
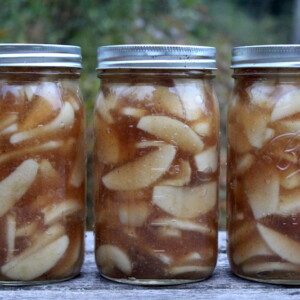
Take the pot off the heat, fold in the warm, drained apples, and immediately ladle the hot filling into prepared quart jars, leaving one inch of headspace. De-bubble, adjust headspace if needed, wipe rims, apply lids and then tighten on rings to fingertip tight.
Work quickly, as the clear jel will start setting up as it cools. It needs to be piping hot when it goes into the jars to pack evenly without bubbles.
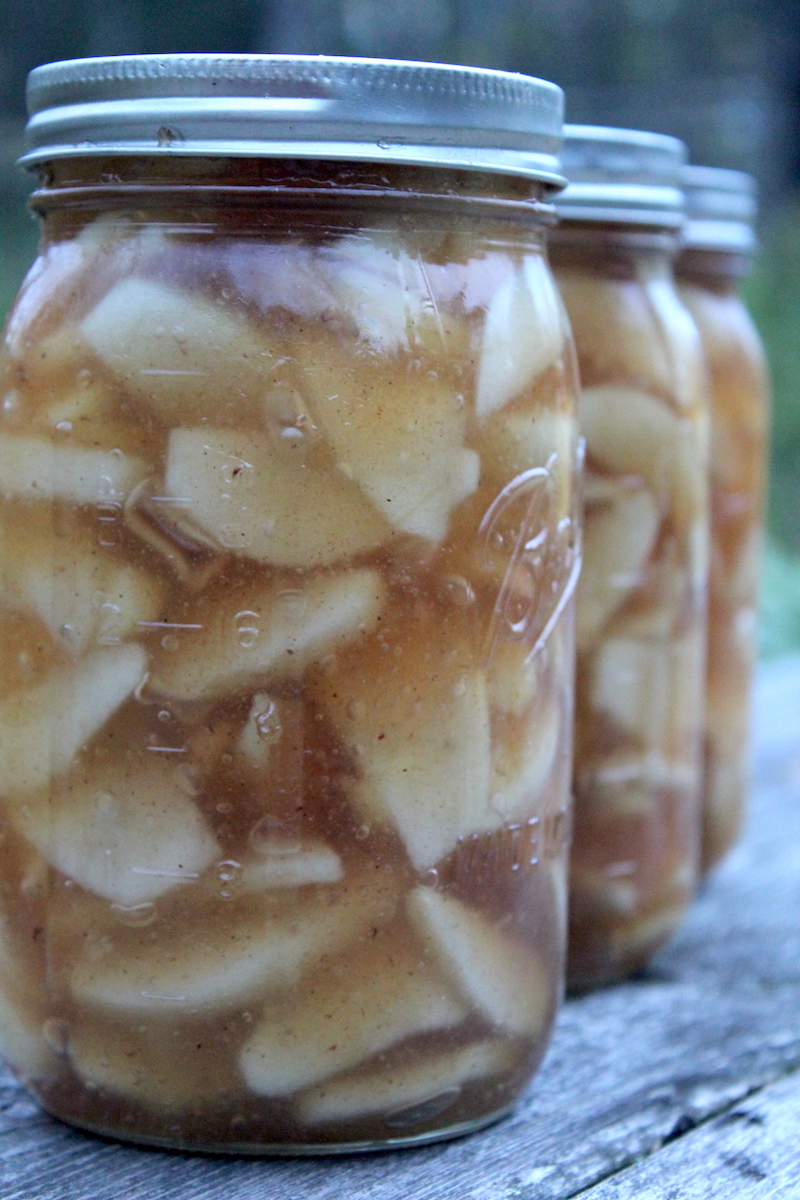
If you’re not canning, this pie filling can then be stored in the fridge and it should keep for about a week or so. That said, I think it’s much nicer to process the batch in a waterbath canner so you can store it on the pantry shelf until you need it.
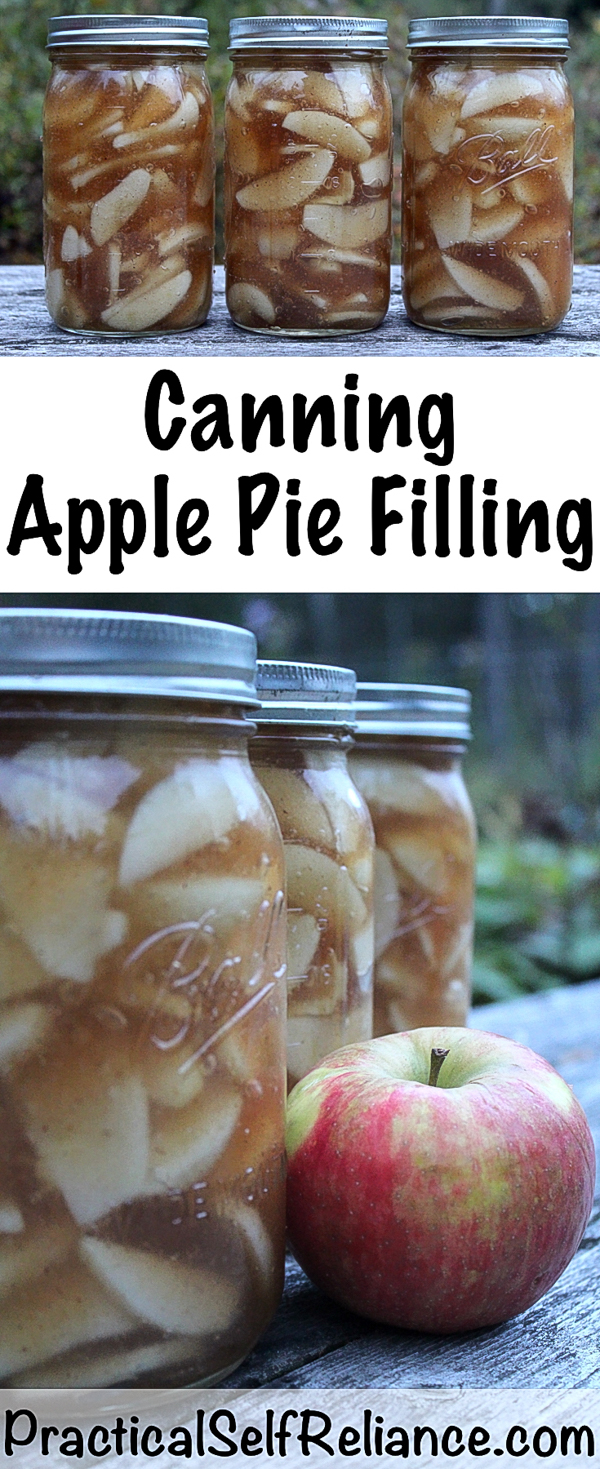
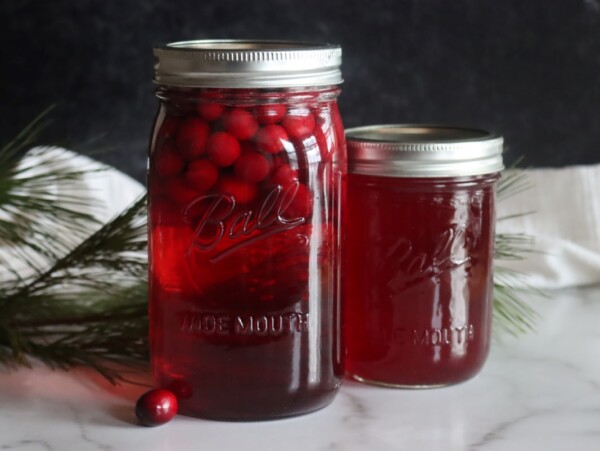
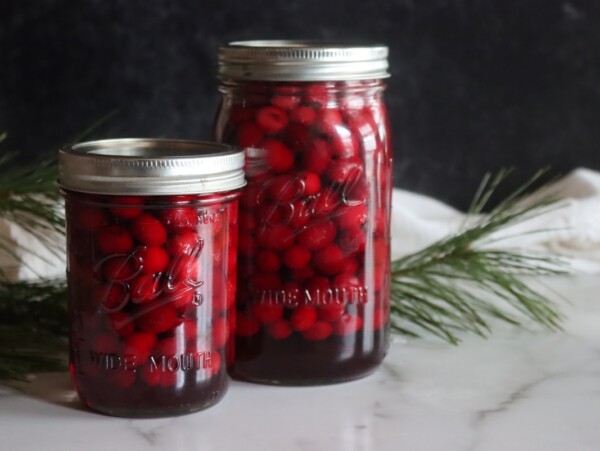
Canning Apple Pie Filling
If canning, prepare a waterbath canner, jars, lids and rings before beginning.
Once everything is ladled into jars and they’re de-bubbled and capped with two part canning lids they can be loaded into a pre-heated canner. The canner should be simmering, around 180 degrees F.
Bring the canner up to a full rolling boil before you start your timer.
Process jars, both pints and quarts, for 25 minutes adjusting for altitude (see below).
When the processing time is up, turn off the heat, remove the canner lid, and let the jars rest in the hot water for about 10 minutes to help reduce siphoning, then lift them out and set them on a towel to cool undisturbed for 12 to 24 hours.
Pie fillings are prone to sciphoning or liquid loss as they come out of the canner, so this extra step to allow them to cool slightly before you bring them out into the air is really helpful.

After they’ve cooled, check the seals and refrigerate any jars that didn’t seal. Properly processed and sealed jars can be stored on the pantry shelf, where they’ll maintain peak quality for 8 to 12 months.
Altitude Adjustments
Process hot-packed pints or quarts for:
- 0–1,000 ft: 25 minutes
- 1,001–3,000 ft: 30 minutes
- 3,001–6,000 ft: 35 minutes
- Above 6,000 ft: 40 minutes
Yield Notes
This recipe is written so that you can make either a 1 pint batch or a full 7 pint canner batch. If you’d like to make something in between, simply multiply the 1 quart batch by the number of quarts you’d like to make.
The NCHFP measures the sliced apples in quarts, which is honestly, a strange way to do it.
I have found that 9 pounds of apples as purchased (or about 24 medium apples) will yield 6 quarts sliced (or about 6 pounds prepared). That’s the amount required for a full 7 quart canner batch.
Your yield might be slightly different, if you’re more or less efficient peeling and coring the apples. Still, the finished yield holds true. A quart (4 cups) of peeled, sliced apples weighs about a pound. You’ll need slightly less than a pound of prepared sliced apples (7/8ths pound, 0.875 lb, 14 ounces or about 400 grams) to equal the 3 ½ cups for every quart of pie filling you hope to make.
Storage
If properly canned and sealed, pie fillings can be stored on your pantry shelf and will be safe to eat indefinitely (so long as they’re sealed).
While canned food doesn’t spoil, but it does decline in quality over time. Most canning recipes say that it’s best to consume the food within 12 to 18 months for best quality.
I have found, however, that pie fillings with clear jel don’t hold their quality quite as long as jams and jellies. For best quality, use within 8 to 12 months of canning.
They’ll hold longer if they’re kept in a cool, dark pantry, out of direct sunlight and away from heat.
Using Canned Apple Pie Filling
One quart makes roughly one 8-inch pie, and I’ve found that you need a quart plus a pint for an average 9 inch pie. If you have a really big deep dish pie, you might use 2 quarts.
For the most part, I can apple pie filling in quarts. When I use it for pie, I use a quart and a half in the pie, and then save the extra bit left from the second quart in the fridge to use to top ice cream, oatmeal and waffles throughout the week.
Apple pie filling isn’t just for baking pies, and it works really well anywhere you’d like a sweet apple-y filling or topping. It’s perfect between layers on a birthday cake, and it makes for an extra special sunday pancake day. Many recipes use it as a cheesecake topping, and of course, you can always use it in cobblers and crisps.
I like using it in my apple pie shortbread bars, and it’s tasty in thumbprint cookies too.
FAQ for Apple Pie Filling
Yes. Regular (cook-type) Clear Jel is the only thickener used in tested recipes for canning apple pie filling. It stays thinner while hot (so heat can move through the jar) and then gels as it cools, which is exactly what you want for safe canning and a filling that still bakes up properly later.
Cornstarch (as well as flour and tapioca) isn’t recommended for canning apple pie filling because it changes how heat penetrates the jar and it isn’t used in tested canning methods. If you want a different thickener, add it after opening the jar when you’re reheating the filling.
Yes. Sugar is there for flavor and texture, not preservation, so you can reduce it to match your taste. Just know that a lower-sugar filling will taste more tangy/bright and the spices may come through more strongly.
Pie filling is one of the most siphon-prone products because it’s thick and holds heat. To reduce siphoning, keep jars and filling hot, maintain proper headspace, don’t over-thicken, and let the jars rest in the canner with the heat off for about 10 minutes before removing them. Also be careful about your headspace, and if siphoning continues to be a problem, increase the headspace to 1 1/4 inches and wipe the rim carefully.
If properly processed and sealed, it’s shelf-stable, but for best quality (texture and consistency) I recommend using Clear Jel apple pie filling within 8 to 12 months. Store jars in a cool, dark pantry and refrigerate after opening.
A quart is usually right for an 8-inch pie. For a standard 9-inch pie, I typically use 1 quart plus 1 pint, and deep-dish pies may take 2 quarts depending on the pan.
Apple Canning Recipes

If you tried this Apple Pie Filling Canning Recipe, or any other recipe on Practical Self Reliance, leave a ⭐ star rating and let me know what you think in the 📝 comments below!
And make sure you stay in touch with me by following on social media!
Canning Apple Pie Filling
Ingredients
For 1 Quart
- 3 ½ cups Apples, peeled, cored and sliced, see notes
- ½ cup sugar
- ¼ cup Clear Jel, cook-type, not instant
- ½ cup cold water
- ¾ cup apple juice
- 2 Tbsp bottled lemon juice
- ½ tsp cinnamon, optional
- ⅛ tsp nutmeg, optional
For a 7-Quart Canner Batch
- 6 quarts Apples, peeled, cored and sliced, see notes
- 3 cups sugar
- 1 ½ cups Clear Jel, cook-type, not instant
- 2 ½ cups cold water
- 5 cups apple juice
- ¾ cup bottled lemon juice
- 1 Tbsp cinnamon, optional
- 1 tsp nutmeg, optional
Instructions
- Before you start cooking, prepare a boiling-water canner, wash jars and lids, and keep the jars hot. Apple pie filling is thick and sets quickly, so you want everything ready to go before the Clear Jel mixture finishes thickening.
- Wash the apples, then peel and core them. Slice into pieces about ½-inch thick so they stay nicely “pie-like” in the jar. If you want to prevent browning while you work, hold the slices in a solution of ascorbic acid and water (or water with a splash of lemon juice), then drain well. This step is optional and only affects appearance.
- Bring a separate pot of plain water to a boil and blanch the apple slices for 1 minute, working in batches so the pot stays at a boil. Drain each batch well and transfer the warm apples to a covered bowl or pot to keep them hot while you finish blanching the rest. Keeping the apples warm helps everything stay hot-packed and ready for the jars.
- In a large, non-reactive pot, whisk the sugar and cook-type Clear Jel together until evenly combined. Add the cold (or room-temperature) water and apple juice, then whisk thoroughly until the Clear Jel is completely dissolved and the mixture looks perfectly smooth. Don’t shortcut this step. Once Clear Jel starts heating, any dry pockets can turn into little gel lumps that won’t smooth back out.
- Set the pot over medium-high heat and cook, stirring constantly, scraping the bottom and corners as you go. As the mixture heats, it will begin to look more translucent and noticeably thicken. Keep stirring until it comes to a full bubble (not just a lazy simmer). When the mixture is bubbling, add the bottled lemon juice, stir well, and continue boiling for 1 minute, still stirring constantly.
- Remove the pot from the heat and immediately fold in the drained, warm apple slices. Stir gently but thoroughly so all slices are coated and the filling is evenly distributed. Work promptly from this point forward so the filling stays hot.
- Ladle the hot apple pie filling into hot jars, leaving 1 inch of headspace. Use a bubble remover (or a plastic knife/chopstick) to work out trapped air pockets around the fruit, then re-check headspace and adjust if needed. Wipe the jar rims with a clean, damp cloth to remove any syrup or starch residue, then apply two-piece canning lids and screw bands on fingertip-tight.
- Load the jars into the preheated canner. The water should be hot/simmering when the jars go in; then bring the canner up to a full rolling boil. Once boiling, start the processing timer and process pints or quarts for 25 minutes, adjusting for altitude as needed.
- When the processing time is complete, turn off the heat and remove the canner lid. Let the jars rest in the hot water for about 10 minutes before removing them, which helps reduce siphoning (pie fillings are especially prone to it). After the rest, lift the jars out with a jar lifter and place them upright on a towel, leaving space between jars. Don’t retighten bands and don’t disturb the jars while they cool.
- Allow jars to cool undisturbed for 12 to 24 hours. Check seals, then remove bands, label, and store sealed jars in a cool, dark pantry. Refrigerate any unsealed jars and use them first. Refrigerate after opening any jar.
Notes
Safe adjustments
You may adjust dry spices (cinnamon, nutmeg, apple pie spice blends, etc.) to taste. You may also adjust the sugar up or down since it’s there for flavor, not preservation. You may reduce the Clear Jel slightly for a looser filling, but do not increase it beyond the recipe amount. You may increase lemon juice for extra tartness, but you may not decrease it; the minimum amount must remain the same.Altitude Adjustments
Process hot-packed pints or quarts for:- 0–1,000 ft: 25 minutes
- 1,001–3,000 ft: 30 minutes
- 3,001–6,000 ft: 35 minutes
- Above 6,000 ft: 40 minutes
Yield and Scaling
The recipe is written as one-quart amounts and a full seven-quart canner batch. To make any amount in between, multiply the one-quart ingredient amounts by the number of quarts you want. For the full canner batch, I’ve found that about 9 pounds of apples as purchased (roughly 24 medium apples) yields the 6 quarts sliced apples. A quart of peeled, sliced apples weighs about a pound, and each quart of finished pie filling uses 3 ½ cups sliced apples, which is roughly 14 ounces (about 400 g) prepared apples.Using Canned Pie Filling
One quart fills about an eight-inch pie. For a typical nine-inch pie, I usually use a quart plus a pint, and deep dish pies may take two quarts. Any extra opened filling keeps well in the refrigerator for 7 to 10 days.Nutrition
Nutrition information is automatically calculated, so should only be used as an approximation.


Loved the taste, but my pie did not hold together. I used empire apples that were crunchy and firm. When I cut into pie the filling just spilled out. Could not get a clean slice. Any suggestions for the next batch?
You may want to let it cool a bit before slicing. The clear gel is designed to flow when hot and thicken as it cools.
Mine was cooled and refrigerated until the next day!?
Did you use the cooking kind of clear gel and not the instant?
My 2nd batch: packed quart jars only 3/4 full; all emerged from canner nicely full and safely sealed.
My 1st batch: packed quart jars to usual max fill line (“oh, I’m sure this will be fine, and I want a jar to fill a small pie…”) ; all jars siphoned or poorly sealed.
DO! what Ashley says and then some: leave LOTS MUCHO TONS of head room in the jars. This filling expands a lot more than most in the bath (in my perspective from bath/pressure canning two decades). Better to use and open more jars per pie than lose your work or see it rot.
Thank you so much for sharing that!
I made a batch of this canned pie filling and it looks fantastic! I am eager to use it when the holidays roll around. I do have one concern however. I noticed when I removed my jars from the hot water bath that there weren’t little bubbles rising to the top inside the jars, like I usually see. They seem to have sealed well. Should I reprocess them?
As long as you followed the recipe and processed them for the correct amount of time and they are sealed they should be just fine.
I found this recipe many years ago when I started to can my apples instead of freezing. This is the best recipe
to use for I had tried others but waiting on apples to come in so can finish up my canning season. My shelves
are all loaded down with lots of canned goods for family and all to enjoy. Been baking pies since before going
to school. Faster to bake then cook a full meal. My husband and family, friends always want me to bake pies!!
Oh my goodness, this was delicious! What an amazing recipe. I used fresh ground nutmeg and fuji apples since they were $.75 versus honeycrisp that were $2.25. I wish I had weighed the apples though. I sliced way too many of them and then didn’t put enough into the pot for a full pint. I ended up with 3 quarts and 1/2 pint. Now we’re suffering by eating it plain. 😉 I will definitely be making this many times again. Thank you for sharing!
Too funny! I bet you really suffered through that. Sometimes you just have to take one for the team. So glad you enjoyed the recipe.
I used this recipe to make 3 batches this year and they all came out phenomenal. I would highly recommend using sweet cider instead of standard apple juice as it makes the apple taste that much stronger. Added some vanilla too and 1/8 tsp cloves instead of the nutmeg but not everyone likes cloves in their apple pie. 😉
Thank you for the amazing recipe and thorough instructions which haven’t failed me for all 3 batches!
Wonderful, so glad you enjoyed it!
Hi there I made this a couple months ago. All my jars sealed just fine. I just went to use one and noticed that they were no longer jelled. The filling is all liquid and there is mold in the top. Any idea as to what I did wrong?
Thanks.
Alison
I’ve had them lose their gel too…but only when I forgot them in the pantry for several years (like literally 3-4 years). It sounds like it was only a couple months ago, and the mold thing…that’s a tricky one. I imagine there was something faulty about that seal given the mold. I did a bit of research, and mold in canned goods can be caused by a number of things.
“Mold growth can indicate a poor vacuum, a weak seal, contamination along the jar rim, too little headspace, or under-processing.” https://ohioline.osu.edu/factsheet/hyg-5592
I’ve also read that too much headspace can result in mold issues.
My best guess is there was some problem that caused the jar to mold, and then the mold changed the pH in the jar and caused it to lose gel. Either way, definitely throw it out, and try to troubleshoot what could have possibly been the cause of the mold.
Good luck!
I made this and it is delicious – and your tutorial really helped.
Question: With your peach and cherry pie fillings, you use juice or cooking liquid/juice to make the gel Is there a reason you don’t use apple juice or cider in place of the water here?
I took this recipe from The Ball Complete Book of Home Preserving. It does have 2 1/2 cups of apple juice in it already but you could certainly add more if you wish.
I made a batch of just the sauce and canned it since one of my family members has issues with texture. One of the jars didn’t seal so I let it cool overnight in the garage and put it in the fridge. Is it still okay to eat? It probably sat out for 10 hrs or so before going into the fridge.
If it were me, I would probably eat it.
I can a lot and this recipe is wonderful. The directions, especially blanching the apples, really helped the end product to be wonderful. I made three batches and every one turned out perfect. Thank you for sharing this great recipe.
I’m so glad you liked this recipe, Wendy!
WARNING: LONG, GEEKY POST AHEAD!
First, THANK YOU for using the Ball approved recipe! Cooking is an art; preserving is a science, and nobody wants a shiny jar of botulism for Christmas. Clearjel is weird and fun; i look forward to playing with it more!
Now, on to siphoning, which i’ve never had to deal with before. THANK YOU for the heads-up about headspace. I gave mine plenty, 1″ each for 2 qts and a pt (coulda maybe made a 3rd qt, but i didn’t want to screw around repacking). I babysat them like a basket of sticky new puppies. Offed the heat, forgot ’em for almost 20 mins (poor puppies), pulled the lid, still saw a bubble or 2 rising from the jars, left ’em submerged for another 5 mins; they sealed as soon as i lifted ’em. This morning when i removed the bands, no siphoning, but check out this physics: 1 qt had a wide mouth; it kept 1/4″ headspace. The pint had a reg mouth, but since it’s a pint, and half the overall volume of expanding goo, and the mouth is _relatively_ large, a nice 1/4″ of room there. 2nd qt had a reg mouth (hey, have you tried to find lids lately?! it’s what i had) and there’s ZERO space. Sealed, but it squeezed right to the top (and may have wept a drop or 2 into the canner, but i couldn’t tell). Less air-volume in a reg mouth is going to give you less food-expansion room. If you must use a reg mouth qt, maybe give an extra 1/4″ space (dicey prospect), or allow a bit more more cooling time in the bath, like maybe 15-20 mins instead of 5-10.
Final observation: no need to acidify the apples before blanching. My mix of wild apples browned even in acidulated water during prep, but the blanching chelated them right back to white. Thanks again!
Awesome, good to know about the regular mouth jars. I only have a handful of those, almost all Widemouth so I probably never would have known without the heads up!
This recipe is perfect! I made my first pie with it today. I wanted to try it out before canning more apple pie filling in case I didn’t like it. No worries on that front. It is a 2 YUMS up recipe! I used Gravenstein apples for my filling. Make sure you don’t overfill the jars. I know….I know….you warned us and I am an experienced canner so I should have known better, but for the first batch I had sticky filling leaking all over the place. That was my mistake. I made a second batch and it was perfect. I got 3 one litre jars from the recipe. A one litre jar is the perfect amount for one pie. This was my first time using cooked clear jel and it worked great!
That’s great! So glad you enjoyed the recipe.
Just made six quarts today! I followed your directions exactly and opted for the 10 minutes standing time. Perfect!!! I had a few bites leftover, and it was phenomenal! Thank you so much for sharing this recipe and instructions!
You’re very welcome. So glad you enjoyed the recipe.
As I was filling my jars I noticed my mixture cooled down quite a bit. It was still warm when I filled the last jar. Should I empty all my jars heat it back up and reprocess?
As long as you were able to get it all in the jars and get the bubbles out without it thickening up on you too much, you should be fine.
I didn’t use lemon juice! Can I freeze the filling?
For sure!
Can I use apple cider in place of apple juice? If so, would the amount be the same?
You can absolutely use the cider in place of the juice. I think the flavor would be great. You can just use the same amount.
How hot does the water bath canner need to be? Boiling the whole time? Med-high? Low?. Start warm put the cans in and let it heat up?. This recipe looks like the best one and is easy to read. Thanks
You want your canner to be boiling vigorously during the entire processing time. Your apple pie filling will be very hot when it goes into the jars so there is no need to let the water heat up after you add the jars. You can add the jars to the boiling water.
I followed your recipe and while the filling tastes great once baked into a pie, it’s not as firm as I expected. The filling ‘escapes’ from the crust. Have you ever had this issue?
What kind of apples did you use?
Could I use my pressure canner instead of water bath method?
I don’t believe there is a tested time for pressure canners and apple pie filling. If you want to use a pressure canner, you can always can the apples as slices and then make it into filling right before baking your pie.
I peel and core my apples and then vaccum seal them and freeze. Can I use these apples once they are thawed out.
You could try it and see how it works. It’s possible that it might affect the texture though.