Affiliate disclosure: This post may contain affiliate links. Please see our Privacy Policy.
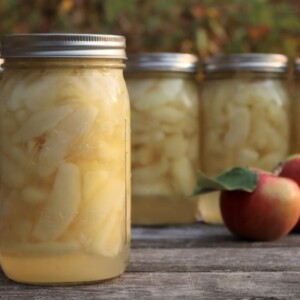
Canning apple slices at home is an easy way to enjoy the autumnal flavor of in-season apples throughout the entire year.
Autumn brings with it a surplus of apple cider, applesauce, apple donuts, and other apple-centric delights — and once you’ve tried canning apple slices you can enjoy the taste of in-season apples all year round.
Home-canned apple slices are incredibly versatile and can be used in just about any recipe calling for sliced apples. They can be strained and used in homemade apple cake, apple shortbread bars or as a simple topping for yogurt, oatmeal or ice cream.
They’re perfect for homemade apple pies all winter long, just strain the canning liquid into a saucepan, thicken it with a bit of flour or cornstarch and pour it over the apple slices in a pie shell. (If you’d like a ready to go filling, try this already thickened recipe for canning apple pie filling.)
Canning your own apples isn’t difficult, all it requires is some initial prep work (enlist a friend or family member for the peeling and slicing part) and some extra pantry space. I’m an efficient apple peeler and slicer, so I don’t mind prepping the fruit by myself, and the act itself has a meditative quality that I find very relaxing.
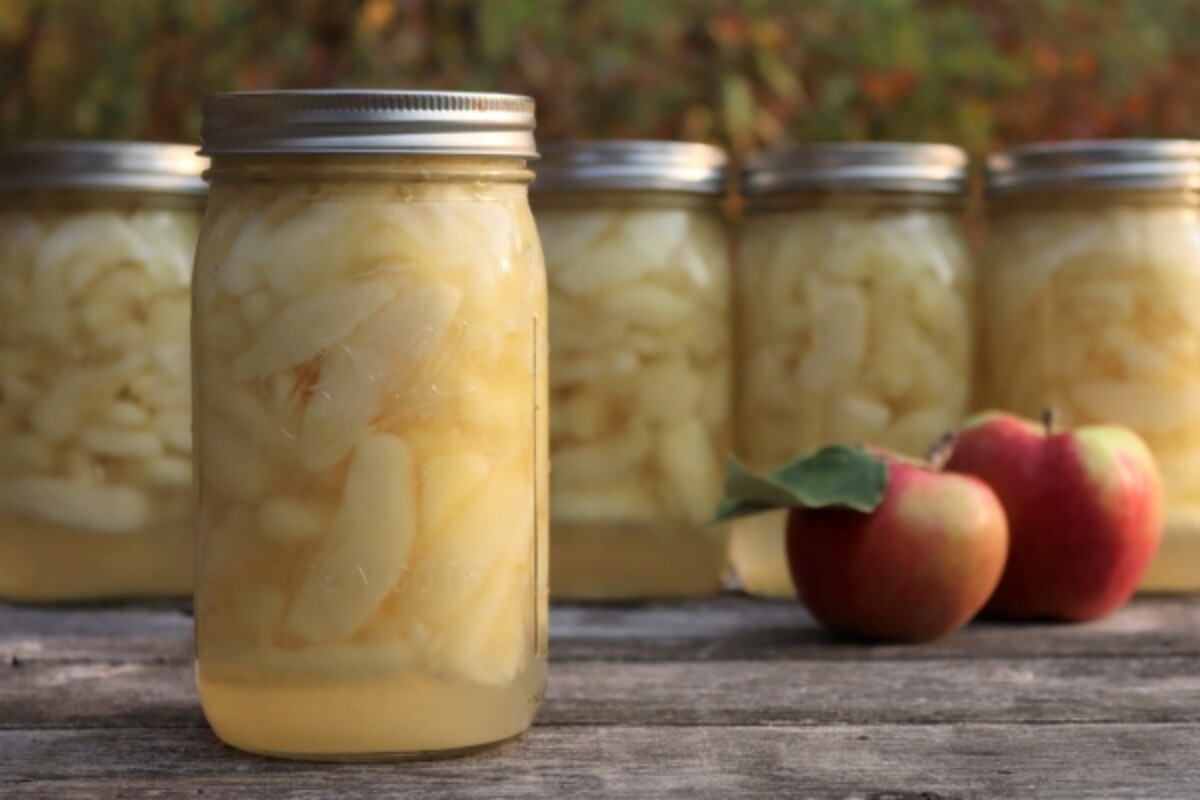
When I make this recipe I use pint or quart jars, and both sizes make a lovely hostess or housewarming gift. I also like to include a crafty mason jar recipe tag with instructions for how to make a simple dessert using canned apple slices.
Best Varieties of Apples for Canning
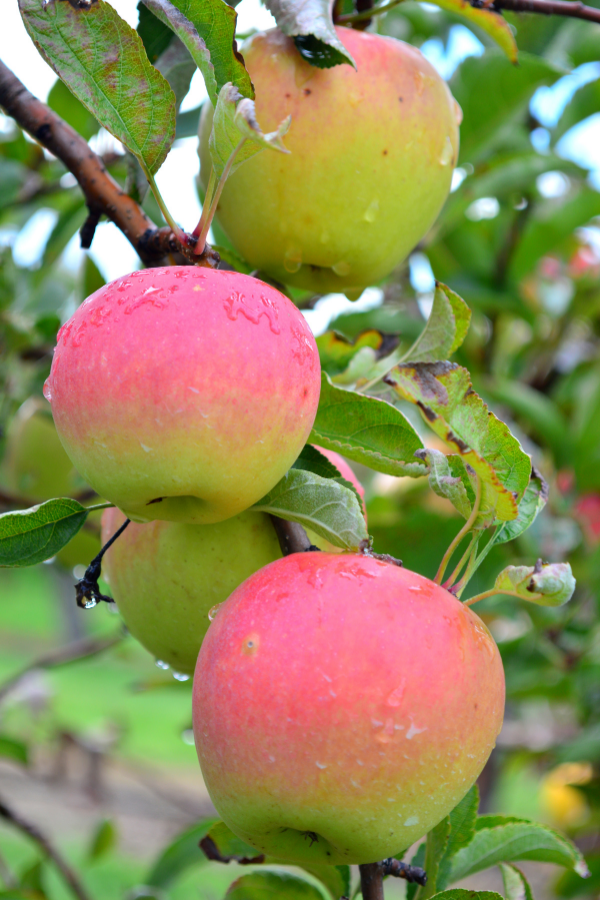
There’s no beating Honeycrisp apples when it comes to canning. Living up to their name, Honeycrisp apples boast a honey-like sweetness that is instantly reminiscent of sunny autumn days (and what more could you want during the dark winter months?).
In addition to having incredible flavor, Honeycrisp apples hold their shape remarkably well throughout the canning process (and long afterwards).
Other readily available apples to try include Granny Smith, Pink Lady, Braeburn, and Golden Russet. Essentially, any variety of apple that is considered a pie apple is ideal as it will hold its shape and maintain a firm texture during and after the canning process.
An exception to this guideline is Golden Delicious apples; while this type of apple will hold its shape well, it definitely lacks brightness of flavor (making for a rather bland and disappointing finished result).
Avoid using “sauce” varieties, since they’ll fall apart as soon as they’re cooked. You really need a firm apple to make this work.
Syrup for Canning Apples
Canned apples can be prepared using several different types of canning liquid. Fruit juices such as apple, pear, and grape as well as homemade canning syrups, are all good options to explore.
While it is possible to use plain water as a canning liquid, I find that it mutes the flavor of the apples considerably, undermining all your hard work and canning preparation.
Extra light syrup is my go-to liquid when I’m canning most kinds of fruit.
It’s sweet but not exceedingly so, and it matches the sweetness of the apples without covering up any of the fruit’s bright flavor profile. I typically use cane sugar but maple syrup and honey can also be substituted with excellent results.
How to make extra light syrup for canning apples:
For a 7-quart canner batch use 10 1/2 cups water and 1 1/4 cups sugar
For a 9-pint canner batch use 6 1/2 cups of water and 3/4 cup sugar
If you prefer a sweeter or heavier syrup for canning, check out this canning syrup table for further instructions.
How to Can Apples
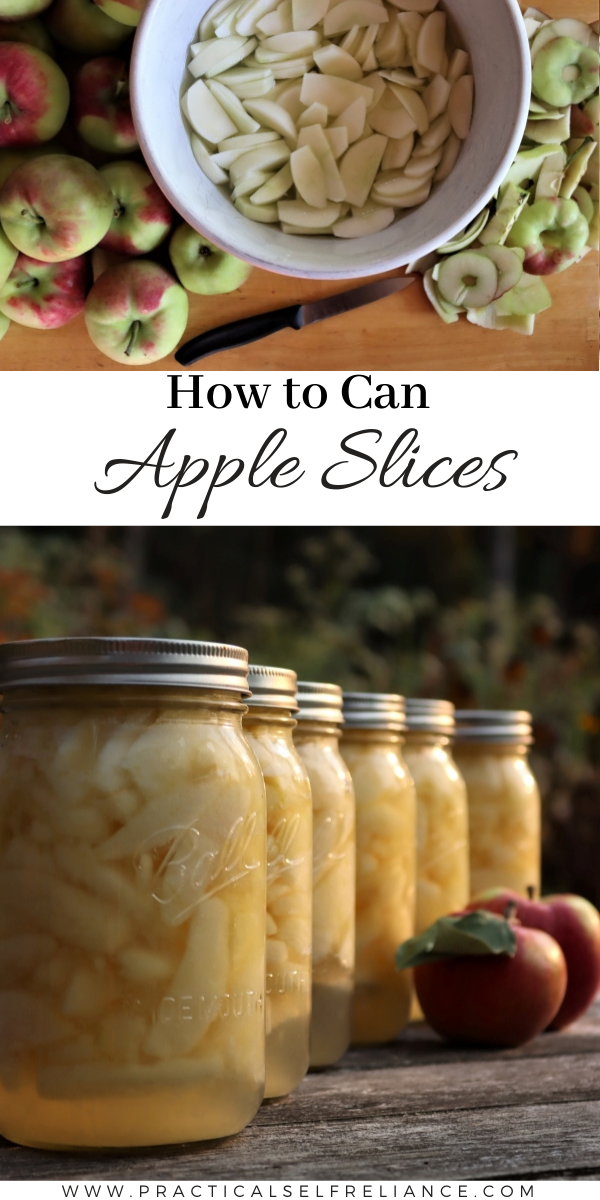
The first step when canning apples is to prepare the fruit.
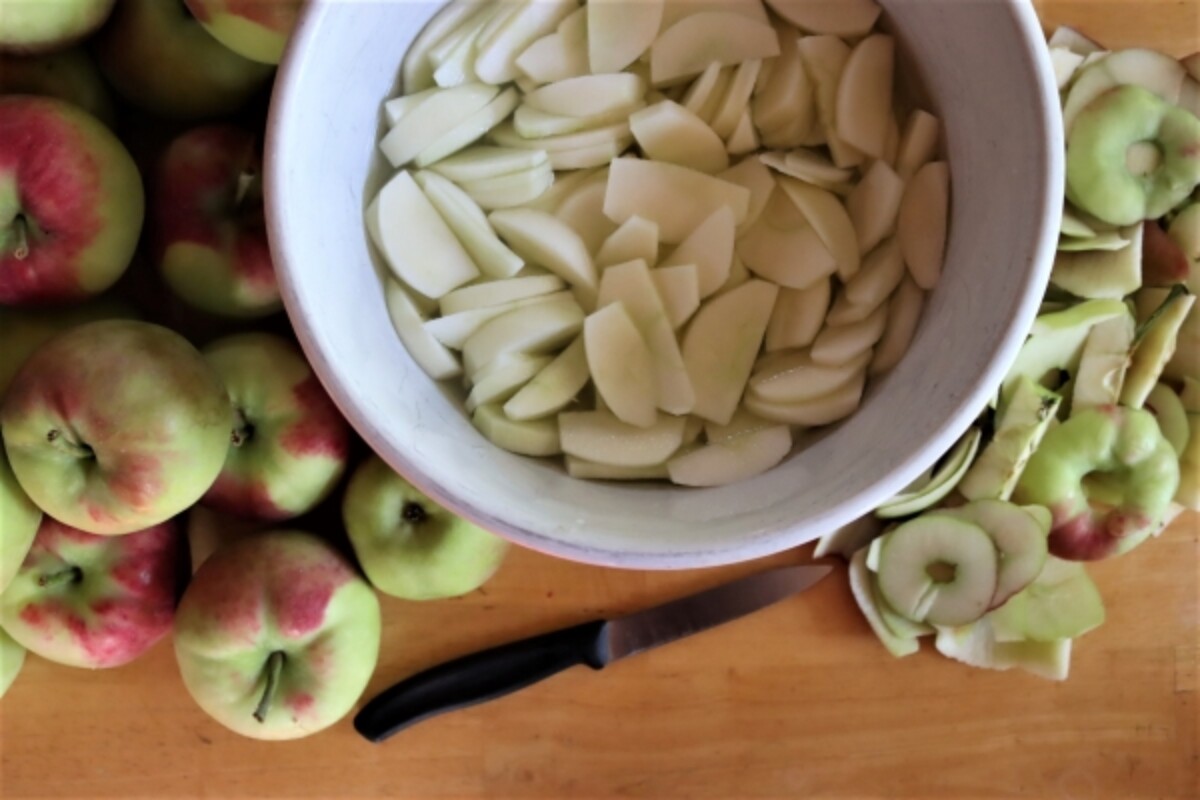
Remove the skin, using a sharp paring knife or a vegetable peeler, core the apple, and cut into uniform slices. Try to keep the slices relatively the same size, not only does this make the finished canned apples look more aesthetically appealing, it also helps to ensure the slices are evenly heated through once they’ve been added to the canning liquid.
While you can use those fancy spinning apple peeler/corer/slicer gizmos, the slices are so thin that the apples don’t hold up well to canning. You really need chunky apple slices, at least 1/2 inch thick, so that they keep their shape during cooking.
To prevent the apple slices from turning brown, toss them into a bath of acidulated water as you work. Simply add a generous splash of lemon juice to a bowl of cool water (about 1 tablespoon of lemon juice per cup of water) or stir 1/2 teaspoon of ascorbic acid into 1/2 gallon of water.
If you forget to add ascorbic acid or lemon juice, don’t panic! The finished canned apples won’t be as pretty as those prepared using acidulated water, but they’ll still taste wonderful (and are especially suited to baking projects where appearance isn’t as important — think quick breads, crisps, and compotes).
As you’re peeling and slicing the fruit, begin to heat a water bath canner.
At the same time, using a different pot, prepare the canning liquid.
Again, I prefer to use an extra light syrup for canning, but there are plenty of options to suit every taste. I’ve experimented with fruit juice and light to heavy syrups and each type of canning liquid has produced good results. I find that the extra light syrup is sweet without being overly so and that it doesn’t mask the natural sweetness of the apples.
If you’re making extra light syrup, combine 10 1/2 cups water and 1 1/4 cups sugar in a pot and bring to a boil. This amount of canning syrup is ideal for a 7-quart canner batch from approximately 19 pounds of apples.
Once the syrup has come to a boil, strain the apple slices from the lemon juice/ascorbic acid water and add them directly to the boiling canning liquid. Cook the apple slices for 5 minutes in the hot liquid, stirring occasionally to prevent browning.
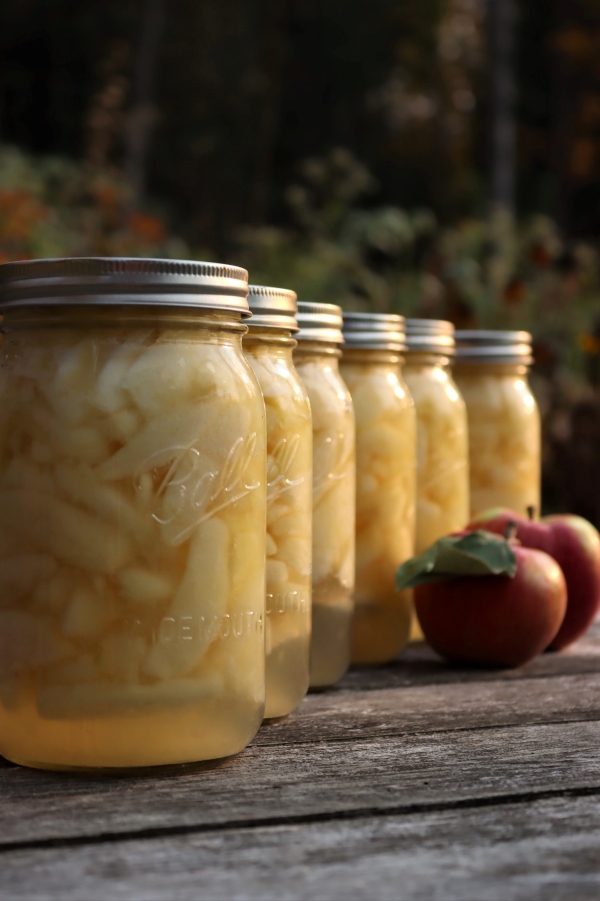
Pack the apple slices into canning jars, making sure to leave 1/2 inch headspace. This important step creates a vacuum seal that prevents any remaining air in the jar and/or from the apple slices from getting trapped and bubbling over as it expands.
Carefully seal each jar using 2 part canning lids and process in a water bath canner. The standard process times for both pints and quarts below 1,000 feet in elevation is 20 minutes. Please see notes below for canning times at higher elevations.
Ways to Use Home Canned Apple Slices
Once the canning process is complete, it’s time to enjoy the fruits of your labor!
Top yogurt, muesli, or oats with canned apple slices, adding an optional sprinkle of golden raisins and pinch of cinnamon for a comforting breakfast on cold mornings.
Canned apples work particularly well in dessert recipes, especially in apple crumbles and crisps, quick breads, bars, and yeasted coffee cakes. Unless otherwise specified, I recommend draining the canned apple slices before using them in a baking recipe as they absorb (and release) a surprising amount of canning liquid.
My all-time favorite way to use home-canned apple slices is in a simple compote (such as this recipe for apple compote from the New York Times). Apple compote, which is essentially a less refined but equally-as-tasty take on fresh applesauce, is delicious when served warm on top of pancakes, folded into crepes, or piled onto homemade waffles.
In my opinion, however, there’s no better use for apple compote than spooning it over a generous scoop of creamy vanilla ice cream.
Canning Apple Slices
Ingredients
- 19 pounds apples, roughly 40 to 55 apples, depending on size
- Canning syrup, juice, or water *see note
- Lemon Juice, Optional, to prevent browning
Instructions
- 1. Prepare a water bath canner.
- 2. Prepare apples for canning by peeling the fruit and then cutting it into uniform slices (approximately 1/2 inch thick).
- 3. As you work, place the peeled and sliced apple pieces into a bowl of cool water with a generous splash of lemon juice to prevent browning (or dissolve 1/2 teaspoon absorbic acid into 8 cups of cool water).
- 4. Bring a pot of your preferred canning liquid to a boil (see note below on canning liquids).
- 5. Remove apple slices from water and drain off any excess liquid.
- 6. Carefully add the apple slices to the boiling canning liquid and cook for 5 minutes, stirring occasionally, until the apples are heated through. Be sure to stir gently, so that the apple slices don’t fall apart.
- 7. Pack the apples into canning jars, being mindful to leave 1/2 inch headspace. Ladle canning liquid over the top of the apple slices while maintaining a 1/2 inch headspace.
- 8. De-bubble canning jars and make any final headspace adjustments before capping the jars with 2 part canning lids.
- 9. Process the jars in a water bath canner for 20 minutes for both pints and quarts. (Recipe is written for a 7-quart canner batch below 1000 feet in elevation, see notes for other batch sizes and elevations).
- 10. Once the canning time is complete, remove the jars and cool on a towel on the counter. After 24 hours, check seals and store any unsealed jars in the refrigerator for immediate use.
- Sealed jars of properly canned apple slices will maintain peak quality in the pantry for 12 to 18 months.
Notes
Nutrition
Nutrition information is automatically calculated, so should only be used as an approximation.
Ways to Preserve Apples
Looking for more ways to preserve apples this season?
- Canning Apple Cider
- Apple Cider Syrup
- Apple Butter
- Canning Applesauce
- Apple Wine
- Hard Cider
- Apple Jam
- Canning Apple Pie Filling
- Homemade Apple Cider Vinegar
Fall Canning Recipes
Canning more than apples this fall?


Thank you for this recipie! I’ve saved it for so long and it came in handy after apple picking this year. I loved the super light syrup too. Thanks again!
Lovely!