Affiliate disclosure: This post may contain affiliate links. Please see our Privacy Policy.
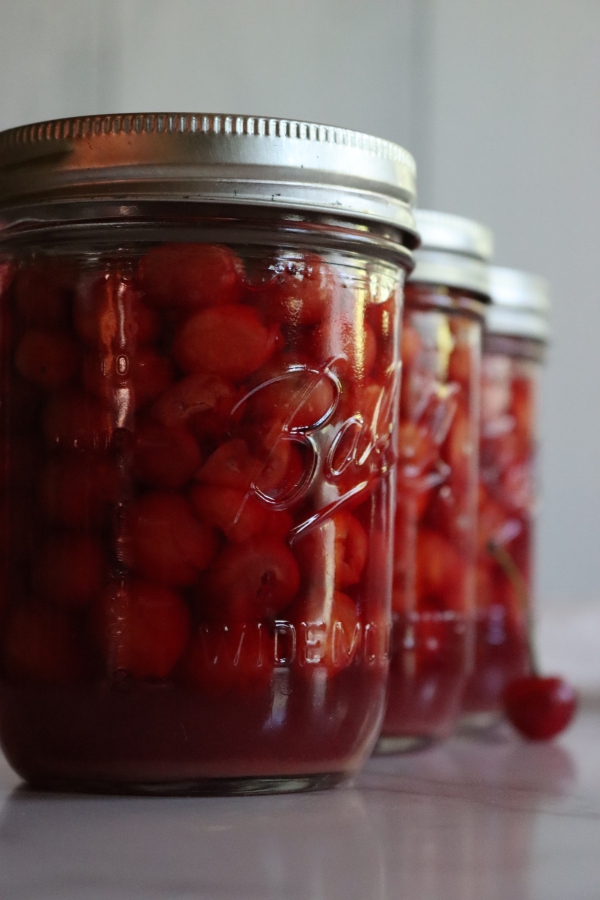
Canning cherries is an easy way to preserve cherries for year-round enjoyment. They hold up beautifully, maintaining their shape, color, and most importantly, flavor!
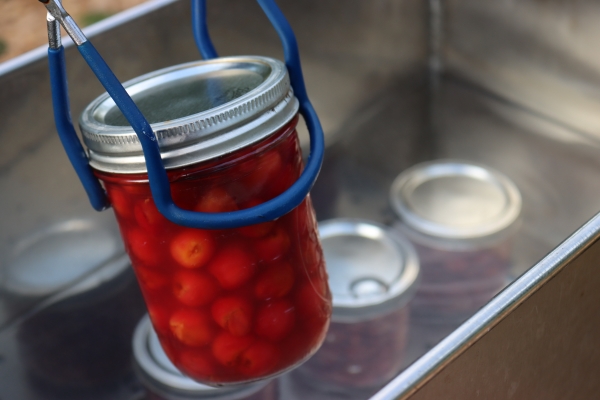
Table of Contents
- Selecting Cherries for Canning
- Syrup for Canning Cherries
- Preparing Cherries for Canning
- How to Can Cherries
- Raw Pack
- Hot Pack
- Headspace for Canning Cherries
- Water Bath Canning Cherries
- Pressure Canning Cherries
- Home Canned Cherry Variations
- Using Canned Cherries
- Canning Cherries Recipe
- Processing times for water bath canner (hot pack, pints):
- Processing times for water bath canner (hot pack, quarts):
- Processing times for water bath canner (raw pack, pints or quarts):
- Processing times for dial-gauge pressure canner (hot pack, pints)
- Processing times for dial-gauge pressure canner (hot pack quarts and raw pack, pints, and quarts):
- Processing times for weighted-gauge pressure canner (hot pack, pints):
- Processing times for weighted-gauge pressure canner (hot pack quarts and raw pack pints and quarts):
- Fruit Canning Recipes
- Summer Canning Recipes
Every summer my whole family gorges on fresh cherries for as long as they’ll last. We have quite a few tart cherry trees that bare buckets of fresh fruit each season, and as a special treat, my parents out west sometimes pack up a crate of sweet cherries and ship them as a present for the kids.
Cherry season is just so short, and without fail my daughter still wants more long after the last cherry is picked. This year, she even asked for cherries for Christmas, thinking that somehow the magic of the holiday season would somehow conjure up fresh fruit. While fresh cherries in a Vermont December aren’t going to happen, I did actually put a jar of home-canned cherries in her stocking. You should have seen her face light up, and she served herself a bowl of yogurt and plopped a dozen of those little beauties on top before coming back to the rest of the presents.
Beyond plain canned cherries, I put up canned cherry pie filling and one of my favorites, sour cherry jam every single year. They’re delicious, but those are single-purpose preserves. Canning cherries in light syrup or cherry juice means that you can use them for almost anything, from fresh cherry muffins to festive drinks. Or, you know, you can just eat them right out of the jar with a fork…
Selecting Cherries for Canning
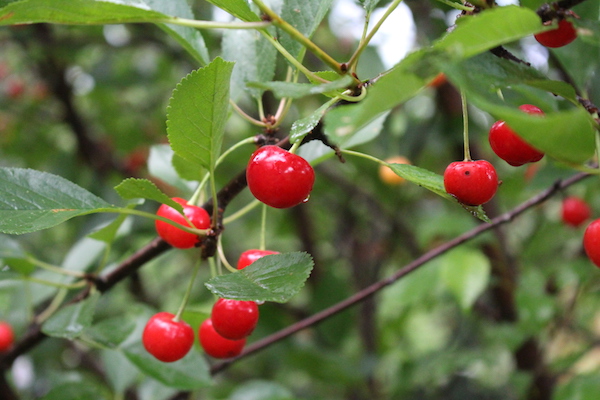
The cherries you use for canning can be of the sweet or sour variety, the choice depends entirely on what’s available to you locally and your own tastes. Both types are delicious, but I think there’s something special to be said about the tart-sweet flavor of sour cherries. In fact, I often find myself returning to tart cherries when canning season rolls around. The layers of tart and sweet come together beautifully when the cherries are preserved, making them a beautiful and brightly flavorful addition to both sweet and sour dishes.
Here in Vermont, the growing season for cherries is fairly brief, taking place in June and July, and that’s incentive enough for me to take advantage of the short window we’re given. Whether you’re picking your own cherries or buying them by the box load at the farmers market, be on the lookout for fruit that’s firm, ripe, and (most importantly) tastes good to you.
Syrup for Canning Cherries
Cherries are quite acidic, with sour cherries being even more so, and they pair well with all kinds of canning liquids. When I make a syrup for cherries, sweet or sour, I’m more likely to choose an extra-light syrup. For sweet cherries, extra light syrup maintains their natural sweetness, and for tart cherries, it adds just a bit of sweetness to their bright tart flavor.
I really love maintaining a little bit of sour in home-canned tart cherries, and they work perfectly in summer cocktails. My kids though, won’t touch them unless I add a bit more syrup to bring the sweetness up a touch. They like them in light syrup, which has twice as much sugar as extra light syrup, but is still pretty minimal as far as canned fruit goes.
Sour cherries can also be canned in heavier syrups if you don’t mind the added sugar and the inevitably sweeter finished product.
It really just depends on how you’ll use the fruit later on. Tart cherries work wonderfully in baking projects, and tart cherry muffins are lovely with minimally sweetened fruit, and the cherries provide a burst of tart flavor in an otherwise sweet muffin. If you’re planning on eating them right out of the jar, or on oatmeal, cereal, or yogurt without any extra sweetness you might want to increase the sugar a bit, depending on your tastes.
If you’re watching your sugar intake, or prefer not to add any sugar, water is a totally acceptable canning liquid. I will say that I find that water can wash out the finished flavor of the cherries, so if you can make an extra light syrup doable I would highly recommend it.
Extra light syrup matches the natural sweetness of most fruit, meaning that it won’t add sweetness, but it’ll just keep the sugars in the fruit from leaching into the canning liquid.
- Extra-light syrup: 3/4 cups sugar to 6 1/2 cups water
- Light syrup: 1 1/2 cups sugar to 5 3/4 cups water
- Medium syrup: 2 1/4 cups sugar to 5 1/4 cups water
- Heavy syrup: 3 1/4 cups sugar to 5 cups water
These measurements are for a canner load of 9 pints, but if you’re canning with quart jars you can check out this table for the correct amounts.
Another option is to make cherry syrup from scratch, which is a fairly simple process that I’ve explained in detail in my post about canning blackberries. I that article, I walk you through how to make a fruit syrup without any extra equipment.
To make cherry syrup, you’ll need cherry juice, and I’ve had lots of success using my steam juicer for this exact purpose. The cherries need about 90 minutes of slow steaming before the juices completely release, but in this case, slow and steady yields the most juice while demanding very little in terms of hands-on work.
One of my favorite ways to can cherries is with tart cherry juice which has had a small amount of sugar added; the brightness of the cherry flavor is, if anything, amplified. A year or more after being preserved, these cherries will continue to taste like they’ve been freshly picked from the tree.
Unsure of how to choose a canning liquid? Remember you can always make a small test batch before committing to a large-batch recipe.
Preparing Cherries for Canning
If you don’t have a cherry pitter I would highly, highly suggest getting one for the task. They’re inexpensive, will save you time, and don’t take any room in the kitchen gadget drawer. If for some reason you can’t get a cherry pitter, a stainless steel metal straw or chopstick can be used fairly effectively to remove the pits (position over the pit at the stem and then push through to remove the pit).
Sour cherries are infamous for turning brown when exposed to air, usually at the part where the stem has been removed. Toss the cherries into a big bowl of water as you work, preferably with lemon juice or ascorbic acid added. Don’t worry if there’s any browning or discoloration, the fruit might be dark in parts but it’ll still taste as good as an unmarked cherry.
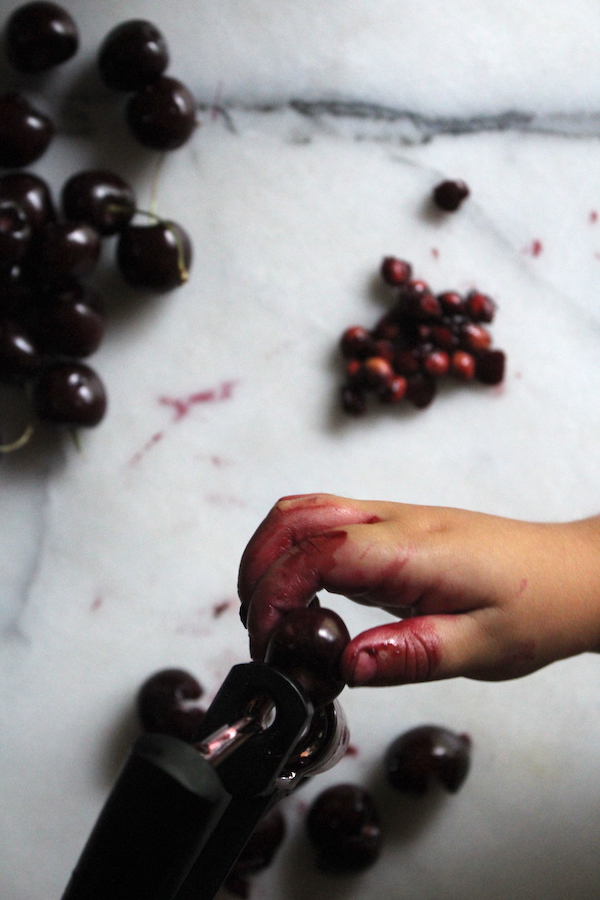
Whatever tool you end up using, this is a task that’s best tackled with the help of one or two other people. If you’re working alone, there’s never a better time to multitask while binge-watching your favorite show. Tart or sweet cherries, I just put my preschoolers on the task. A simple pitter from OXO is easy to use, and they take turns (there’s actual fighting that occurs over who gets to pit them this time).
How to Can Cherries
To make a canner load of 9 pints, you’ll need about 11 pounds of whole cherries; to make 7 quarts you’ll need about 17 1/2 pounds of whole cherries.
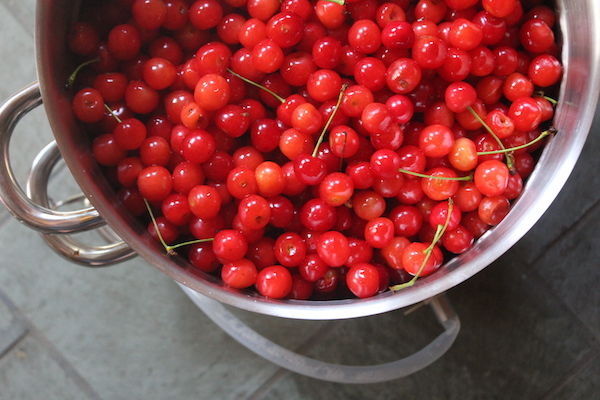
Remove stems from the cherries and give them a good wash, keeping an eye out for and discarding any too-ripe or mushy fruit. Now for the fun part: pitting all the cherries! If you’re feeling particularly ambitious, you can actually use the cherry pits to make a vibrant cherry syrup for cocktails and sparkling water using a technique that takes advantage of the leftover cherry flesh still clinging to the pits.
Cherry pitting is a messy business and if you have an outdoor space to use, I say go for it. I actually have my entire canning station set up outside, thanks to the three-burner camping stove and a (missing from the picture) side table with a smaller range for when I’m hot packing the cherries.
With sour cherries, it’s important to have them sitting in liquid to prevent them from browning after they’ve been pitted. The most effective way to stop discoloration is to add ascorbic acid (either in powder or tablet form) to cold water. To figure out how much ascorbic acid you’ll need to add to the water, either check this site for measurements or follow the manufacturer’s directions on the packaging. You can also use lemon juice, in a pinch (at about 1 cup of juice to 1 gallon of water).
There’s always the temptation to skip the cherry pitting, although from my point of view omitting this step does very little in terms of saving time. Because here’s the thing, unpitted cherries need to be carefully pierced on each side with a needle to stop them from splitting from the heat. It takes a split second longer to pit a cherry than it does to poke each individual fruit in two places, and I’d be willing to bet that for most people there isn’t a time difference at all.
There are also the teeth to consider, crunching down on a cherry pit, unassuming or otherwise, is painful at best and a dental disaster at worst.
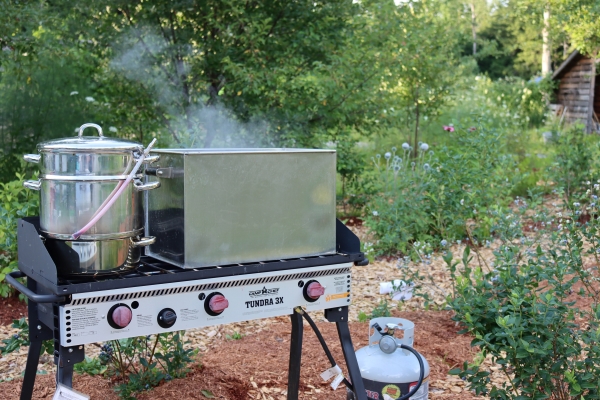
Since cherry season comes right along with peak summer heat, I tend to can cherries in my outdoor canning kitchen. I set up in my blueberry patch, about 15 feet from our tart cherry orchard, and enjoy the sunshine while canning. Working outdoors means I don’t miss the best parts of summer, and I also don’t heat up the house with all that steam.
For this job, I’ve set up my steam juicer outdoors on a three-burner camp chef stove, alongside my high-capacity Amish canner. The steam juicer is only necessary if you’re canning cherries in homemade cherry juice, and you can skip it if you’re using water or syrup. On another table, I have a small Coleman stove setup to hot pack the cherries in syrup.
Raw Pack
The main benefit of a raw pack is that it cuts down on time. Because the cherries are added to the jar uncooked there’s no need to mess around with hot fruit and liquid as you’re canning. There are two main drawbacks to using the raw pack method, the first being that the fruit tends to shrink, which causes it to float in the jar. The second reason you might not want to raw pack fruit is that the natural sugars in the cherries will start to brown when exposed to heat during the canning process. This discoloration tends to happen 2 to 3 months after canning, but it doesn’t have an effect on the taste of the canned cherries.
Begin raw packing the cherries by adding 1/2 cup of hot canning liquid (syrup or juice) to each jar. Distribute the pitted and drained cherries among the jars, gently shaking the jars so that the cherries settle evenly. Fill each jar with hot canning liquid, leaving 1/2-inch headspace between the top of the liquid and the underside of the jar. Adjust lids to fingertight and wipe down the sides of the jar with a clean cloth. Load into canner and process according to the times specified below.
Hot Pack
Through experimentation, I’ve found that the hot pack method is the best way to can cherries. Hot packing is slightly more involved (but not by much) and involves briefly cooking the cherries in their canning liquid before adding them to the jars. There are also practical advantages to hot packing cherries, it removes air in the fruit which then allows you to increase the number of cherries you can pack into a single jar.
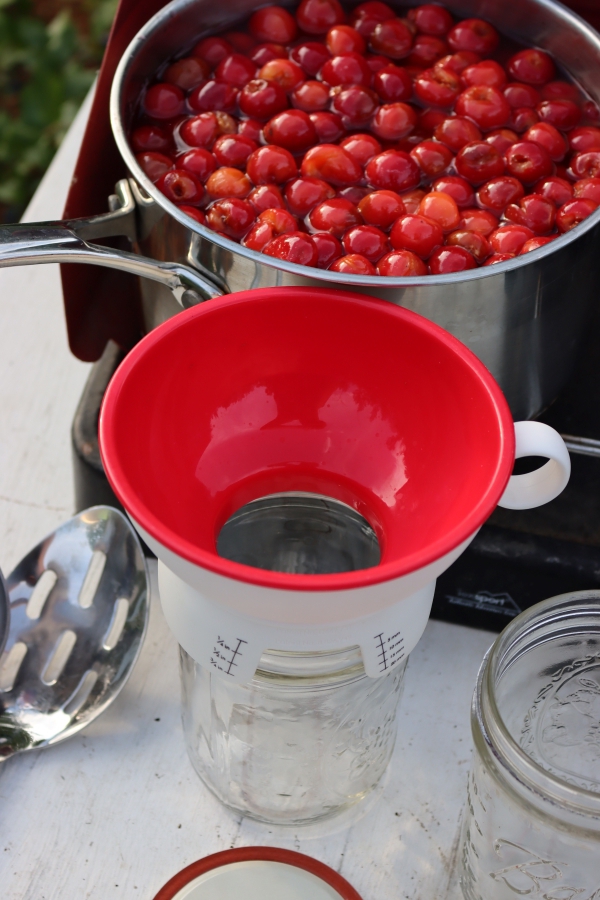
For every quart of pitted and drained cherries, you’ll need to bring 1/2 cup of your chosen canning liquid to a boil in a large saucepan along with the pitted cherries. As soon as the liquid boils, pour the cherries and canning liquid into the jars, leaving 1/2-inch of headspace. Apply lids and adjust until fingertight, wiping down the sides of the jar before loading the jars into the canner and processing.
Headspace for Canning Cherries
For cherries, and most other canned whole fruits, the propper headspace is 1/2 inch. Both the cherries and their canning liquid should stop 1/2 inch below the top of the glass jar edge. To ensure that the cherries stay submerged, some sources suggest you can go with 3/4 inch headspace when packing the fruit and then fill the liquid to 1/2 inch. I find that unnecessary since even hot-packed fruit will shrink a tiny bit during canning and they’ll stay below the liquid line in the jar.
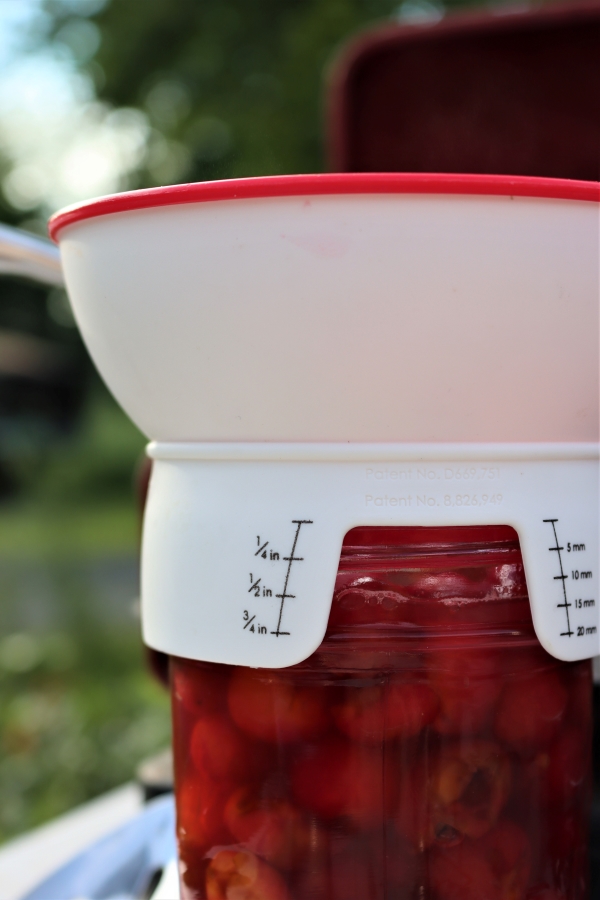
When it comes to measuring headspace, I love my two-in-one canning funnel. It’s super-durable (I’ve had it for ages), reduces the chances of an accidental mess, and takes out any guesswork in terms of accurate measuring. As for a nonmetallic utensil to get rid of air bubbles, a chopstick, plastic knife, or ruler all work perfectly well (no need to buy any fancy equipment!).
Water Bath Canning Cherries
If you’re new to canning, take a minute to read up on the process before you begin. My beginner’s guide to water bath canning contains all the information you need for home-canning success and is chock-full of tips to ensure your preserves are safe to eat while being full of fantastic cherry flavor.
I find it helpful to go through a mental checklist before I load the jars into the canner. Make sure the measurement for headspace is correct, check that the lids are sealed to fingertight, wipe down the jars with a clean cloth — once these tasks have been completed you’re ready to start the canning process.
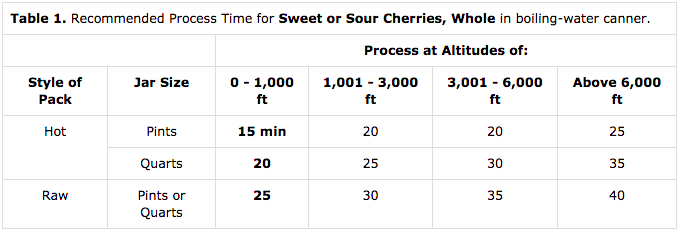
As you can see in the table below, unless you’re canning at an extremely high altitude (at which point the canning time will need to be increased) the processing times for cherries are actually pretty short. For hot pack, pints are processed for 15 minutes and quarts for 20 if you’re below 1,000 feet in elevation. For altitude adjustments and raw pack cherry canning times, refer to the table below:
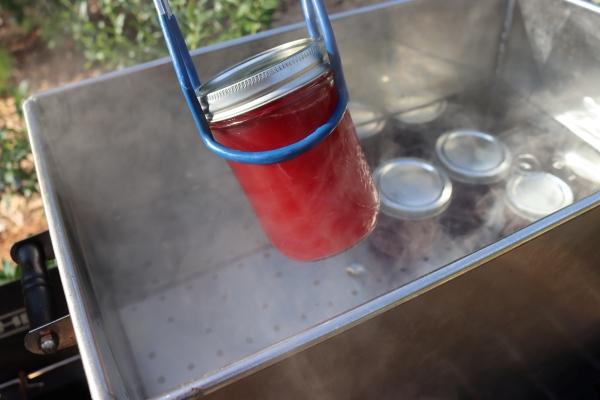
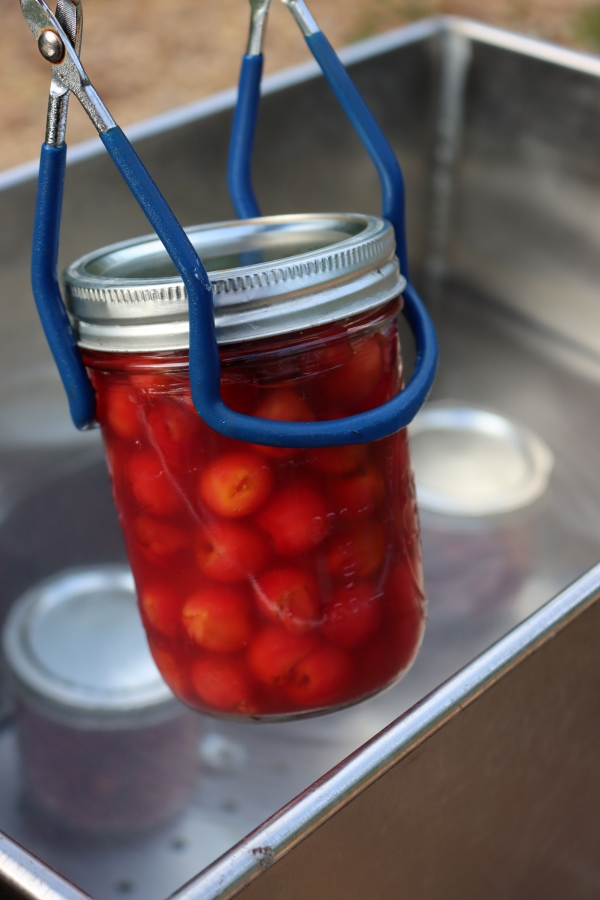
When the cherries have finished processing, remove the canner lid and give the jars another 5 minutes in the still-hot liquid to acclimatize to a cooler temperature (and helps prevent siphoning, or liquid loss when the jars are removed from the canner). Remove the jars with a jar lifter, and arrange them on a drying rack or on a clean towel; be careful not to tilt the jars or move them around too much. Allow for at least one inch of space around each jar so that air can circulate easily.
Let the canned cherries sit out for about 24 hours, or until the contents of the jars reach room temperature. Check each lid for a proper seal and remove the ring (the lids should curve slightly downwards and won’t move when you press down on them). For any jars that didn’t seal properly, move them to the refrigerator and enjoy the cherries within a couple of days.
Label the remaining jars with the contents and the date they were processed. Store canned cherries in cool, dry place away from fluctuating temperatures for up to 18 months.
Pressure Canning Cherries
If you’re working with a dial-gauge or weighted-gauge pressure canner the processing times are going to be noticeably shorter. Pressure canners work quickly, but they’re more complicated to use than a water bath canner. I’ve created a guide to using both types of pressure canners, it’s worth giving a read-through even if you’re already fairly familiar with the ins-and-outs of pressure canning.
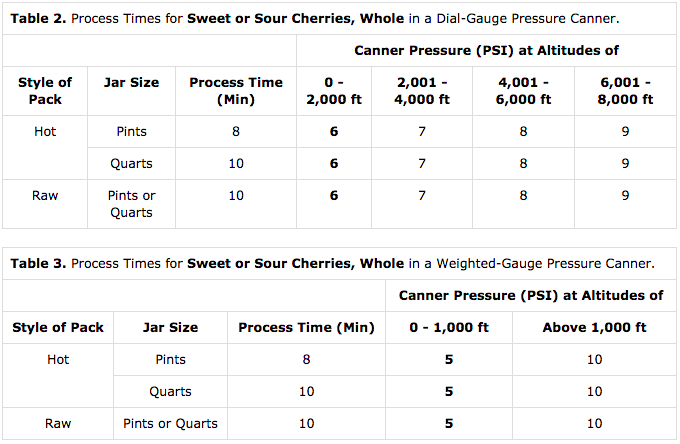
Before loading the pressure canner, go through the little checklist I’ve outlined above. Once all the jars have been checked, load them into the pressure canner and cap up the lid. The charts below show processing times for both a dial-gauge pressure canner and a weighted-gauge pressure canner.
Allow the canner to vent steam for 10 minutes before bringing it up to pressure. Don’t start the timer until the pressure canner is up to pressure, and be sure to maintain the proper pressure for the whole canning time as shown in the table below:
When the timer goes off, turn off the heat and let the pressure canner come back to room temperature and 0 PSI before removing the processed jars to check whether lids are sealed and to be labeled for storage.
Home Canned Cherry Variations
There are many variations on the classic canned cherry recipe, so don’t feel limited by the syrups and juice suggestions I’ve outlined in this post.
I love making boozy cherries with brandy, using the same method I’ve written about in my post about canning blackberries. After the intense heat during processing, the cherries aren’t particularly alcoholic, especially if you used them in baking projects where they’ll be exposed to even more heat. You can also use a mixture of honey and water as a canning liquid, which gives you perfectly sweetened cherries with just a hint of honey flavor.
Canned cherries are also particularly conducive to warm spices such as cinnamon, allspice, and cloves (and make an incredible Manhattan, if you’re so inclined).
Using Canned Cherries
Canned cherries, sweet or tart, are heavenly when piled onto full-fat yogurt or vanilla ice cream. These cherries are also a dessert lover’s dream when made into tart cherry crisp, cherry oatmeal bars, and of course, the quintessential cherry pie.
Though if you’re only planning to make cherry pies, save yourself a bit of effort at baking time by canning cherry pie filling instead of plain cherries. It’s already thickened, sweetened, and seasoned for the perfect cherry pie. Sour cherry jam is also a great option if you’re only planning on making cherry bars, and it’s one of my favorite ways to top my toast, so you’ve got plenty of options for canning cherries!
If you’re lucky enough to have leftover cherry juice, it’s nothing short of heavenly when stirred into tart/sweet cocktails or used for spiking big glasses of ice-cold lemonade on hot days.
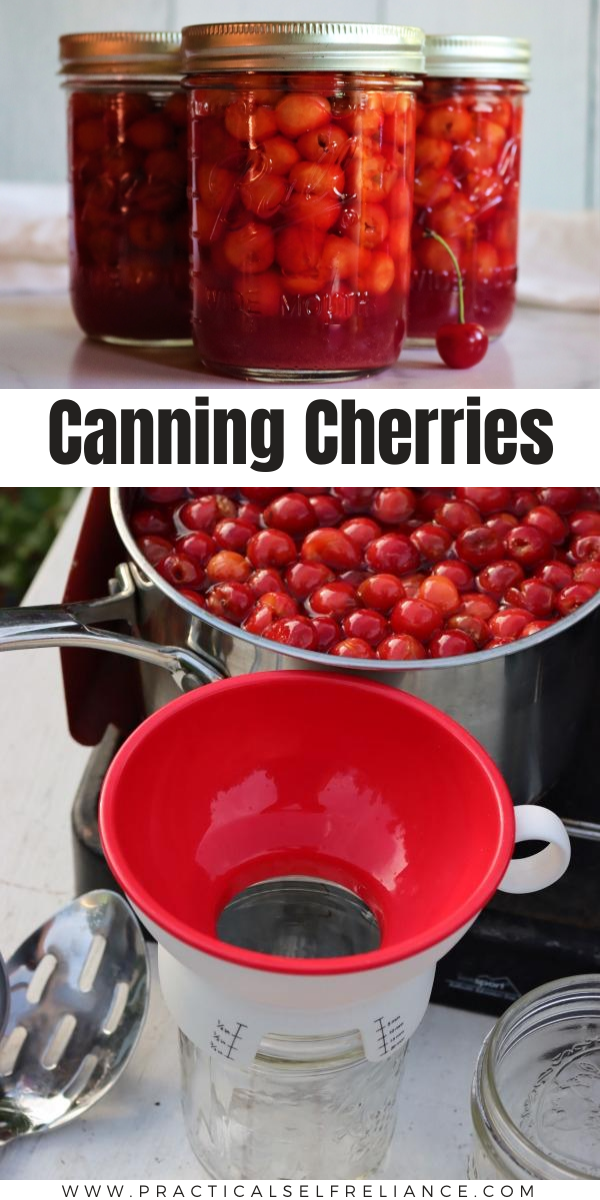
Canning Cherries
Ingredients
- 11 lbs. sweet or sour cherries, weighed whole before pitting
- Canning syrup or juice*
Instructions
- Prepare a water bath canner, pint jars, and two-piece lids.
- Prepare the cherries by washing and then removing the stems. Pit the cherries using a pitter, metal straw, or chopstick.
- If using sour cherries, place the pitted cherries into a bowl of cool water with a generous splash of lemon juice to prevent browning (or dissolve 1 teaspoon ascorbic acid into 1 gallon of cool water).
- For a hot pack: Combine pitted cherries and syrup, bring to a boil. As soon as the syrup and cherries mixture is boiling, fill the prepared jars leaving 1/2-inch headspace between the liquid and the lid. Wipe the outside of the jars clean. Apply and adjust the lids until fingertight. Load into a water bath canner and process for 15 minutes. For raw pack instructions, canning times at higher altitudes, or if you're using a pressure canner, see the notes below.
- Allow the processed jars to sit in the hot water bath canner for 5 minutes before removing with a jar lifter. If using a pressure canner, turn off the heat and let the water come to room temperature (and the pressure to 0) before removing the jars
- Set the jars on a clean towel or drying rack, making sure there’s at least one inch of space around each jar. Let the jars sit for 24 hours before checking the seal on each lid (refrigerate any jar without a proper seal), label, and store in a cool, dark, dry place for up to 18 months.
Notes
-
- For a 9-pint canner batch, mix 6 1/2 cups water and 3/4 cups sugar.
- For a 7-quart canner batch, mix 10 1/2 cups water and 1 1/4 cup sugar.
Processing times for water bath canner (hot pack, pints):
- 0–1,000 feet – 15 minutes; 1,001–6,000 feet – 20 minutes; above 6,000 – 25 minutes
Processing times for water bath canner (hot pack, quarts):
- 0–1,000 feet – 20 minutes; 1,001–3,000 feet – 25 minutes; 3,001–6,000 feet – 30 minutes; above 6,000 – 35 minutes
Processing times for water bath canner (raw pack, pints or quarts):
- 0–1,000 feet – 25 minutes; 1,001–3,000 feet – 30 minutes; 3,001–6,000 feet – 35 minutes; above 6,000 – 40 minutes
Processing times for dial-gauge pressure canner (hot pack, pints)
- Processing time is 8 minutes; 0–2,000 feet – 6 PSI, 2,001–4,000 feet – 7 PSI; 4,001–6,000 feet – 8 PSI; 6,001–8,000 feet – 9 PSI
Processing times for dial-gauge pressure canner (hot pack quarts and raw pack, pints, and quarts):
- Processing time is 10 minutes; 0–2,000 feet – 6 PSI, 2,001–4,000 feet – 7 PSI; 4,001–6,000 feet – 8 PSI; 6,001–8,000 feet – 9 PSI
Processing times for weighted-gauge pressure canner (hot pack, pints):
- Processing time is 8 minutes; 0–1,000 feet – 5 PSI; above 1,000 feet – 10 PSI
Processing times for weighted-gauge pressure canner (hot pack quarts and raw pack pints and quarts):
- Processing time is 10 minutes; 0–1,000 feet – 5 PSI; above 1,000 feet – 10 PSI
Fruit Canning Recipes
Looking for more recipes to preserve the summer’s fruits and berries?
Summer Canning Recipes
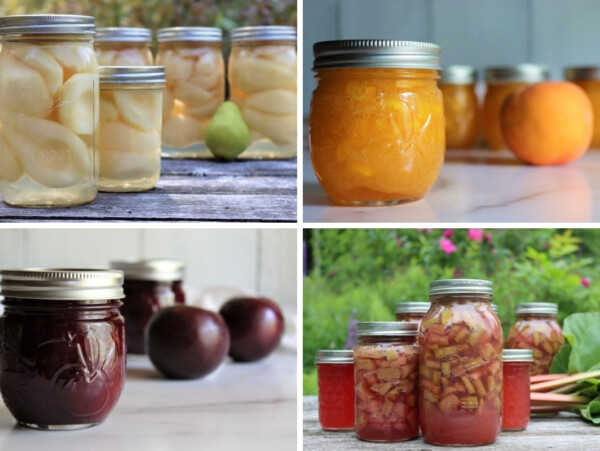
Need a few more reasons to keep the canner hot this summer? I have literally hundreds of canning recipes, but here are a few to get you started:
Hello,
I followed this recipe here which was very clear and easy to understand. I used the hot pack method with extra light syrup.
I used pint jars and filled to 1/2″ but not it seems that the liquid has receded below the top of some of the cherries. The fruit isn’t floating its just higher than the syrup.
Are these no good now? Am I able to add more syrup and reprocess?
The cherries should be fine. It sounds like you may have experienced a little siphoning. The fruit above the liquid may discolor a bit but should still be safe to eat.
So not ideal, but I live in a part of the world where I can’t get fresh cherries—I can however buy a giant bulk container of commercial maraschino cherries…I’m wondering if I could reportion these cherries to smaller jars and water bath can them? I’m really trying to avoid having a giant jar in my fridge 😅
No, I would not recommend doing that. You might be able to freeze then although I have never tried it. What is it that you’re wanting to use the cherries for?
Hello, my son an I canned cherries last night and did not use a water bath. We noticed that some of the cherries have changed colour and some have gone brown. Is it to late to put them in a water bath now?
We used brandy in the syrup, wondering if they will be safe to eat a few months down the road.
Would appreciate your thoughts.
Kathleen
What was the recipe that you used for the syrup?
I found your article very informative. I decided to try sweetened sour cherry juice as a liquid for my Hot Pack Sour Cherries. I haven’t seen much reference to that. I was thinking I could make a simple syrup with juice and sugar. When I let my jars sit overnight I noticed a cloudiness on the bottom, maybe sugar, maybe fruit residue from juice. I used a wire mesh strainer. I followed your direction for blackberry juice to extract cherry juice. So I came to the conclusion I can’t make syrup from fruit juice and sugar. Is that right? Are my cherries safe to eat? should I process them in a different way to make them shelf stable? You mentioned packing sour cherries with just a little sugar. Do you just pack the light syrup and cherries? I’m new to canning, thanks for helping me out. Last year I loved your articles on apples. I made apple pie filling, apple butter and apple slices.
As long as you followed the procedures in this post for canning your cherries, the cherries should be safe to eat. Cloudiness can sometimes be caused by minerals in the water. You can use syrup made with just water and sugar or juice and sugar.