Affiliate disclosure: This post may contain affiliate links. Please see our Privacy Policy.
Colby cheese is a type of cheddar with a mild flavor and short aging time, and most recipes use cheese wax to maintain moisture while the cheese is aging. That means you don’t need a humidity-controlled cheese cave for aging the cheese, which makes it a good choice for beginners with minimal cheesemaking equipment.
Cheesemaking is incredibly rewarding, and really it’s not as hard as you might think!
I’ll walk you through everything you need to know to make colby cheese at home, which is one of the easier semi-hard cheeses. It’s a lot easier than making cheddar cheese, and this is a good beginner cheesemaking recipe.
If you’d like a little bit more guidance before you get started, I’d suggest reading this beginner’s guide to home cheesemaking to answer any questions you might have about the general process.
What is Colby Cheese?
Colby cheese is very similar to cheddar cheese, and it was originally called colby cheddar. While traditional cheddar cheese can be dense and crumbly, colby cheese retains more moisture in the finished cheese and has a more open texture.
Colby cheese has a very mild, pleasant flavor and it’s most commonly used as a slicing cheese right on the table. Since the flavor is so mild, it’s not generally used in cooking.
Coloring Colby Cheese
Colby cheese is often colored yellow with annatto. That coloring step is traditional but optional, and I chose not to add coloring to my cheese.
Yellow coloring was originally added to cheese to make consumers think it was made with a higher quality milk. Grass-fed milk takes on a light yellow/orange color during the spring and summer, when the cows are eating the most nutritious fresh forage.
The best grass-fed butter and cheese was a bit yellow, but farmers could cheat a bit and add a bit of annatto to the cheese to create the same effect. Over time, they added more and more coloring, and it’s no longer a “subtle” effect as many brands make a bright yellow cheese for the market.
Adding annatto is in no way harmful, but I’d rather just eat the cheese and let the natural color of the milk shine through. If you love the bright orange color of colby cheese, no judgment, just add about 4 drops of liquid cheese coloring annatto to the batch with the rennet.
Equipment for Making Colby Cheese
While Colby is a good beginner hard cheese, it still requires a bit of equipment beyond a simple soft cheese. You’ll need some type of cheese press to bring the curds together and press out the extra whey.
Here are some of the most popular options on the market:
- The Ultimate Cheese Press – Made from hardwood for the press and food-grade plastic for the cheese mold, this one is simple and elegant.
- Dutch Style Stainless Steel Cheese Press – A nice choice because it’s all stainless steel, and you can precisely control the pressing weight (which is guesswork with other presses).
- The Whey Station Cheese Press – By far the most economical cheese press on the market (about 1/4 the price of the others) and it gets the job done. It’s a little on the small side if you want to use 2 gallons of milk for a moist cheese like colby, but you can easily fit the curds from 2 gallons of milk for dryer cheeses.
Beyond a cheese press, the other equipment and cultures are all the same types that you’d use to make simple soft cheeses. For this Colby cheese recipe, you’ll need:
- Cheesecloth (90 Grade)
- Cheese Salt (or Canning Salt) ~ it’s the same no additive salt, but the canning version is often much less expensive)
- Direct Set Mesophilic Starter
- Single Strength Rennet (or double strength and use half as much)
- Liquid calcium chloride (optional, but it helps pasteurized milk form good curds)
- Annatto (Optional – for color)
- Collander (Nothing special – just a regular kitchen colander)
- Large Stainless Steel Pot
How to Make Colby Cheese
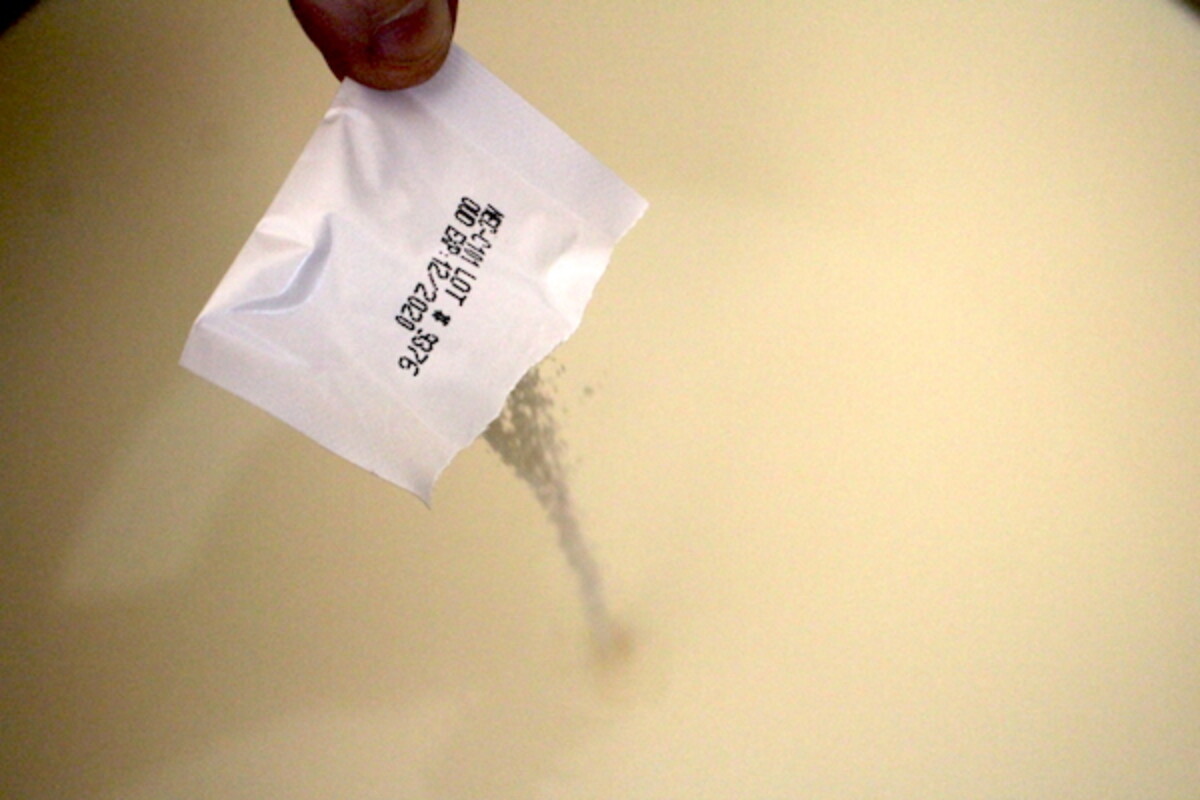
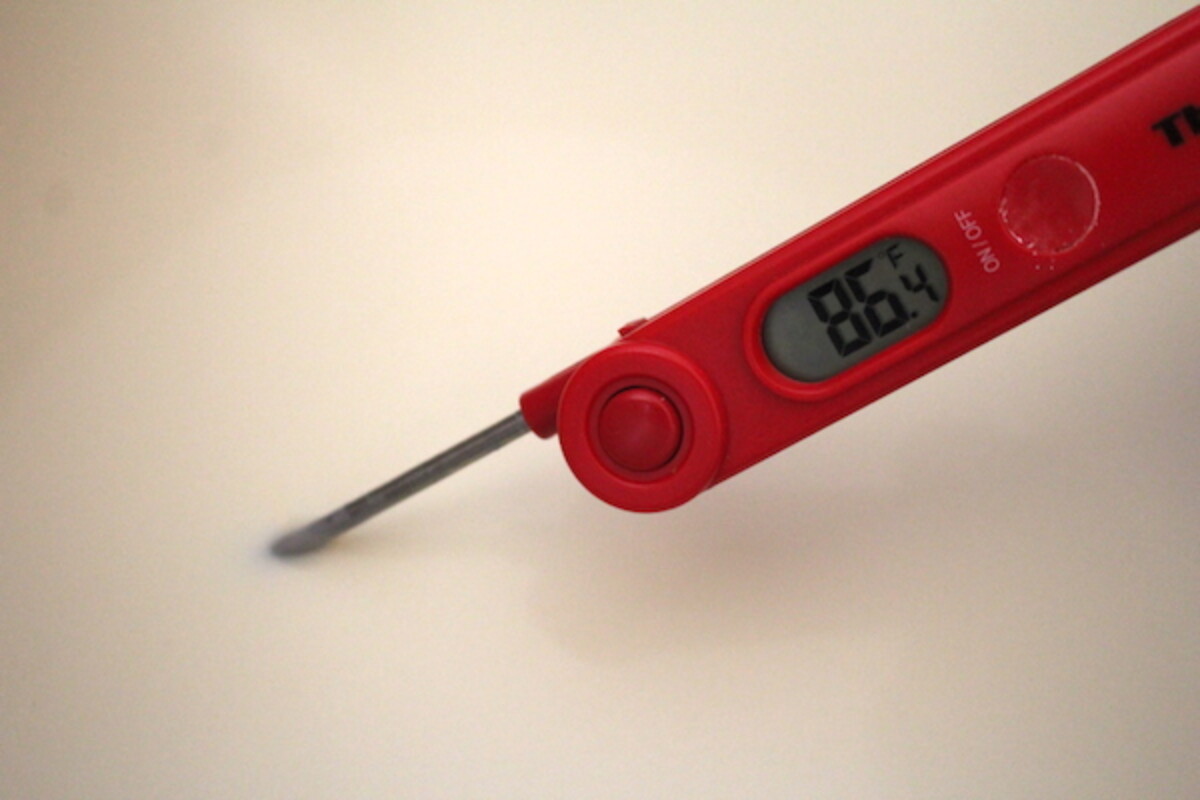
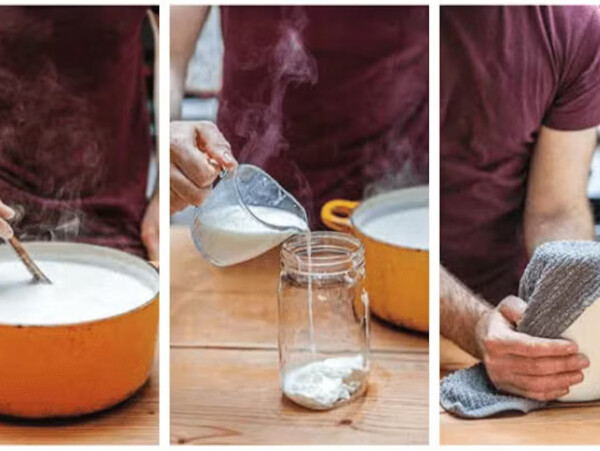
The first step is to bring the milk up to 86 degrees and add the mesophilic starter culture packet. Stir the culture into the milk for a few minutes to ensure that it’s evenly distributed.
The cheese needs to ripen for about an hour, staying at around 86 degrees. This initial ripening stage allows the cheese culture to colonize the milk and begin acidifying the milk.
After 1 hour, check the temperature of the cheese and make sure it’s still around 86 degrees. Add the diluted rennet and stir it into the cheese with an up and down motion for 1 minute. For raw, farm fresh milk, continue to stir for a few more minutes.
If you’re using pasteurized milk, adding a bit of liquid calcium chloride at this point can help the milk form good curds. Sometimes the milk is affected by the pasteurization process and can have trouble getting a good clean break in the curd. Add 1/4 teaspoon of liquid calcium chloride per gallon of pasteurized milk for a firmer curd.
If using calcium chloride, add it along with the rennet and stir both into the milk together.
One hour after adding the rennet, the curd should have a clean break. You can test this by touching the tip of a knife into the curd and seeing if the curd is solid and cuts cleanly. If it doesn’t, allow more time for the rennet to work on the milk.
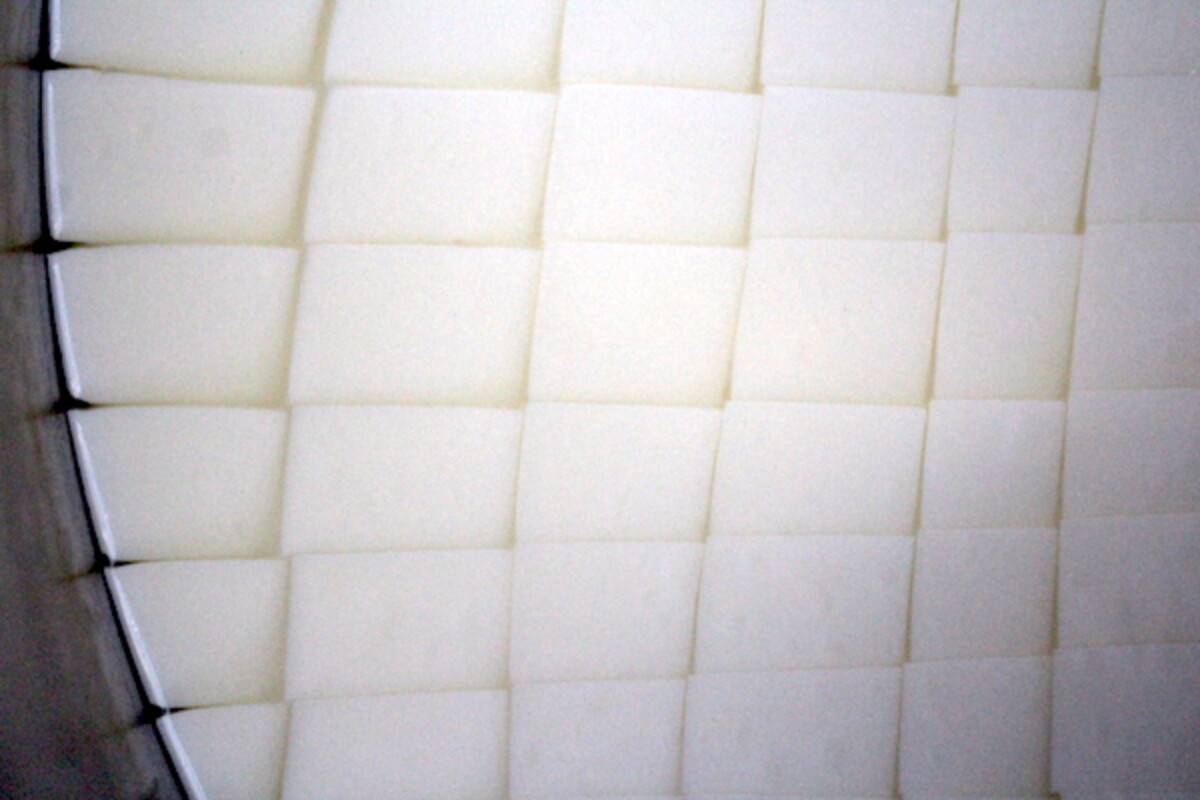
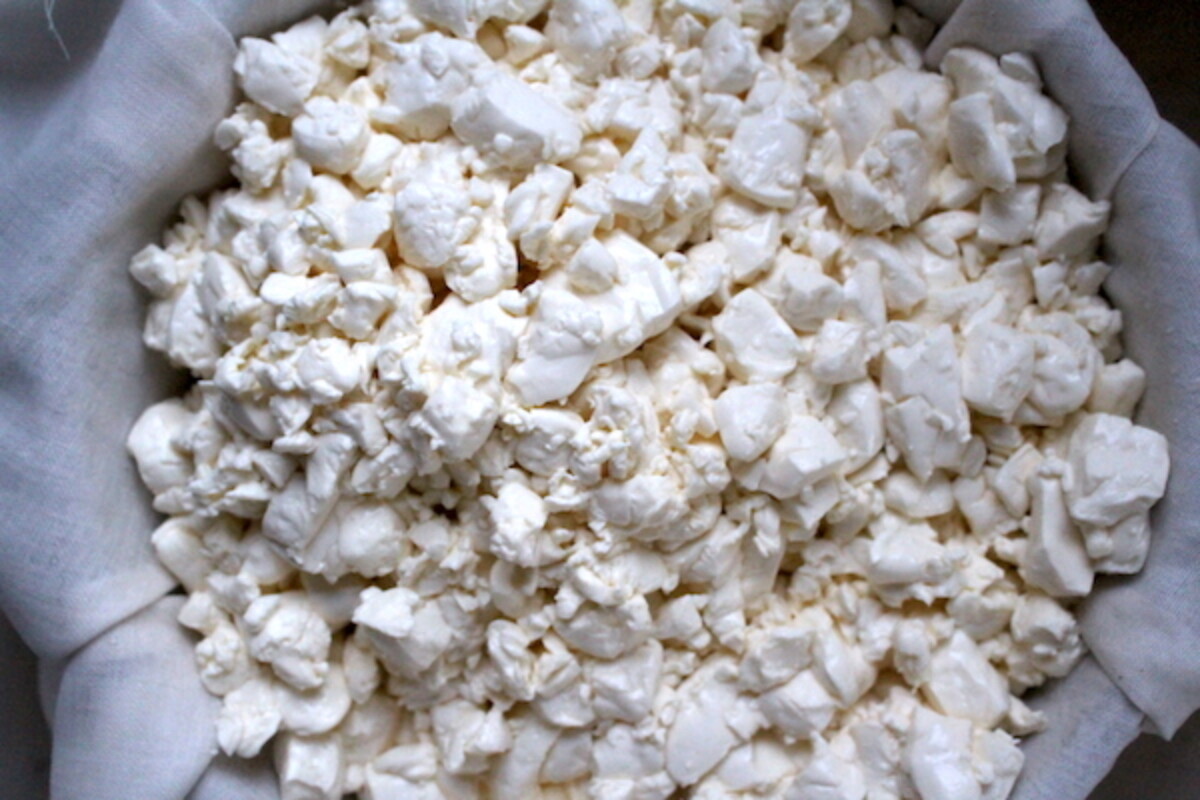
If the curd does have a clean break, cut the curd into 3/8ths inch cubes with a long sharp knife. Make sure you cut all the way down to the bottom of the pot, forming long towers of curd that are the depth of the pot.
Allow the cut curds to set for 5 minutes before moving on to the next step.
After the cut curds have set, it’s time to gently warm them. Slow heating is very important because if they’re heated too quickly they’ll form a skin on the outside trapping moisture inside the curd. The heating process helps expel whey, but if it’s done too quickly it has the opposite effect and will result in a cheese that is both tough and too moist.
Heat the curds to 102 degrees F by raising the temperature of the whey 2 degrees every 5 minutes. The easiest way to achieve this is to place the cheese pot in a sink full of hot water. The hot water around the outside provides indirect heat, like a very slow double boiler, and that slowly brings the cheese up to temperature.
Once the curds & whey reach 102 degrees, maintain that temperature for 30 minutes. Stir periodically to keep the curds from matting.
Pour off most of the whey, until the remaining whey is down to the level of the curds. While stirring, add cool (60 degrees F) water until the water/whey is at 80 degrees F.
Keep the temperature steady at 80 degrees for 15 minutes, stirring frequently. (This added water step is called “washing the curds” and helps determine the final moisture of the cheese. A warmer mixture means dryer cheese, and cooler means more moisture in the finished cheese.)
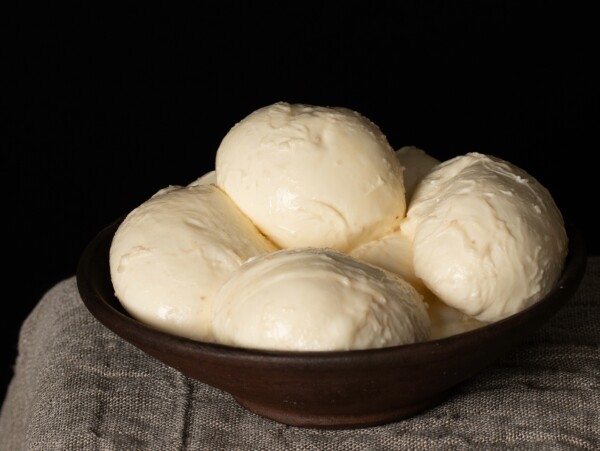
Pour the curds into a colander lined with cheesecloth and allow them to drain for 20 minutes. Break the curds into small pieces and gently mix them with the cheese salt.
The broken, salted curds are now placed into a cheesecloth-lined cheese press. Regardless of what press you’re using, line the mold with cheesecloth and wrap the ends of the cheesecloth over the top of the curds so they’re completely enclosed on all sides.
Now you’ll press this colby cheese with progressively more weight and longer times. Here’s your guide:
- Press at 20 pounds pressure for 20 minutes.
- Remove the cheese from the mold and peel off the cheesecloth. Re-dress the cheese, flip the cheese and place it back into the press at 30 pounds pressure for 20 minutes.
- Remove the cheese, re-dress and flip again, then press at 40 pounds for 1 hour.
- Repeat the re-dressing/flipping again, then press at 50 pounds for 12 hours.
- Remove the cheese from the press and remove the cheesecloth. The cheese is now fully pressed.
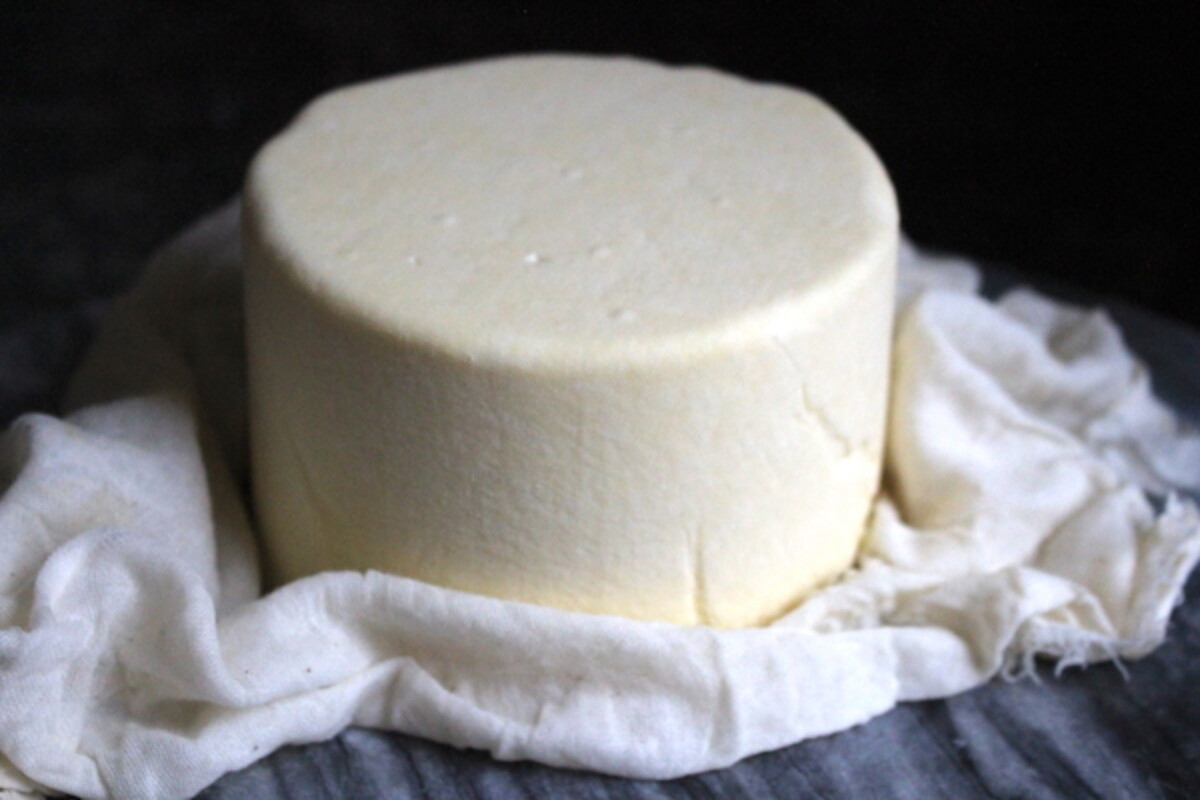
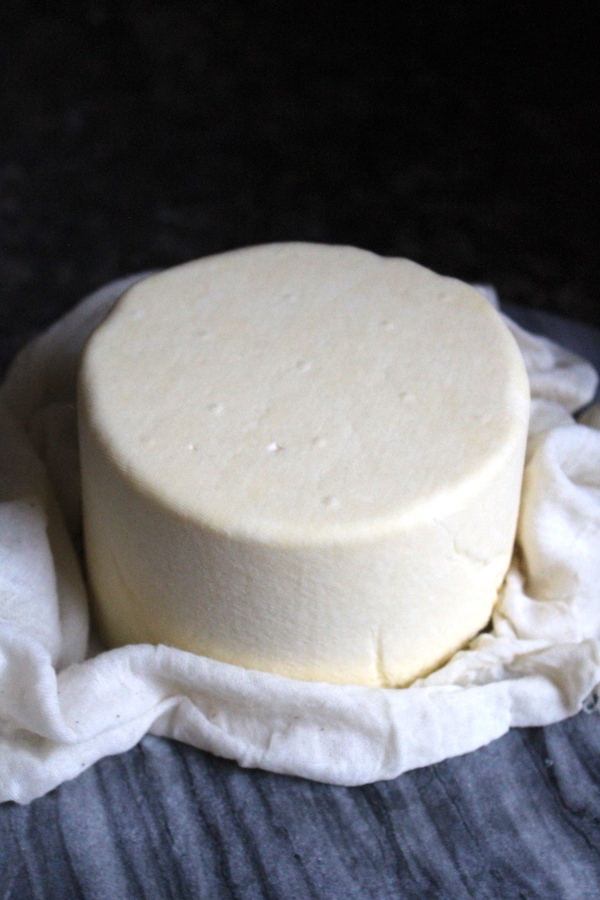
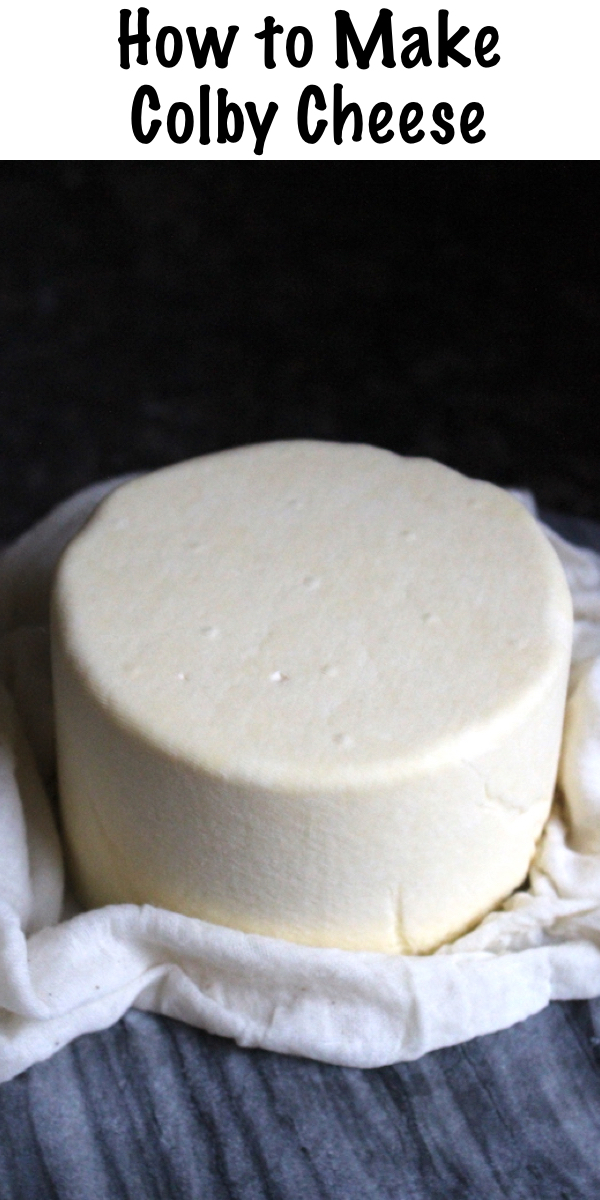
Air dry the cheese for several days until it’s dry to the touch on all sides. Flip the cheese regularly during this open drying.
This should take 2-4 days depending on humidity. Here’s what my cheese looked like at this point, dry to the touch but not yet waxed.
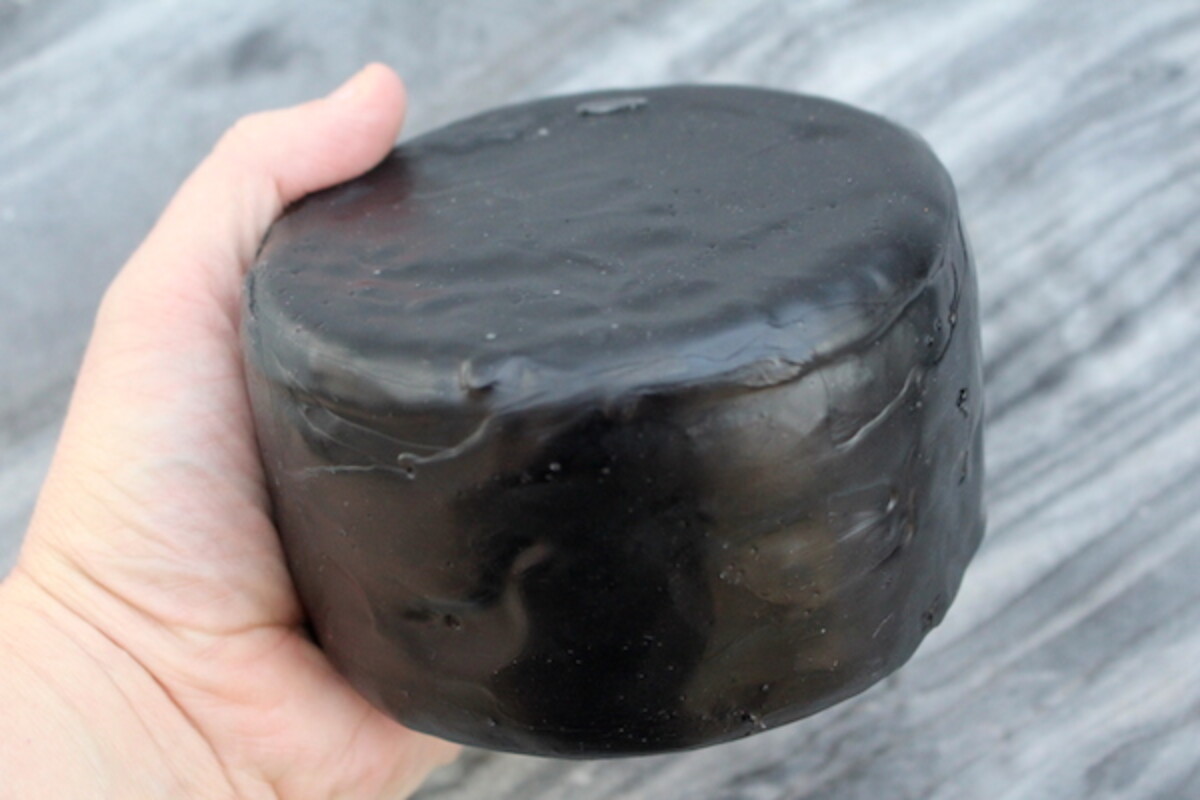
After the cheese has dried at room temperature for 2-4 days, it’s time to wax the cheese before aging. Waxing is important because you don’t want to lose any more moisture at this point.
Blocks of cheese wax are available directly from cultures for health (a cheesemaking supplier) or on Amazon. At the time of this writing, cultures for health has the best price by far, but things are always changing.
A one-pound block should wax somewhere between 10 and 15 pounds of cheese, depending on how thick you apply it. Melt the cheese wax in a double boiler or small crockpot on low.
For single cheeses, you can apply cheese wax with a cheese wax brush, which is a natural bristle brush. Don’t use a hardware store painting brush, they often have synthetic bristles which will melt in the wax.
I’ve tried using a silicone pastry brush designed for cooking and it just didn’t hold the wax well. It ended up making a big mess of everything. Use a cheese wax brush, it’s only a few dollars and will save you a lot of frustration.
If you’re making multiple cheeses, you can melt a good bit of cheese wax and then dip the cheeses into the wax directly. You need several pounds of melted wax to make this method work, but it really is a lovely method if you’re making a big batch of cheese.
Once the cheese is waxed, it should age at roughly 50 degrees F for 60 to 90 days. If you used raw milk, it must age at least 60 days for safety.
After 60 days, the “good” cultures have enough time to overpower any potential contamination. Even if you’re using pasteurized milk, letting it age at least 60 days is a good idea either way.
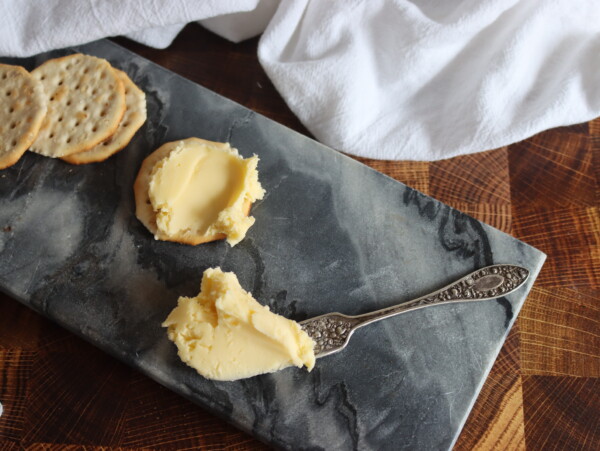
When it’s ready, cut into the cheese, take off the wax and enjoy!
Colby Cheese
Ingredients
- 2 gallons whole milk, raw or pasteurized
- 1 packet direct-set mesophilic starter
- 1/2 tsp rennet, single strength, dissolved in 1/4 cup cool, unchlorinated water
- 2 Tbsp cheese salt
Instructions
- Begin by heating the milk to 86 degrees F.
- Add the starter culture, stir for about 1 minute to thoroughly incorporate the culture and allow the milk to ripen for 1 hour.
- After 1 hour, check the temperature of the cheese and make sure it's still around 86 degrees. Add the diluted rennet and stir it into the cheese with an up and down motion for 1 minute. For raw farm fresh milk, continue to stir for a few more minutes.
- Cover the cheese and allow it to sit undisturbed for 30 minutes, until the cheese has a clean break.
- Cut the curd into 3/8-inch pieces, stir gently and then let the cut curds set for 5 minutes.
- Heat the curds to 102 degrees F by raising the temperature of the whey 2 degrees every 5 minutes. It's important to heat them slowly, and placing the pot in a sink full of hot water helps slowly and gently heat the curds.
- Once the curds & whey reaches 102 degrees, maintain that temperature for 30 minutes. Stir periodically to keep the curds from matting.
- Pour off most of the whey until it's down to the level of the curds. While stirring, add cool 60 degree F water until the water/whey is at 80 degrees F. Keep the temperature steady at 80 degrees for 15 minutes, stirring frequently. (This added water step is called "washing the curds" and helps determine the final moisture of the cheese. A warmer mixture means dryer cheese, and cooler means more moisture in the finished cheese.)
- Pour the curds into a colander lined with cheesecloth and allow them to drain for 20 minutes.
- Break the curds into small pieces and gently mix them with the cheese salt.
- Place the salted curds in a cheesecloth lined cheese press.
- Press at 20 pounds pressure for 20 minutes.
- Remove the cheese from the mold and peel off the cheesecloth. Re-dress the cheese, flip the cheese and place it back into the press at 30 pounds pressure for 20 minutes.
- Remove the cheese, re-dress and flip again, then press at 40 pounds for 1 hour.
- Repeat the re-dressing/flipping again, then press at 50 pounds for 12 hours.
- Remove the cheese from the press and remove the cheesecloth. Air dry the cheese for several days until it's dry to the touch on all sides. Flip the cheese regularly during this open drying. This should take 2-4 days depending on humidity.
- Wax the cheese and age for 60 to 90 days at 50 degrees F.
More Food Preservation Recipes
Looking for more ways to preserve the harvest (and make it tasty at the same time)?
- Farmhouse Cheddar Recipe from the 18th Century
- Duck Prosciutto (Salt Cured Duck Breast)
- Guanciale (Pork Jowl Bacon)
- Salt Cured Egg Yolks
- Preserved Lemons


I am very new at cheese making, so forgive me if this is a silly question. When you say 20 pounds of pressure, does that mean 20 pounds or 20 PSI? I have seen recipes with both.
It’s just pounds.
Hi.. you mentioned using annatto as option.. but can you explain how much should be used in this recipe (2 gal milk) please …
If you choose to use annatto, you want 4 drops
Thank you..
You’re welcome.
Can I age this cheese in the refrigerator?
The cheese should age at 50 degrees farenheit so a refrigerator will not be the correct temperature.
So, I need ideas of how to dry the cheese after pressing
I moved from KY to IN and my cheese starts to mold after taking out of the press
or it just doesn’t dry on all edges . . . Can you describe how and what you do to dry the cheese for the 2-4 days please
You’re just simply letting it sit out to air dry. The humidity can affect how well it dries out. Is it super humid there? The other thing to note is the temperature that you’re at when you’re washing the curds on step 8. Ideally it should be around 80 degrees during this step. Warmer temperatures will result in a dryer cheese and cooler temps will result in a cheese with more moisture.
Happy New Year!
I just cut into my first Colby cheese and it’s bitter to the taste. It’s beautiful and a bit soft. Any ideas what I did incorrectly? Today is the 60 day mark.
Many thanks!
I think I would allow it to finish curing for the full 90 days and then see what you have.
With two gallons of milk, how much does the finished cheese weigh?
The yield on this recipe is 2 pounds.
All the milks in my grocery store are ultra pasteurized. Is that okay to use or do you know of a brand that works well? I don’t have access to raw milk.
I would not use ultra-pasteurized milk. You should be able to find brands that are not ultra-pasteurized. Do you have Aldi where you live? I know that the milk that I get from there is not ultra-pasteurized.
Can I use a vacuum sealer for Colby cheese instead of wax? I saw that you listed that as an option for the cheddar.
Yes, that should work just fine.
Is the milk in imperial gallons?
This is US gallons.
How does one make their own cheese wax?
Here’s a tutorial written by my friend Quinn: https://www.reformationacres.com/2016/03/How-to-Naturally-Wax-Cheese-with-Beeswax