Affiliate disclosure: This post may contain affiliate links. Please see our Privacy Policy.
Farmhouse cheddar is one of the easiest ways to preserve milk and the tradition of making it goes back centuries. These days, due to selective breeding, cows produce 14+ gallons of milk a day.
Even in the 18th century, a milk cow would still produce around 3 gallons of milk per day for a family’s use. Generally, cows were in milk from April to November, and cheesemaking is a great way to store surplus summer production for winter use.
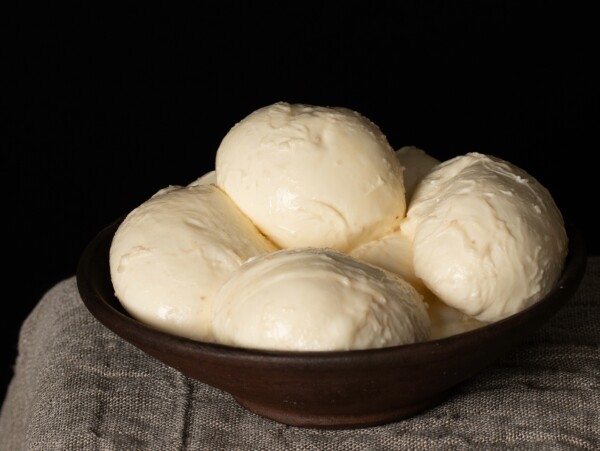
My family has been making soft cheeses for the better part of a decade now, and they’re a normal part of our weekly routine. Even now as I write this, my husband is in the kitchen preparing a homemade mozzarella while our 3-year-old daughter eagerly waits for the first taste.
Hard cheeses are the obvious next step, but generally, they involve expensive equipment, namely a cheese press. Since cheesemaking is a niche hobby, there are only a few manufacturers, and prices are steep. There are a number of inexpensive cheese presses out there, ranging from as little as $40 to around $120 each.
Good options include:
- All Hardwood Cheese Press ~ This provides the basic framework for pressing cheese, but you’ll need a cheese mold for shaping the cheese and weights to place on top (milk jugs filled with water work for small amounts of weight).
- Simple Cheese Press with Cheese Mold ~ This one includes the cheese mold for about $40, and all you’ll need is something heavy to set on top to apply weight. I’ve personally used this one and it works just fine as a budget option.
- Stainless Steel Cheese Press ~ This one is designed to press anything, including cheese, fruit (for homemade wine), and herbal tinctures. For use with cheese, I’d suggest the largest model which holds 1.6 gallons of liquid (or the curds from several gallons of milk). It’s about $100, so a bit more than the other two, but more multi-purpose and you won’t need to find weights since it’s a screw-top model.
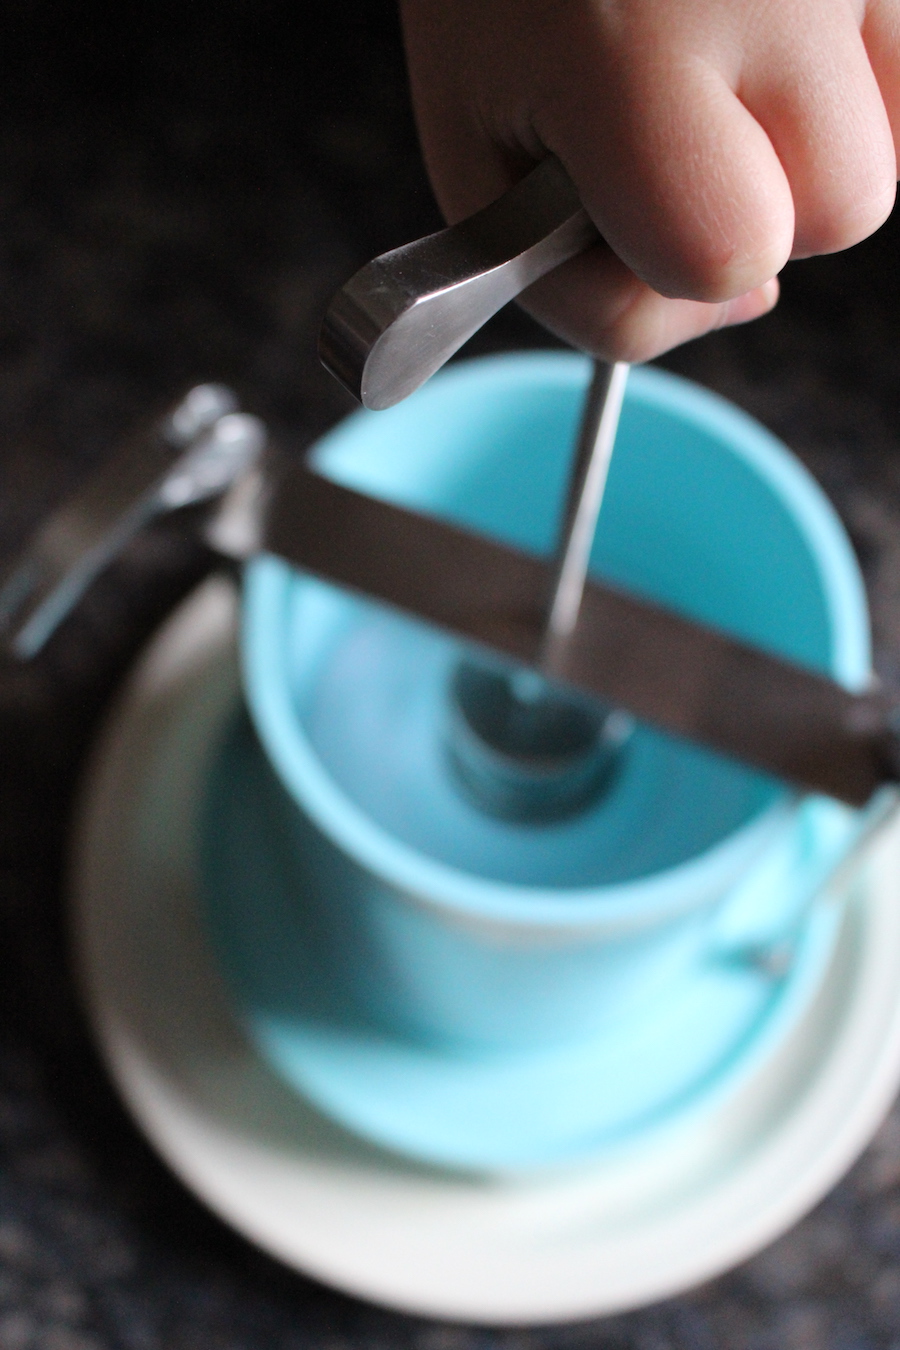
The simple inexpensive cheese press I’m using below is a screw-top model, but made from plastic. They don’t make it anymore, but a higher quality all stainless steel version costs about the same (around $100) and should last a lifetime. Professional cheese presses cost $300 to $500.
At roughly 1/3 the price of most of the others on the market, this one gets the job done nicely without breaking the bank. My 3-year-old cheese assistant was able to operate it just fine, which really says something about the ease of use.
Beginner Farmhouse Cheddar Recipe
Now that we have the press, the next step is finding a hard cheese to test it out.
I’ve seen a number of farmhouse cheddar recipes, and the recipes are often pretty exacting. Very specific temperatures, curd sizes, pressing weights, and aging methods. It can be a bit intimidating for a beginner.
Then I came across this video made by the Townsends, a supplier of 18th-century gear for reenactors. The woman heats the curds by the woodstove in a giant tub, measures the temperature with her finger, and spends plenty of time shooing away stray flies. The cheese is pressed without any mention of weights, on an old antique crank press.
Now that’s more my speed!
The trick now is to turn a video into a simple recipe for the home cheesemaker.
She starts with a rather large batch of 5 gallons of milk, which would make quite a bit of cheese. Most home cheese presses are only equipped to handle 1.5 to 2 pounds of curds for hard cheese. While you can make your own gigantic cheese press, I’m going to scale this down a bit for practicality.
Her directions are vague, add a small handful of salt, which she estimates is 2 to 3 tablespoons. This results in a relatively salty cheese with a dry texture, ideal for grating like parmesan. The extra salt means the cheese will keep better, even with less than perfect temperature control.
If you’re using pasteurized milk, instead of farm-fresh raw milk, it’s important to add about a bit of cultured buttermilk to put the good bacteria back into the milk. This recipe has no added cultures, and is simply relying on the natural bacteria in raw milk, thus “farmstead cheddar.”
If you are using raw milk, modern recommendations are that the cheese is allowed to age for at least 60 days so that the “good” bacteria can out-compete any nasty pathogens that might be present. It’s rare with propper dairy hygiene, but this recipe calls for a minimum of 2-3 months of aging anyway.
Here in Central Vermont, there’s no shortage of raw milk suppliers, and many farms will actually sell you bulk jugs (4 gallons) at half price. It saves them on jar washing and packaging, and cheesemakers being good loyal dairy customers, get a bit of a break on the price.
Farmhouse Cheddar Equipment & Ingredient List
If you’re new to cheesemaking, I’d suggest reading this beginner’s guide to cheesemaking at home before you begin. I walk you through the equipment and basic process in detail there, which will allow you to make this farmhouse cheddar as well as all manner of other homemade cheeses.
- Fine Cheesecloth (90 grade)
- Collander or Fine Mesh Strainer
- Slotted Spoon
- Cheese Press
- Rennet
- Cheese Salt or Canning Salt (Non-Iodized)
- Liquid Calcium Chloride (for pasteurized milk)
- Buttermilk or Buttermilk starter cultures (for pasteurized milk)
- 2 Gallons Fresh Milk (ideally, raw farm-fresh milk)
How to Make Farmstead Cheddar
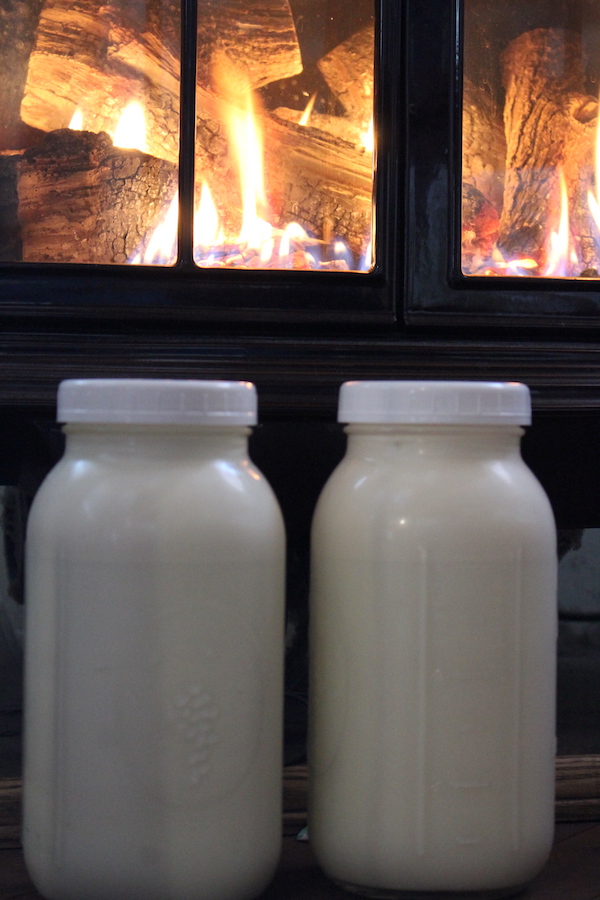
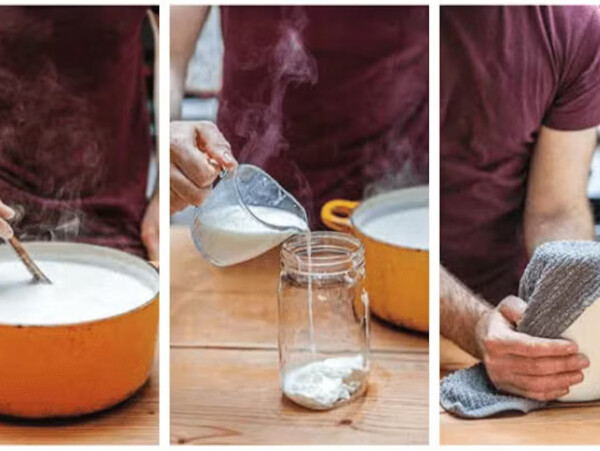
Start by placing the milk on the stove and heating it up to “about blood warm.” You can test this with your finger, and ideally, the milk would be roughly as warm as your skin with clean hands. She mentions that you’re shooting for about 85 degrees F on a thermometer, which is slightly less than skin temperature.
In my house mid-winter, the best way to do this is to place the jars of raw milk right by the stove to come up to temperature. Placing them in a pot of water and surrounding it with scalding hot water in the sink is also a good option, or very gentle heating on the stove works too.
If you’re using pasteurized milk, add one quart of cultured buttermilk for every 5 gallons of pasteurized milk. Or, just under one cup of buttermilk for each gallon of milk. If you’re using raw farm-fresh milk, it’s a live food full of the right cultures for making this farmhouse cheddar naturally.
The rennet she’s using in this recipe is a commercial single-strength rennet, which is the concentration for most rennet on the market for the home cheesemaker. Occasionally there are bottles of double-strength rennet, so watch that depending on where you get it. For single strength rennet, the bottle will generally say use 1/2 teaspoon diluted 20:1 in water to set 2 gallons of milk.
You’ll notice that the rennet is the only thing that she does measure in this recipe, and the rennet concentration is quite important. Adding more will result in very stiff curds and not enough and the milk will not form curds.
You’re using pasteurized milk, it often has a bit of trouble forming curds, and liquid calcium chloride is added to help the curds form. For pasteurized milk, add 1/4 tsp of calcium chloride diluted in 1/4 cup of water to the milk along with the rennet.
Once the diluted rennet and optional calcium chloride are added, stir the milk using a figure 8 motion, making sure you’re moving from top to bottom for about 1 minute. Your goal is to distribute the rennet evenly, especially from the top to the bottom of the pot of milk.
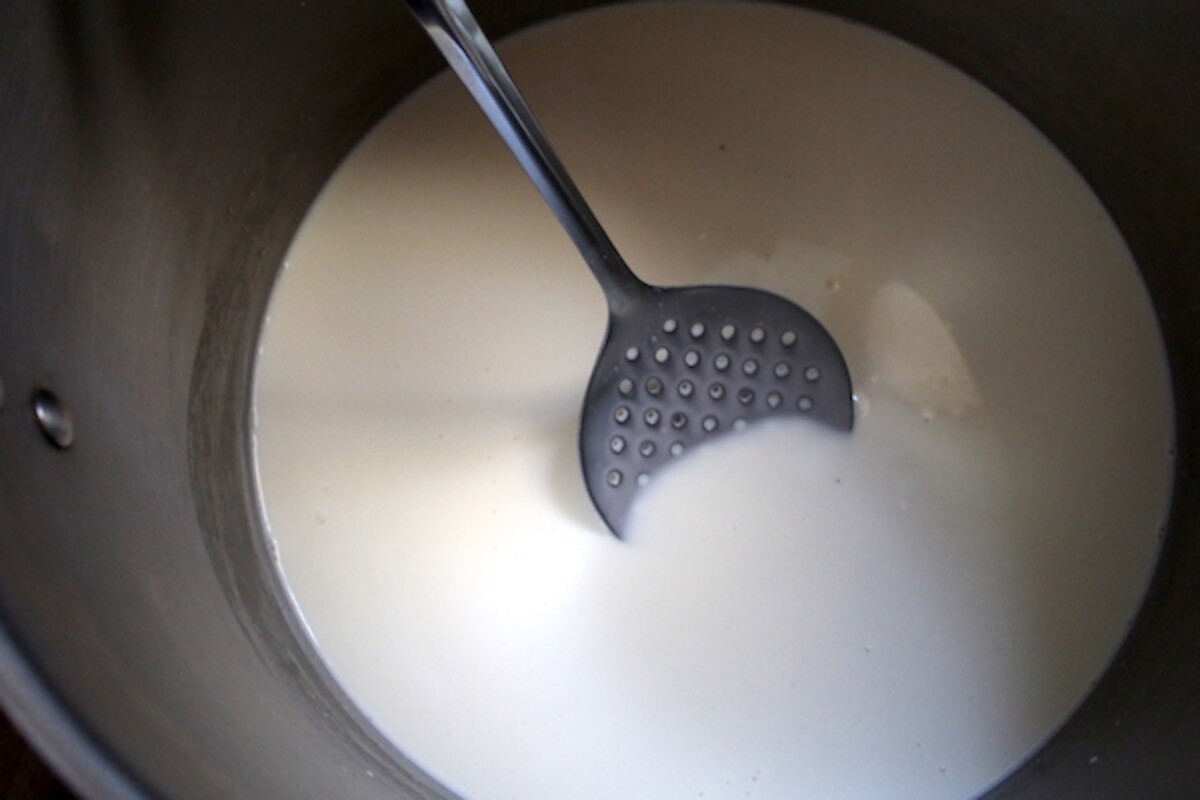
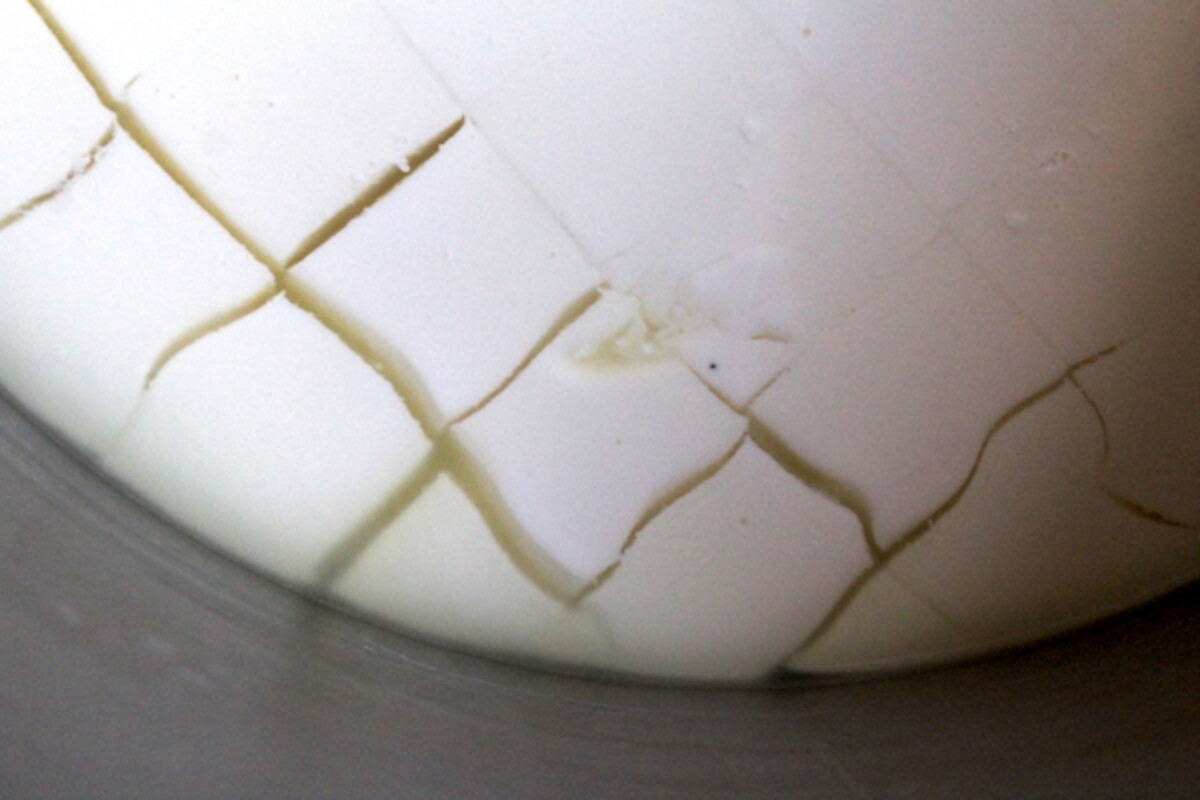
After stirring, the cheese needs to stand for about 90 minutes in a warm place for the curds to set. At that point, it’s time to cut the curds into 1-inch curds with a large knife. Be sure to cut from top to bottom of the pot to get through all the curds. After cutting the curds, the cheese rests for another 60 to 90 minutes.
After the second rest, the cheese curds are placed back on a very low stove and slowly heated to 100 degrees. If it’s heated too quickly, the curds will become rubbery and won’t release whey properly.
This slow heating process should take about 30 to 60 minutes. During this heating process, the curds will continue to release whey and firm up further.
The book Home Cheesemaking has detailed instructions for farmhouse cheddar and says that the best way to do this is to place the whole cheese pot into a sink filled with hot water, and instructs you to increase”the temperature no more than two degrees every 5 minutes.” Once the curds and whey hit 100 degrees, keep them there for about 5 minutes.
The next step is to break up the curds and strain out the whey. Pour the cheese and whey into a colander lined with cheesecloth and allow the whey to drain. You can save the whey off to the side for making a whey cheese (recipes coming soon). Break up the cheese curds with your hands into small pieces and knead in a bit of cheese salt.
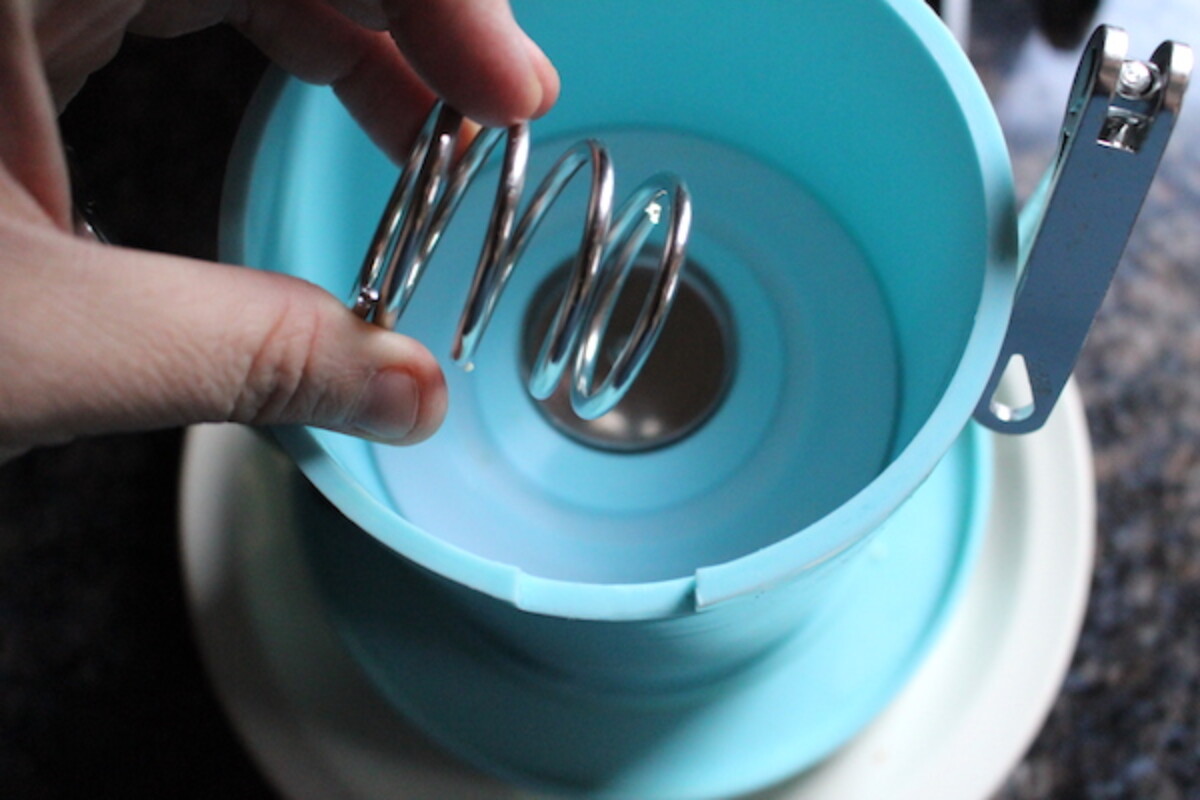
Line the cheese press with cheesecloth, place the salted curds into a cheese press and apply pressure. This cheese press is equipped with a spring, which means that turning is easy from start to finish.
Increase the pressure every 30 minutes to take up the slack as the whey drains. After about 2 hours of regular pressure increases, allow the cheese to sit under pressure overnight (about 12 hours).
Take the cheese out of the press, flip it over and allow it to press for another 12 hours. While the woman in the video had quite a bit of trouble slipping the cheese out of her wooden press, mine came out easy for flipping.
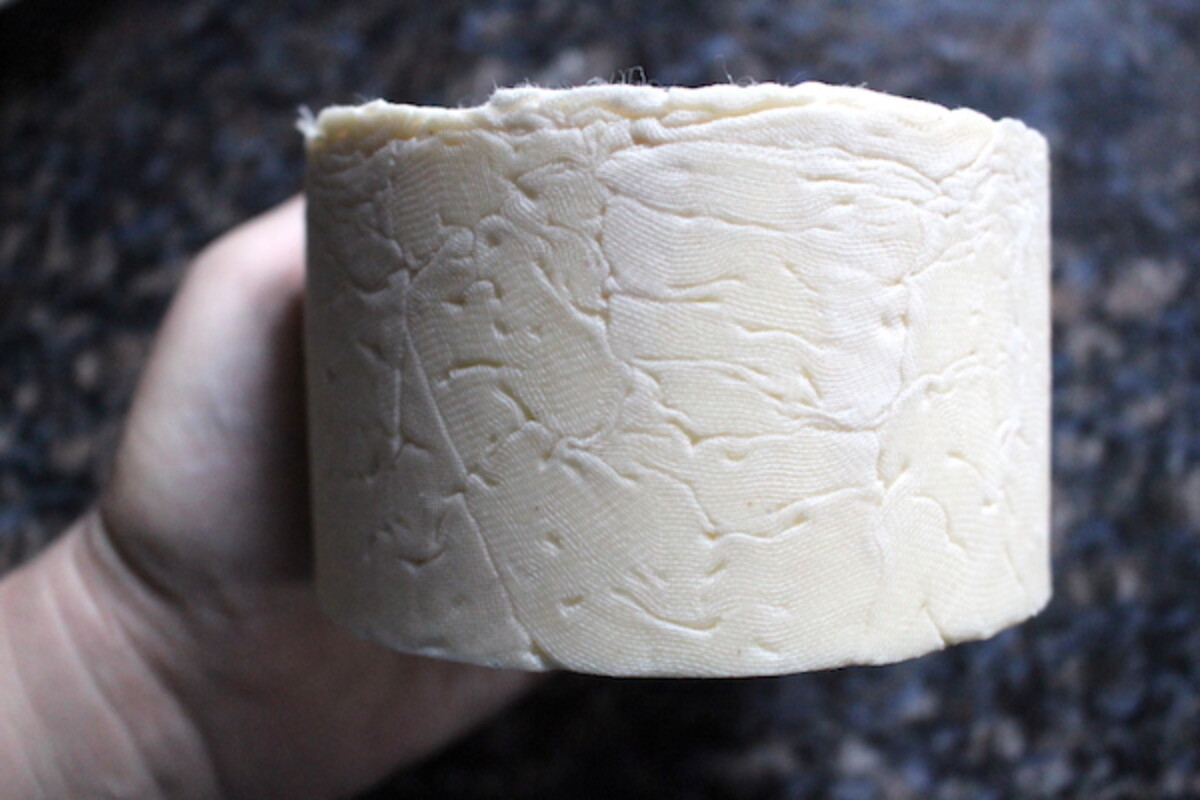
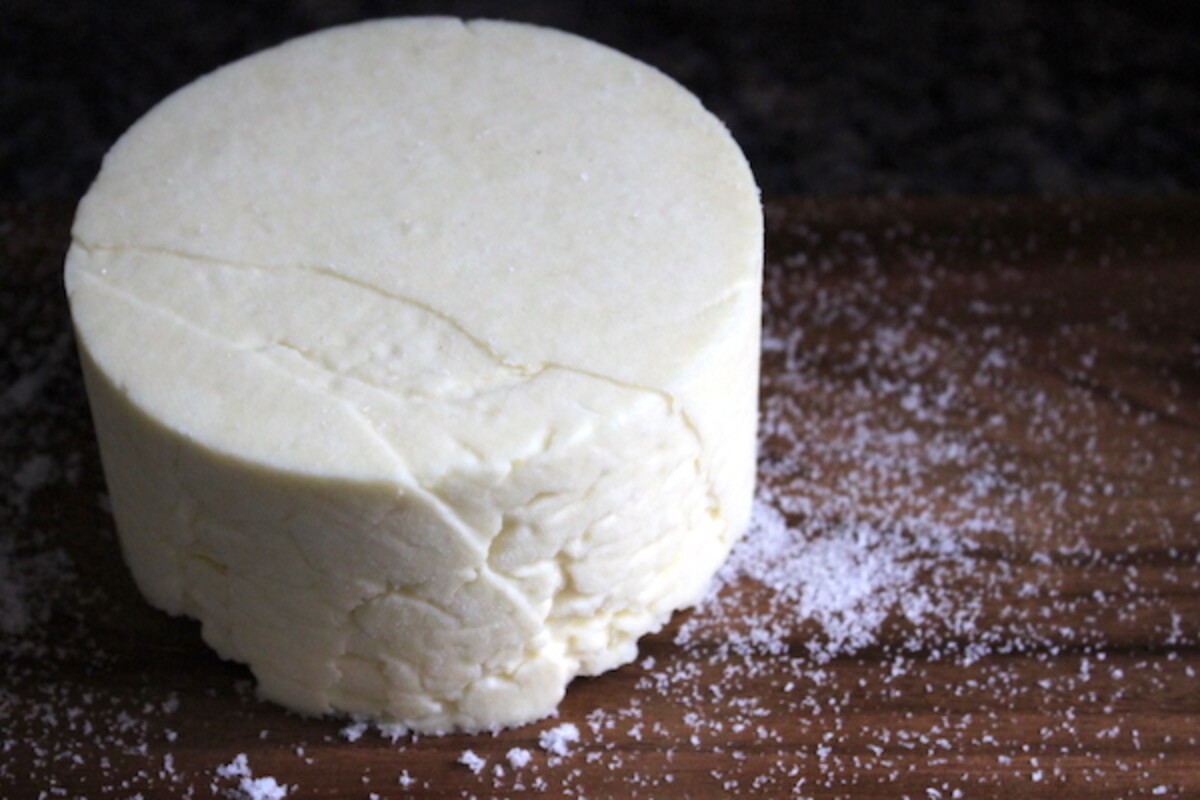
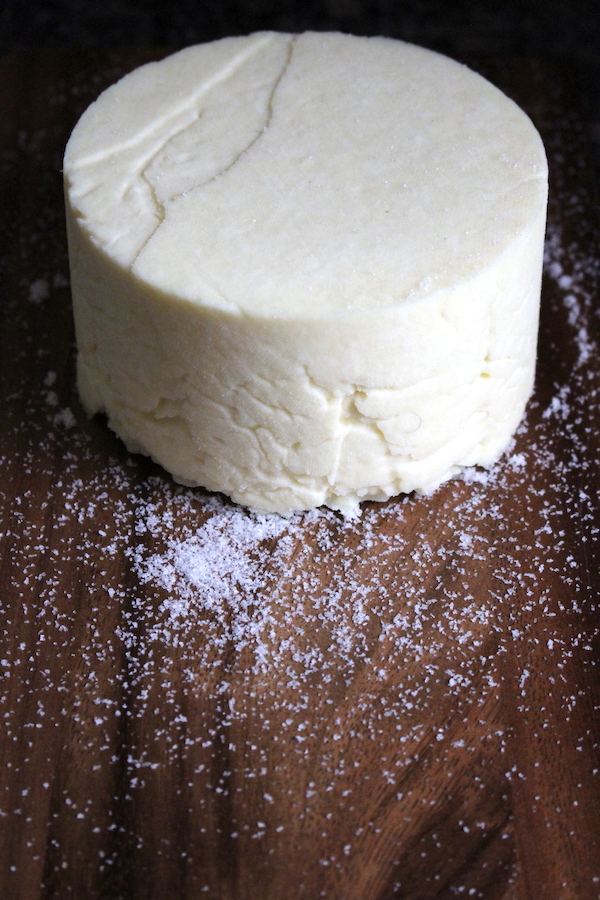
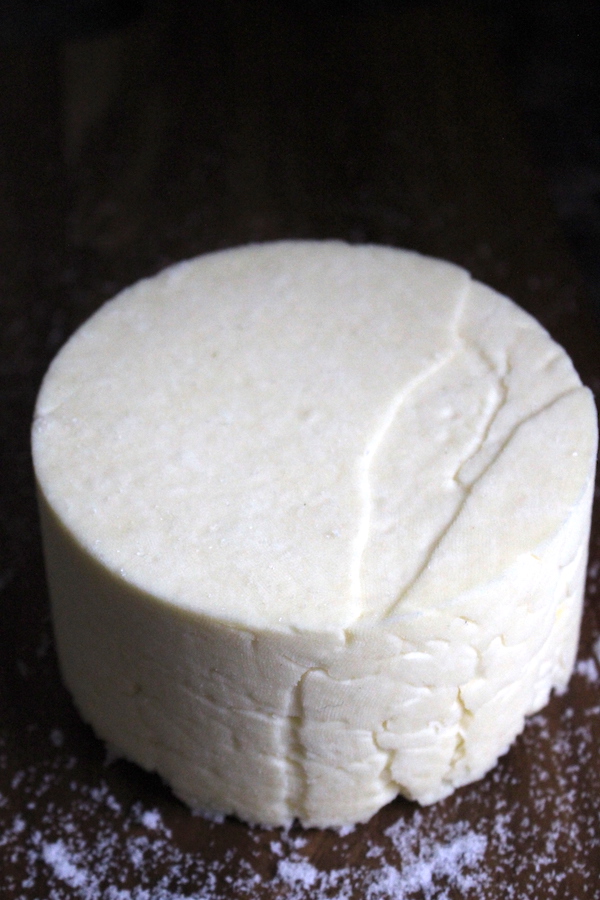
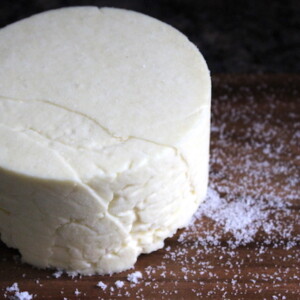
Once it’s been pressed on both sides for 12 hours, remove the cheese from the press. Remove the cheesecloth from the outside of the cheese.
Place the cheese on a salted shelf to age for a minimum of 60 days, flipping the cheese over every day. With more aging time the cheese will get sharper and dryer.
Cheesemaking Recipes
Looking for a few more cheesemaking recipes?
Farmhouse Cheddar ~ 18th Century Recipe
Ingredients
- 2 gallons milk, preferably raw
- 1/2 tsp liquid rennet, diluted
- 1 tbsp cheese salt, or canning salt
- 1/2 tsp calcium chloride, optional - if using pasteurized milk
- 1 cup cultured buttermilk, optional - if using pasteurized milk
Instructions
- Warm the milk to around 85 to 90 degrees.
- Dilute the rennet in 1/4 cup of water. Add the diluted rennet to the cheese and stir for about 1 minute using a figure 8 motion up and down in the pot.
- If using pasteurized milk, also add 1 cup cultured buttermilk and 1/2 tsp calcium chloride diluted in water at this time.
- Allow the cheese to sit in a warm place undisturbed for about 90 minutes until a stiff curd forms.
- Cut the curd into 1'' cubes with a large knife, ensuring you cut all the way through to the bottom of the pot.
- Allow the cut curd to rest for an additional 60 to 90 minutes.
- Slowly heat the curd and whey to 100 degrees, increasing the temperature by no more than 2 degrees every 5 minutes. Placing the pot in a sink full of hot water works well (though a wood stove is a more traditional 18th century method).
- Allow the cheese to stand at 100 degrees for 5 to 10 minutes before straining the curd through a colander lined with cheesecloth.
- Add salt and break the curd up into small pieces with your hands while distributing the salt.
- Line a cheese press with cheesecloth and place the curds into the press.
- Press the cheese, increasing pressure every 20 to 30 minutes for about 2 hours. Then allow the cheese to sit in the press under pressure for about 12 hours.
- Remove the cheese from the press and flip it over. Press on the other side for another 12 hours.
- Remove the cheese from the press and age the cheese on a salted shelf for a minimum of 60 days, flipping it over every day or two.
- The finished cheese will be dry and a hint salty, perfect for grating like parmesan.
Nutrition
Nutrition information is automatically calculated, so should only be used as an approximation.
Historical Food Preservation
Cheesemaking is only the tip of the iceberg when it comes to historical food preservation.
- How to Make Apple Cider Vinegar
- Beginner’s Guide to Lacto-fermentation
- Preserving Cheese in Wood Ash
- 30+ Ways to Preserve Eggs


Once the cheese is flipped and pressed a second time, am I able to age it in a salt brine (possibly in the fridge) rather than on a salted shelf? I have big dogs that can reach everything 🤦♀️
Brine-aging would turn it into a different cheese entirely. Aged continuously in brine, the cheese would absorb too much salt, never form a rind, and stay soft. You’d end up closer to feta than cheddar.
Better solution that’s already in my main cheddar post here(https://practicalselfreliance.com/homemade-cheddar-cheese/). Wax or vacuum-seal the wheel. After 2 to 3 days on a salted shelf (long enough for the surface to firm up), wax or vacuum-seal it and then age anywhere dog-proof, including a regular fridge or closed cabinet. A waxed cheddar in the fridge ages more slowly than in a 55F cave, but it works fine for home use.
The waxed or vacuum-sealed cheese will have a slightly different character (more moisture, milder flavor, no rind), but it’s still very much a cheddar.
Vinegar and lemon juice can both be used. It’s a learning curve. This generally makes a “fresh” cheese. Look up queso blanco, or farmer’s cheese. I’ve never tried to make a pressed cheese with it. The important variables are the heat and the amount of acid. If the milk isn’t hot enough, the acid won’t make it coagulate into a curd. If it’s too hot, the curd will be tough and dry. If there’s not enough acid, no curd. Too much acid, it coagulates but leaves an acid taste behind. Experiment with it. I usually use this process to make cheese balls or cottage cheese rather than a pressed cheese. For cream cheese I use a different process.
I have read that lemon juice or vinegar can be used as a rennet substitute, do you think that would work for this recipe? Trying to make cheese from strictly home made ingredients! Thank you!
It’s possible that it could work. Typically this is done with softer cheeses. The lemon juice or vinegar will help the milk to coagulate but it could coagulate too quickly at too high of an acidity. It would be something that you would want to research a bit and experiment with if it’s something that’s super important to you. Otherwise you could just stick with the rennet.
Great, thank you so much!
You’re very welcome.
Do you have to let the raw milk age for 60 days, or can you just go ahead and use it freshly milked?
You don’t need to let the milk age, you just need to allow the cheese to age once it has been made.
Hi, Which milk is best cow or goat to make a sharp Italian cheese ? Would it be better to use half cow and half goat milk ? I get natural goat milk and if possible would like to use it. Also, Ive read recipes that use different bacteria you can add to milk to make different types of cheese. Is this really necessary ? Also I read you can coat the outside of cheese while ageing with oil to keep from getting rock hard? Thank you !
Hi Mark,
Goats milk should work wonderfully in this cheese. If you want to make sharp Italian cheese, most of that is made with skimmed milk and aged for quite a while. One of the keys to the sharpness is that it’s made with a different type of rennet, something more traditional that includes more of the enzymes in the cows stomach to really give it a kick. These days they add something called lipase powder to give that same type of flavor but without needing a special rennet. Anyhow, most of the answers to the rest of your questions can be found here: https://practicalselfreliance.com/beginner-cheesemaking/
If there’s something not answered there, let me know!