Affiliate disclosure: This post may contain affiliate links. Please see our Privacy Policy.
Growing grapes from cuttings is a rewarding way to expand your vineyard without the cost of buying new plants. With just a few simple steps, you can easily propagate grapevines from dormant wood and watch them flourish into productive vines year after year.
Grapevines are truly a gift that keeps on giving. All you need are a pair of pruning shears, some deep pots, and potting soil to propagate as many cuttings as you’d like. In my experience, they’re one of the easiest plants to propagate — whether you get started in the winter or during the growing season.
In this article, we’ll focus on the process of growing grapes from hardwood cuttings, which is the most beginner-friendly method and typically has a success rate of 70-80%. These cuttings are taken from dormant grapevines in winter and are perfect for most grape varieties.
I’ve found that the entire process, from pruning to regrowth, has been a fascinating homeschool activity for my little ones to participate in and learn from over the course of the growing season, and hardwood cuttings are easy enough that they’re perfect as a kids gardening project.
If you’re interested in exploring other methods of propagation, check out my guide on 5 Different Methods of Propagating Grapevines. I also have a detailed guide that walks you through propagating grapes from greenwood cuttings taken during the summer growing season (which is the best option for muscadines and pigeon grapes.)
Whichever method you choose, the odds are very much in your favor that you’ll be gifted with several brand new plants for your efforts. Growing grapes from cuttings is incredibly rewarding, and you can grow literally hundreds of grape vines from your winter grape pruning.
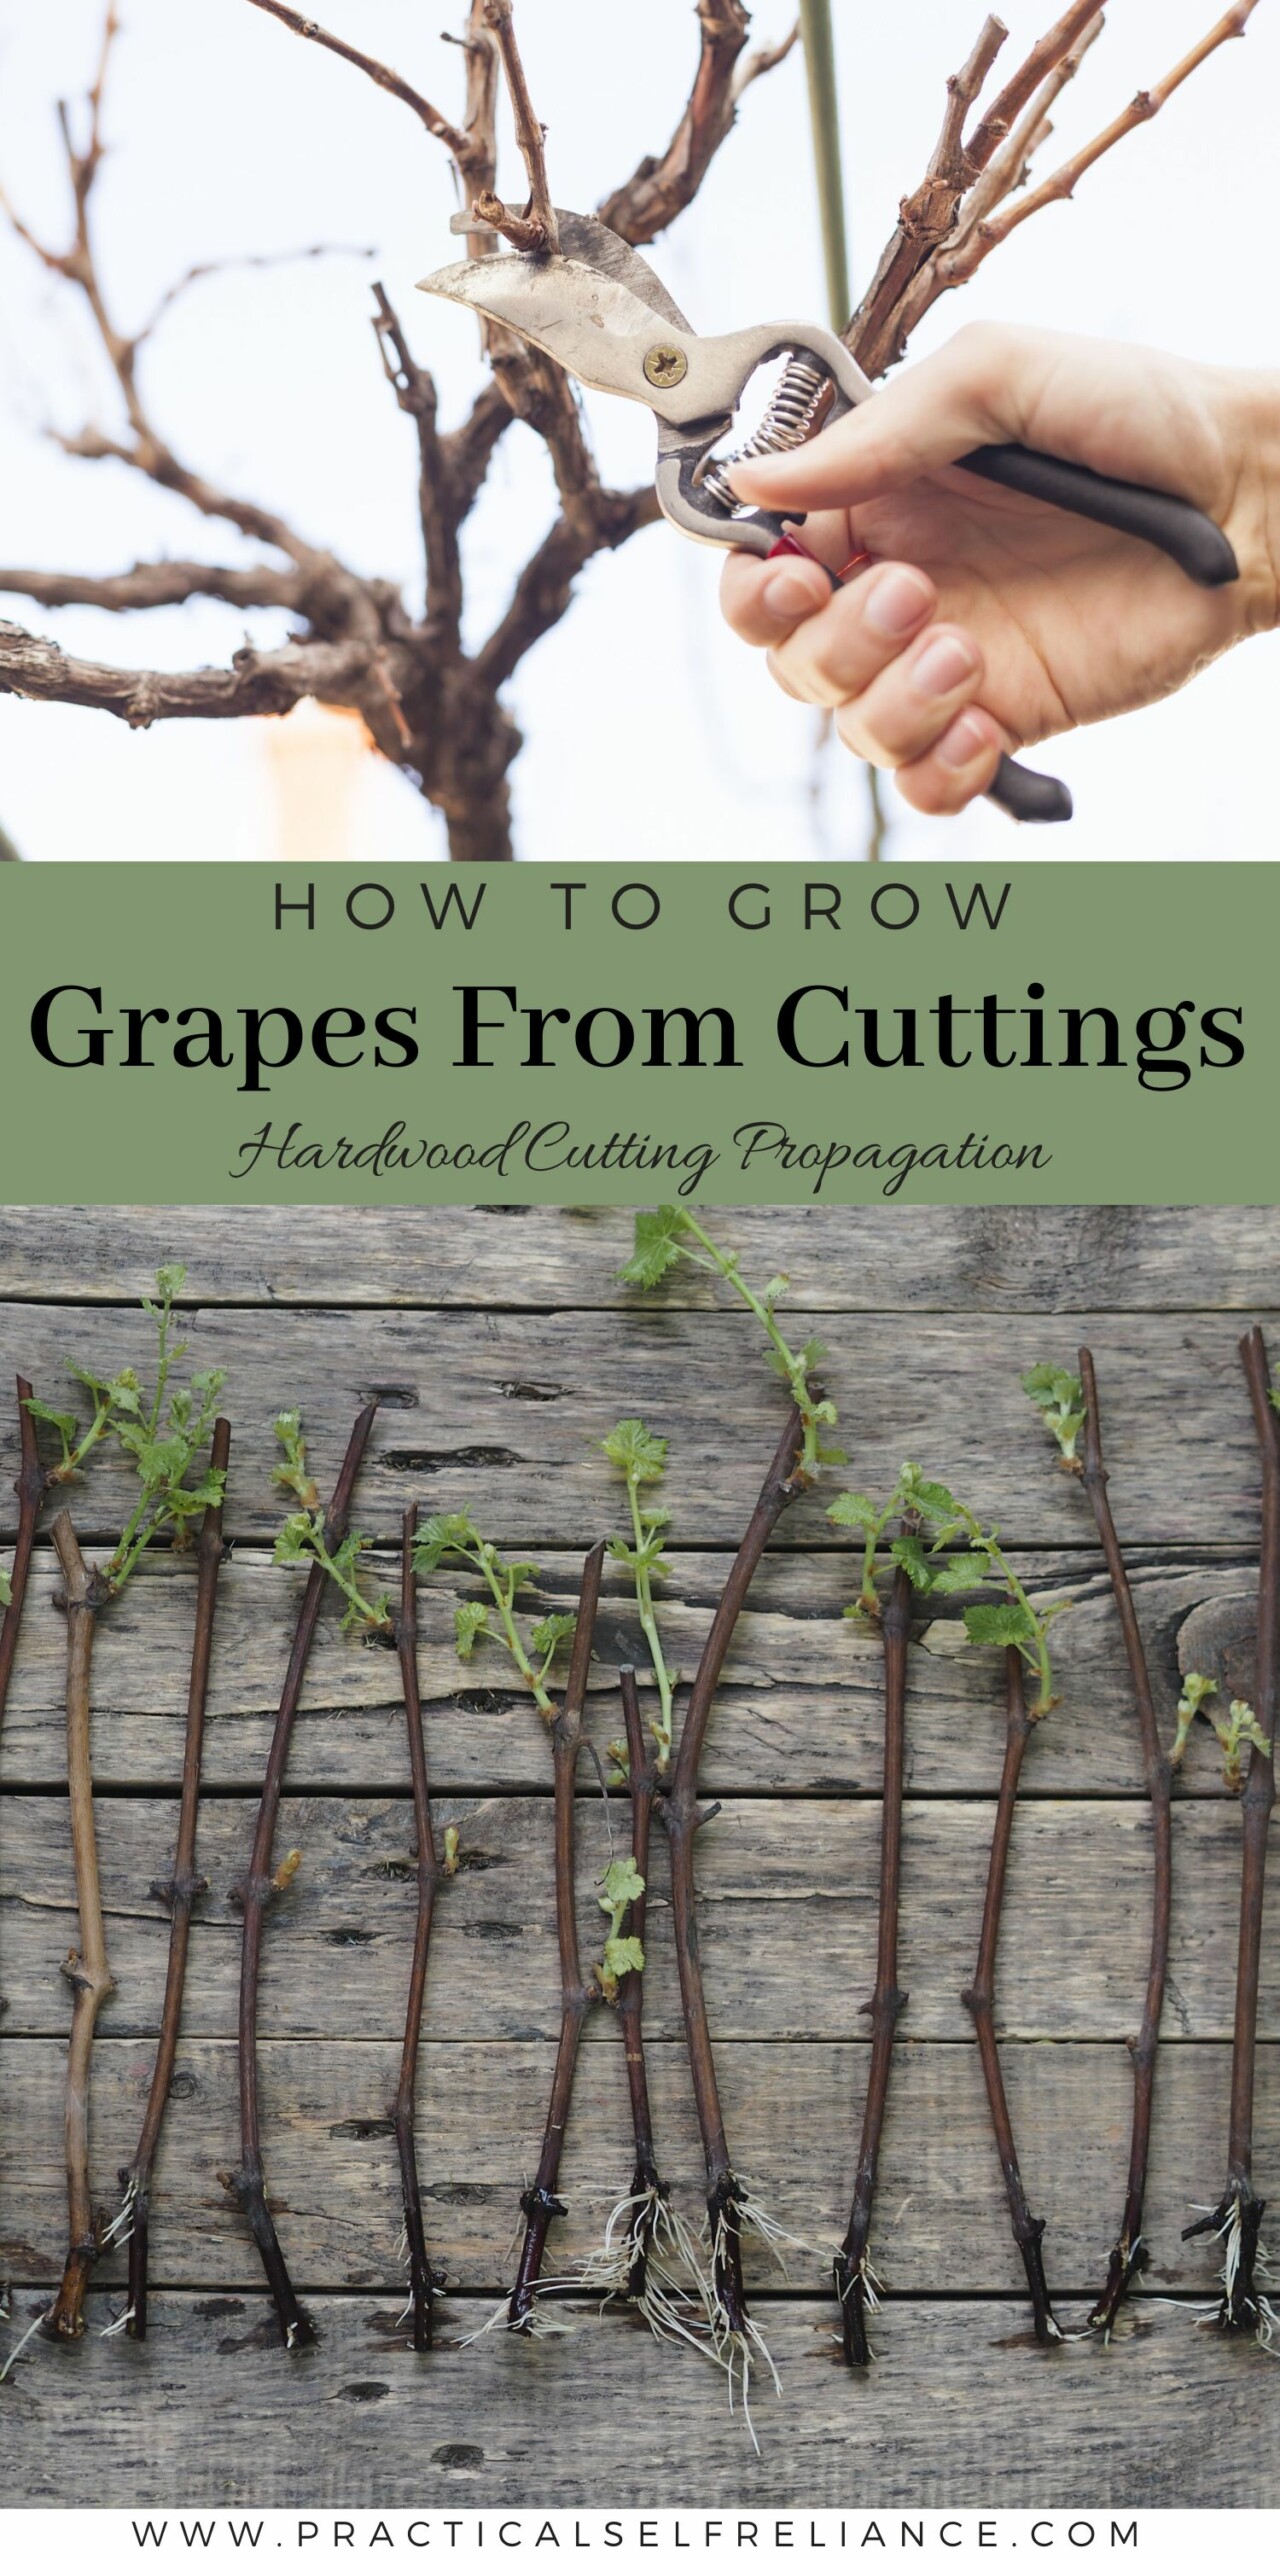
How to Grow Grapes from Cuttings
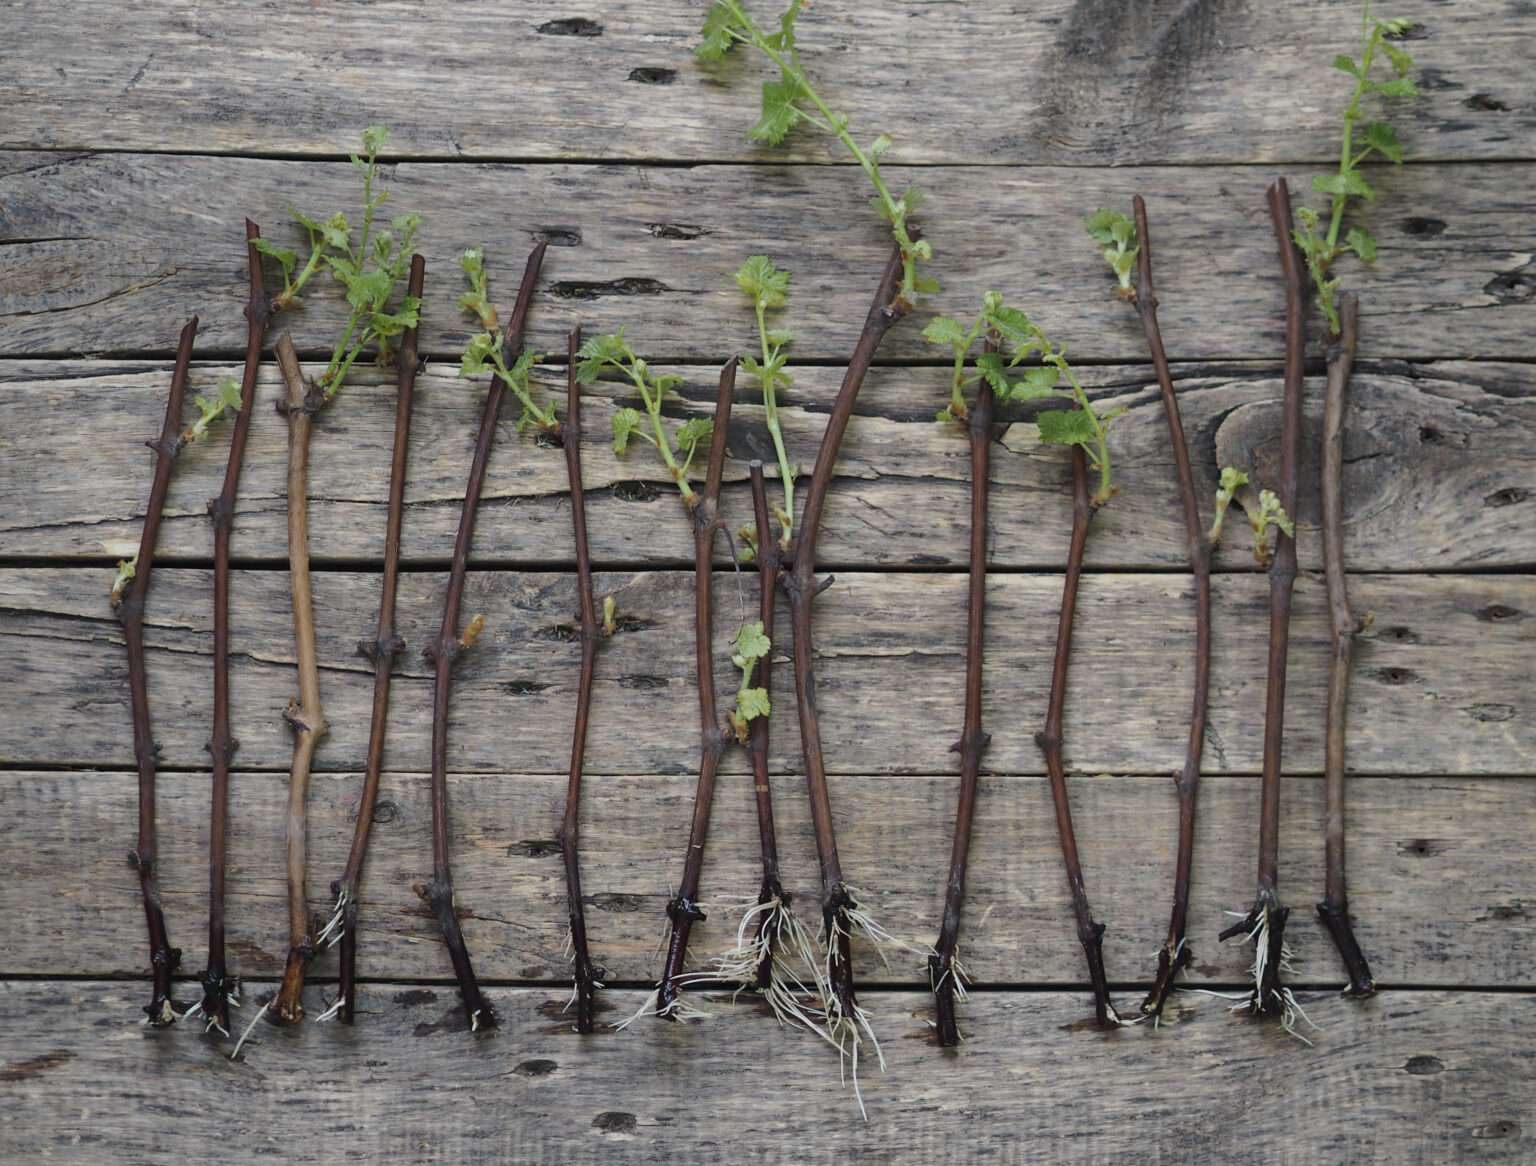
Hardwood cuttings, which are removed from inactive grapevines over the fall and winter, essentially look like sticks. At first glance it’s hard to imagine the cuttings producing any growth at all, let alone flourishing, but with a little bit of TLC you’ll be surprised at how the cuttings transform over time.
You can use cuttings leftover from pruning grapevines, or you can intentionally remove specific parts of the plant for the purpose of propagation.
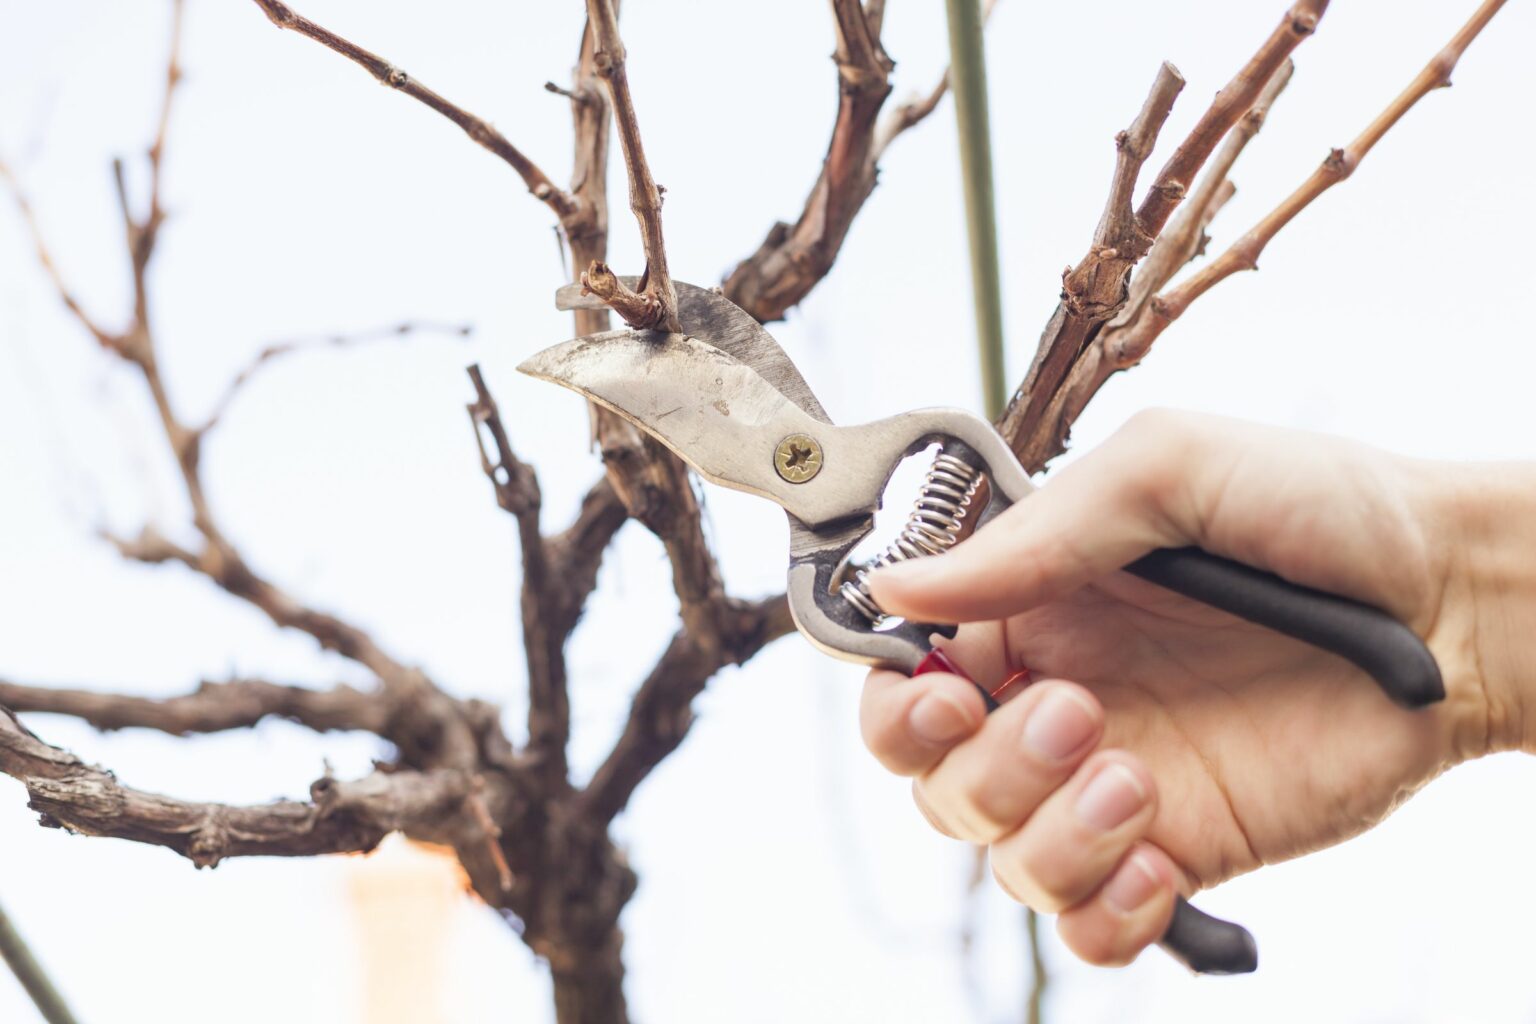
To get started, take a good look at the stems you plan on propagating, paying extra attention to where the plant nodes are (this is where the leaf buds will eventually grow from). You’ll be taking cuttings from the stems using a sharp pair of pruning shears, being careful to leave one or two leaf nodes on the remaining branch so that the grapevines will continue to grow and remain healthy after the stems have been removed.
Because the cuttings will be planted in a deep pot (and eventually into the ground) it’s important to keep them on the longer side. I aim to keep them at around 12 to 18 inches in length. Once you’ve gathered the cuttings, store them in a cold, moist environment until the beginning of the growing season.
A basement or the crisper drawer of your refrigerator works well for this, just be sure to wrap them in plastic and put damp shavings or newspaper in there with them to keep them from drying out.
You have two options for prepping the cuttings for soil: Callusing or dipping into rooting hormone.
Callusing involves placing the cut ends of the stems in a warm, humid environment for a few weeks, allowing the tissue to form a protective layer. This can speed up root development, but it’s not strictly necessary if you prefer to use rooting hormone instead.
The term ‘moist heat’ refers to keeping the cuttings at room temperature in a humid environment, not hot conditions. They’ve been in the cold before this, so room temperature is quite warm to the plant at this point.
Instead of waiting for the cut side to callus, I actually prefer to dip the roots in a rooting hormone, which is a much easier and more fail-proof method. Using rooting hormone can significantly boost the success rate of your hardwood cuttings by stimulating faster and more vigorous root growth. Simply dip the cut end of each cutting into the hormone powder immediately before planting the cuttings about 2 to 3 inches deep in moist potting soil. While it’s not strictly necessary, rooting hormone helps increase the chances of successful rooting, especially for more challenging grape varieties.
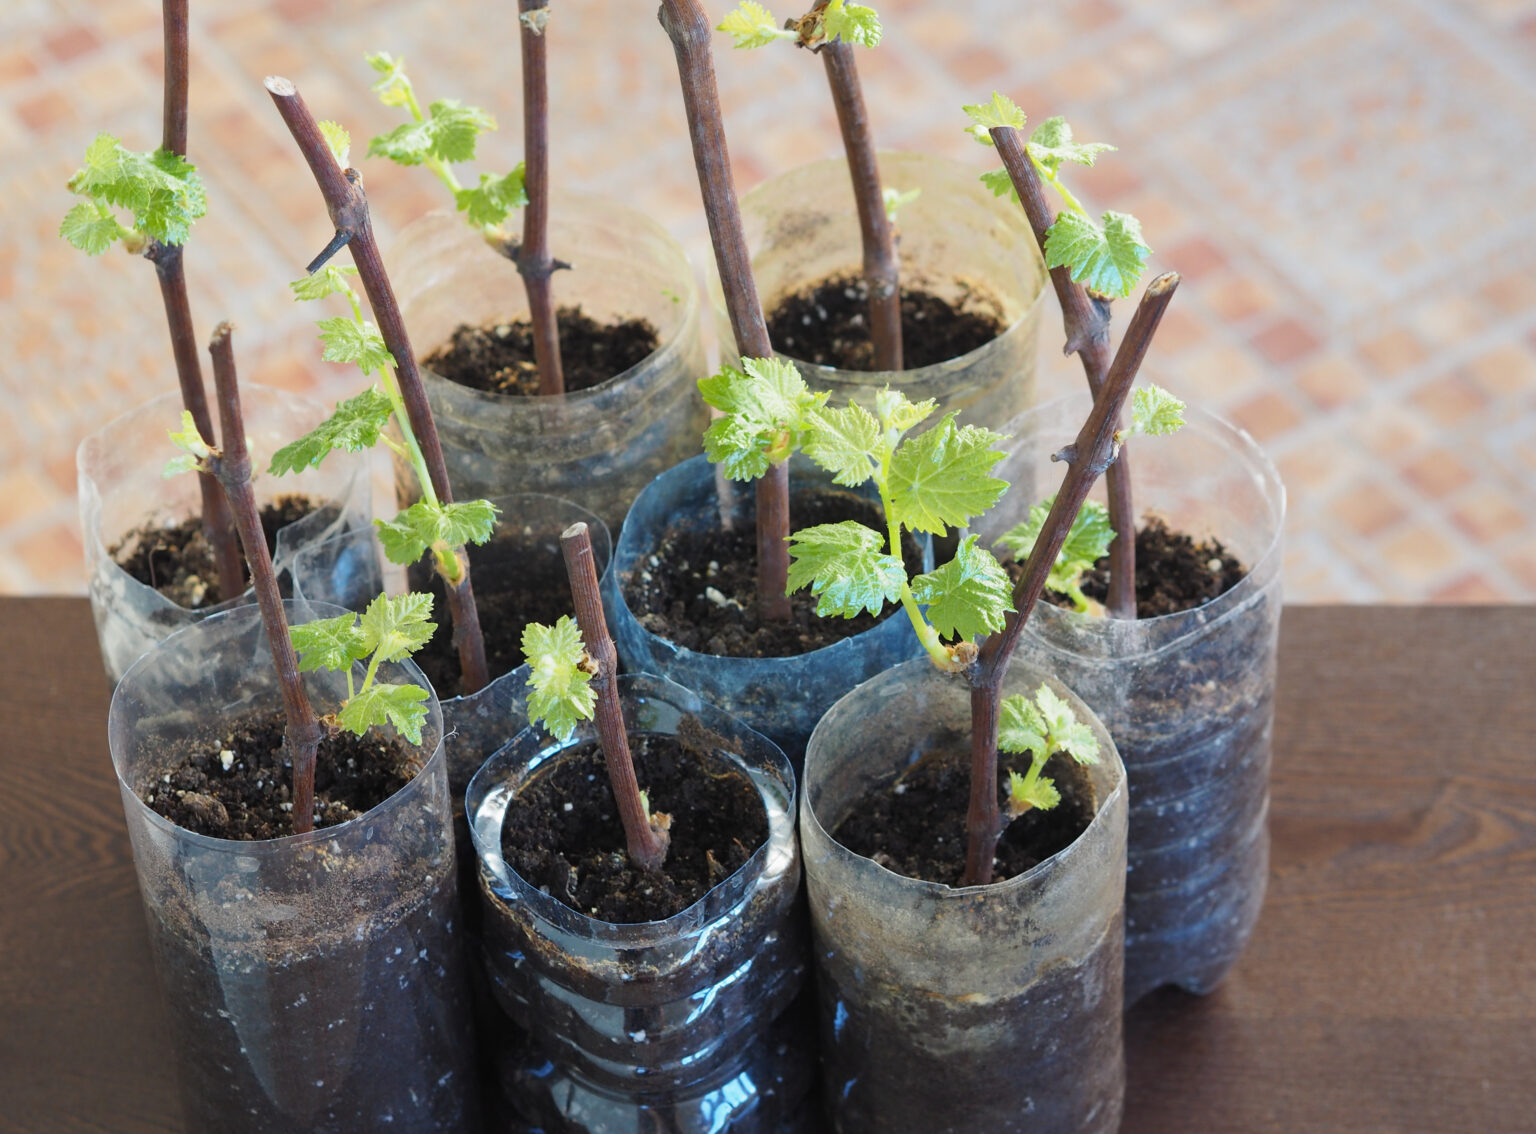
Give the cuttings a good water after they’ve been planted and keep the soil moist as they continue to grow. Keep the potted grape cuttings indoors until the growing season officially begins. I like to keep them in our attached greenhouse until it’s time to replant them outdoors, but a sunny windowsill actually works better.
You don’t want the plants to get too hot and dry out at this early stage when they don’t have proper roots.
Alternately, you can dissolve a bit of rooting hormone in water and place the cuttings in a vase. Be sure to change the water every few days so it doesn’t get gross/slimy/moldy. The grapes regularly changed need clean fresh water to prevent plant disease, but they will root just fine in water without soil.
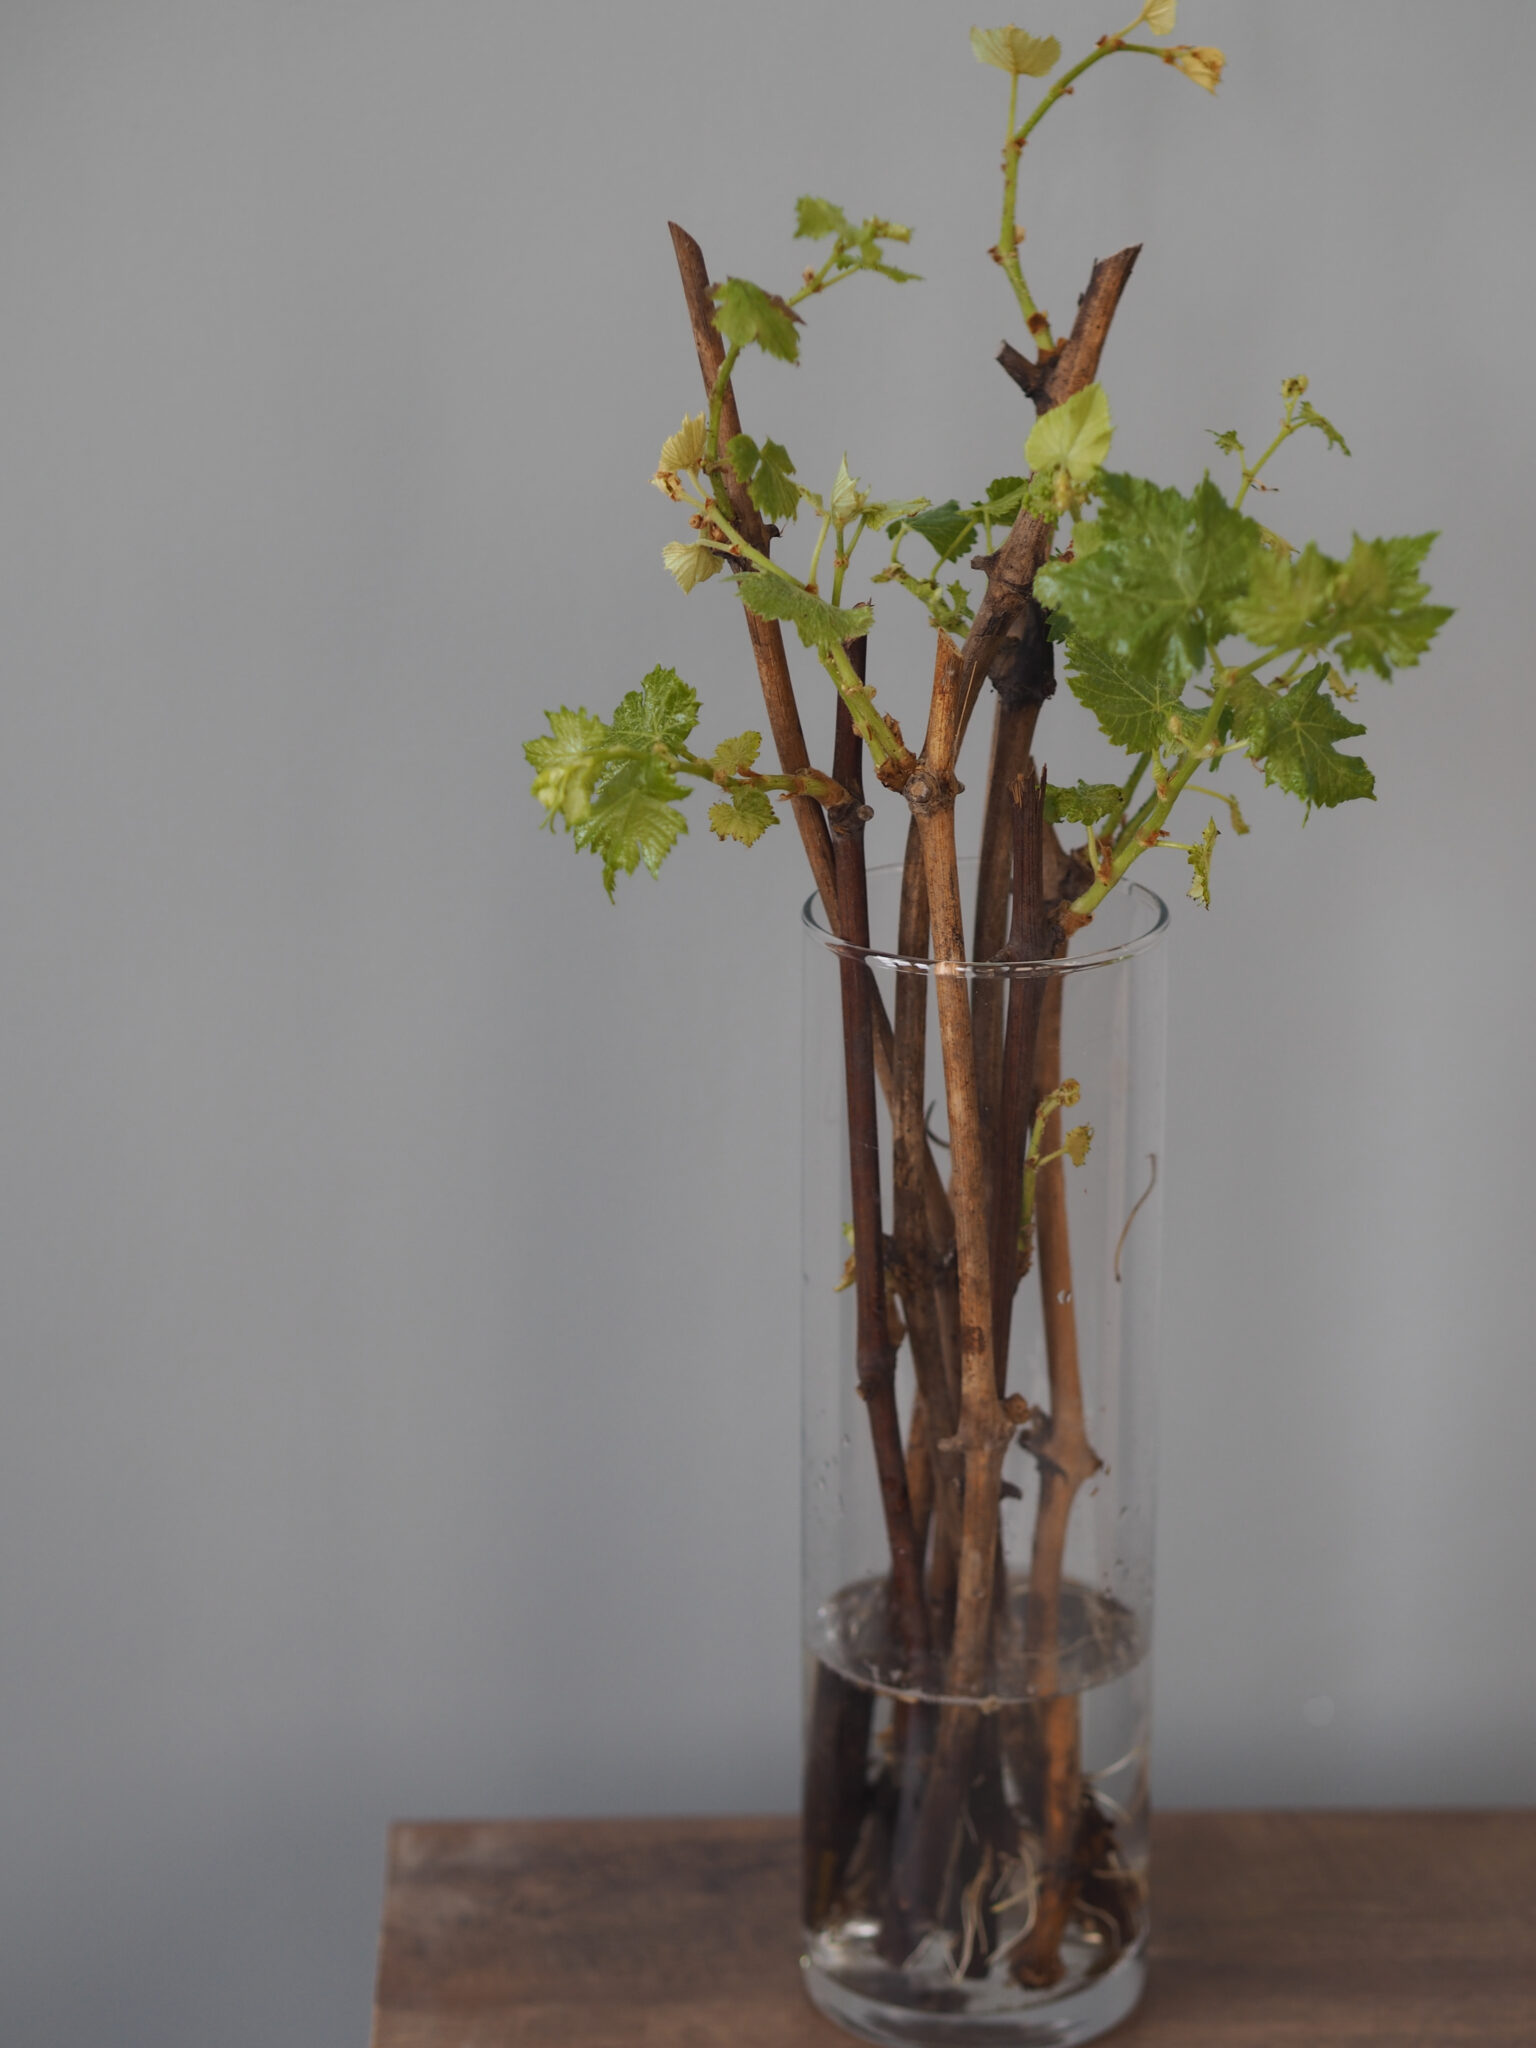
Once you see the roots start to form in water, it’s time to get those plants into soil. The water doesn’t have any nutrients, and they’ll need actual soil to develop properly over the long term.
When rooting grape cuttings in water, it’s important to remember that while this method is effective for initial root development, the cuttings may not be as strong or long-lasting as those rooted directly in soil. The water provides no nutrients, so once roots form, it’s crucial to transplant the cuttings into a well-draining potting mix to support healthy growth and ensure a more robust vine in the long run.
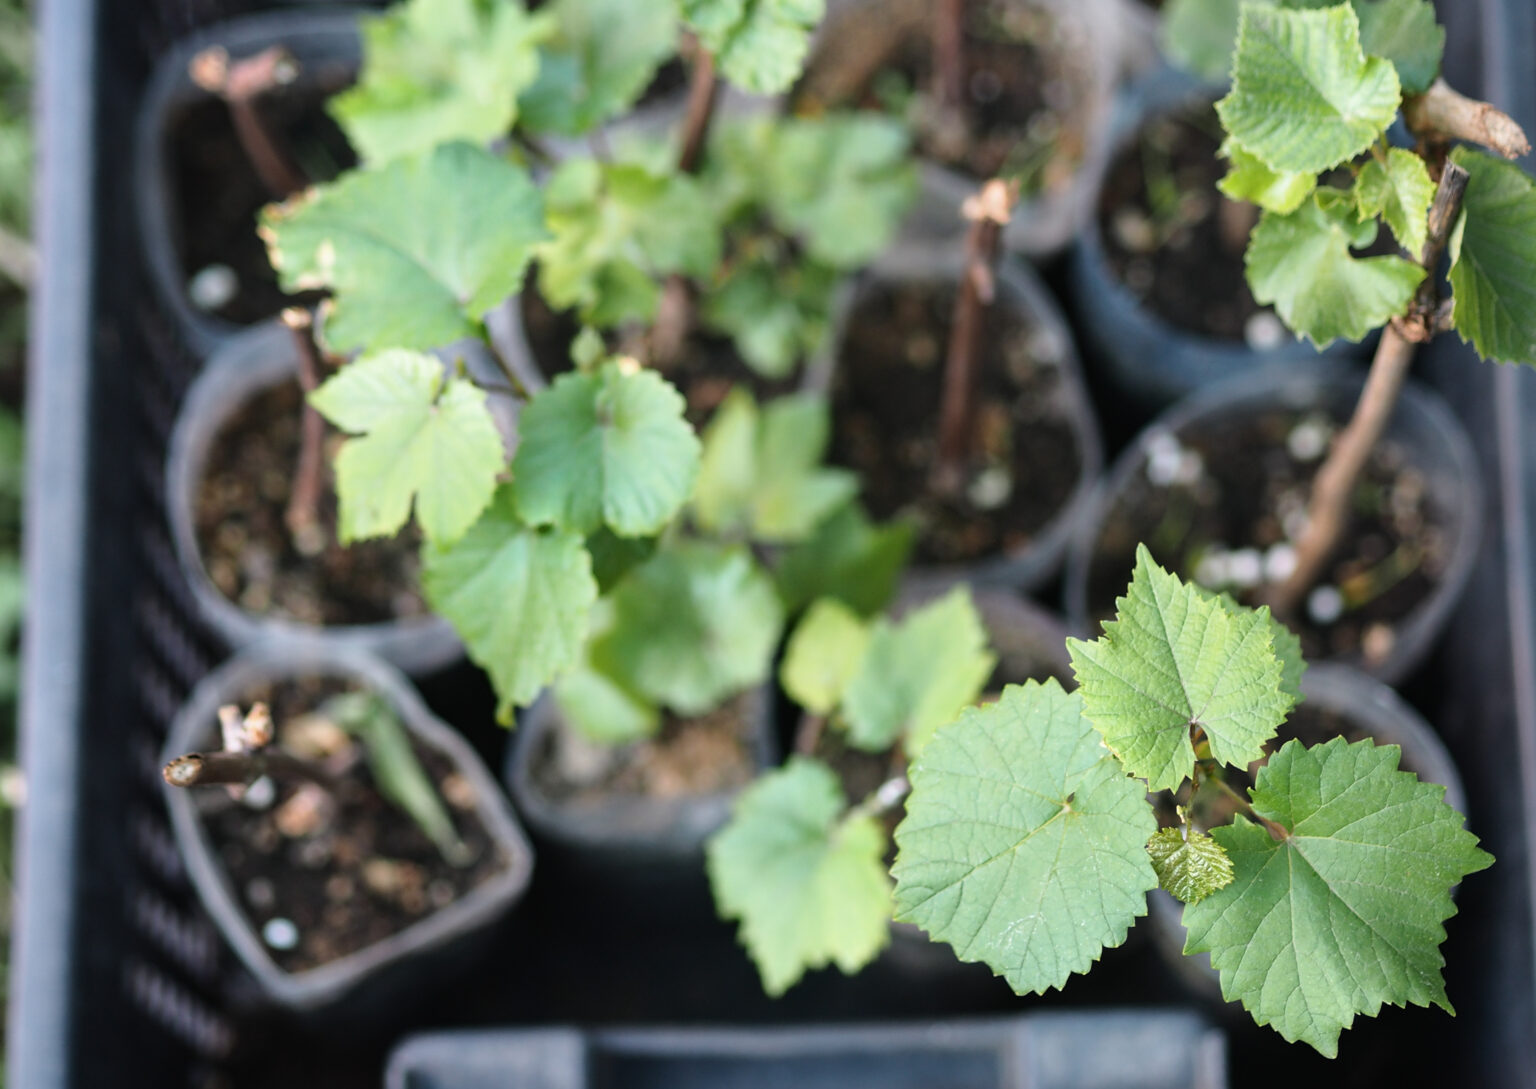
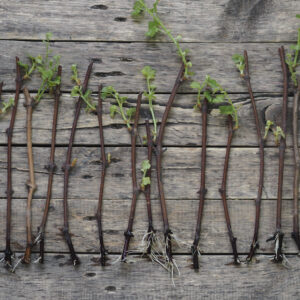
Before you move the cuttings outside, make sure they’re firmly rooted in the pots. You’ll probably see buds beginning to appear after a couple of weeks, but the new roots will need longer to become established in the soil. The best time to replant grapevines is in early to mid-summer, giving the cuttings plenty of time to grow and thrive in the comfort of their pots.
In general, cuttings taken from dormant or hardwood have an 80 percent chance of success, which is why I like to start with several cuttings. That way, even if some don’t make it, I’ll still have plenty of cuttings to plant outdoors when the right time rolls around.
Since you want a deep pot, repurposed plastic water bottles work really well, just cut a few holes in the bottom for drainage. Milk jugs, either waxed paper or plastic work well too.
Common Mistakes
While propagating grapes from hardwood cuttings is relatively simple, there are a few common mistakes that can hinder success. By being aware of these pitfalls and taking preventative measures, you can improve your chances of success.
Improper Storage Conditions: One of the biggest mistakes is storing cuttings under the wrong conditions. Hardwood cuttings should be stored in a cool, moist environment, ideally between 40-50°F (4-10°C). If the cuttings are stored in too-warm or too-dry conditions, they may dry out or rot. Conversely, overly moist conditions can cause mold growth or premature sprouting. A simple solution is to store the cuttings in damp sand or sawdust in a cool, shaded area, ensuring they stay hydrated but not soaking wet.
Over-Watering: Avoid over-watering your cuttings after they’re planted. While it’s important to keep the soil moist, waterlogged soil can lead to root rot and fungal diseases. To prevent this, ensure the potting mix is well-draining and only water when the top inch of soil feels dry. Proper drainage holes in the container will also help excess water escape.
Incorrect Rooting Hormone Application: Using rooting hormone can significantly increase the success rate of your hardwood cuttings, but it’s important to apply it correctly. Some beginners make the mistake of dipping the entire cutting in the hormone, which can lead to clumping and uneven distribution. For best results, dip only the cut end of the cutting into the rooting hormone and tap off any excess. Too much hormone can cause the cutting to fail, as it may interfere with proper root formation.
Planting Too Deep or Too Shallow: If you plant the cuttings too deep, there may not be enough energy for the buds to sprout, leading to poor growth. On the other hand, if the cuttings are too shallow, they may not develop enough root structure to support healthy growth. For hardwood cuttings, aim to plant them about 2 to 3 inches deep, ensuring that at least one or two buds are below the soil surface.
Lack of Patience: Rooting grape cuttings can take time, sometimes several weeks. One of the most common mistakes is impatience—many gardeners dig up their cuttings too soon to check for roots, interrupting the process. It’s crucial to allow the cutting to stay undisturbed until roots have had sufficient time to form. Avoid the temptation to pull or disturb the cutting, as this can set back root development.
Growing Grapes from Cuttings
Equipment
Ingredients
- Dormant grapevines (from fall or winter pruning)
- Rooting hormone Optional, but recommended
- Potting Soil
Instructions
- Select the Right Cuttings: Choose healthy, mature wood that is 12-18 inches long and includes at least three buds.
- Prepare the Cuttings: Trim the cuttings, removing any leaves, and dip the cut end in rooting hormone.
- Plant the Cuttings: Place the cuttings 2-3 inches deep in moist potting soil.
- Maintain Moisture and Temperature: Keep the soil moist but not soggy. Place the pots in a warm, humid spot.
- Wait for Roots: Roots should begin to form within a few weeks. Once established, transplant the young vines into larger pots or into the garden.
Notes
Tips for Success with Hardwood Cuttings
While propagating grapes from hardwood cuttings is one of the easiest methods, there are a few tips that can significantly increase your success rate:- Select Healthy, Mature Wood: Choose wood from a healthy grapevine that is 1-2 years old. It should be firm and slightly bendable, not brittle or overly green. The best cuttings are typically taken from the middle of the vine, rather than the very tip or base.
- Cut Cleanly and Sharply: When taking cuttings, use a sharp, clean knife or pruning shears. A clean cut reduces the risk of introducing disease or pests. Make sure the cut is straight to maximize the surface area for root growth.
- Ensure Adequate Buds: The cutting should have at least 3-4 buds to increase the chances of successful rooting. The more buds you have, the higher the chance that at least one will sprout and develop into a healthy plant.
- Avoid Over-Drying: After taking the cuttings, store them in a cool, moist environment until you’re ready to plant. If they dry out too much before planting, they are less likely to root successfully. Wrapping cuttings in a damp cloth or placing them in a plastic bag can help preserve moisture.
- Callus the Cuttings: If you’re storing your hardwood cuttings for any period before planting, consider callingusing them. This process encourages the cut ends to develop healing tissue, which promotes faster and more reliable root development. Be cautious, however, as too much heat or moisture can cause the cuttings to rot.
- Use Rooting Hormone: While not strictly necessary, dipping the cut ends of your hardwood cuttings into rooting hormone can greatly boost success rates. Rooting hormones stimulate root growth and increase the chances of the cutting successfully establishing roots.
- Ensure Proper Planting Depth: Plant your cuttings about 2-3 inches deep in moist, well-draining soil. Make sure the cutting is buried with at least one bud beneath the soil surface.
- Maintain Consistent Moisture: Keep the soil consistently moist, but not soggy, during the rooting process. Avoid letting the soil dry out completely. Regularly misting the surface can help maintain humidity levels and keep the cutting from desiccating.
- Provide Temperature Control: Hardwood cuttings root best when the soil temperature is between 60°F and 70°F (15°C-21°C). If temperatures are too cold or too hot, rooting success may decrease.
- Patience is Key: Rooting from hardwood cuttings can take several weeks to months. Be patient and don’t be discouraged if it takes time for roots to develop. As long as the cutting stays healthy, it’s likely to take root eventually.
Propagating Plants
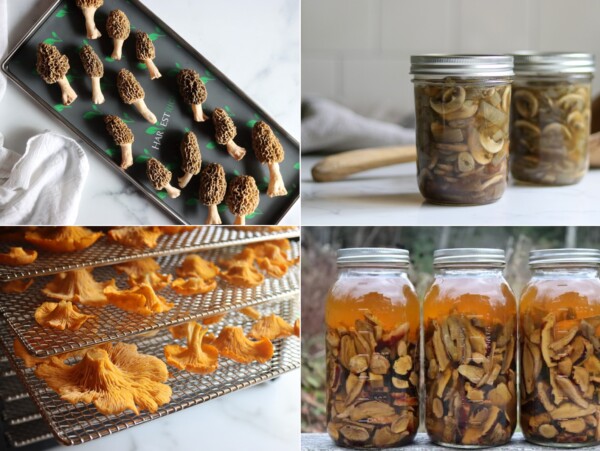
Grapes aren’t the only fruiting perennials that can be propagated by cuttings.
You can also use the hardwood cutting method to propagate a number of other plants, and many varieties have 80-99% success rates. We grow sea buckthorn from cuttings and have had near 100% success rates.
Likewise, it’s incredibly easy to grow elderberries from cuttings.
Growing blueberries from cuttings is a bit trickier, but success rates are still reasonably high. Blueberry plants are incredibly expensive at nurseries, so it’s worth the effort even with a somewhat lower success rate.
Perennial Growing Guides
Looking for more growing guides? Read on…
- Growing Strawberries from Seed
- Growing Rhubarb from Seed
- Growing Asparagus from Seed
- How to Plant Asparagus
- Growing Garlic as a Perennial
- 30+ Perennial Vegetables


I refer to your site frequently as I live a similar kind of life. I’m going to steal your idea and try some of my cuttings in repurposed water bottles this year and not use up so much soil and space as when I use the 12 inch deep pots specially made for cuttings. Good idea! Thanks for sharing all your stuff.
Wonderful! I’m so glad it’s helpful to you =)
I love it, Thanks for the info.
Hi!
Just a slight correction:
“muscadines and pigeon grapes can only be propagated using greenwood cuttings”
This isn’t true. We just propagated 80% of our muscadine cuttings from last year’s growth that were just coming out of dormancy: some in water, some in grow mix, and some in plain dirt. 🙂
Very Best Regards,
Tom Scott
That’s good to know. Thanks for sharing.
To root grape vines in water, how much rooting hormone do you add to the water? Thank you!/
I’m not sure. We don’t usually measure. Just a small amount should be plenty. I have actually successfully rooted plenty of cuttings without rooting hormone.
Thank you for this post. My dad planted 7 concord vines in 1963. I have one left and it’s not doing well. I hope to propagate it and continue growing it. I’ve tried seeds to no avail but now will try cuttings. This will probably be the last year since last year it had a few leaves and no fruit. Crossing my fingers.
I hope you’re able to save it.
Greetings Ashley!
I am getting ready to prune my Concord grape vine, and I would like to use those cuttings to try and make new vines. I read through your article and was wondering if I could keep the cuttings in our unheated shipping container until it warms a bit and I can begin rooting them. There are no windows in the shipping container and it obviously stays cold in there.
Would that be too drastic? Not enough light/too cold? We live in SW Missouri and right now we are dropping below freezing at night (averaging 20s) and averaging 30s/40s/50s during the day.
As long as you’re able to keep them moist then I think it should work. Let us know if you decide to try it.
I kept the cuttings in our crisper drawer so I could make sure they stayed moist and I didn’t forget about them. I kept them in there for a couple weeks and now have them in water and they are starting to leaf out. Do I need to put more rooting hormone in each time I change the water? There are no roots as of yet, but virtually all of my cuttings have buds that are beginning to open.
It wouldn’t hurt to add more rooting hormone, but I have successfully propagated cuttings without it as well.
Thank you!
You’re very welcome.
I grow Valiant grapes on the mn/canada border. I have 3 of them and no need for others for polination. they are small fruits, but hey its up north! makes the best grape jam. 😉
I live in Calgary so I highly doubt grapes will grow here (zone 3), but if I ever go back to BC, this will be a very handy guide.
You might try planting along a southern face of a wall, with additional protection from which ever direction your winter storms come.. Roots well mulched and covered with straw might combine to create a zone 4 or higher microclimate.
We’re zone 4b and have some vines on the north side of our garage. At 42’ N they produce because they get several hours of sun during summer.