Affiliate disclosure: This post may contain affiliate links. Please see our Privacy Policy.
Hard cider is a tradition that’s as old as the craft of orcharding itself. Some of the first apple trees produced sour, bitter apples that aren’t great fresh but ferment into a spectacular alcoholic cider.
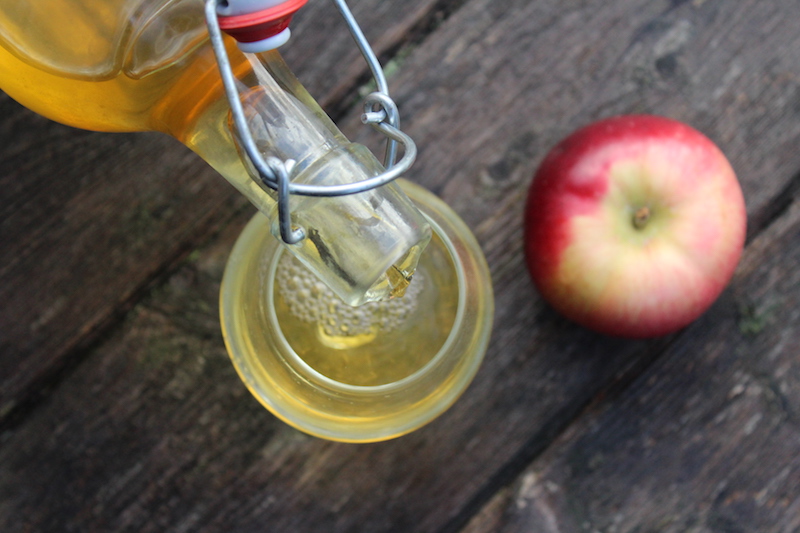
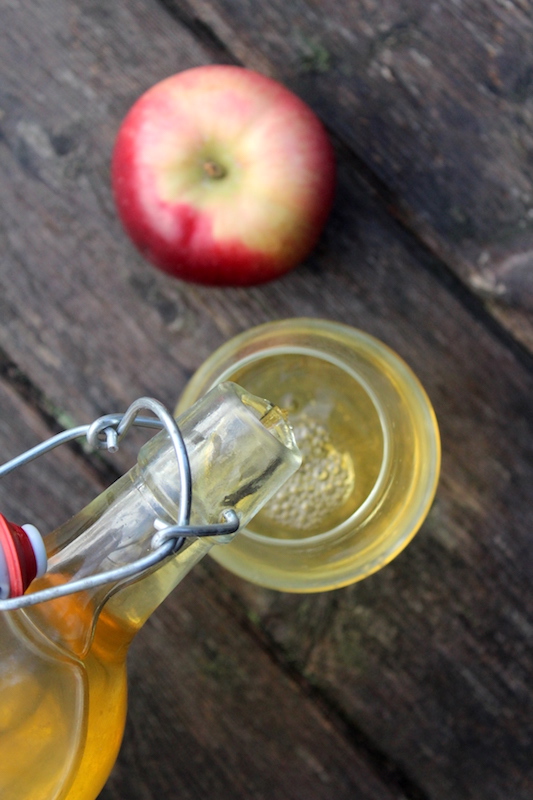
Making hard cider is really easy, and chances are you’ve already done it if you’ve kept a jug of orchard-fresh cider in the back of the fridge too long. Apples contain plenty of fermentable sugar, along with aromatic compounds that give them their characteristic flavor. Natural cider yeast live on the surface of apples right out in the orchard, and once you’ve pressed the juice, hard cider just happens!
Raw apple cider will begin to ferment and become alcoholic in about 24 hours if left at room temperature. Generally, it’s refrigerated to slow that process, but even in the fridge, the little yeasts are still working, just slower. Even in cold temperatures, left to their own devices without preservatives (and with the cap cracked to prevent the buildup of pressure), you’ll have hard cider within a few weeks.
So if it’s that easy, and the cider is just going to happen, why on earth do you need to keep reading? Good question.
The answer is simple though…while making hard cider requires no skill what so ever, making GOOD hard cider is an art. By choosing the proper ingredients and controlling the fermentation, you can make truly exceptional hard cider at home with minimal equipment or experience.
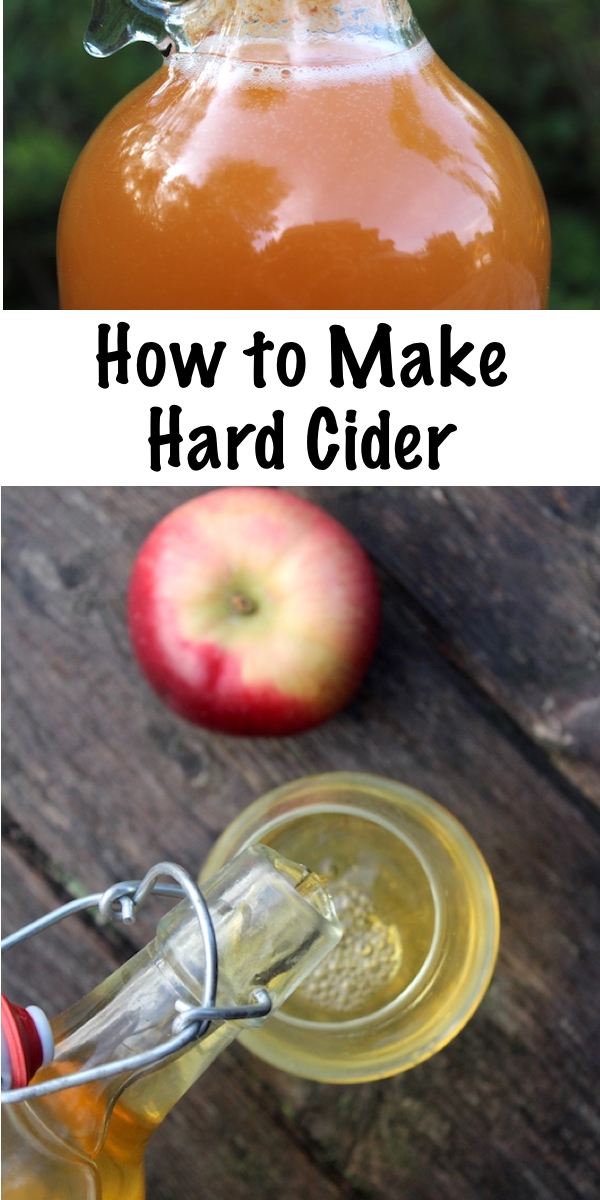
How to Make Hard Cider
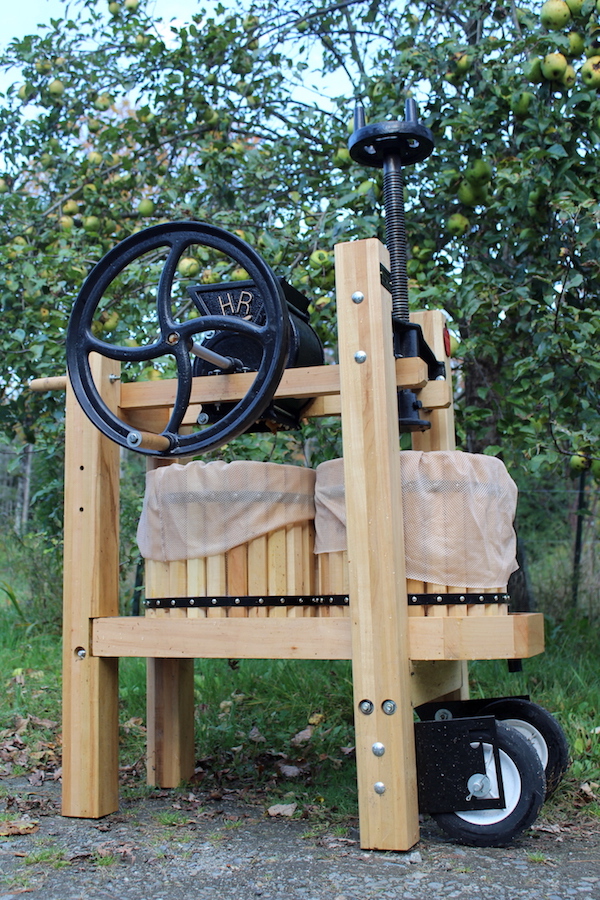
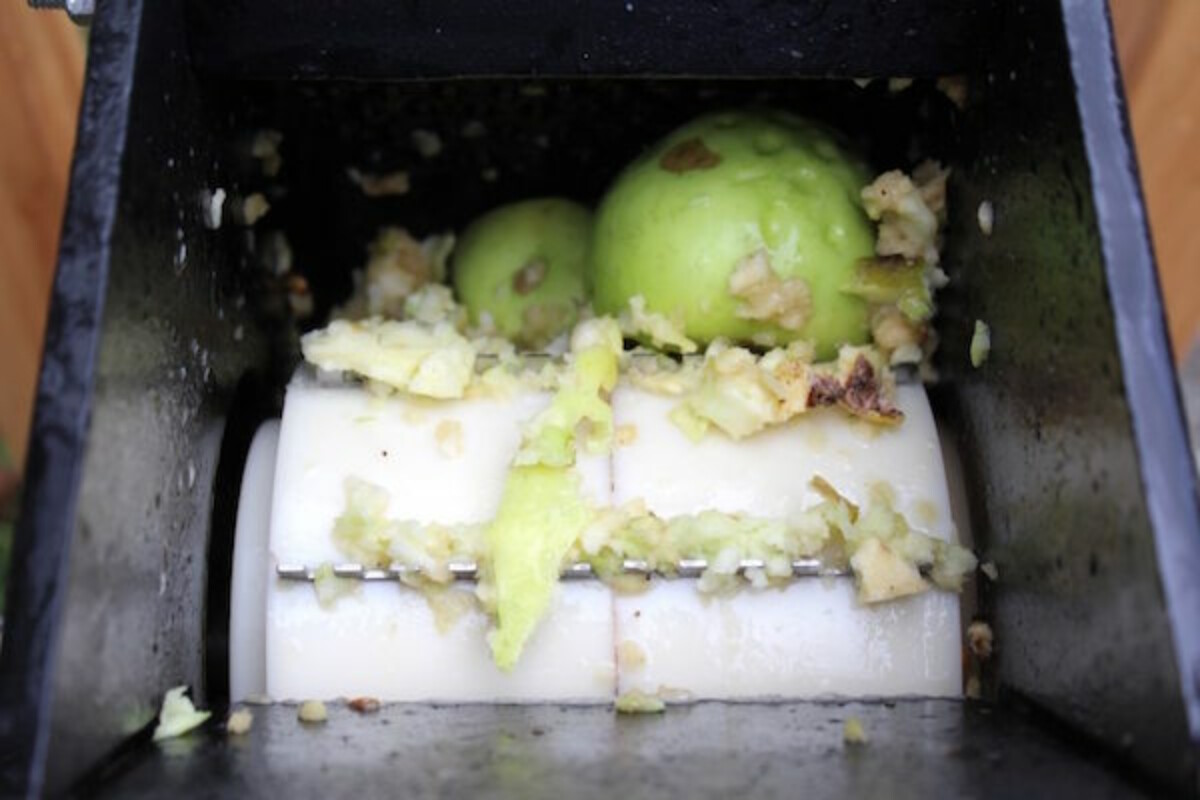
The basic process for making hard cider is pretty simple. Start by pressing apples, or acquiring fresh-pressed cider from a local orchard (without preservatives). Often grocery store cider contains potassium sorbate, and there’s nothing on earth that’ll get that cider to ferment, so be sure you’ve got a completely fresh, preservative-free cider as a base.
We use a really lovely double-barrel cider press that’s efficient and works really well with our homegrown cider apples.
Sanitize all your equipment with a no-rinse brewing sanitizer (more on this later). The equipment for making hard cider, at a minimum, includes:
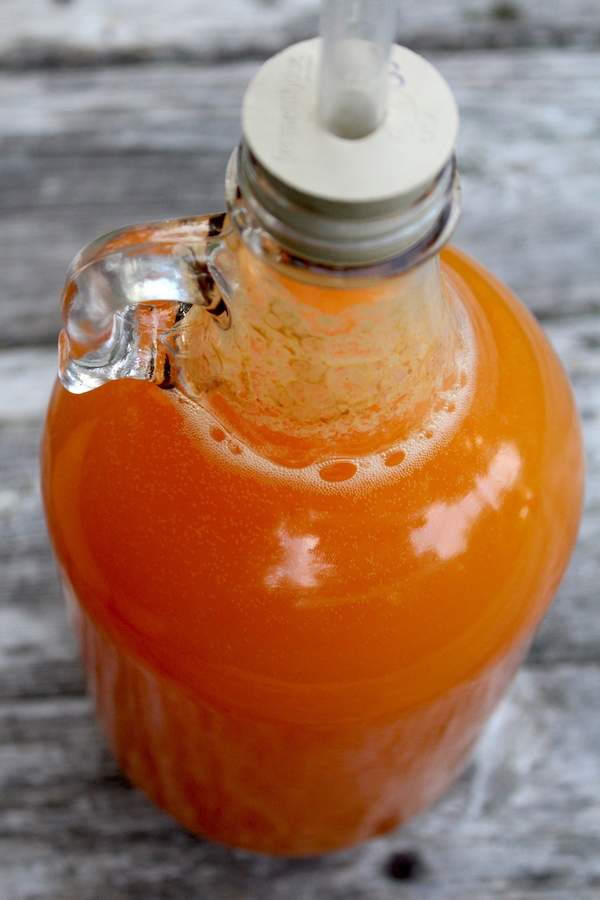
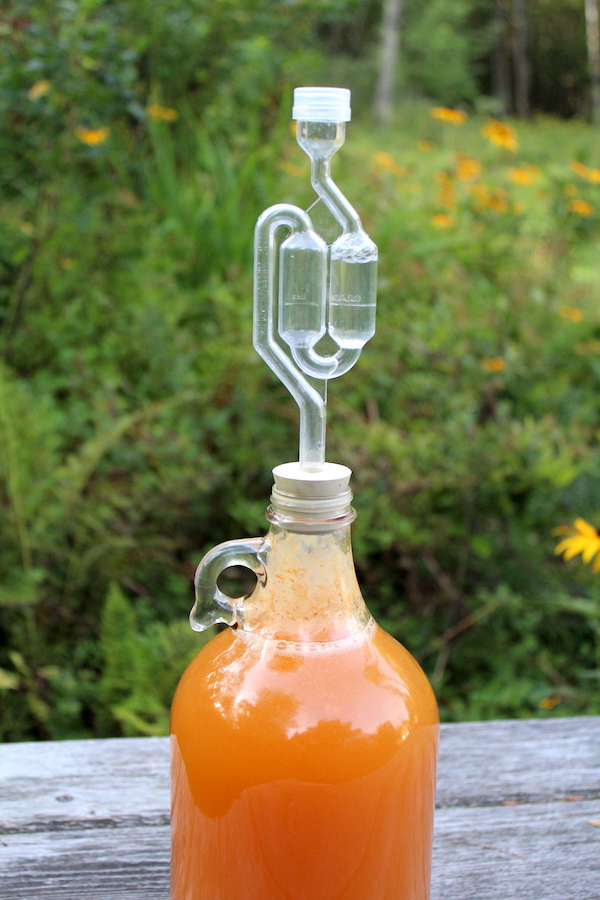
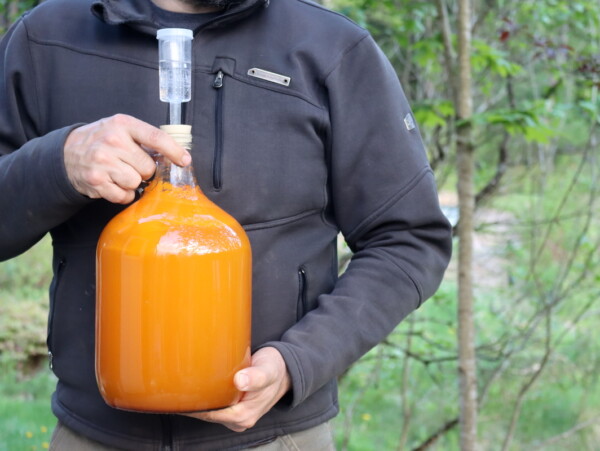
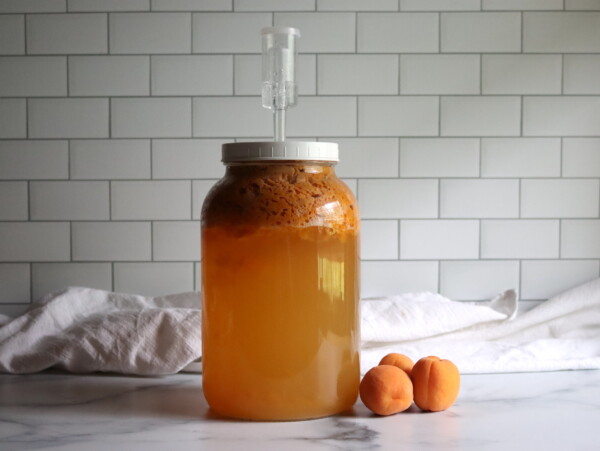
- A Fermentation vessel ~ usually a one-gallon glass carboy jug for small batches or a five-gallon fermentation bucket for larger batches. If you’re racking the cider for more clarity, you’ll need two of these (more on this later).
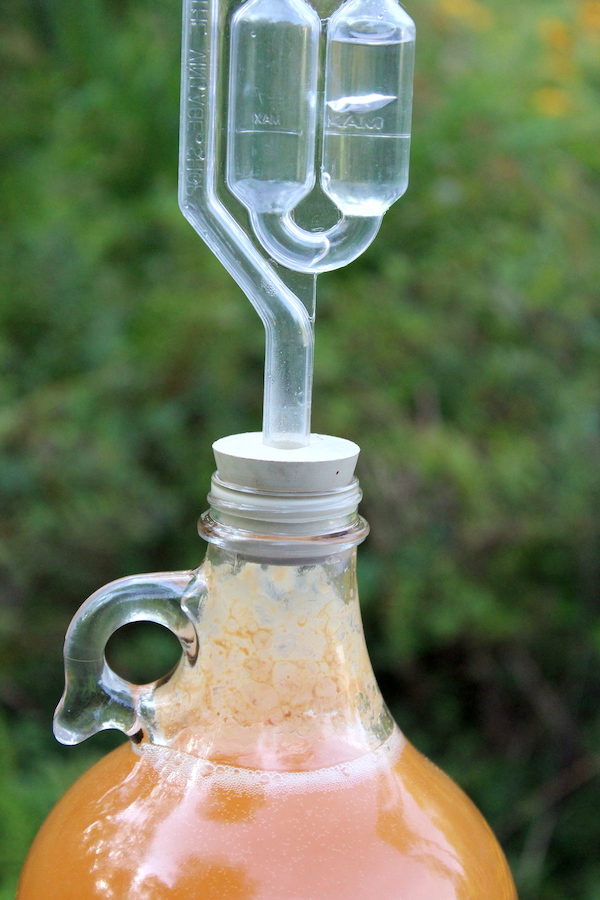
- Rubber Bung & Water Lock ~ This often comes with the fermentation vessel, but sometimes not. It’s basically a one-way valve that allows CO2 to escape but prevents contamination from getting in.
- Brewing Sciphon and Tubing ~ This is required for bottling, and for racking the cider (optional). It’s the best way to pull off the clean finished cider without disturbing the natural sediment at the bottom of the fermentation vessel, which will create off-flavors (and look nasty) in the finished cider if it’s included in the final bottles.
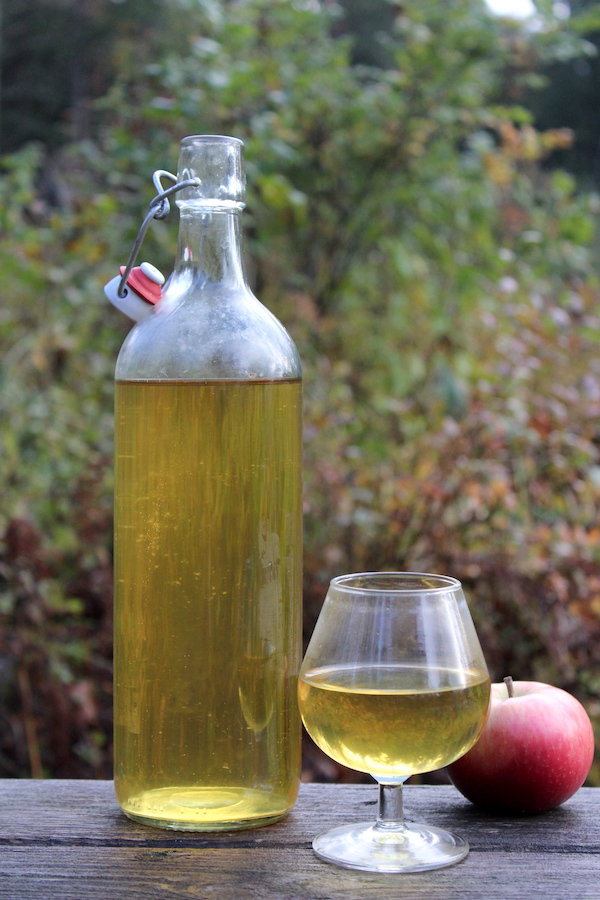
- Bottles, Caps and a Bottle Capper ~ Usually clean beer bottles, metal caps, and a beer bottle capper. You can also use wine bottles and corks, and for small batches, Grolsch bottles work great and don’t require a capper.
After obtaining the juice and the sanitizing equipment listed above, place the fresh cider into a fermentation vessel (one or five-gallon based on batch size).
At this point, some people choose to sterilize the fresh cider with Camden tablets (potassium metabisulfite) to kill any wild yeasts. If you choose to do this, add 1 tablet per gallon of cider and wait 24 to 36 hours before proceeding.
I skip this step because while all apples are covered in wild yeast strains, they’re in low concentrations and they’ll quickly be overwhelmed by the cider yeast pitched into the batch. Know that this step is optional, and used by modern brewers to completely control the process, but if you’d like a less chemical-heavy process you can skip it knowing that the wild yeasts present in small concentrations will not noticeably affect the finished cider.
Another option for sanitation (besides adding Camden tablets) is to heat the cider to 165 degrees and hold it there for about 10 minutes. This will low temperature pasteurize the cider, but it will also drive off some of the aromatic compounds in the process. This heat treatment, just like Camden tablets, is optional and will give you more control over the finished taste of the cider and the yeast strains at work, but it comes at a potential loss of flavor.
Campden tablets, heat treatment or not, the next step is to add the other ingredients (if any). None of these are strictly required, but all will result in a better quality hard cider.
- Pectic Enzyme breaks apart fruit cells and will help get every last bit of flavor and juice out of the pectin apple fiber present in the cider. It’ll also cause any remaining apple fiber to sink to the bottom to clarify the hard cider. Without it, the finished product may be cloudy. It’s not required, but it does improve hard cider quality. Use 1/2 tsp of pectic enzyme per gallon of cider.
- Yeast Nutrient isn’t strictly necessary either, but it is strongly recommended. It helps to feed the yeast by providing some of the micronutrients they need to thrive. It’ll help ensure a quick and thorough fermentation where cider yeast dominates, and avoid stalled or sluggish ferments if conditions (temperature, acidity, etc) are not ideal. Add 1 tsp yeast nutrient per gallon of cider (usually, some brands are different, read the package instructions).
- Cider Yeast is technically optional unless you’re using Camden tablets to kill all the wild yeast in which case you must use it. That said, while you can make a cider with the wild yeast present on the apples, the results will be inconsistent and you’ll likely be disappointed. Yeast strains add a lot of flavor to the finished cider, and the wrong one will dramatically affect the finished cider. If you’d like to see this in action, make two batches from the same cider, one with wild yeast and the other with a commercial cider yeast. One packet of yeast is good for 5 gallons of cider.
There are a number of cider yeasts all with a slightly different nuanced flavor, but they’ll all work wonderfully in a cider. Safcider yeast is a safe bet, and a traditional strong fermenting cider yeast. Beyond that, here are a few others to try:
- Neutral flavor and dry finish: Red Star Premier Blanc or Lalvin EC-1118
- Fruity and Aromatic Flavors Added: Red Star Cote des Blancs or Lalvin 71B
At this point, you should have cider and whatever additives you’ve chosen in a fermentation vessel. Now it’s time to cap it up with a water lock to prevent contamination. This is basically a one-way valve that lets CO2 from the fermentation out, but prevents anything from coming in to contaminate your hard cider.
Allow the cider to ferment in a cool, dark place (about 60 degrees ideally) for 1 to 2 weeks. In the first few days, fermentation will be very active and the cider may foam up into the water lock.
Watch it carefully at this point and make sure you clean out the water lock if this happens to prevent a clog (which is a huge mess…). If you need to clean it out, take it off, wash it and then put the water lock back on.
After about 2 weeks, visible fermentation should have slowed to a stop. This can happen faster in warmer areas or slower if it’s colder. There should be a thick cake of brown solids at the bottom, known as the lees. This is a mixture of apple solids and dead yeast that has settled out during fermentation.
At this point, you have two choices: Bottle the cider right away, or rack it into a secondary fermentation vessel to allow it to ferment and clarify further. Either way, it’s important to get the cider off the lees at this point.
A hard cider left on the lees will develop off-flavors, and it should be racked or bottled as soon as fermentation slows/stops at around 2 weeks. If it’s still fermenting and bubbling occasionally, then rack it at this point to get it off the lees.
If racking, use a brewing siphon to carefully transfer the cider to a clean fermentation vessel, leaving the yeast cake (lees) behind in the primary fermentation vessel. Secure the fermenter with a water lock and allow the cider to ferment for another 2 to 4 weeks to further clarify the hard cider.
After that, you get to decide how you’d like to finish the cider, which will depend on your own tastes.
Finishing Homemade Hard Cider
When finishing hard cider, you have a few options. Generally, hard cider without any sugars added will be VERY dry.
There’s only a small amount of fermentable sugar in apples compared to grapes, and the yeast will have converted just about all of them to alcohol. Adding sugar at the beginning, unless you add A LOT of sugar, will just yield a dry cider with higher alcohol content.
On average, hard cider is only 4 to 6% alcohol and most yeast (depending on the strain) will continue working at 12 to 18% alcohol. At that point, the cider is no longer a true hard cider, it’s an apple wine because of all the added sugar and likely other things (tannins, etc) to balance it out. You’d have to add a lot of sugar to still have residual sugar after fermentation is complete.
Here are a few hard cider finishing options:
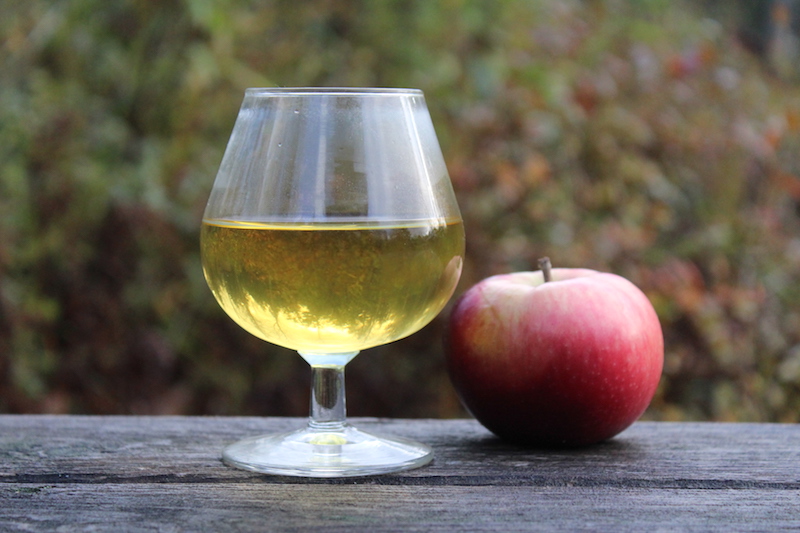
- Dry, Still Cider – Allow fermentation to complete and bottle the cider as is, for a very dry, still cider that’s likely 4 to 6% alcohol. Some drink this cider, but many people find this unpalatable. It stores well and is great for marinades or mixed cocktails with added sugar.
- No Additives Natural Cider (short shelf life) ~ Bottle a bit early, while fermentation is still active but slowed, after about 10ish days depending on temperature. Allow the bottles to carbonate for a few days, and then either drink the cider relatively quickly before too much carbonation develops to pop the bottles, or store in a very cool space (refrigerator or cellar). This method is not meant to be stored for long periods and can be a bit unpredictable. It’s a primitive method, with no added sugar or sulfites that satisfies those looking for an “all-natural” approach to hard cider making.
- Carbonated Hard Cider ~ Allow the fermentation to finish, then back sweeten the cider with corn sugar (about 1 ounce per gallon, dissolved in a bit of boiling water and then cooled completely). Bottle and allow the bottles to carbonate at room temperature for about a week, then move to a cold storage location to prevent over carbonation (a cold cellar or refrigerator). This cider will keep 3 to 12 months if kept cold enough.
- Still, Sweet Hard Cider ~ Allow the fermentation to finish, and then add stabilizers (potassium sorbate) to kill off all the yeast. Then back sweeten the cider with sugar for a balanced cider that’s not too dry, the amount will depend on your tastes. Brown sugar is a good choice since it complements the flavor cider nicely, but plain sugar, honey or maple also work. Since the yeast is all dead, it’ll be a still cider. This cider can be bottle-aged for extended periods. If using, add 1/2 teaspoon of potassium sorbate per gallon.
In a commercial setting, there are other options like adding artificial carbonation with CO2 after adding sugar and stabilizers, and perhaps there’s equipment for that on a home setting but I’ve never tried it.
Bottling Hard Cider
When bottling hard cider, you again have a number of choices. For small batches designed for immediate consumption, I usually opt for either flip top Grolsch bottles because they’re convenient and reusable.
They come in a variety of shapes and colors, so take your pick. They can be a bit expensive though, so this is best when you have a small amount of cider.
For a larger quantity of cider, beer bottles with commercial metal caps are a good choice. We use this when we’re planning a 5 gallon batch for some kind of gathering. If you time the batch right, you can bottle it all with a bit of residual sweetness and allow it to carbonate in the bottle for a short time.
I’d keep these in our cool basement until they’re all gone to avoid over carbonation issues. For this, you’ll need bottle caps, a bottle capper and a lot of clean sanitized beer bottles (reused is totally fine, so long as they’re clean).
Wine bottles also work for bottling hard cider, and then you’ll need clean wine bottles, new wine corks, and a bottle corker.
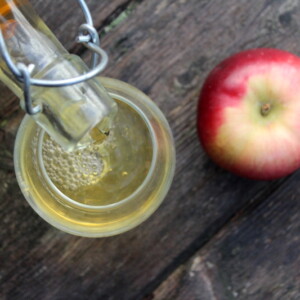
However, you plan to do it, sanitize everything to prevent contamination by acetobacter (vinegar causing bacteria) and then use either an auto-siphon to fill the bottles or rack everything into a bottling bucket with a bottling spigot (easier for large batches). Fill the bottles, leaving about 1 1/2 to 2 inches headspace. Cap or cork as appropriate.
Hard Cider
Equipment
- One Gallon Carboy e.g., glass carboy or fermentation bucket
- Winemaking Auto-Siphon for racking and bottling
- Beer Bottles Or Grolsch bottles, wine bottles, etc.
Ingredients
- 1 gallon fresh-pressed apple cider, without preservatives
- 1 packet cider yeast, e.g., Safcider, Red Star Premier Blanc
- 1 tsp yeast nutrient, optional, but recommended
- 1/2 tsp Pectic Enzyme, optional, for clarity
- 1-2 Campden tablets, optional, for sterilizing cider
Instructions
- If using fresh cider, ensure it’s free from preservatives (check the label for potassium sorbate).
- Pour the cider into a clean fermentation vessel.
- Sterilize the Cider (optional): If you want to kill off wild yeast and bacteria, add 1 Campden tablet per gallon of cider and wait 24-36 hours before proceeding. I don't do this, but some people prefer it. Alternatively, heat pasteurize the cider at 165°F (74°C) for 10 minutes. This will kill wild yeasts but may remove some flavor.
- Add 1/2 tsp of pectic enzyme to help clarify the cider by breaking down apple fiber.
- If desired, add 1 tsp of yeast nutrient to help the yeast thrive.
- Add your chosen cider yeast (typically one packet for 1 to 5 gallons).
- Pour everything into a fermentation vessel. Attach a rubber bung and airlock to the fermentation vessel. The airlock allows CO2 to escape while preventing contaminants from entering. Place the fermenter in a cool, dark location (around 60°F/15°C is ideal). Fermentation should begin within 1-2 days. The cider will start bubbling through the airlock as yeast converts sugar into alcohol.
- Allow fermentation to continue for 1-2 weeks, until bubbling slows or stops. During the first few days, monitor the airlock for clogging. If the cider foams up into the airlock, clean it out to avoid messes.
- Rack the Cider (Optional): After fermentation slows (usually 2 weeks), there will be a layer of sediment (called lees) at the bottom. Use a siphon to transfer the cider to a new fermentation vessel, leaving the lees behind. This helps improve clarity and reduces off-flavors. If you’re bottling soon, you can skip this step.
- Secondary Fermentation (Optional): If you racked the cider, allow it to ferment and clarify for another 2-4 weeks.
- Before bottling, finish the cider by leaving it as is, or adding sugar based on the choices below.
- For dry cider: Bottle directly without any added sugar for a 4-6% ABV dry cider.
- For carbonated cider: After fermentation, add 1 ounce of corn sugar per gallon, dissolve in a bit of hot water, and add it to the cider. This will encourage carbonation in the bottle.
- For sweet cider: Add sugar (brown sugar, honey, or maple syrup) to taste after fermentation finishes. To prevent further fermentation, you can add 1/2 teaspoon of potassium sorbate per gallon to stop yeast activity.
- Clean and sanitize your bottles (beer, wine, or Grolsch bottles all work). Use a siphon to fill the bottles up to the neck of the bottle, leaving about 1-2 inches of headspace. Seal with caps or corks, depending on your bottle choice.
- Bottle age the cider before opening. For a still cider with no added sugar, age for 3-6 months in a cool, dark space. For a carbonated cider with added sugar, let it carbonate at room temperature for about a week, then refrigerate to avoid over-carbonation.
Notes
You can let the wild yeasts present on the apples ferment the cider naturally, but it will likely lead to inconsistent results and off-flavors. Using a cider yeast will give you more predictable and controlled results. Popular strains like Safcider are great for a clean, traditional cider flavor. Apple Selection:
The quality of the apples you use is critical. If you can, opt for a mix of apple varieties:
- 30-60% Neutral Apples (e.g., Baldwin, Red Delicious)
- 10-20% Tart Apples (e.g., Granny Smith, Jonathan)
- 10-20% Aromatic Apples (e.g., McIntosh, Golden Russet)
- 5-20% Astringent Apples (e.g., Crab Apples or wild apples for tannin content)
- Red Star Premier Blanc: Neutral flavor, dry finish.
- Lalvin EC-1118: Another neutral, dry yeast strain.
- Lalvin 71B or Cote des Blancs: Adds fruity, aromatic flavors to the cider.
- Perry (Pear Cider): Use pears instead of apples for a different sugar profile and naturally sweeter taste.
- Honey Cider (Cyser): Add 1/4 lb of honey per gallon for a slightly sweeter, fuller cider.
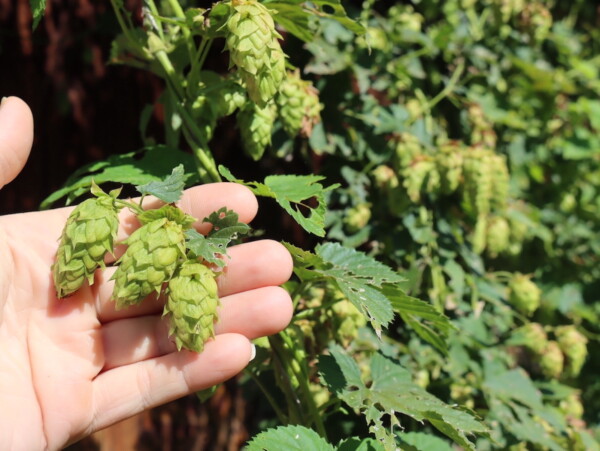
- Hopped Cider: Dry hop with a low alpha acid hop for a fresh, floral flavor.
- Fruity Cider: Experiment with fruits like pomegranate, peach, or berries for added flavor.
- Herbal Cider: Add herbs like lavender, basil, or chamomile for a unique twist.
Nutrition
Nutrition information is automatically calculated, so should only be used as an approximation.
Brewing Sanitation
Obviously, historically sanitation was less of a concern, as the role of yeast and microorganisms in the fermentation process was only discovered in the few centuries. You can, in fact, just mash up apples in any old bucket and the wild yeasts present on their peels will cause them to ferment into hard cider.
Yeast will quickly dominate the cider, and the risk of spoilage bacteria that’d be harmful to human health infecting the cider is negligible. Still, even though it likely won’t hurt you, poor sanitation is still a bad idea for a few reasons.
First, the yeast actually play a pretty big role in the flavor of a finished hard cider, or any alcohol for that matter. Heady topper, a famous beer we have here in Vermont, is actually pretty difficult (or impossible) to re-create without the right yeast. The yeast put out aromatic compounds and bi-products that flavor the final product, which is why there are specific cider yeasts that add flavors that compliment the apples.
Historically, cider was made in a vessel that was already impregnated with good yeasts from previous batches, or in a place that had the right yeasts in the air (such as a barn that’d been used for brewing for centuries). The yeast hanging around your kitchen may not be as ideal, which could lead to off-flavors.
Second, while there’s little risk of spoilage bacteria infecting a batch in a way that’d make it harmful to human health, there is plenty of risk that they could make it unpalatable. The yeast will dominate at the beginning, effectively sanitizing the brew with their alcoholic byproducts, but vinegar cultures (acetobacter) love alcohol and will quickly work on converting it to vinegar if they’re present.
Good sanitation will ensure that the right yeasts, namely the cider yeast strain you’ve chosen, will ferment the batch into a tasty hard cider. It’ll also ensure the batch doesn’t turn to vinegar, ruining all your hard work.
I’d suggest washing all equipment with a one-step no-rinse brewing sanitizer. It quickly sterilizes the equipment, but it denatures quickly without leaving any residue that will prevent fermentation a few minutes later. Pretty nifty.
Choosing Apples for Hard Cider
When you’re making a country wine out of just about any type of fruit, it’s customary to add things to balance out the flavor. Things like tannins to balance out sweet fruits, or acid to brighten others. True hard cider doesn’t have added tannins and acid and relies on the apples to provide the right balance of aromatics, tannins, and acid.
You can make hard cider from any type of untreated apple juice or cider. It’ll all ferment and it’ll all contain alcohol, and likely taste pretty decent if you don’t let it get too dry. That said, a truly exceptional hard cider relies on a good choice of apples.
Ideally, you’d have access to an old cider apple orchard which contains some mouth-puckering tannin-rich apples and some really tart acidic apples. You’d pair those with highly aromatic dessert apples, and blend the juice for the perfect hard cider mix.
The book Sweet and Hard Cider: Making It, Using It and Enjoying It has really detailed information on cider making, and it’s hands down the best book on cider making I’ve found to date. They discuss how the orchard conditions during the summer months will actually impact the chemical composition of the apples and even change how the finished cider ferments. The book suggests the following ratio of apple types for a high-quality homemade hard cider:
- 30 to 60% Neutral Base Apples ~ Baldwin, Ben Davis, Red Delicious, Cortland, Rome Beauty, Winesap, etc.
- 10 to 20% Tart Apples ~ Jonathan, Cox Orange Pippin, Northern Spy, Wealthy, Granny Smith, etc.
- 10 to 20% Aromatic Apples ~ Golden Russet, McIntosh, Roxbury Russet, Winter Banana, etc.
- 5 to 20% Astringent Apples ~ Crab Apples, wild apples or old-time cider apples chosen for their tannin content.
Often, old school orchards that press their own cider will have a “carboy day” where you can bring a fermentation vessel and they’ll fill it with a good mixture for homemade hard cider. One of our local orchards here in Vermont (Shelburn Orchards) does it at the very end of the season in late October. Similarly, Poverty Lane Orchard in New Hampshire, which produces some of the best commercial hard cider in the country, will fill carboys with a good hard cider mix if you make arrangements ahead of time.
Check with your local cider mill, likely they’re already working with other hard cider makers and you just have to ask. Or you can just scrabble together as many wild apples as you can find (most of which are high in acid and tannin) and then mix it with some storebought base apples, and press your own hard cider blend…
Making Hard Cider from Store-Bought Juice
If you’re making hard cider from store-bought juice, make sure it doesn’t contain potassium sorbate. Ideally, pick up raw cider fresh from the mill, but lacking that any preservative-free cider will work.
Around here, raw unpasteurized cider can only be sold on the farm and grocery stores carry preserved cider that’s been heat-treated (not true cider), pasteurized with UV light (a good option), or treated with potassium sorbate (which won’t ferment). Read the label, if it contains potassium sorbate it’ll say so.
In a pinch, you can also just buy a jug of commercial apple juice. That’ll technically work, but all the nuance of flavor is lost in that pasteurized, standardized juice.
If you choose commercial apple juice that comes from the center of the store (rather than the refrigerated section), I’d suggest making apple wine instead where you can add all manner of tannins and acid to balance out an otherwise bland juice. To do that, read up on small-batch winemaking, and common winemaking additives.
Hard Cider Recipe Variations
With the craft brew revolution, hard cider makers are really going crazy creating some spectacular and unique hard ciders. A few hundred years ago, before wine and beer became more accessible, cider was the primary drink on every homestead in the US. A bit further back, it was the staple of every medieval peasant village in Europe.
All those old school recipes are being revived and it’s a beautiful thing. Once you master basic hard cider, try making any of these variations:
- Pear Hard Cider (Perry) ~ Just as traditional as hard cider, perry is the same thing but made with pears. The sugar profile is slightly different, and pears contain some unfermentable sugars (sorbitol) naturally and the finished cider will be a bit sweeter. For that reason, making hard pear cider is actually a bit easier because the finished product is naturally more balanced and won’t end up as dry.
- Honey Hard Cider (or Cyser) ~ This is where names get a bit confusing, and it’s kind of unclear whether this is a true hard cider or an apple mead (known as a Cyser). Honey adds more fermentable sugars to the mix, along with flavor and body. Meads generally have a much thicker body in the finished beverage, and the mouthfeel is very distinctive. If you add a lot of honey, around 2.5 to 3lbs per gallon, then it’s definitely a cyser rather than a hard cider and it’ll finish very sweet and have a high (15% or more) alcohol content. Adding just a bit, around 1/4lb per gallon will add flavor and a hint of body, but still, be more of a hard cider since most of the fermentable sugars come from apples.
- Hopped Cider ~ All the rage with the Vermont craft brew community, hopped cider just uses hops to flavor the cider for a unique character. Perhaps it’s due to the rise in IPA’s, but it seems like brewers are putting hops in everything these days. If you want to try it, add the hops directly into the fermentation vessel (known as dry hopping). Choose an aromatic (low alpha acid) hop variety. If you want to try this, I’d suggest starting with a dry-hopped cider kit unless you’re an experienced beer brewer.
- Fruity Cider – There’s no reason you can’t add other fruits to hard cider for added flavor. I can’t speak to how “traditional” this practice is, but it sure is tasty. Pomegranate hard cider is a popular choice, as is peach-infused hard cider. You can make variations of those by adapting this pomegranate wine recipe or this peach wine recipe to use slightly less sugar, and then cider instead of water as the liquid.
- Oaked Cider – Historically, oak barrels as fermentation vessels would have provided flavor for an oaked cider, but those are pretty darn expensive these days (and not the best for modern sanitation practices). Modern oaked cider is made by adding either oak chips or oak spirals (a cleaner option) to the fermenter.
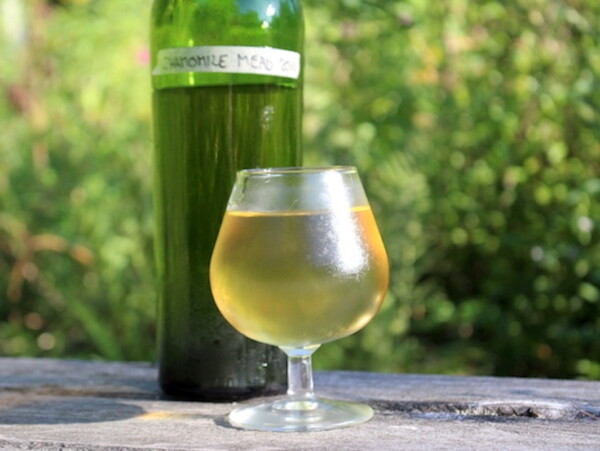
- Herbal Cider – Historically, alcoholic beverages were often used medicinally as herbs are often more soluble in alcohol than in water. The site Ciderculture has a list of modern herbal ciders from craft brewers, which includes ciders containing basil/mint, lavender/hops, and chamomile/lemon balm. Those are mostly for flavor, but if you’re interested in crafting medicinal ciders with herbs I’d suggest you look into a course from the Herbal Academy called “The Craft of Herbal Fermentation” which takes you through everything you need to know about brewing with herbs (cider, beer, mead and more).
Hard Cider Kits & Resources
If you’re completely starting from scratch with no equipment, a hard cider-making kit is a really economical way to buy everything you need at once. They come with detailed instructions which will get you off to a great start, and generally, the equipment is less expensive if you buy it all together in a kit.
Several suppliers make a hard cider starter kit that has everything you need to get you started with your first batch of cider, equipment, and ingredients. After you’ve made your first batch, you can just use your own cider with all the equipment year after year (or week after week if you’re ambitious…)
As to other resources, I’ve read through a number of hard cider-making books, and hands down the best one I’ve ever found is an old book from the ’70s titled Sweet and Hard Cider: Making It, Using It and Enjoying It. It is everything you could ever want to know about making cider, including a good bit of well-written and entertaining cider history. More modern cider-making books like The Modern Cider Maker’s Handbook contain a lot of spectacular photographs, but lack good solid usable information in my opinion.
Still have questions about making hard cider at home? Don’t worry, you’re probably not the only one! Leave me a note in the comments and I’ll do my best to help you out.
Other Easy Homemade Beverages
More Tasty Apple Recipes
- Apple Sugar (Extracting Sugar from Apples)
- Apple Pie Shortbread Bars
- Canning Apple Pie Filling
- Canning Apple Cider


I incorrectly vented one of my jars while making homemade apple cider vinegar. It is made from apple scraps, filtered water, and sugar. After two weeks fermentation, it turned into alcohol. Is it possible to turn this into a drinkable hard cider?
Thank you for the article, I’ve enjoyed reading it and may try my hand at homemade hard cider purposefully! My favorite alcoholic drink.
I don’t think you did it incorrectly. When you make apple cider vinegar, it first turns to alcohol and then the acetic acid bacteria convert the alcohol to vinegar. It’s the same thing with all vinegar, they have to go through an alcohol stage first. (Red wine vinegar is in fact red wine before it’s red wine vinegar.) If you have something that’s kinda alcoholic at this point, it just needs more time (and exposure to air) to turn into vinegar.
If it’s tasty at this point, you have in fact made hard cider.
Incidentally, one of the easiest ways to make hard cider is to take a jug of sweet cider without preservatives and crack the lid. Then leave the lid cracked a bit and put it in the back of your fridge for about a month. It’ll turn into a bubbly hard cider just fine that way. It’s not the kind you’d bottle, but more the kind you’d just make quickly and drink cold and fizzy, but a good first batch without any special equipment if you’re just getting started.
Enjoy!