Affiliate disclosure: This post may contain affiliate links. Please see our Privacy Policy.
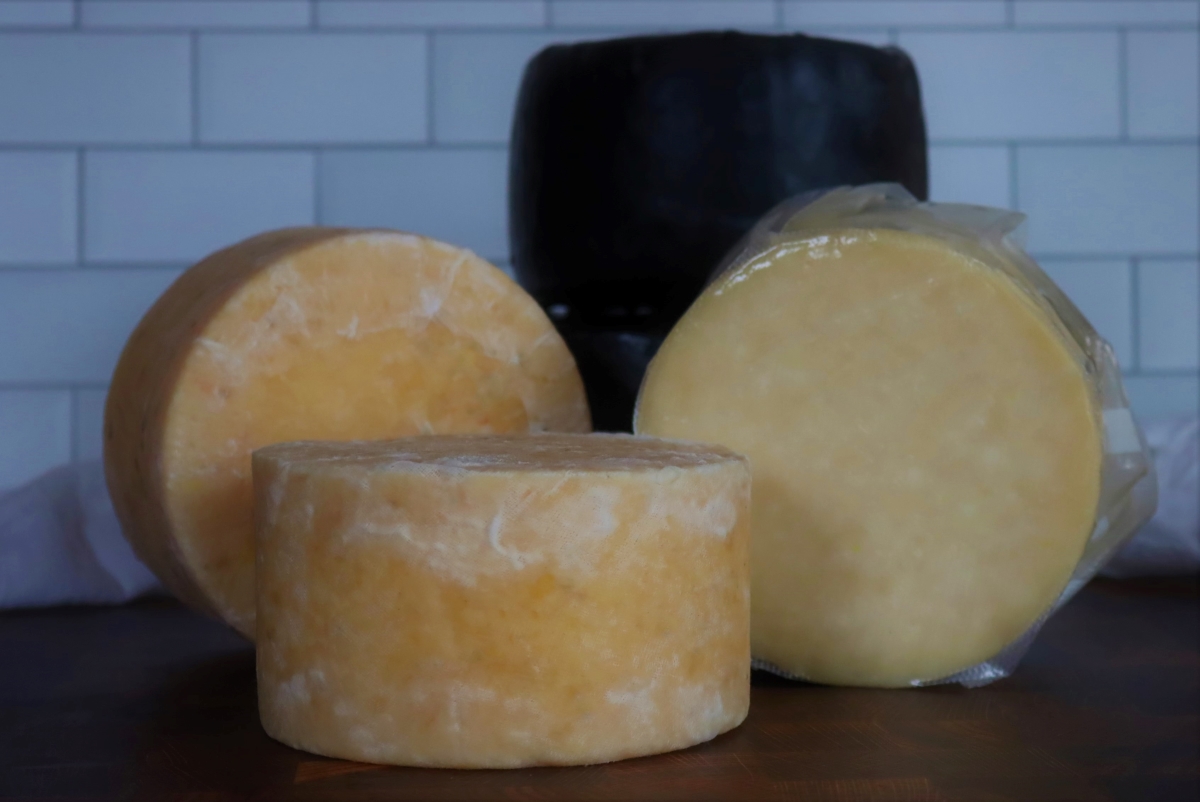
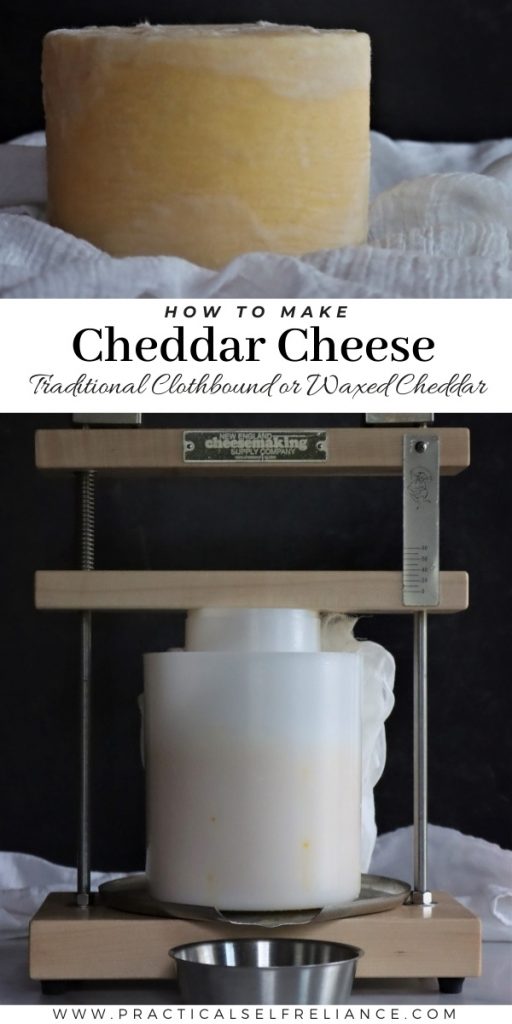
Homemade Cheddar cheese is a labor of love, and the results are well worth the effort. It can be made as either a waxed cheddar, similar to many of the nice options available at the cheese counter these days, or as clothbound cheddar.
Traditional clothbound cheddar is unbelievably flavorful, and it’s dramatically different than what passes for fine cheddar on the supermarket shelves these days.
Whether clothbound or waxed, the process for making cheddar cheese at home is the same right up until the last steps and I’ll walk you through all of the options.
(If you’re new to cheesemaking, I’d highly recommend you read this beginner’s guide to cheesemaking before getting started.)
When I started making my own cheese, the first thing my kids asked for (of course) was homemade cheddar.
I love cheddar just as much as anyone, but my preferences are for an intensely sharp, crumbly wheel of traditional clothbound cheddar. My kids love the mild smooth textured high moisture cheddar, that’s perfect for grilled cheese.
Why not make a bit of both?
In the process of writing this tutorial, I made quite a few wheels of cheddar. Some using raw jersey milk from a farm down the road, and others using pasteurized grocery store milk.
Some wheels were waxed or vacuum sealed before aging, and only aged a few months for a mild high moisture cheddar. Still, others were clothbound so they’d develop a natural rind, dry crumbly texture and aged for over a year for an incredibly sharp delicacy.
I’ll walk you through all the options after showing you how to make a traditional cheddar cheese.
Types of Cheddar
These days, most cheddar is either waxed or vacuum-sealed to mature. That seals the cheese off from the outside environment and doesn’t allow it to naturally “breathe” throughout the aging process.
In an industrial setting, that’s ideal, because it’s a lot easier to age the cheese consistently. Moisture within the cheese is maintained, regardless of the outside environment.
This is a great option if your aging space is less than ideal, and you can’t maintain proper humidity. It’s also a good option if you have children in the family, as the waxed cheddar generally maintains a higher moisture content (thus it’s softer and less crumbly).
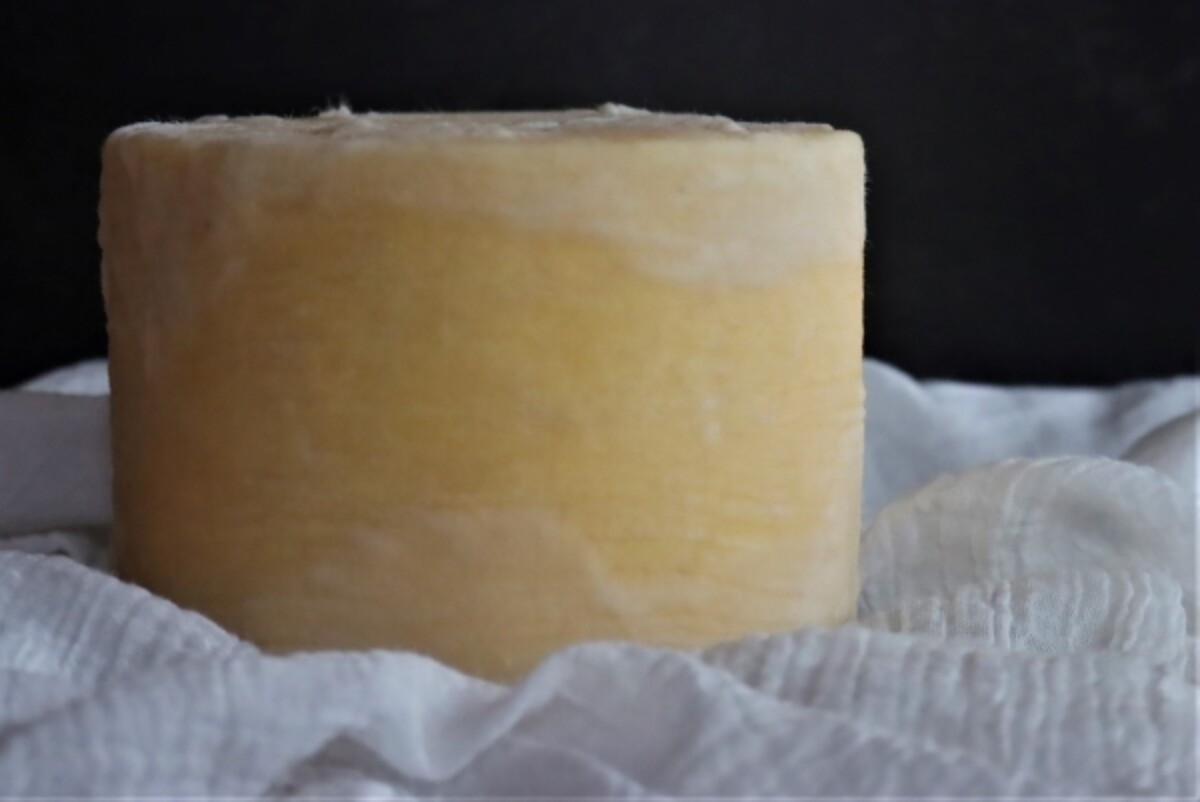
If you’d like a real treat, I’d suggest making clothbound cheddar, as it’s hard to find these days and it’s a truly artisanal product. Since the cloth binding allows the cheese to breathe and develop a natural rind, it’s a complex live food full of unique and intense flavors. (Nothing like the bland yellow dyed commodity sold on grocery store shelves.)
A few producers still make clothbound cheddar in the traditional way, wrapped in bandages, and aged in a controlled environment. In fact, one of the best is right here in Vermont, and they sell their clothbound cheddar for $30 per pound.
It’s spectacular and totally worth every penny in my book, and it’s the reason I’m taking all this time to perfect my own homemade clothbound cheddar.
I’m going to walk you through a recipe for a 4-pound wheel of homemade cheddar, whether waxed or clothbound is your choice.
Yes, it does take all day to make (mostly hands-off time), plus a week of drying, and then many months to age before it’s ready. Given that the effort is the same, I’d strongly suggest trying your hand at clothbound if at all possible, if you have a way to control humidity in the aging space.
But there’s nothing like slicing into a $120 wheel of cheese you made yourself…
This recipe for traditional cheddar is adapted from Home Cheesemaking by Rikki Carrol.
It was one of the first home cheesemaking books written in the US, and it was the original spark that kindled a movement of home cheesemakers that’s burning strong 40 years later.
The book has a number of homemade cheddar recipes, from farmhouse cheddars to stirred curred cheddars and flavor-infused sage cheddar. Ricki notes that “Making cheddar the traditional way takes longer, but is well worth the effort.”
If you’re going to go through the effort of making cheddar cheese at home, you might as well do it right and make really good cheddar…
(If you’re looking for a simpler recipe, try making this 18th-century farmhouse cheddar or Colby cheese instead.)
Ingredients & Equipment for Traditional Cheddar
The ingredients for making cheddar are pretty straightforward. You’ll need just one cheese culture, along with a bit of rennet to form the curds, plus fresh milk of course.
I’m using raw milk from a dairy just around the corner, but pasteurized milk works as well (just not ultrapasteurized). If you’re using pasteurized milk, add calcium chloride to help the curds form (since it’s damaged during the pasteurization process).
- Direct Set Mesophilic Starter Culture
- Rennet
- Calcium Chloride (for pasteurized milk)
- Milk (Raw or Pasteurized, but not ultrapasteurized)
- Cheese Salt or Canning Salt (without additives)
For equipment, you’ll need:
- 5-gallon stockpot (for a 4-gallon batch)
- Butter muslin or fine cheesecloth (90 grade)
- Slotted spoon
- Long knife for cutting curds
- Collander
- Cheese press (this inexpensive one will get the job done if you have weights around)
- Cheesemaking Form
- Strainer pot (optional, but helps with the cheddaring process discussed later)
- Aging Space (Either a refrigerator with a temperature bypass thermostat or a wine refrigerator, that can maintain 50 to 55 degrees)
How to Make Cheddar Cheese
Start by heating 4 gallons of milk to 86 degrees F. (Note: You can cut this recipe in half for a 2-gallon recipe.)
Sprinkle the packet of mesophilic starter culture over the top of the warmed milk, and allow it to rehydrate for 2 minutes undisturbed. (This helps prevent clumping.)
If using farm-fresh raw milk, you can use half the culture because the raw milk already has natural cultures present.
(There are in fact traditional methods of making this cheddar without any added culture, though it’s tricky. If you’re interested in that process, I’d suggest reading The Art of Natural Cheesemaking by David Asher.)
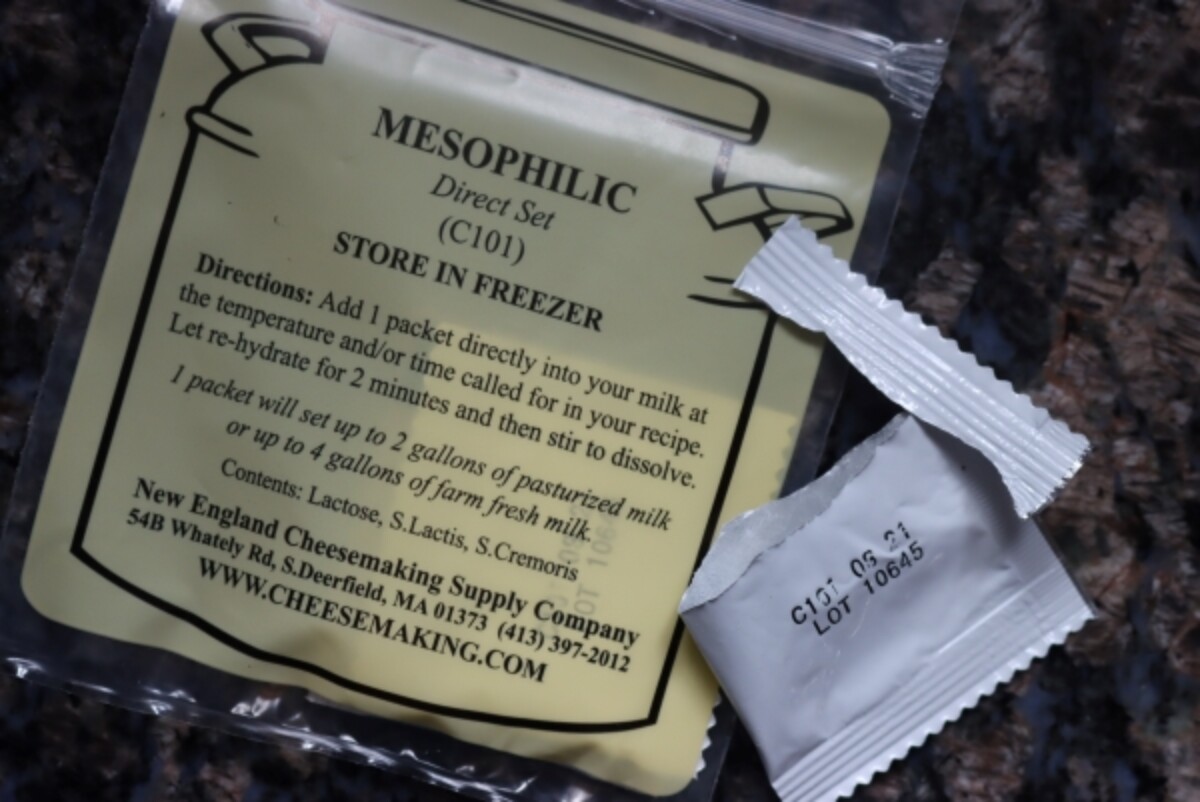
If using a direct set mesophilic starter packet (pictured above), you’ll need 2 packets for four gallons of pasteurized milk or 1 packet for raw milk. Alternatively, use 1/4 teaspoon (1/2 teaspoon for pasteurized milk) bulk powdered mesophilic culture.
Stir the starter culture into the milk using an up and down motion for 1 minute.
Cover the milk and allow it to ripen undisturbed at 86 degrees F for 45 minutes.
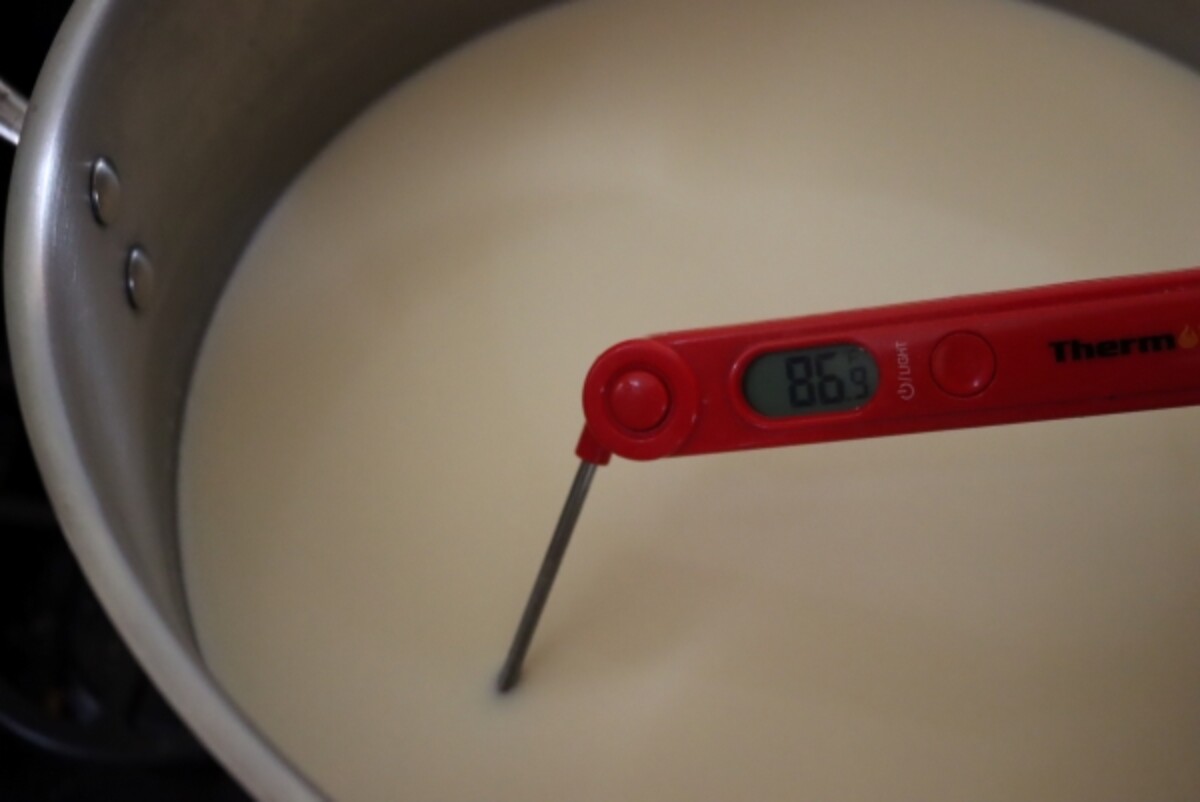
After 45 minutes, check to make sure that the milk is still at 86 degrees, and if it’s cooled more than a degree or so re-warm it gently.
Dilute the rennet in 1/4 cup of unchlorinated water and add it to the cultured milk. Add the diluted rennet, and stir it in using an up and down motion. After 1 minute, use the spoon to still the milk (stop the motion).
Be aware that rennet comes in varying strengths, so check the bottle to be sure of the measurement. My rennet, which I believe is single strength, says one teaspoon will set 4 gallons of milk in 45 minutes.
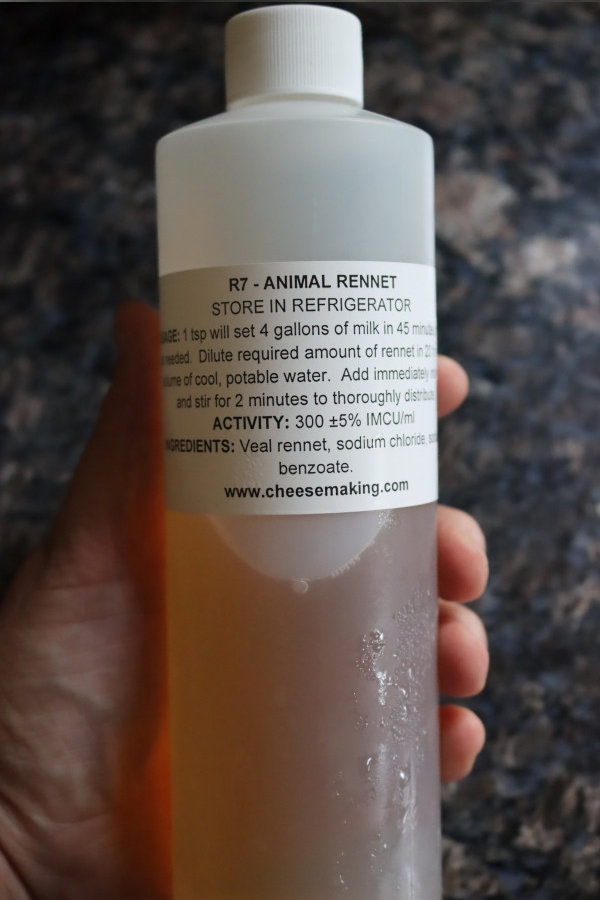
Cover the pot and allow it to sit completely undisturbed for 45 minutes.
Don’t try to heat the milk, take the temperature, or otherwise fuss over the milk during this time. Ideally, it should stay at 86 during this period, but fussing over the milk will cause more harm than good.
The pot needs to be still for the curds to form properly, so really try to leave it alone during this time.
After 45 minutes, check to make sure the curds have formed into a solid mass and give a clean break. (This shouldn’t be an issue unless it’s really quite cold in the room and the pot has cooled substantially.)
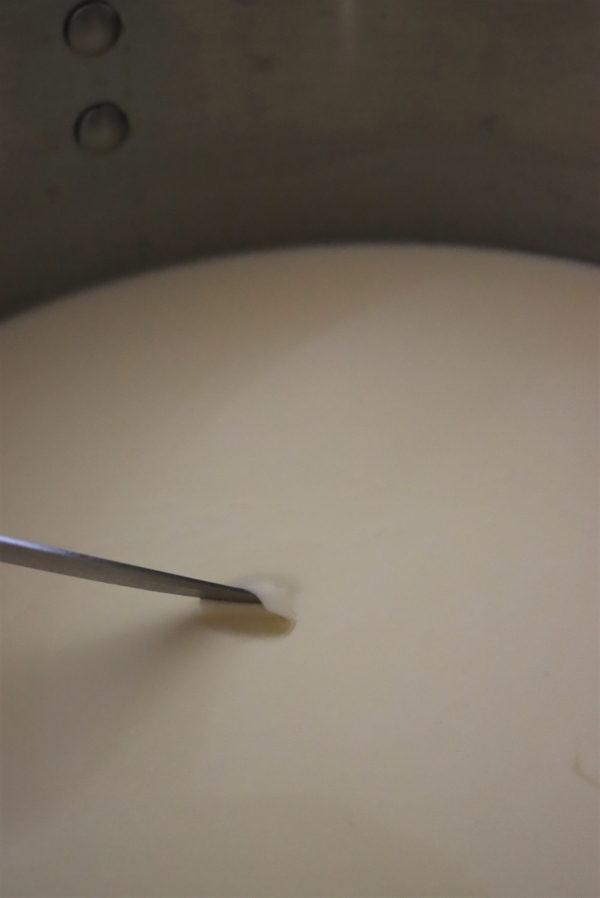
If they haven’t formed, give them another 5-15 minutes before proceeding.
Cut the curds into 1/4 inch cubes and then allow them to sit for 5 minutes. (This allows the curds to heal a bit before you move along, which will improve the structure of the finished cheese.)
Slowly heat the curds to 100 degrees, increasing the temperature by no more than 2 degrees every 5 minutes.
This will take quite a while, be patient!
The curds likely cooled a few degrees as the curds were setting and are somewhere between 82 and 86 degrees. Assuming they’re 84 degrees, they need to heat by 16 degrees total…at no more than 2 degrees every 5 minutes you’d need at least 40 minutes of gentle heating.
Placing the pot in a sink full of hot water generally accomplishes this, but you’ll need a big sink (possibly a bathtub…) to accommodate a pot holding 4 gallons of milk. I gently warm the pot on my simmer burner, turning it on very low for a few minutes, then off for a few minutes.
Gently stir the curds during this heating period to prevent them from matting.
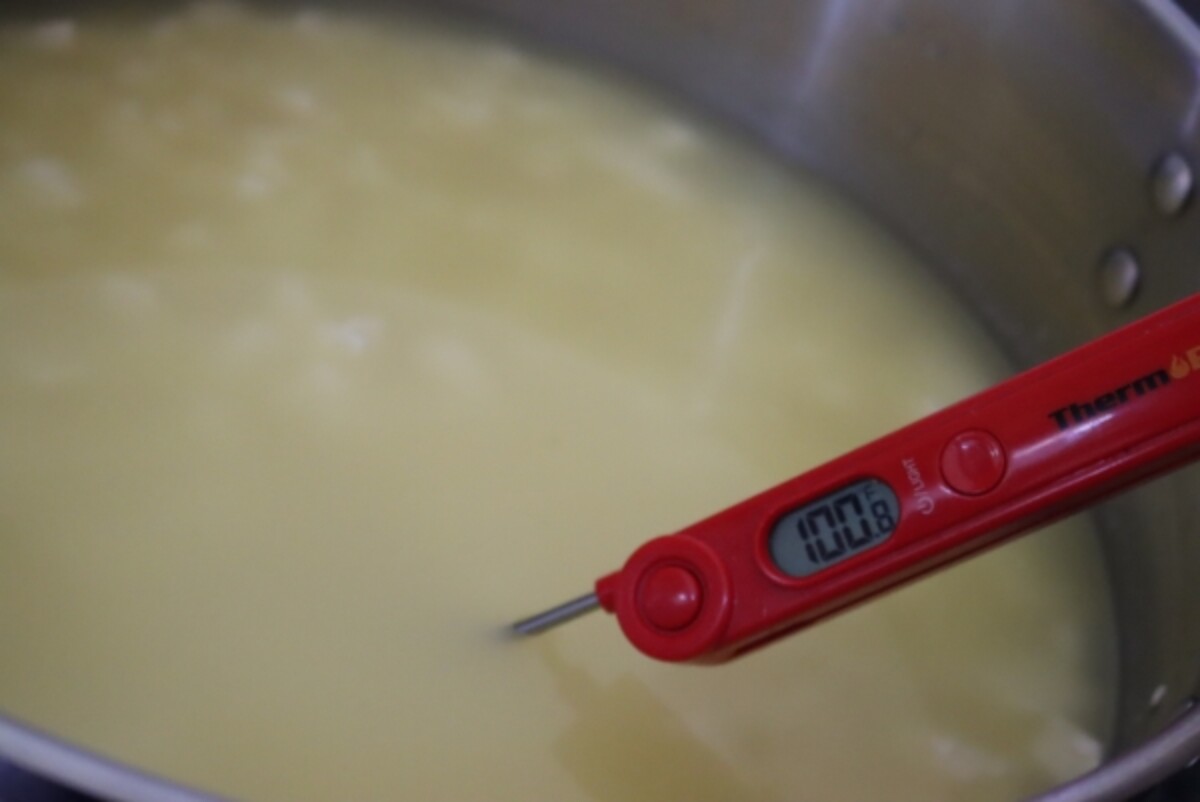
Once the curds and whey reach 100 degrees, hold that temperature for 30 minutes and continue gently stirring.
After 30 minutes, stop stirring and allow them to settle for 20 minutes.
Once settled, pour the curds through a cheesecloth-lined colander, reserving the whey.
Pour the whey back into the original cheese pot and set the colander holding the curds at the top of the pot over the warm whey. A special “pasta making pot” that has a colander fit into it helps with this process because it allows the curds to be suspended over the whey (or warm water) for the cheddaring process.
Place the colander over the whey and allow it to drain and settle for 15 minutes. The curds will quickly mat together forming a single mass.
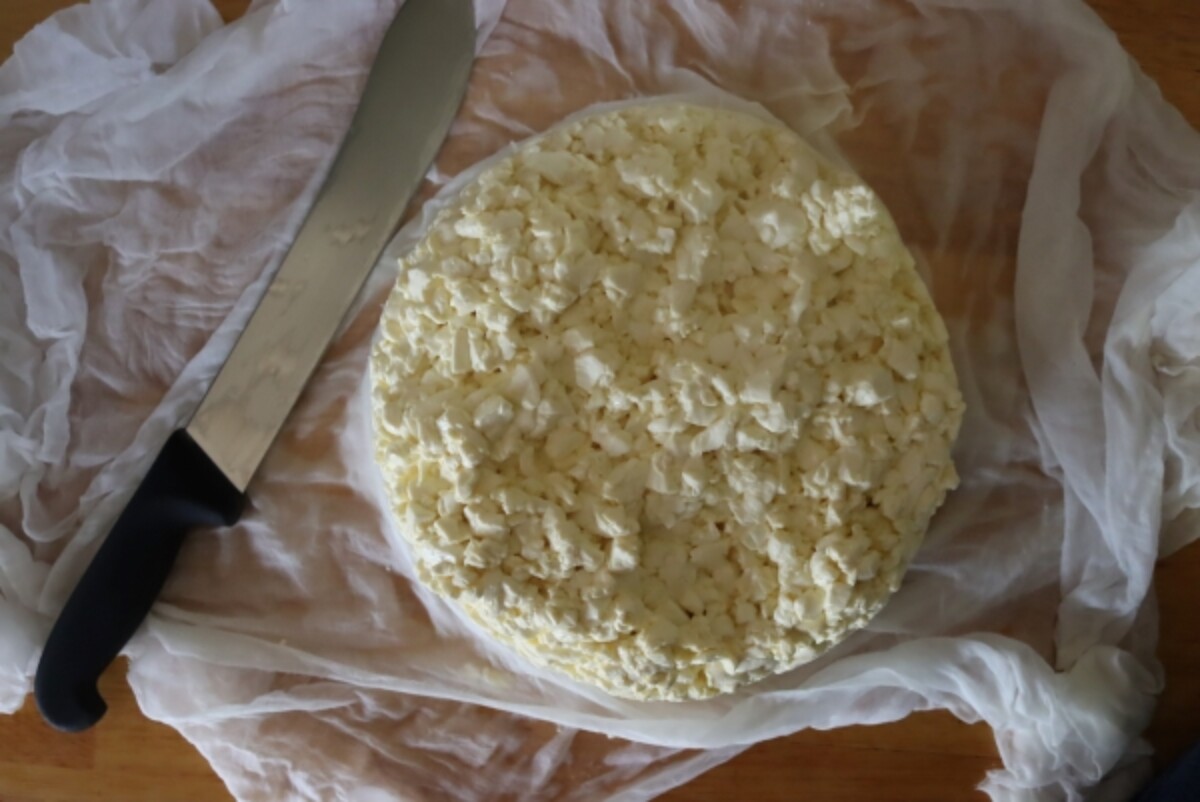
Remove the curds from the colander and cut them into 1-inch strips, and then place them back into the cheesecloth-lined colander supported over the warm whey, stacking the curds so the weight of the top curds presses on the curds beneath.
Keep the whey warm, at 100 degrees F (38 C) for the next 2 hours. During this time, flip the curds every 15 minutes to ensure they’re evenly pressed by their own weight.
This process of slowly pressing warm curds, flipping them often, is known as cheddaring and is what gives this cheese its name and distinction.
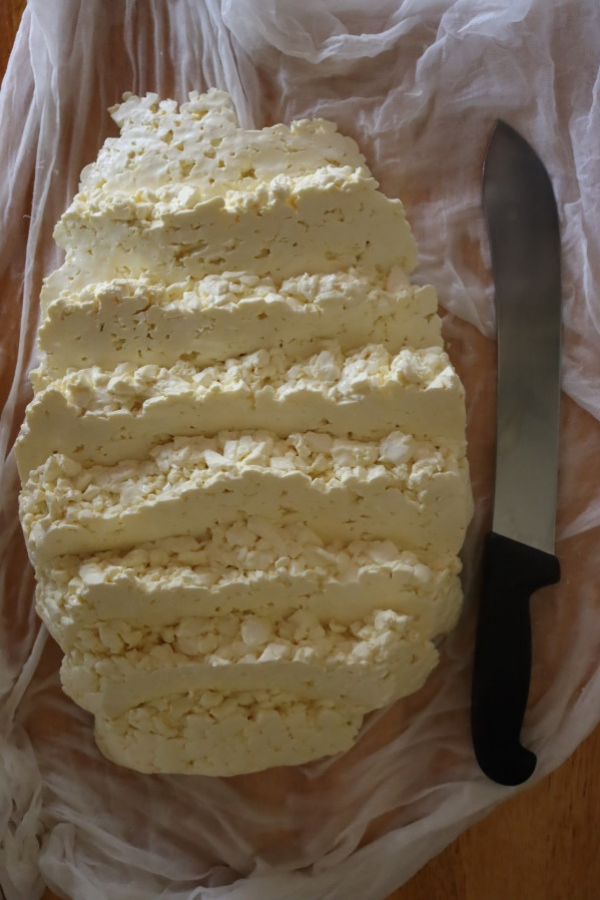
In smaller batches (from 2 to 6 gallons of milk), sometimes cheesemakers will fill a gallon ziplock bag with warm water and set it on top of the curds. This additional weight helps with the cheddaring process, as traditionally cheddar is made in very large batches (at least 6 to 10 gallons).
If you don’t have a way to suspend the pot over the warm whey, you can simply place the drained curds in the cheesemaking pot and then put the pot in a sink full of 100-degree water for the cheddaring process.
(It’s not essential that it’s suspended over whey, warm water will work just fine. If you prefer, strain off all the whey and use that immediately for making whey cheese, and simply suspend the curds in a colander over warm water.)
Periodically pour off the whey from the pot during the process, and flip the curds every 15 minutes as with the colander method.
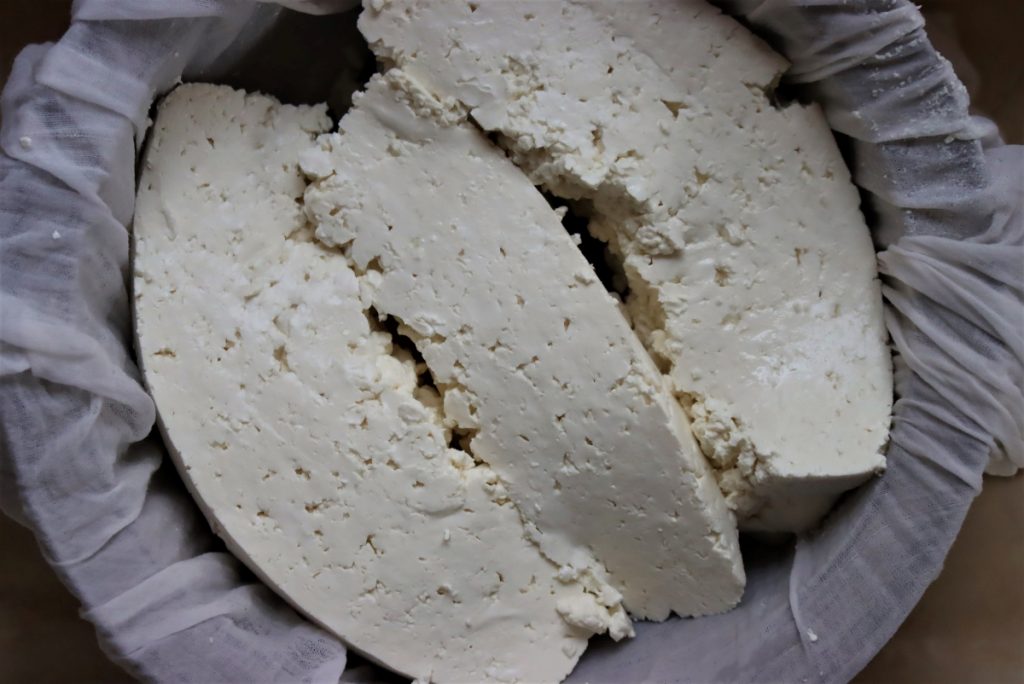
Once the cheddaring process is complete, the curds should be quite tough and have a texture like cooked chicken breast meat.
Break the curd slices apart with your fingers into 1/2 inch pieces, still keeping them over the 100-degree water bath.
Stir the curds with your fingers every 10 minutes for 30 minutes to keep them from matting. Just stirring, don’t try to squeeze whey from the curds, just gentle stirring.
After 30 minutes, add the salt (2 Tbsp cheese salt for 4 gallons milk, or 1 Tbsp. for a 2 gallon batch) and gently distribute it through the curds with your hands.
Line a cheese mold with cheesecloth. This should be either a pair of 2-pound molds or a single larger mold capable of handling 4 pounds of cheese.
Press at 20 pounds of pressure for 30 minutes. This initial press just gets the loose curds to start to hold together enough to be handled.
Remove the cheese from the mold, undress it, flip it over, and re-dress it with cheesecloth.
Then press it for 12 hours at 40 pounds of pressure. (Usually done overnight.)
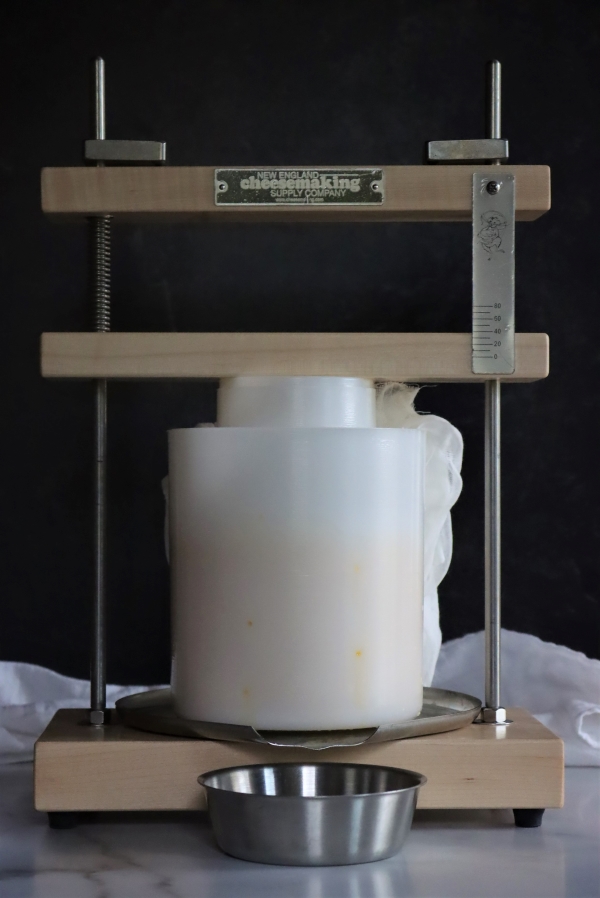
In the morning, remove the cheese from the press, undress it, flip it and redress it. Then press the cheese at 50 pounds pressure for 24 hours.
Remove the cheese from the press and remove the cheesecloth. Allow the cheese to air dry for 2-5 days at room temperature, flipping daily, until it’s dry to the touch.
Dressing Homemade Cheddar for Aging
At this point, it’s time to decide how to “dress” the homemade cheddar cheese for aging. There are three common methods used these days, clothbound, waxed, or vacuum packed.
I’m opting for a traditional clothbound cheddar, where strips of cheesecloth are slathered with lard to form a barrier around the outside of the cheese. We render our own lard, so I have plenty on hand, but you can also use coconut oil or butter.
The cheesecloth helps the lard stick and forms a barrier that helps retain moisture, but still allows the cheese to “breathe” so that it can develop a natural rind and complex flavors.
Read more on bandaging cheddar for aging here.
Making a waxed cheddar is also an option, and the cheese is dipped in melted wax to create a barrier around the outside. Since it’s fully surrounding the cheese in a waterproof layer, moisture isn’t lost during aging and it’s easier to age if you’re not able to maintain consistent humidity in the aging space.
The wax also prevents a natural rind from developing, which means you don’t lose the outer layer of the cheese. (Thus a higher yield by weight due to the higher moisture content.)
The cheese won’t develop the complex flavors of a clothbound cheddar, but really intense crumbly aged clothbound cheddar isn’t everyone’s cup of tea anyway. If you like high quality aged waxed cheddar, then this is a good option.
The process for waxing cheese is outlined here. Personally, I’d suggest the dipping method, as it’s much cleaner. Brushing the wax is slow and incredibly messy.
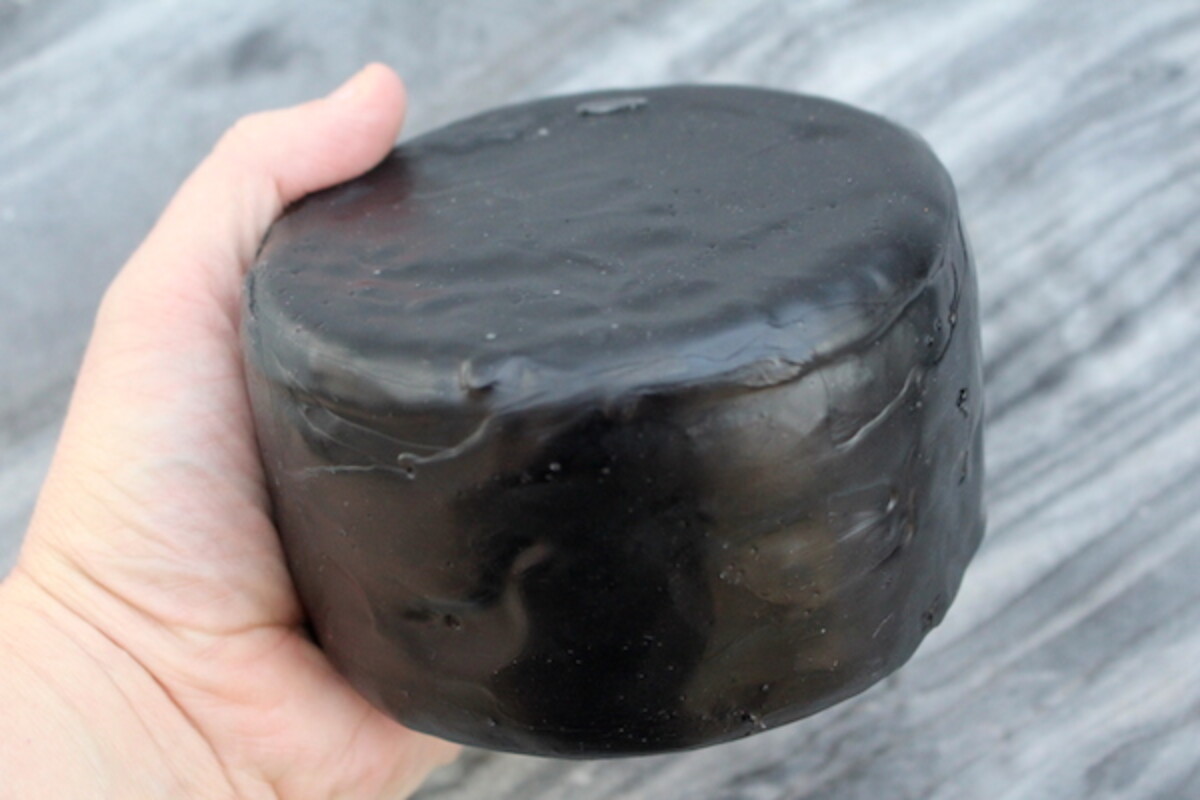
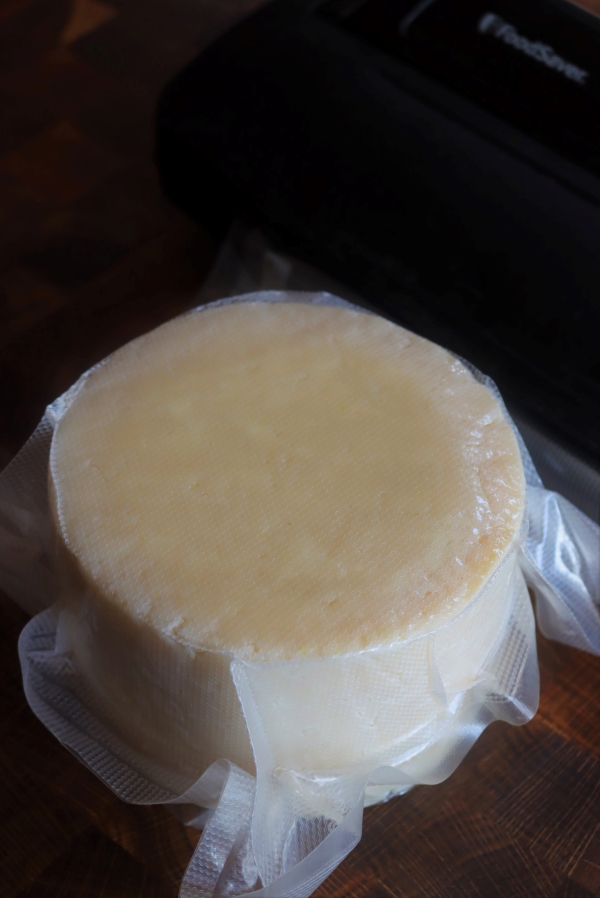
The last option is vacuum packing, which is what happens to much of the industrial cheddar produced in the US.
This assumes you have a home vacuum sealer, but they’re not too expensive and handy for packing meat and frozen veggies anyway.
Simply place the cheese in a vacuum sealer bag, suck all the air out, and seal it up. It’ll age in there similar to waxing, as either way it’s creating a waterproof layer excluding air around the outside.
Aging Homemade Cheddar
Regardless of how you’ve dressed the cheddar, it must be aged for at least a few months (preferably longer) to develop flavor.
The cheese cultures don’t have nearly enough time to work during the cheesemaking process, which is mostly about preparing the curd and developing the right texture within the cheese.
The flavor happens during the aging period, and it’ll get more pronounced the longer you age the cheese.
Ideally, cheddar is aged at 50 to 55 degrees F (or 10-13 degrees C) and 85% relative humidity for at least 3 months. Ideally, it’s aged 6 months to a year, or up to 2 years if you’re patient.
Humidity isn’t important if you’ve waxed or vacuum-sealed the cheddar, that’s more of a concern with clothbound cheddar.
Normal refrigerators are much colder than 50-55 degrees F, and are too cold for the cultures and enzymes to work. You can get a bypass that overrides the refrigerator’s temperature control unit, and many people set up a mini-fridge with a bypass as an aging cave.
I’m using a wine refrigerator, which allows you to set the temp to anywhere between 45 and 60. That’s the perfect range for cheesemaking, and it has really nice built-in wooden shelves that work well too.
Timetable for Making Cheddar Cheese
I know, that was a lot. I’m going to briefly recap the process in bullet form, which will likely be easier to follow as you’re actually making the cheese. Since timing is important, I’ve set the bullet points to times starting (as I did) at noon. This is a time-intensive process, so you might want to start a bit earlier in the day…
That said, most of the time is waiting, so it’s easy enough for me to incorporate this into a rainy day afternoon of indoor play with my two preschoolers (so long as I set a loud timer for each step…).
On day one, the activity takes about 6 1/2 to 7 hours, on and off. Then pressing and drying takes about a week. Finally, the cheese is aged for months.
- 12:00 ~ Heat the milk to 86 degrees F.
- 12:12 to 12:15 ~ Sprinkle culture over the top, allow it to dissolve 2 minutes, then stir in for 1 minute.
- 12:15 to 1:00 ~ Ripen the cheese for 45 minutes.
- 1:00 ~ Dilute rennet in 1/4 cup of water and add it to the cheese, stirring 1 minute.
- 1:00 to 1:45 ~ Allow the cheese to sit undisturbed for 45 minutes until curds form.
- 1:45 to 1:50 ~ Cut curds into 1/4 inch cubes and allow them to set for 5 minutes.
- 1:50 to 2:30 ~ Heat the curds to 100 degrees, raising the temperature no more than 2 degrees every 5 minutes.
- 2:30 to 3:00 ~ Hold the curds at 100 degrees for 30 minutes, stirring gently.
- 3:00 to 3:20 ~ Stop stirring and allow the curds to settle for 20 minutes.
- 3:20 to 3:35 ~ Strain the curds through a cheesecloth-lined colander (reserving whey), and allow them to set 15 minutes.
- 3:35 to 3:40 ~ Place the whey back in the original cheese pot and heat it to 100 degrees. Cut the curds into 3-inch slices, stack them and place them back in the colander suspended over the warm whey.
- 3:40 to 5:40 ~ Hold the curds at 100 degrees for 2 hours by keeping them suspended over the warm whey. Flip the curds every 15 minutes so they can press under their own weight.
- 5:40 to 6:10 ~ Mill the curds with your fingers into 1/2 inch pieces (keeping them suspended over the warm whey). Stir the curds with your fingers every 10 minutes for 30 minutes.
- 6:10 During the last stir of the curds, add salt and stir it in, ensuring it’s equally distributed.
- 6:10 to 6:25 ~ Line a cheese press with cheesecloth and press the cheese for 15 minutes at 10 pounds pressure.
- 6:25 to 6:30 ~ Remove the cheese from the press, undress it, flip it, redress it and then put it back in the press.
- 6:30 to Next Morning ~ Press the cheese for 12 hours at 40 pounds pressure (or a bit longer if you’re sleeping in).
- Day Two in the AM ~ Remove the cheese from the press, undress it, flip it, redress it and then put it back in the press.
- Day Two AM to Day Three AM ~ Press the cheese at 50 pounds pressure for 24 hours.
- Day Three to The rest of the week ~ Remove the cheese from the press and cheesecloth. Allow it to dry at room temperature for 2-5 days, flipping daily, until it’s dry to the touch on all sides.
At this point, a full week later, the cheese is ready for dressing (cloth binding or waxing) and aging for at least 3 months (but preferably 6 to 12).
Homemade Cheddar Cheese
Ingredients
- 4 Gallons Whole Milk, Raw or Pasteurized, but not Ultrapasturized
- 2 packets Direct Set Mesophilic Starter, 1 packet for raw milk
- Or bulk mesophilic starter, 1/2 tsp for pasturized milk or 1/4 tsp for raw milk
- 1 tsp Liquid Rennet, diluted in 1/4 cup cool, unclorinated water
- 1 tsp Calcium Chloride Liquid, optional, for pasteurized milk only, diluted in 1/4 cup water
- 2 Tbsp. Cheese Salt or Canning Salt, without additives or iodine
Instructions
- Gently warm the milk to 86 degrees F (30 C).
- Sprinkle the packet of mesophilic starter culture over the top of the warmed milk, and
allow it to rehydrate for 2 minutes undisturbed. (This helps prevent
clumping.) Use 1 packet for raw milk or 2 packets for pasteurized milk. Alternately, use a bulk mesophilic starter at a rate of 1/4 tsp for raw milk or 1/2 tsp for pasteurized milk. - Stir the culture into the milk using an up and down motion for 1 minute.
- Allow the milk to culture undisturbed for 45 minutes.
- If using pasteurized milk, dilute 1 tsp of calcium chloride in 1/4 cup cool unchlorinated water. Add to the cultured milk and stir for 1 minute to distribute. (This is optional, but highly recommended as the calcium is damaged in pasteurized milk, and it has difficulty forming good curds. This will help firm them up a bit, which will be easier to work with during the cheddaring process.)
- Dilute 1 tsp rennet in 1/4 cup of cool unchlorinated water and add it into the cultured milk, stirring using an up and down motion for 1 minute.
- After 1 minute, still the milk and allow it to set undisturbed for 45 minutes until the curds are set and show a clean break. If the curds are not set, wait another 5-15 minutes before proceeding.
- Cut the curds into 1/4 inch cubes and then allow them to sit for 5 minutes. (This allows the curds to heal a bit before you move along, which will improve the structure of the finished cheese.)
- Slowly heat the curds to 100 degrees F (38 C), increasing the temperature by no more than 2 degrees every 5 minutes. This should take at least 40 minutes. Occasionally stir the curds to prevent matting.
- Once the curds reach 100 degrees F (38 C), hold the temperature for 30 minutes and gently stir the curds.
- After 30 minutes, stop stirring and allow the curds to settle to the bottom of the pot.
- Once settled, pour the curds through a cheesecloth-lined colander (reserving the whey to make whey cheese).
- Allow the curds to drain for 15 minutes, during which they’ll mat into a solid mass.
- Remove the curds from the colander and slice them into 1-inch strips. Stack the strips on top of each other and place the stacked curds back into the cheesecloth-lined colander.
- Suspend the colander over a pot of warm (100 degree F, or 38 C) water, and place a lid on top of the colander to maintain warmth. (Optionally, you can also fill a large Ziploc bag with warm water and place it on top of the curds to add more warmth and weight to help the cheddaring process.)
- Hold the curds at 100 degrees F (38 C) for two hours, flipping the stacked curds over every 15 minutes. This is called cheddaring.
- After 2 hours, the curds should have a texture like cooked chicken breast. Gently break them with your hands into 1/2 inch pieces, but keep them in the colander over the warm water bath to keep them warm.
- Hold the broken curds in the colander, still maintaining 100 degrees in the water below, for 30 minutes. Gently stir the curds with your hands every 10 minutes to keep them from matting.
- After 30 minutes, add the cheese salt (2 Tbsp. if starting with 4 gallons milk) and gently distribute it through the curds with your hands. Be sure to mix it thoroughly so it’s evenly distributed.
- Line a cheese form (cheese mold) with cheesecloth and place the salted curds in the form. Drape part of the cheesecloth over the top of the curds, and then place a follower for the cheese form on top.
- Place the curds into a cheese press and press at 20 pounds pressure for 30 minutes to form the cheese into a block. At this point, the individual curds will still be visible, but it should mostly hold together when removed from the press.
- Remove the cheese from the press, undress it, flip it over and redress with cheesecloth. Press at 40 pounds pressure for 12 hours (overnight usually).
- In the morning, remove the cheese from the press, undress it, flip it and redress it. Press the cheese at 50 pounds pressure for 24 hours.
- Remove the cheese from the press and remove the cheesecloth.
- Allow the cheese to air dry at room temperature for 2 to 5 days, flipping daily until it’s dry to the touch on all sides.
- Dress the cheddar block for aging by cloth binding, waxing, or vacuum sealing (see article).
- Age the dressed cheddar block at 50 to 55 degrees F (10 to 13 degrees C) and 85% relative humidity for at least three months. (Preferably 6 months to a year.) Flip the cheese daily for the first week, and then weekly after that.
Once the aging period is complete, store the cheese in the refrigerator. The colder refrigerator temps will slow/stop the enzymatic processes within the cheese, and it should then be stored, wrapped, and cared for as you would any finished cheddar cheese (ie. as you would treat a cheddar from the store).
Notes
Cheesemaking Recipes
Looking for more cheesemaking recipes?
Homemade Cultured Foods
Cultured dairy is delicious, but so are these other cultured food recipes:
- How to Make Sauerkraut
- Salt Cured Duck Breast
- Homemade Hard Cider
- How to Make Mead
- How to Make Apple Cider Vinegar
- Small Batch Winemaking


Are we supposed to skim the cream off then raw milk? I’m using Jersey so there’s a very thick layer.
No, you don’t want to skin the cream off the top. It will all mix together as you cook it.
Thanks for the recipe but I couldn’t help but gasp when you said it got the name ‘cheddar’ from the process of cheddaring. It gets its name from cheddar in England, where it originated from and where cheddar cheese is still ripened in its caves it is 30 mins from me and you can still buy amazing cheese there,
We certainly didn’t mean to make you gasp. 😉 I think the point here is really that the process of cheddaring is what makes it cheddar cheese but thank you for sharing that extra bit of information regarding the origin of cheddar cheese.
The best cheddar-making website I’ve ever seen – thanks so much for the detailed explanations! As I’m in Sweden, I need to convert to European metric weights and measures, and so just want to double check – when you talk about pounds of pressure, does it mean pounds per square inch (psi)?
You can get a cheese press that automatically calculates it for you but if not here is a good article that explains it. https://culturesforhealth.com/blogs/learn/cheese-making-simple-cheese-press#:~:text=Cheese%20pressing%20weights%20are%20figured,25%20of%20the%2010%20pounds.
I have used many cheddar recipe and this one, hands down, came out the best! I cloth bound the wheel and aged it 6 months. It was amazingly good! My only complaint, which has nothing to do with this recipe, is how much cheese is lost scraping/cutting off the outer layer. Otherwise, this cheese came out absolutely perfect! Better than store bought!!! Thanks for sharing! I’m making another wheel today 😁
Thank you for the detailed instructions. In the recipes I was following, there is a gap in what to do with the cheese after pressing and before wrapping. You explained it perfectly. I am looking forward to trying my creation in a few weeks!
You’re very welcome. We’re so glad it was helpful for you.
Is it okay to keep in the fridge if we don’t have the space/option for an additional refrigerator? Thanks!
You can really keep it anywhere as long as the temperature and the humidity are correct. The typical refrigerator doesn’t usually meet these requirements.
Hey!
I have followed these instructions to the letterwith several batches of cheese. Two problems keep happening and I hope you can help me:
ONE: Dry curds. We’ve kept the temps exact thru the process, using a sous vide to warm the water bath that the pot sits in. Doubt that’s the problem… We have adjusted the cooking times down a bit to try to slow down the whey release – still dry.
TWO: I would highly discourage the use of butter in traditional wrap. It leaves a rancid butter taste that permeates and ruins the cheese. This is discouraging when you unwrap after a year of aging with 12 more wheels on the shelf that were made in the same processes. The mold with this method also permeates the cheese.
Any idea what we’re doing wrong? – Thank you!
Sometimes stirring too vigorously during the early stages of cheesemaking before the curds are properly formed can also cause too much whey to be released resulting in drier curds. So maybe try to slow down the stirring process. Using butter in a traditional wrap method is pretty common practice. I’m not sure what would cause it to have a rancid taste.
Hello, can I use the two mold cheese press to make smaller wheels? The single press seems like it would be too much cheese for my family to use up at one time
You can use any size mold that you wish.
I’ve been making cheese for a couple of years and have had a lot of success with the basic types. Lately I’ve branched out to types of cheddar that have additives. I have one with red bell and jalapeno pepper pieces, one with caramelized vidalia onion pieces and another infused with merlot wine. I would like to try making one that contains roasted garlic but I have not idea how to prep the garlic. Do you have any idea about what I should do to the garlic before adding it to the curds?
Thanks in advance for any information you might be able to provide.
Phil DiMarino
I haven’t personally tried this but I did see a recipe on the New England Cheesemaking website that used garlic scapes and onion. The onion was dehydrated so no special preparation was needed. The scapes were blanched to take care of any unwanted bacteria. I would think that roasting the garlic cloves would have the same effect.
Thank you for sharing your knowledge. I am looking to make this very soon and wondered what effect not adding the salt in would have to the making and ageing process. I often buy raw and unsalted cheese for specific purposes and was hoping to be able to adapt this into making my own
Salt is very important in the cheesemaking process. It doesn’t just add flavor. The salt helps to control bacteria, regulate moisture, helps with texture development and helps to preserve the cheese as it ages. If you want to omit salt, you would have to find something that would replace those actions but I am not familiar with how you would accomplish that.
Thanks for the recipe. After I finished I put the cheese in wax paper to start the aging process. After 3 days, the cheese had some surface mold. Yikes.
What did I do wrong? Is it salvageable?
This is very normal. Check out the notes at the bottom of the instructions for a complete explanation.
I Have a Question About cultures.How who one reproduce cultures so you dont or can’t buy them if the system goes down and you can not order them? And love all the information you are sharing I’m learning lots and working on being self sufficient .TY for all you do for us .
Detailed instructions for that are found in the art of natural cheesmaking. He actually never uses store bought cultures, just propagates and maintains his own seed cultures (from the air, natural bacteria in the milk, etc).
Got to try making cheese.