
Affiliate disclosure: This post may contain affiliate links. Please see our Privacy Policy.
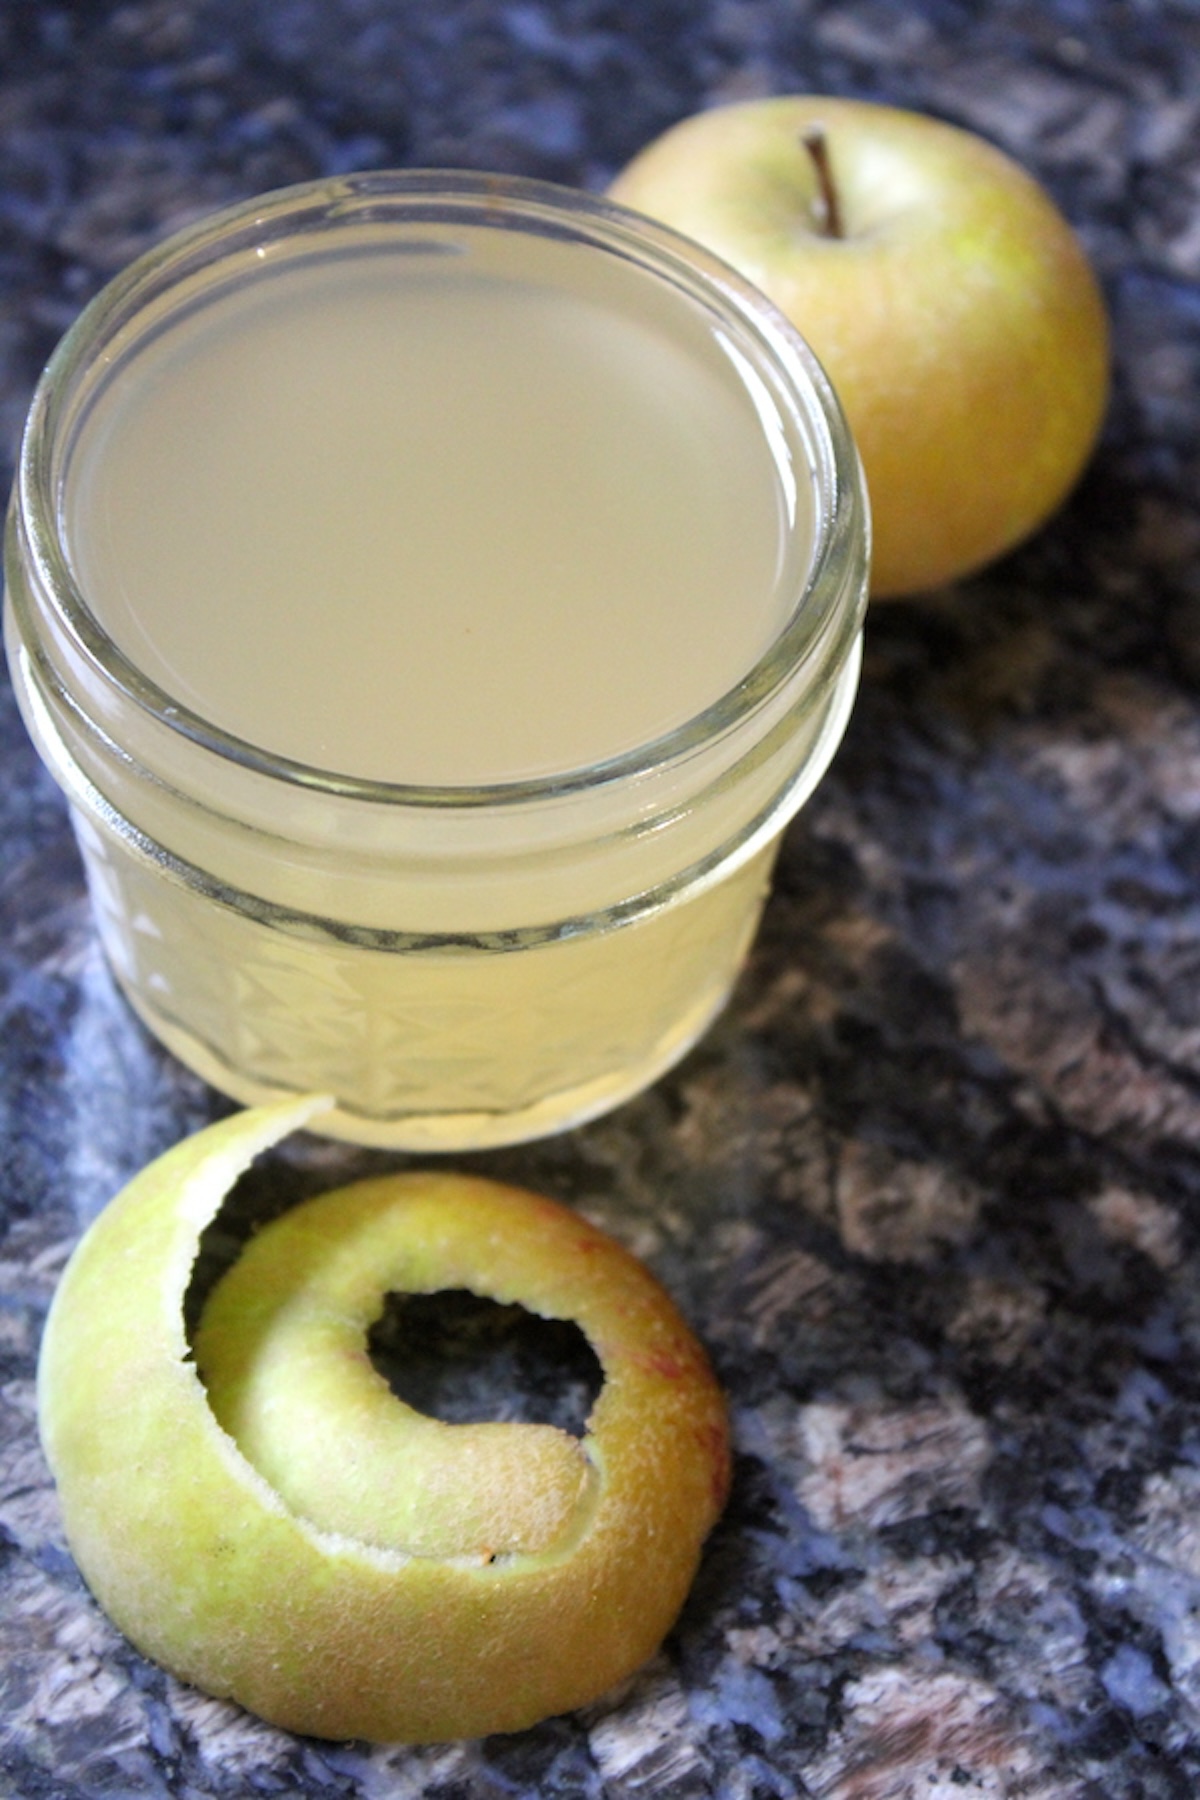
Apple scrap vinegar turns the peels and cores left over from a batch of pie or applesauce into a tangy homemade vinegar. All it takes is a jar, a little sugar, and a few weeks of patience.
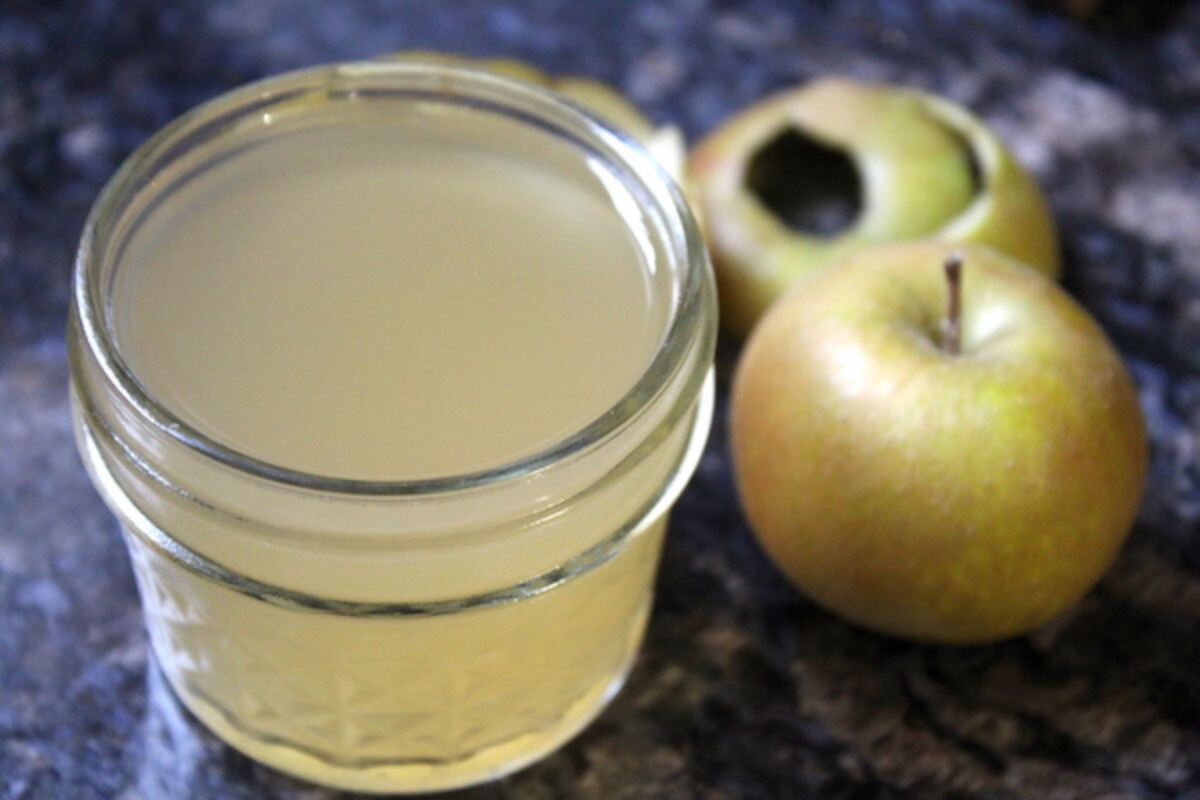
Table of Contents
- Notes from my Kitchen
- Ingredients for Apple Scrap Vinegar
- Equipment for Apple Scrap Vinegar
- How to Make Apple Scrap Vinegar
- Why Vinegar Doesn’t Use an Airlock
- Mother or Mold?
- Can You Use Apple Scrap Vinegar for Canning?
- Storage and Shelf Life
- Recipe Tips & Variations
- Ways to Use Apple Scrap Vinegar
- Apple Scrap Vinegar FAQs
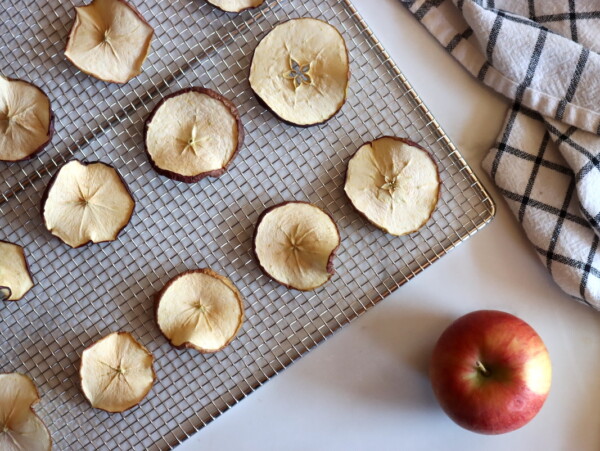
- Ways to Preserve Apples
- Apple Scrap Vinegar Recipe
- Homemade Vinegar Recipes
Every fall our kitchen turns into an apple processing station, and no matter how carefully I work, I still end up with bowls of peels and cores on the counter. Those scraps don’t have anywhere near the sugar of the raw cider we press in the fall, but they still carry plenty of apple flavor, and they’re covered in the wild yeast that makes fermentation possible in the first place.
I’ll be honest about what this is and isn’t. Apple scrap vinegar isn’t true apple cider vinegar, because real cider vinegar starts with pressed cider that ferments into hard cider first and then sours into vinegar. This is apple-flavored vinegar made from what would otherwise hit the compost pile, and it’s incredibly useful in the kitchen even if it isn’t the same product you’d buy at the store.
The method here works for more than apples, too. Pear peels, peach pits and skins, and grape stems all ferment the same way, and I’ve written up the general technique for fruit vinegar if you want to branch out. Apples are simply where most of us start, since we generate a mountain of scraps in September and October anyway.
Notes from my Kitchen

Back when we had angora rabbits on the homestead, apple peels never made it as far as the compost. Those rabbits had a real weakness for them, and I’d occasionally find myself baking something apple-heavy on a Tuesday afternoon for no better reason than that the little guys were running low on scraps. It was a good arrangement for everyone involved.
Now that we’re raising two-legged kids instead of the four-legged kind, the peels go into vinegar jars instead. I keep a half-gallon jar going on the counter through most of apple season, and by Thanksgiving I usually have a couple of quarts of soft, fruity vinegar that costs me nothing but the sugar. It’s the kind of small win that makes a long day of peeling feel worthwhile.
Ingredients for Apple Scrap Vinegar
The ingredient list is about as short as it gets. The apples carry wild yeast to start the fermentation, as you have to make hard cider first, and then that’s transformed into vinegar using the vinegar mother. The wee beasties know what they’re doing, and you don’t have to fuss about it, so everything goes into the jar and they figure it out.
- Apple scraps (peels and cores): Anything on the outside of the apple ends up in your vinegar, so wash the fruit well before you peel it and use organic apples when you can. Cores are fine to include along with the peels, seeds, and all. Save scraps in the freezer if you want to accumulate enough for a full jar over several baking sessions.
- Sugar: The yeast on the apple skins needs something to eat, and there isn’t enough sugar left in the scraps on their own. Every batch I’ve tried without added sugar spoiled instead of fermenting. Honey works if you’d rather use it, but the bacteria have a harder time digesting it and the whole process runs slower. Raw cane sugar and brown sugar work too, but not sugar substitutes. You’re feeding the probiotics here, and they can’t live on monkfruit.
- Water (filtered or dechlorinated): Chlorinated tap water can slow down the yeast and bacteria you’re trying to encourage. If your tap water smells strongly of chlorine, let it sit out uncovered overnight or use filtered water.
- Raw apple cider vinegar with the mother (optional): A splash of raw cider vinegar jump-starts the acetic acid bacteria and gives you more consistent results. It isn’t strictly required, since those bacteria are already floating around your kitchen, but it’s cheap insurance on a first batch.
More sugar means more fermentable material, which means a stronger finished vinegar. That only holds true to a point, though, and I wouldn’t go past about half a cup per half-gallon jar.
Past that the yeast tend to stall out before they’ve worked through everything, and you end up with something sweet and boozy rather than sour.
What a fantastic how-to, thank you! I have tried to make apple scrap vinegar on two other occasions with poor results. Over the weekend we spent $6 on 42 lbs of ground apples from a local orchard here in rural NH. We made 12 quarts of apple sauce from the apples and saved the scraps for this very purpose! I followed your instructions, adding ACV to each jar as an insurance policy, and I have very high hopes for a good turnout this time. Thank you!
Equipment for Apple Scrap Vinegar
Vinegar making needs less gear than most fermentation projects, but two pieces genuinely matter.
- A half gallon mason jar or any wide mouth glass jar. Quart jars work fine too, you’ll just need more of them.
- A glass fermentation weight to hold the scraps under the liquid. This is the piece people skip, and it’s the reason most failed batches fail. A small ramekin or saucer that fits inside the jar works in a pinch, and one reader told me she uses a teapot lid.
- A cloth cover and rubber band, or a mason jar ring with the flat lid removed. A napkin, a tea towel, or a doubled square of cheesecloth all work.
- A fine mesh strainer for bottling at the end.
How to Make Apple Scrap Vinegar
The whole process breaks into two fermentations that happen back to back in the same jar.
First, the wild yeast on the apple skins converts sugar into alcohol, and then acetic acid bacteria convert that alcohol into vinegar. You don’t have to do anything to trigger the handoff. It happens on its own as long as the jar stays open to the air.
Packing the Jar
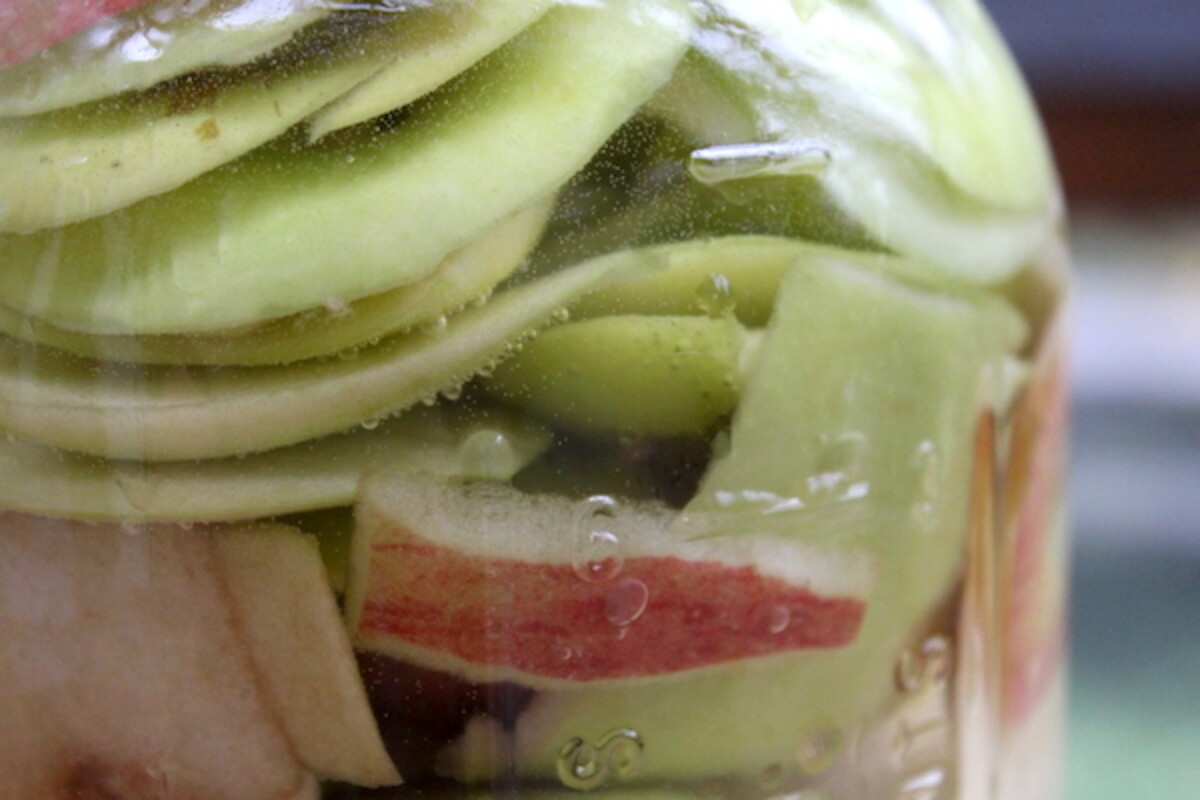
Pack the peels and cores into your jar, leaving an inch or two of headspace at the top. One heaping batch of apple pie filling generates roughly one half-gallon jar of scraps, and a big applesauce day will fill several.
Leave the pieces large. Readers ask fairly often whether chopping or grinding the scraps would speed things along by increasing surface area, and I’ve found the opposite to be true.
Small bits float up past the fermentation weight and mold on the surface, while big pieces stay put where they belong.
Adding the Sugar Water
Dissolve the sugar in a bit of warm water, then pour it over the scraps and top the jar off with plain water until everything is submerged. There’s no precise measurement for the water. You just need enough to cover the apples with a little to spare, which usually lands somewhere around four to five cups in a half-gallon jar.
If you’re using raw cider vinegar as a starter, stir in a tablespoon or two now. Don’t worry about the sugar making a sweet finished product. Nearly all of it gets eaten by the yeast and bacteria over the next few weeks, and what comes out the other end is sour.
Weighting and Covering the Jar
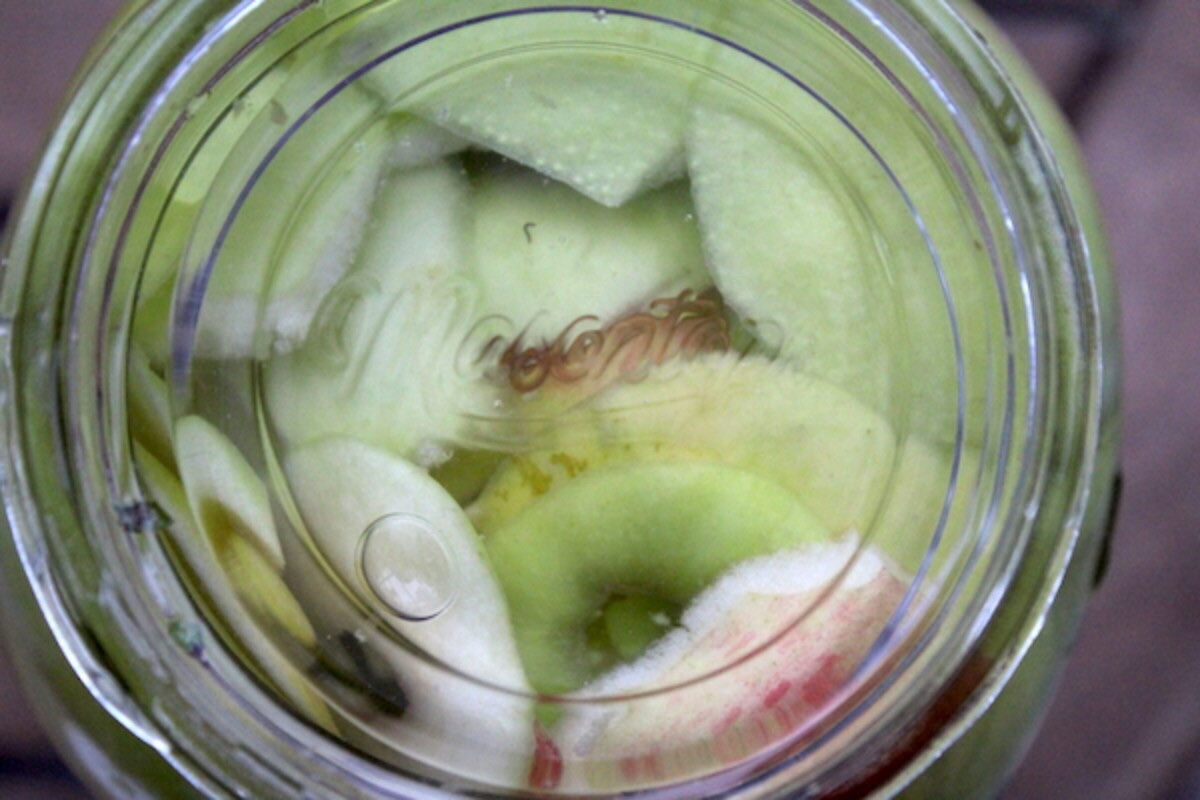
Settle the fermentation weight on top of the scraps so every last piece sits below the water line. This is the step that makes or breaks the batch. Any apple that pokes above the liquid will mold, and once mold takes hold in a jar of fermenting fruit you’re better off starting over than trying to rescue it.
Cover the mouth of the jar with cloth and secure it with a rubber band or a jar ring. The ferment needs air exchange, but an open jar of sweet apple water is an engraved invitation to every fruit fly within a mile. Cloth solves both problems at once.
Why Vinegar Doesn’t Use an Airlock
If you’ve done any lacto-fermentation or home brewing, reaching for an airlock is instinct. Resist it here.
- An airlock exists to keep airborne acetic acid bacteria out of a ferment. Those bacteria are exactly what sours hard cider into vinegar, which is why cider makers work so hard to shut them out.
- Making vinegar means welcoming them in. Sealing the jar stops the second fermentation before it starts and leaves you with weak, flat hard cider instead.
- Cloth gives you the air exchange you need while keeping fruit flies and dust out.
Fermenting and Straining
Set the jar somewhere out of direct sun at ordinary room temperature. After about a week you should see a steady stream of bubbles rising through the scraps, which is the wild yeast working through the sugar and giving off carbon dioxide as they go.
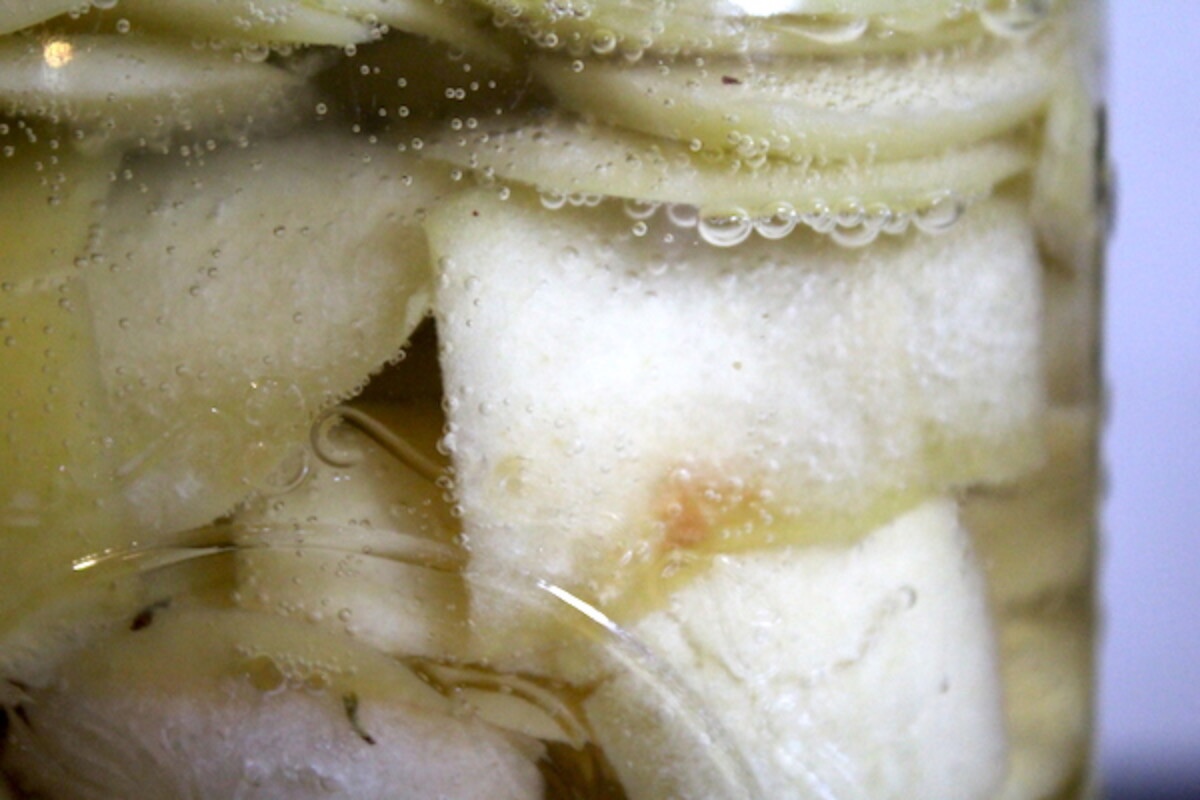
From there it’s a waiting game. Give the jar three to six weeks, tasting occasionally, until it hits the sourness you want. At three weeks it’ll be mild and pleasantly tart.
Leave it longer, and the acetic acid bacteria keep converting alcohol to acid, and it sharpens considerably. If you started with a heavy hand on the sugar, plan on the longer end so everything has time to convert.
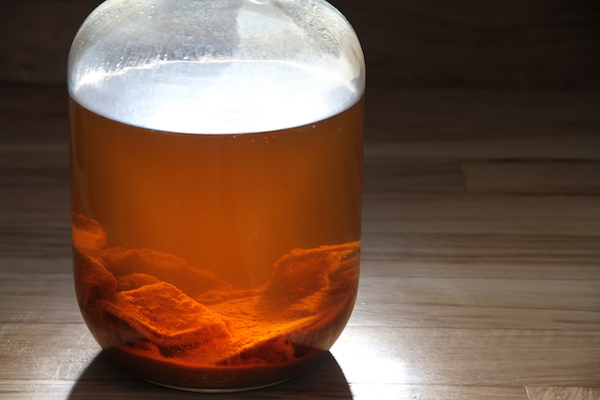
The scraps will brown, and the liquid will shift from clear to a soft cider color over those weeks. Both are normal. Somewhere in that window you’ll also notice a pale, gelatinous disc floating on the surface above the weight, and that’s your vinegar mother.
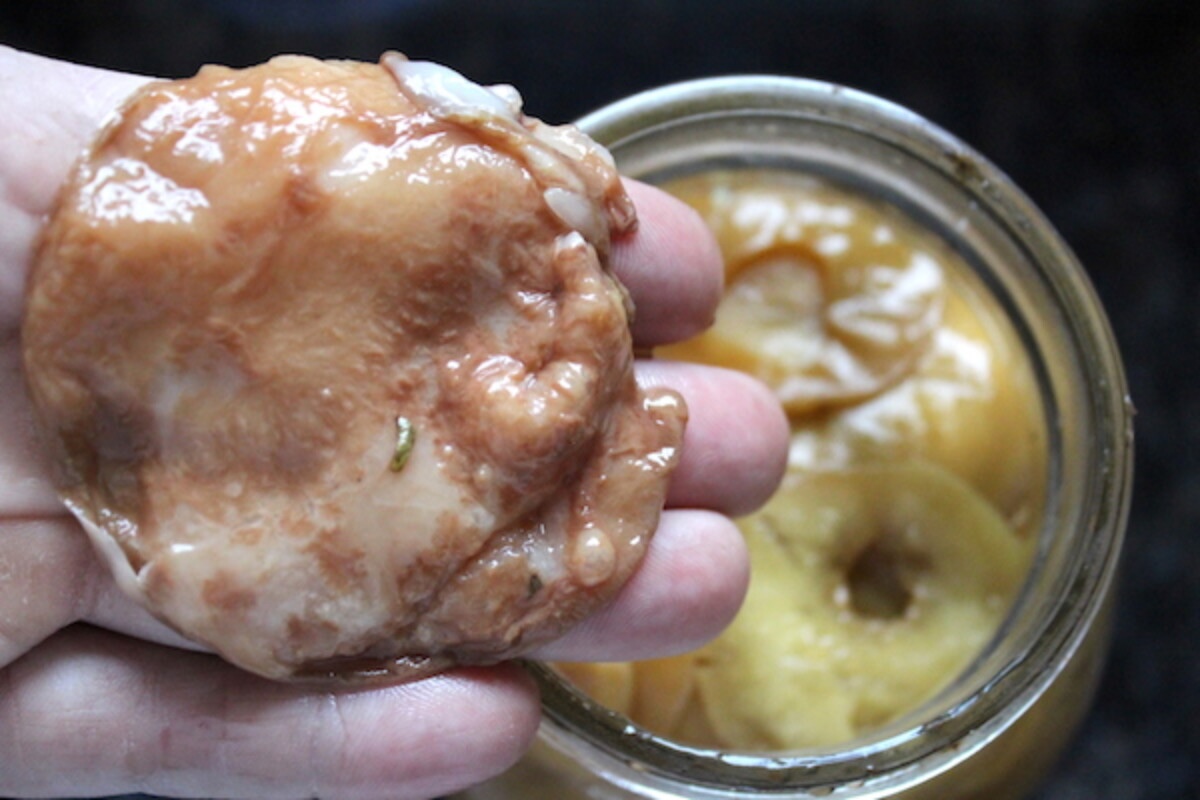
When it tastes right, strain the vinegar through a fine mesh strainer into clean bottles and cap them. I leave the mother in the bottle rather than fishing it out, since it does no harm and keeps the vinegar lively.
The spent scraps can go to the compost pile at that point, having given up everything they had.
Mother or Mold?
This is the single most common question I get about vinegar, and the two are easier to tell apart than you’d think.
- A mother sits in or on the liquid. It’s smooth, rubbery, and translucent, somewhere between a jellyfish and a thin slab of gelatin. Colors range from cream to tan to pink depending on the apples, since the mother picks up pigment from whatever it’s growing in.
- Mold grows above the water line. It’s fuzzy, dry looking, and usually blue, green, black, or white with visible texture. It grows on exposed apple pieces, not on the liquid surface.
- Small spots can be scooped off as long as you get the apples fully back under the weight afterward. Widespread fuzz means the batch is done for.
- Odd smells partway through are usually fine. Fermentation runs through intermediate stages that can smell sharp or strange before settling into a clean vinegar aroma. Give it another week and smell again before you make any decisions.
Can You Use Apple Scrap Vinegar for Canning?
No, and this is worth being clear about. Homemade vinegar has a variable acidity that you can’t measure at home, and tested water bath canning recipes are built around commercial vinegar standardized to 5 percent acidity. Extension food safety guidance is consistent on this point: never use homemade vinegar or vinegar of unknown acidity for home canning, because the acid level is what keeps a shelf-stable pickle safe.
Your apple scrap vinegar could easily come in under 5 percent, and there’s no way to know without lab testing. Save it for cooking, cleaning, refrigerator pickles, and herbal preparations, and buy commercial vinegar for anything that’s going on the pantry shelf.
Storage and Shelf Life
Store finished apple scrap vinegar at room temperature in a capped bottle, out of direct light. Like any vinegar it keeps more or less indefinitely, and because it’s raw and unpasteurized it’ll continue to develop and sharpen slowly on the shelf.
You may see new mother forming in the bottle over time, or cloudy strands drifting through it. Neither is a problem. Shake before using, or strain again if the texture bothers you. If you’d rather stop the aging in its tracks, you can heat the vinegar to about 150°F and hold it there briefly before bottling, though I usually don’t bother.
Recipe Tips & Variations
- Freeze scraps as you go. Peels and cores keep for months in a bag in the freezer, so you can build up a full jar across several baking sessions instead of waiting for one enormous apple day.
- Watch the temperature. Ferments crawl in a cold kitchen. If you’re weeks in with no bubbles at all, a chilly corner is the usual culprit. Move the jar somewhere warmer or set it on a seedling heat mat before you give up on it.
- Save a piece of the mother. A chunk of mother added to your next jar of sugar water gets that batch going faster than starting from scratch. It works the same way a starter does in any other ferment.
- Try other fruit. Pear cores, peach skins, and pineapple rind all ferment beautifully. Pineapple scraps make a lightly fizzy drink called tepache if you catch them before they turn sour.
- Infuse the finished vinegar. Once it’s strained, a jar of apple vinegar makes a good base for herbal vinegar with rosemary, thyme, or garlic scapes.
- Expect the occasional oddity. Apples carry a lot of natural pectin, and once in a great while a batch will thicken or gel as it sits. It’s harmless, just unusable as vinegar.
Ways to Use Apple Scrap Vinegar
In the kitchen, it does everything a mild cider vinegar does. I use it in salad dressings, in braises where a splash of acid brightens things at the end, in marinades, and for quick refrigerator pickles that live in the fridge rather than the pantry. It’s softer and fruitier than store-bought, which makes it particularly good anywhere the vinegar is meant to be tasted rather than hidden.
Beyond cooking, it’s a workhorse for household and herbal projects. Readers use it as a laundry rinse and a hair rinse, and it works as the base for fire cider or a honey-sweetened herbal oxymel.
If you want more ideas, I’ve put together a running list of 100+ uses for apple cider vinegar that applies just as well to the homemade stuff.
And if you’re on a mission to keep good food out of the compost bucket, apple scraps are only the beginning. There are dozens of other ways to preserve apples, including extracting sugar from apples, and saved bones from the freezer turn into home canned bone broth.
Apple Scrap Vinegar FAQs
The mother is a mat of cellulose produced by the acetic acid bacteria that turn alcohol into vinegar. It floats on the surface as a smooth, translucent disc, and it can be cream, tan, or pink depending on the apples you used. It is a sign the ferment worked, not a problem. You can leave it in the bottle, or move a piece of it into your next batch to speed things along.
No. Tested canning recipes require vinegar standardized to 5 percent acidity, and homemade vinegar has a variable acid level that cannot be measured at home. Extension food safety guidance specifically warns against using homemade vinegar or vinegar of unknown acidity in home canning. Use it for cooking, refrigerator pickles, cleaning, and herbal preparations instead.
Temperature is the usual reason. Wild yeast slow down considerably in a cool kitchen, and a jar sitting in a drafty corner in winter can take weeks longer than one on a warm counter. Move the jar somewhere warmer or set it on a seedling heat mat. As long as there is no mold, a slow ferment is not a ruined ferment.
Yes, cores work just as well as peels, seeds included. In fact a mix of peels and cores gives a better result than peels alone because the cores hold more fruit flesh and sugar. Leave the pieces large rather than chopping them, since small bits float above the fermentation weight and mold.
Plan on three to six weeks. Around three weeks it will taste mild and tart, and the longer you leave it the sharper it gets as the bacteria keep converting alcohol into acetic acid. If you added a lot of sugar at the start, give it the full six weeks so everything has time to convert. Taste it every week or so and strain it when it suits you.
Ways to Preserve Apples
If you tried this Apple Scrap Vinegar recipe, or any other recipe on Practical Self Reliance, leave a ⭐ star rating and let me know what you think in the 📝 comments below!
And make sure you stay in touch with me by following on social media!
Apple Scrap Vinegar
Equipment
- Half Gallon Mason Jar
Ingredients
- 6 cups apple scraps, peels and cores, loosely packed, enough to fill a half gallon jar leaving 1 to 2 inches headspace
- 2 Tbsp granulated sugar, up to 4 tablespoons for a stronger vinegar, never more than 1/2 cup per half gallon jar
- 4 cups water, filtered or dechlorinated, plus more as needed to cover
- 1 Tbsp raw apple cider vinegar with the mother, optional starter
Instructions
- Wash the apples well before peeling, since anything on the skin ends up in the finished vinegar. Pack the peels and cores loosely into a half gallon jar, leaving 1 to 2 inches of headspace at the top. Leave the pieces large rather than chopping them.
- Dissolve the sugar in a cup of warm water, then pour it over the scraps.
- Top the jar off with additional water until the scraps are fully submerged with a little liquid to spare. Stir in the raw cider vinegar now if you are using it.
- Set a glass fermentation weight on top so every piece of apple sits below the water line. Any scrap left above the liquid will mold.
- Cover the mouth of the jar with a cloth napkin or doubled cheesecloth and secure it with a rubber band or a jar ring with the flat lid removed. Do not use an airlock or a solid lid, since the ferment needs air exchange to sour into vinegar.
- Set the jar out of direct sunlight at room temperature. After about a week you should see a steady stream of bubbles rising through the scraps as the wild yeast convert sugar into alcohol.
- Ferment for 3 to 6 weeks, tasting occasionally. At 3 weeks the vinegar will be mild and tart, and it sharpens the longer you leave it. The scraps will brown and the liquid will darken to a soft cider color, and a pale gelatinous mother will form on the surface.
- Check the jar every few days for mold on the surface. Scoop off any small spots and make sure the scraps stay fully submerged.
- When the vinegar tastes right to you, strain it through a fine mesh strainer into clean bottles and cap them. Leave the mother in the bottle or reserve a piece to start your next batch.
- Store at room temperature out of direct light. Raw vinegar keeps indefinitely and will continue to sharpen slowly on the shelf.
Notes
Nutrition
Nutrition information is automatically calculated, so should only be used as an approximation.
Homemade Vinegar Recipes
Find the perfect recipe
Searching for something else? Enter keywords to find the perfect recipe!











We make this every year with leftover organic apple peels before they go into the compost. It’s a great way to get one more use out of them before they feed the worms!
Thank you so much!!! It is so great to make this after freezing all my apples!
I’m so glad it worked out for you!
I made some ascrvin, left it for quite a bit, when I strained it the whole jar was jelled…..not had that happen before….is it still good? If not is there anything i can use it for?
Wow, that’s crazy! I had that happen with blackcurrants once, which have incredible amounts of pectin in them, but never apples. Apples are high pectin generally, though not usually as high as currants. Must be that your particular type of apple was really high pectin? Now how to use it, I’m not sure.
Why don’t you pasteurize the apple scrap vinegar like you would the apple cider vinegar?
You can, or you can leave it as is. Either way.
Can you also put in apple cores 🙂 thanks
Yes, you sure can.
Hi! Enjoy your recipes greatly!
Im working on my second batch of apple scrap vinegar and its not progressing like my first last year. I did add sugar and acv, weighted down with ferment weights, no mold, looks good, but no bubbles after 2 weeks. Do you think its temp related? That the only thing i can think of…I keep the house at 69, but I am in north GA and we are just getting through a bitter cold spell (by our definition 🙂 ) I was planning to use my new heated seed starting mats in that corner of my counter to see if that helps. Do you think temp is a component? should I throw this all away and start over? Or give it two weeks with the mats? thanks so much!
It definitely could be the temperature. I would still try it with the mats. If there isn’t any mold, I don’t think it will hurt anything.
Just wanted to pass on a little something fir the real beginner who may not have a glass weight, or who only has regular mouth jars. I used a teapot lid. It fits in my regular. Mouth mason jar. Most are food safe, but you could wrap it in something if you’re not sure. It worked, my vinegar is delicious.
That’s a great tip! I hadn’t ever thought of that before.
I make jars and jars of fruit scrap vinegar because this is what I use as a rinse for my laundry and also a rinse for my hair. I add essential oils such as lavender, rosemary & peppermint. You are a wealth of knowledge and ideas which match my google searches. You are much appreciated!
Thank you so much. So glad you’re enjoying the posts.
Do you add more water if the water evaporates at all ?
No, there is not need to add any extra water.
I didn’t see how much water to add to the sugar?
This is really a recipe with specific measurements, it’s more of a technique. I would just use enough water to dissolve the sugar and then you can top the jar off with more water as needed.
I’m curious if the mothers can be used like scobys to make new vinegar? Like if you transferred them to a new bottle of sugary water would they make vinegar again? Or perhaps used with other inputs to make different kinds of vinegar?
I tend to leave mine in the jar but you can definitely add it to a new batch of vinegar to give it a bit of a jump start if you wish.
This is awesome, thank you so much for sharing this information! What is the “mother” and what can it be used for?
The mother is simply a form of cellulose that is created by the bacteria that produce acetic acid which is the acid that is present in all vinegar. I usually don’t do anything with my mother and just leave it in the bottle with the vinegar. Sometimes the mother is not a solid mass but more like little floaties. In that case, I simply shake the vinegar before using and use it along with the vinegar. You can take some of it and add it to new batches of vinegar to give them a kick start. I have heard of some people feeding extra mothers to their chickens. Apparently they really like them a lot.
Hi! Thank you for the wonderful “how to”. I made two jars of apple scrap vinegar. Both made jelly like substances on top. One is clear-ish and the other is a bit more white. Are they both mothers? When you strain and bottle the vinegar, what do you do with the mother? Thanks for your help!
Yes, it sounds like the mother. I personally would keep the mother in with the vinegar when you bottle it.
Thank you!
I followed the recipe and did three half gallon jars. I just smelled of them and 2 of them have an ammonia smell. Tthe other smells great. Are the ammonia jars bad? Also, the mother in my jars is more of whitish tan and not pinkish brown like your picture. Hoping its not mold, but a true mother. Any suggestions. Thanks in Advance.
The mother can be all manner of colors, so I wouldn’t worry about that. Usually it picks up colors from the liquid its fermenting in, and if your apples have pink skins then it’ll be more pink. In red wine vinegar it’s a blood red, etc.
The fact that it’s different in two of your jars is strange…assuming you used the same input in all the jars. If it’s three different batches made with different ingredients then them being different is totally normal. If it’s all the same batch…then that’s odd and I’m not sure what to say there.
As to the smell, that’s not a problem I’ve had, but I did a bit of research and it looks like there are some more intermediary steps in fermentation and before it’s done it’ll put off some strange smells.
I’d give it more time and smell it again.
Mold is usually really obvious, like fluffy on the surface above the water line. Mold doesn’t happen below the water line, as it needs air contact. It only really happens if you have solids in there that float and are in contact with the air, and then the solid chunk (like a piece of apple) is what’s molding. In that case, just remove it as soon as you see it.
The other common problem is kahm yeast, which is not harmful and more of a cosmetic thing. There’s more about that here: https://www.nwferments.com/prevention-and-treatment-of-kahm-yeast
Miss Ashley
I have a question on the size of the SCRAPS Would it be better or Worse if I chopped or ground
the scraps before putting them into the jar and adding the water and sugar, I’m thinking More surface area.
what do you think, Yes more work, but will it be worth the extra work ?
I actually find that bigger pieces work better as they are easier to keep under the liquid. The small bits will tend to float to the surface of the water and develop mold.
thanks now I know what is best.
You’re very welcome.
What a fantastic how-to, thank you! I have tried to make apple scrap vinegar on two other occasions with poor results. Over the weekend we spent $6 on 42 lbs of ground apples from a local orchard here in rural NH. We made 12 quarts of apple sauce from the apples & saved the scraps for this very purpose! I followed your instructions, adding ACV to each jar as an insurance policy, & I have very high hopes for a good turnout this time. Thank you! 🙂
Awesome, I hope it works out for you!
It did, YAY! Thank you! I even ended up with a vinegar mother on each & every jar! 🙌
Wonderful!
Thank you! This was very helpful. I’m trying to reduce plastic use and food waste so tried this last night.
You’re so welcome. I love making my own apple cider vinegar.
Thank you for all the tips. I made my own ACV several years ago but freaked out when I saw “the mother” on top. The blog I got instructions from didn’t say anything about that! I ended up using the vinegar for my chickens, but was afraid to use it for my family. Now I know better! Thank you.