Affiliate disclosure: This post may contain affiliate links. Please see our Privacy Policy.
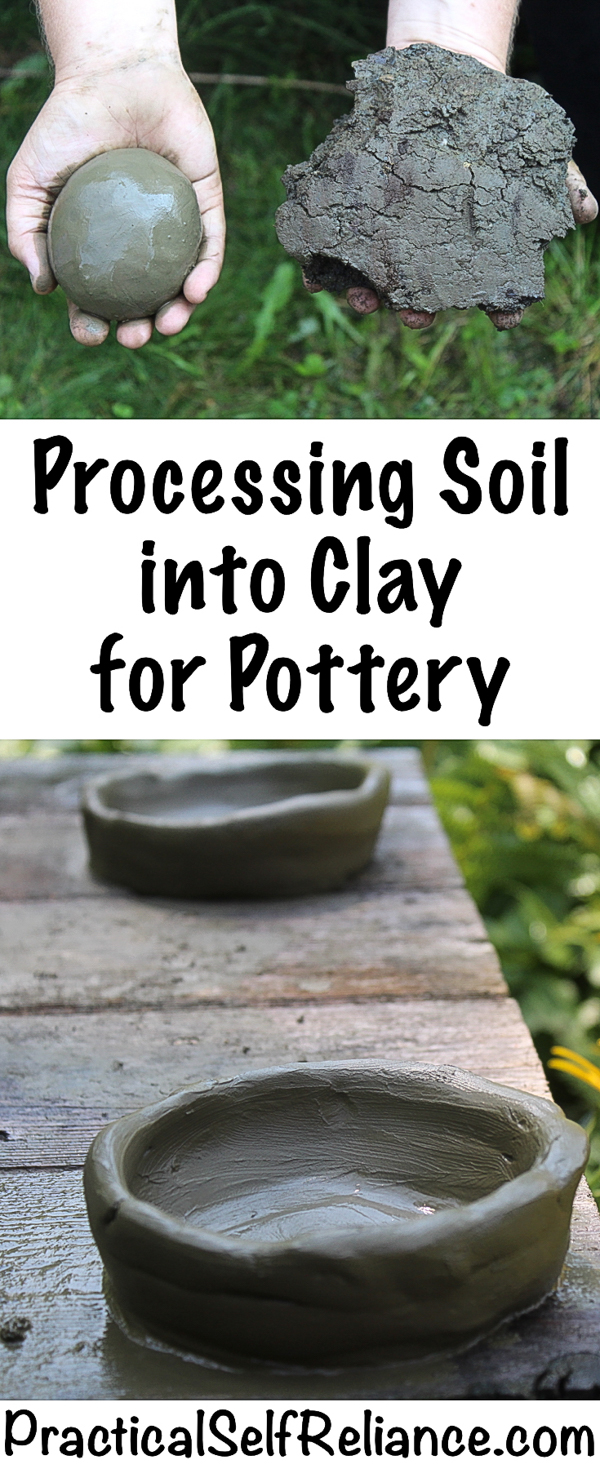
How did primitive potters harvest clay? People have been making pottery for millennia, and convenient hobby shops have only been a thing for a few decades at best.
Before that, people harvested their own clay right from the soil.

Clay is present just about everywhere, and even soils described as “sandy loam” can contain as much as 20% clay. To the naked eye, it may look like sandy soil, but with a 20% clay content, every 10 pounds of soil is hiding 2 pounds of clay ready for harvest.
With a little effort, you can harvest your own clay for craft projects or even something as advanced as a backyard bread oven.
Though most soil has some clay content, the yield will obviously be higher if you find high clay soils. Look for areas where the water tends to sit after a heavy rain.
Our soils are very shallow, and there’s usually somewhere between 8 and 18 inches of topsoil before a layer of dense clay. We’ve been working to slow the water runoff from our land, and the clay harvest happens more or less by accident while in the process of digging small slowing ponds.
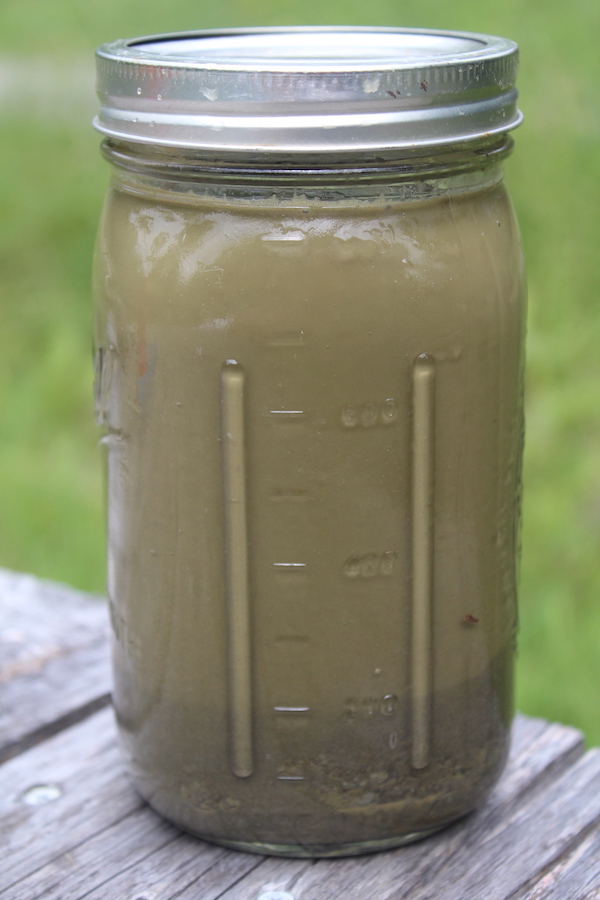
If you’re curious how much clay your soil contains, try doing a test jar. Fill the jar about halfway with soil, add water and stir to completely break up soil particles. After a few minutes, any sand and silt will settle to the bottom. Anything that’s still left suspended in the water is the clay content.
This jar started at half full, and it’s now 1/4 full with silt, sand, and rock. I’d estimate that my soil sample is roughly 50% clay.
There are two traditional methods for harvesting clay: dry and wet.
Dry Clay Harvest Method
The dry method involves completely drying out the soil, sifting it repeatedly and pounding the clay globs until it’s completely uniform and flour-like. This sifting is followed by a few rounds of winnowing the clay onto a collection surface.
The dried clay powder is then rehydrated and kneaded into workable potting clay.
This method is a great option in water-limited areas, but it requires a lot of time and energy. If you have baking hot sun and very little rain, it’s practical to completely dry earth.
None the less, the process of sifting, pounding and winnowing will take hours for just a few pounds of clay.
Wet Clay Harvest Method
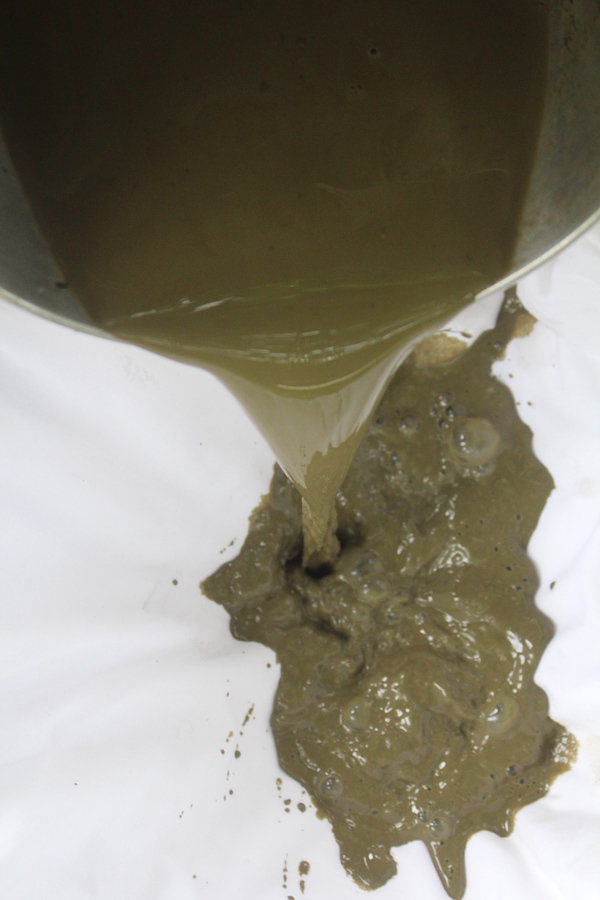
The wet harvest method involves adding both water and soil to a bucket. The soil is then stirred into the water, and allowed to sit for a brief period to allow the rock, sand, and silt to settle out. The clay stays suspended in the water for longer.
The clay and water mixture is then filtered through a fine cloth or sheet. What’s left is a ball of smooth clay.
The wet harvest method is much more efficient and allows gravity to do most of the work. If you have access to plenty of water this is the way to go.
Up here in Vermont, we’re never short on water, and it’d be hard to find enough hot rain-free days in a row to completely dry the soil out for the dry extraction method anyway.
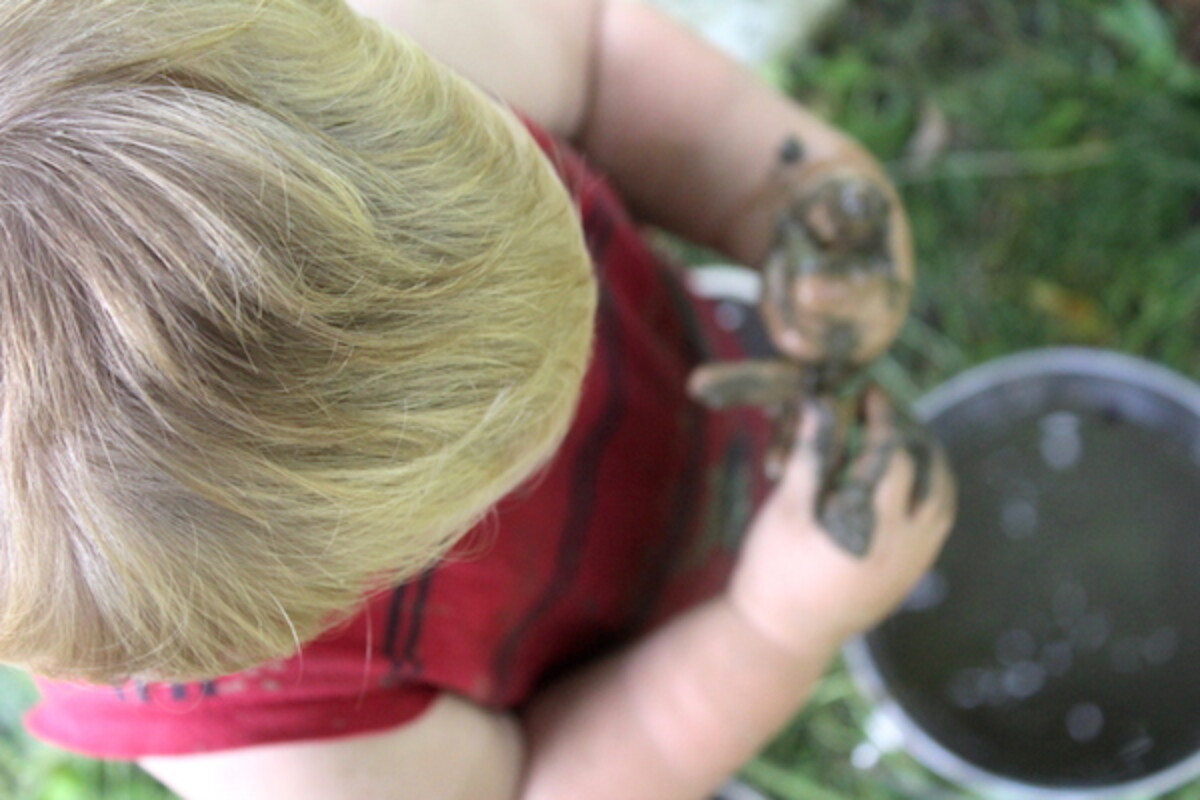
The wet extraction method is also a lot more fun, and allows kids to join in on clay processing. My 18-month-old was a huge help loading soil into the bucket and stir it up, and I couldn’t have asked for a more enthusiastic helper.
Processing Clay for Pottery
To use the wet extraction method, start by filling a bucket about 1/3 of the way with soil. Add water and use your hands to break up the soil particles as finely as you can get them.
Allow the soil to hydrate for a few minutes, or preferably a few hours. Then use your hands to break up the soil pieces again.
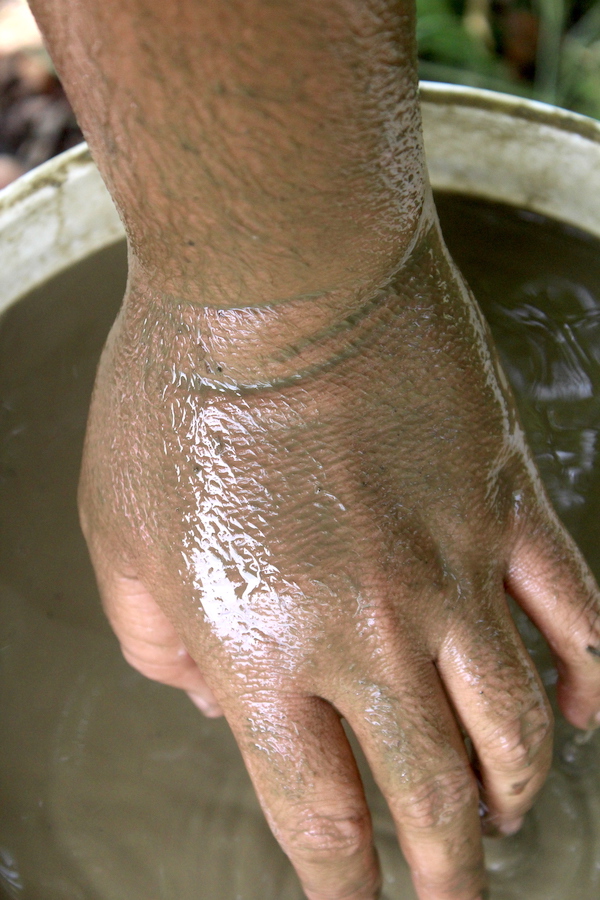
Give the whole bucket a good stir. A shovel works well for this, or a boat oar, or just an arm.
Our soil has so much clay suspended in the water that an arm in the bucket comes out completely covered in the clay slurry.
Once the soil is fully suspended in the water, give the bucket a few minutes to settle. The rocks fell out of suspension almost immediately, followed by the sand.
The silt will take 2-5 minutes to settle down, leaving only the smallest clay particles suspended in the water.
While you’re waiting, get a sheet ready inside a bucket or colander. Anything with a fine weave will do, I’m using an old bedsheet.
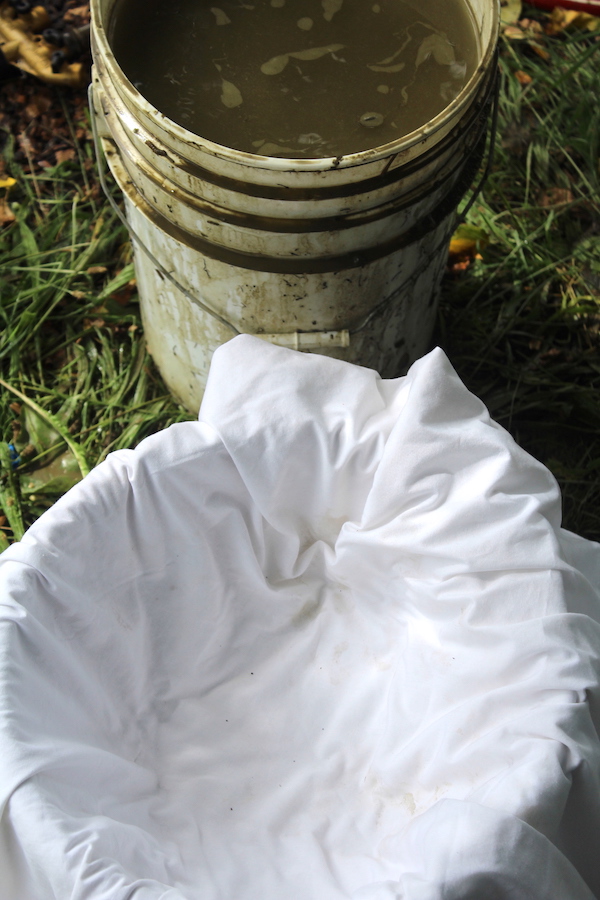
The sheet has a relatively loose weave, so I’ve folded it into quarters.
The water moved through the sheet quite slowly, and I think next time I’ll just double it instead so I don’t have to wait 24 hours for the water to completely drain.
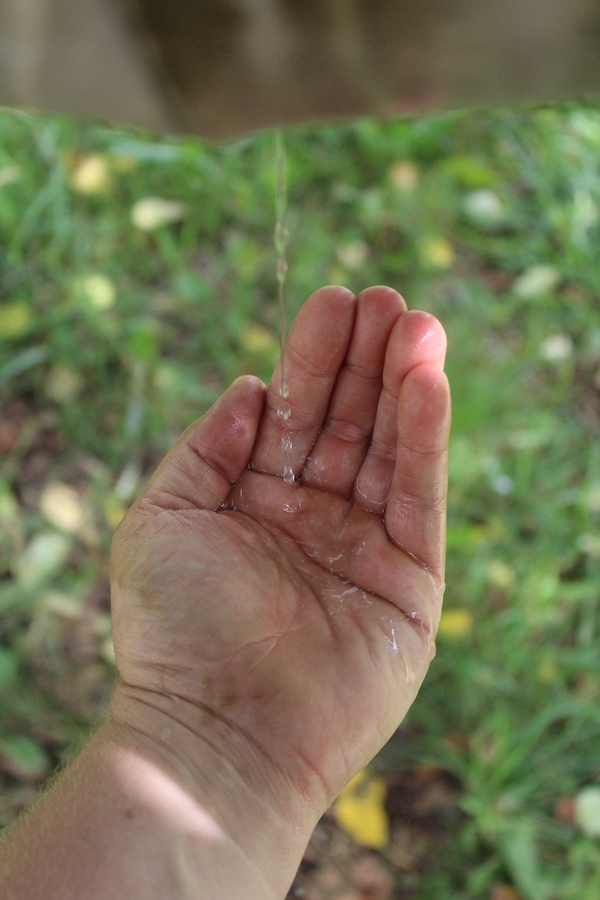
I’ve read in rural India, women who filter water through 7 layers of sari cloth actually filter out cholera. With 4 layers of bed sheet, I was able to filter a clay slurry to completely clear water.
I wouldn’t imagine that I removed bacteria, but it’s good to know that I can take scummy water and make it clear enough to boil for fresh drinking water.
My daughter has been drinking from our pond all summer using a life straw, mostly for novelty value. She gets a kick out of being able to drink right from the pond, but filtering the water to remove dirt first seems like a much more sustainable long-term solution for water.
With 4 layers of bed sheet, it took about 24 hours for the water to completely drain. As I said, 4 layers is definitely overkill.
Next time I’ll cut this sheet in half and make two clay extractors, each with two layers of a bedsheet.
To speed up the process, I gathered the corners of the sheet and hung it from a tree.
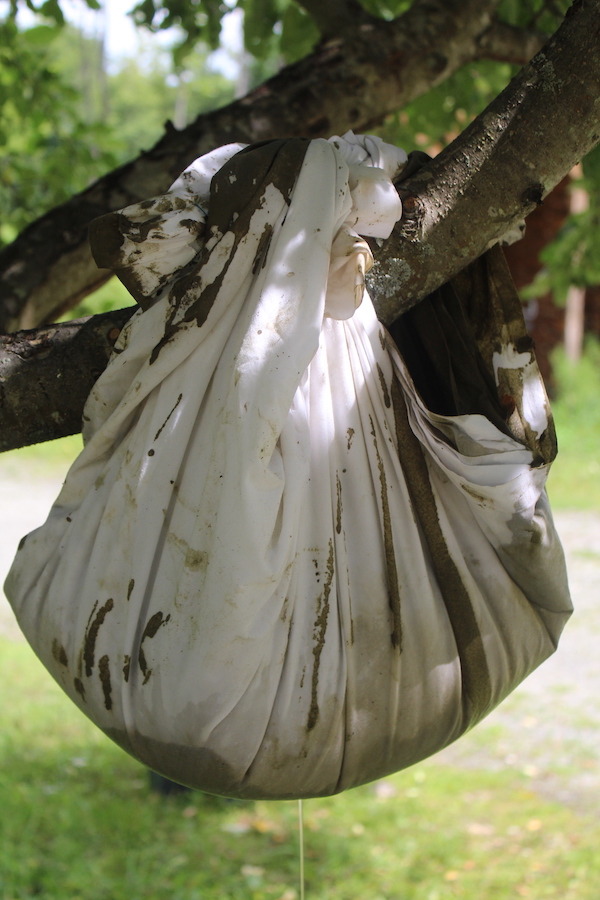
In the end, the top inch of clay was still pretty wet and slimy.
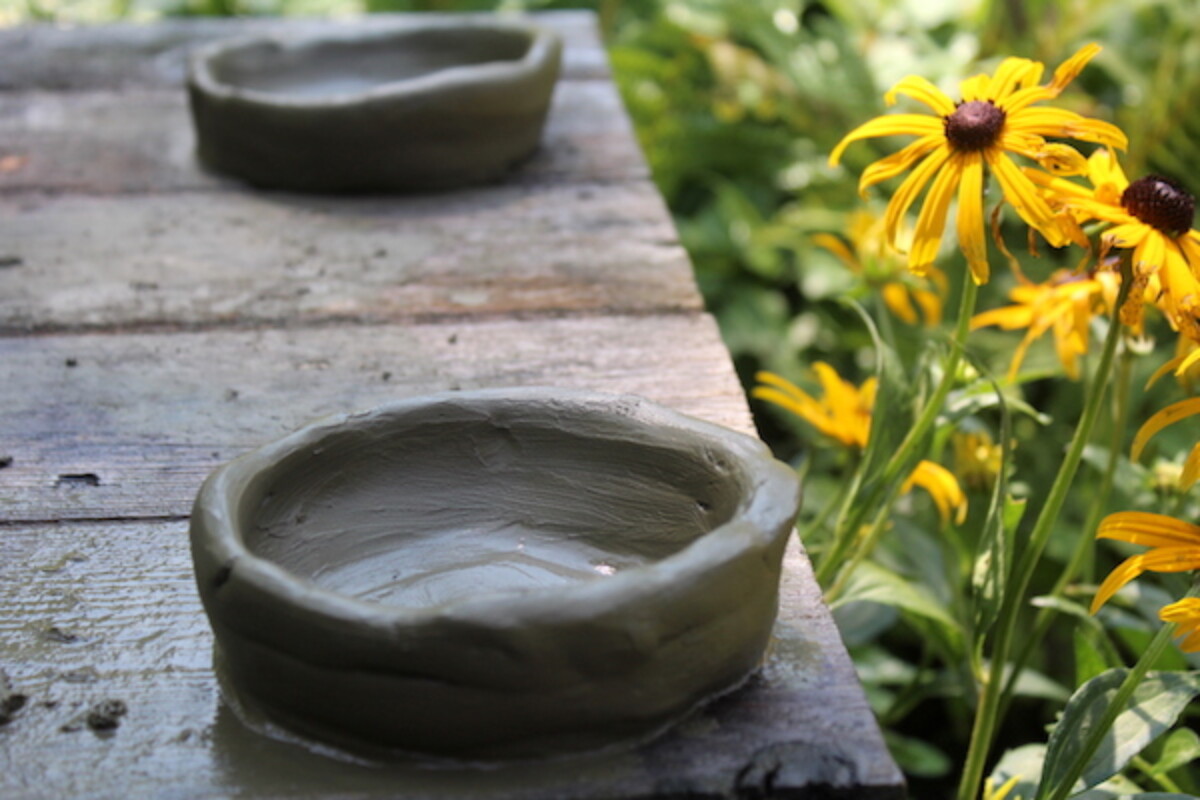
After 24 hours, I pulled all the clay out of the sheet, kneaded it together and let it dry in the sun for a few hours. At that point, the texture was just right.
Since it’s not commercial clay, it’ll take a bit of effort to learn how to fire it correctly. The right firing temperature may be hard to achieve, but our next step is to make a primitive kiln in the backyard.
I’m really inspired by the maker of the primitive technology videos on youtube, and he has a beautiful homemade rocket stove kiln. Temperatures in that won’t be exact either way, so it’ll be a learning curve regardless of the type of clay used.
I’ve read that inconsistencies in homemade clay can make it liable to crack during firing and that some potters actually mix in stones to their pottery vessels to help stabilize them. Soon enough I’ll find out when we go to make primitive pottery.
I can pull an unlimited amount of clay out of our soil without much trouble, so even if it takes a while to get the pottery process down it doesn’t much matter. It’s all part of the journey.
We worked our first lumps of clay into very primitive bowls, and thus far I’ve found that it’s much easier to make clay than it is to make attractive pottery.
It’ll take a lot more practice to make something worth firing, but in the meantime, we’ll try firing these practice bowls to refine our technique.
Overall, the process was almost effortless. Though I haven’t tried the dry method, there’s no way it could be this easy.
By description, it’s pretty grueling and it seems like you’d be inhaling a lot of clay dust in the process.
I’ll stick with the wet method and mud splashing with the kids.


Grab red clay from Georgia use the dirt to water method dump water with soil in bucket back and forth until rocks sand out shouldn’t be much most of Georgia is clay…fire it like stated the hard fired part is clay the dust if it cracks is dirt …reload the hard toss the dust …now you have better clay less likely to crack…another way is buy it ..pretty sure the world’s not gonna end in next 100yrs
I have much clay in my soil and was excited first time that I read this post. Decided to do some experimenting. After mixing soil and letting it settle a bit, I poured top liquid into another bucket and repeated process until all that was left is part to be strained, but instead of straining it, I left it sit in bucket thinking that I could settle out clay. Forgot about it for a time, when I returned to it weeks later,lol, all the clay was in bottom of bucket in a solid sheet, poured of water. Never used it. Will stay tuned for all the great ideas and try again.
Hi, Thanks for this post…I’ve been meaning to ask this for a while now: when the bucket with soil and water has been stirred and left for a short while, do you then scoop off the water with clay in suspension and filter that, or do you tip the content of the bucket, including the soil into the sheet to drain? That part wasn’t very clear to me. It feels like the whole lot would get mixed together again if tipping it all in to drain…..?
Hoping to try get some clay for grandkids project soon.
Really enjoy your posts/information
The heavier particles should stay towards the bottom of the bucket as you pour it as long as you do so slowly.