Affiliate disclosure: This post may contain affiliate links. Please see our Privacy Policy.
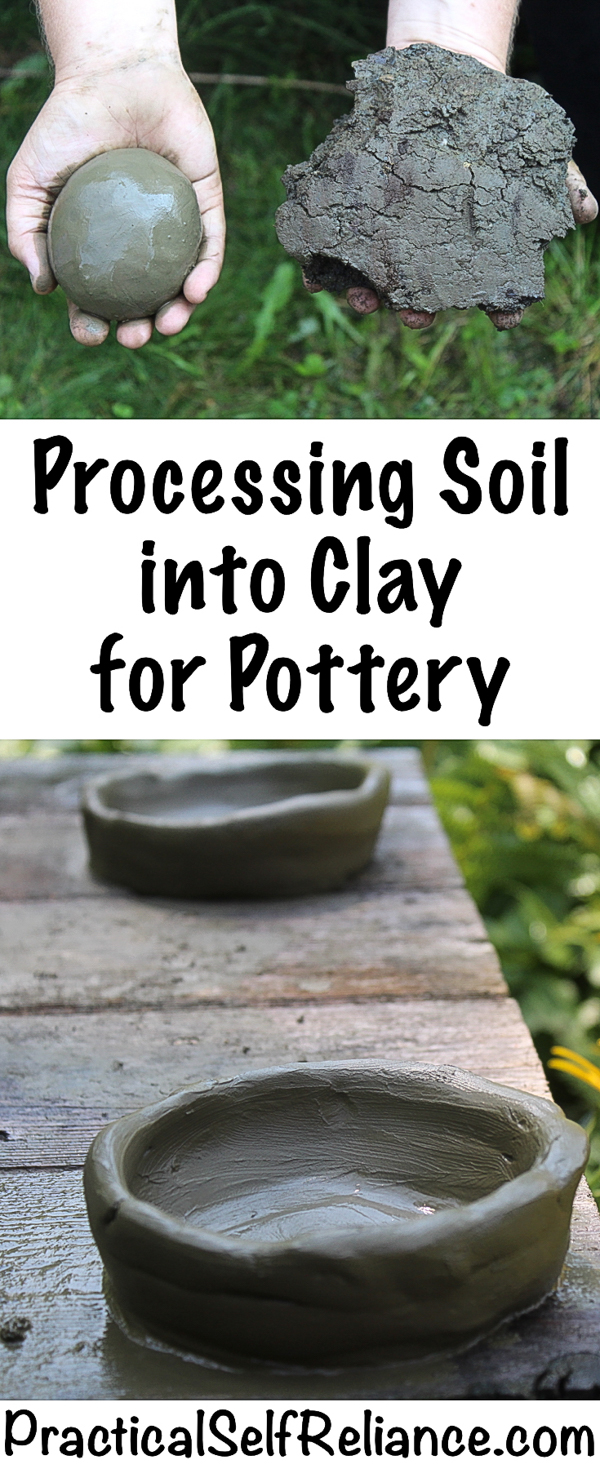
How did primitive potters harvest clay? People have been making pottery for millennia, and convenient hobby shops have only been a thing for a few decades at best.
Before that, people harvested their own clay right from the soil.

Clay is present just about everywhere, and even soils described as “sandy loam” can contain as much as 20% clay. To the naked eye, it may look like sandy soil, but with a 20% clay content, every 10 pounds of soil is hiding 2 pounds of clay ready for harvest.
With a little effort, you can harvest your own clay for craft projects or even something as advanced as a backyard bread oven.
Though most soil has some clay content, the yield will obviously be higher if you find high clay soils. Look for areas where the water tends to sit after a heavy rain.
Our soils are very shallow, and there’s usually somewhere between 8 and 18 inches of topsoil before a layer of dense clay. We’ve been working to slow the water runoff from our land, and the clay harvest happens more or less by accident while in the process of digging small slowing ponds.
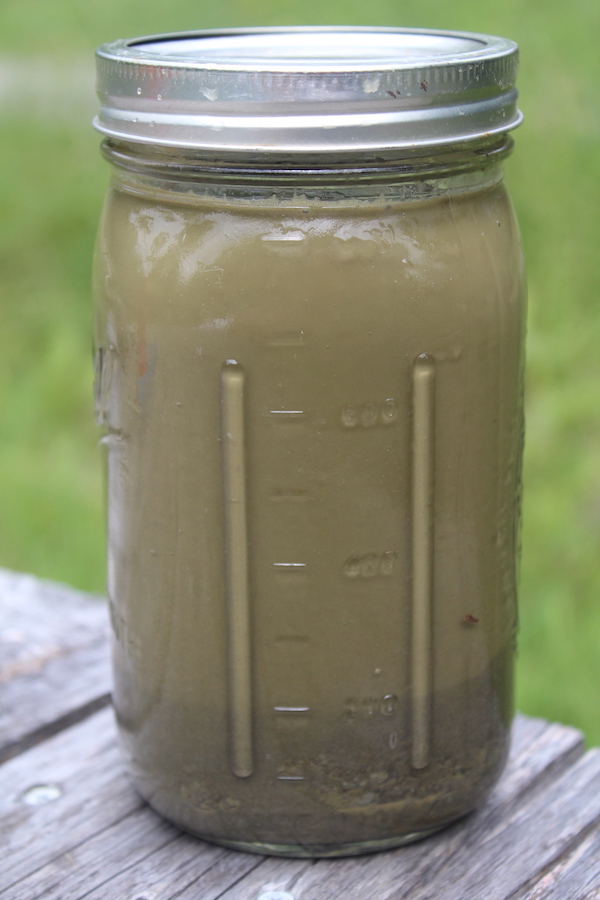
If you’re curious how much clay your soil contains, try doing a test jar. Fill the jar about halfway with soil, add water and stir to completely break up soil particles. After a few minutes, any sand and silt will settle to the bottom. Anything that’s still left suspended in the water is the clay content.
This jar started at half full, and it’s now 1/4 full with silt, sand, and rock. I’d estimate that my soil sample is roughly 50% clay.
There are two traditional methods for harvesting clay: dry and wet.
Dry Clay Harvest Method
The dry method involves completely drying out the soil, sifting it repeatedly and pounding the clay globs until it’s completely uniform and flour-like. This sifting is followed by a few rounds of winnowing the clay onto a collection surface.
The dried clay powder is then rehydrated and kneaded into workable potting clay.
This method is a great option in water-limited areas, but it requires a lot of time and energy. If you have baking hot sun and very little rain, it’s practical to completely dry earth.
None the less, the process of sifting, pounding and winnowing will take hours for just a few pounds of clay.
Wet Clay Harvest Method
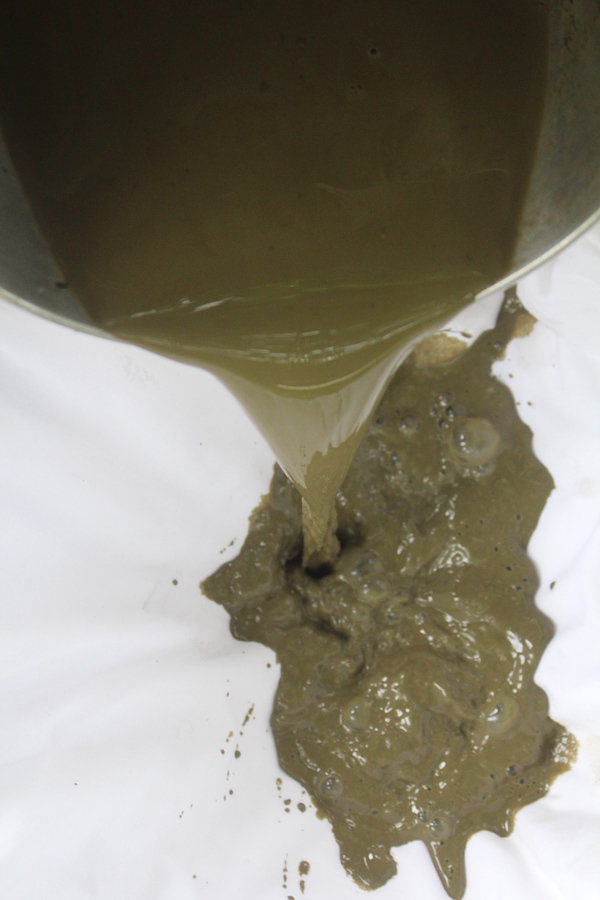
The wet harvest method involves adding both water and soil to a bucket. The soil is then stirred into the water, and allowed to sit for a brief period to allow the rock, sand, and silt to settle out. The clay stays suspended in the water for longer.
The clay and water mixture is then filtered through a fine cloth or sheet. What’s left is a ball of smooth clay.
The wet harvest method is much more efficient and allows gravity to do most of the work. If you have access to plenty of water this is the way to go.
Up here in Vermont, we’re never short on water, and it’d be hard to find enough hot rain-free days in a row to completely dry the soil out for the dry extraction method anyway.
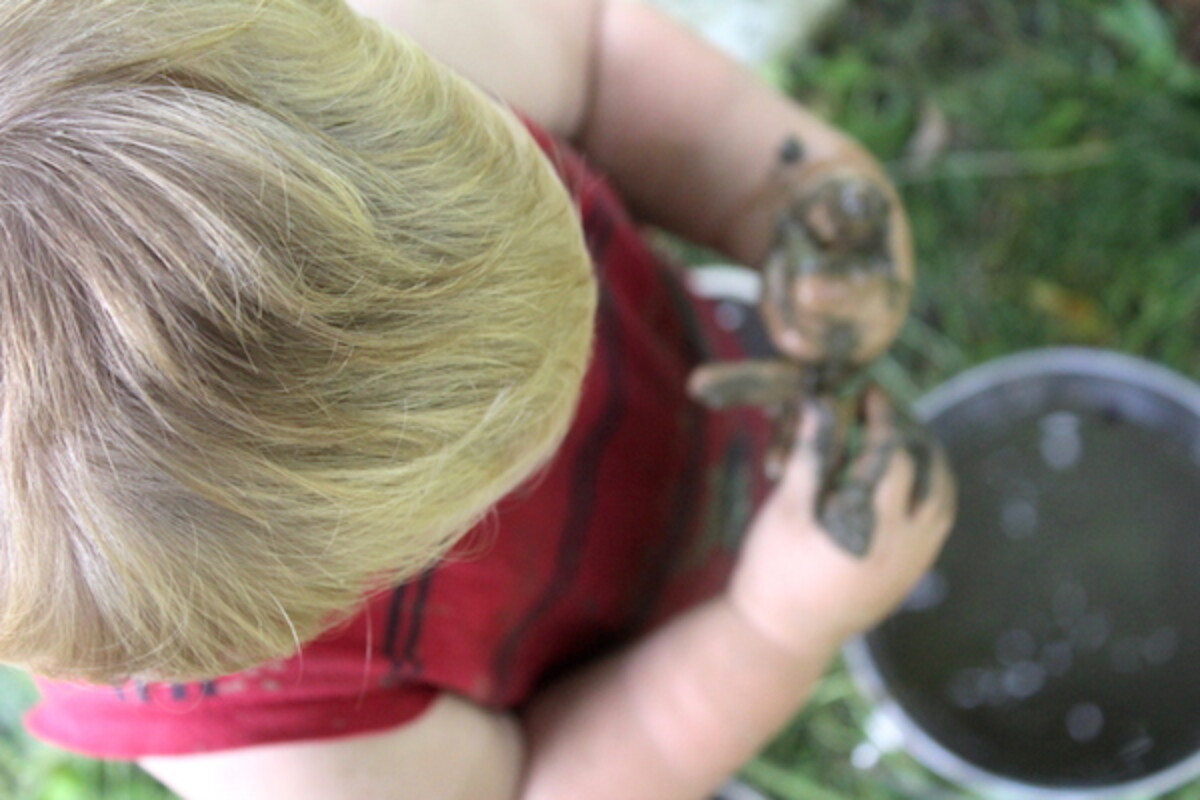
The wet extraction method is also a lot more fun, and allows kids to join in on clay processing. My 18-month-old was a huge help loading soil into the bucket and stir it up, and I couldn’t have asked for a more enthusiastic helper.
Processing Clay for Pottery
To use the wet extraction method, start by filling a bucket about 1/3 of the way with soil. Add water and use your hands to break up the soil particles as finely as you can get them.
Allow the soil to hydrate for a few minutes, or preferably a few hours. Then use your hands to break up the soil pieces again.
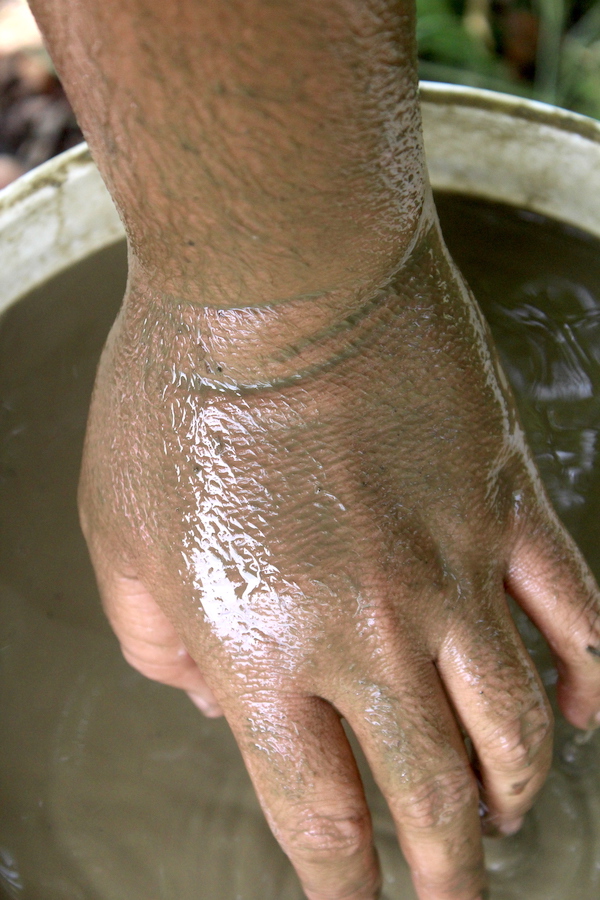
Give the whole bucket a good stir. A shovel works well for this, or a boat oar, or just an arm.
Our soil has so much clay suspended in the water that an arm in the bucket comes out completely covered in the clay slurry.
Once the soil is fully suspended in the water, give the bucket a few minutes to settle. The rocks fell out of suspension almost immediately, followed by the sand.
The silt will take 2-5 minutes to settle down, leaving only the smallest clay particles suspended in the water.
While you’re waiting, get a sheet ready inside a bucket or colander. Anything with a fine weave will do, I’m using an old bedsheet.
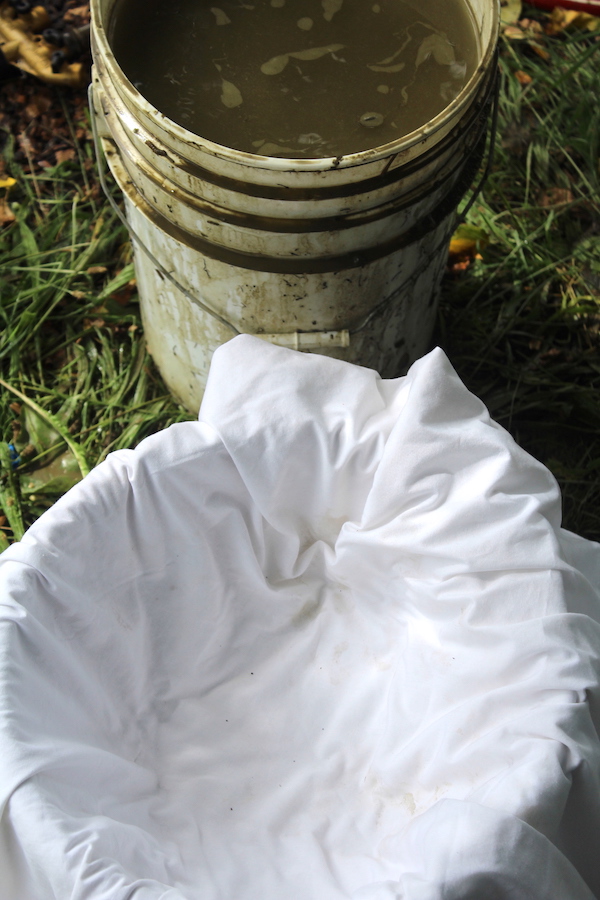
The sheet has a relatively loose weave, so I’ve folded it into quarters.
The water moved through the sheet quite slowly, and I think next time I’ll just double it instead so I don’t have to wait 24 hours for the water to completely drain.
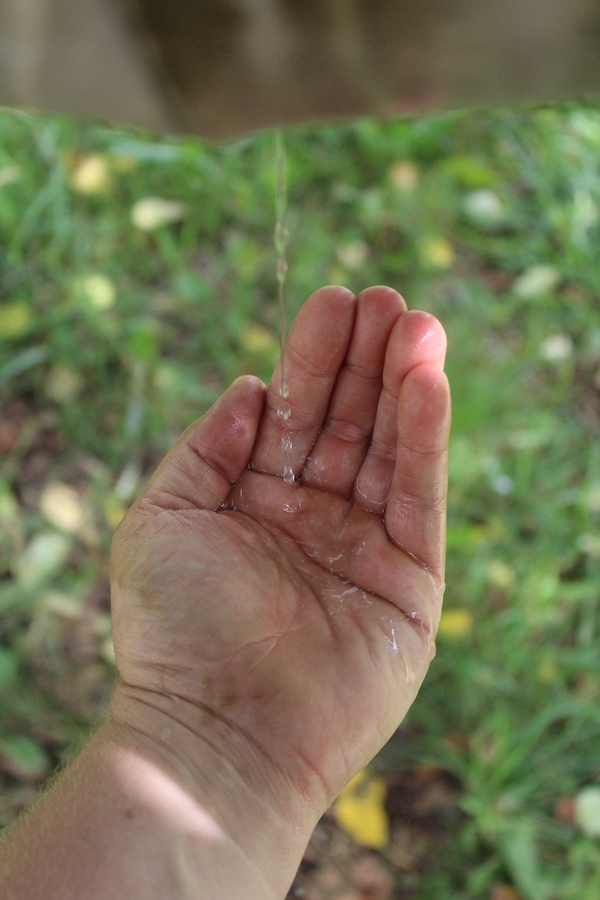
I’ve read in rural Bangladesh, women who filter water through 7 layers of sari cloth actually filter out cholera. With 4 layers of bed sheet, I was able to filter a clay slurry to completely clear water.
I wouldn’t imagine that I removed bacteria, but it’s good to know that I can take scummy water and make it clear enough to boil for fresh drinking water.
My daughter has been drinking from our pond all summer using a life straw, mostly for novelty value. She gets a kick out of being able to drink right from the pond, but filtering the water to remove dirt first seems like a much more sustainable long-term solution for water.
With 4 layers of bed sheet, it took about 24 hours for the water to completely drain. As I said, 4 layers is definitely overkill.
Next time I’ll cut this sheet in half and make two clay extractors, each with two layers of a bedsheet.
To speed up the process, I gathered the corners of the sheet and hung it from a tree.
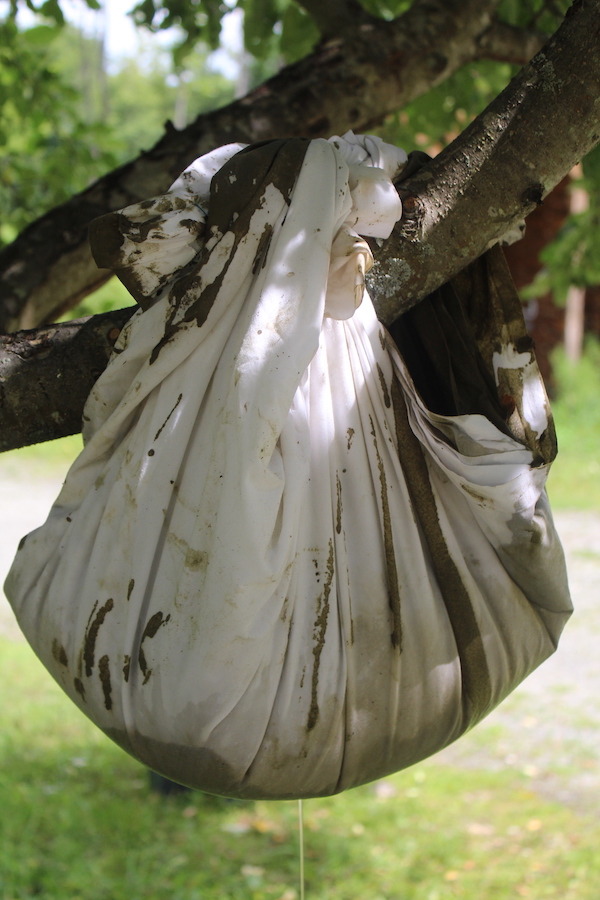
In the end, the top inch of clay was still pretty wet and slimy.
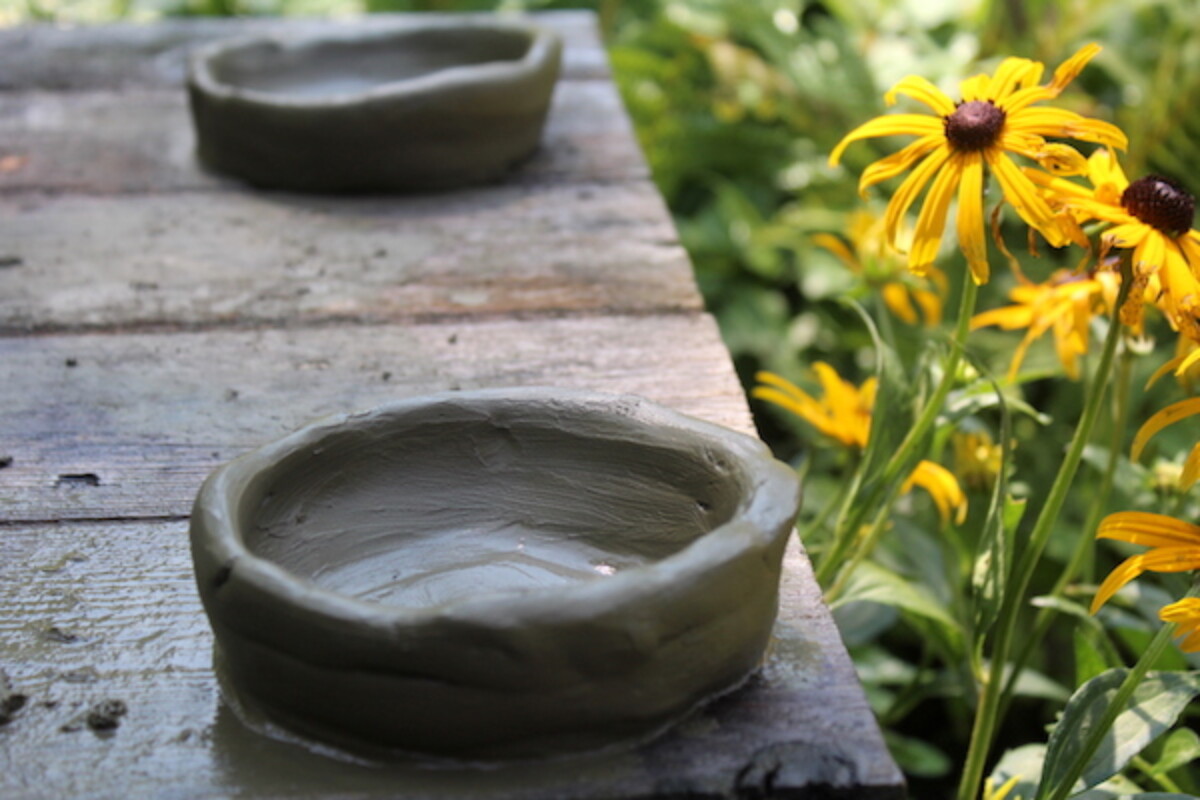
After 24 hours, I pulled all the clay out of the sheet, kneaded it together and let it dry in the sun for a few hours. At that point, the texture was just right.
Since it’s not commercial clay, it’ll take a bit of effort to learn how to fire it correctly. The right firing temperature may be hard to achieve, but our next step is to make a primitive kiln in the backyard.
I’m really inspired by the maker of the primitive technology videos on youtube, and he has a beautiful homemade rocket stove kiln. Temperatures in that won’t be exact either way, so it’ll be a learning curve regardless of the type of clay used.
I’ve read that inconsistencies in homemade clay can make it liable to crack during firing and that some potters actually mix in stones to their pottery vessels to help stabilize them. Soon enough I’ll find out when we go to make primitive pottery.
I can pull an unlimited amount of clay out of our soil without much trouble, so even if it takes a while to get the pottery process down it doesn’t much matter. It’s all part of the journey.
We worked our first lumps of clay into very primitive bowls, and thus far I’ve found that it’s much easier to make clay than it is to make attractive pottery.
It’ll take a lot more practice to make something worth firing, but in the meantime, we’ll try firing these practice bowls to refine our technique.
Overall, the process was almost effortless. Though I haven’t tried the dry method, there’s no way it could be this easy.
By description, it’s pretty grueling and it seems like you’d be inhaling a lot of clay dust in the process.
I’ll stick with the wet method and mud splashing with the kids.


I want our clay for soap making, We have that black clay soil that cracks when we get no rain, and it shrinks. Give the yard some good rain and the soil will raise up as much as 2″ or more.
That’s very interesting. I don’t believe I have ever seen black clay soil before. Where is it that you live?
This is almost a 3 year old post, but I wanted to add that I live near McComb, IL, and I have black clay soil. There used to be many pottery companies hear and I am going to try your idea. (I’m not the person who you asked the question of.) Thank you. Love your site.
~Ginene
Very interesting article. I enjoyed it very much. Great work!
You’re very welcome. So glad you enjoyed it.
Hi i’m an ameture gold prospector from Queensland Australia and we go out and dig up pay dirt to put through our sluice and remove the gold, however it often is heavy with clay and its diificult to wash the gold out of the clay when its wet so I dry it in tubs in the shed then put it in my cement mixer with a heap of random size rocks and put a lid over the front then turn it on while i have a beer. Then when I open it up the dirt feels like moon dust you can wave your hand through it like a fog. I then tip it through a screen to seperate the rocks and run it through my sluice which has an enclosed recirculating water system and it quickly fills up with silt which is a pain to deal with but now reading this I think I might know what to do with the silt which has passed through 4 settling tubs and is super fine, its obviously pure clay at this point. By the way I call my little home made trommel and sluice The Alchemist because it turns dirt into Gold.
Great reading
thanks Phil
Sounds like a fun adventure. You will have to keep us updated on how your clay turns out.
Could someone please explain what, “winnowing the clay onto a collection surface” means? Specifically what winnowing means?
Winnowing is the process of sifting heavier and lighter components using air. You would pour the dry material from a higher level allowing the heavier particles to drop straight down and the lighter particles to be separated by the air.
There are 2 more ways to get Clay. If your soil drains well you can just pure the slurry into a hole cover it for some hours or over night and scrape the upper 1/2″ to 1″ away. For pottery it might be even ok to pull off the clay layer. I made this for eating so I took only the upper 1/2″ layer. It’s chocolate fine. To avoid soil particles falling into the hole just smear the upper 2/3 and the rim and cover for example with the lid of a big pale. I also applied the soil on my leprosy diseased foot. The wounds closed everyday a little more. The other method is using Termite clay. A post of a shed was eaten by termites. So I took the post out of the soil and scraped out the termited clay. It made over a dozend balls as you show in your pictures. My plan is now to place internodes of Bamboo with the node on top into the soil just below topsoil level and have it filled by termites. This might be the least laborous way of geting pottery clay and additional it might have already some of the additives from the termites to make the material more durable.
Just a tip, even if the original clay isn’t stable, after the first firing, you can grind up the ceramic that was made and add it to your clay mixture as grog, really stabilizes the clay.
One thing isn’t clear so I’m guessing: You pour the suspended clay/ water mixture out of the bucket into the sheet LEAVING the sand/stone particles in the bottom of the bucket? This seems obvious but isn’t clear in your write up. Ted
I would actually add the sand and stone particles in as well. Many times people actually add stones or broken pottery pieces into their clay in order to help stabilize it.
But how do you get rid of organic matter and other impurities in the soil?
What kind of organic matter and impurities are you concerned with?
Great stuff. I’ve been doing primitive pots for 16 years. I usually get my clay from old Indian sites. But have it all figured out. It all started when picking up Indian pottery. I’ve even gone so far as copying. The designs. If anyone needs help please contact me. I’ve got everything written down that I’ve done. An archeologist told me to make sure I sign my pots bacause he couldn’t tell them from the real thing. In making your pots make sure you hand build them using the rope and coil method as the Indians did. Thanks. Great site. Hope more people would try it. Gary Northcutt. Dahlonega Georgia.
Hi Gary,
Would you mind if the admin gave me your email address? I live in Dahlonega too, and would love to learn more!!
Goodness! You are generally invigorating and useful. I like your benevolent acts. Truly Yours – Lisa, Choctaw Nation of Oklahoma dwelling in California
Thank you so much. I am glad you are enjoying the blog.
Hi, me and my kids tried this recently but found our creations cracked badly while drying. We followed the instructions and have super clay soil (the bane of my garden). Any suggestions?
You probably want to add some kind of tempering material into your clay mix to avoid cracking. If you scroll through the other comments, you will find lots of helpful suggestions from ground rock, sand, or even ground clay from failed pottery pieces.
HI, thanks for this extremely useful article! I found it a few weeks ago and tried it out, and it has been working perfectly — so far I’ve reaped about 60 lbs of high-quality grey earthware from the soil in my (Oakland California) backyard! But I have had a very difficult time with the sheets I’ve been using to drain. Even though I am only using a single ply (as opposed to your 4 folds), the water is just not draining enough. Even after a few days, with regular squeezing intervals, the clay is still far too soupy to take out of the sheets. To confound the situation, the water that drains from it at first is definitely NOT clear, but the same opacity of the clay itself, so much so that I collect it to reuse in my next slurry batch. And then after a few hours the drips stop completely, and the water just remains in the sheet.
This might be part of the problem but it has been so productive that I would like to keep it up if possible: I went to the thrift store and bought an old window screen. As an intermediate step before pouring it on the sheet, I pour it from one bucket to another, with the screen laying over the bucket. Then when I pour that slurry into the sheet, it has been completely filtered already, free from rocks and organic matter. Sand still sifts through, but that is a useful additive (as many people mention in the comments). Do you think that this much thicker slurry, with sand, is the problem? It really shouldn’t be, if all the water is just draining out anyway over time…
Again, thank you for your article and advice!
If you’re having trouble with the wet method, you may want to try the dry method described in the post. It is a bit more labor intensive but perhaps it might work better for your clay.
Can you please make more primitive skills posts? I like them a lot and wish to create another living area out of natural materials.
That’s a great suggestion. We are working on new content all the time.
I love reading your articles. I gotta ask, how the heck do you find the time to write them while juggling family and homesteading? I used to write a lot but as a new mom I’d be happy just to be able to finish this comment! Haha.
It can definitely be a challenge juggling it all. You just have to have a great support system, prioritize the things that are really important and make use of little pockets of time.
Hello! My name is Kristen and I am making an apothacary cabinet and all of the utensils that I may need. I started making small spoons from wood I had laying around. Now I’m needing a mortar and pestle, and I am wondering if this would be a wonderful way to use for the bowl? Would it be strong enough to mash up the herbs? And, would it be better to have a wooden pestle? Thanks for the wonderful information you have allowed us all to find! I have to say, I have been trying to get my daughter into something else other than her phone, and this is perfect and inexpensive!! Do you have a recipe for any glazes for use on the pottery?
It looks like you can purchase clay mortars, so I don’t see why it wouldn’t work. It probably depends on what you are grinding. If it is just leafy herbs then it should work fine. It does look like most of the clay mortars that I have seen have a wood pestle so that is probably a good idea. We have a post here that talks about using wood ash for pottery glaze. https://practicalselfreliance.com/wood-ash-uses/
I can’t wait to try this with my kiddos!! Thank you!!
I’ve find your site is my go-to when I need information.
Thank you from Porquis Junction, Ontario Canada!
I have a question about seeds. Is there a contact page?
We can answer any questions that you have right here. Just drop a reply and we will get back to you as soon as possible.
As someone who took seven semesters of ceramics making this is a great blog article. My teacher said that you need a bit of ground up bisque clay to add strength as well as if your clay is actually just wet enough to grow a little bit of mold it will be a better smoother clay for both building your materials as well as for the strength of them.
The other important thing is to make sure what ever you have made needs to have dried to “bone dry” so that the water content in it won’t make it explode. Placing it in a cool dry place with a cloth covered board under it will help it to wick the water content out to get to that bone dry state.
Good luck on your projects!
Thank you for sharing this! It made the light bulb turn on for me…it’s the water threat makes it explode.
My kids have such short attention spans and I’d hate for them to be upset with the process not working after having spent a long time on it. We too, live in Vermont, along the Battenkill in the southern part. I’ve never encountered and clay in our soul. Maybe right near the river. Again though, hate to disappoint!
I know i’m replying to an old comment, but felt compelled for what it’s worth. You said “I’d hate for them to be upset with the process not working after having spent a long time on it”. While disappointment is an uncomfortable feeling, it’s one of the very important emotional experiences that builds resilience in people. Attempting to do something, identifying better methods, having expectations not met, trying again, really working at something, problem solving, triumphs and failures are EXACTLY what kids need. Short attention spans can result and as kids become older they can often feel disempowered, incapable and easily defeated because they simply didn’t have the learnings and experiences when they were younger. Life skills require practice, so one of the ways we can prepare our kids for an exciting and fulfilling life is to give them practice at all the skills you wish for them to have as adults.
This article neglects to mention how important it is to add ground up already-fire clay powder to your clay to prevent cracking! Use any broken pottery.
When you fire your parts in a pit or a fireplace, wherever you fire them, if some of them crack or break and you decide they are unusable a good thing to do with them is to take a rock or brick or a piece of cinder block and break them and grind them up into us a sand as fine you would like (This takes some experimenting.)
I have the grit that you have created back into a new batch of fresh clay. Don’t put too much in; maybe one tabs or 1/8 of the amount of clay you have. Knead it into your clay so that it is mixed in evenly and make your next pots with this new clay and “grog “ mixture.
Doing this should make your pots stand up better and not slump. They should dry faster. And they should be less susceptible to breaking when you fire them. People have been doing this as long as they have processed clay and made pots. Native American people sometimes used their metates, their corn grinding stones, to make grog from their broken pottery. Large pot shards can also be used to cradle new pots and protect them from the flames when you are firing them. This will allow them to heat more evenly and makes them less likely to break in the firing, also.
Thank you for sharing these wonderful tips!