Affiliate disclosure: This post may contain affiliate links. Please see our Privacy Policy.
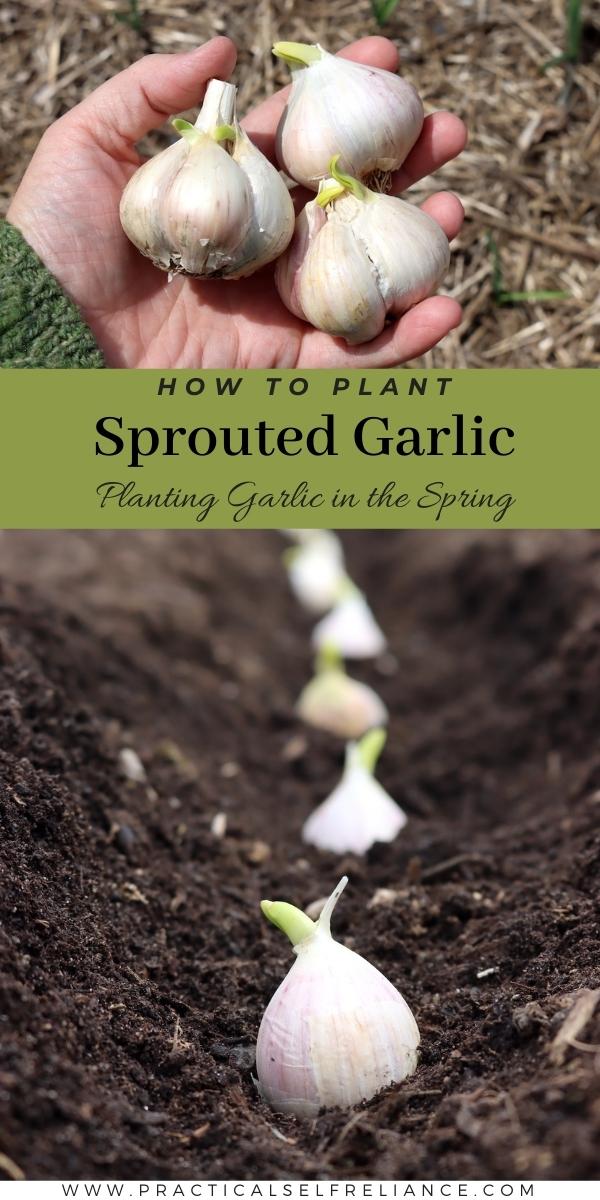
Planting sprouted garlic is one of the easiest spring gardening projects on a homestead, and any clove that’s started to sprout in your pantry can go straight into the soil to grow a whole new bulb by late summer. Most home gardeners are taught to plant garlic in fall, but spring planting works perfectly well too, especially when you’re starting from sprouted cloves that are already eager to grow. The end-of-winter pantry sprouts that most people throw out are actually a free planting stock for the year ahead.
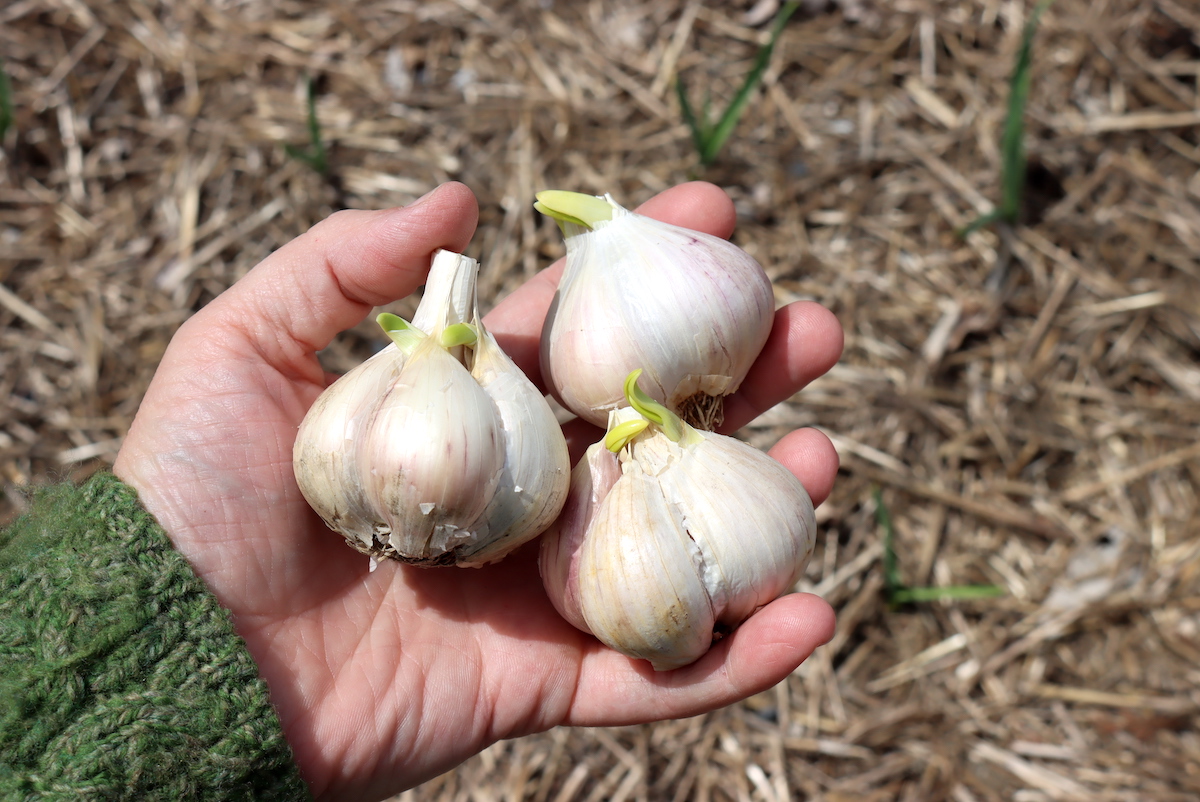
Table of Contents
- Notes from My Homestead
- Can You Plant Sprouted Garlic?
- Can You Plant Garlic in the Spring?
- Is Sprouted Garlic Safe to Eat?
- Why Is My Garlic Sprouting?
- Preparing Sprouted Garlic for Planting
- How to Plant Sprouted Garlic
- Planting Sprouted Garlic Indoors
- Can You Grow Garlic in Water?
- Caring for Spring-Planted Garlic
- Spring-Planted Garlic vs. Fall-Planted Garlic
- Curing and Storing Your Garlic Harvest
- Sprouted Garlic FAQs
- More Pantry-to-Garden Projects
- How to Plant Sprouted Garlic Recipe
- Using and Preserving Your Garlic Harvest
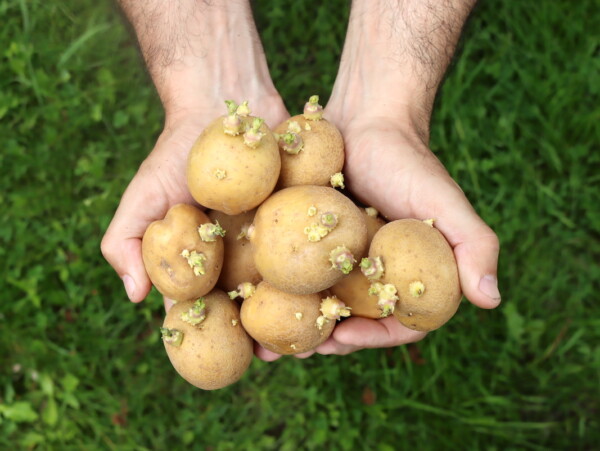
Garlic stores reasonably well most of the time, but sooner or later every garlic-loving household ends up with a forgotten bulb that’s developed a life of its own. The cloves push out tall green sprouts, the bulb gets soft, and the whole thing looks too far gone to use in the kitchen.
Far from being garbage, that sprouting garlic is the easiest plant material you’ll ever work with. Each clove will grow into a whole new bulb within a few months of planting, and a single forgotten head of garlic can become a respectable patch in your garden.
Notes from My Homestead

This whole post started because my mom called me one spring looking for advice. She’d found a head of garlic sprouting in her pantry in California and had no idea what to do with it. She’d never grown garlic before and didn’t cook with it often, which is how it had ended up forgotten in the back corner of the cupboard in the first place. Was sprouted garlic safe to eat? Could you plant it? She had no idea, but she knew we grew a lot of garlic up here in Vermont, so she’d come to the right place.
We plant garlic in the fall on our homestead, with hundreds of cloves going into the soil for harvest the following summer. We eat garlic by the bushel and store the harvest all winter long, but inevitably we end up with sprouting cloves come spring. Some go into spring kitchen projects, but the rest go into the ground for a second wave of garlic to harvest later in the season alongside the fall-planted bulbs. With a few planting instructions in hand, my mom popped her sprouted garlic cloves into the soil that spring, and a few months later she had a dozen full garlic bulbs out of one forgotten pantry bulb. That story has stuck with me as the perfect example of how a homesteading mindset turns kitchen scraps into garden harvests.
Can You Plant Sprouted Garlic?
Yes, you can plant any garlic that’s started to sprout, and the resulting plants grow into full-sized bulbs within a few months. Sprouted garlic is essentially a head start on the planting process, since the clove has already broken dormancy and started pushing out a green shoot. Once it’s in the soil, the roots develop quickly to support the existing top growth, and the plant takes off without missing a beat.
The only time sprouted garlic can’t go straight into the garden is when the soil is frozen solid. In cold climates where pantry garlic starts sprouting in midwinter, the sprouted cloves can be planted indoors in pots and tended on a sunny windowsill until the ground thaws in spring. In warm climates where the soil never freezes (like California, Florida, or the southern United States), sprouted garlic can be planted outdoors any time of year except the peak heat of summer.
Garlic is a cool-weather crop that does its best growing in spring and early summer. Cloves planted in the heat of summer often hunker down dormant until temperatures cool in fall, which means waiting an extra full season before harvest. The sweet spots for planting sprouted garlic are early spring (as soon as the soil can be worked) or fall (the traditional planting time, 6 weeks before the soil freezes).
Can You Plant Garlic in the Spring?
Yes, garlic can absolutely be planted in spring, even though most US gardeners are taught to plant in fall. Spring-planted garlic produces full-sized bulbs the same year, harvesting in late summer alongside any fall-planted garlic in your beds. The bulbs may end up slightly smaller than fall-planted ones (since spring garlic misses the head start of fall root establishment), but they’re real, full bulbs that store and use the same way as any other garlic.
Spring planting works for both sprouted pantry garlic and for cloves you plant intentionally from a fresh head. If you missed the fall planting window or didn’t have access to seed garlic in autumn, spring is your second chance. Plant as early as the soil can be worked, even if there’s still a chance of frost, since garlic tolerates cold conditions just fine and prefers cool weather over warm.
The timing target for spring planting is roughly 4 to 8 weeks before your last expected frost date, which puts most northern gardeners planting in March or April and most southern gardeners planting in February. Earlier is better than later, since garlic needs as much cool weather as possible to develop full bulbs before summer heat shuts down growth.
Is Sprouted Garlic Safe to Eat?
Sprouted garlic is perfectly safe to eat, contrary to common myth. The flavor changes once a clove sprouts, becoming milder, greener, and a little more like green onion or chive than the pungent bite of cured pantry garlic. Some people prefer the milder flavor for raw uses like dressings and pestos, while others find it too mild for cooked dishes that need stronger garlic punch.
The real reason to use sprouted garlic quickly is that it doesn’t store well once it’s broken dormancy. The bulb starts pulling its stored energy into the green sprout, and within a few weeks the cloves get soft and eventually rot. If you’re not going to use sprouted garlic in cooking within a week or two, planting it is genuinely the best option since it gives the cloves a productive second life rather than letting them go to waste.
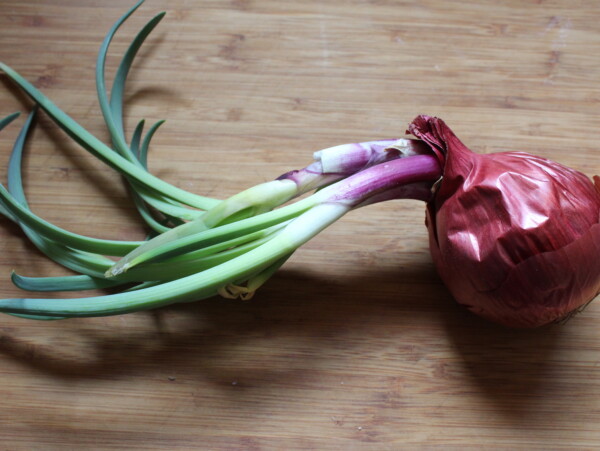
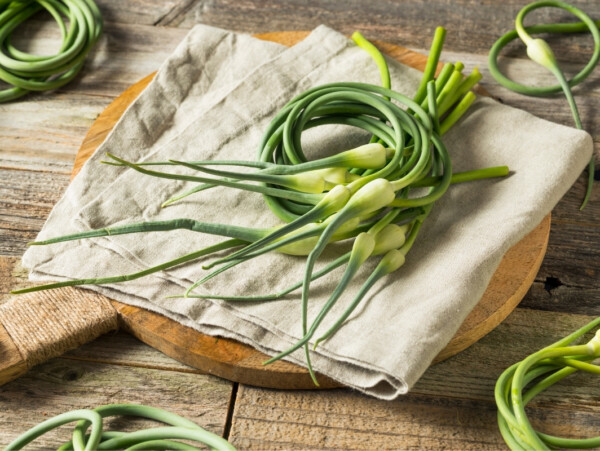
For kitchen uses, sprouted garlic works in any recipe where the garlic is going to be cooked and softened. The mild green flavor blends beautifully into sautes, stir-fries, soups, and stocks. The fresh green sprouts themselves are also edible, with a mild garlicky flavor similar to garlic scapes, and can be chopped into salads, omelets, or scrambled eggs. The same is true for sprouted onions, which behave the same way as sprouted garlic and are best either eaten quickly or planted for a second-life harvest.
Why Is My Garlic Sprouting?
Garlic sprouts in the pantry for two main reasons: the bulb is reaching the natural end of its dormancy period, or the storage conditions have triggered the bulb to wake up early. Most garlic stores well for 4 to 6 months from harvest, which means a head bought in late summer or fall will typically sprout sometime in late winter or early spring as the bulb prepares to start growing again on its natural cycle.
Storage conditions can speed up or delay sprouting. Garlic stays dormant longest in cool (50 to 60°F), dry, dark conditions with good air circulation, which is why a pantry, basement, or root cellar is ideal. Refrigeration can actually speed up sprouting, since the cold temperatures mimic winter and trigger the bulb to start growing as soon as it warms up again. That’s why garlic stored in the fridge often sprouts faster than garlic kept in a pantry.
If your garlic is sprouting earlier than you’d like, the simplest fix is to use cooler, drier storage going forward. But there’s no fixing what’s already sprouted, and at that point your two best options are using the cloves quickly in the kitchen or planting them in the garden.
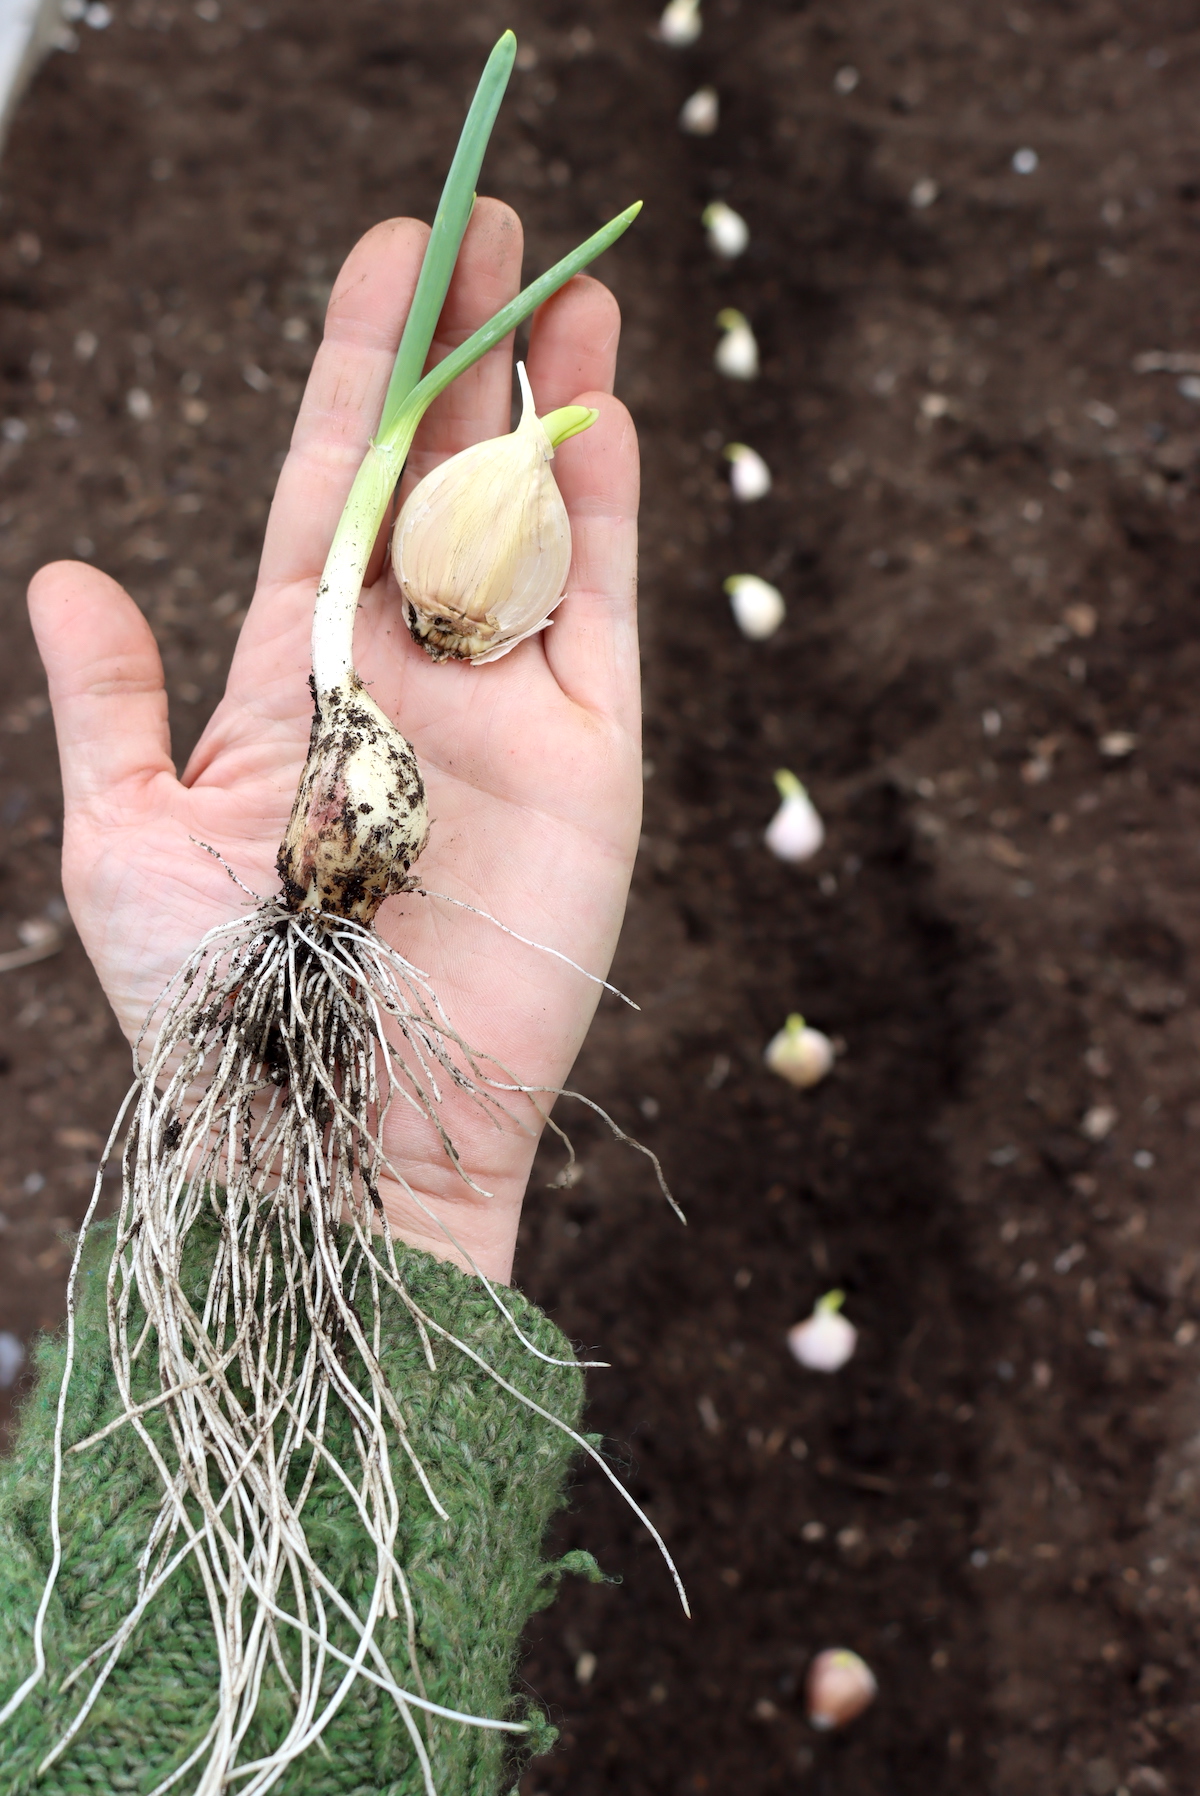
Preparing Sprouted Garlic for Planting
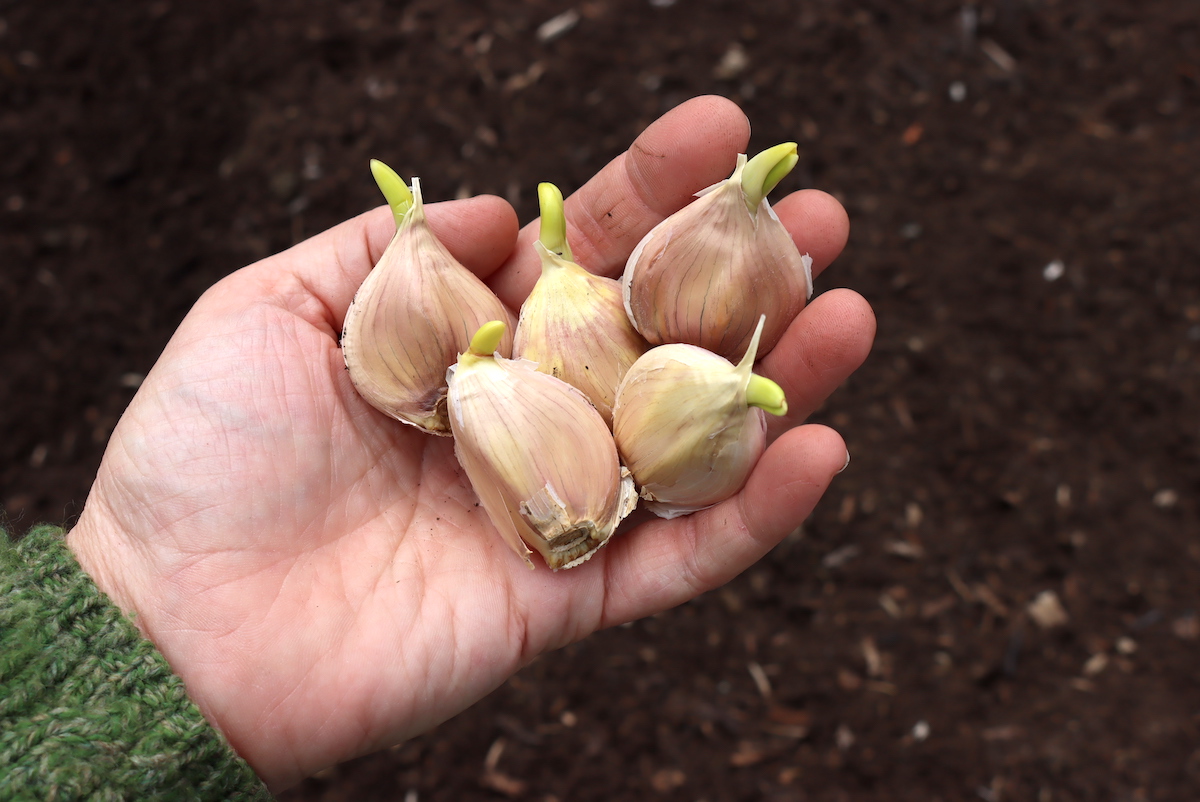
To prepare sprouted garlic for planting, peel off the loose papery outer layer of the bulb to expose the individual cloves. You don’t need to peel the cloves themselves, just enough of the outer wrapper to separate them cleanly. Each individual clove will grow into a whole new garlic bulb within a few months, so each one needs to be planted separately.
If you plant the entire bulb without breaking it apart, all the cloves will try to grow in a single clump and crowd each other out. The resulting bulbs will be small and stunted, similar to what happens when you let garlic resprout in place from a previous year’s bulb that wasn’t fully harvested. That’s a real situation, by the way. Some homesteaders intentionally grow garlic as a perennial by leaving some bulbs in place to resprout each year. The technique works, but the bulbs end up smaller than properly divided plantings.
Break the bulb gently into individual cloves, being careful not to damage the green sprout that’s already pushing out from the top. The sprout is the seedling-equivalent of the new plant, and a damaged sprout will set back the new bulb’s development. Leave the outer paper on each individual clove for protection during planting. If your garlic has been stored in the dark and the sprouts are yellow or white rather than green, that’s totally fine. They’ll turn bright green within a few days of being exposed to sunlight.
How to Plant Sprouted Garlic
Planting sprouted garlic in spring uses essentially the same technique as growing garlic from fresh seed cloves any other time of year. The cloves need rich, well-amended soil, plenty of sun, and good drainage. Garlic is a heavy feeder, so the bed should be well-prepared before planting.
Choose a location with full sun and prepare the bed by working in 2 to 3 inches of finished compost. Garlic prefers slightly acidic to neutral soil (pH 6.0 to 7.0) with good drainage. Heavy clay soils that hold water can cause the cloves to rot before they establish, so amend with sand or compost to improve drainage if needed.
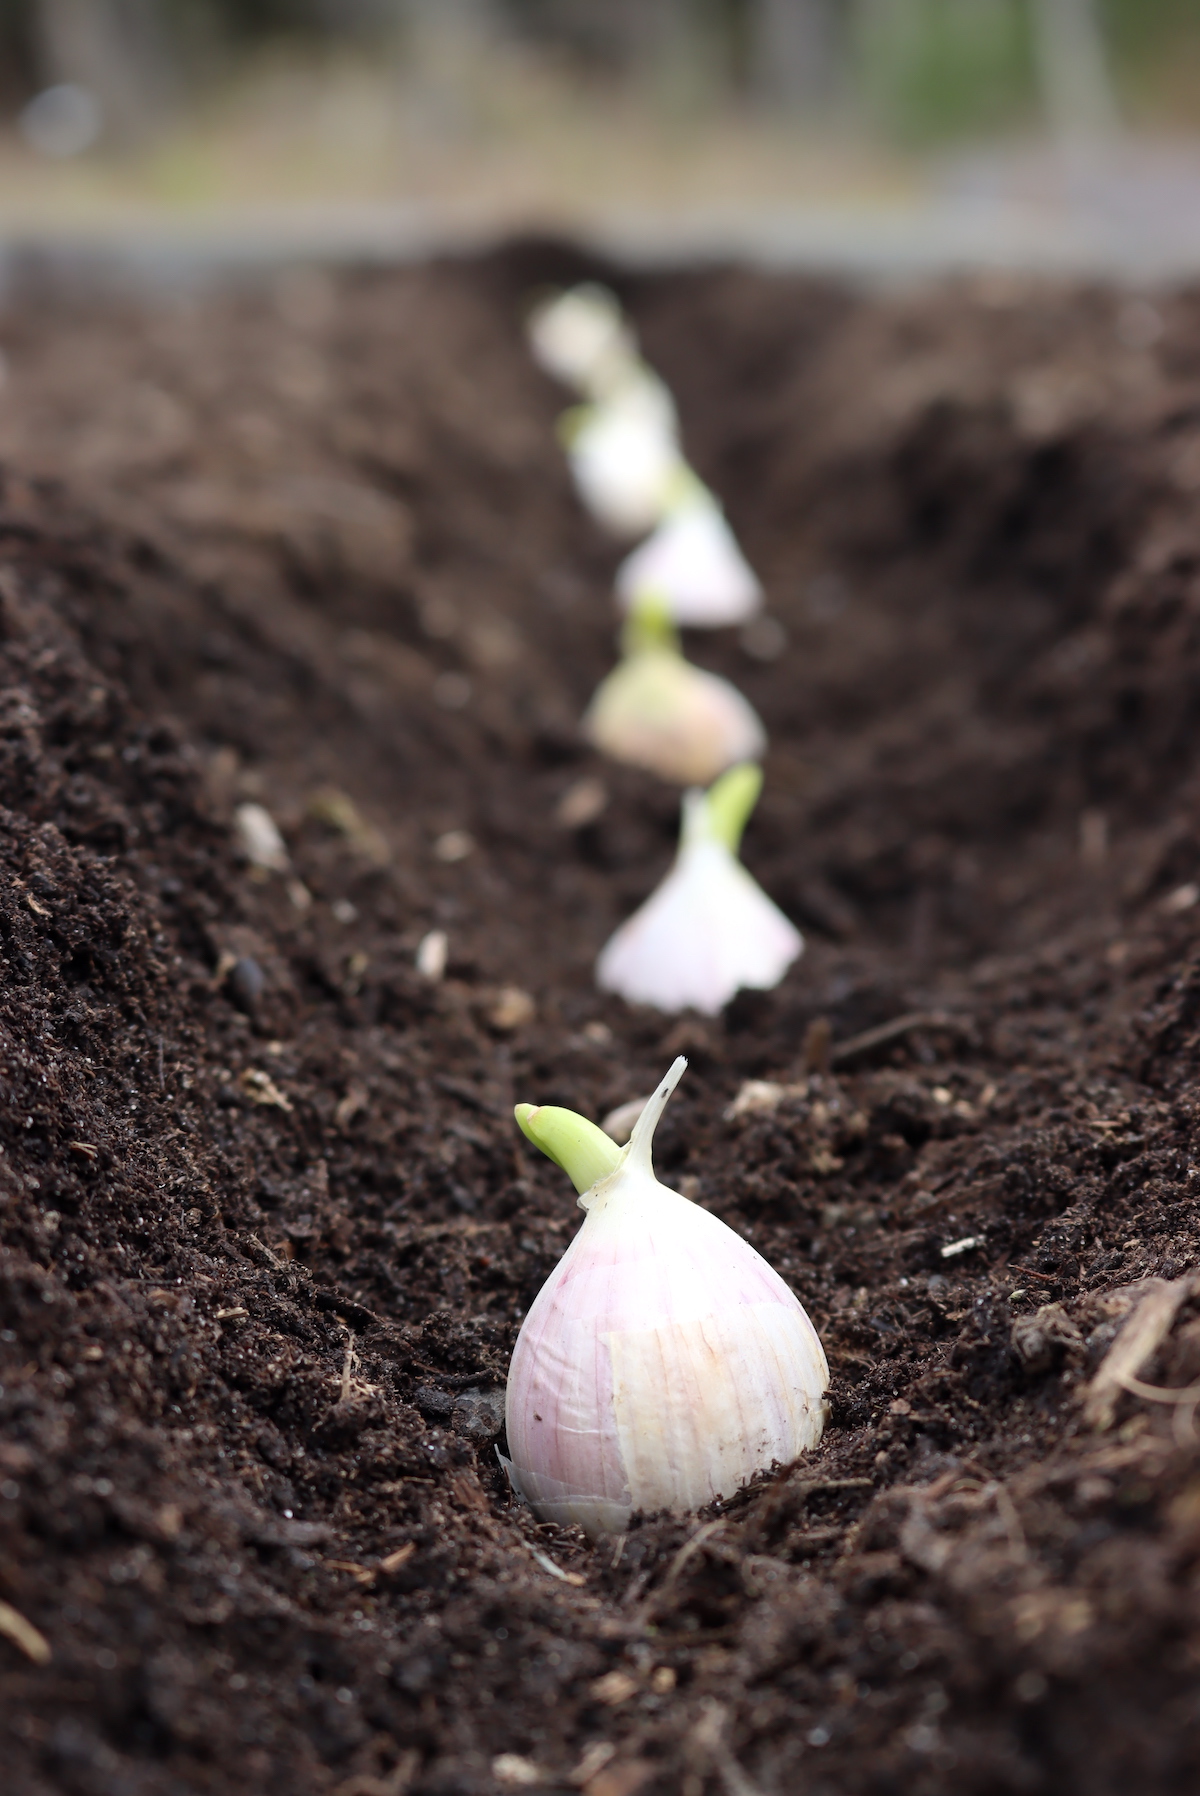
Plant individual cloves 6 inches apart in rows about 12 inches apart, with each clove pointed-end up and the basal end (where the roots will emerge) pointed down. The depth target is 1 to 2 inches of soil over the top of the clove, which puts the bottom of the clove about 3 to 4 inches deep depending on clove size. The green sprout can extend above the soil line. That’s perfectly fine and the plant will continue to grow normally from there.
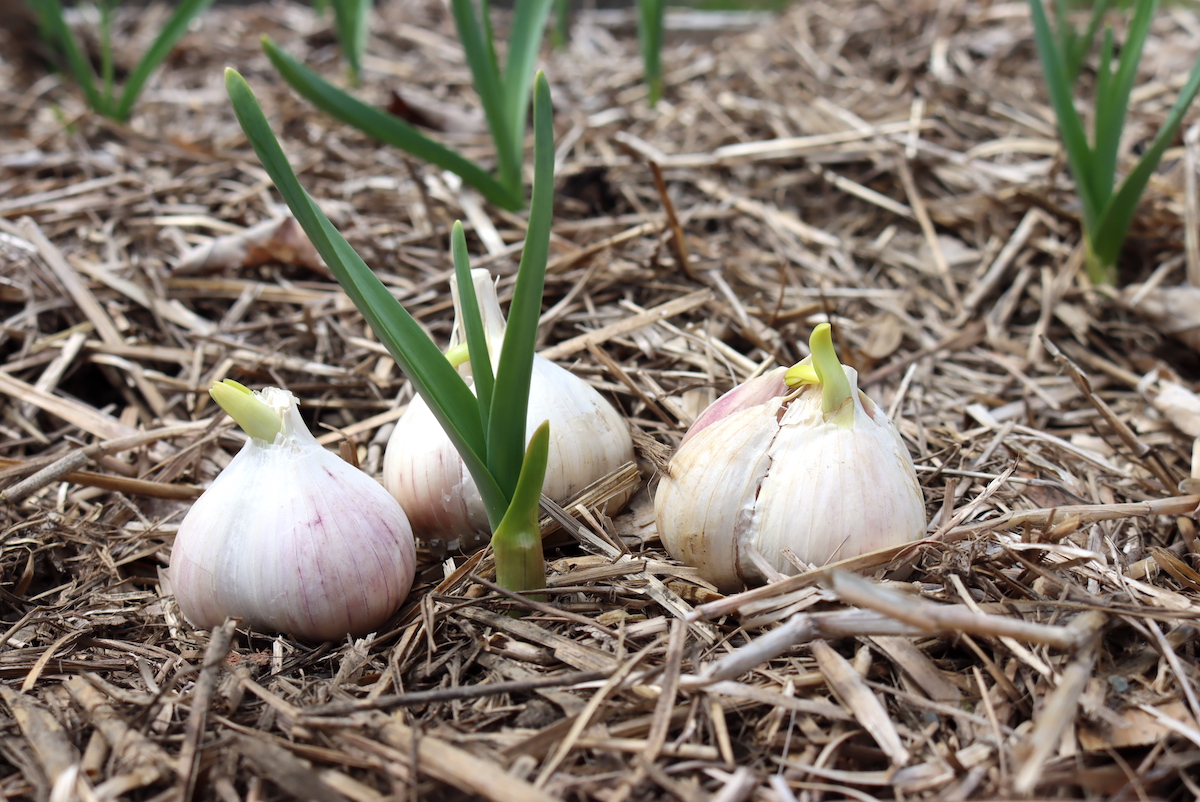
Mulch the bed with 1 to 2 inches of straw or shredded hardwood leaves. Mulch is essential for fall-planted garlic in cold climates because it insulates the bulbs through winter, but it’s also helpful for spring-planted garlic because it keeps the soil cool (which garlic prefers) and suppresses weeds during the critical early growth period.
Planting Sprouted Garlic Indoors
If your garlic is sprouting in midwinter when the ground is still frozen solid, planting indoors in a pot is a perfectly viable alternative to waiting for spring. Indoor-grown garlic won’t produce the same full-sized bulbs as garden-grown garlic (the pots are too small for full bulb development), but the plants produce excellent green garlic shoots for kitchen use, and they keep the cloves alive until the ground thaws and you can transplant outside.
Use a deep pot (at least 6 inches deep with good drainage) and standard potting mix. Plant cloves the same way you would outdoors: pointed end up, basal end down, with the top of the clove 1 to 2 inches below the soil surface. Water well after planting and place in your sunniest window or under grow lights for 6 to 8 hours of light per day.
Indoor sprouted garlic produces tender green shoots within a week or two that can be snipped for kitchen use just like chives. The shoots have a mild garlicky flavor and regrow continuously as long as the bulbs have stored energy left. Once the soil thaws outside, transplant the cloves (with as much intact root system as possible) into the garden to finish their growth cycle and develop full bulbs.
Can You Grow Garlic in Water?
Sprouted garlic can be grown in water for the green shoots, similar to how green onions are sometimes regrown from kitchen scraps in a glass on the windowsill. The technique is simple but the results are limited. The water-grown plants produce edible green garlic shoots for a few weeks but won’t develop into full bulbs the way soil-planted garlic does, since the bulb itself doesn’t have access to nutrients in plain water.
To grow sprouted garlic in water, place individual cloves (basal end down, pointed sprout end up) in a small jar with about 1/4 inch of water in the bottom. The water should just touch the bottom of the clove without submerging it, which would cause rot. Place the jar in a sunny windowsill and change the water every 2 to 3 days to prevent stagnation.
Within a few days, white roots will emerge from the basal end and the green sprout will continue to grow from the top. Snip green shoots as needed for kitchen use. The cloves themselves will eventually exhaust their stored energy and shrivel, at which point you can either compost them or transplant the rooted clove into soil to finish growing into a (small) bulb.
Caring for Spring-Planted Garlic
Once your sprouted garlic cloves are planted, the new plants start putting down roots to catch up to their fall-planted counterparts. The top sprout is already developed, but the root system is essentially starting from scratch, so the first few weeks after planting are mostly underground catch-up work.
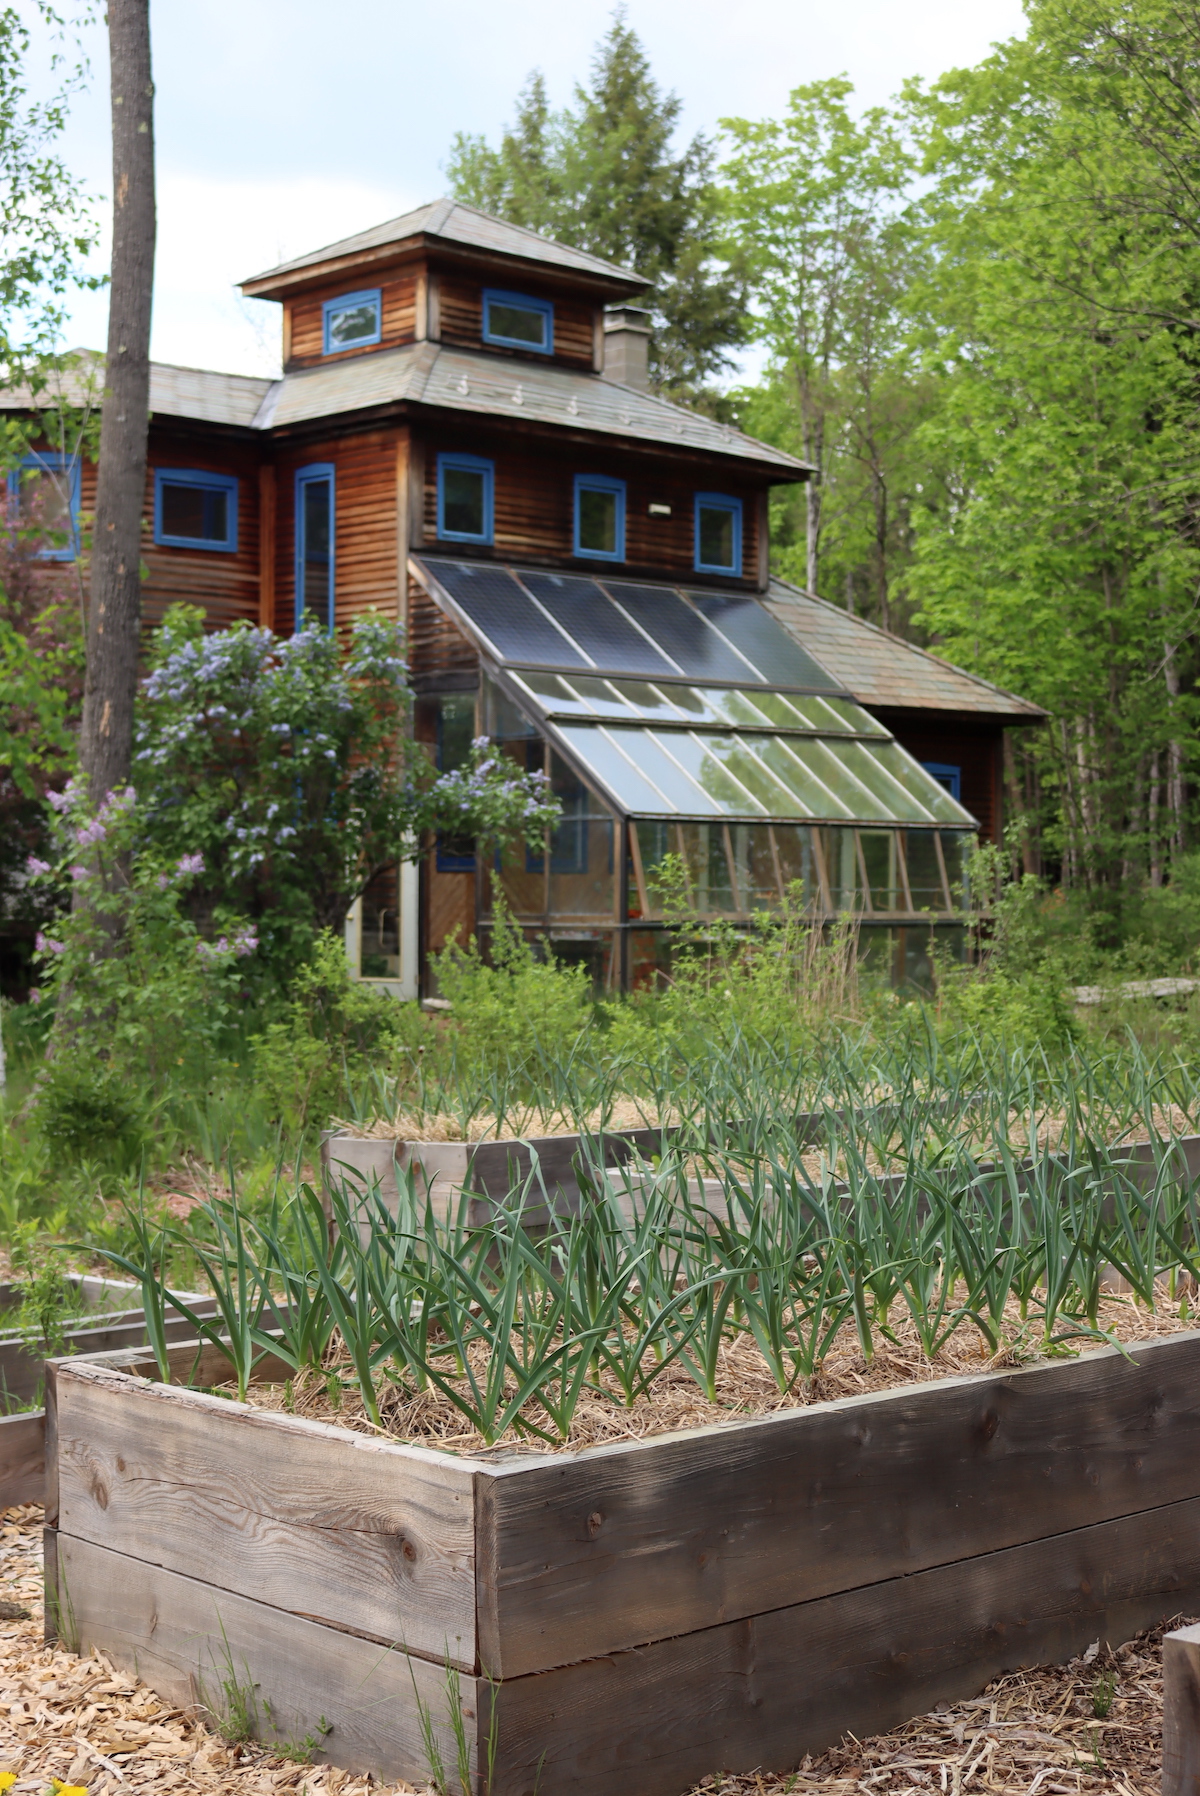
After 2 to 3 weeks, spring-planted garlic typically has a respectable root system established and starts pushing the top growth taller. By the end of the first month, spring-planted garlic looks almost identical to fall-planted garlic above the soil line, just a few weeks behind in overall development.
If you’re growing hardneck garlic varieties (which is what we grow here in the northeast), the plants will send up a curling flower stalk called a garlic scape in late spring or early summer, about 2 months after planting. Most grocery store garlic is softneck garlic, which doesn’t produce a scape, so you may not see this if you’re working with sprouted grocery store cloves. Hardneck varieties from a farmers market or seed catalog do produce scapes.
Garlic scapes are essentially garlic flowers, and they should be trimmed off as soon as they form to encourage the plant to put energy into bulb development rather than seed production. The scapes themselves are a delicious early-summer harvest with mild green-garlic flavor, and they go beautifully into garlic scape recipes like pesto, compound butter, or simply sauteed as a side dish. Removing the scapes typically increases bulb size by 20 to 30%, so it’s well worth the few minutes of trimming.

If you’d rather leave a few scapes on for seed-saving experiments, the unpollinated flower heads develop tiny top setting bulbils that work like seeds for propagation. With careful hand-pollination of the actual flowers, it’s even possible to breed your own garlic varieties from true seed, though this is genuinely advanced and most home gardeners stick with simply trimming the scapes and eating them.
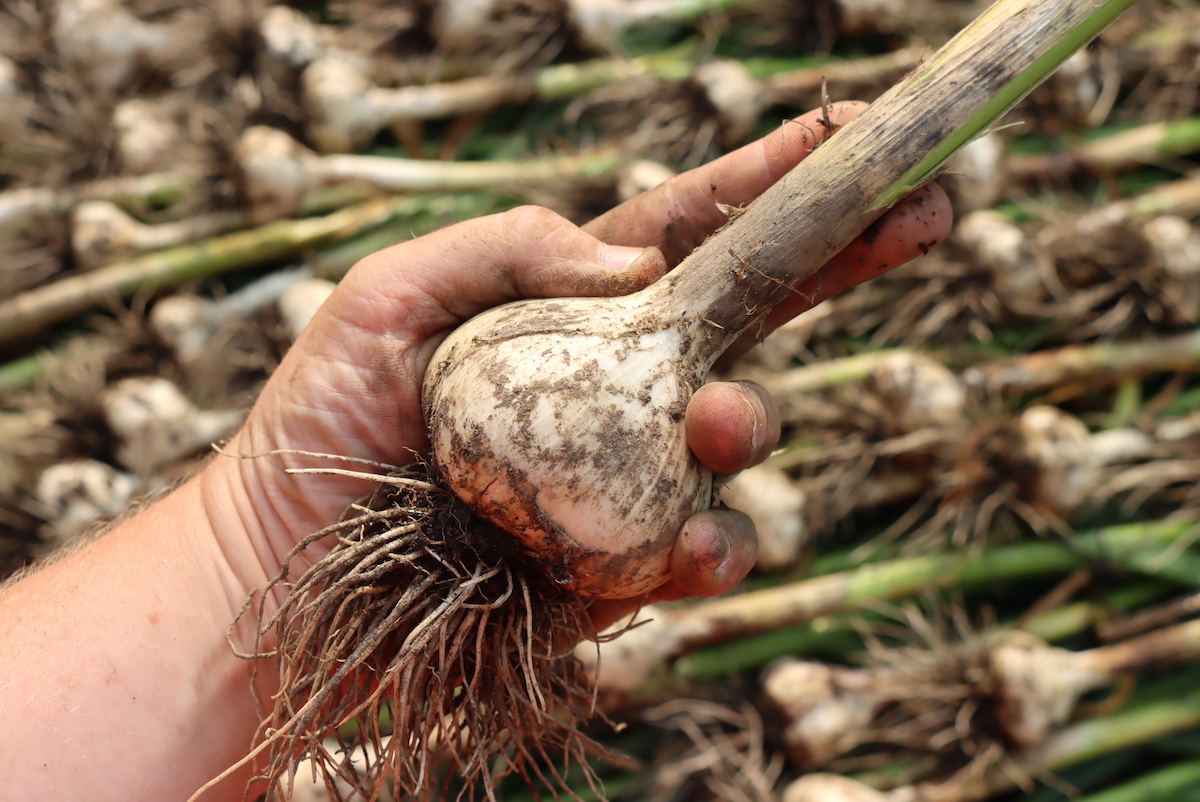
The bulbs continue to develop through the spring and into early summer, and they start to die back as summer heat sets in. Spring-planted garlic typically harvests a couple weeks later than fall-planted garlic, often in late July or early August in our zone 4 Vermont garden. The harvest signal is the same regardless of planting time: when the bottom 2 pairs of leaves have yellowed and dried, the bulb is ready to dig.
If you’re not sure whether your garlic is ready, dig down at the base of one stem and check the bulb directly. A ready bulb is well-formed with tight wrapper layers around the cloves. If you wait too long, the bulb starts to separate as the cloves prepare to go dormant for their next cycle. Separated bulbs are still perfectly edible, but they don’t store as well, so use them up quickly.
Spring-Planted Garlic vs. Fall-Planted Garlic
The main difference between spring and fall garlic is the head start. Garlic is traditionally planted in fall, about 6 weeks before the soil freezes in cold climates, because that 6-week window gives the cloves time to develop a deep root system before going dormant for winter. The bulbs sit underground all winter, fully rooted and ready to send up vigorous spring growth as soon as the soil warms.
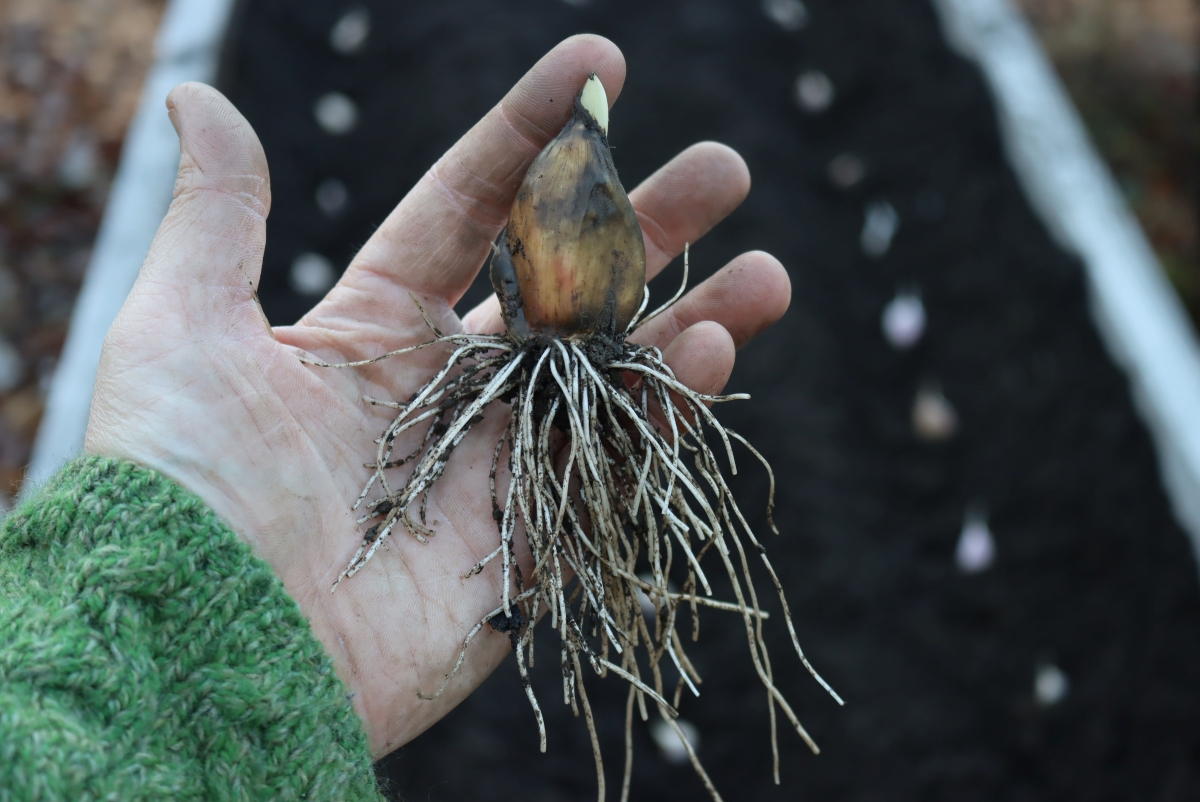
To show the difference, I dug up a fall-planted clove about 6 weeks after planting (right before the soil froze for the season) to see what was happening underground. There was no shoot above the soil yet, but the clove had developed an impressive root system already, deep enough to anchor the plant for the winter ahead.
By spring, the difference becomes even more dramatic. The fall-planted garlic comes out of winter with a fully developed root system already in place and pushes up tall green shoots almost immediately. The spring-planted garlic is starting from scratch on roots while simultaneously pushing top growth, which means it’s playing catch-up all season long.
What this means in practice is that fall-planted garlic typically produces slightly larger bulbs and harvests a few weeks earlier than spring-planted garlic. Both produce real, full-sized bulbs in a single season, but the fall-planted garlic gets a competitive edge from its head start. If you have a choice, fall planting is preferred. But if you’re working with sprouted pantry garlic in spring, the spring-planting option is the right call. The cloves would just rot in the pantry otherwise.
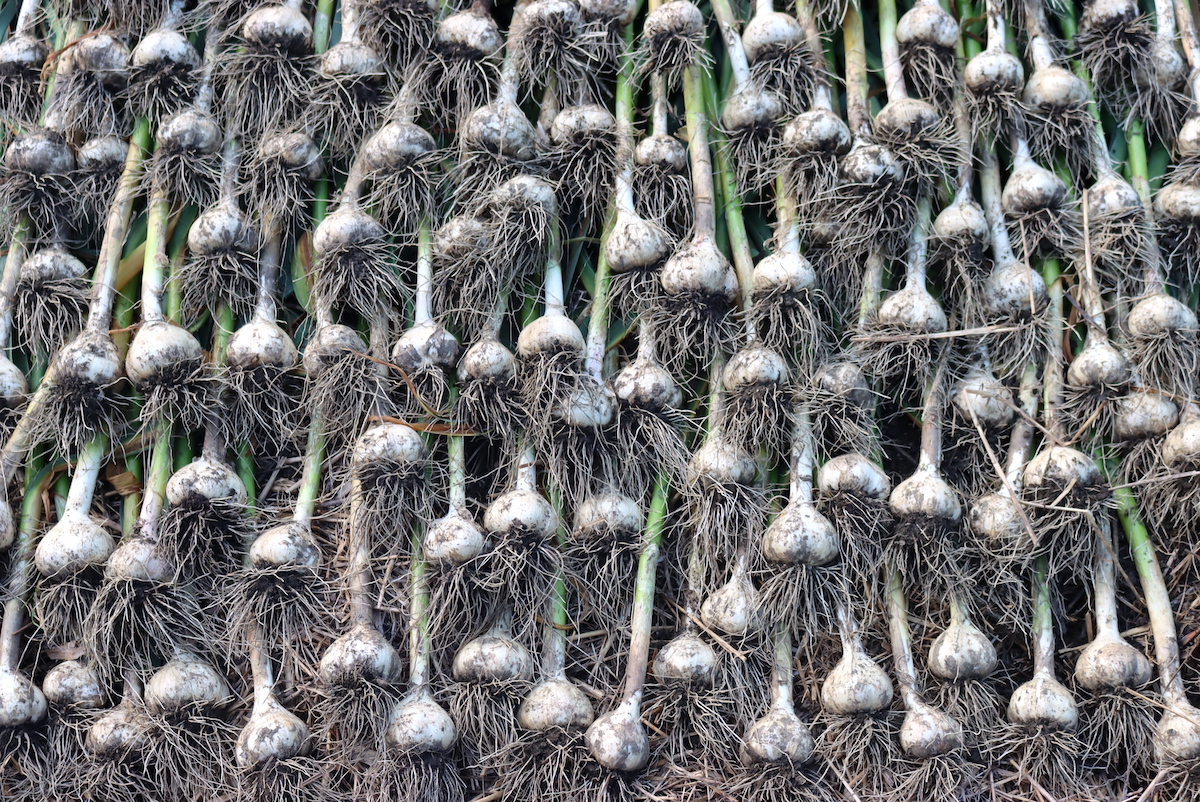
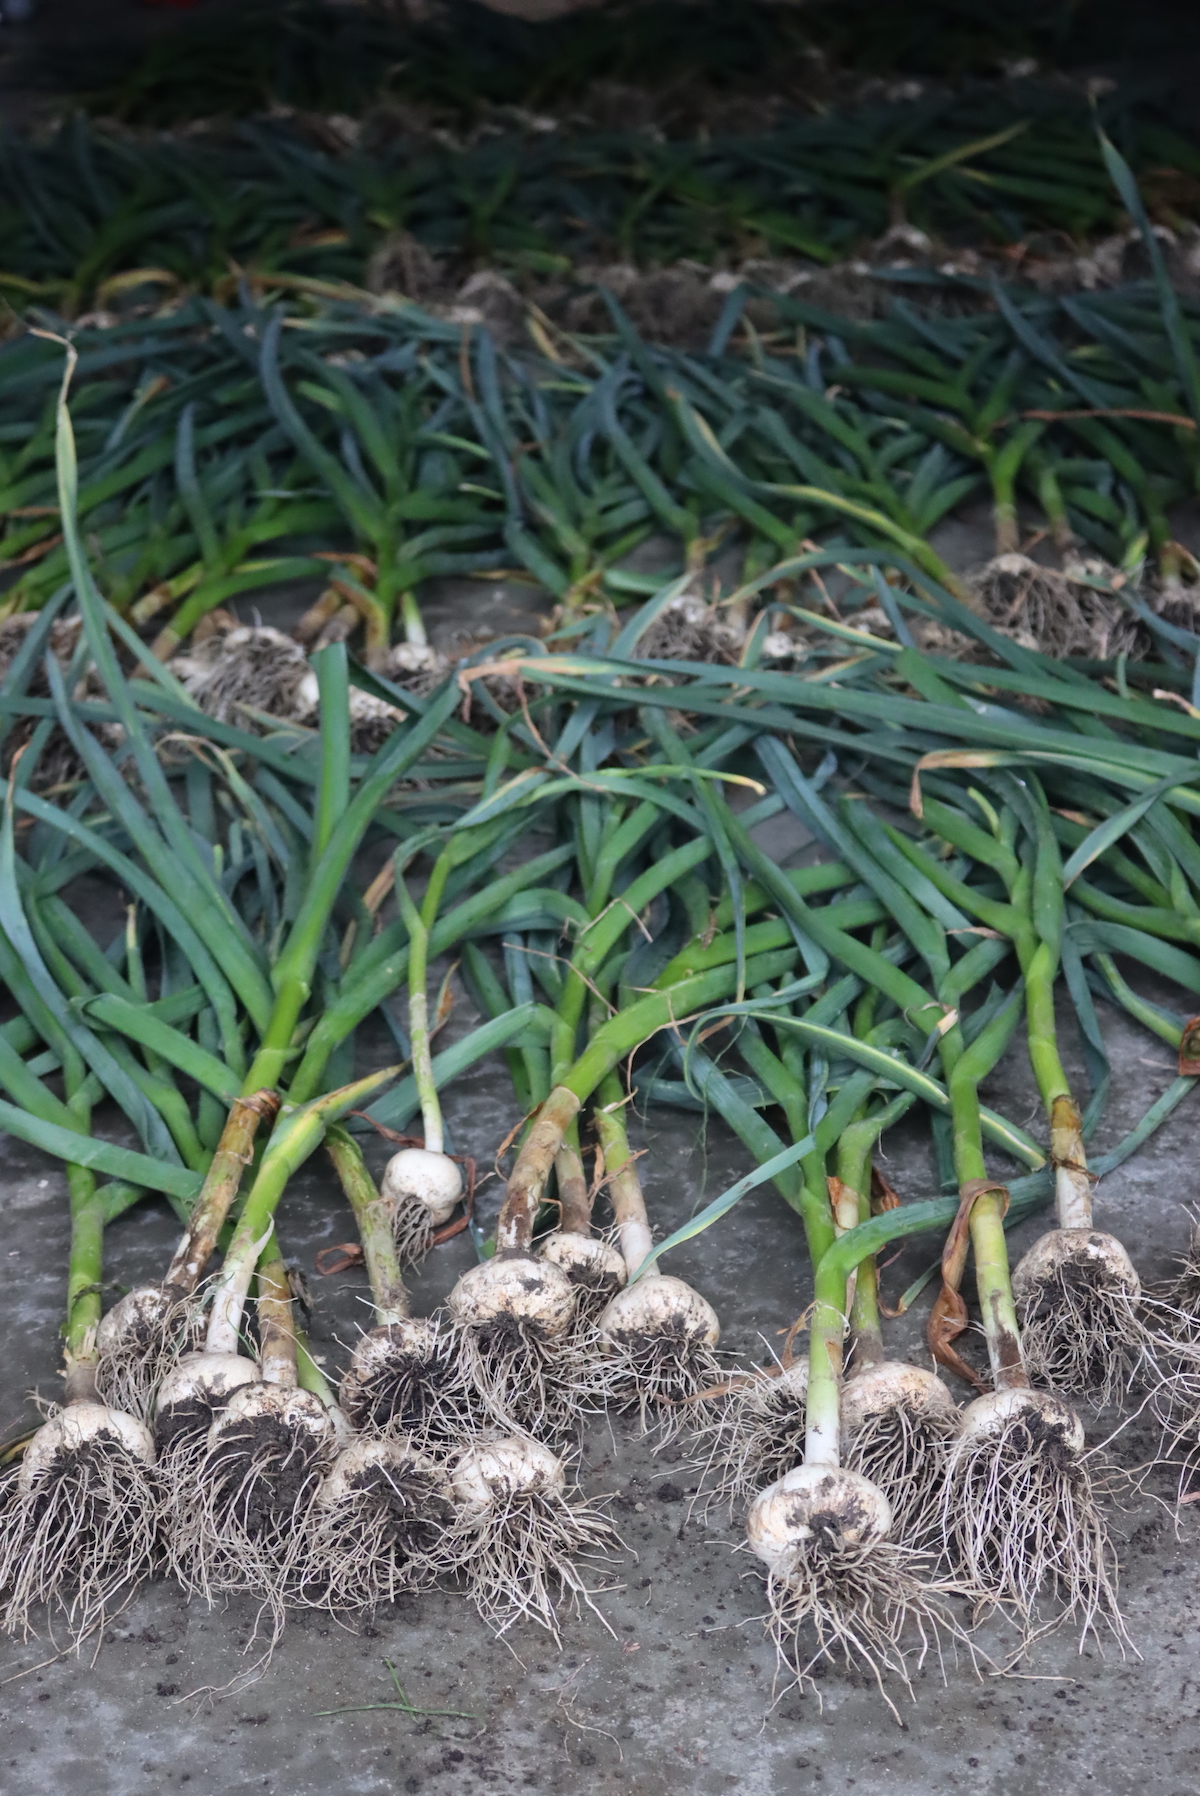
Curing and Storing Your Garlic Harvest
Fresh-harvested garlic is what’s known as “green garlic” or “wet garlic,” and it tastes noticeably milder than the cured garlic you find at the store. Green garlic is a real treat that’s almost impossible to find outside of a few weeks of the year at well-stocked farmers markets. The flavor is mild and almost sweet, with just a hint of garlic bite. Try a few cloves fresh before curing the rest, since you’ll only get the chance for those few weeks each year.
The drawback of green garlic is that it doesn’t store well. To save your garlic harvest for use through the year, you’ll need to cure it. Curing means drying the bulbs slowly in good airflow until the outer wrapper layers are completely dry and papery, which protects the cloves inside from rot during long-term storage.
To cure garlic, lay the harvested bulbs out in a single layer in a shaded spot with good air circulation. A covered porch, garage with a fan, or barn loft all work well. Avoid direct sunlight, since UV damages the bulbs. Leaving the tops attached during curing is optional but helps the bulbs cure faster, since the dying tops pull moisture out of the bulb as they dry.
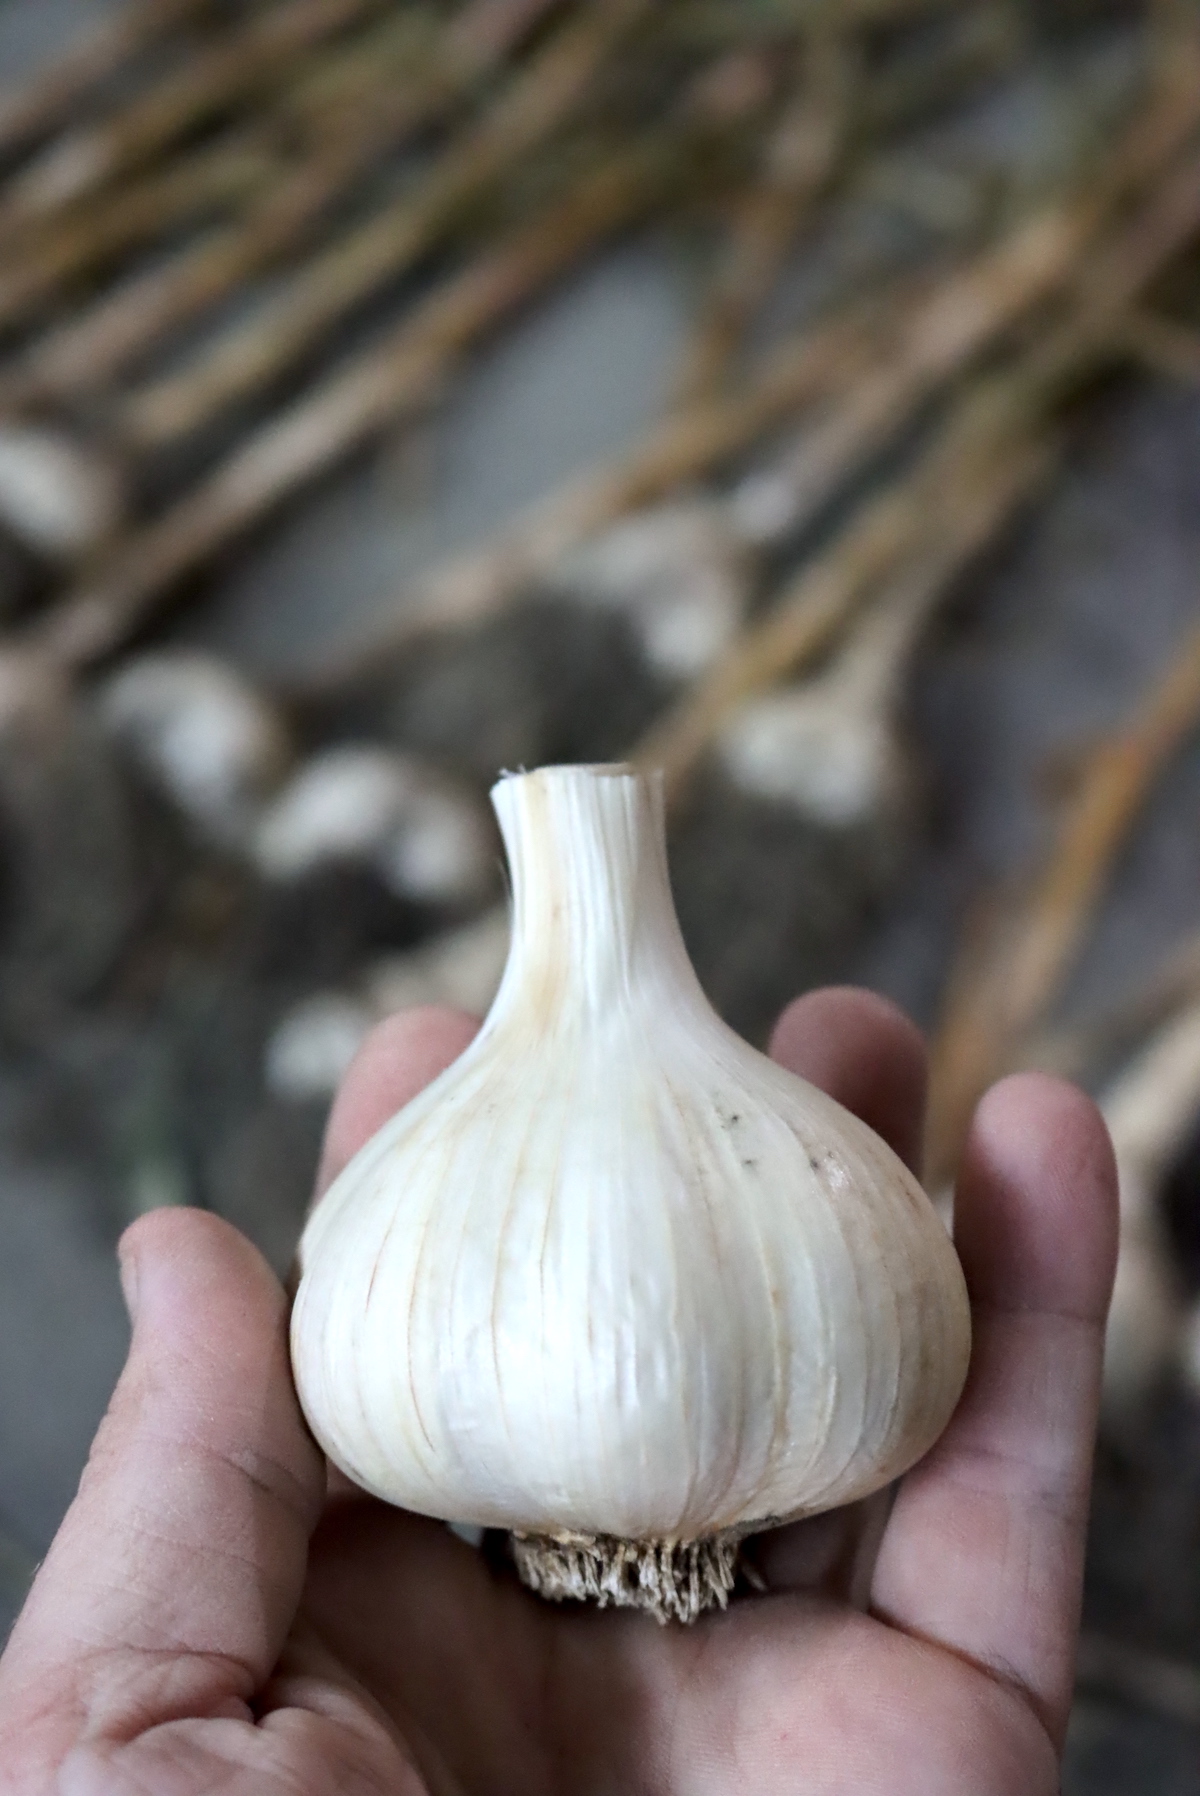
We cure our garlic on the floor of our garage with a fan running. It’s not the most aesthetic setup, but it works reliably even in our humid Vermont summers. Curing typically takes 2 to 4 weeks depending on bulb size and ambient humidity. The garlic is fully cured when the outer wrapper is completely papery and the neck (where the leaves meet the bulb) is dry and tight.
Once fully cured, trim off the dried tops and the roots, then store the bulbs in a cool, dry, dark spot with good air circulation. A pantry, basement, or root cellar is ideal. Properly cured garlic stores for 4 to 6 months and sometimes longer, with hardneck varieties tending to store a bit shorter than softneck varieties.
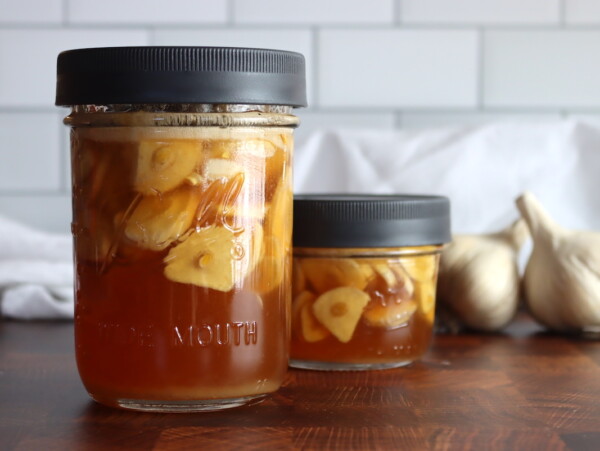
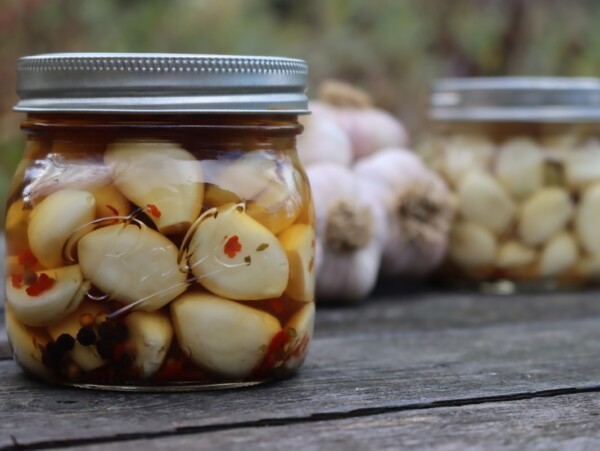
For climates that are too humid or too hot for reliable garlic storage in bulb form, preservation projects work beautifully. Pickled garlic keeps for at least a year in the refrigerator, and fermented garlic honey turns excess garlic into a spectacular winter wellness ingredient with both medicinal and culinary uses. And of course, if any of your stored garlic does sprout next spring, you’ll know exactly what to do with it.
Sprouted Garlic FAQs
Yes, sprouted garlic from the grocery store can be planted in the garden and will grow into full bulbs within a few months. Most grocery store garlic is softneck garlic, which works fine for planting but doesn’t produce a scape (the curling flower stalk that hardneck varieties send up). Choose firm bulbs that are sprouting but not yet soft or rotting, and plant the cloves individually following standard garlic planting depth and spacing.
Yes, sprouted garlic is perfectly safe to eat and is sometimes preferred for its milder flavor. The cloves taste greener and less pungent than cured pantry garlic, similar to a cross between garlic and chives. Use sprouted garlic quickly though, since it doesn’t store well once it has broken dormancy. Cloves not used within a week or two are better off planted in the garden than left to spoil.
Yes, garlic can be planted in spring and will produce full-sized bulbs ready to harvest in late summer of the same year. While fall planting is traditional and produces slightly larger bulbs due to the head start of fall root establishment, spring-planted garlic still produces real, usable bulbs. Plant as early as the soil can be worked, ideally 4 to 8 weeks before your last expected frost date.
Spring-planted sprouted garlic typically takes 3 to 5 months from planting to harvest, with most northern gardeners harvesting in late July or August from cloves planted in March or April. Spring-planted garlic harvests a few weeks later than fall-planted garlic, since fall-planted cloves get a head start on root development before winter dormancy.
Garlic sprouts in the pantry as the bulb naturally exits its dormancy period, typically 4 to 6 months after harvest. Storage conditions affect timing significantly. Cool, dry, dark conditions with good air circulation extend storage life, while warm or moist conditions accelerate sprouting. Refrigeration can also speed up sprouting by mimicking winter conditions and triggering the bulb to break dormancy.
Yes, sprouted garlic can be planted in pots indoors and grown on a sunny windowsill, especially useful when the outdoor soil is still frozen. Indoor-grown garlic produces excellent green garlic shoots for kitchen use within a week or two of planting, but the bulbs themselves typically don’t develop to full size in pots. Once outdoor soil thaws, transplant the rooted cloves into the garden to finish their bulb development.
More Pantry-to-Garden Projects

How to Plant Sprouted Garlic
Ingredients
- Sprouted garlic bulbs
- well-amended garden soil
- compost
Instructions
- Peel off the loose papery outer layer of the sprouted garlic bulb to expose the individual cloves. Don’t peel the cloves themselves, just enough of the outer wrapper to separate them cleanly.
- Break the bulb gently into individual cloves, being careful not to damage the green sprout that’s already pushing out from the top. Leave the outer paper on each individual clove for protection during planting.
- Choose a garden bed with full sun and well-draining soil. Work in 2 to 3 inches of finished compost before planting, since garlic is a heavy feeder that thrives in rich soil.
- Plant individual cloves 6 inches apart in rows about 12 inches apart, with the pointed sprout end up and the basal end pointed down. Aim for 1 to 2 inches of soil over the top of the clove, putting the bottom of the clove about 3 to 4 inches deep.
- Mulch the bed with 1 to 2 inches of straw or shredded hardwood leaves to keep the soil cool, suppress weeds, and conserve moisture during the early growth period.
- Water deeply after planting and keep the bed consistently moist (not waterlogged) for the first few weeks while the cloves establish their root systems.
- Once plants are growing actively, reduce watering to about 1 inch per week. Garlic prefers cool, evenly moist soil, but shouldn’t sit in waterlogged conditions.
- If you’re growing hardneck garlic varieties, trim off the curling flower stalk (called a garlic scape) when it appears in late spring or early summer. Removing the scape directs the plant’s energy into bulb development rather than seed production. The trimmed scapes themselves are delicious in stir-fries, pesto, or compound butter.
- Stop watering about 2 weeks before harvest to let the bulbs cure in place and develop firm wrapper layers. The harvest signal is when the bottom 2 pairs of leaves have yellowed and dried while the upper leaves are still green.
- Lift the bulbs gently with a garden fork rather than pulling by the tops, which can break and damage the bulb. Brush off loose soil but don’t wash the bulbs.
- Cure the harvested garlic by laying it in a single layer in a shaded spot with good air circulation for 2 to 4 weeks, until the outer wrapper is completely papery and the neck is dry and tight.
- Once fully cured, trim off the dried tops and roots, then store the bulbs in a cool, dry, dark spot with good air circulation. Properly cured garlic stores for 4 to 6 months in pantry conditions.
Notes
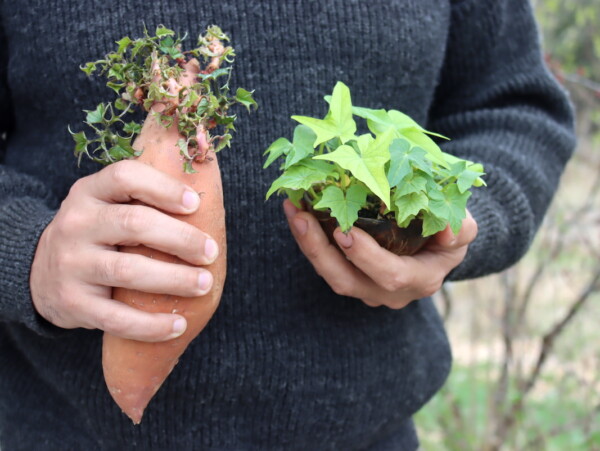
If you’ve got more sprouting vegetables in your pantry, you can grow a surprising amount of food this way. Planting sprouted onions works on the same principle as sprouted garlic, and even sweet potato slips can be grown from a single forgotten sweet potato. For more growing guides, take a look at our complete garlic growing guide, our overview of garlic varieties, and our guide to growing garlic as a perennial.
Using and Preserving Your Garlic Harvest
Find the perfect guide
Searching for something else? Enter keywords to find the perfect guide!


I planted some sprouted garlic this spring. I will plan to harvest in the late summer/fall. Can I then replant this garlic to overwinter and harvest next spring/summer? Does it need to be cured before replanting? I normally plant in November where I live.
Yes, absolutely! Saving your own bulbs to replant is how garlic growers maintain their stock year to year.
Cure them first. After you harvest, hang or rack the bulbs (with leaves still attached) in a dry, well-ventilated spot out of direct sun for 2 to 4 weeks. This dries the wrappers, firms them up, and makes them far less likely to rot in damp fall soil. Then store at cool room temperature until November, not in the fridge (refrigeration can trigger sprouting). Break into cloves just before planting.
One note: spring-planted garlic doesn’t get the long fall-to-spring growing window, so bulbs are usually smaller and less developed than fall-planted. Save your biggest cloves for the November replant, and consider supplementing with some purchased seed garlic if yours are on the smaller side.
Thanks for sharing!! We’ve been finding our garlic from the store sprouts within 2 weeks of buying, so I wanted to try something fun with them!
I’ll be doing this in an inside pot, any tips on watering? Or when to over to a bigger pot?
If you plan to keep it inside, you may need to offer some additional fertilizer since garlic is a heavy feeder. You should be able to water it like anything else. As far as moving it to a bigger pot, it kind of depends on how you plant to grow it. If you’re wanting to harvest the bulbs then you would do that once the heads have developed and then replant the individual cloves for new bulbs. You may not need a bigger pot. Here is another post on growing garlic that might help. https://practicalselfreliance.com/how-to-grow-garlic/ And then we also have a post on growing garlic as a perennial here. https://practicalselfreliance.com/perennial-garlic/
I start garlic in water bottles on the windowsill, they grow great roots and green leaf shoots, then transplant them to soil. Wanting until fall to see how this works.
I haven’t ever tried it like this. Thanks for sharing and let us know how it goes.
Thank you! I live in an NYC Apartment and planted four sprouted Garlic Cloves that are growing very well under my grow light in seedling trays. When should I transplant them to pots? What size pots do you suggest I get?
Garlic doesn’t need much room to grow, as long as you have enough soil to accommodate the size of the finished bulb.
Thank you for providing all of this information. Last Fall was the first time I have ever planted garlic and you have left nothing out of the process of planting, when to pull, curing and storing.
I can not wait to try my first cloves fresh from my garden.
You’re very welcome. We’re so glad you enjoyed the post. We hope you enjoy your first garlic harvest.