Last Updated on March 18, 2023 by Ashley Adamant
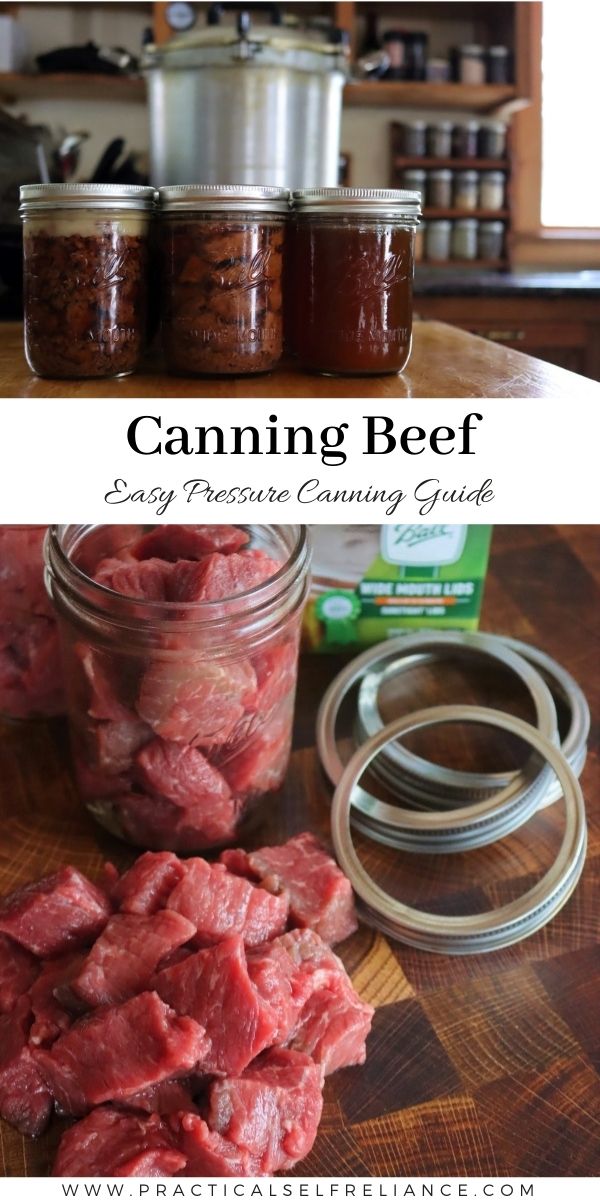
Canning beef is a simple way to preserve meat in a shelf stable ready to eat portions. Once the meat is safely pressure canned, just heat and serve, or add to your favorite recipes. Beef can be canned in a variety of ways including as cubes, ground crumbles, formed hamburgers and meat stock, and this beef canning tutorial covers all those options in detail.
This past fall we purchased a half cow share, and that really stretched our freezer space to the limit. With a growing family, buying beef by the side is by far the most economical way to fill the freezer, and next year as my kids grow, I can only imagine needing to add to our stores.
We already make beef jerky, but there’s only so much dried beef you can eat.
Canning beef is a simple way to save on freezer space, while preparing shelf-stable meals in a jar for busy weeknights. You never have to worry about the power going out and spoiling your stores (as is a constant concern with freezer meat).
It’s great for emergency preparedness, but it also tastes great for everyday meals. Pressure canning beef means you’re pressure cooking it (just in jars), and that results in tender flavorful meat that’s already cooked and ready to go. No need to plan ahead and slowly braise the stew beef all day, it’s already waiting for you in a canning jar.
The process for canning beef is pretty much the same as canning any sort of meat, be it pork, lamb, venison, moose, or even bear.
I’ll walk you through how to can beef as:
- Chopped Beef Chunks (both raw pack and hot pack)
- Ground Beef (both as crumbles and formed hamburgers)
- Beef Broth (from trimmings and bones, fully strained)
Beyond these preparations, you may also can beef as stew or chili, and I’ll give you a few recipes for those as well.
(It’s important to note that beef must be pressure canned, and cannot be canned in a water bath canner. If you’re not familiar with pressure canning, I’d strongly suggest reading this beginner’s guide to pressure canning before you get started.)
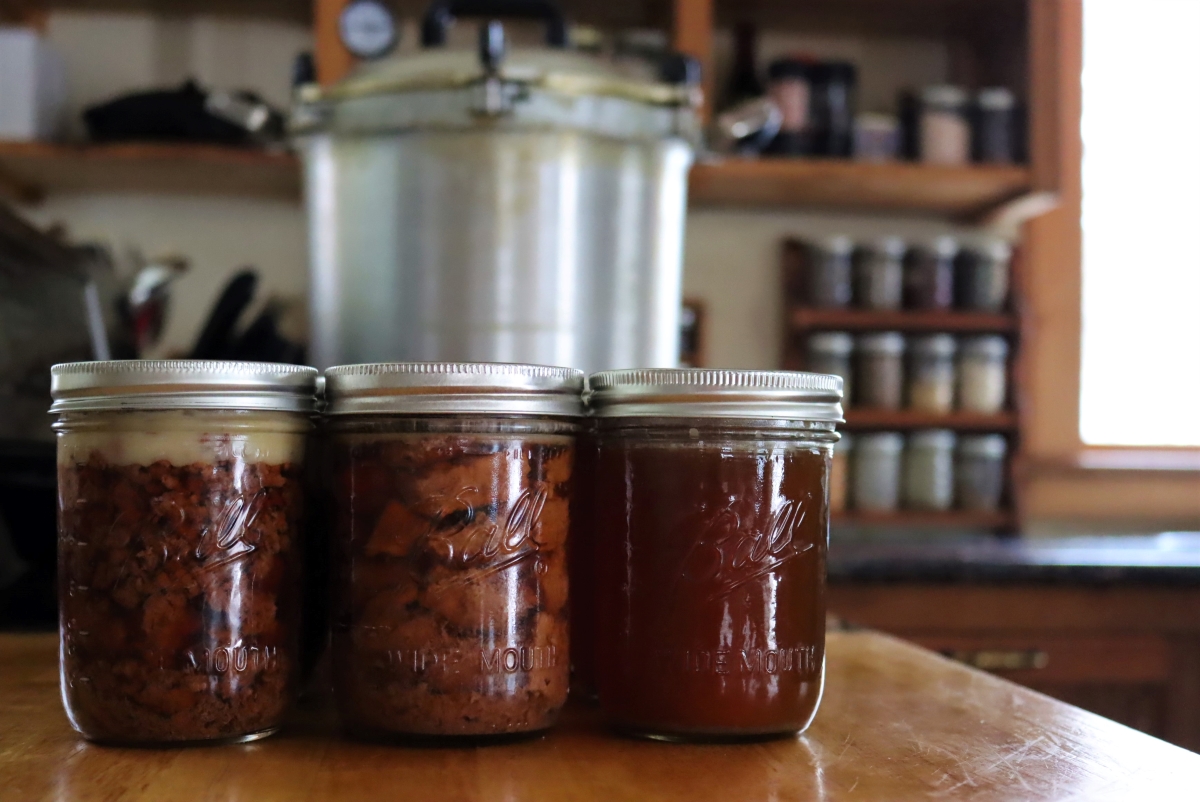
A quick note on yields: I weighed all the meat during this process, and found that on average 3/4 pound (340 grams) of raw beef was required to fill each pint jar. That’s true whether you raw or hot pack, and even if it’s ground or chunks. So for a 9-pint canner batch, you’d need just under 7 pounds of raw meat, regardless of the type of beef and how you chose to pack it.
Canning Beef Chunks
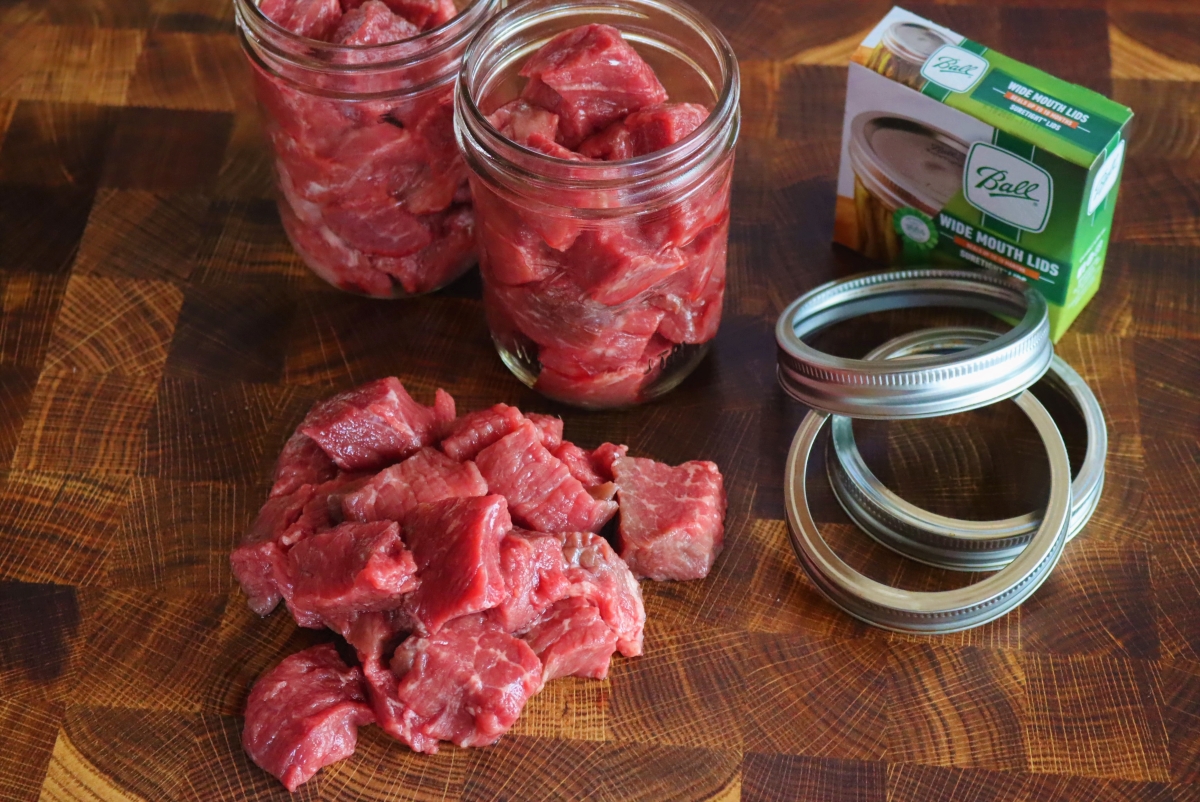
When most people think of canning beef, they assume actual chunks of meat, so that’s where we’ll start. Beef pieces can be canned as strips, cubes or chunks and the National Center for Food preservation gives no restrictions on the size of the pieces. Small roasts or steaks that can fit into jars are perfectly fine for canning, as are smaller beef chunks as I’m demonstrating.
Beef can be packed into canning jars raw (with no liquid), or browned and submerged in your choice of liquid. I’m canning beef in homemade beef stock, but water, meat drippings, and tomato juice are also acceptable options. Adding salt is optional, but if you choose to, somewhere between 1/2 tsp to 1 tsp per pint (double that for quarts) is what’s suggested.
Hot pack (browned) meat results in better quality, but I’ll walk you through both methods.
Raw Pack
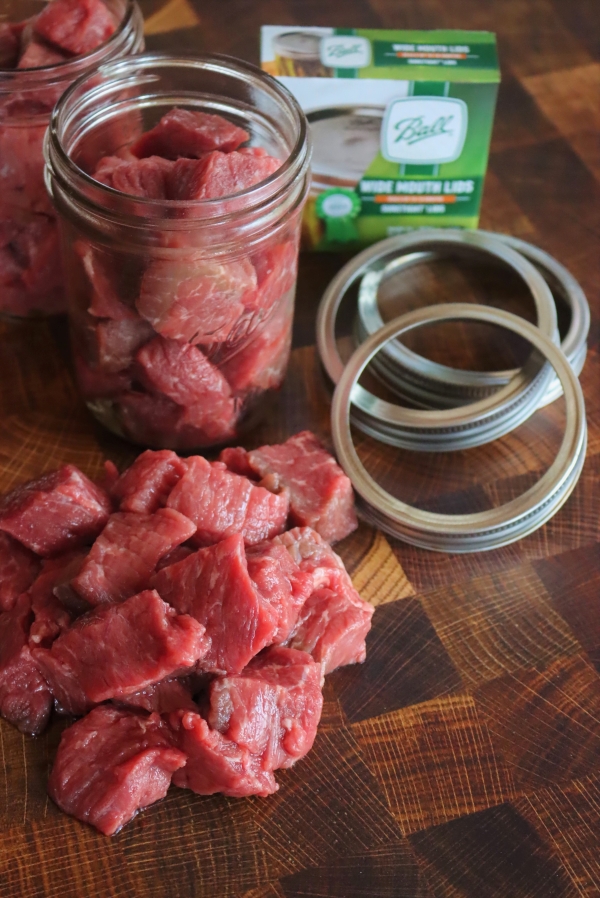
When beef is canned “raw pack,” chunks of beef, or small steaks/roasts are packed into canning jars. No liquid is added, as they’ll let out their own juices during cooking.
Modern lean beef cuts don’t tend to let out as much liquid as the beef raised a few decades ago, so raw packing can be problematic. The lack of browning also results in beef that has a “boiled” consistency, without the added flavor and improved texture that browning the meat before canning would provide.
None the less, it’s easy…simply chop the meat as you see fit and pack it into jars leaving 1-inch headspace.
Hot Pack
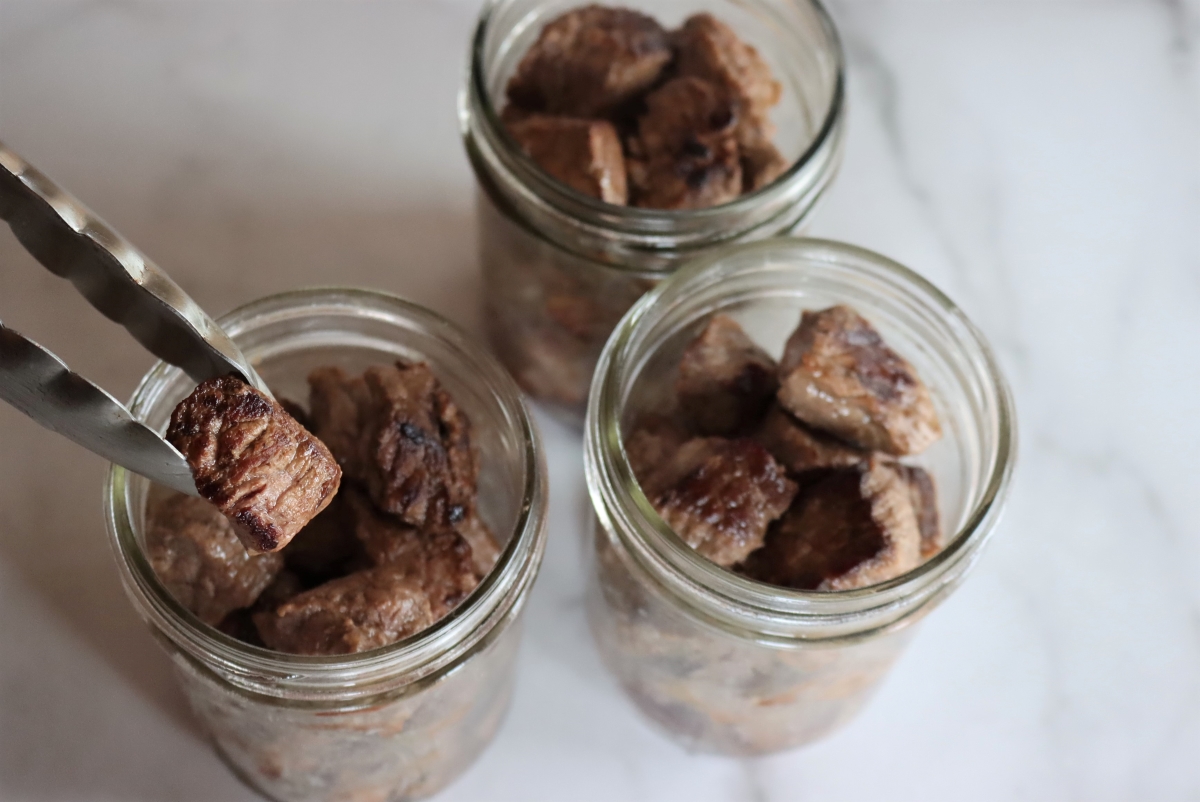
For hot pack, the beef is browned before loading into jars, which helps the chunks retain shape, and the crisp browned outside adds to both the flavor and the texture of the canned beef. When you’re preparing meat for the crockpot, the result is always better if you take the time to brown the meat before slow cooking, and pressure canning is no different.
Quickly brown the meat on all sides with a little oil (or beef fat) in a hot skillet. There’s no need to cook the meat through, your goal here is simply to put a nice sear on all sides of the beef.
Once the jars are filled with beef, hot pack beef chunks are topped with boiling liquid (water, broth, or tomato juice), while still retaining 1-inch headspace.
Whether you’ve raw packed or hot packed, the pressure canning instructions are mostly the same, with one key difference. As you’re preheating the pressure canner, you should warm the 2-3 inches of water in the bottom of the canner to roughly 140 degrees F (very hot, but not simmering) for raw pack and 180 degrees F (barely simmering) for hot pack.
It doesn’t have to be exact, and there’s a good bit of wiggle room there, but the idea is to minimize the difference between the temperature of the jars going in and the water in the canner. If you put cold jars in a hot canner they can break from thermal shock.
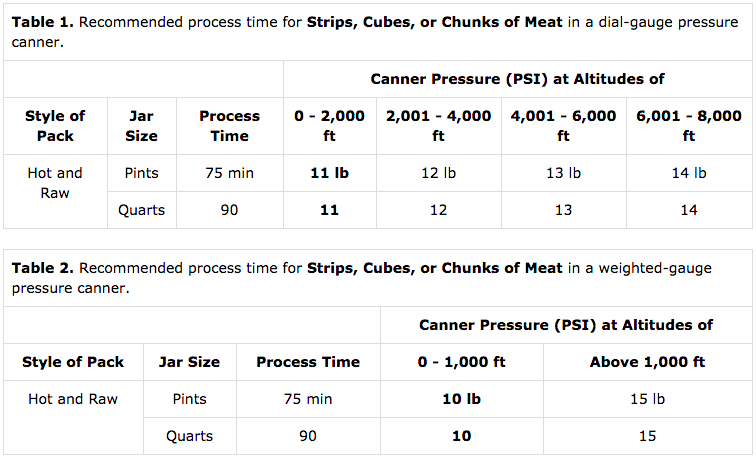
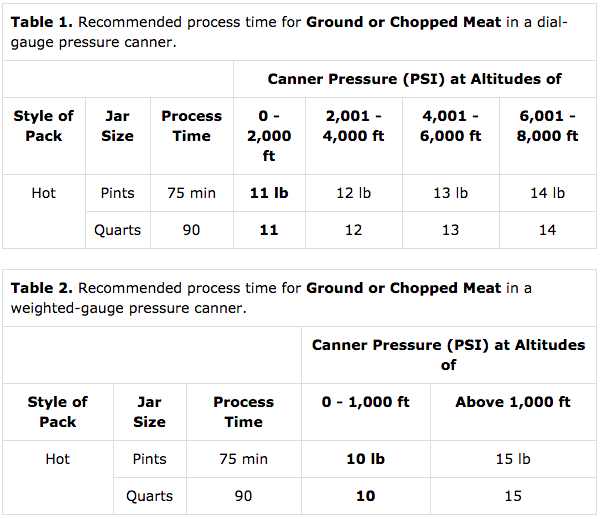
Load the canner following the manufacturer’s directions, and once it’s up to pressure process the jars for 75 minutes for pints and 90 minutes for quarts.
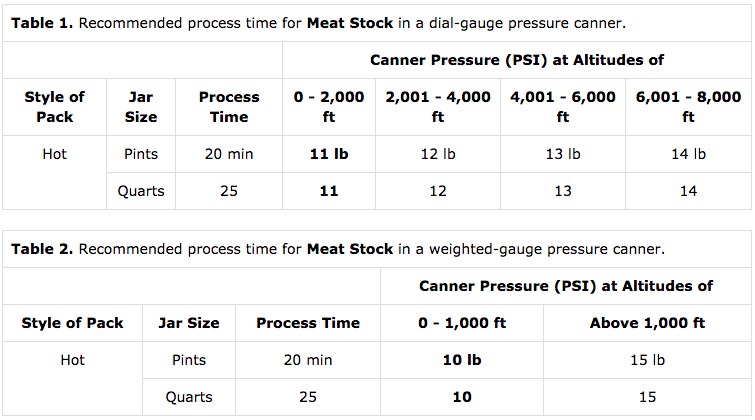
Adjust the total pressure to your altitude and the type of canner (dial gauge v. weighted gauge) as shown in the table below:
Canning Ground Beef
The process for canning ground beef crumbles, or whole hamburgers, isn’t all that different from canning beef chunks.
Raw pack is no longer an option, and the ground meat must be browned before filling the jars. Browning helps to render out some of the fat, and it also sets the shape of the beef to keep it from packing together into one big loaf in the canning jar.
Though you’re draining fat from the beef, there will still be plenty in the jar, and that’s perfectly fine for canning. You’ll see a thick layer of beef fat at the top of the jar once they’ve cooled, and that’s not only normal it’s perfect for crisping the meat (or burgers) as they come out of the canning jars for serving.
The National Center for Food Preservation actually recommends adding some fat to lean meats like venison, around 1 part pork fat to 4 parts venison, both to help the meat brown and to improve flavor. Ground beef generally has 15 to 20% fat, so it has plenty already.
Ground Beef Crumbles
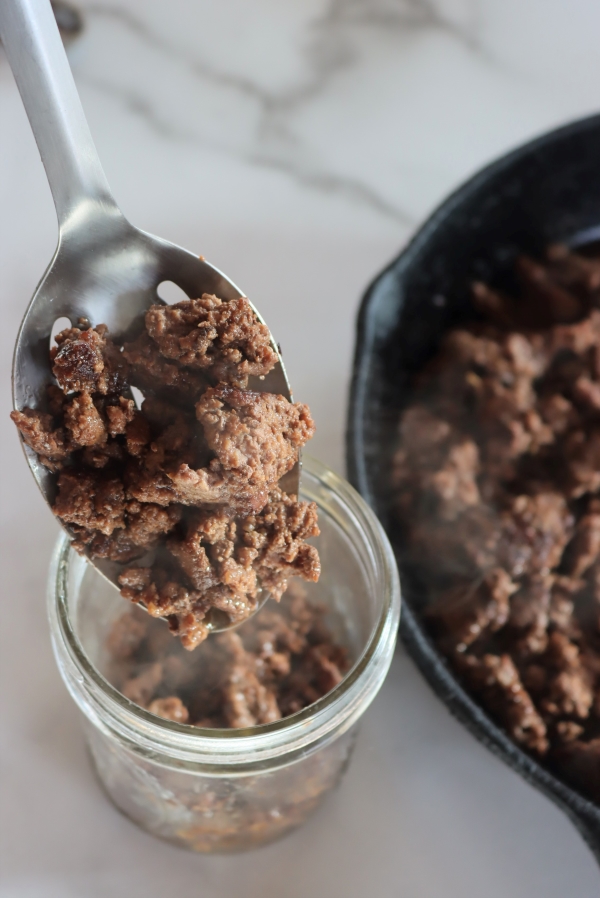
Canning ground beef crumbles is probably the most versatile method and the simplest. Just brown the crumbles and then pack into canning jars leaving 1 inch of headspace.
The meat may be seasoned with salt, pepper, and spices of your choice before canning. Taco seasoning, for example, is a common choice.
Be aware that some spices don’t can well. Sage and thyme, for example, can get bitter during canning. Other spices, like cumin, can get overbearing after pressure canning. It’s a safer bet to spice the meat at serving time.
If adding salt, 1 teaspoon per pint and 2 teaspoons per quart is a rough guideline.
Canning Hamburger Patties
Believe it or not, you can also can whole hamburger patties and they hold up surprisingly well through the canning process. (The same is true for ground pork, which may be canned as patties or links)
For these, I’d recommend salting/seasoning the meat before you form the patties as you won’t be able to season them as easily on serving as the ground beef crumbles.
Just about any salt/seasoning combination is fine for canning, but you cannot use any binders in the meat. No egg, breadcrumbs, or starch of any kind as those are not approved for canning. Stick to meat, salt, and spices.
Shape hamburger patties, knowing that you’ll be able to fit roughly 3/4 pound of meat in the jar. I chose to make three 1/4 pound burgers per wide-mouth pint jar, shaping the burgers to exactly the size of the jar opening.
Be sure to form them well, packing the meat tightly and then brown well on each side so they hold their shape.
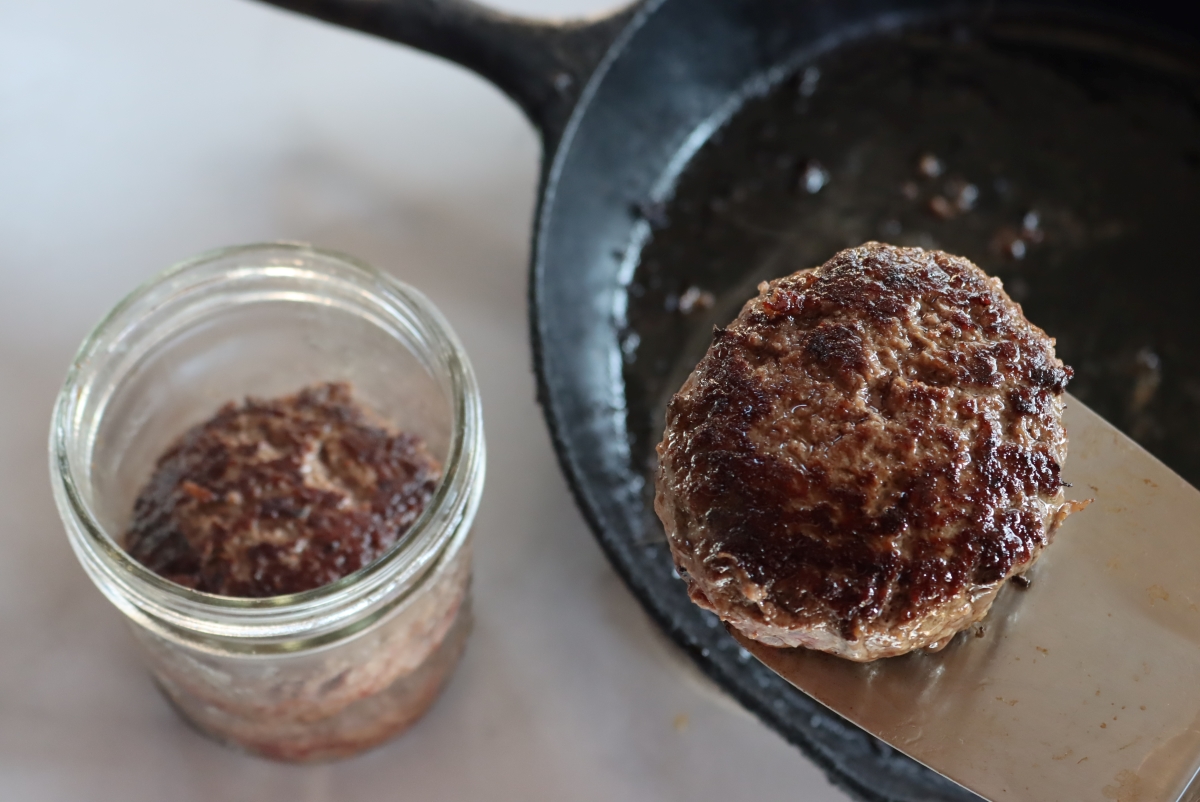
Since all the jars are hot packed for canning ground beef, the process is exactly the same whether it’s loose crumbles or formed hamburger.
Pour boiling stock, water, or tomato juice over the top of the meat in the jars, leaving 1-inch headspace. Seal with 2 part canning lids to finger tight.
Load the jars into a pressure canner that’s been preheated to just barely simmering (around 180 degrees F).
Process in the pressure canner according to the manufacturer’s instructions for 75 minutes for pints and 90 minutes for quarts. This is the same as if canning beef chunks above. Refer to the table below for altitude adjustments.
I will admit that canning hamburgers whole is not my favorite preparation. They held together beautifully, which I didn’t expect, but the resulting burgers are quite wet, which makes sense given that they’re canned in broth.
To make them proper hamburgers again, be sure to scoop off the top fat and brown them well in a pan as you’re reheating them. Use your spatula to press down as they cook, trying to press out as much moisture as possible.
A grill also works well for this, as the moisture is able to drip away.
If you’re really conscious of this during re-heating, then you can actually make a totally passable canned hamburger.
Canning Beef Broth
I prefer to can meat of all kinds in meat stock (rather than water) because it prevents the meat’s flavors from leaching out into the canning liquid. If you make an especially rich and flavorful stock, it’ll actually impart flavor to the canned meats (rather than taking it away as water would).
That means that making stock is a part of canning beef, at least in my house.
Canning broth is already part of our normal routine, as the quality is the same as frozen containers of homemade broth and it doesn’t take up any freezer space that way. We must have 8 to 10 gallons of home-canned bone broth in the house at any given time.
None the less, canning beef means making fresh stock (or buying beef bullion), and I’m a fan of making fresh stock as part of the process. If you make a big batch, you can follow up your beef canning round with the second round of beef broth.
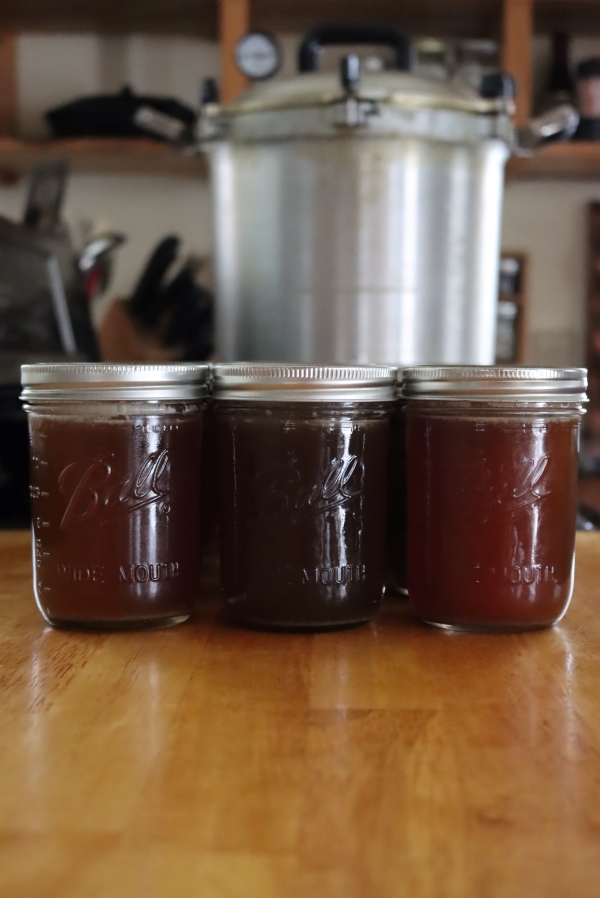
Make the beef broth as you otherwise would, following your favorite recipe, or simply throwing roasted beef bones and bits of meat into a stockpot, simmering slowly for many hours and then straining.
To can beef broth, the timing is much shorter than canning beef chunks because the jars are only filled with liquid rather than broth and meat.
After filtering, reheat the broth to boiling and then fill canning jars with boiling broth, leaving 1-inch headspace.
Process the jars in a pressure canner at pressure for 20 minutes for pints and 25 minutes for quarts. Adjust the pressure based on your altitude following the table below:
Beef Canning Recipes
Besides canning beef, either plain or seasoned, you can also pressure can chili and soups containing beef. Here are a few recipes that allow you to create shelf-stable meals in a jar:
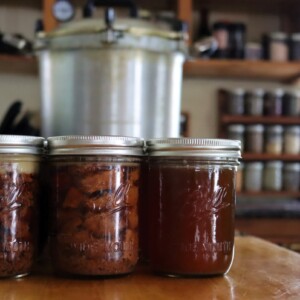
Canning Beef
Canning beef in a pressure canner is an easy way to preserve meat without taking up freezer space, and it's perfect for emergency preparedness or busy weeknight meals.
Ingredients
- Beef (Either cubed chunks or ground beef)
- Canning Liquid (Water, Broth or Tomato Juice)
Instructions
- Prepare a pressure canner according to the manufacturers instructions. For most models, this means adding 2-3 inches of water in to the bottom, along with the bottom trivet and then bring it up to a gentle simmer (180 degrees F).
- Brown all meat, whether it's ground beef, beef cubes or beef strips. Remove the meat from the pan with a slotted spoon, straining out as much fat as possible.
- While the meat is browning, bring canning liquid to a boil and keep it hot. Water, broth and tomato juice are all options, but I generally choose homemade beef broth.
- Pack browned meat into prepared canning jars, either pints or quarts, leaving 1 inch headspace.
- Pour boiling canning liquid over the meat in the jars, still maintaining 1 inch headspace.
- Wipe rims and seal with 2 part canning lids to finger tight.
- Load the jars into your pre-heated pressure canner, seal the lid and allow steam to vent for 10 minutes.
- After steam has vented for 10 minutes, add the canning weight (for weighted guage) to allow the canner to begin coming up to pressure.
- Once the canner is at target pressure (see notes, as the target pressure varies based on your elevation), process the jars for 75 minutes for pints and 90 minutes for quarts.
- After the jars have processed, turn off the heat and allow the canner to cool completely. Once cool, unseal the canner and remove the jars.
- Check seals, remove rings and wash jars. Store any unsealed jars in the refrigerator for immediate use. Sealed jars should maintain quality on the pantry shelf for 12-18 months if properly pressure canned.
Notes
(It's important to note that beef must be pressure canned, and cannot be canned in a water bath canner. If you're not familiar with pressure canning, I'd strongly suggest reading this beginner's guide to pressure canning before you get started.)
In this recipe card I'm presenting the best way to make high quality canned beef at home, hot pack pan browned beef packed in liquid. Other methods, including raw pack and no added liquid variations are discussed in the original article, and while they are approved canning methods, they're not methods I recommend because they sacrifice quality for convenience.
The instructions are the same whether you're canning chunks or strips of beef, or loose pack ground beef crumbles.
Yield: I've found that it takes roughly 3/4 lb raw beef to fill a pint jar, and around 1 1/2 to 1 3/4 pounds beef per quart jar. This is true regardless of canning method, though I only recommend hot pack. The meat is weighed while raw, either from the store or from your own home processed fresh beef.
Beef Fat in Jars: Please be aware that fat at the top of the jars is completely normal, especially with ground beef and hamburger. During browning, try to remove as much fat as possible so that the fat within the jar isn't too excessive, but a solid fat cap is not abnormal depending on the type of beef used.
"Excessive" fat within the jar can sometimes bubble out during canning and get into the seal, preventing jar seals. I've never had this happen, but it's something to watch.
Canning Beef Broth: To can simple beef broth without meat included, simply make the broth and filter out the solids. Return the stock to a boil and ladle into canning jars leaving 1 inch headspace. The total canning time is substantially less when it's just broth rather than broth and meat. Process in a pressure canner for 20 minutes (pints) or 25 min (quarts).
Altitude Adjustments for Pressure Canning Beef: Altitude adjusted pressures for beef chunks, ground beef and stock are all the same, but actual pressures vary slightly depending on the type of canner used:
Weighted Gauge Canner:
- Under 1,000 Feet Elevation Use 10 lbs
- Over 1,000 Feet Elevation use 15 lbs
Dial Gauge Canner:
- 0 to 2,000 Feet Elevation Use 11 lbs
- 2,001 to 4,000 Feet Use 12 lbs
- 4,001 to 6,000 Feet Use 13 lbs
- 6,001 to 8,000 Feet Use 14 lbs
Pressure Canning Recipes
Looking for more pressure canning recipes?
Brian T Stokes
Great article, thank you!
David Griggs
Good Morning Ashley, I really enjoy all the practical homesteading advice you dispense. On canning beef or any meat for that matter, it is a lot of work. I agree that freezer space is a at a premium, especially in the fall, but in certain areas, using the great outdoors is a much less expensive option. With canning lids nonexistent this year, long processing times, and rising propane costs, procuring a second freezer may be a much cheaper way to go. But I mention the great outdoors. Currently it is -20F as I type this. From mid-November it has been below freezing in my part of Northern Minnesota. My freezer has been full since October. I raised 11 turkeys, and we harvested 3 deer. Canning that much would have been hideously expensive. As it stands, we have eaten 2/3 of the deer meat, and 5 of the turkeys. Disadvantages to outdoor storage: critters(shrews and weasels here) and the potential of fluctuating temperatures leading to thawing/refreezing of meat. Again, I really enjoy the writing you put out. Have you ever harvested lake ice for summer use and stored it in sawdust?
Ashley Adamant
I agree, it’s not a practical option for large quantities…like the hundreds of pounds we put up. Also not the most economical from an energy standpoint, but it is nice to have defrosted ready to eat meat on occasion. We have 3 chest freezers, one regular 14 CF AC freezer, and then two 8.5 CF freezers that are DC and run straight from our batteries. We salt cure pork and duck, which saves space. Here for this, I found myself needing to boot beef out to make space for frozen blueberries. Yes, you can can blueberries, but there’s something magical about frozen blueberries mid-winter.
We do a mini-ice house type thing, bringing 5-gallon buckets full of water outside to freeze, then using them to cool a part of our basement, but it’s never “frozen,” it just helps keep the apples cooler/moist so they store longer if it’s dry/warm. Outside’s not the best option here, we’ve had 4 years straight of unseasonably warm weather. This year, I was harvesting cilantro from the garden on new years day, it just never snowed and it was in the 40’s most days.
Only now we’re getting dependably freezing temps outside. So strange for what’s supposed to be zone 4 Vermont.
For canning lids, I always have 2 years on hand, they’re so much cheaper to buy in bulk, so a shortage didn’t really hit me. I do that for the savings, but I was happy about that this year!
Lorelei Rogers
Beautifully done! I have a pressure canner and use it for so much! Have been canning meat, stew, chicken soup, you name it! So nice to see these recipes again, thank you. Don’t believe fda recommendations that you can’t safely can meat, that’s just a disclaimer to protect Campbell’s lol.
Ashley Adamant
The national center for food preservation actually specifically promotes home canning meat, provided you do it in a pressure canner. Not sure where you saw a FDA disclaimer, but I wouldn’t be surprised if various government agencies had different opinions…
Doris Roberts
Have you canned chicken? Would appreciate your help with that!
Ashley Adamant
There’s a post on that coming soon!
Christine
Ashley, what cuts of beef should I use for canning chunks? Should it be a leaner, more tender cut or can it be a chuck, for example?
Ashley Adamant
This is best done with tough cuts, saving freezer space for things like tenderloin. Chuck is really your best choice for canning. Since too much fat can interfere with a seal, you’re better off using lean-ish cuts and/or trimming off as much fat as you can before canning. That said, a substantial fat cap isn’t unusual…just try to minimize the fat going in wherever you can.
Blake
I know there are probably some variables that would play a role, but how long can you expect canned meat to last on the shelf? I’m interested in canning deer, chicken and beef for long term storage. We raise meat rabbits, so I might try to can some of them too.
Ashley Adamant
In a technical sense, it shouldn’t “spoil” for quite a long time (many years?). Honestly, I think so long as it’s sealed it’s still technically edible for a very long time, and I’m not sure anyone’s really tested that.
The problem is, there’s a difference between “spoiling” and still being tasty. So long as there’s water in there, enzymatic actions are still happening and the food degrades in the jar over time. Even MRE’s are only rated for about 5 years under ideal storage conditions (cool/dark place for storage). For this home-canned beef, It’s still good as the day it was canned about 12 months later, but at around 18-24 months quality really starts to go downhill…and at 2-3 years old it’s really not worth eating short of actual starvation (in my opinion).
So I guess, to answer your question, it really depends on what you mean by “long term.” For a year, yes it’s totally great. Longer than that, and I’d look into freeze-drying. Freeze-dried meat is spectacular after 25 years, and since the water is out of it, it’s good as the day it was stored (and rehydrates beautifully, to be pretty darn close to fresh meat, unlike simple dehydrating which never really comes back).
Carol L
This is in regard to your “canning other things” list: I have read repeatedly, that canning pumpkin is NOT safe! Why do you believe it is, based on many others saying that the canning “authorities” say not to as it is not safe to do so? I’m just wondering why you are the lone voice saying we can can pumpkin safely.
Thanks for the great post about canning meat! I love this. I used to can my own tuna, years ago. Would go to the coast of Oregon, buy it right off the fishing boats and come home, clean and can it! It was wonderful to see al those jars of fresh canned tuna!
Ashley Adamant
Canning pumpkin puree is not safe, I agree. There is, however, a safe and tested recipe for canning cubes of pumpkin and other winter squash. The recipe I’m discussing there comes directly from the national center for food preservation and is a safe and tested pressure canning recipe.
Janice
I pressure can pumpkin in cubes too. Did a bunch last fall (2023) and recently finished the last jar of it: it was still good. I pressure-canned 4 more pumpkins this year.
Belinda
Thank you for your great recipes and instructions! On hamburger patties if I grill them on the pit instead of on the stove top or in the oven is that still ok to can? Thank you!
Administrator
It should work fine to grill them, just remember that you’re just browning the outside and not cooking the meat all the way through.
Terry
I just canned my first meat: 7 qts beef, raw method, following your recipe; if anything, my meat had more fat than you recommend. All 7 sealed, but there are partial chunks of beef above the rendered juice and fat in every jar, sticking into the headroom of the jar. I’m thinking as long as the seal is good, that’s not a problem the beef’s not all submerged; but I’d like a second opinion, please.
Flavor and consistency are great, btw.
Administrator
It should be fine. You may find that the meat above the liquid could discolor over time but it isn’t a safety issue as long as it was processed properly.
Terry
Thanks! I’ll be doing some more tomorrow, then.
Administrator
You’re welcome.
Sharon Garnes
I used to make lots of beef BBQ for school concession stand. Will it be safe to pressure can with the brown sugar, ketchup, onion and Worcestershire ?
Administrator
I would look for an approved canning recipe for BBQ beef.
Raina
I’ve only canned chuck roast once. I browned the roast whole and then cut it up and used broth. Will that be ok?? Thank you for your site and recipes, I’m very new to canning so it’s appreciated.
Ashley Adamant
Yup, chuck roast is fine, and one of the most flavorful roasts in my opinion. Just as you say, cut it up, brown it, and pack it in hot broth before using the pressure canning instructions provided. Enjoy!
Azzam Ejjeh
Hi thank you for this very important article. My question is, can I use jars that have a rubber band inside the metal seal in a pressure canner instead of the ball jars that come with double sealing process?
Administrator
Do you have a link to the jars you’re speaking of? I’m not sure that I know exactly which jars you are referring to.
Andy Sonntag
Howdy! I am looking to can corned beef. I know there is no approved (tested) way to do so, but was wondering if you think my reasoning is sound. According to this website, (https://www.scienceofcooking.com/science-of-brining.html) the physical changes in brined beef make it less dense than raw beef. Density being a huge factor in processing meat in jars, I am assuming that, all things being equal, corned beef should can safely using raw beef guidelines. I want the final product for homemade corned beef hash so will be hard frying it and not concerned with it holding its shape.
I know you cannot say this is safe to do as no testing has been done, but do you see any flaws in my reasoning that I have overlooked. I am undertaking this entirely at my own risk.
Ashley Adamant
Hi Andy, That’s a darn good question. We make a lot of cured meats at home, but mostly the dry cured type that hangs for weeks. I’ve never made corned beef, and I honestly haven’t even eaten it either (so definitely not speaking from experience). If you want the pure “by the book” answer, you’ll find it here on Healthy Canning (https://www.healthycanning.com/home-canning-cured-meats-bacon-brined-corned-ham-etc/)
That said, it sounds like you know the “by the book” answer, which is that it hasn’t been tested thus it’s not recommended because it hasn’t been tested. There’s a concern about density, and air cured meats (pancetta, etc) do get much more dense as they’re dried and cured, which I imagine is their main concern. Wet brined things like corned beef actually pull in more liquid from the surrounding brine, so you’re right, I think it is just the opposite.
That said, all that salt may change how the heat penetrates the jar. My guess is that it’d actually help heat transfer, but that’s a guess.
In theory, if you’re using corned beef cured with nitrites then the curing salts should help inhibit botulism, especially if you use instacure #2 which is the slower release version (I believe the fast release is what’s usually used for corned beef)…that said, there are other concerns when you cook nitrites, especially at high temperatures. I’ve read (can’t remember where) that cooking nitrites at high temperatures can cause them to become mildly carcinogenic, and you’re not supposed to high heat or char broil cured meats. I wish I could find that citation and remember where I read that. Anyhow, there may be other unknown consequences that are hard to anticipate.
Without nitrites, it’s just a really salty meat with a lot of spices, and given that they don’t actually limit the amount of salt you can put in a jar in the guidelines, I’d imagine it’s really not that different than just canning beef in general.
So that’s a long way of saying…I have no idea…but your reasoning seems sound to me.
You’re planning on cooking it at the end, and I’d make sure you cook it really well when it comes out of the jar, at least 10 minutes at “boiling” temperatures or higher. The national center for food preservation actually gives that guidance themselves as what to do when you’re not 100% sure your recipe is approved. They obviously don’t want you to do it, but they do know that people are going to anyway and they’re trying to put that out there to help people stay safe.
Here’s the guidelines:https://nchfp.uga.edu/how/general/for_safety_sake.html
This is the relevant quote:
“If Clostridium botulinum bacteria survive and grow inside a sealed jar of food, they can produce a poisonous toxin. Even a taste of food containing this toxin can be fatal. Boiling food 10 minutes at altitudes below 1,000 feet altitude should destroy this poison when it is present. For altitudes at and above 1,000 feet, add 1 additional minute per 1,000 feet additional elevation. Boiling means that you are able to see the liquid in the food actively forming large foamy bubbles that break all over the surface. Note that as of July 2013 the Centers for Disease Control and Prevention (CDC) recommendation is to discard any home-canned food that might contain botulism toxin.”
Good luck, I know you know it’s at your own risk…but I have to say it, enjoy at your own risk =)
Andy Sonntag
Thanks for walking through the reasoning with me. I plan to hard-fry the meat in the fat when making hash so I’m confident it will be safe.
Corning beef may be something you might look into. It cures like saurkraut, so may be good for your basement. It preserves large quantities of beef, and has been done for centuries.
A note on curing- I read that celery powder is a natural source of nitrates, but the concentrations are not consistent. I powder excess dried vegetables for adding flavor, but now know I will be adding a form of “cure” when I add the celery powder. I just canned a load of home made Italian sausage chunks in tomato juice, and the celery powder I added for flavor is apparently adding just a little bit more safety to the process. Who knew! lol
Thanks again- I always look forward to the wide variety of topics you post, and am planning to explore floral jams and jellies this year. Come-on, Dandelion season!!!
Ashley Adamant
Wonderful, so glad I could help (even if I don’t actually know the answer…)
Corned beef is on our list for this year, especially with all the beef we’ve been eating. Found a really great local farm that we buy a beef side from, and I’m making everything with it. Is there a particular corned beef recipe you’re using? I’d love to start with a tried and true recipe from someone who’s actually making it. Let me know if you’re willing to share your process.
We just did beef bacon this week and it’s completely amazing, working on typing up the recipe now actually. Bresaola is next, but I’d love to get some corned beef going while that’s curing.
Thanks!
-Ashley
Andy Sonntag
I don’t make my own- I have a tiny house on a speck of land in the Detroit suburbs. I got it on sale for $1.99/lb so put it up before the price jumped back up after St. Patty day. “Canning, Freezing, curing & Smoking Meat, Fish & Game” by Eastman has a basic recipe for the brine. (I think I ordered the book after you recommended in in a post so you probably have it). Good luck!
Diane Muse
Great info you have here! I’ve gotten really into making homemade broth/stock. I don’t have a big freezer so have been looking into pressure canning it. Everything I’ve read except for your info emphasizes cooling the broth and removing the fat before reheating and canning. I feel like the fat is one of the big benefits of homemade stick, especially if using grassfed beef! So I’m puzzled. My trusty “Putting Food By” book doesn’t really give a reason, another source claims the fat can get onto the edge of the jar and keep it from sealing properly. I’m interested in your thoughts on this! Thank you.
Administrator
I found this article on saving the fat from the bone broth. This might be a good solution for you. https://whatgreatgrandmaate.com/how-to-save-the-fat-from-bone-broth/
Cate
Thank you for this post on canning ground beef. My question is do I have to heat the jars before packing with meat?
Thanks
Ashley Adamant
I don’t, but many people do. The risk there is thermal shock on the jars, not safe processing. The jars being hot or not won’t affect the canning time as they’re in the canner a long time, the main issue is the potential for jar breakage when you pour a very hot liquid into a cool jar. I’ve never had an issue with hot beef in a room temperature jar. Just make sure the jars aren’t cold. (Or, out of an abundance of caution, you can pre-heat them in a water bath or your oven…but my interpretation of the guidance from the natioanl center for food preservation is that this step is deemed no longer strictly necessary.)
Andy
To prevent thermal shock, I leave the hot water in the jars after washing them. When I pack them with meat and boiling broth they are still very warm. It simply uses a necessary step for two purposes.
Ashley Adamant
Perfect!
Terry
Regarding bone broth, I have canned with the fat. No harm done. My broth usually slow cooks long enough for the bones to be softening and the marrow to have dissolved out. Sometimes I pass it through a narrow mesh strainer, but then I press the fat and marrow through with a rubber spatula. All I’m trying to do is make sure I’ve removed small bones and, if I’ve used any, leafy seasonings or chopped celery and leaves. (Most often I don’t add seasoning, thus to extend my options when I’m cooking.)
Regarding canning meat: I give jars a foreshortened hot water bath just to bring them up to temp. I load meat raw, room temperature, I don’t add liquid. I include all fat that’s attached to the meat. I don’t season, for more options on the use side.
I get my meat from a farm, and request the butcher to leave on all the fat s/he can, so I usually have a strong quarter inch at the top of quarts of cooled canned beef. I’ve never had a problem with proper sealing.
Diane
Interesting and great to hear! Thanks
Deborah Kelley
I want to know if you can can empenyada beef filling. It does require cumin but I can leave that out. Ingredients are ground beef red peppers onions olives tomato paste cumin and chili peppers And last but not least have paprika
Administrator
I would recommend doing some research to see if there is a tested recipe out there for it.
Christie
Hi! Is it possible to can cooked shredded beef? I have a delicious recipe for Italian Beef that I would love to have on the shelf if possible. Because I’d want it shredded when it goes into the jar, it would be fully cooked. Do you think that it would still retain its texture and not get tough? I would keep it in larger pieces to try and avoid it completely falling apart.
Administrator
I would look to see if there is a tested recipe for that. Otherwise I would can it plain in chunks or strips and then add in all of your seasoning in and shred it when you are warming it up to eat.
Christie
My recipe is honestly just beef stock with various Italian seasonings – I’ve definitely found tested recipes that include all the same seasonings. I just wasn’t sure about the shredded beef. I might just keep it in chunks and shread it once it’s reheated.
Administrator
Sounds like a great plan!
Andy Sonntag
I can pork chunks for pulled pork and shred them when boiling-off the liquid. They have flavor through the chunks and shredding is a breeze.
Christine
I have been canning beef for years. It usually has a reddish tint when finished. This latest cow we processed, is very dark in the jars and the liquid is darker than usual. Maybe because it was am older cow? Have you ever notice this?
Administrator
I’m not sure. I haven’t personally seen this. As long as it was good meat and proper canning procedures were followed, it should be ok.
Christine Bell
I was wondering if you’d done any canning in small jars? I’m wanting to can sausage in 4 ounce and 8 ounce jars and can’t find any information on times. Any insight is appreciated.
Administrator
You can usually use the processing times for bigger jars for smaller jars but I haven’t personally tried it.
Phillip Da
This is a question, not a comment. So I canned some goat meat today. This is my first time canning. I did the cold pack method. The fear I’m having is the “broth” isn’t coving all the meat, do I have to worry about that??? I don’t want to poison me or my wife.
Administrator
Yes, that’s fine as long as you followed safe canning procedures.
Paul C
Yes browning the meat first is best helps it stay in pieces rather than breaking up when you use it in stews later
and yes even the cheapest toughest cuts of beef are supper tender once pressure canned and to make any dish you only need to cook it long enough for the vegetables you put in