Affiliate disclosure: This post may contain affiliate links. Please see our Privacy Policy.
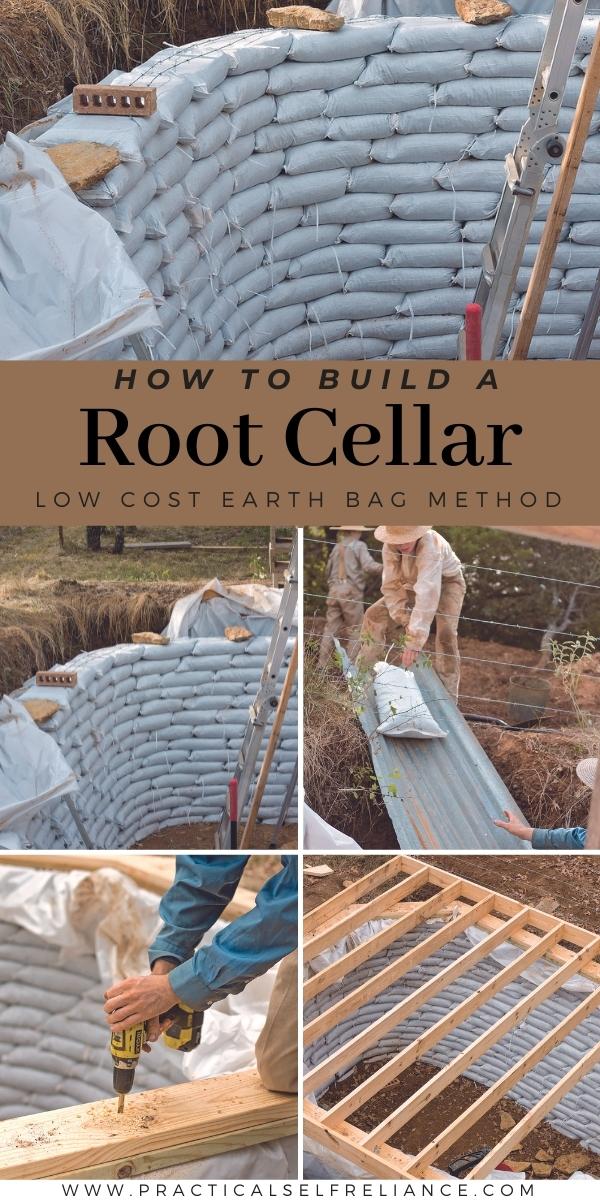
Root cellars are an old fashioned way to keep food fresh without modern refrigeration. Insulated by the ground, a properly made root cellar will stay at “refrigerator” temperature year round, even in the heat of summer.
Generally, they’re expensive to build, but this plan is for a DIY earth bag root cellar that costs almost nothing.
For years we’ve “root cellared” in our basement, and while it mostly gets the job done, it doesn’t quite stay cool enough in the summer heat. I’ve always wanted a proper outdoor root cellar, dug into the earth and insulated above so that it’ll stay cool year round.
The problem is, they’re generally expensive to build and require heavy equipment (like a cement truck). My friend Teri even has a really sleek design in her book on the topic, but it requires heavy construction equipment, concrete, etc.
It’s daunting to say the least.
I recently came across a design for an earth bag root cellar, that uses earth in sandbags to create the walls. They’re held together securely, but inexpensively with things like rebar driven through the bags.
This construction technique is used in other parts of the world where labor (and time) are plentiful, but money is not.
The actual plans for this DIY root cellar come out of one of my favorite off grid book resources, The Doable Off-Grid Homestead. Just about everything in this book is done with practical ingenuity, and on a shoe string budget.
This one can be done for (almost) free, and is the perfect solution for someone who has time but not money.
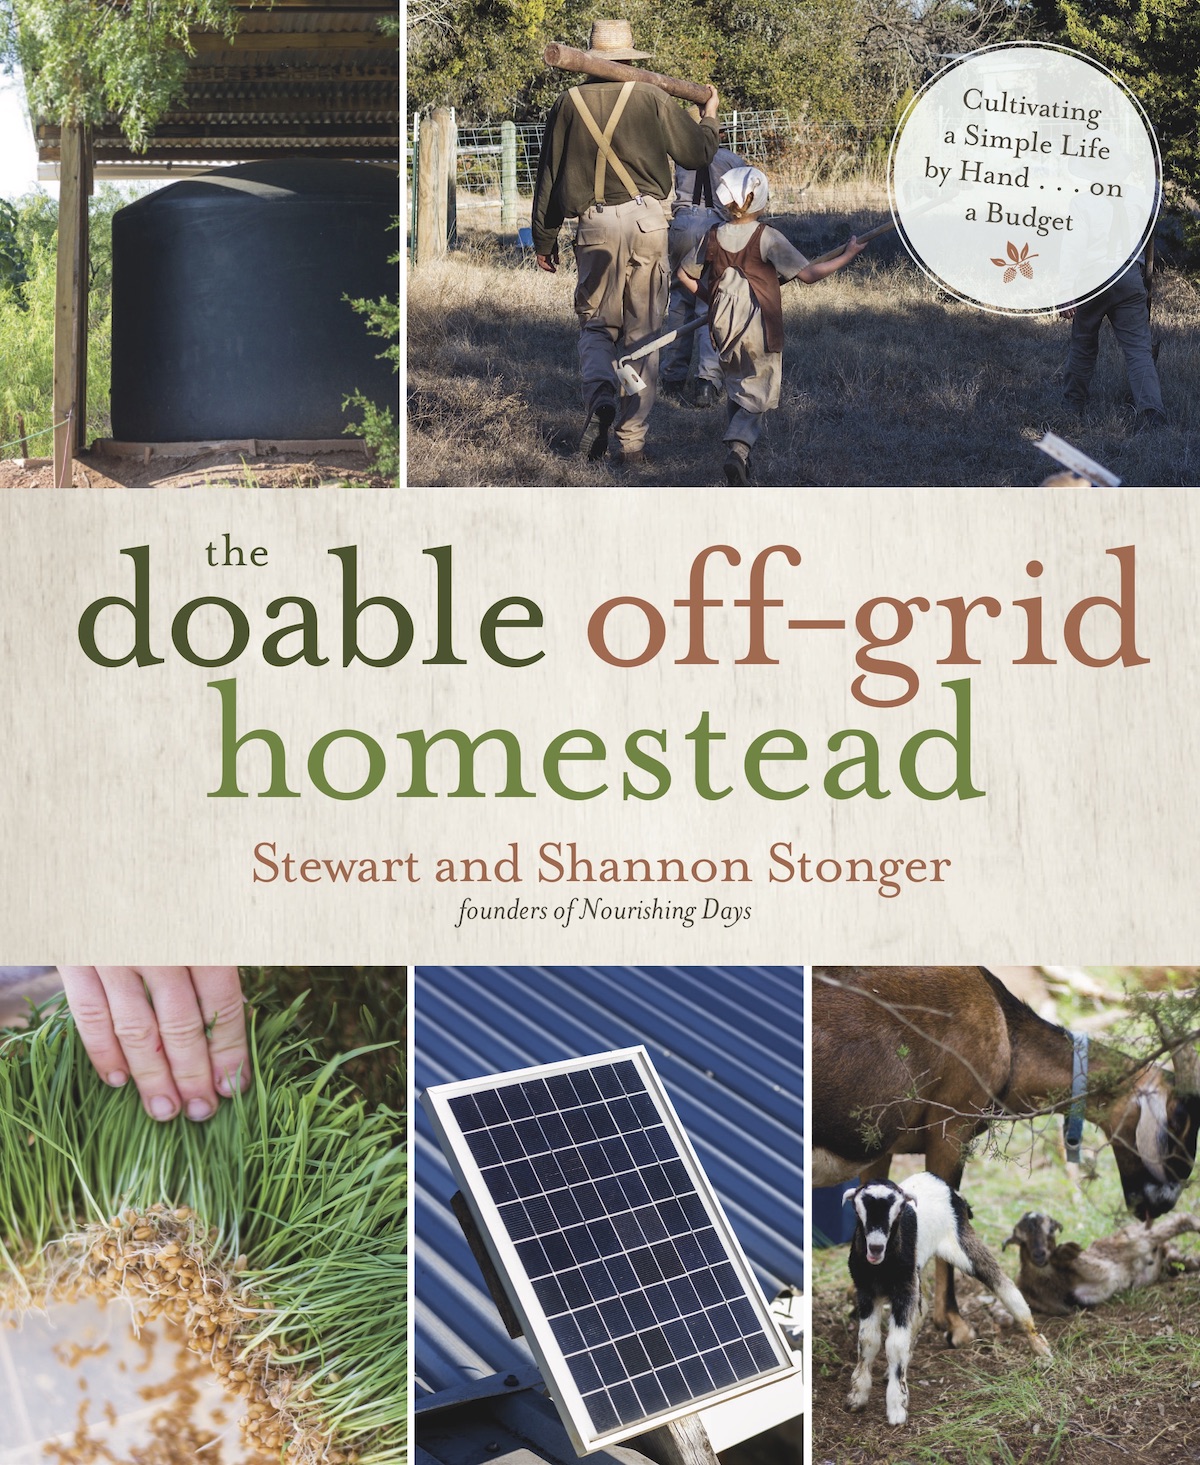
Reprinted with permission from The Doable Off-Grid Homestead by Stewart and Shannon Stonger. Page Street Publishing Co. 2018. Photo credit: Shannon Stonger. It has been edited slightly for format and length to fit the web.
Earthbag Root Cellar
If you have time but not money, then earthbag building might be for you. Earthbag construction is simply using sand bags filled with moist dirt that are tamped level as building blocks along rows. Think of it as building with simple dirt blocks that you create. Note that this will not work with really sandy soil because the bags would shift too much.
Estimated Time
With a team of one adult and two children (ages 9 and 11), we were able to fill up and place around 30 bags in a 3 ½-hour period.
(Quick back of the envelope math with that estimates that it’ll take about 150 “man hours” to fill the bags for this project, or about 2 weeks of full time work for two healthy adults. Again, you’re putting in time, not money here.)
Estimated Cost
This root cellar project used a bit fewer than 600 sandbags at less than $0.20/bag plus barbed wire, rebar and materials for covering the earthbags.
(Total cost for materials used by this project, assuming you already have basic tools like shovels and buckets, is around $250 to $400.)
Tools and Materials
- Shovels
- 4-foot (1.2-m) level
- Dirt with some clay content
- 6-mm plastic sheeting
- Sandbags
- Bucket with no bottom
- Water for moistening dirt
- Tamper
- Four-pointed barbed wire
- Leather gloves
- Safety glasses
- Wire cutters
- Rebar cutter or reciprocating saw with metal blade
- 3/8-inch (9.5-mm) rebar, as needed
- Small sledgehammer
- Treated 2 x 8 boards, optional
- Drill and 3-inch (7.6-cm) deck screws, optional
- Cement stucco or earthen plaster materials, as needed
- Chicken wire or other mesh material, as needed
How to Build an Earthbag Root Cellar
Prepare your hole. Keep in mind that earthbag walls do not have to be square; in fact, they are stronger when curved.
We started with a hole approximately 6 feet (1.8 m) deep and 8 x 12 feet (2.4 x 3.6 m) at the base. Make sure you account for the space the earthbags will take up in your hole.
Using a shovel, clean up the hole in order to create a level surface (double checking with the 4-foot [1.2-m] level) around the perimeter that is wide enough for the earthbags and put all the dirt from the cleanout in a pile in the middle. This dirt will later end up in the earthbags.
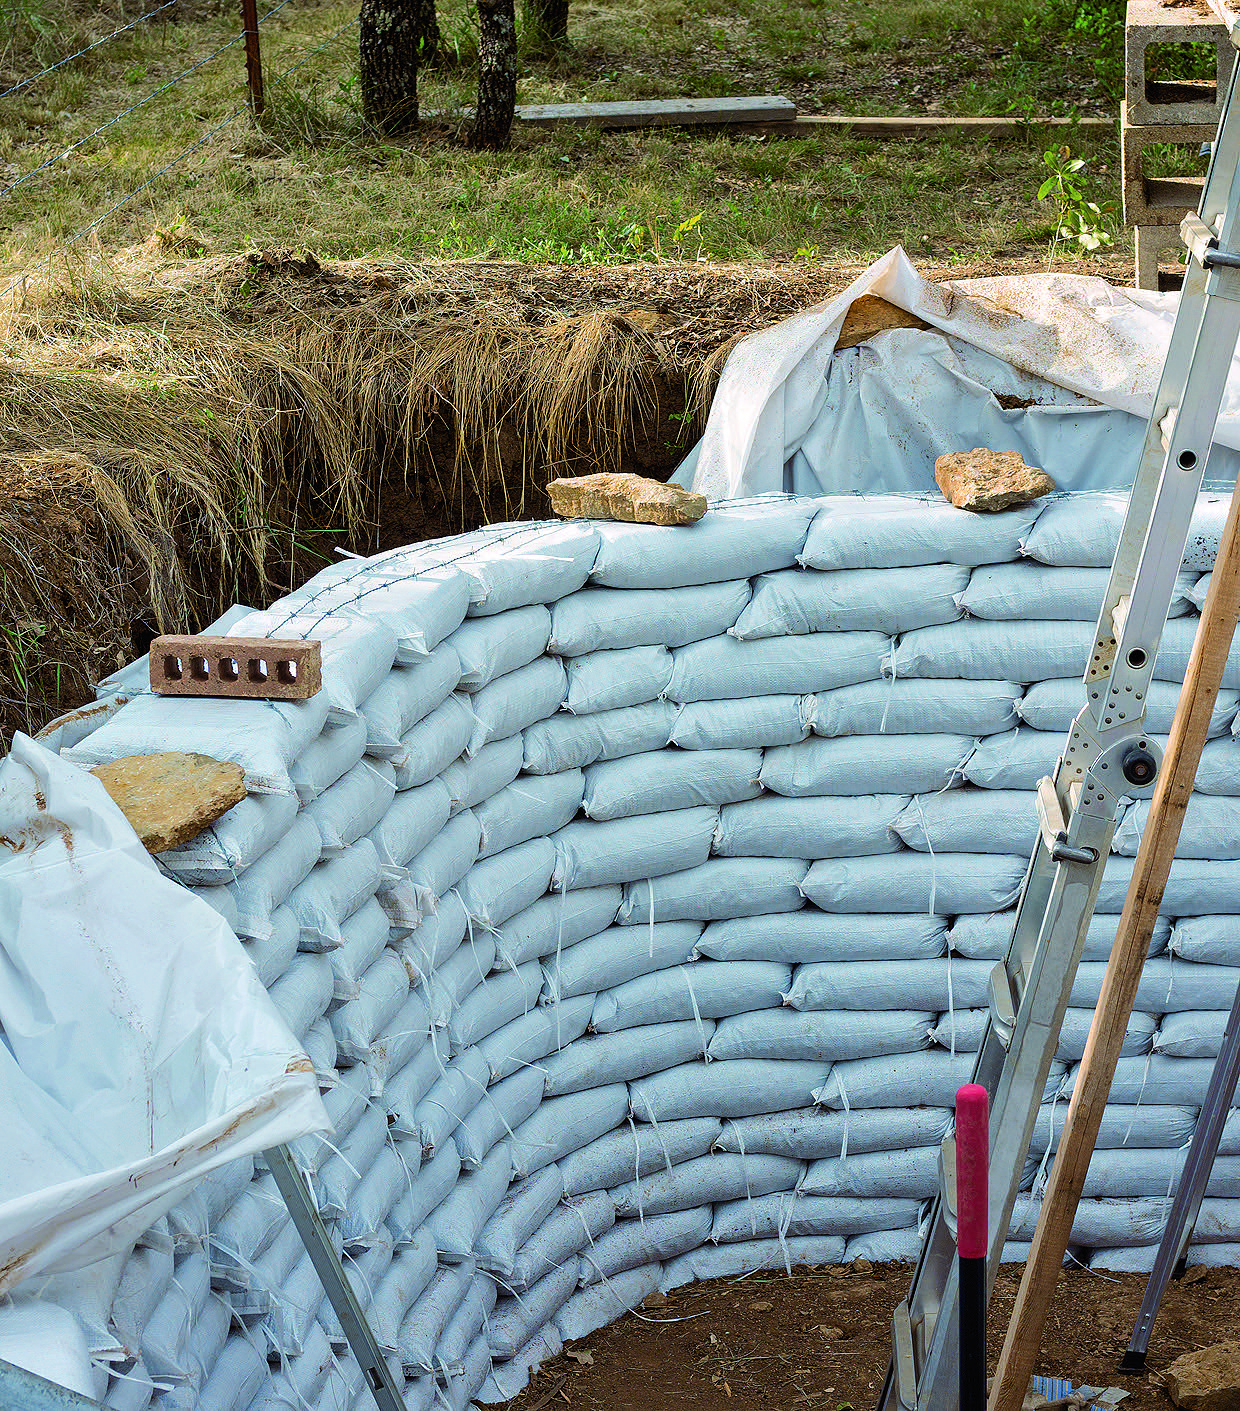
Place a layer of 6-mm plastic sheeting around the edge of the entire hole. Temporarily secure it in place with rocks or bricks while you build your walls.
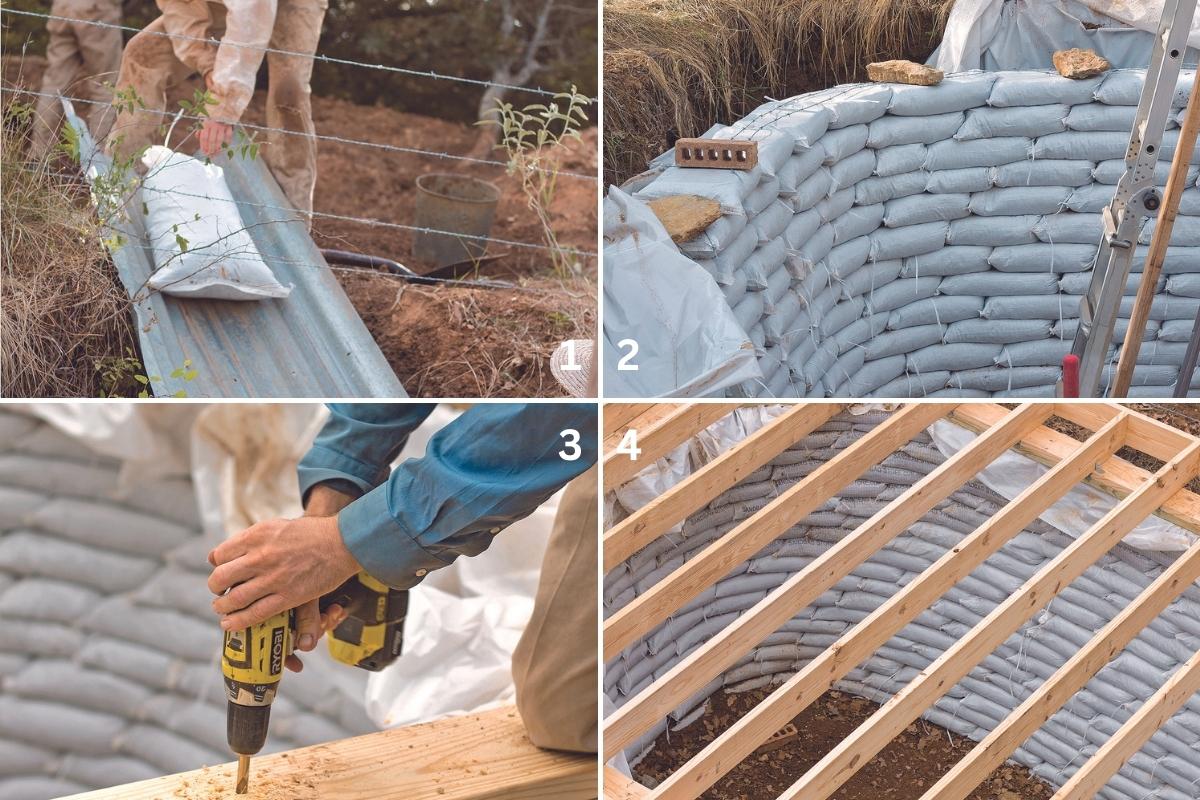
To fill a sandbag, place the bucket with the bottom cut out inside the sand bag. This will keep the bag open while you fill it. Moisten the dirt with water as necessary and fill the bucket with dirt. When you lift the bag and bucket up together, the dirt falls to the bottom of the bag and you can finish filling the bag.Tie off the bag (many bags come with built in ties) and repeat as needed.
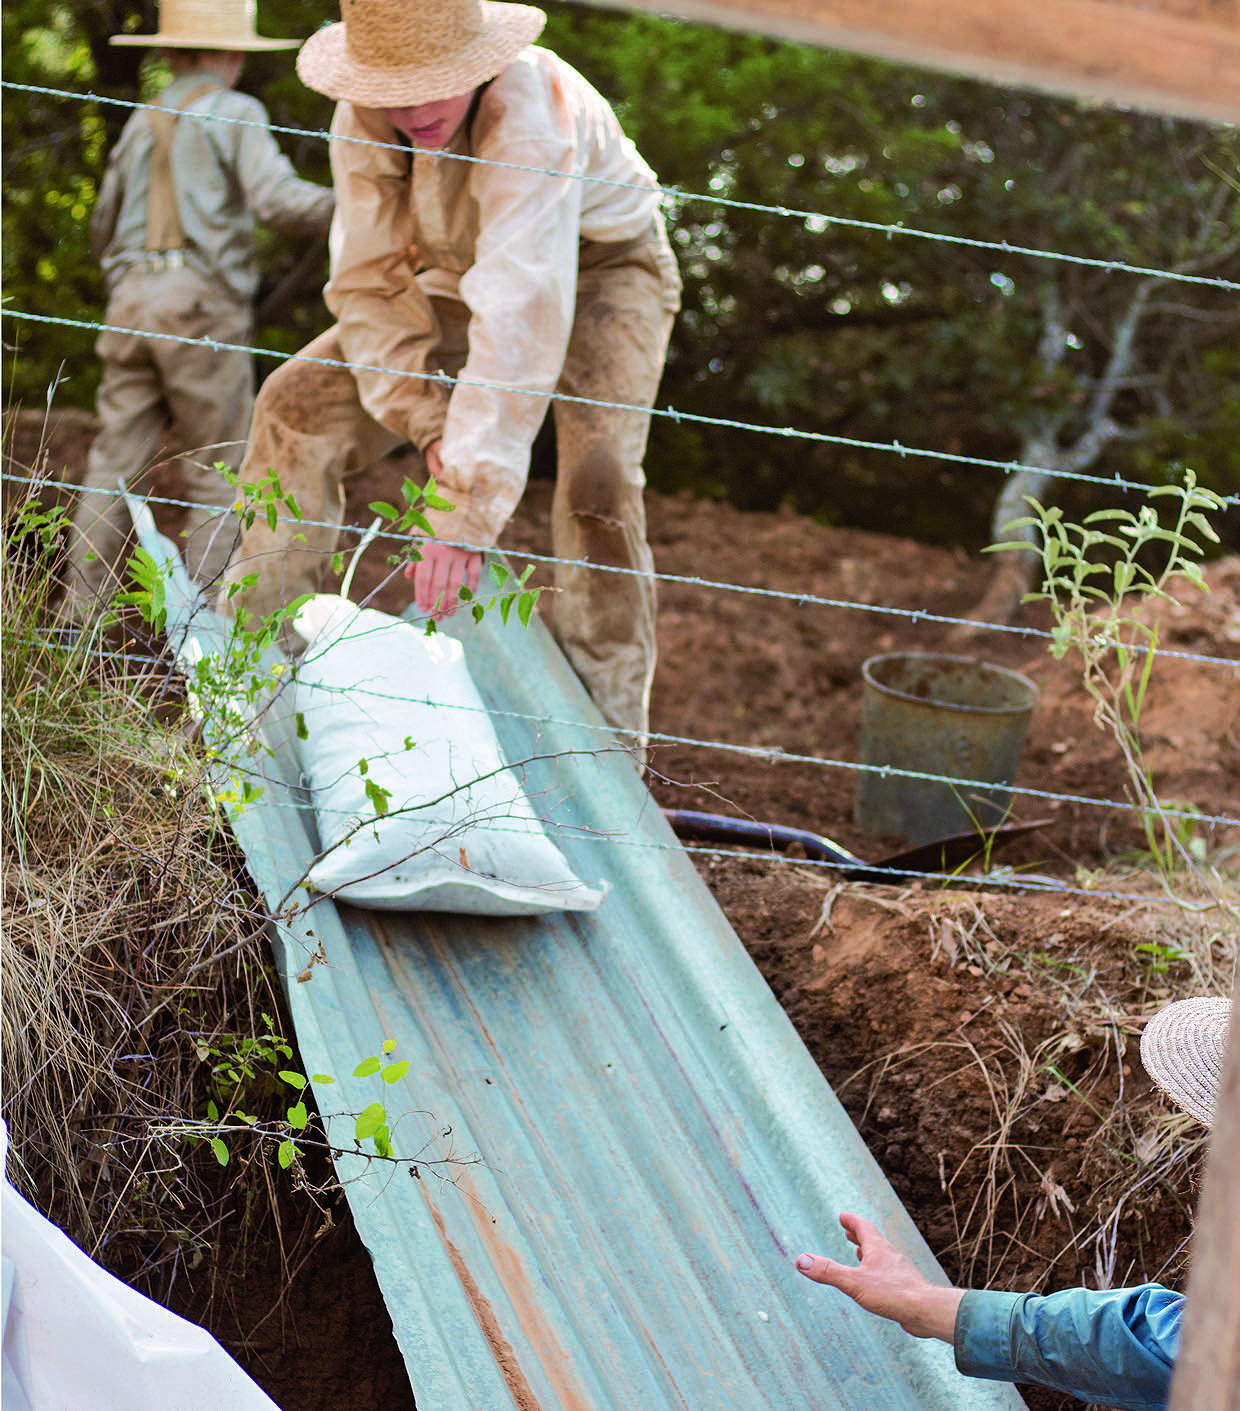
Lay the earthbag down so that the tied opening butts up against the bag next to it. Tamp the bag level with the earthbag next to it. Continue filling and placing the earthbags, tamping as you go, until a single row fills the perimeter.
Carefully place 2 strands of the barbwire on the earthbags. After each layer of earthbags is laid down and tamped level, you need to put down 2 more strands of barbed wire.
You can hold this barbed wire down temporarily with rocks or bricks while you place the next layer of bags.
Cut the rebar.
If you’ve never cut rebar with a reciprocating saw before, you’ll find you can destroy a metal cutting blade on a single piece of rebar.
Two simple tricks help make the metal blade last a lot longer:
- First, move the reciprocating saw blade back and forth while cutting so that it isn’t always on the exact same spot on the blade.
- Second, between each cut, dip the blade in cool water. Heat is the primary thing that wrecks the blade, in our experience.

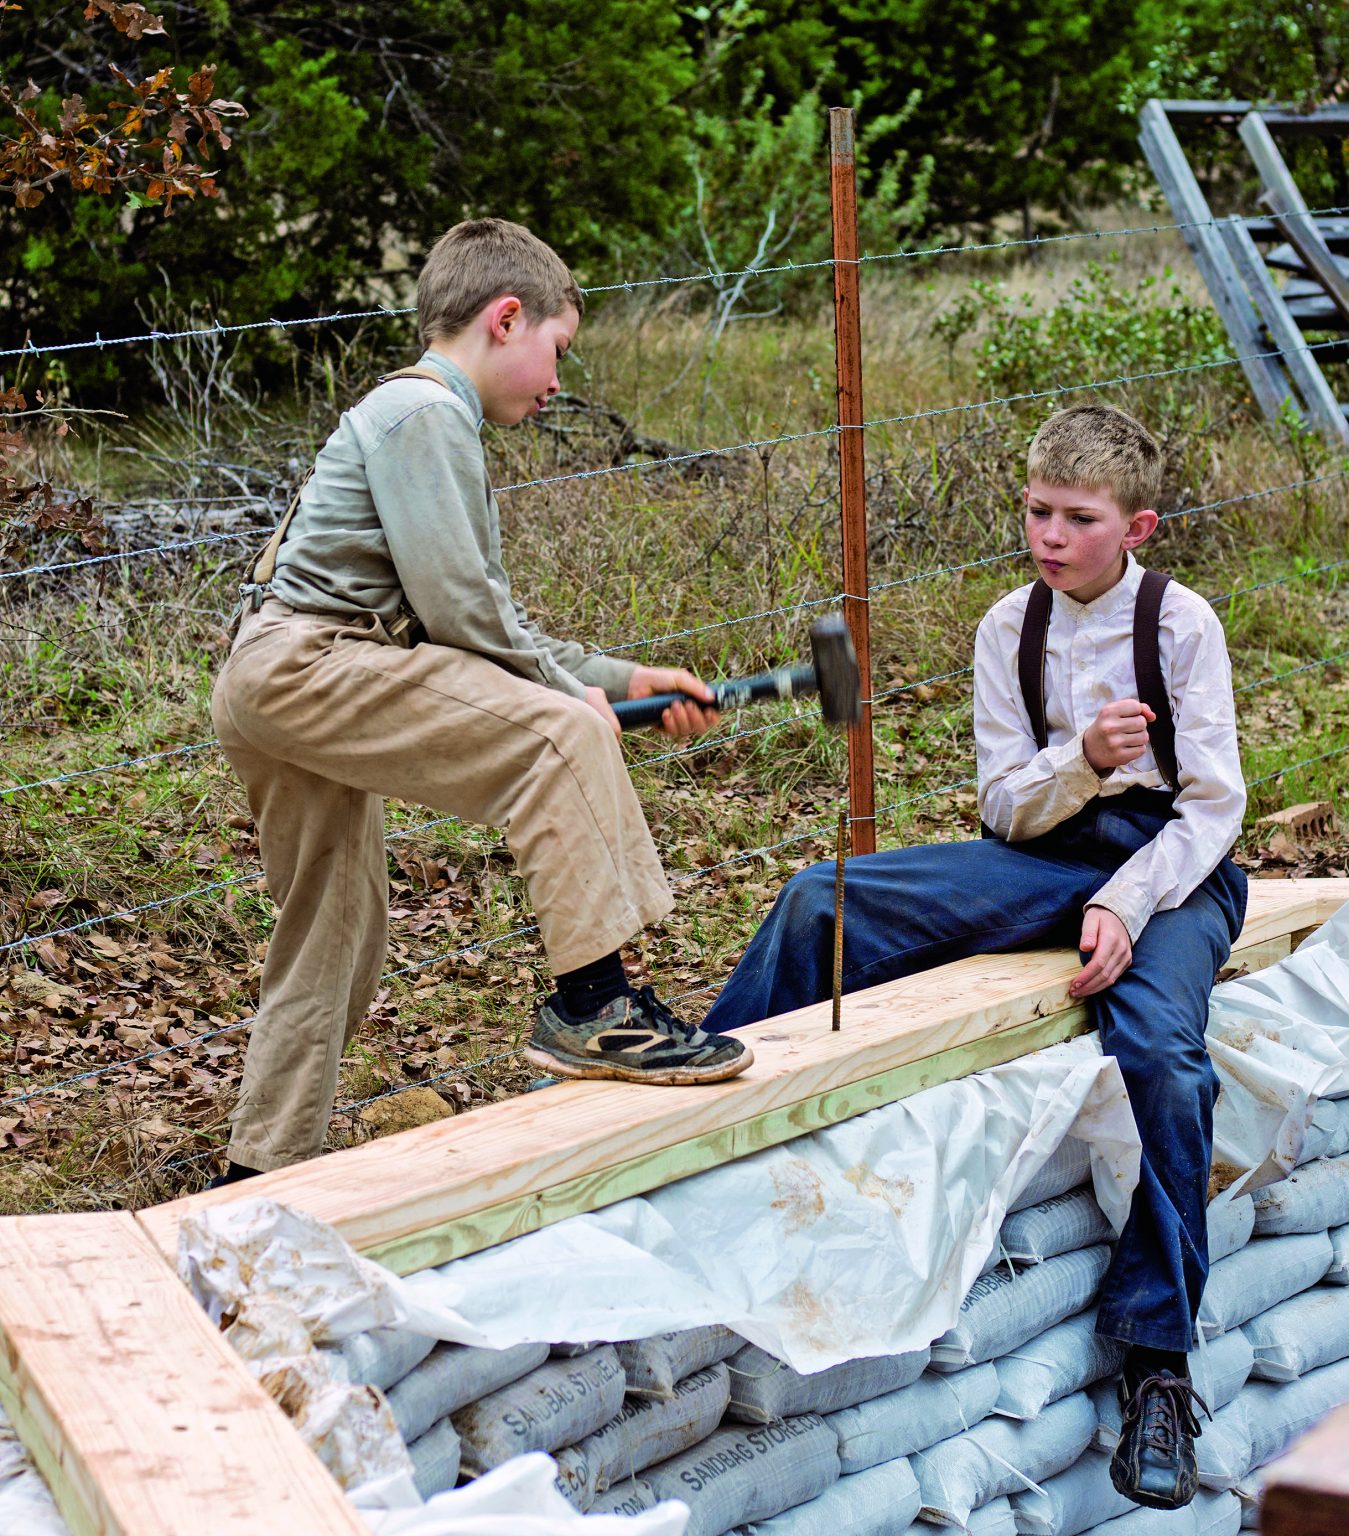
Pound the rebar through the bags with the sledgehammer.
For the foundation layers—the first two layers—pound 1 or 2 pieces of rebar into each bag. After that, you can pound rebar down through the bags every 5 layers.
Repeat layering earthbag and barbed wire and pounding rebar as needed until the desired height is reached.
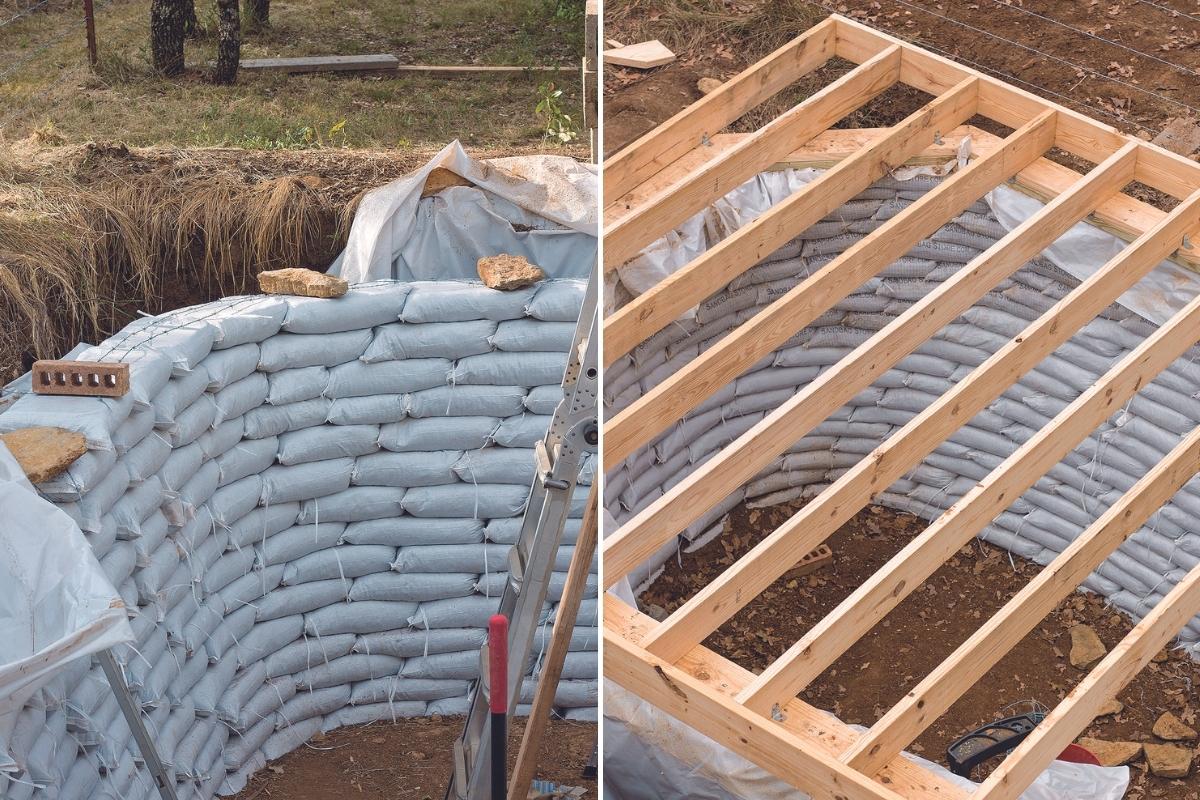
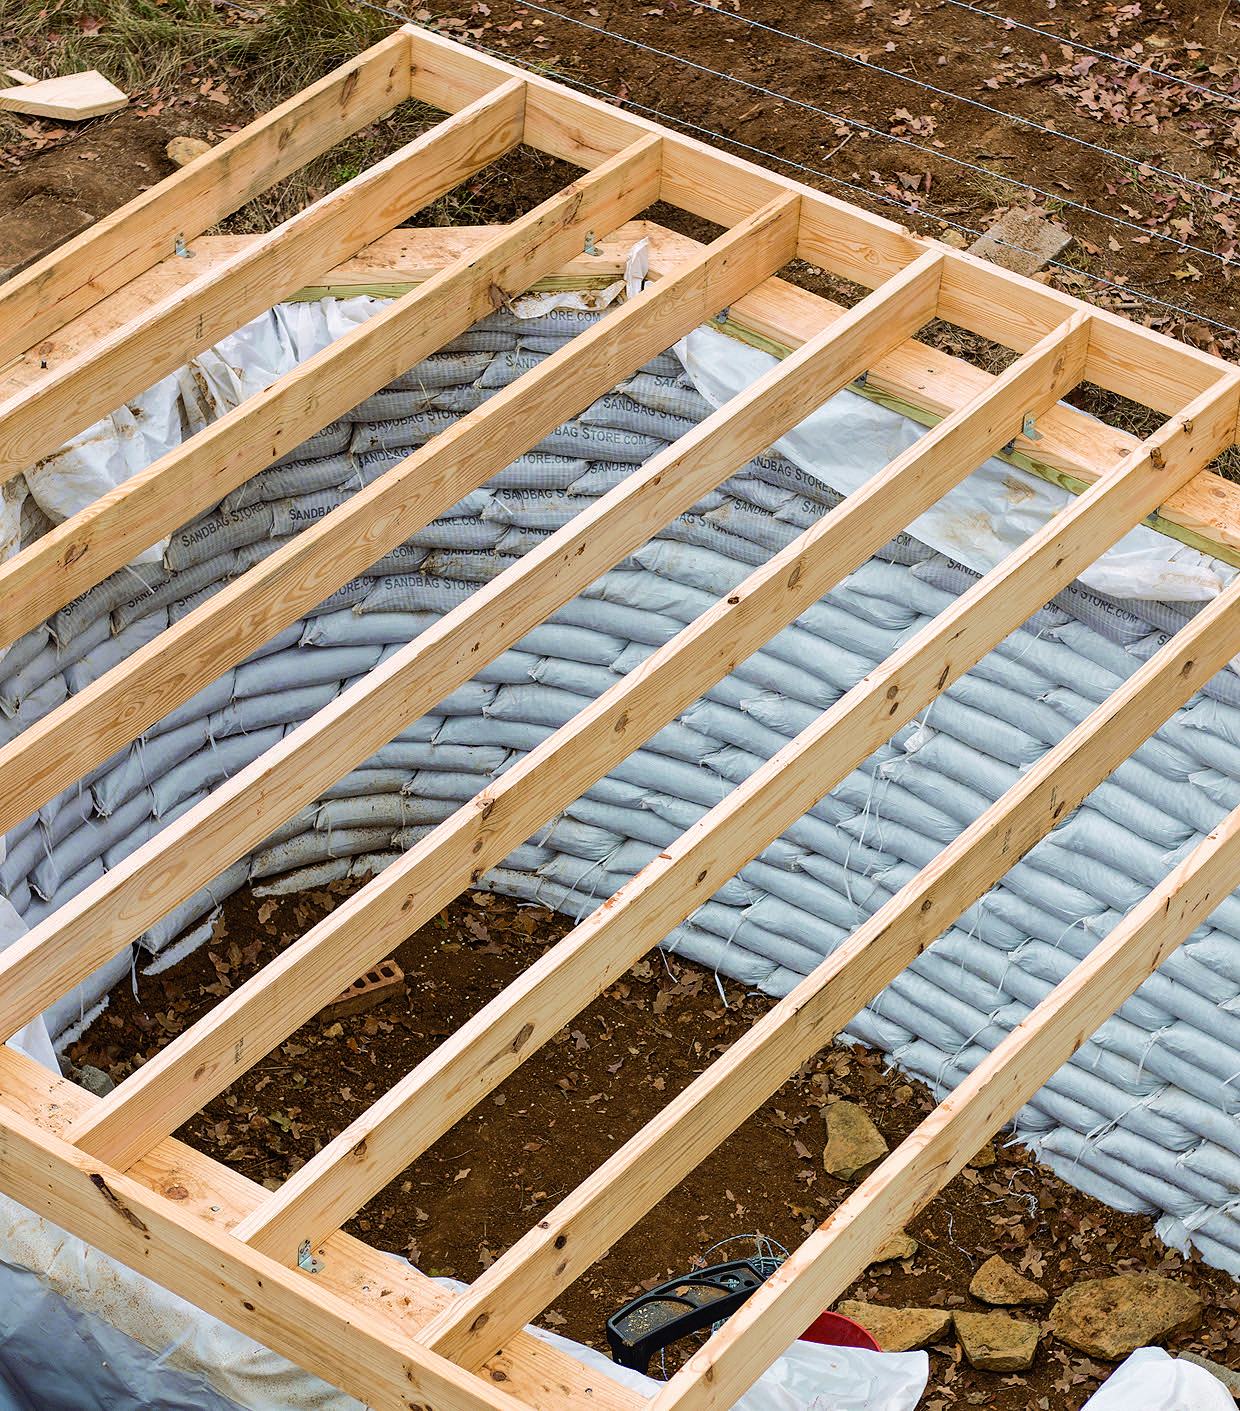
Once the walls are finished, you need to tie everything together at the top. To do this, we created wooden bond beams.
We used 2 x 8 lumber laid flat across the tops of the earthbags, which attempted to cover a portion of each earthbag. We screwed all these boards together with the drill and 3-inch deck screws in a roughly shaped octagon.
Then we put on a second layer of 2 x 8 lumber over top to cover the seams in the first layer.
Screwing the second layer down to the first layer gives you a very strong continuous “beam.”
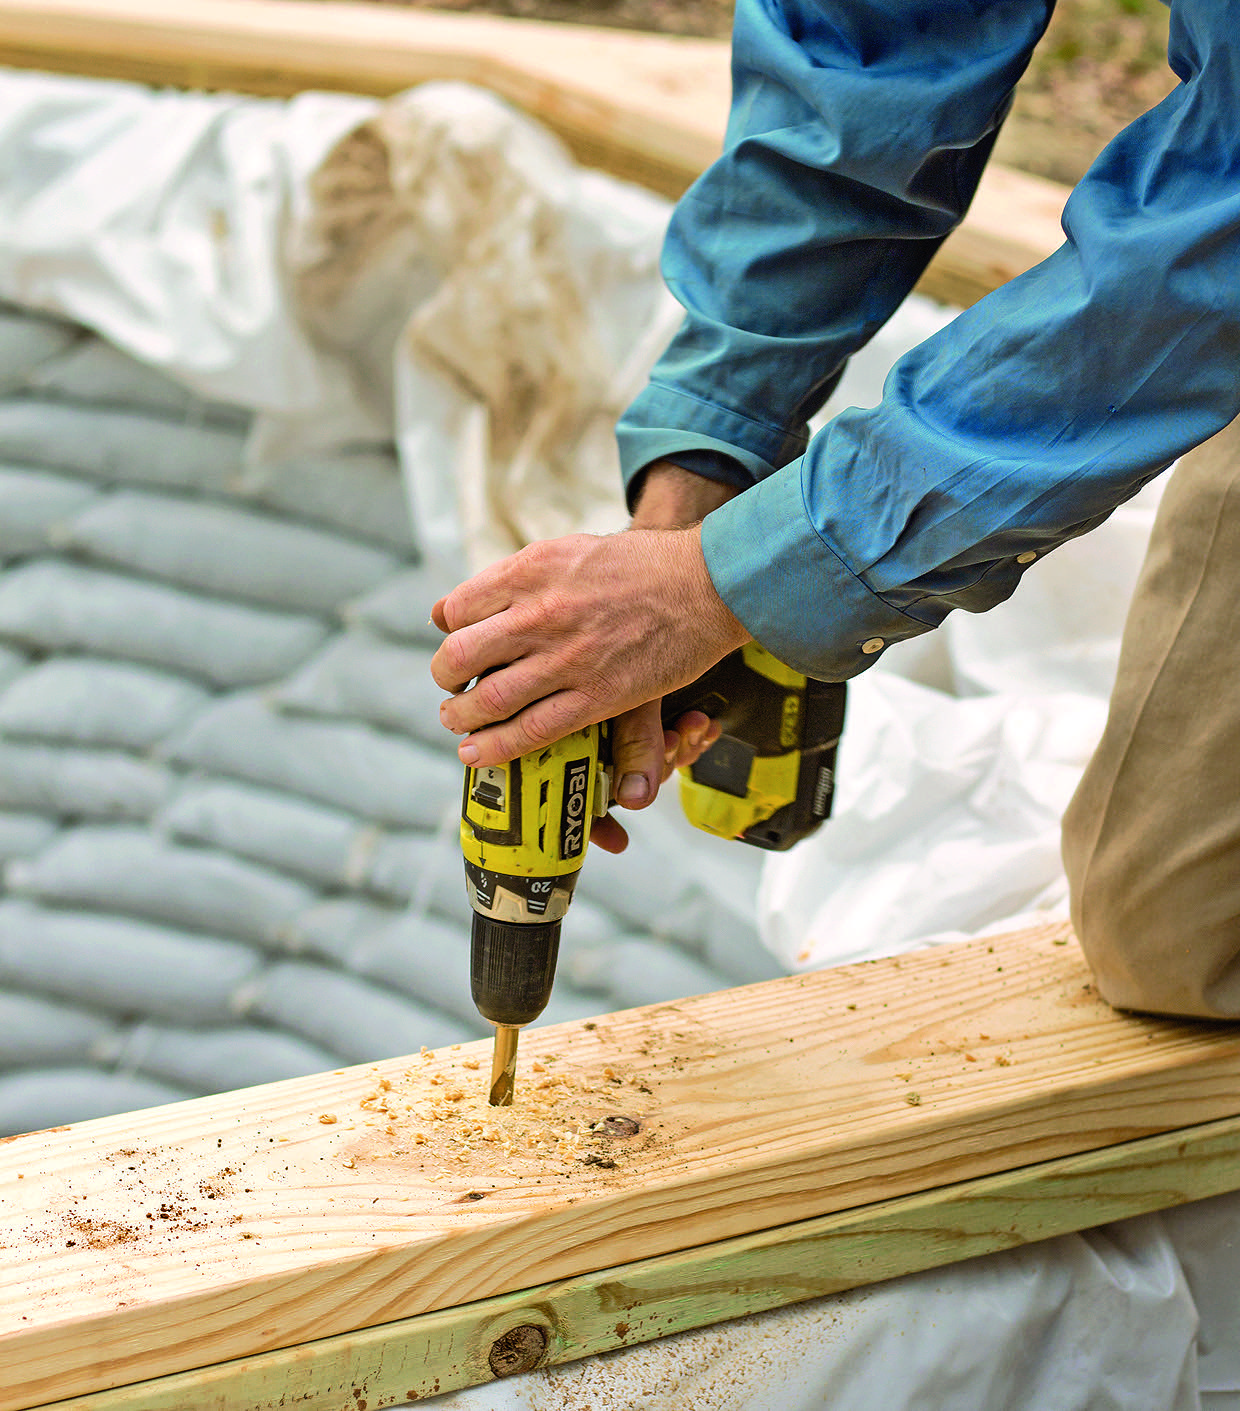
Finally, we drilled holes down through the 2 x 8 boards into the earthbags. Then we pounded rebar down through the holes into the earthbags. At this point the bond beam was firmly anchored to the wall.
Cap the cellar.
A popular way of keeping root cellar temperatures down is to create a small room with an overhanging roof on top of the root cellar. If this is your approach, your next step is to build a floor. If not, you are going to have to build a strong roof to cap the cellar.
In any case, you need to cover the bags with the roof or stucco to protect them from the elements. You can pin chicken wire to the earthbags to help the stucco adhere to the walls.
Off-Grid Skills Tutorials
Looking for more resources for your off grid lifestyle?
- Off Grid Appliances
- Maintaining Off Grid Systems in Winter
- Pedal Powered Washing Machine for Off Grid Laundry
- 10 Luxuries We Have Off Grid (That Most Suburban Homes Don’t)
- Raising Goats Off the Grid


Very interested inyour experiences . I am in Australia and have 1400 acres of natural bushland.
Nice work. Just a tip, use an angle grinder to cut the rebar. A metal cutting disc lasts a long time and does a great job at cutting rebar.
Thank you!
This root cellar looks amazing – thanks for sharing:
1. What are your highest temperatures as I need something that will keep things cool in temperature between 40-45 degrees celsius?
2. Any issues with pests in the root cellar?
3. Anything you would change in the design of your sandbag root cellar?
Thanks.
This post is a book excerpt, not my root cellar, but I personally haven’t had pest issues in my root cellar. This design should keep things cool enough to keep, but that may depend on how well you get it buried and roofed.
I feel like the instructions finished way too early, how do you access this cellar? Do you line the walls with anything? What do you mean by you’re going to need a floor in some situations? I’m also not clear on the roof v stucco options. are these answerable or is it designed as a pitch to sell the book?
This plan was not ours and was taken from the book. This method of building the root cellar allows you the option of how to finish off the top based on your personal needs, preferences and resources. The reference for the floor is based on the choice to build a small room over the cellar. If you choose this option then you would finish off the top of the cellar with what will be the floor of the room. If you don’t want to build a room then there is no need for a floor and you can simply put a roof over top of the cellar. It’s not designed as a pitch to sell the book but we do have to respect publishing rights and can’t simply reprint all of the information that is in a book. This post is meant to be a starting point to provide some direction and inspiration that you can then use to create your own design based on your individual needs.
What is the average temperature of the cellar?
Ideally they should be between 32 and 40 degrees. Some run closer to 50 degrees.
I get a lot of rain in my area (60+ inches per year). Will this building method keep water from coming in the side? I can build a waterproof roof, but I can’t afford to have water coming through the walls. Thank you for your time.
If you live in an area with a high water table, this just isn’t going to work. This one pictured was built in Texas, with little rain and not a lot of ground water. It does have plastic sheeting to keep water from coming in the sides, but it’s not going to cut it if you have a lot of rain.
Thank you for your reply.
I rarely find something so simplistic but helpful as your sand bag celler. Thank you and I’d like to keep in touch to learn more ideas and share my my process as I build this amazing idea.
You’re quite welcome!
Would love to see what your finished project looks like! What are the next steps after creating the roofing frame?? It would be nice to see some more details about the finishing steps, thanks! 🙂
How is the finished floor/roof done in this one? Also, hubby said he uses circular saw to cut rebar and it doesn’t ruin the blade and cuts pretty fast. Why type of material are they finishing out the platform on top? Metal also where is the opening to get into cellar?
There are lots of ways to go about finishing the top of the root cellar. You can build a small room above it with an overhanging roof or you can cap it by building a strong roof.
It cannot be used in regions with high level of ground water..
I want to see photos of the finished roof and cellar!
The photos from this post were actually taken from the book which you can find here. https://www.amazon.com/Doable-Off-Grid-Homestead-Cultivating-Simple/dp/1624145388?crid=KHT80M34TY0L&keywords=The+Doable+Off-Grid+Homestead&qid=1666623494&qu=eyJxc2MiOiIwLjgzIiwicXNhIjoiMC41NSIsInFzcCI6IjAuNTIifQ%3D%3D&sprefix=the+doable+off-grid+homestead,aps,257&sr=8-1&linkCode=sl1&tag=selfrelianc0e-20&linkId=3859dd6ac3bf134ea969f037649bdb6e&language=en_US&ref_=as_li_ss_tl
This is a neat idea. We recently sold our homestead which had an amazing root cellar that we built underneath our shed. At our new place, there is no root cellar so it’s on the near future to-do list.
One of the books listed in this post would definitely be helpful for you.