Affiliate disclosure: This post may contain affiliate links. Please see our Privacy Policy.
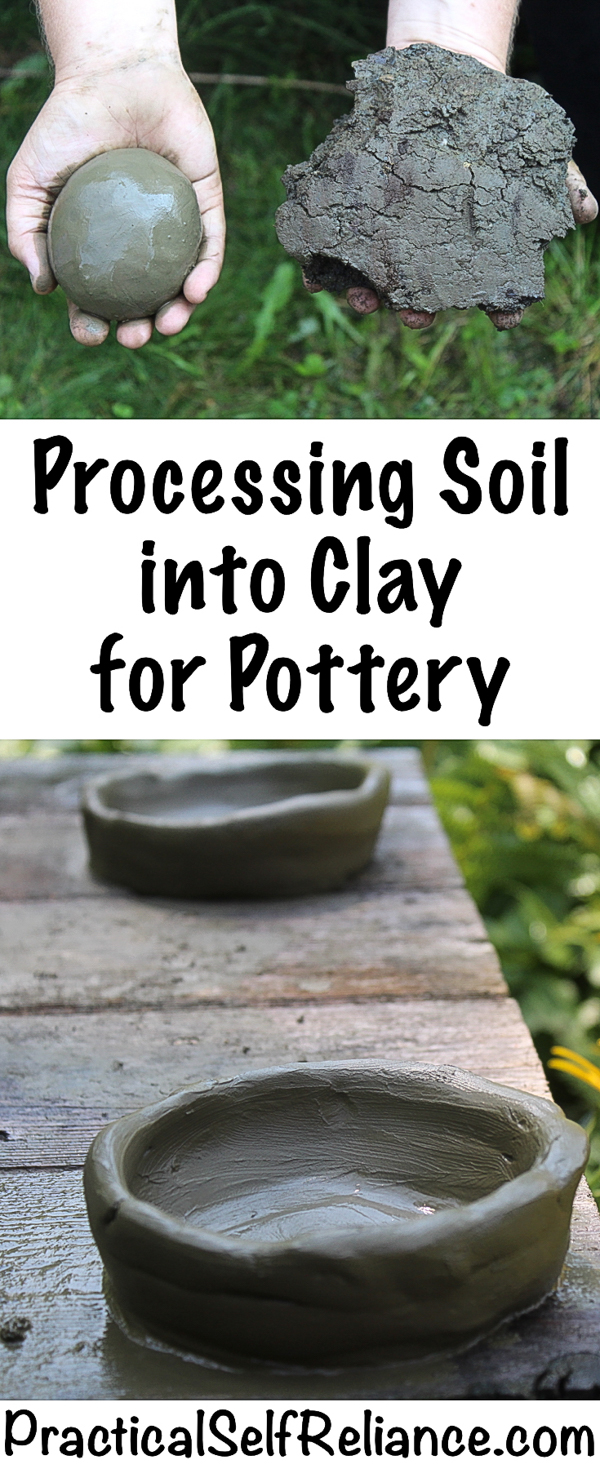
How did primitive potters harvest clay? People have been making pottery for millennia, and convenient hobby shops have only been a thing for a few decades at best.
Before that, people harvested their own clay right from the soil.

Clay is present just about everywhere, and even soils described as “sandy loam” can contain as much as 20% clay. To the naked eye, it may look like sandy soil, but with a 20% clay content, every 10 pounds of soil is hiding 2 pounds of clay ready for harvest.
With a little effort, you can harvest your own clay for craft projects or even something as advanced as a backyard bread oven.
Though most soil has some clay content, the yield will obviously be higher if you find high clay soils. Look for areas where the water tends to sit after a heavy rain.
Our soils are very shallow, and there’s usually somewhere between 8 and 18 inches of topsoil before a layer of dense clay. We’ve been working to slow the water runoff from our land, and the clay harvest happens more or less by accident while in the process of digging small slowing ponds.
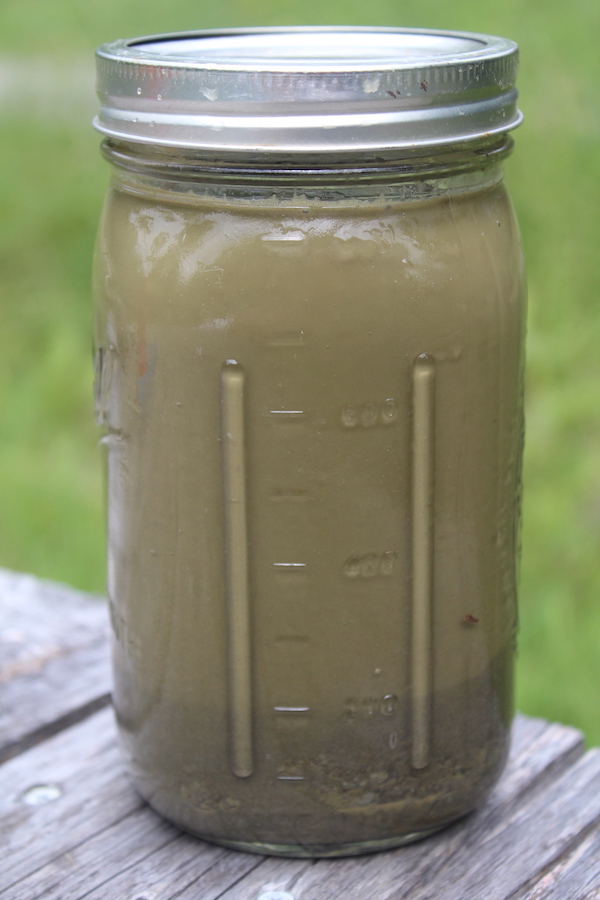
If you’re curious how much clay your soil contains, try doing a test jar. Fill the jar about halfway with soil, add water and stir to completely break up soil particles. After a few minutes, any sand and silt will settle to the bottom. Anything that’s still left suspended in the water is the clay content.
This jar started at half full, and it’s now 1/4 full with silt, sand, and rock. I’d estimate that my soil sample is roughly 50% clay.
There are two traditional methods for harvesting clay: dry and wet.
Dry Clay Harvest Method
The dry method involves completely drying out the soil, sifting it repeatedly and pounding the clay globs until it’s completely uniform and flour-like. This sifting is followed by a few rounds of winnowing the clay onto a collection surface.
The dried clay powder is then rehydrated and kneaded into workable potting clay.
This method is a great option in water-limited areas, but it requires a lot of time and energy. If you have baking hot sun and very little rain, it’s practical to completely dry earth.
None the less, the process of sifting, pounding and winnowing will take hours for just a few pounds of clay.
Wet Clay Harvest Method
The wet harvest method involves adding both water and soil to a bucket. The soil is then stirred into the water, and allowed to sit for a brief period to allow the rock, sand, and silt to settle out. The clay stays suspended in the water for longer.
The clay and water mixture is then filtered through a fine cloth or sheet. What’s left is a ball of smooth clay.
The wet harvest method is much more efficient and allows gravity to do most of the work. If you have access to plenty of water this is the way to go.
Up here in Vermont, we’re never short on water, and it’d be hard to find enough hot rain-free days in a row to completely dry the soil out for the dry extraction method anyway.
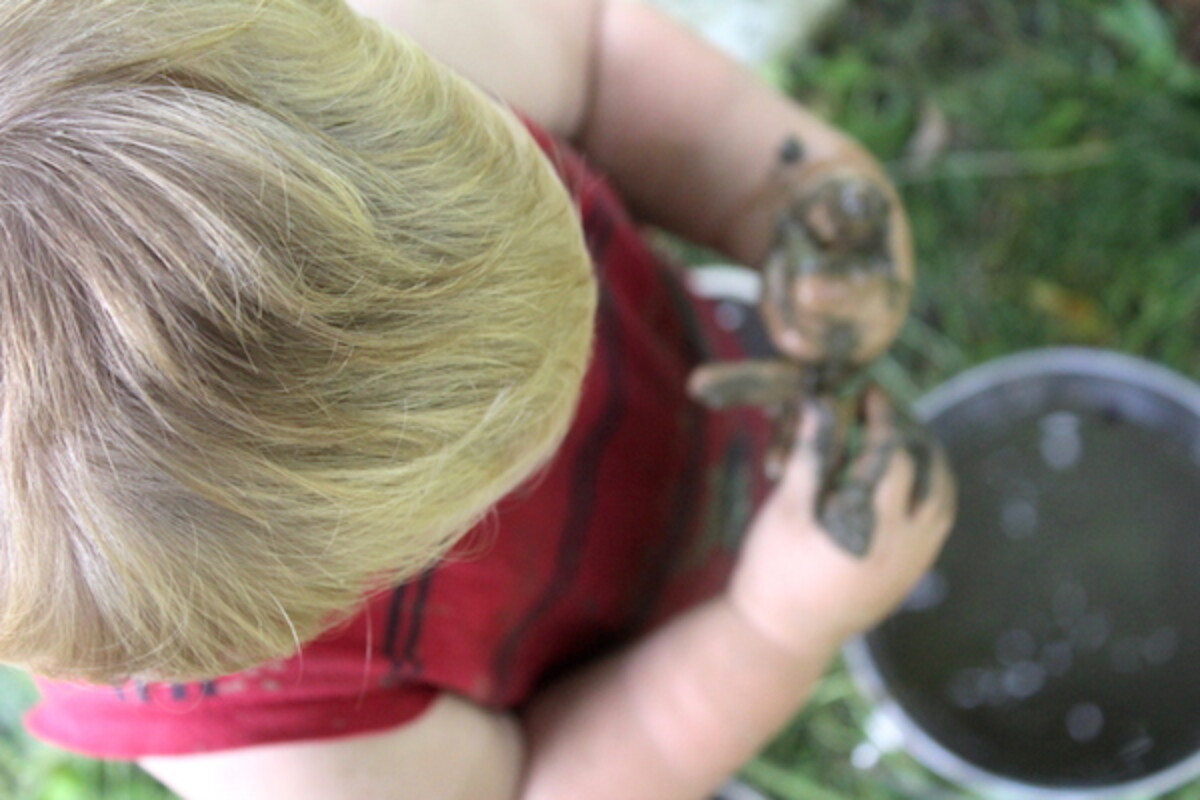
The wet extraction method is also a lot more fun, and allows kids to join in on clay processing. My 18-month-old was a huge help loading soil into the bucket and stir it up, and I couldn’t have asked for a more enthusiastic helper.
Processing Clay for Pottery
To use the wet extraction method, start by filling a bucket about 1/3 of the way with soil. Add water and use your hands to break up the soil particles as finely as you can get them.
Allow the soil to hydrate for a few minutes, or preferably a few hours. Then use your hands to break up the soil pieces again.
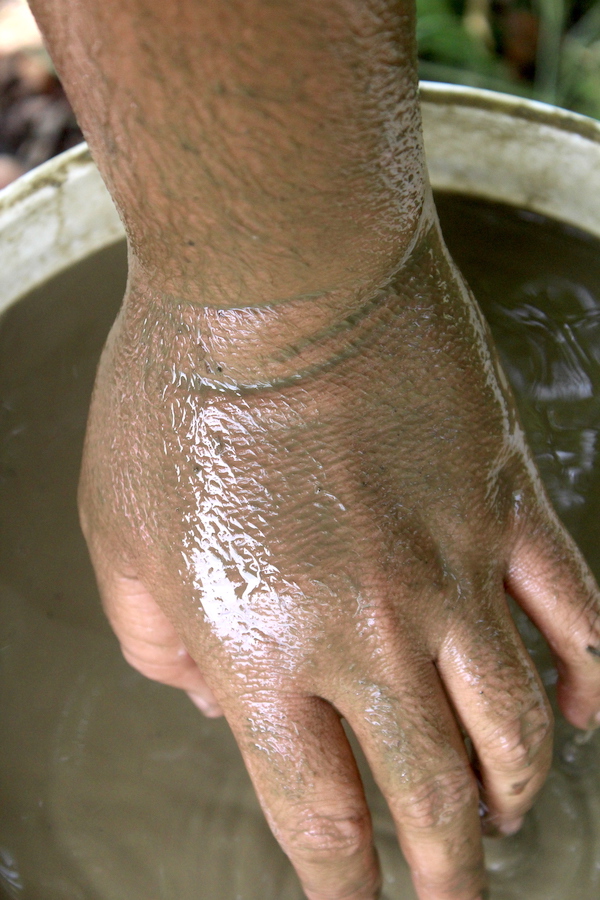
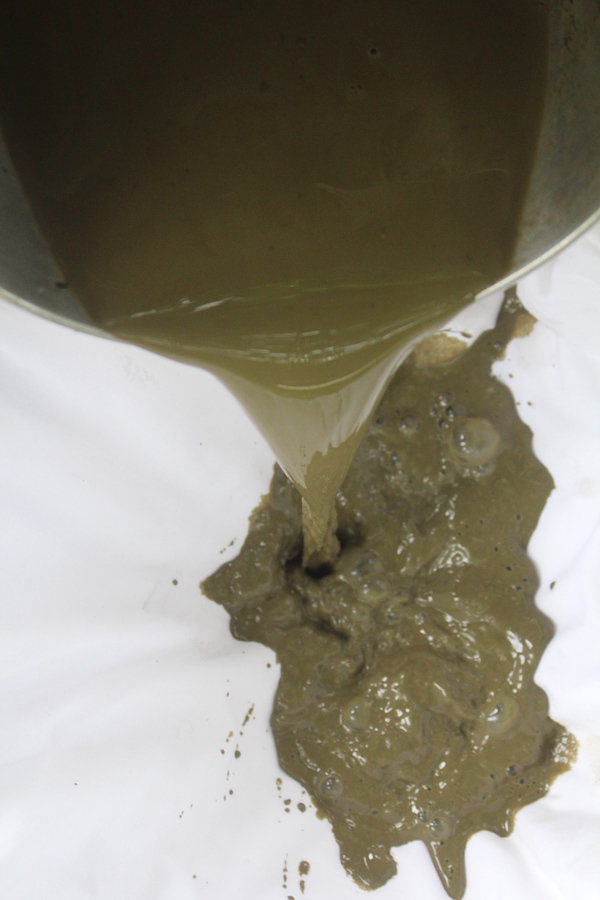
Give the whole bucket a good stir. A shovel works well for this, or a boat oar, or just an arm.
Our soil has so much clay suspended in the water that an arm in the bucket comes out completely covered in the clay slurry.
Once the soil is fully suspended in the water, give the bucket a few minutes to settle. The rocks fell out of suspension almost immediately, followed by the sand.
The silt will take 2-5 minutes to settle down, leaving only the smallest clay particles suspended in the water.
While you’re waiting, get a sheet ready inside a bucket or colander. Anything with a fine weave will do, I’m using an old bedsheet.
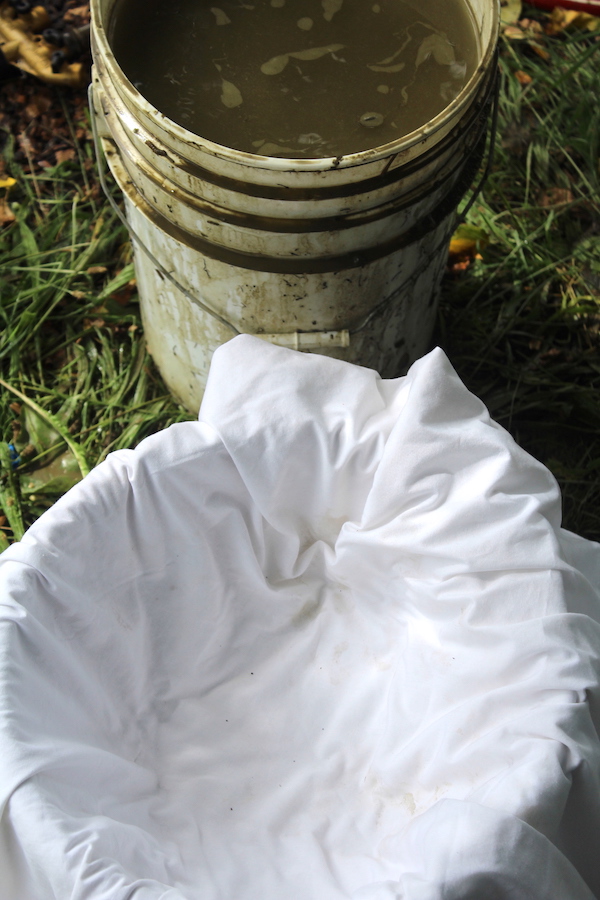
The sheet has a relatively loose weave, so I’ve folded it into quarters.
The water moved through the sheet quite slowly, and I think next time I’ll just double it instead so I don’t have to wait 24 hours for the water to completely drain.
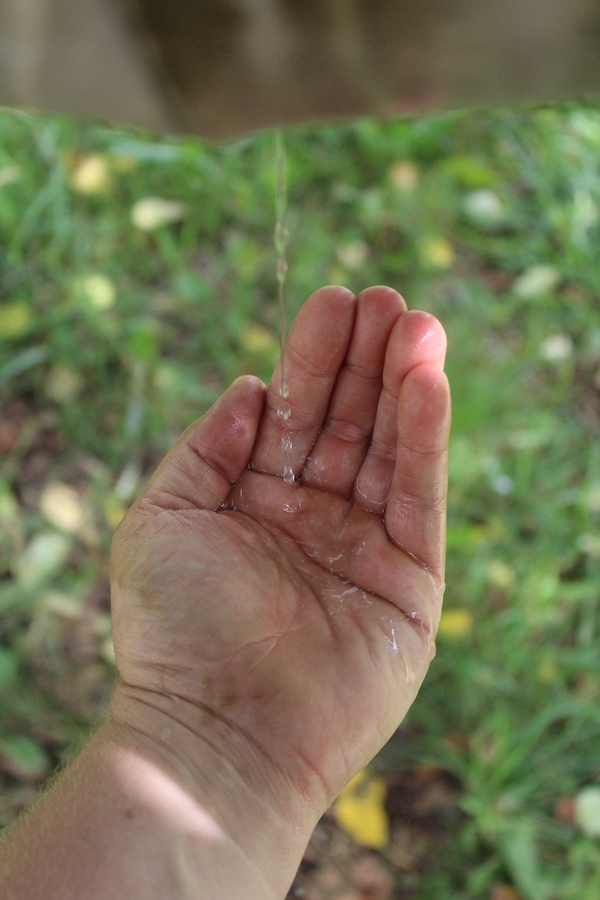
I’ve read in rural Bangladesh, women who filter water through 7 layers of sari cloth actually filter out cholera. With 4 layers of bed sheet, I was able to filter a clay slurry to completely clear water.
I wouldn’t imagine that I removed bacteria, but it’s good to know that I can take scummy water and make it clear enough to boil for fresh drinking water.
My daughter has been drinking from our pond all summer using a life straw, mostly for novelty value. She gets a kick out of being able to drink right from the pond, but filtering the water to remove dirt first seems like a much more sustainable long-term solution for water.
With 4 layers of bed sheet, it took about 24 hours for the water to completely drain. As I said, 4 layers is definitely overkill.
Next time I’ll cut this sheet in half and make two clay extractors, each with two layers of a bedsheet.
To speed up the process, I gathered the corners of the sheet and hung it from a tree.
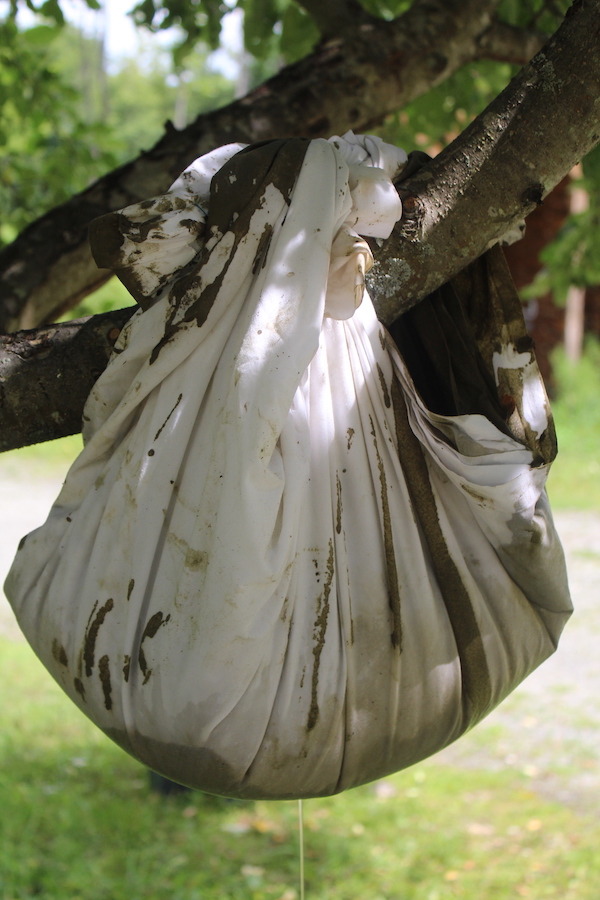
In the end, the top inch of clay was still pretty wet and slimy.
After 24 hours, I pulled all the clay out of the sheet, kneaded it together and let it dry in the sun for a few hours. At that point, the texture was just right.
Since it’s not commercial clay, it’ll take a bit of effort to learn how to fire it correctly. The right firing temperature may be hard to achieve, but our next step is to make a primitive kiln in the backyard.
I’m really inspired by the maker of the primitive technology videos on youtube, and he has a beautiful homemade rocket stove kiln. Temperatures in that won’t be exact either way, so it’ll be a learning curve regardless of the type of clay used.
I’ve read that inconsistencies in homemade clay can make it liable to crack during firing and that some potters actually mix in stones to their pottery vessels to help stabilize them. Soon enough I’ll find out when we go to make primitive pottery.
I can pull an unlimited amount of clay out of our soil without much trouble, so even if it takes a while to get the pottery process down it doesn’t much matter. It’s all part of the journey.
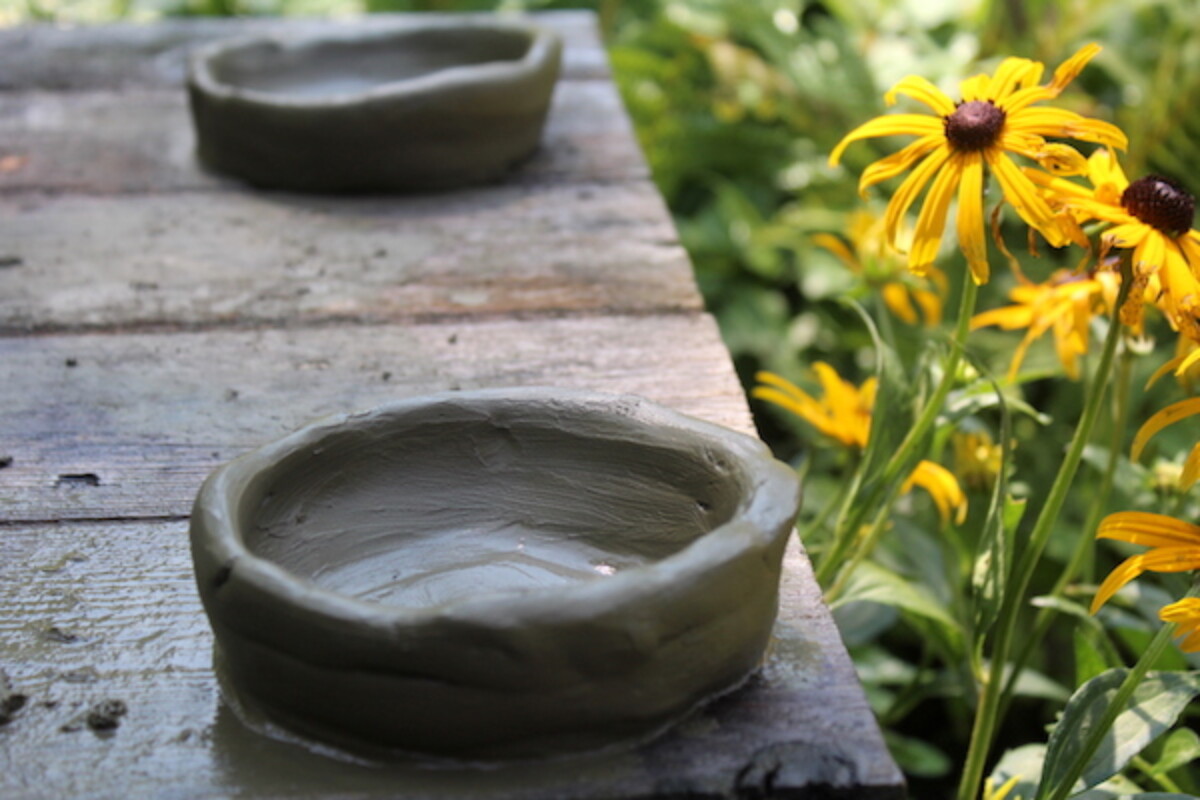
We worked our first lumps of clay into very primitive bowls, and thus far I’ve found that it’s much easier to make clay than it is to make attractive pottery.
It’ll take a lot more practice to make something worth firing, but in the meantime, we’ll try firing these practice bowls to refine our technique.
Overall, the process was almost effortless. Though I haven’t tried the dry method, there’s no way it could be this easy.
By description, it’s pretty grueling and it seems like you’d be inhaling a lot of clay dust in the process.
I’ll stick with the wet method and mud splashing with the kids.


How do you get the clay to harden after you’ve made it ? Does it air dry or do I need to heat it? And if I do need to heat it, how?
Air dry won’t give you “pottery” as it needs to be heated in a kiln to set. There are a lot of options, some even in an open campfire, just do a bit of research on firing homemade clay good and pottery. Good luck!
https://m.youtube.com/watch?v=o2dgqHuy03A
Andy does a great job of explaining how to low fire pottery above ground with out a kiln. Just an open fire.
Hello! I followed this tutorial, but I didn’t have a fine woven sheet or something, so I took a bunch of some old stretchy pants and a very thin shirt and layered those. When the water started coming through it wasn’t that clear, but it wasn’t that dark either! I found that after leaving it overnight that it was clogged so I took it and layered the still kind-of wattery mush thick onto a plastic placemat and let it sit for the day. After the day went by, I then went to look at it and it was a clay-like consistency!, but only in the areas that it was thick and not so thin, the thin parts (mainly toward the edges) were already dry and it cracked like a chip. But the other parts were fine so I put it into a plastic bag, it actually feels like clay you buy at the store! So cool!! Thanks for making the tutorial, others were not as good as this one. 🙂
You’re very welcome. So glad you enjoyed it.
I just stumbled onto this blog it’s wonderful thank you so much. Your kids are lucky!!
I am a terracotta sculptor and I find the best way to strengthen Clay is by adding powdered shard of broken pottery. Ofcourse you still need to fire it and that as you rightly said is a trial and error method
. I wish you every success- with lots of love from Indis
To add to Evan’s comments freshwater mussle were used as tempering agents.
As an archaeologist, let me just say that I have never, nor do I know anyone who has ever, found pottery fragments that are pure clay. There is always some other tempering material involved, to do exactly what you are worried about: preventing cracking. Sand, ground rock, ground failed pottery all go into the mix. And yes, it’s a trial and error method of determining what works best. This is an awesome blog post, thank you!
Thank you so much!
I understand this comment is very old, but I have recently dug clay directly from my garden. I didn’t follow the methods in this post and simply sifted it through old flyscreen. I did not add any form of temper to it, and it has fired to 1000 degrees without cracking or exploding. Wondering if you could shed some light on this..?
I think the issues may come in when it is heated again at a later time, not necessarily during the initial firing. This is especially important for items that will be used as cooking vessels, pipes, etc.
Same here, I dig my clay from the rock and roots then filter it with a screen. I haven’t fired anything yet but I’m curious how well it will fire
I am having trouble separating the sand from my clay soil
Ho can we use Dry pond mud to make this clay to make clay sculptures?
Likely, give it a try!
Lisa, Choctaw Nation of Oklahoma, back here again to say that “I did it!”. I noticed that the soil near my apartment looked very cay-like and did indeed hold water puddles after a hard rain so I mustered up the courage to swipe a few scoops and sure enough it worked! I hung up my muddy looking bed sheet ball just like yours outside on the balcony and the next day I had clay. It was still pretty wet so I stuck it in my compost bin and can’t wait to go try it out. Thank you. Perfect COVID-19 project!
Awesome! I’m so glad it worked for you, Lisa!
Hi, my son has been doing this too, after being inspired by a YouTube video. We are doing the wet method and using 2 buckets, repeatedly poured tbe mixture through a fine sieve to remove stones & sand. Word of warning, ours ended up with gnat larvae in the water (partly due to leaving the mixture to settle for several days). Haven’t got to the final stage yet though!
Oh no, just a quick question.. what did the gnat larvae look like? And how did you know it was there? Asking because I don’t want this to happen to me haha!
How do you pour the water/clay through the sheets while leaving the rocks/sand/silt behind. I feel like I missed something. Lol looks like fun though!
Our soil contains pretty much clay. I was able to create stuff from the soil without any of these methods, built a small fire pit and everything went very well. Nothing even cracked. Now I want to try this wet method because sometimes i find small stones in the clay and this will definitelly be the better way to go!
Love, love, love this site! I just came across it searching for info on harvesting clay for a cob oven I plan to build. I am now living in the Caribbean, building a home and trying to incorporate as many live off the land elements as possible. some things are easier here, others more challenging, but your site is a great inspiration and this article is exctly what I was looking for in perfect detail. Thank you!
You’re welcome! I’m so glad you’re here. Enjoy your Caribbean home!
I just read your article. So cool.
I live in Mississippi and our soil here on our land it’s extremely sandy. But ive noticed a washed out area that is completely gray clay. Can this be used for pottery?
It’s possible, one way to find out =)
😂 so true. Im going to collect some and see how it does.
I know my neighbor had a clay mine? Where they used it for clay masks? Maybe.? Anyway it was something to do with beauty products. Lol
Looks like a great activity. Kids love to mess in the mud, and they love to be helpful. I am an art educator and a ceramic artist. Our own children certainly benefited from similar activities and are living very creative lives today. I have several articles about working with kids to foster their creativity. These two URLs are articles with more ideas on these topics.
https://www.goshen.edu/art/DeptPgs/rework.html
https://www.goshen.edu/art/ed/clay&kids.htm
Wonderful, thank you!
Looking for clay-rich soils is also important in cob construction…
Miss Ashley,
It’s been MANY years since I played with the mud.. but I recall somewhere in that past, someone saying to me that they used pulverized pieces of their cracked pottery as an added aggregate to their clay…I never knew why…perhaps you’ve explained that in this wonderful article, regarding cracking pottery…You are blessed, and so, we are. Thanks!
“The wet harvest method is much more efficient and allows gravity to do most of the work. If you have access to plenty of water this is the way to go.” <- If you're okay with 75%+ losses. You will end up with almost four to five times as much processing the same materials dry as you do wet.
if it is 10% the work, for 25% the product, I would call that a win.
I’m sure you could expend 500% the effort to get 75% of the product, and you are free to try that.
but for many of us, EASY is better even if the return is less.
You really shouldn’t use the word “primitive” in your description of the method and people who use it considering there are cultures, and yourself, that are now using it. Most, if not all, anthropologists agree that the word is derogatory and insinuates lesser intelligence or social complexity. It’s just a matter if respect for cultures other than your own. You don’t even need to include primitive in your sentences. You can say pre-industrial methods since it’s machines that process clay nowadays. Thanks!
Pretty sure the use of the word Primitive is on the mark.
Primitive
adjective
1.
relating to, denoting, or preserving the character of an early stage in the evolutionary or historical development of something.
Perception is not reality.
Exactly. The procedure, not any demographic, is referred to. The method being primitive and ancient often is what people love about it, too – connection to ancestral lifeways, self-sufficiency without machinery or corporate sources, natural materials with no chemical so-called purification. The intent & tone here are certainly not derogatory at all. Hand-forming is referred to as primitive by friends whose cultures get stereotyped and who are very much connected to their cultures, bc it does not imply less skillful at all, but rather more hands-on and not commercialized! It’s good to realize it might bother someone but I see no disrespect here, rather the opposite, an appreciation for gifts of the earth and primitive technology is still technology, and in fact imies wiser for lack of it being mostly done for us! It takes work & becomes a skill! It could be said that assuming primitive means lesser, is rude. Yes, all in the perspective.
People should get over being “offended” so much. They would be a lot happier just letting a lot of stuff go! Enjoyed and appreciate stumbling on this article very much. We just found a bunch of sandy clay, and didn’t know what I needed to do with it to get it ready for use. I am part Native American, and am eager to learn more of the PRIMITIVE ways of doing things. These may be very useful in a disaster situation.
-Fizzlecat
Get a life! You mentally unstable liberals want to criticize everyone and redefine the world. Primitive is a perfectly acceptable term for rustic plastic arts and you don’t know what you are talking about.
Just…no. Have you ever watched the show Primitive Technology? Maybe you should find someone who is the demographic you are “defending” and ask them. All of the people I know who do this type of work consider themselves primitive artisans. Maybe grow up and mind your own freaking business Karen?
Love this post! Our soil is more clay than anything else. I have to try this!