Affiliate disclosure: This post may contain affiliate links. Please see our Privacy Policy.
Pressure canning can be intimidating, especially for beginners, but it’s well worth it. Don’t limit yourself to water bath canning jams and pickles! Once you learn how to use a pressure canner properly, you’ll be able to safely can low acid foods like vegetables, soups, and meat.
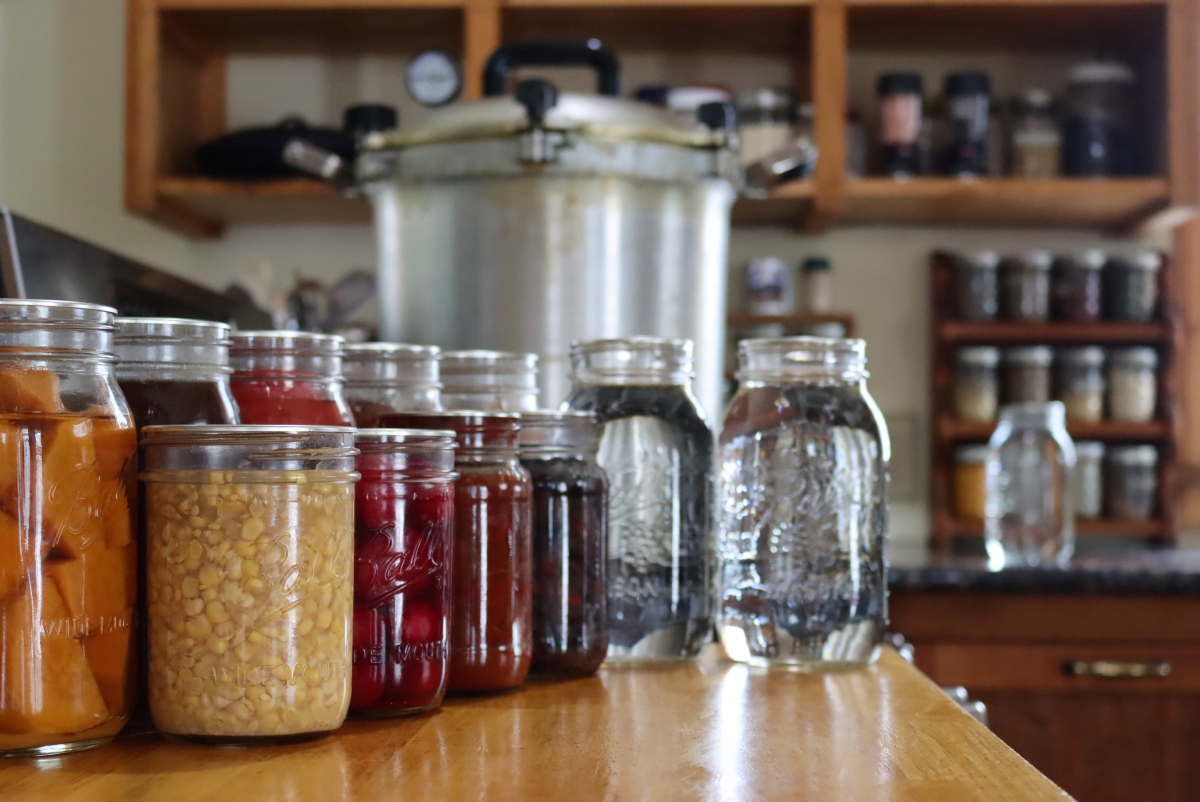
Table of Contents
- How Does Pressure Canning Work?
- What Foods Need to Be Pressure Canned
- Foods That Cannot Be Processed in a Pressure Canner
- Is Pressure Canning Really Necessary?
- Types of Pressure Canners
- Weighted Gauge Pressure Canner
- Dial Gauge Pressure Canner
- Choosing a Pressure Canner
- Pressure Canner vs. Pressure Cooker
- How to Use a Pressure Canner
- Pressure Canning Prep
- Preparing Food for Pressure Canning
- Pre-Heating the Pressure Canner
- Loading a Pressure Canner
- How to Seal a Pressure Canner
- Steam Venting a Pressure Canner
- Bringing Pressure Canner up to Pressure
- Processing Food in a Pressure Canner
- Unloading a Pressure Canner
- Pressure Canning Troubleshooting Guide
- Pressure Canning Recipes
Getting started with pressure canning can be intimidating. Even though I’d been water bath canning for years, I was still nervous when I ran my first pressure canner batch. Is this thing safe? Did I do it right? Am I going to blow up my kitchen?
Now that I’ve spent the last decade using my pressure canner at least a few times each month I’m glad I took the leap. Here’s what you need to know to get started pressure canning food at home.
How Does Pressure Canning Work?
A pressure canner uses pressure to create temperatures well above boiling to effectively heat process low acid foods like meat, vegetables, beans and soups. A boiling water bath canner is sufficient for canning jams, pickles and other high acid foods (pH under 4.6), but low acid foods can harbor more potent bacteria.
Most people remember from high school physics that water boils at 212 degrees F (100 degrees C), at least at sea level. At higher elevations, water boils at lower temperatures, dropping by 1 degree F for every 500 feet in elevation gain due to reduced pressure at higher altitudes. A pressure canner is just the opposite, creating higher boiling temperatures by increasing pressure.
Most foods are processed at 10 pounds pressure, which correlates to 240 degrees F at sea level. Higher altitudes need to use more pressure to get the same result.
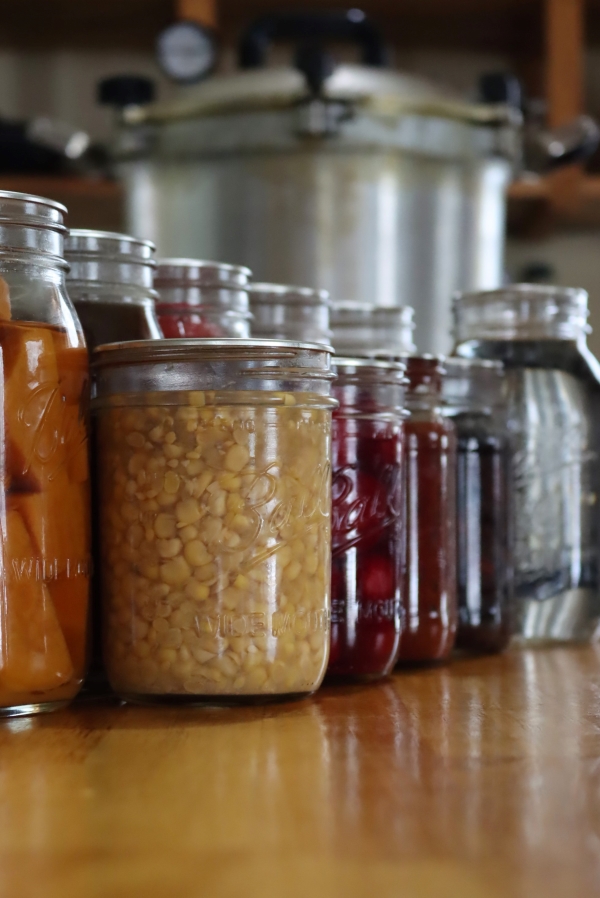
When low acid foods are processed and sealed appropriately in a pressure canner, they’re shelf stable and can be stored on the pantry shelf for extended periods.
What Foods Need to Be Pressure Canned
Not all foods need to be pressure canned. The higher sterilization temperatures inside a pressure canner are only necessary for low acid foods, like vegetables, soups and meats.
High acid fruits (pH under 4.6) like peaches and apples only need brief processing in a water bath canner. The same goes for pickles, which are acidified by the addition of vinegar.
Pressure canners are required for low acid foods, like meats, soups and vegetables. This includes:
- Meat of All Kinds ~ Beef, Chicken, Pork, etc.
- Stocks and Broths ~ Both Meat and Veggie
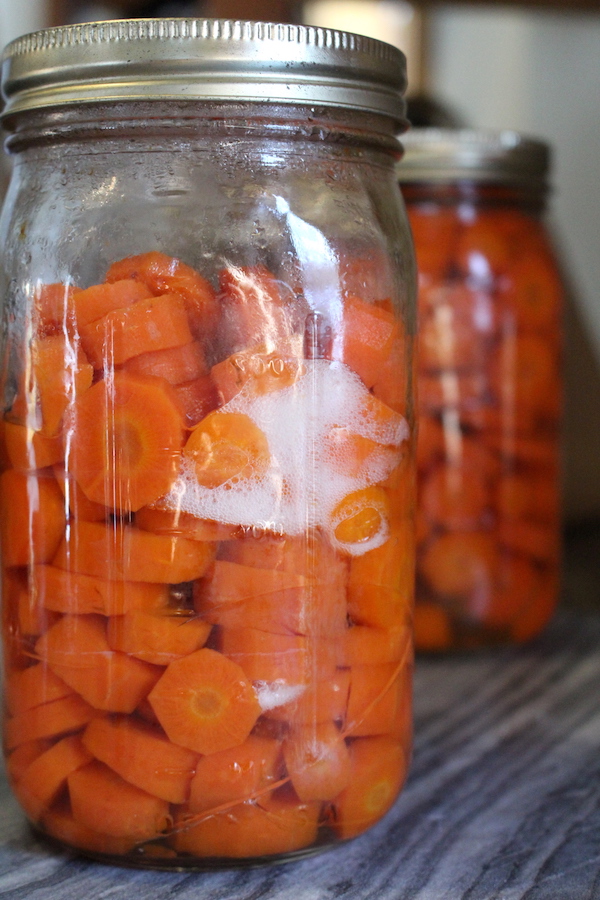
- Vegetables ~ Potatoes, Pumpkin, Green Beans, Etc.
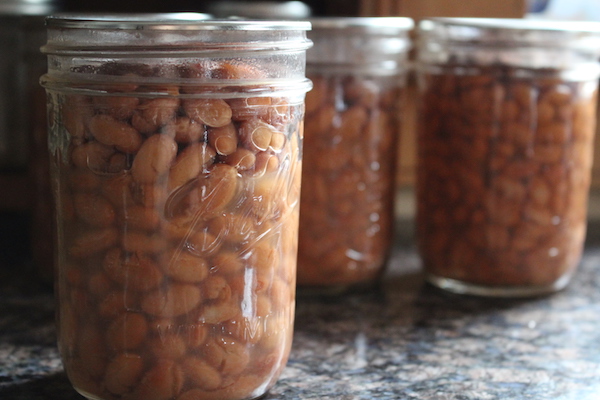
- Dry Beans ~ Black Beans, Pinto Beans, Navy Beans, etc.
- Chili and Baked Beans
- Soups and Stews
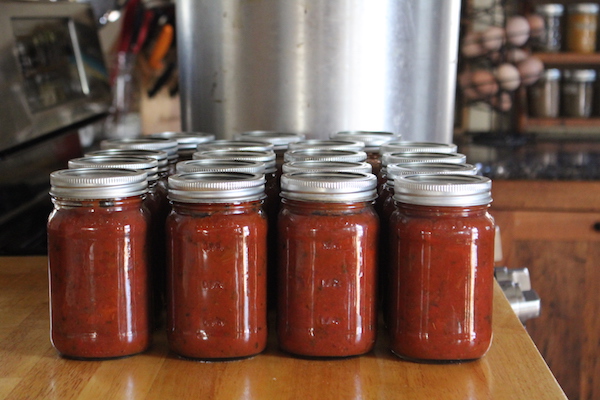
- Some Tomato Products, like pasta sauce with low acid ingredients such as mushrooms, onions and peppers included.
Foods That Cannot Be Processed in a Pressure Canner
Be aware that not everything is safe for canning, even in a pressure canner. These foods are not safe for home canning, regardless of the method:
- Milk, Cream, Butter and Other Dairy Products
- Coconut Milk
- Flour, Corn Starch, and most thickeners (Canning Clear Jel is the only Exception)
- Rice, Pasta and Other Starchy Foods
- Eggs, including pickled eggs
Beyond things that cannot be processed using any canning method, there are foods that simply don’t fare well at pressure canning temperatures.
Canning lemon curd is a good example. It is approved for water bath canning, using a very specific tested recipe that slowly brings the ingredients up to temperature. The fragile emulsion just won’t survive pressure canning, and should only be water bath canned.
Beyond that, I simply wouldn’t recommend trying to pressure can cucumber pickles, they’ll just turn to mush.
Is Pressure Canning Really Necessary?
Can’t I just water bath can everything? Why do I need to pressure can low acid foods?
If you look back at very old canning guides from the early 1900s, you won’t see any mention of a pressure canner. Things like meat and low acid vegetables were processed for extended times, often as long as 5 hours, in a simple water bath canner.
While that did help keep the food from “spoiling” in the jar, it didn’t eliminate the risk of botulism. Botulism spores can live through a boiling water bath canner, and then begin proliferating inside the sealed jars if the pH is above 4.6.
The high acidity (low pH) of fruits and pickles inhibits its growth, but it can grow readily in water bath canned meats and veggies.
So why didn’t grandma die of botulism after water bath canning her green beans? Three reasons…
- First, botulism had to be present in the first place. It’s spores are present in the soil and environment, but it’s really just a matter of chance if they’ll actually be inside the canning jar. If they’re not there, they can’t grow. The risk is highest with root veggies and other things in contact with the earth, but the spores can technically be anywhere. It’s like playing Russian roulette…the odds are low, but the consequences dire.
- Second, grandma knew that she’d need to boil low acid foods that she’d water bath canned for at least 10 minutes. Boiling won’t kill botulism spores during canning, but it does denature the botulism toxin if it was produced inside the canned food. So after she water bath canned those green beans for 3+ hours, she then took them out and boiled them on full heat on the stove for at least 10 minutes.
- Third, in grandma’s day canned goods were often kept in the cold cellar (rather than a room temperature pantry shelf), which basically acted as a refrigerator to help keep foods from spoiling. Sterilizing with a canner combined with a cold cellar worked together to prevent issues, thus reducing risks.
There are still people who choose to water bath can vegetables and meats, and they tend the canner for 3 to 5 hours in the process. They then know that the foods must be boiled at high heat for at least 10 minutes to reduce the risks.
To me, it’s just not worth the risk…pressure canning is really easy and much safer. You don’t have to worry about your kids (or house guests) taking green beans off the pantry shelf and not boiling them 10 minutes before serving them.
It also results in a much better quality product. Taking the foods to a high temperature (around 240 F in the canner) for a short period is actually much gentler than water bath canning them for many hours, then boiling them on the stove out of the jar.
What do you think is going to be left of those green beans after you’ve canned them for 3 hours, and then you pour them into a pot and boil them for another 10 minutes…
The answer is a slimy mess.
Please pressure can instead, it’s much more dependable, safer and honestly easy once you learn how. I actually choose to pressure can foods that can be water bath canned these days, because it’s quicker and heats up the kitchen much less. The results are the same, and sometimes better, than water bath canning.

Types of Pressure Canners
There are two main types of pressure canners, weighted gauge and dial gauge. They operate a bit differently, and most pressure canning recipes will actually provide two sets of instructions or process pressures, one for each type.
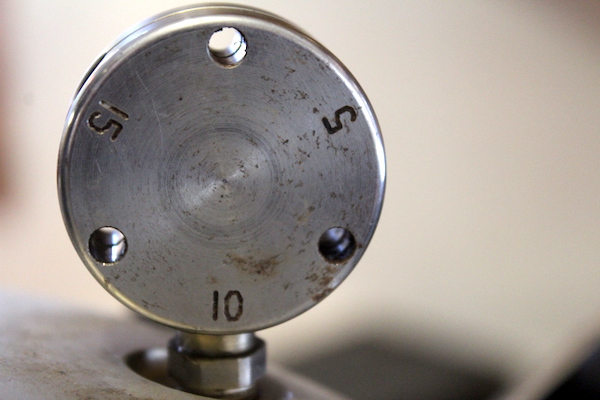
Weighted Gauge Pressure Canner
This type of pressure canner is “set” with a weight on the steam valve, usually to 5, 10 or 15 PSI. When the canner reaches that temperature the weight jiggles, and releases a small amount of steam. These are easier to manage, as they’re sell regulating for the most part.
Once up to temperature, you turn the heat down so that the weight jiggles about once per minute. This ensures that the canner is staying hot enough to properly process the food, but not blowing steam off constantly.
On my stove, that’s between low and medium heat.
They’re easy to use because you don’t have to babysit this type of canner (as much), and it’ll reliably maintain pressure without constant adjustments. The downside is that there’s only three possible settings, at 5, 10 or 15 PSI.
Most foods are processed at 10 PSI if you’re below 1000 feet in elevation. Above 1000 feet, your only option is to increase to 15 PSI to ensure safe temperatures are achieved.
With a dial gauge pressure canner, on the other hand, there’s more intermediate pressure options. At just above 1000 feet in elevation, you can move up to 12 PSI (instead of jumping to 15).
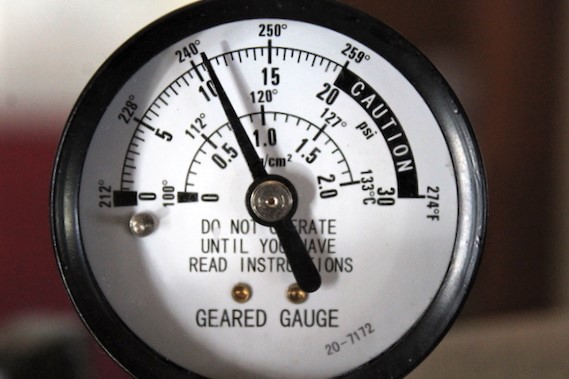
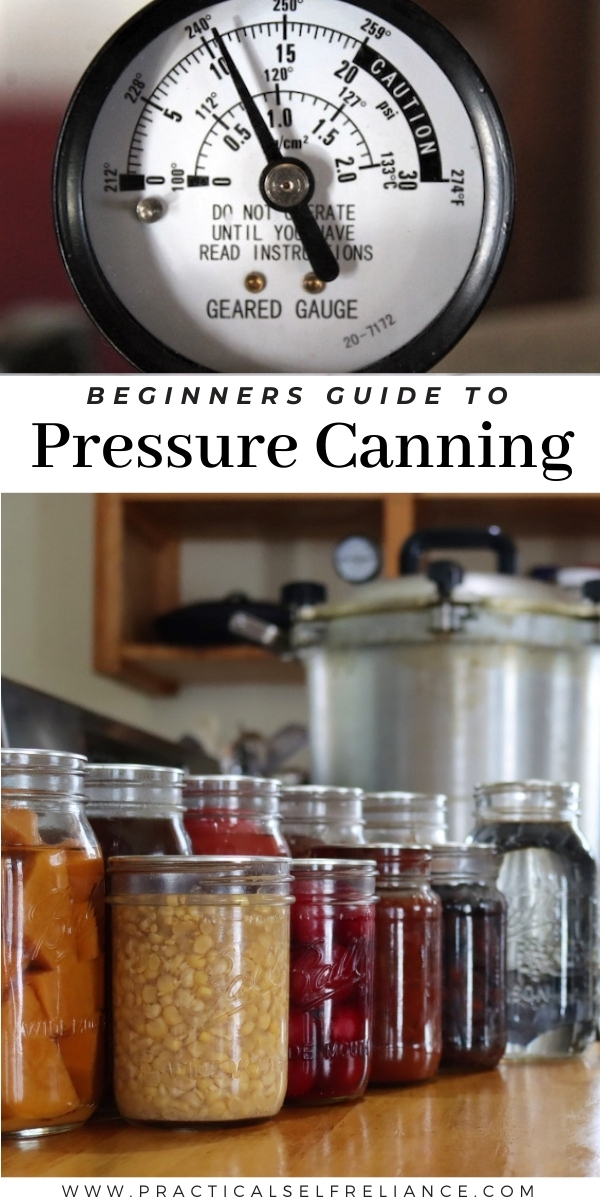
Dial Gauge Pressure Canner
A dial gauge canner means you’re watching the dial on top to regulate pressure. As the canner processes food, you’ll need to be there to adjust the heat to ensure that the canner always stays above your target pressure. That allows you to maintain an intermediate temperature (for example, 12 PSI), but it comes at the cost of your time and attention.
I’ve only used a dial gauge canner once, and I was canning pumpkin, which is processed for 90 minutes in quart jars (55 min in pints). After meticulously watching that gauge and adjusting the temperature every 2 minutes for an hour and a half I never wanted to pressure can again.
Sure, canning saves money, but an hour and a half of staring at a gauge isn’t worth the savings to me.
With a weighted gauge you pay attention to the canner by ear, listening to make sure it’s “jiggling” every minute or so. You can easily do other things with your hands, and make good use of your time.
(I’ll admit, this is my bias, and plenty of people absolutely love their dial gauge canners.)
Choosing a Pressure Canner
Beyond the type dial gauge or weighted gauge, there are other considerations like gaskets and size.
Gaskets or Gasket-less Pressure Canners ~ To create a seal, some canners use rubber gaskets that need to be replaced regularly. Gasket canners are usually much less expensive, but they’ll cost more over the life of the canner as gaskets wear out and need to be replaced. Others are precisely machined to create a metal on metal seal that works without a gasket. These are more expensive, but last for generations.
The two most common brands of home pressure canner are Presto and All American.
Presto pressure canners are relatively inexpensive models with a dial gauge and gaskets. They take more work to run (since you need to manage the pressure continuously) and will cost you a bit to upkeep (buying gaskets). That said, they’re dependable and an inexpensive way to get into pressure canning. Expect to spend somewhere between $100 and $200, depending on the model.
All-American Brand Pressure Canners are weighted gauge canners, that are run at set pressures (5, 10 and 15 PSI). They’re easier to run since they self regulate to some extent, and they have a metal on metal seal which means you’ll never have to buy gaskets. On average, they cost about twice as much as Presto canners, but they’ll last a century if cared for. Expect to spend somewhere between $250 and $500 depending on size.
That last thing to choose is size, and that depends on how you’ll use it. I chose an All American 30 Quart Pressure Canner, which can hold a batch of 19 pints or 14 quarts. It’s double decker, and two layers are stacked inside with a trivet between so I’m able to can big batches. Since fuel use, time and effort is the same whether you’re canning just a few jars or a full batch, I try to fill it whenever possible.
Honestly, when I bought it I thought it was overkill. It was $300 and a huge investment for me at the time, and now I wish I’d bought the bigger model. They last a lifetime, so I’d suggest you choose the biggest canner you ever imagine needing, you’ll appreciate your own forethought in a few years.
(That said, if you live alone and are only ever going to can a few jars at a time, then opt for a smaller canner and save yourself a good bit of money!)
Pressure Canner vs. Pressure Cooker
Know that a “pressure canner” is different than a “pressure cooker.” Although you can pressure cook foods in a pressure canner, not all pressure cookers will work for pressure canning.
Check your specific model to make sure it’s approved for pressure canning. You’ll need to be able to set and keep the canner at a specific pressure (PSI), not just “high” or “low.”
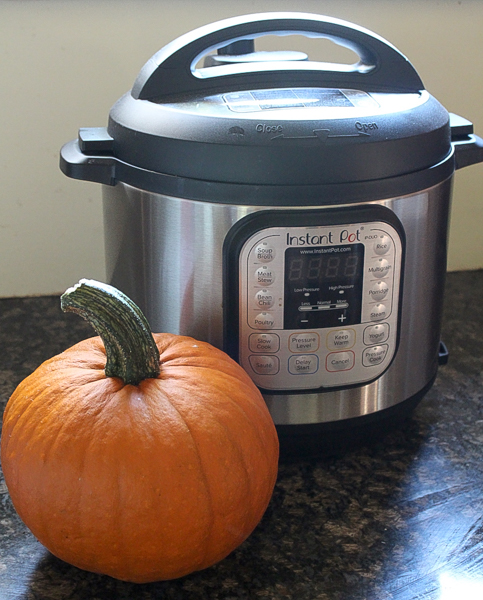
Countertop appliances like the Instant Pot cannot be used for pressure canning as they don’t maintain the even pressures required for safe pressure canning. Their “high” and “low” settings can vary considerably, and there’s no way to know what pressure they’re operating, meaning you can never actually set the canner to “10 psi” or “15 psi” as you can with a real pressure canner.
(You can, of course, water bath can in an instant pot, because all that’s required there is something that can boil water.)
How to Use a Pressure Canner
At this point, you understand why you’d use a pressure canner, and the differences between the most common types. But how on earth do you run one of these things?
The process is actually pretty simple, and once you’ve done it a couple of times you wont need to look at the instructions. At the beginning, I’d strongly recommend you read the manual on your canner, as they can vary slightly in instructions.
I’m going to walk you through how to use a weighted gauge pressure canner (All American Brand). If you have a dial gauge or a different brand, the instructions may vary slightly, but in general the basic process is going to be quite similar.
Pressure Canning Prep
Before you start your first batch, there are a few things you need to do to make sure the canner is in good working order.
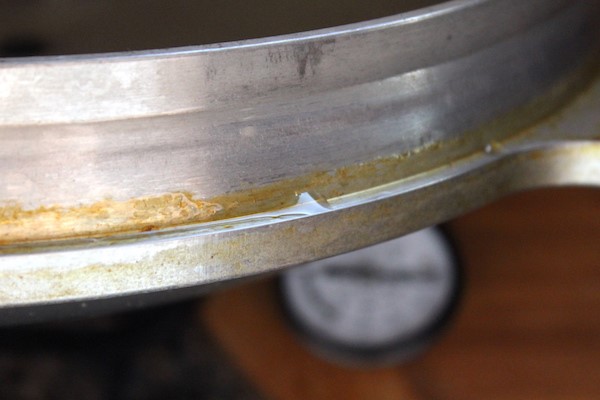
Check the seals and gaskets to make sure they look good. On a gasket-less canner, the metal on metal contact point is oiled with a tiny bit of olive oil periodically to ensure a good seal. Take a bit of olive oil on your finger and run it along the seal before you get started.
Locate all the parts! This includes the canner, canner lid, canning trivet (or trivets for double decker canners) and canning weight. This may seem silly, but if you load the canner and then start looking for the canning weight you’ll be sorry.
I accidentally lost it underneath the bottom trivet inside the canner once, and was pretty sad when my canner was hot and I couldn’t find it…
Preparing Food for Pressure Canning
This is going to be recipe specific. Some raw pack recipes simply have you load up the food into the jars, top with boiling water and load into the canner.
Others require that you blanch or pre-cook the food, usually to preserve texture or prevent the raw food from clumping together during the canning process.
Use a tested canning recipe and follow the instructions provided.
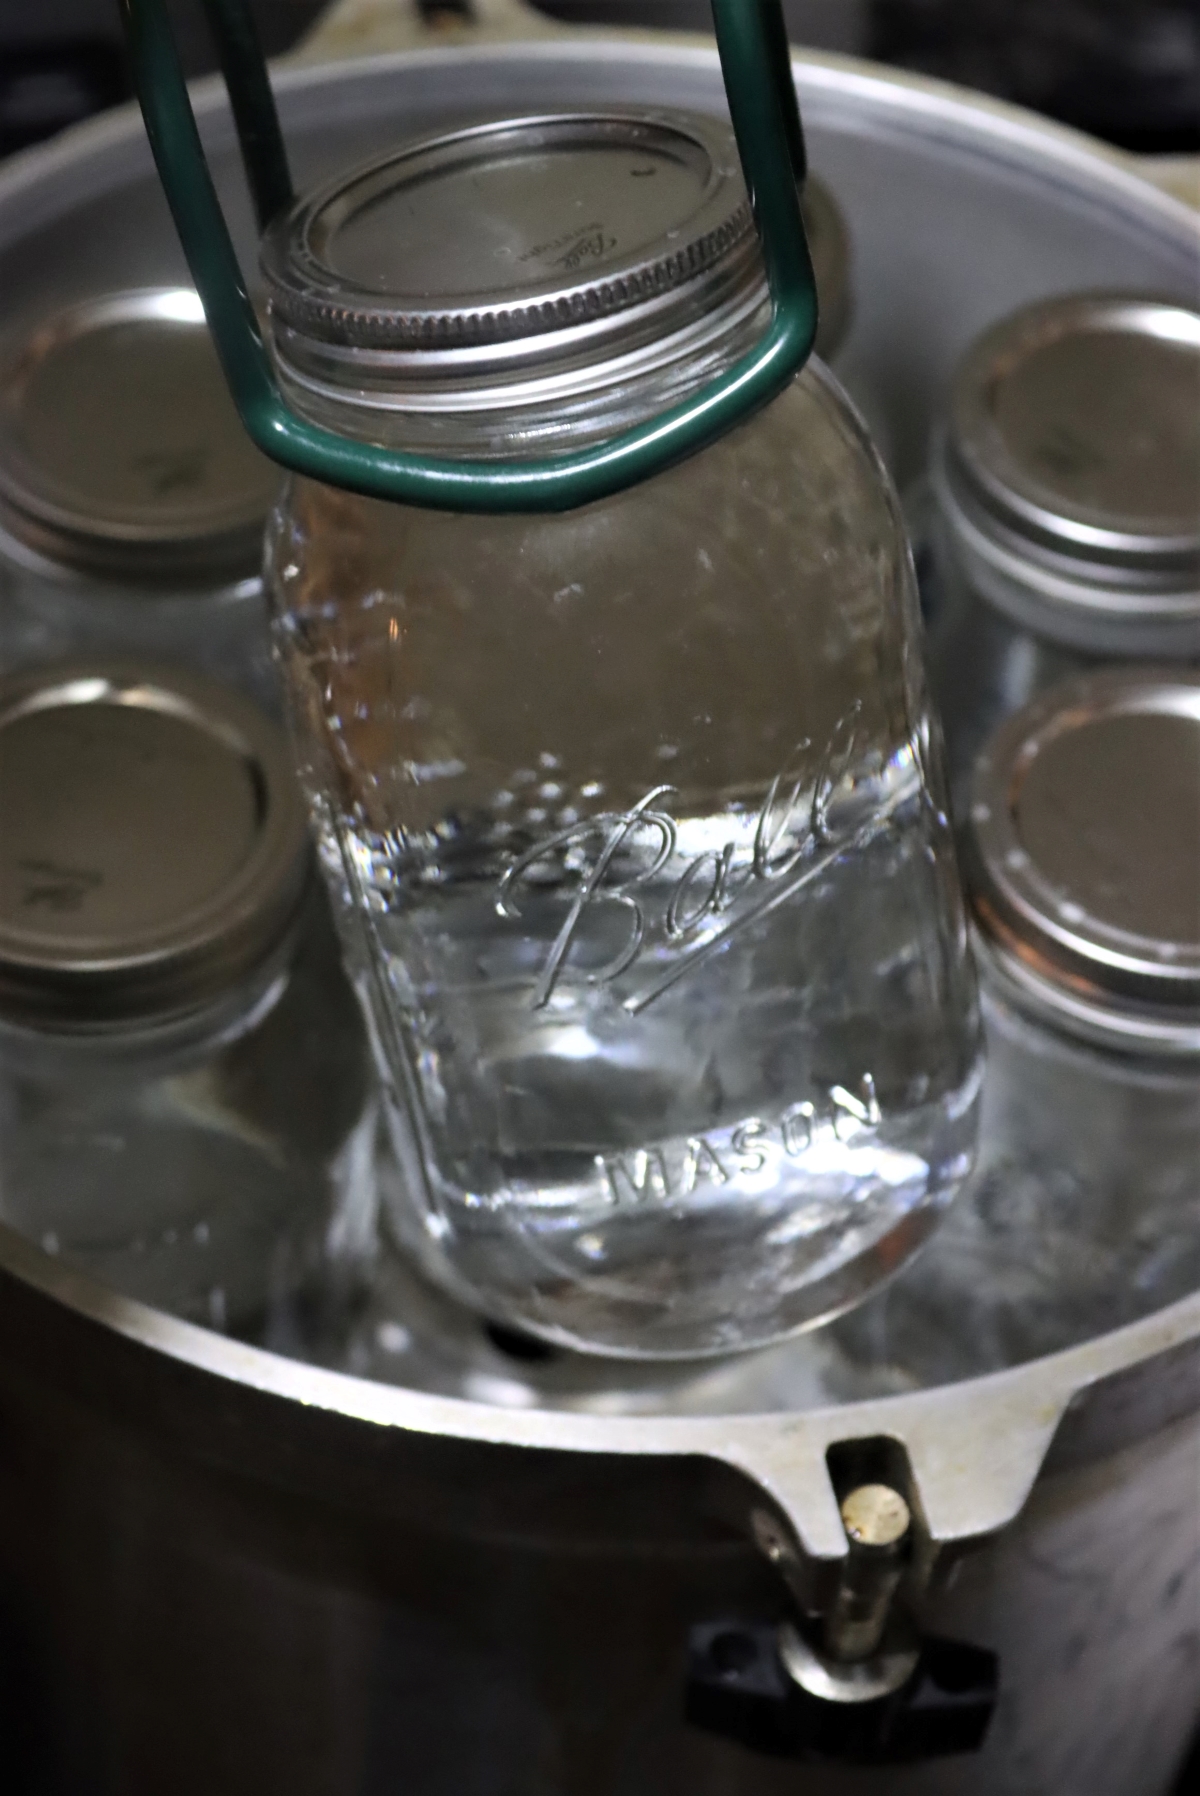
Pre-Heating the Pressure Canner
Unlike water bath canning, a pressure canner is not filled completely with water. The chamber inside will fill with pressurized steam, and you need enough water to both fill the chamber steam and prevent the canner from running dry during the process time. Canner models vary, so read the instructions. Most require you add 2 to 3 inches of water to the bottom before you start.
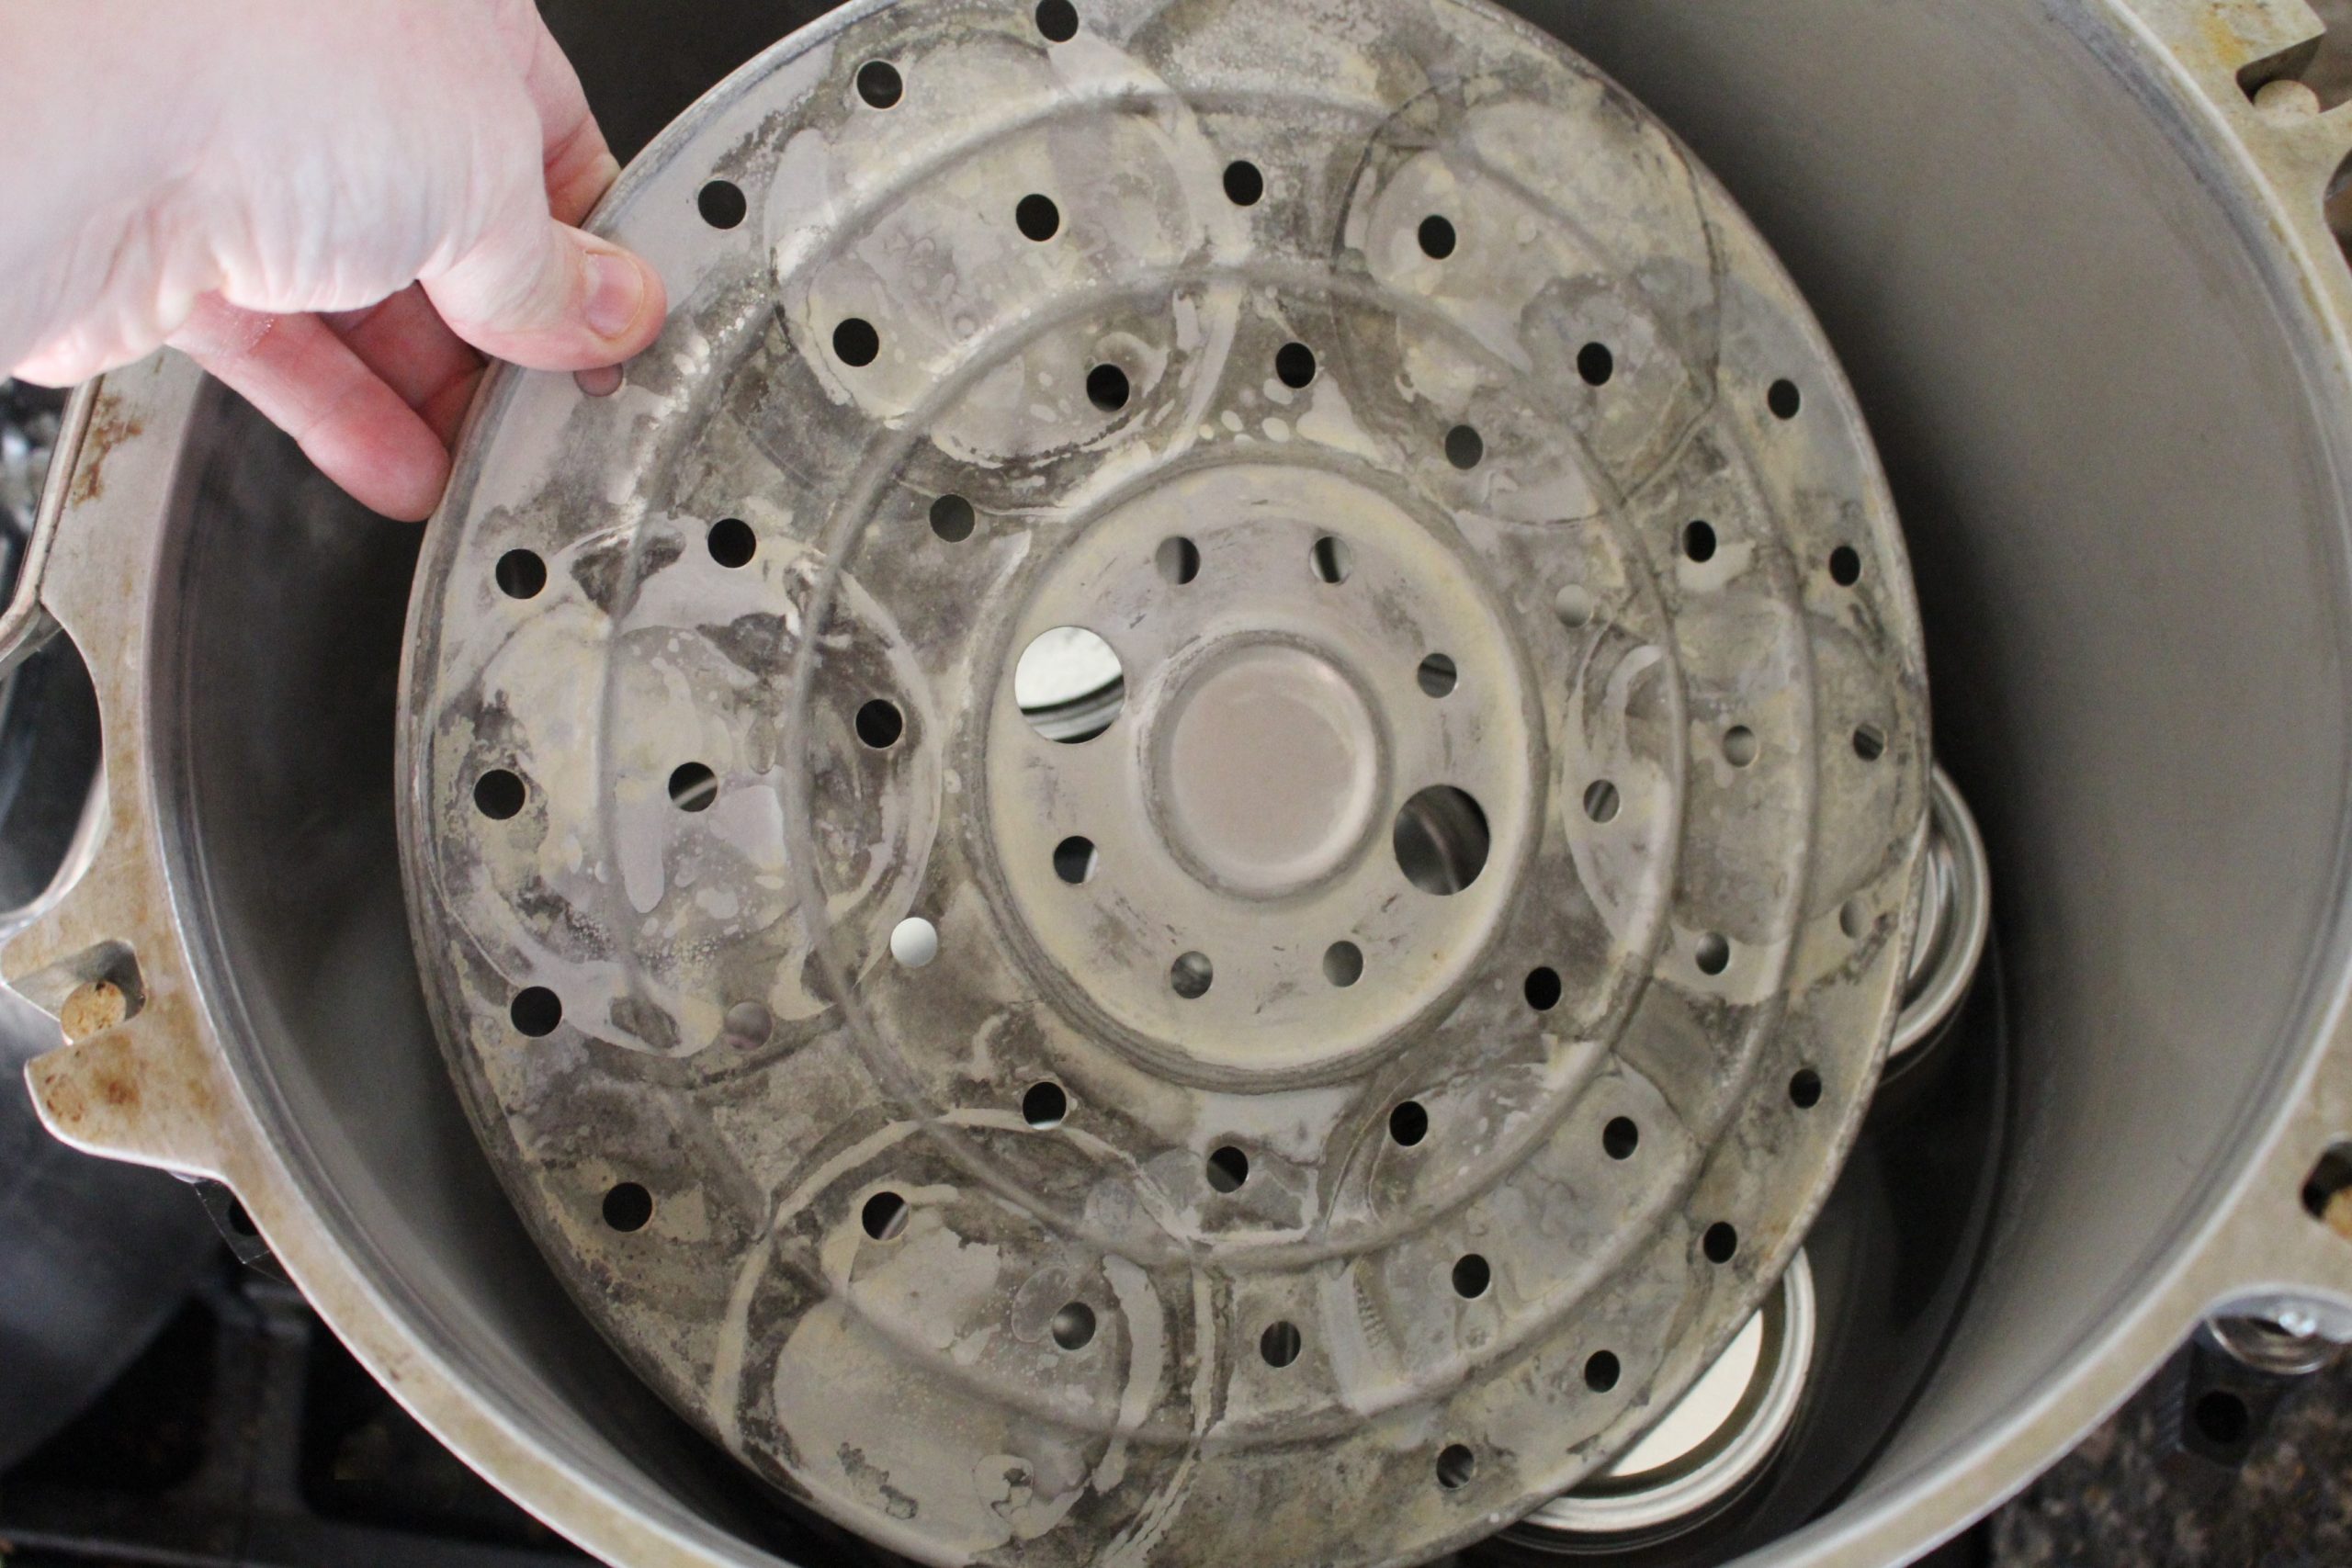
Add the water, then add the bottom canning trivet. The prevents the jars from coming directly into contact with the heated bottom of the canner, which could cause thermal shock and break the jars.
Begin pre-heating the canner, but don’t bring it to a full rolling boil. This is important!
For raw pack recipes, the water in the canner should be quite hot, just hot enough to burn your hand (around 140 F). For hot pack recipes, the canner water should be barely simmering (around 180 F).
These temperatures help ensure that the food going into the canner is at roughly the same temperature as the canner itself. If the canner is a lot hotter or colder than the jars and their contents, then you run the risk of breaking jars with thermal shock.
There’s a pretty big margin for error here, so you don’t have to get out a thermometer and really stress about it. Still, if you put a raw packed jar full of room temperature food into a boiling canner, I’d give you at least a 30% chance you’re going to break that jar.
Try your best to match the temperatures to pretty darn hot (140 F) for raw pack, and simmering (180 F) for hot pack.
Loading a Pressure Canner
As the pressure canner pre-heats, you’re finishing preparing the food and loading it into canning jars. Be conscious of headspace, and make sure you use the headspace specified in the recipe.
Seal the jars with 2 part canning lids, making them finger tight (or as tight as you can turn the lids with just your finger tips, rather than fully cranked down on there). This is loose enough that air can escape to help create a vacuum when the jars cool, but not so loose that the contents leak out into the canner.
(Contents leaking, called siphoning, means your jars are too loose, or your headspace was too small. Jar lids buckling means you tightened them too much. Again, there’s a pretty big margin for error here, so don’t stress too much.)
Load the jars into the canner (on top of the bottom trivet) as you prepare them to keep them warm.

If you have a double decker canner, insert the spacer trivet between the layers and keep on stacking until you run out of jars or your canner is full.
Ideally, off set the jars a bit so that they’re not stacked directly in line with the lower jars. This is supposed to be better for steam circulation within the canner.
How to Seal a Pressure Canner
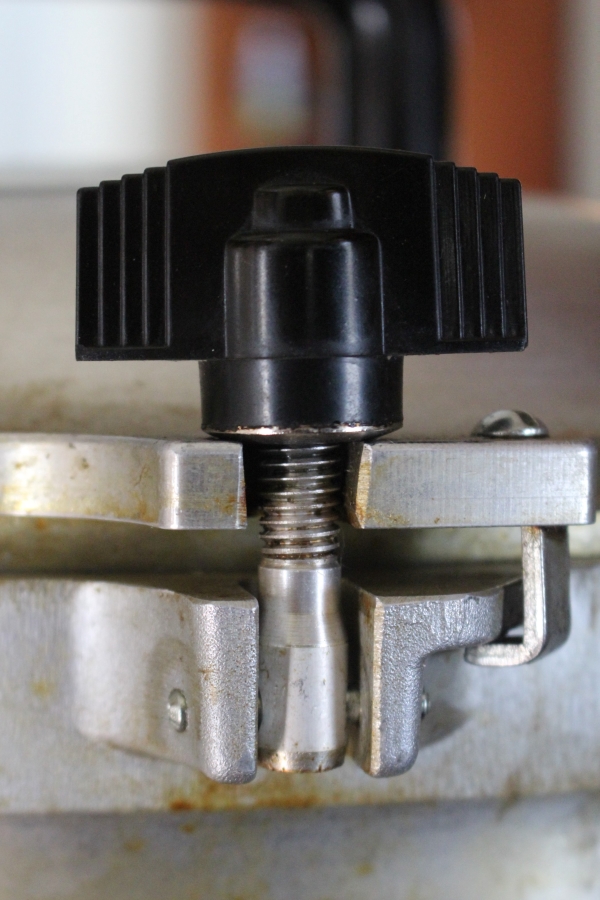
Sealing a pressure canner depends on the model. My all American Brand has bolts that tighten down all around the top, but other brands just turn and click into place. Follow the instructions on your canner.
Regardless of the canner type, be sure you’ve prepped the seal, either by double checking the gasket before starting, or by oiling the contact points for gasket-less canners. Also ensure that the lid is on reasonably straight before you seal it.
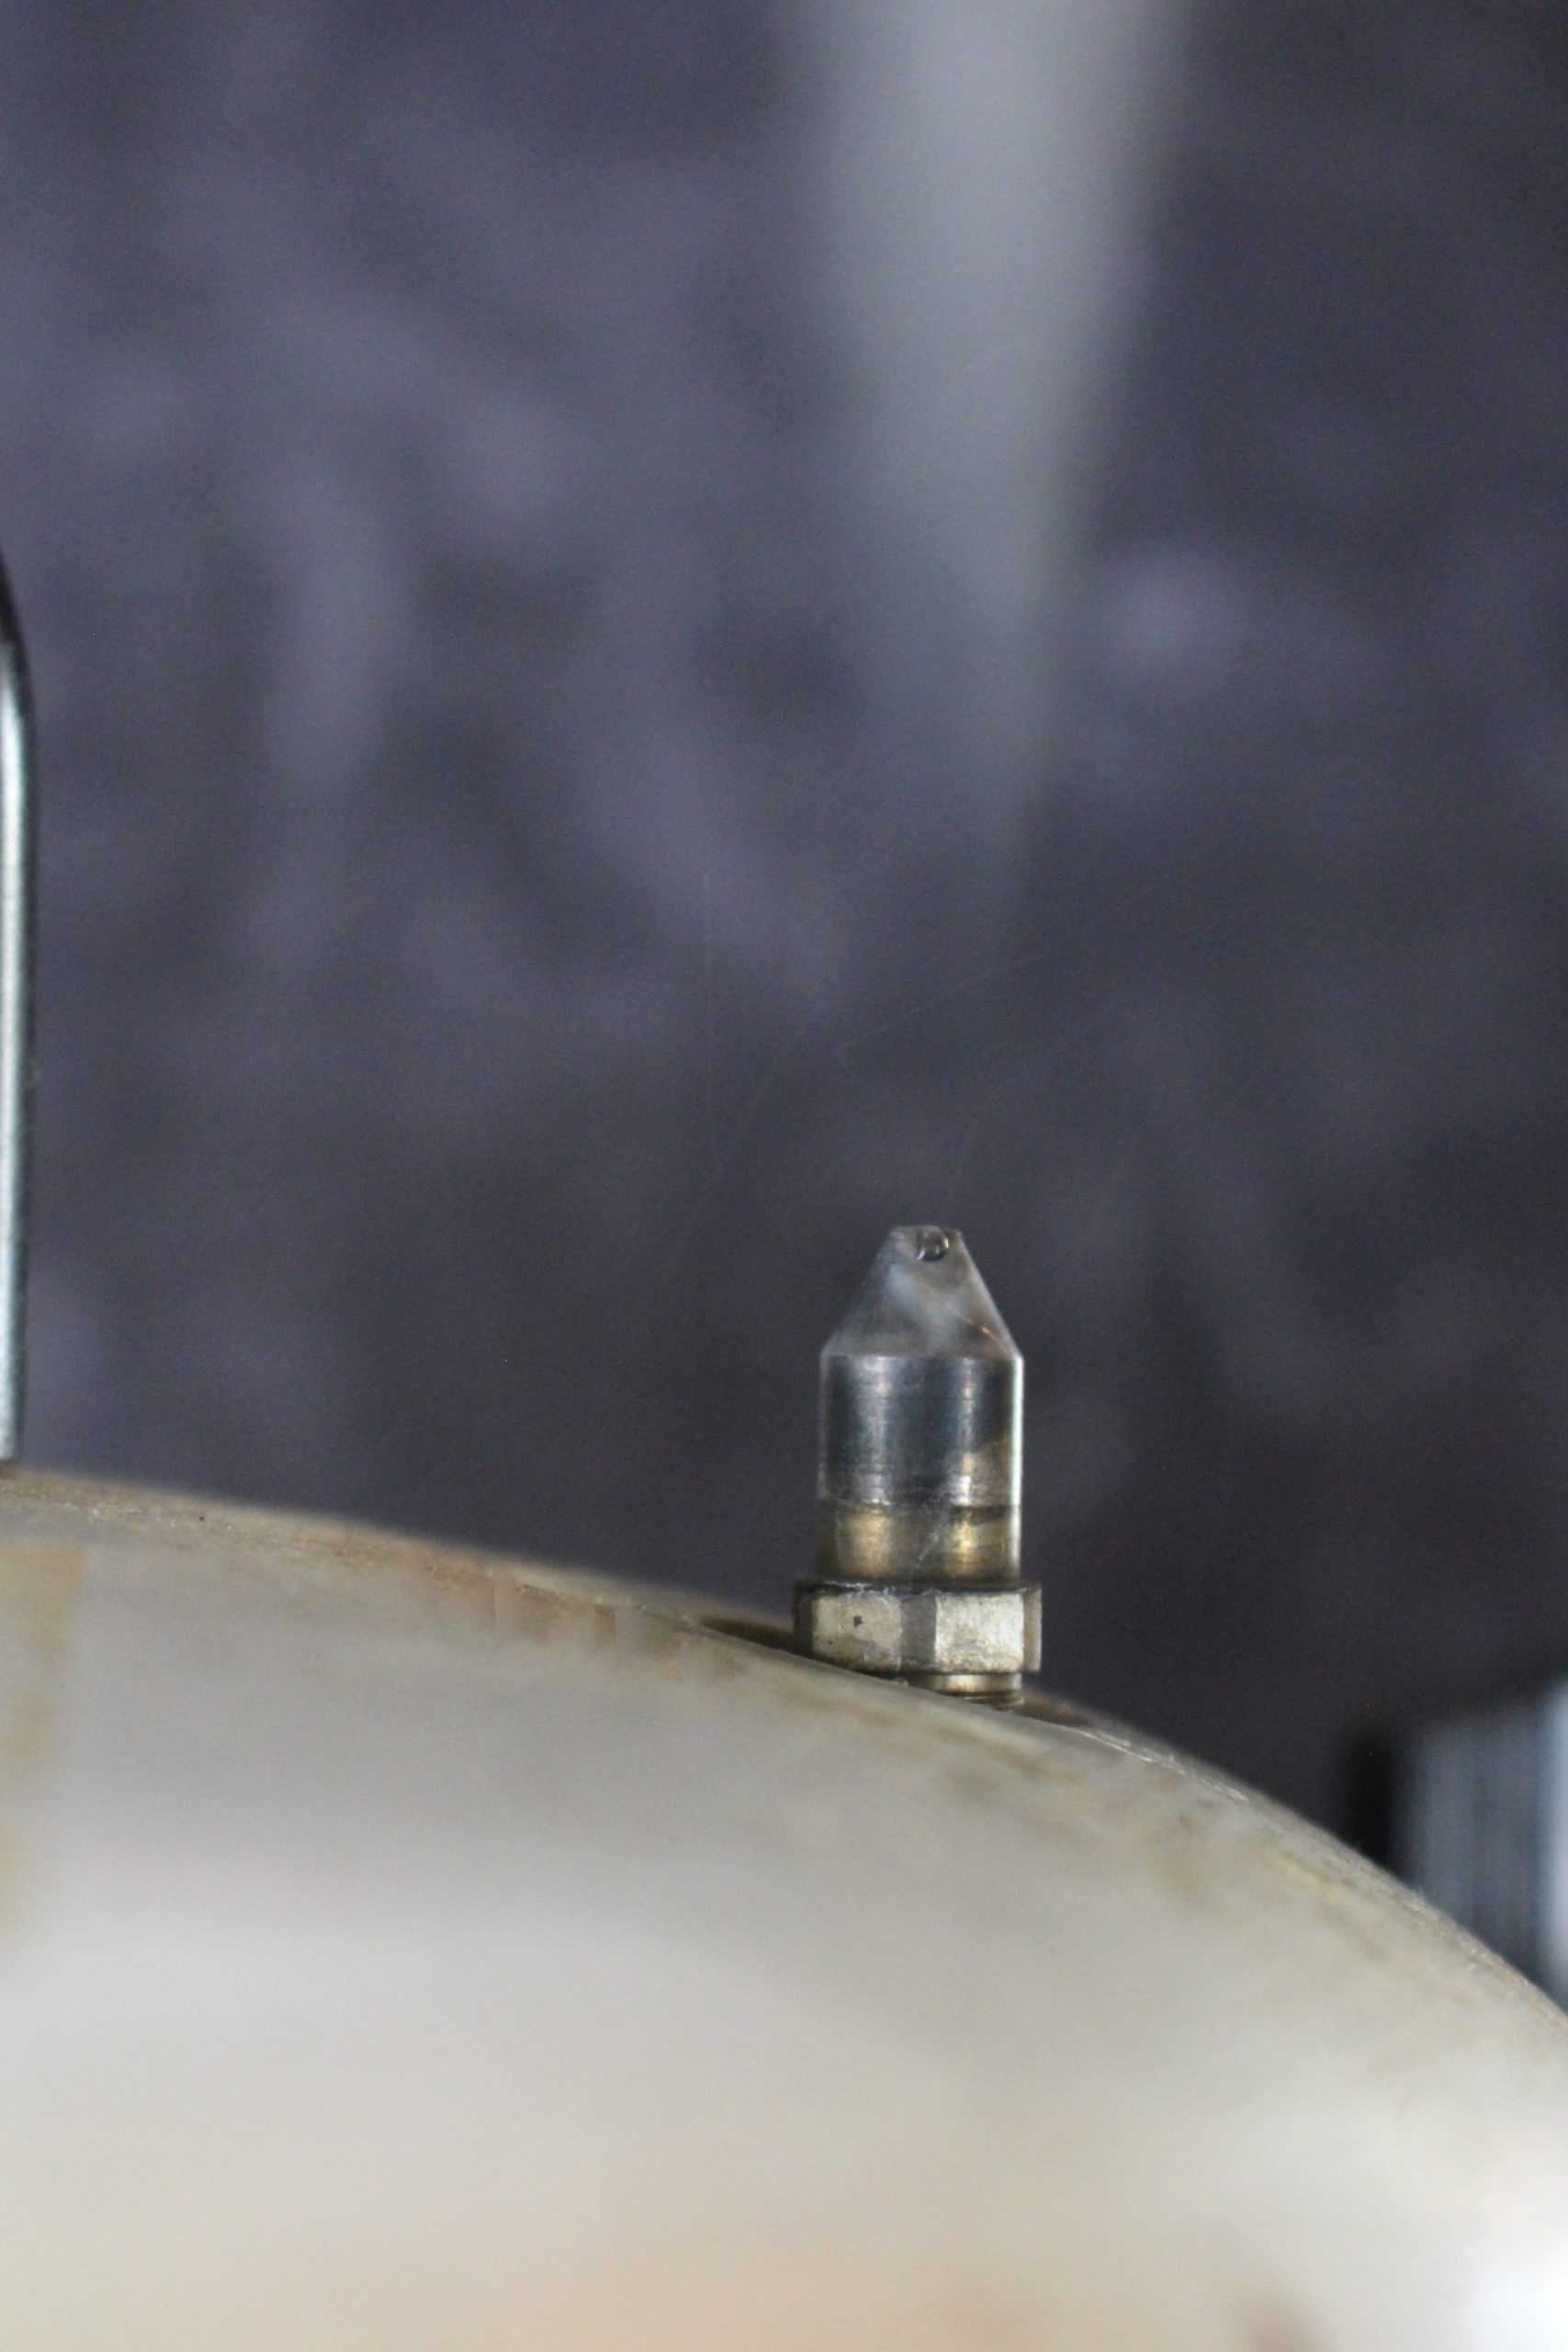
Steam Venting a Pressure Canner
At this point you’ve sealed the lid, but the canner is not “sealed” in the true sense and it’s not yet coming up to pressure.
Turn the heat all the way up to high and bring the canner to a boil with the steam vent open. The entire canner needs to fill with steam for the food to process correctly, and you can’t just seal the steam vent before that happens.
Allow the canner to vent steam for a full 10 minutes before you add the canning weight (weighted gauge) or close the steam vent (dial gauge). This ensures that the contents of the canner are all at boiling, and that the chamber is completely full of steam. Skipping this step can lead to cool pockets inside the canner, and improperly processed food.
Start timing the venting when you see a steady stream of steam coming out the vent, not before. With raw pack, it may be 10-15 minutes before the canner even begins steaming as the contents come up to temp. Once that happens, you still need to wait 10 more minutes allowing steam to vent before closing the vent.
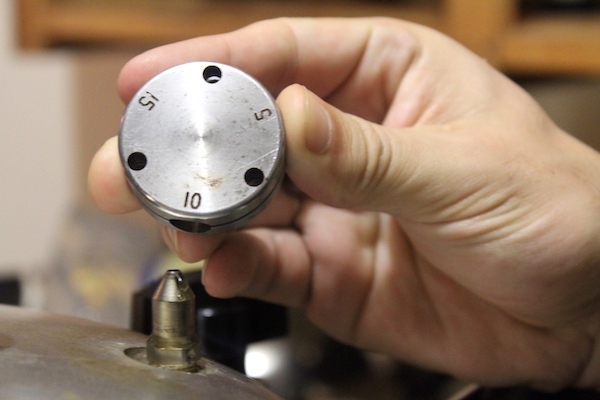
Bringing Pressure Canner up to Pressure
After steam has vented for a full 10 minutes, it’s time to fully seal the canner and bring it up to pressure.
With a weighted gauge, this is done by applying the canning weight to the steam vent. It’s three sided, and you’ll need to choose the labeled side based on the pressure you need to apply within the canner. This depends on your altitude and the recipe.
(For non-weighted gauge, look at the manual for specific instructions.)
Processing Food in a Pressure Canner
It will take somewhere between 10 and 40 minutes for the canner to come up to pressure. This isn’t counted in the “process time” in your recipe, so don’t begin timing when you seal the canner. The process time is only the time that the contents are at the specified pressure.
For example, canning potatoes requires 35 minutes for pints and 40 minutes for quarts. That timer doesn’t start until the canner is up to pressure, which in this case is 10 PSI if you’re below 1,000 feet in elevation.
Once the canner is up to pressure, begin timing, but be sure the canner stays at or above the target pressure the whole time. If the canner dips below the target pressure, you must re-start the timer!
That’s a big deal, as safe pressure canning requires a sustained time at or above a specific pressure. With a weighted gauge this is much easier, as the weight helps keep the canner at the proper pressure. On a dial gauge, you really need to watch it to make sure it doesn’t dip below pressure.
Unloading a Pressure Canner
When the canning time has completed, turn off the heat but don’t touch anything else!
You cannot release pressure manually on a pressure canner, and doing so may cause the jars inside to break (and could cause steam burns). Pressure cooking appliances (ie. Instant Pots) allow you to do this because they have special valves, and there’s not glass jars inside (they’re not approved for canning). Don’t try to rapid cool a pressure canner, and don’t use any instant pot tricks like putting cold towels on the outside.
Simply allow the canner to sit undisturbed until it’s reached 0 PSI on the dial (or it’s completely cooled overnight).
Once there’s no more pressure, you can release the vent and allow any residual steam to escape before opening the canner lid. (Please remember to release the vent before opening the lid, as there may be a good bit of steam in there.)
Remove the jars to cool on a towel on the counter using a jar lifter. Keep in mind that the contents of the jars are still extremely hot, and it’s not uncommon for the liquid inside the jars to still be boiling at this point. (Unless you just leave the canner to cool completely overnight, as I often do.)
Allow the jars to cool completely on a towel on the counter before checking seals and cleaning off any gunk that may be on the outside of the jars.
Once completely cool, remove the canning rings. Jars should not be stored with canning rings on, whether pressure canning or water bath canning. The vacuum inside the jar should be what’s holding the lid closed and leaving the ring on can cause the impression of a false seal. (It can also cause the ring to rust to the jar threads, as it’s still moist in there from the canning process.)
Store any unsealed jars in the refrigerator for immediate use, and store sealed jars in the pantry for use within 12 to 18 months.
Pressure Canning Troubleshooting Guide
If you follow the directions I’ve outlined you really shouldn’t have that many issues, but still, there are a few common pressure canning problems I should cover. Here’s how to troubleshoot the most common issues. (If you have an issue I haven’t listed, please by all means leave me a note in the comments.)
Siphoning or Liquid Loss
There are a number of causes for fluid escaping the jars during canning. The most common two causes are that the lids were not tightened quite enough, or that you had to little headspace.
If there’s not enough headspace, the food inside can bubble up and hit the lid, potentially dislodging it slightly causing liquid loss. Loose lids are similar, in that they allow the boiling liquid to escape along with the air that’s venting from the jars.
The good news is, siphoning isn’t a safety issue. The national center for food preservation says that unless fluid loss is “excessive,” as in more than half of the liquid is lost from the jar, then it’s just a cosmetic issue. The food above the water line may brown or dry out, but so long as the jar is sealed and the food was processed appropriately than there’s no safety issue.
(Low water levels are a common problem when canning beans, as the beans can absorb some of the liquid, and you can also potentially lose liquid to siphoning…making it hard to can dry beans while keeping them all below the water line. They’re still safe if canned appropriately.)
Thermal Shock (Broken Jars)
While it’s possible that broken jars are caused my tiny chips or minor imperfections in the jar, it’s usually the result of thermal shock.
Changing the temperature of the jar too quickly, before the contents have had a chance to warm up (or cool down).
It’s important to match the temperature within the canner, at least roughly, to the temperature of the food as it goes in. Even if you poured it into the jars boiling, it’s cooled slightly before it gets to the canner. If you’ve raw packed, then it’s much closer to room temperature than it is boiling.
As noted above,
- Raw pack recipes, the water in the canner should be quite hot, just hot enough to burn your hand (around 140 F).
- Hot pack recipes, the canner water should be barely simmering (around 180 F).
One more final note since I’ve had so many people ask about pressure canning outdoors or on a wood stove.
Once the canner is up to temperature/pressure, it only takes a small amount of heat input to keep it there. On a modern stove, the burner is turned down to low or medium low, just enough to keep it at pressure. You can’t quickly turn a wood stove down like this, nor can you do that on a wood cook stove or open flame.
On an outdoor propane burner, most high output outdoor burners just don’t go low enough to manage this, and they put out just way too much heat.
I love water bath canning in my outdoor canning kitchen in the summer, but pressure canning really should be done on a modern stove indoors. It may seem like an “old time-y” skill, but in reality pressure canning is a modern invention, and it works best on a modern stove.
Pressure Canning Recipes
I have well over 100 canning recipes posted, with a mixture of both water bath canning and pressure canning recipes. Here are some simple pressure canning recipes to get you started, perfect for beginners:
- Canning Bone Broth
- Canning Turkey
- Canning Green Beans
- Canning Sweet Potato
- Canning Pumpkin
- Canning Carrots
- Canning Potatoes

if water is spurting out of side of All American canner when weight is put on does that mean I need to add oil to lid for a better seal? Letting things cool down then I am going to apply thin layer of oil and bring up to pressure again and place weight on. If this is incorrect could you let me know. Thanks! Canning tomato sauce in pints and quarts at 15psi for 15 minutes because we are above 1000.
You definitely want to be sure that you have a good seal. Did you get it fixed?
Hello. I am new to canning. I have seen several people on the comments suggesting that a glass top stove can’t handle a pressure canner. Is this true? Is it the weight? Or is the stove not powerful enough to maintain the heat necessary? Any information on this would be much appreciated.
Thank you!
You need to check with the manufacturer of your stove. They should specify whether or not your appliance is suitable for pressure canning.
Hi Ashley, and thank you for all your advice. I have had my Presto 21 litre canner for (mumble mumble) years and now, thanks to your hand-holding, feel brave enough to actually try it. I am wanting to can meats, soups, and meals in a jar, mainly, but have a teeny tiny kitchen w only two burners, so prepping a full canner load is kind of a juggling act. I have searched high and low to find out if I can freeze, say, soup or broth — things requiring the same type of pack and canner times — and then thaw and heat them to put in jars and process in one batch. Or keep one kind hot in my slow cooker while I make a few pints of something else. It seems like this should work but I can’t find any ‘official’ word and all the recipes seem to assume I will cook and can right away. My life doesn’t work that way! What you think? Could I do this safely?
The only issue I see with that is from a food safety issue of reheating a particular food too many times. I do think that keeping it in a slow cooker might work perfectly though. Or you could even look at getting a hot plate for some additional cooking space.
Many thanks! I think I’ll try it.
Hi Ashley,
I just started my canner for the first time. I have an All-American electric 25X, 25 qt. That being said, I prepped 17 half-pint jars thinking they’d all fit (silly me for not checking beforehand!)
My questions are:
– According to the manual, I should be using the inner container rack. Only 8 jars fit into it, and from your pictures and others, you don’t seem to be using it. Is that correct?
– What exactly do I need to be double-decking the canner?
– Could you maybe post pictures filling the canner up, after installling the double-decker?
– Your instructions contradict the insstructions from the manual concerning the end of the sterilization process: the makers recommend letting the pressure escape through the valve at the end of the sterilization period. I’m using a dial gauge, is that why that section is differs from yours?
– Are tiny, periodic steam leaks normal?
Thanks in advance, and sending regards from Quebec!
Anaelle
Hi Anaelle,
It sounds like you have the All American Electric sterilizer, which to the best of my knowledge isn’t strictly speaking a “canner” but instead an industrial sterilizer used by hospitals and mushroom cultivators. The one I’m using is a stovetop model, and its setup differently inside than the electric ones. You’re going to have to refer to your manual, as just about every online guide (mine included) is for the non-electric stovetop models. I have never used one of the electric all americans, but I beleive they’re setup differently and work a bit different. Good luck!
I had alot of cherry tomatoes and roasted them in the oven with salt(kosher) and olive oil with some onion and bell pepper pieces and then ran it through a food mill. I hot packed the sauce in pints but did not add any acidifier (lemon juice or citric acid) and pressure canned them at 11 lbs of pressure for 20 minutes. My question is will not adding acidifier make them not safe to eat?
It isn’t necessary to add acid when pressure canning but it doesn’t look like they were probably processed long enough. Here is an article on pressure canning peppers.
https://nchfp.uga.edu/how/can_04/peppers.html
I follow your site more than any other, and I love your advise and recipes. However, I couldn’t find a recipe for Roasted tomatoe and Red Pepper soup, so I found on another site. My first concern is that although I washed the tomatoes thoroughly, (they’re from my garden) I totally forgot to peel them. I did roast them in the oven and then cooked them in a pot before using an immersion blender to emulsify the liquid, then cooked some more. My other concern is that I couldn’t seem to find a canning recipe for roasted tomatoe and red pepper soup except this one, and the cooking time suggested 75 minutes for pints at an altitude of over 3000 in a pressure canner, which seemed extraordinarily long. I then dug a whole lot deeper and eventually found another recipe that suggested 20 minutes. I shut my pressure canner off at 60 minutes and I’m glad i did because turns out it had run out of water. So my question is 2 parts…..is it ok to cook tomatoes with the skin on, and did I ovecook the soup? What happens if you pressure cook for a longer time than is suggested by the recipe?
The reason for peeling tomatoes is to reduce the bacteria load for safer canning. The only issue with overprocessing the soup might be the texture but that shouldn’t be an issue with a pureed soup. When you’re making a recipe like this with mixed ingredients, you always want to follow the appropriate length of time for the ingredient that has the longest processing time.
I’ve canned two rounds in my new Presto 16 quart. I’m beginning my 3rd (all different weeks) and am curious how long I should expect it to come to pressure? The first two rounds were approximately 30-40 minutes. This time it’s been 45+ minutes. If it doesn’t come to pressure after an hour, what do you suggest? >sigh<
Thank you greatly!
There are a couple of different factors that can affect this. Is there anything that you did differently between the batches? Were you canning the same size jars in all 3 batches? How long did it end up taking to come to pressure?
While I’m reading this article, I keep getting kicked out, and it takes me back to the top of the article. Then I have to search and find where I was. This has happened 4-5 times already. How do I get it to stop kicking me back to the top of the article? Thanks so much.
Sorry about that, and I’m not sure what could be causing it? I wish I had a better answer for you there.
I raw pack chicken in the pressure canner but chicken ended up dry and tough. Just wondering what i did wrong?
It’s hard to say without knowing exactly how you canned the chicken. Take a look at this post and let us know if there is anything that you did differently. https://creativecanning.com/canning-chicken/
If I allow the jiggler to rock too fast (see your canner instructions) I run the water dry. I keep an “ear out” during the canning time to make sure it isn’t blowing steam too quickly
I also start with a little extra water (about 3/4 inch more) to make sure I don’t go dry before the time is completed.
I think she was referring to the chicken being dry, not the canner itself running dry.
Anita Z.
What if the canner runs out of water before the pressure time is reached?
The canner should not run out of water if you follow the proper procedures. Your canner should tell you how much water to add to the canner.
It did and I measured out the right amount. I think I started it to soon. Didn’t have the meat ready. Didn’t recheck the water level when I started it. Have a pressure gauge, the gauge set on 14-15 lbs. ,but the pressure regulator was rocking pretty fast. Which do I go by?The jars are sealed and in the refrigerator. Will it be okey if I cook it longer?
If you started it too soon, that could explain why you ran out of water. If you have a dial gauge, you want to go by the pressure on the gauge. Have you had the canner tested to be sure that the gauge is accurate? If not, it is recommended to get it tested yearly. It is usually recommended to reprocess within 24 hours of the initial processing. If it has been longer than that, you want to use it up or freeze it.
Please ignore the comment right before this one. thank you for explaining this to me. This was only my second time using this canner. I appreciate your help.
You’re very welcome. We’re happy to help.
Is it a problem if you miscalculate your canning time and over process raw tomatoes? I misread the instructions and processed my raw tomatoes for an hour instead of the 25 minutes in the recipe. I was looking at the water bath canning time and not the pressure canning time.
If you overprocessed them, it could possibly affect the quality of the food but it should still be safe to eat.
This looks like a typo to me. “With a dial gauge you pay attention to the canner by ear, listening to make sure it’s “jiggling” every minute or so. You can easily do other things with your hands, and make good use of your time.” Shouldn’t it say with a weight gauge?
Yes, it is a typo. Thanks for catching that. We’ll try to get it fixed as soon as possible.
What happens if I leave my chicken bone broth in the pressure canner to long?
How much longer did you leave it?
70 minutes total
An extended processing time may affect the quality of some foods but it really shouldn’t be an issue with the bone broth.
I have a question about venting and I haven’t been able to find it. When I close my canner and the steam starts coming out I start my 10 minute timer. Often before I’m even half way through the 10 minutes the steam is coming out in a steady, almost too much stream, and the pressure pin has popped up. I’m assuming this means that I’ve fully vented it since the pressure pin is up. So I’m wondering if I’m at that point do I still need to continue going for the full 10 minutes of venting?
I would still follow the recommendation of waiting the full 10 minutes.