Affiliate disclosure: This post may contain affiliate links. Please see our Privacy Policy.
Canning corn is a simple way to preserve corn at the peak of freshness.
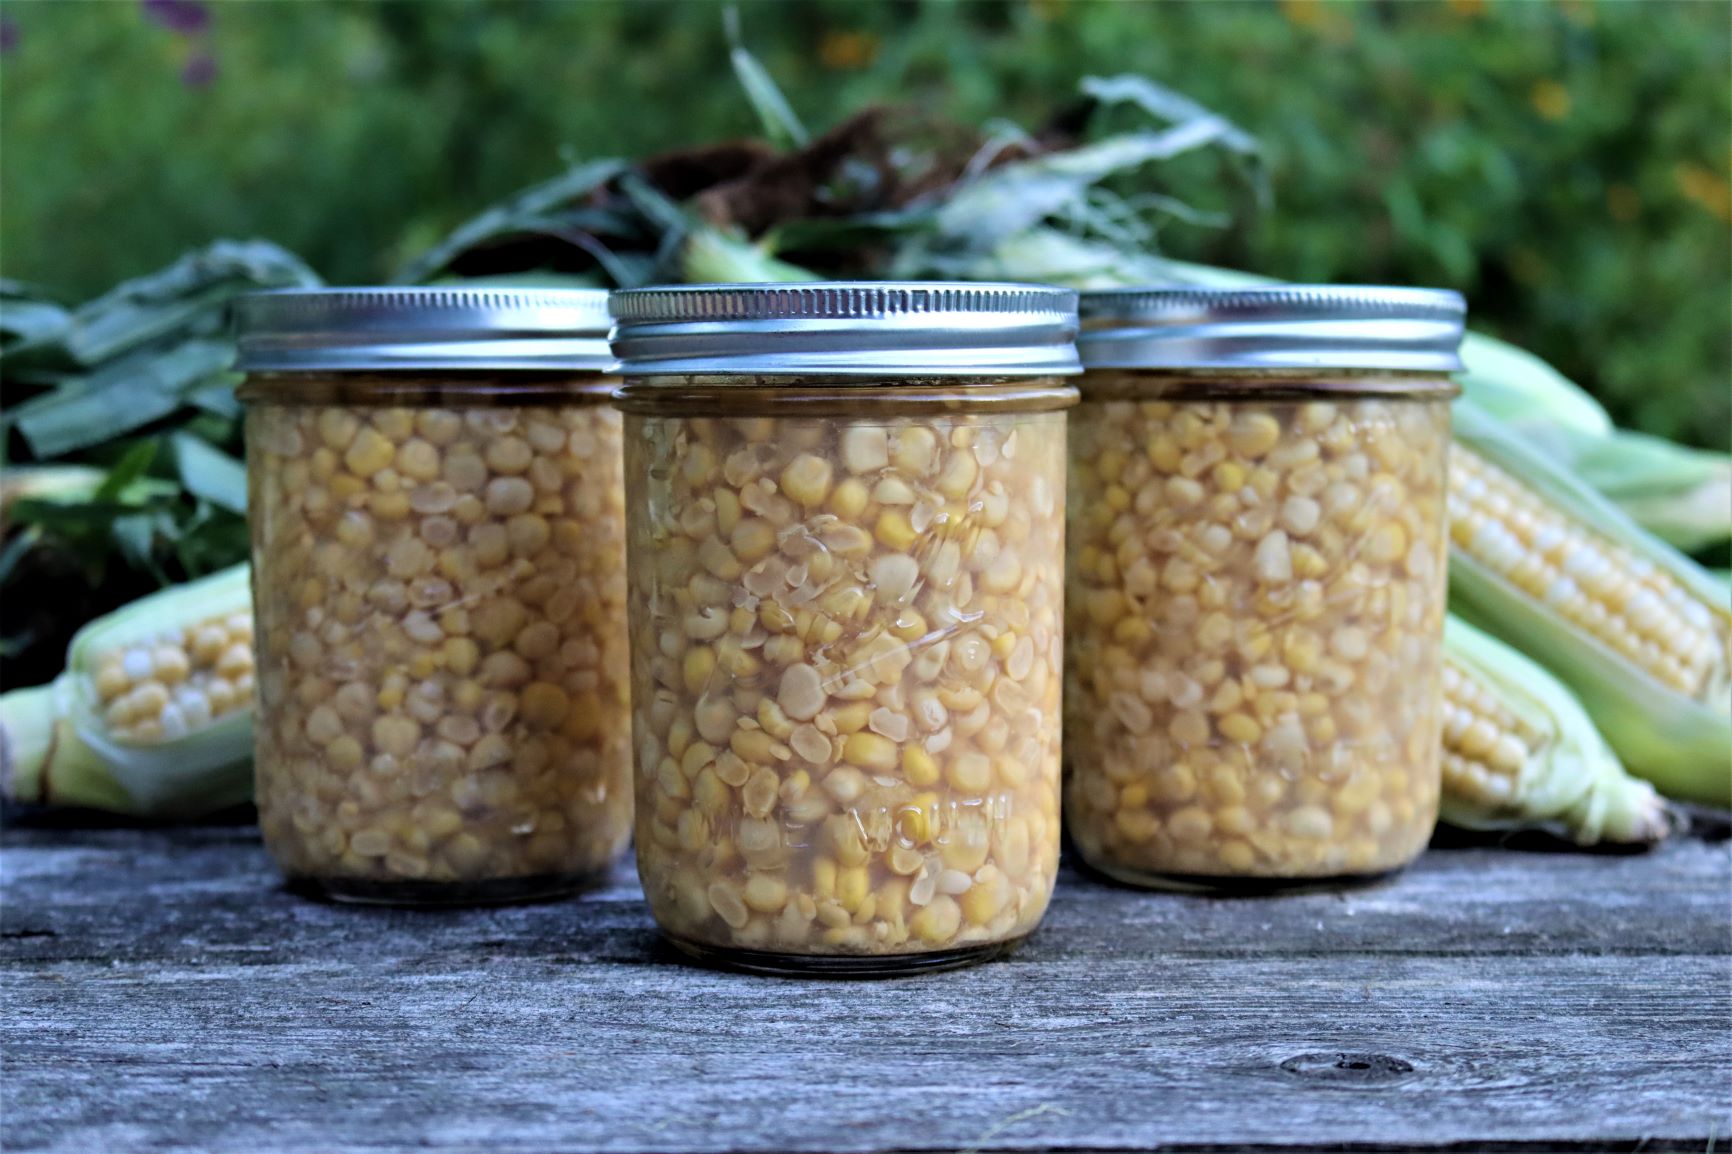
(Corn is a low acid vegetable, and cannot be processed in a water bath canner. Low acid vegetables, meats, broths, and soups must be pressure canned to be shelf-stable. If you’re not familiar with the process, I’d strongly recommend that you read this beginner’s guide to pressure canning before you get started.)
Fresh sweet corn is an incredible summertime treat, and one of the most convenient ways to enjoy it year-round is by canning. Canning corn effectively stops time, and holds delicious local sweet corn at the peak of freshness for year-round eating.
This past year (2020), believe it or not, there was actually a shortage of canned corn! With everyone cooking at home, this easy to prepare pantry staple was in hot demand.
Canning corn at home not only ensures you have plenty on hand, but it also helps you know where your food comes from. Whether you grow it in the backyard, or pick it up from your local farmer, you can be sure you’re getting the freshest possible.
Choosing Corn for Canning
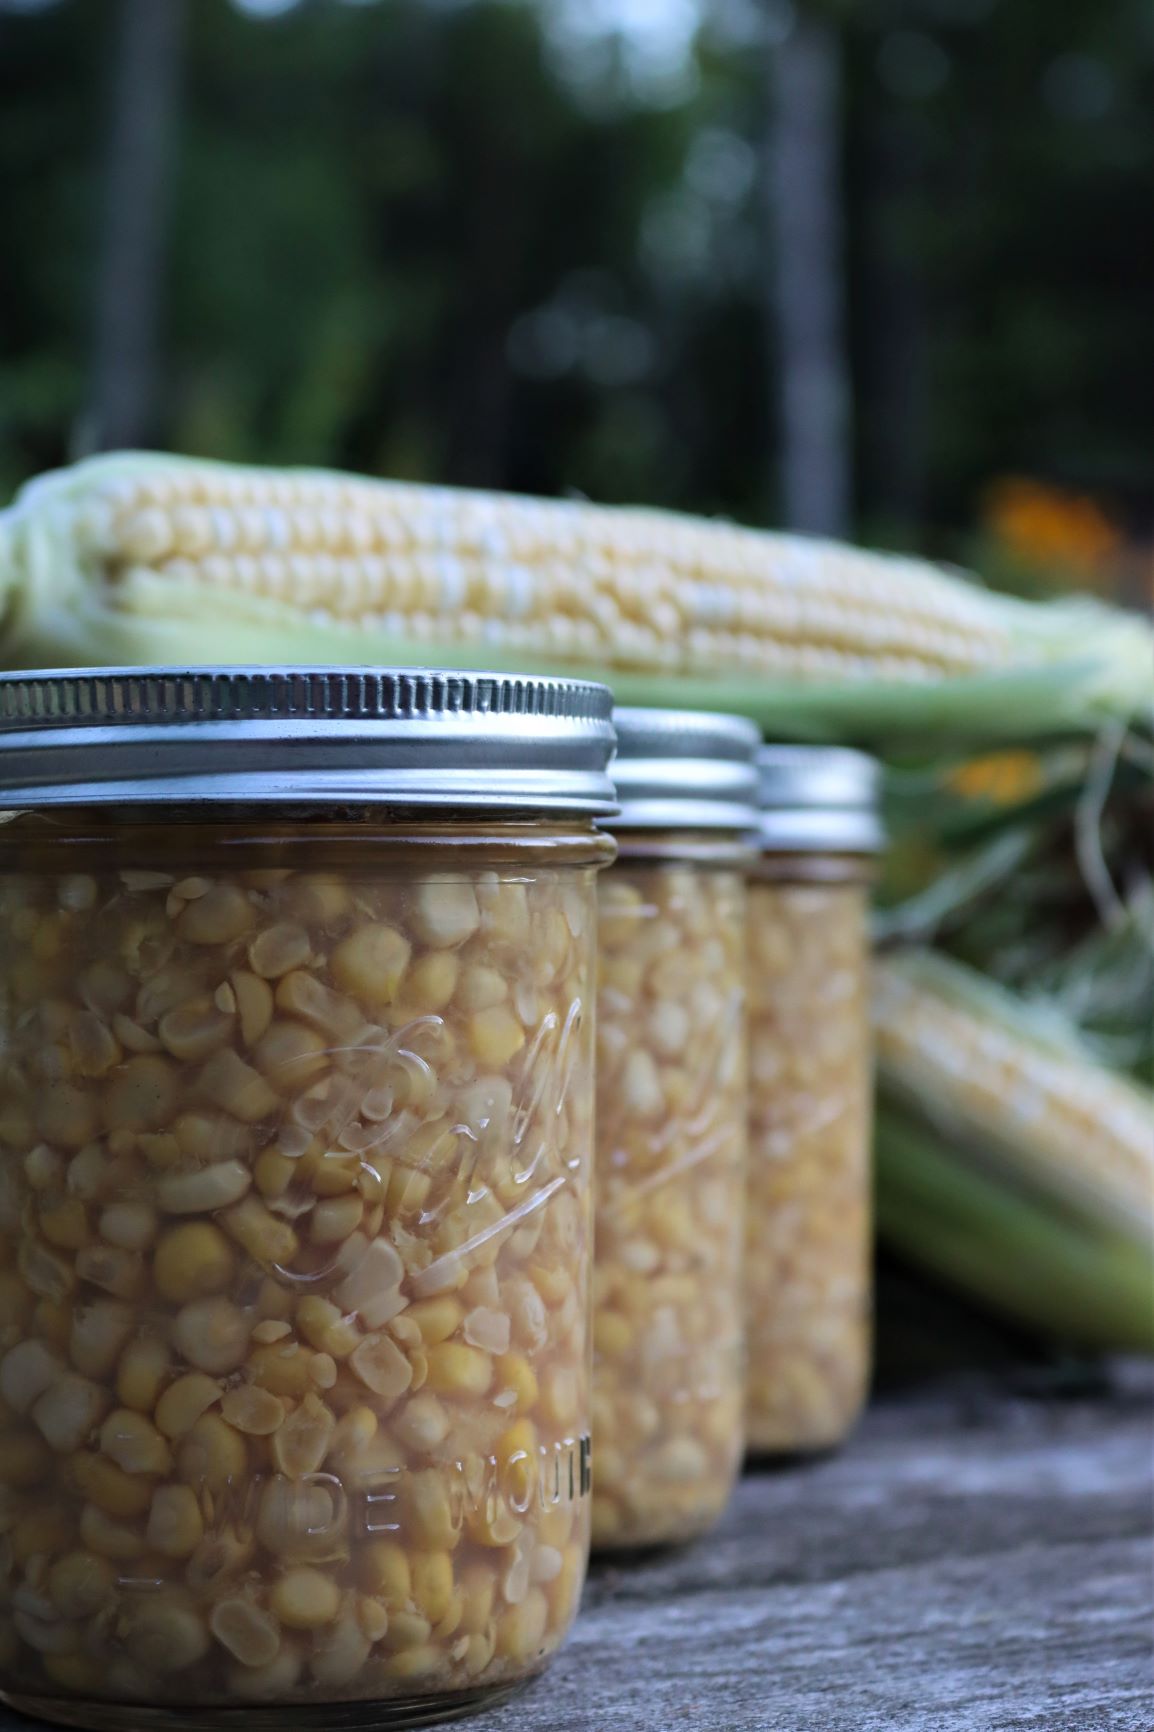
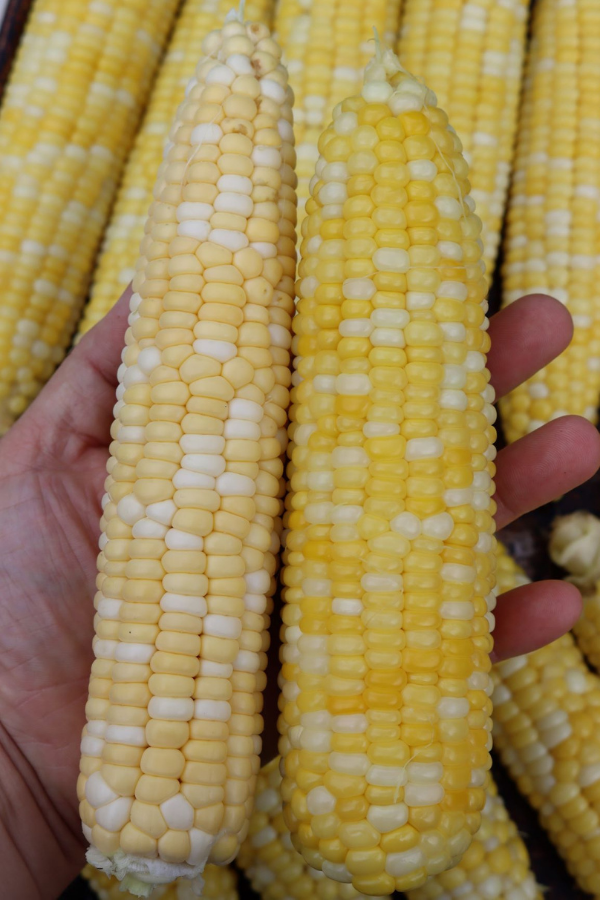
When canning corn at home, the quality of the finished product largely depends on the choice of corn.
The primary concern is freshness. Once the corn is picked, the kernels stop getting nutrients from the mother plant, which signals them to go into “storage” mode. Sugars within the corn kernels immediately start converting to starch…even in the first hour after picking.
If you’re canning homegrown corn, don’t pick it until the blanching pot is already boiling.
When purchasing corn for canning, try to arrange something special with a local farmer. We called a farm just down the road and requested a 50lb sack of corn. We made arrangements to pick it up the next morning, less than an hour after they’d picked it.
If you can’t make special arrangements, do the best you can.
Taste the corn before purchasing in large quantities, to ensure it’s still sweet and fresh.
Yields for Canning Corn
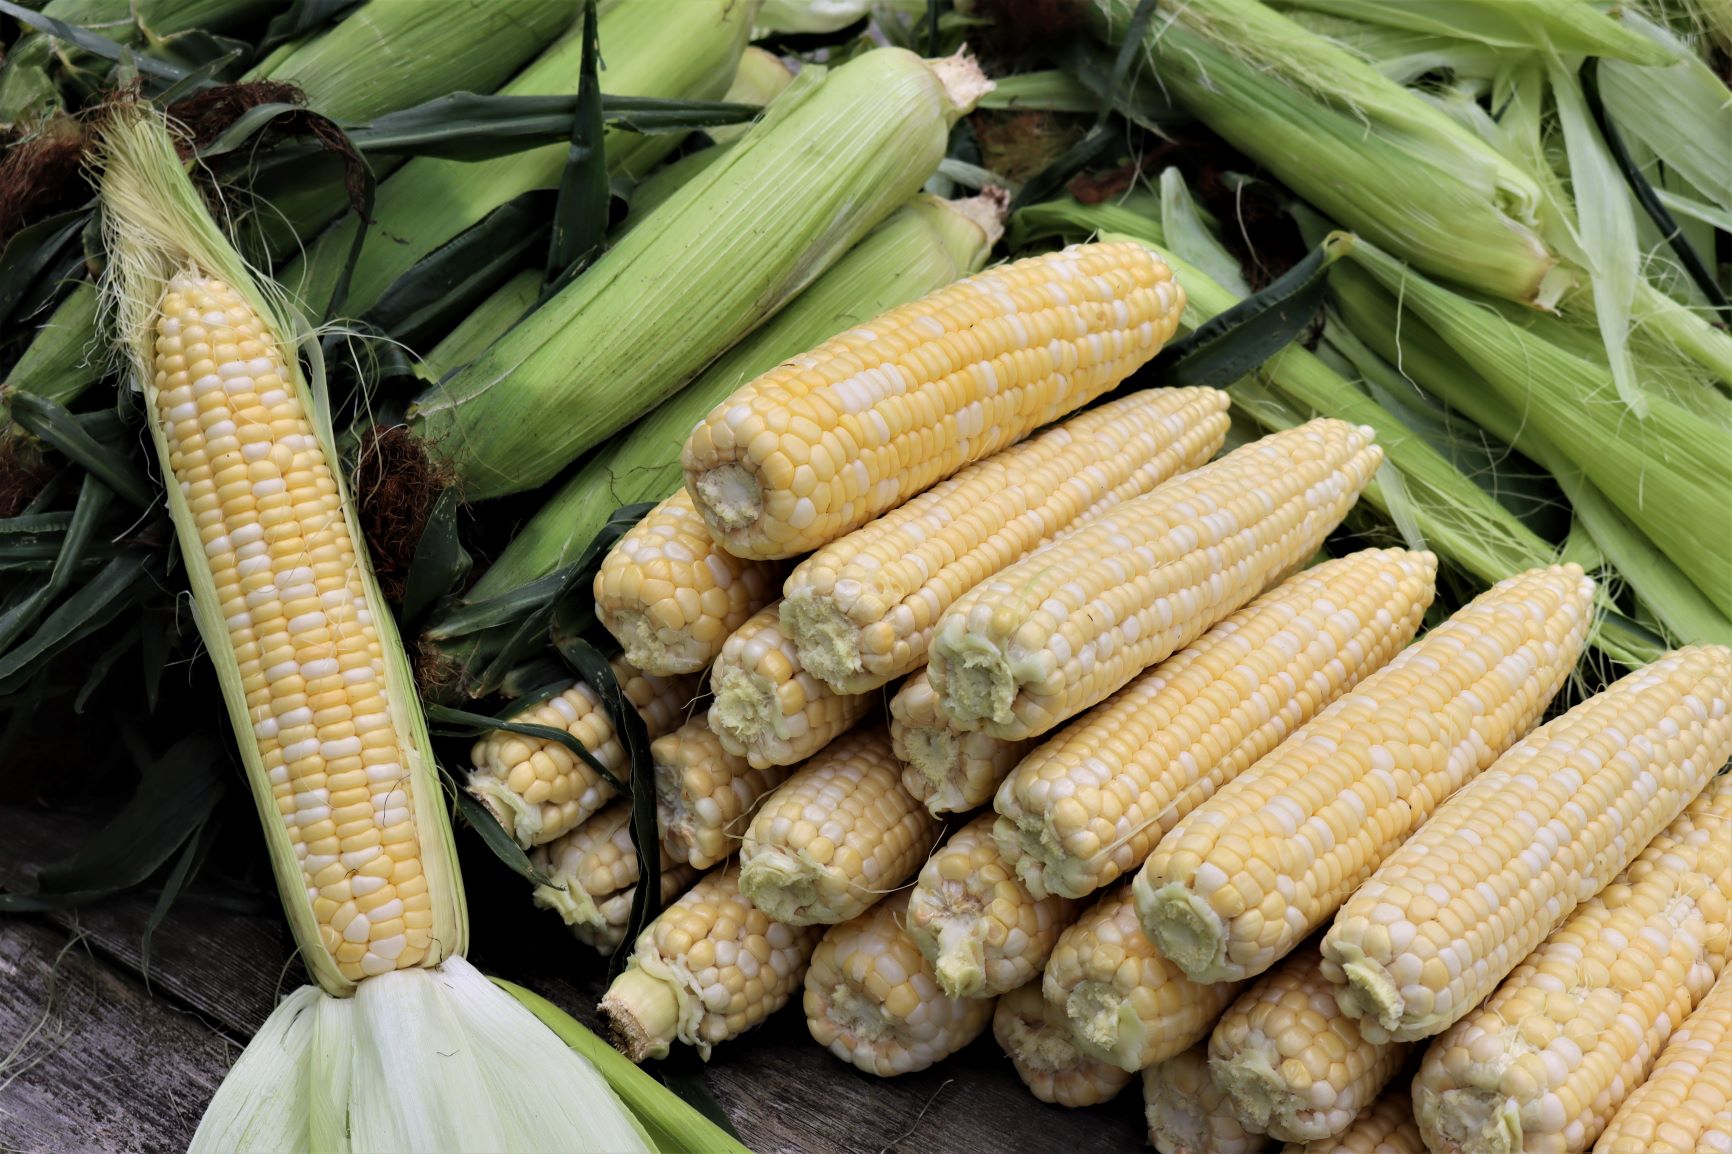
To make canned corn, you’ll need 30 to 32 pounds (in husk) of sweet corn per canner load of 7 quarts. For a standard canner load of 9 pints of canned corn you’ll want to use 20 pounds of in-husk corn. For reference, a bushel weighs 35 pounds and yields 6 to 11 quarts (about 4 1/2 pounds per quart).
But how many ears of corn do you need for canning?
On average, an ear of corn weighs about a pound in husk, but there’s a lot of variation. Some are much bigger, and can weigh as much as 1 1/2 pounds, while others are closer to 3/4 pound. If you’re trying to estimate how many ears of corn you’ll need for a batch without a scale, assume roughly 1 pound per ear (and then add in a few extra just to be sure).
Preparing Corn for Canning
Workspace and weather permitting, shuck the corn outdoors if possible. It’s an unavoidably messy endeavor but it’s made easier if the husks can be immediately moved to the compost. If you have chickens, make sure to save the husks for chicken feed.
To remove the husk from the corn, pull the leaves and silk directly down and tear them from the bottom. Snap off any of the remaining stalk.
The next step is to remove any lingering sticky threads of corn silk from the cob. I like to do this by running the corn under cool water, gently scrubbing with a clean toothbrush or vegetable brush until the corn silk is removed.
Be thorough but don’t brush too hard, you want to avoid bruising or accidentally ripping open the kernels.
Once the corn has been desilked, it’s ready to be blanched. Working in batches, immerse the corn cobs in a pot of boiling water for 3 minutes. Start the timer when the corn goes in (rather than waiting for it to come back to a boil).
When the time is up, remove the cobs from the water with tongs and plunge the blanched corn into cold water to stop the cooking process.
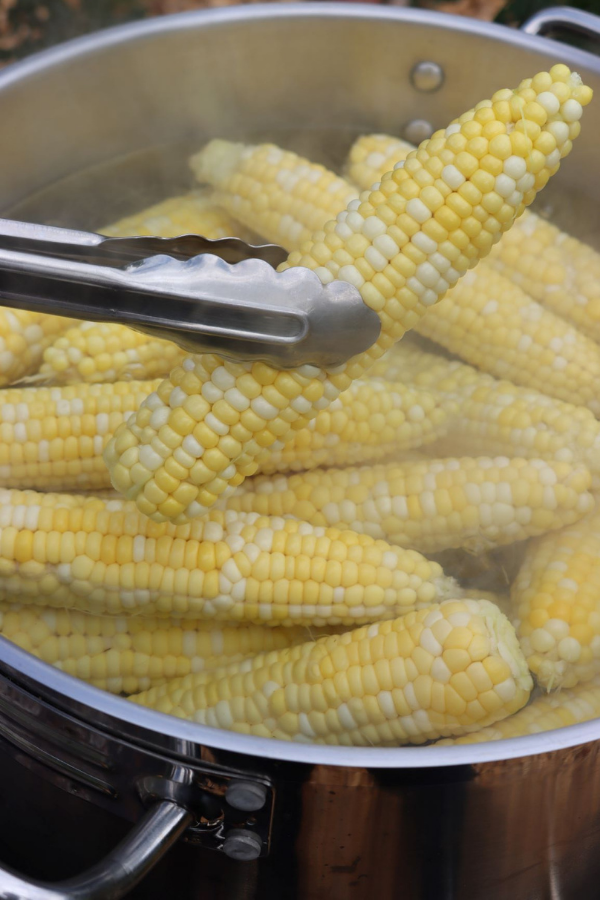
Allow the pot to come back to a full rolling boil before adding the next batch into the pot. Repeat the process until all of the corn has been blanched.
Blanching not only turns the corn a brighter shade of yellow, and immediately stops the natural process within the kernels that converts sugar to starch. This effectively freezes them in time, ensuring that they’re canned at the peak of freshness.
It also sets the starches that are already in the corn, and causes the kernels to expand a bit. If you raw pack the corn, it would release starch into the canning water and expand a good bit, which is another reason it’s blanched before packing.
Lastly, it’s much easier and cleaner to cut the kernels off blanched corn, and that’s the next step.
Cutting Corn from the Cob
I find the most efficient way to cut corn from the cob is to use a bundt cake pan. The raised center is a perfect rest for the cob of corn and the pan catches all of the kernels as you work. You can also work directly on a cutting board, although I find it helpful to use a larger sized board so that the kernels don’t roll away from you.
As long as you have a sharp knife with some weight to it, removing corn from the cob is relatively easy. Because corn quickly becomes slippery once you start cutting it, a dull knife makes the job that much more time-consuming and potentially dangerous.
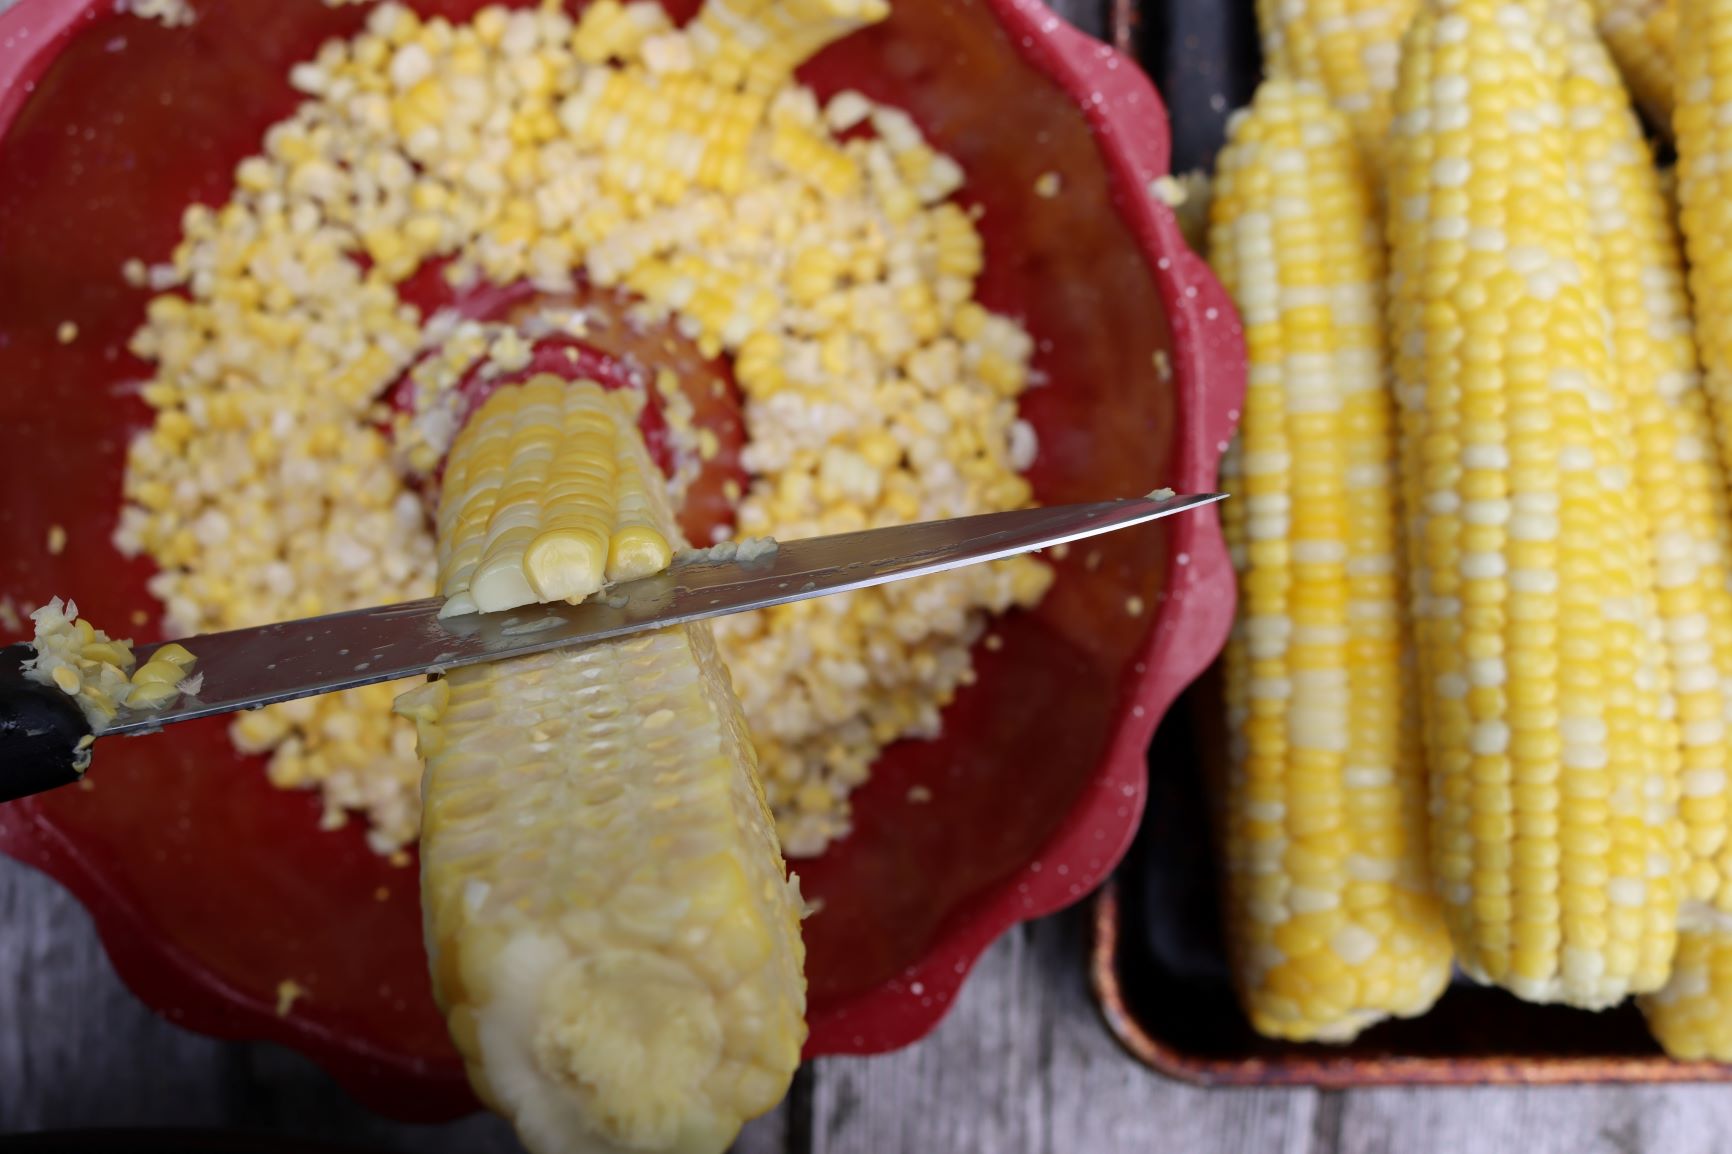
The exact cut you’ll use depends on whether you’re making regular or cream-style canned corn. With cream-style corn, the cobs are cut and then scraped to release all the sweet corn juice and pulp along with the kernels.
Regular canned corn is made from cleanly cut pieces of corn, with roughly 1/4 to 1/3 of the kernel left behind attached to the cob.
This is important!
If you’re making regular canned corn kernels (rather than cream style), leave 1/3 of the kernel attached to the cob (and do not scrape the cob). Adding that bottom portion of the corn kernel will dramatically increase the starch in the canning jar, resulting in a thicker product (ie. creamed corn). Since it’s so thick, it takes much longer to process in the pressure canner.
I’ll walk you through the process for making both regular kernel corn and creamed corn, so take your pick, just be sure not to scrape the cobs if your intent is to make regular whole kernel corn.
Corn cobs leftover from making regular canned corn can be used to make a rich stock for risotto and chowders (or can be fed to the chickens).
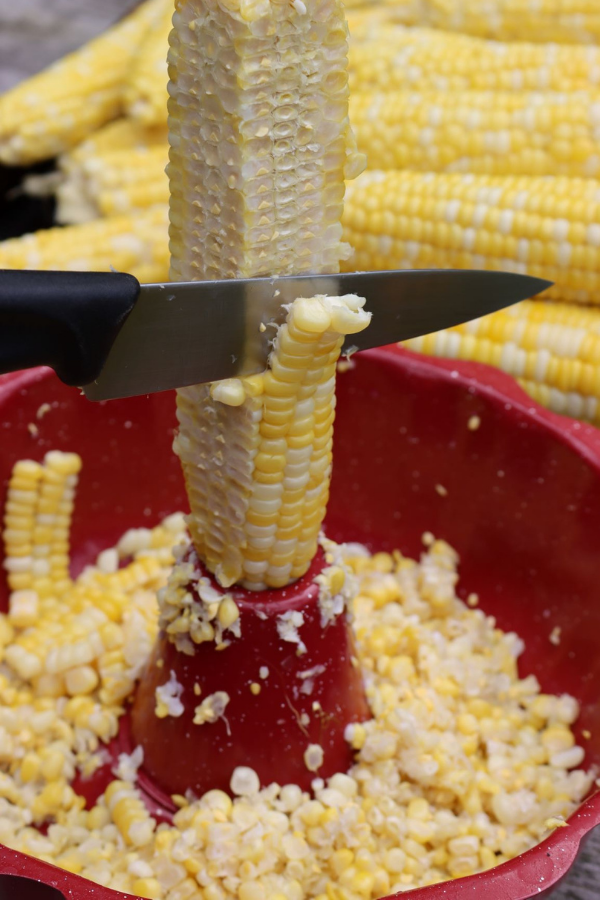
For regular canned corn, cut the corn from the cob at three-fourths the depth of the kernel and do not scrape the cob. You can also cut the corn over a rimmed baking sheet, if you find the kernels are popping off your working space onto the floor.
Resist the urge to scrape the sides of the cob, the corn should be free from pulp and cut just about the base of the kernel.
Preparing Cream Style Corn for Canning
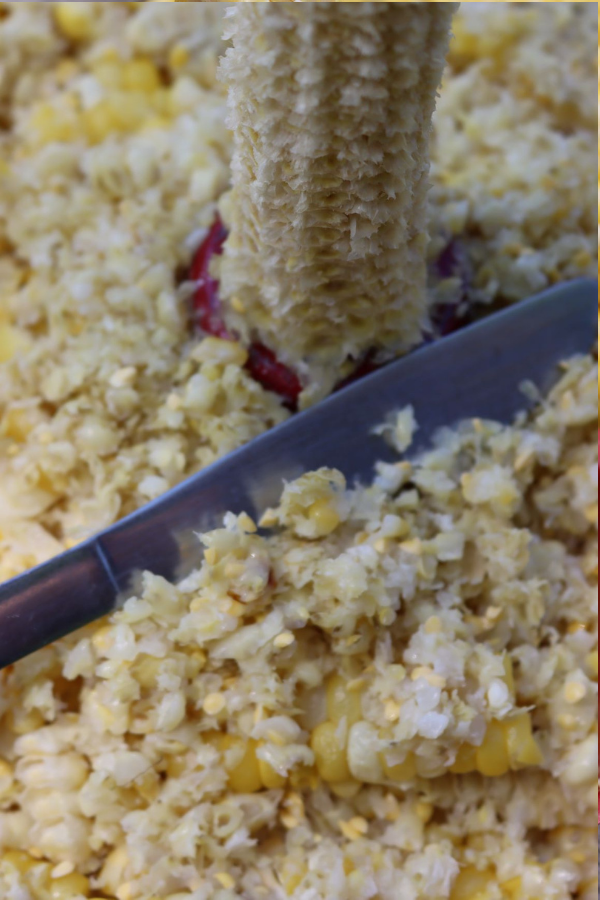
For cream-style corn, cut the corn from the cob at the center of the kernel, scraping the remaining corn from the cob with a knife. With this style of corn, you’re removing every last bit from the cob.
I actually do this second step with a butter knife, running the butter knife over the remaining starchy kernel nubs still attached to the cob. This is a bit messy, and you’ll get covered in sticky starchy kernel shreads. Save it all up and mix it with the kernels when canning cream style corn.
Packing Corn for Canning
Regular canned corn can be raw- or hot-packed; cream-style corn should always be hot-packed to prevent accidental foodborne illness. Some folks think that hot-packing gives better results when it comes to flavor and color, I don’t find too much of a difference when I’m canning corn.
I actually did a blind test with my family, and no one could tell the difference. In the jar, raw pack and hot pack look identical, and once served they taste identical. Given that, it’s a lot easier to do raw pack corn.
(Keep in mind, the corn has already been blanched in either case, so it’s really more “hot pack” or “room temperature pack.”)
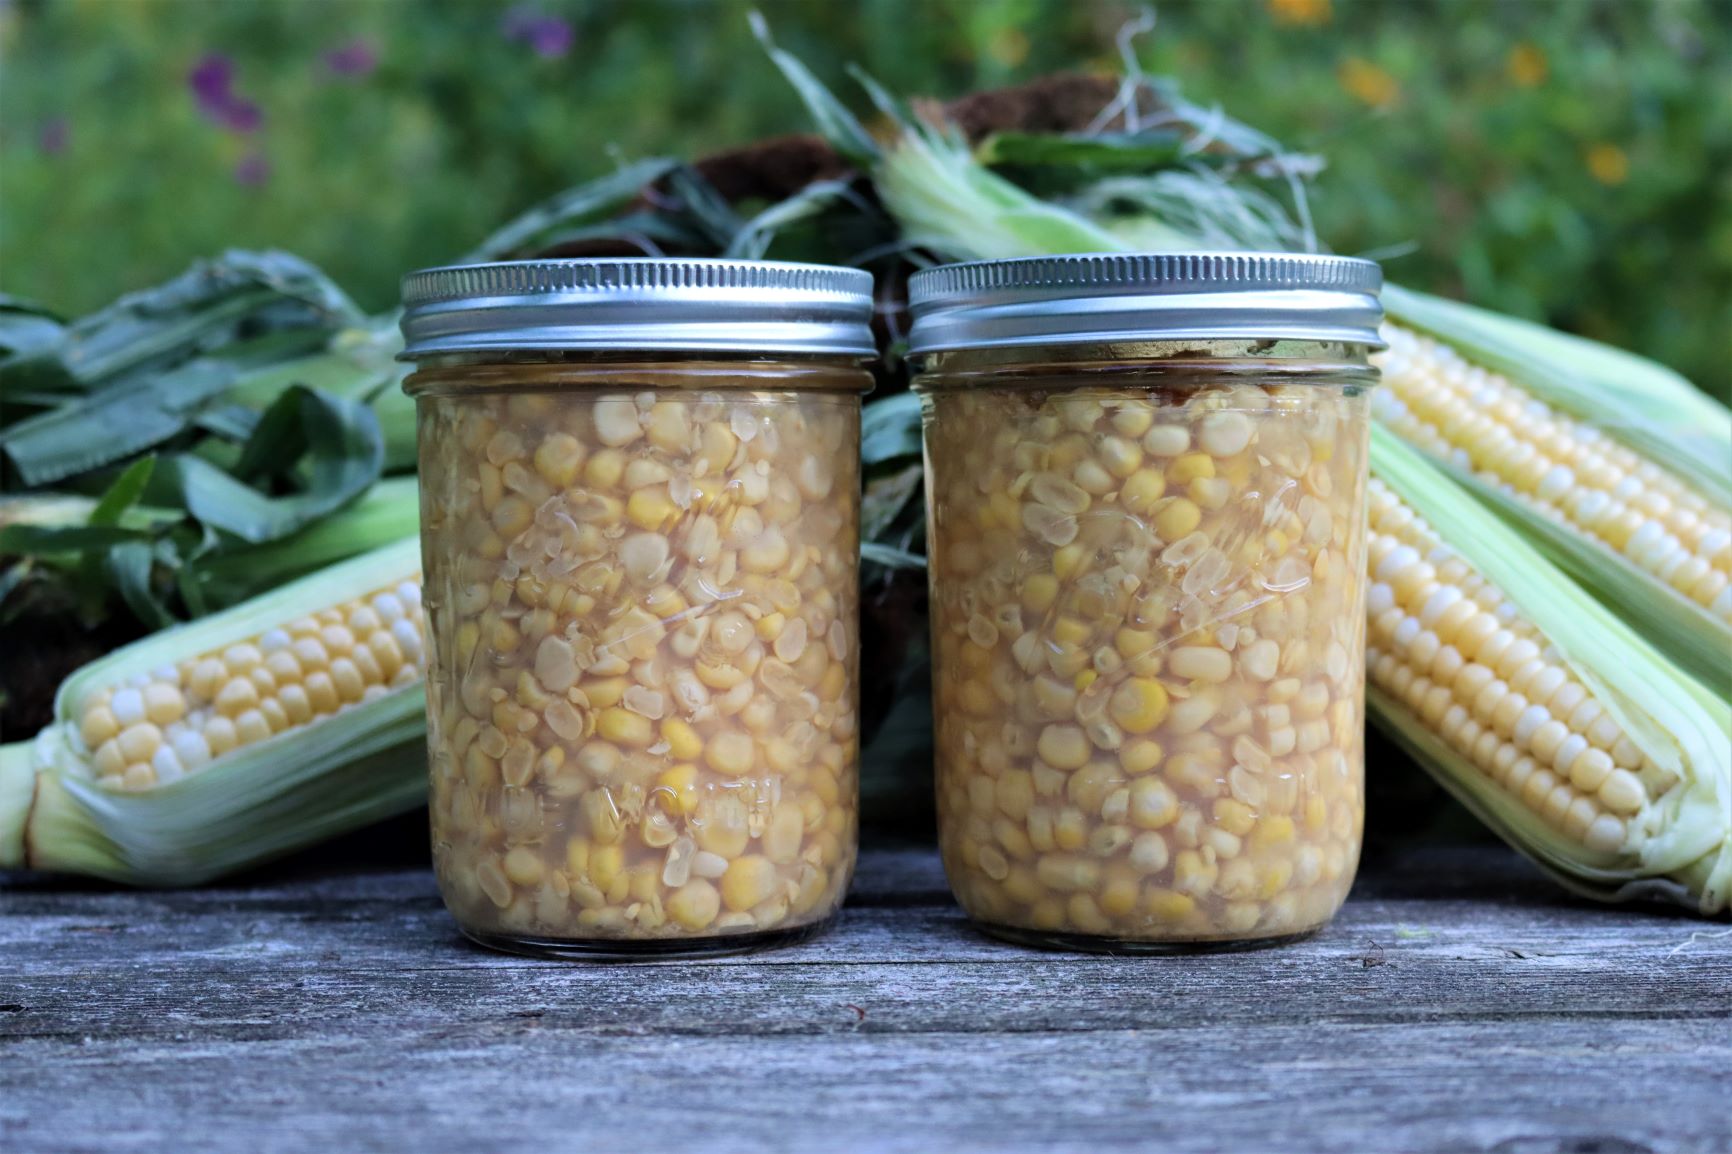
Canning Corn with Raw Pack
To raw-pack corn for canning, fill jars with raw corn kernels, leaving 1 inch of headspace between the top of the corn and the bottom side of the lid.
Avoid shaking the corn or pressing it down to make room, just let it pile up naturally. Corn is one of the few foods that expand during the canning process, rather than shrinks. While you can really pack other foods down, resist that urge when canning corn.
I like to add a teaspoon of salt per quart to the jar (or half a teaspoon if I’m using pint jars), the difference is subtle but goes a long way towards emphasizing the corn’s sweet summery flavor. (Salt is optional though, and can be left out entirely without impacting canning safety.)
Pour freshly boiled water over the corn and optional salt, being sure to leave a 1-inch headspace.
Canning Corn with Hot Pack
To hot-pack corn, begin by heating up water in a large saucepan — you’ll need about 1 cup of water per pint jar of corn kernels (this isn’t a precise measurement, but it helps with portioning out the corn in the next step).
Bring the water and the corn to a gentle boil, heat the corn for 5 minutes. While the corn is heating up, add 1 teaspoon of salt to each quart-sized jar (or 1/2 teaspoon per pint-sized jar), or skip the salt all together if that’s your preference. Salt is optional when canning corn.
When the timer has gone off, fill each jar with corn and the cooking liquid, leaving 1-inch of headspace in each jar.
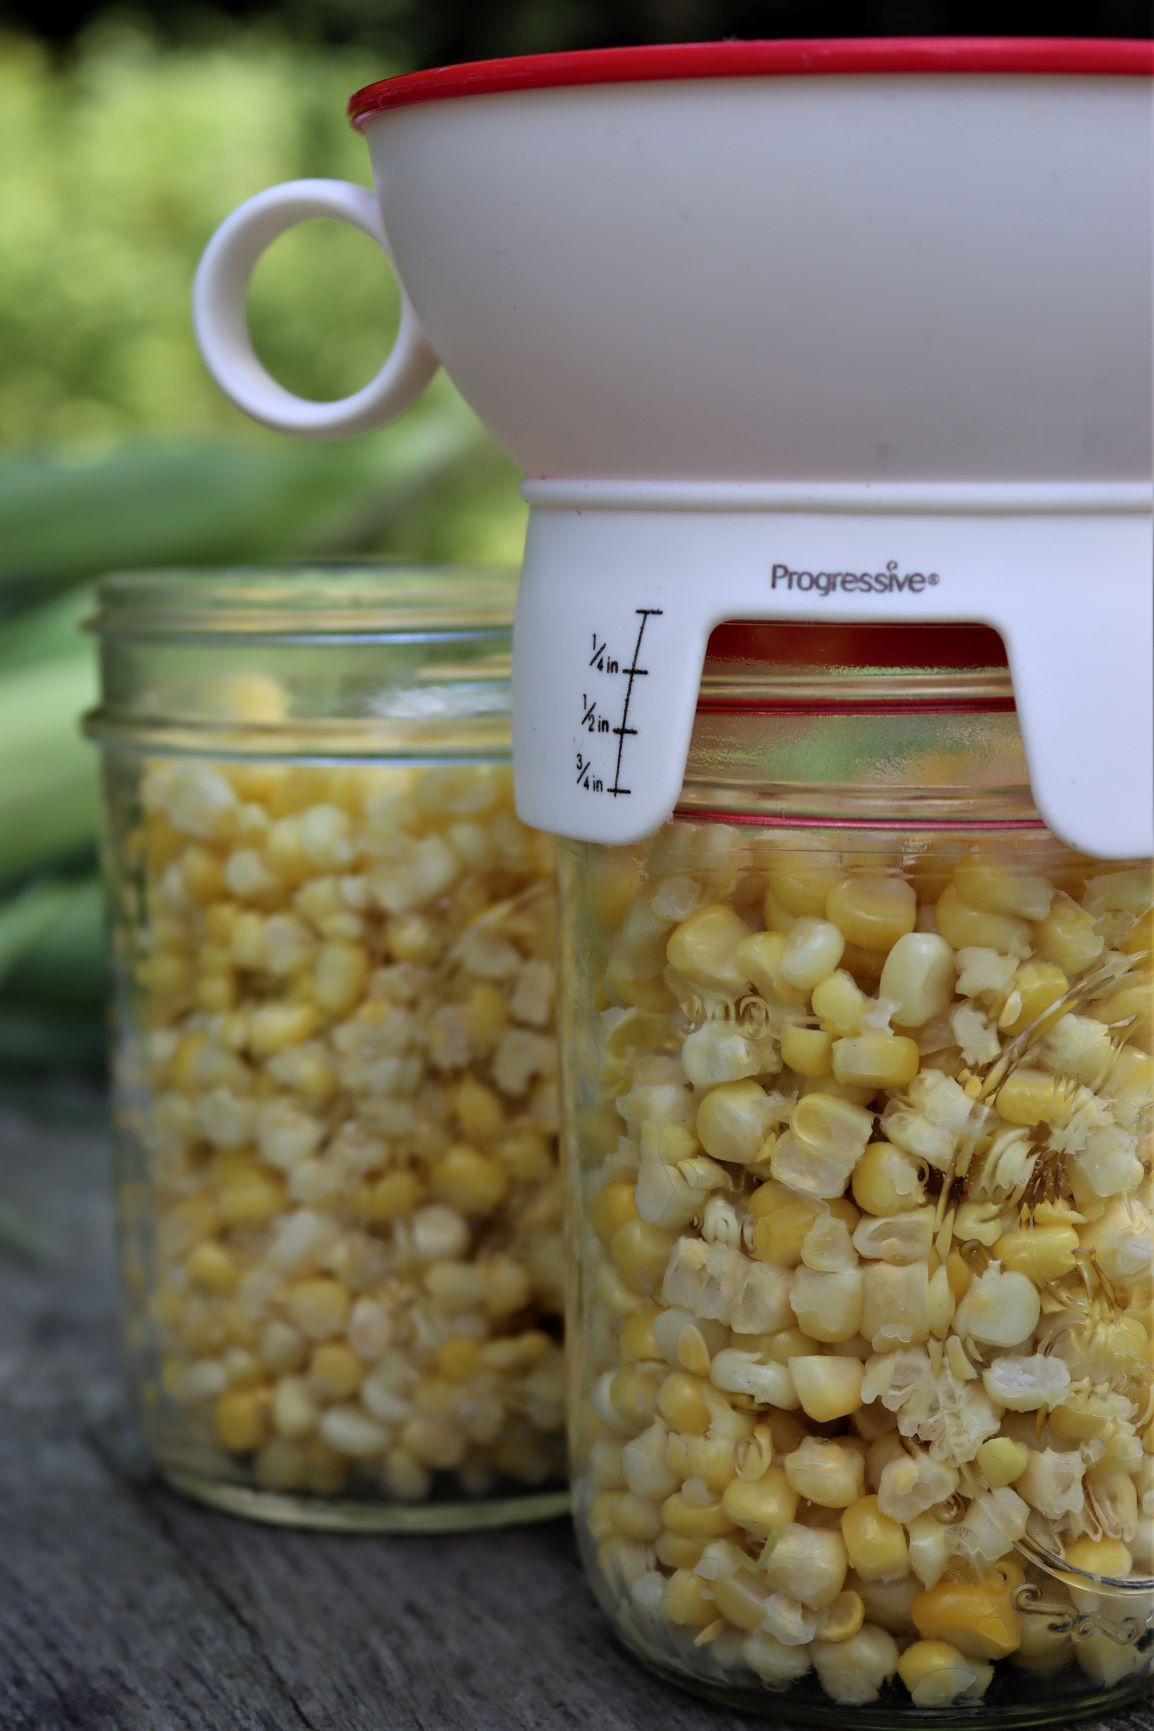
Packing Cream Style Corn for Canning
The process for packing cream-style corn is a bit more involved.
Unlike regular kernel corn, cream-style corn must be hot packed to ensure that the center of the jar is evenly heated during pressure canning.
For food safety reasons, cream-style corn should always be made using a hot-pack method. Do not attempt to raw pack cream style corn.
Begin by adding 1 cup of water to every 2 cups of corn in a large saucepan, bring to a gentle boil. There’s a larger margin of error when it comes to canning cream-style corn, and for this reason, I only use 1-pint jars; quart-sized jars are simply too dense (which means the contents of the jar might not heat through all the way).
(There are actually no approved canning instructions for canning cream-style corn in jars larger than a pint, as it’s just not a dependable method.)
Add 1/2 teaspoon of salt to each pint jar, if desired.
When the corn and water mixture has reached a boil, evenly divide the corn mixture among waiting jars, again leaving 1-inch headspace.
Remove any air bubbles by sliding a nonmetallic spatula between the side of the jar and the corn.
Canning Corn
For all methods, once the jars have been filled, seal with 2 part canning lids and twist to just barely finger tight. In other words, don’t use any force when tightening the lids.
During the processing stage, there needs to be enough room for air to escape as the contents of the jars heats up. This is something that becomes intuitive if you’ve done a lot of canning. For beginners, I’d suggest turning the screw band until you feel resistance and then giving it an extra quarter-turn from there.
Regardless of the method used to pack corn, the actual processing must always be done using a pressure canner. Corn is an example of a low-acid food, which means it needs to be preserved at an ultra-high temperature. Do not water bath can corn!
Canning Whole Kernel Corn
There are two main types of pressure canners, a weighted gauge, and a dial gauge. I have to say, I vastly prefer using a weighted gauge over a dial gauge. A weighted gauge pressure canner is set with a weight on the steam valve, as the steam inside the canner expands, it causes the weight to jiggle and release some of the pressure.
With a weighted gauge canner, you want to get the canner up to temperature and then lower the heat slightly until the weight moves every minute or so. Dial gauge canners, on the other hand, require constant vigilance — you have to constantly monitor the dial so it reflects the pressure you need.
For more information on pressure canning, my beginner’s guide to pressure canning contains everything you’ve ever wanted to know about canning low-acid foods.
Directions can vary slightly based on the brand of canner, so be sure to follow the manufacturer’s instructions. That said, most are pretty similar, and this is the basic process:
To process in a pressure canner, carefully place sealed jars on a jar rack in a canner along with 2 to 3 inches of water. For raw pack, the water in the canner should be 140 degrees F, which is quite hot, but no where near simmering/boiling. For hot pack, the water should be around 180 degrees F, which is just barely simmering.
These temperatures ensure that there’s only a minimal difference between the temperature inside the canner and the canner itself when the food goes in, which reduces the risk of thermal shock. (Thermal shock on jars can result in broken canning jars.)
Fasten the canner lid, but leave the pressure release valve open. Allow the canner to vent steam for a full 10 minutes before fully sealing the canner and allowing it to come up to pressure.
(This 10 minutes of venting ensures that the canner is completely full of steam for processing, which will make sure the jars process fully and evenly.)
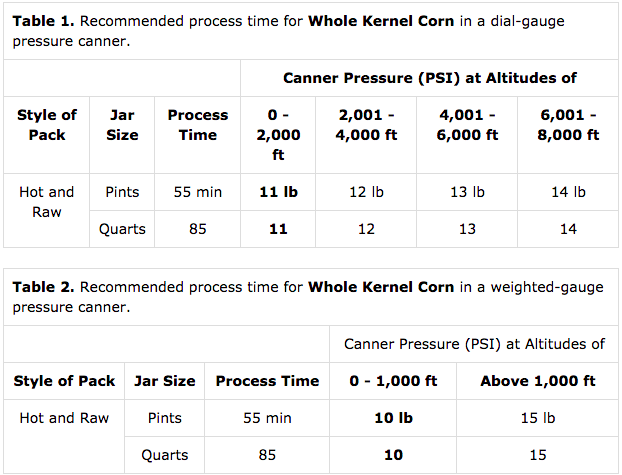
Don’t start timing until the canner is fully up to pressure. The time and pressure vary based on your altitude and the type of canner you’re using.
The following tables give times and pressure for canning whole kernel corn at varying altitudes. Higher altitudes require more canner pressure, but are processed for the same time.
(Be aware, canning cream-style corn takes a lot longer, and has it’s own separate timetable further below.)
Canning Cream Style Corn
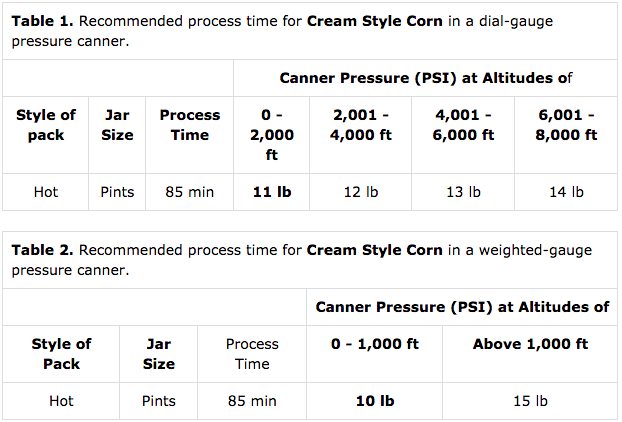
As I mentioned above, cream-style corn should be made in pint (or even half-pint) jars. You’ll notice that cream-style corn has a longer canning time than whole kernel corn, this extra time is needed to process the thickened corn and corn pulp.
As a reminder, cream-style corn must be hot packed, and can only be canned in pint jars. That’s why this table is much simpler, and only has one option for pack type and jar size.
Once the canning time is complete, turn off the heat and allow the canner to cool. Unlike electric pressure canning appliances (ie. instant pots), pressure canners must depressurize naturally. Do not attempt to rapidly cool your pressure canner with wet towels, and don’t attempt to vent pressure manually.
It’ll take the pressure canner an hour or two to reach 0 pounds pressure on its own. I usually just allow it to cool completely by leaving it undisturbed on the stove overnight.
At this point, you’ll want to remove the weighted gauge (if using), to allow any last bits of steam to escape.
Carefully take off the canner lid, tilting it away from you so that steam doesn’t come towards your face.
Remove the jars with a jar lifter and set them on a clean towel on the counter. Resist any urges to tighten the lids and let the jars air-cool for 12 to 24 hours.
When the canned corn is completely cool, remove the screw bands and check the seal of the lid. The lids should be indented, if you find any that aren’t you can try reprocessing the corn in the pressure canner, or store them in the refrigerator for immediate use.
Corn that has been appropriately canned in a pressure canner for the required time should maintain good quality on the pantry shelf for 12-18 months. If sealed, it’ll be good to eat for much longer than that, but the quality tends to degrade after a year of storage.
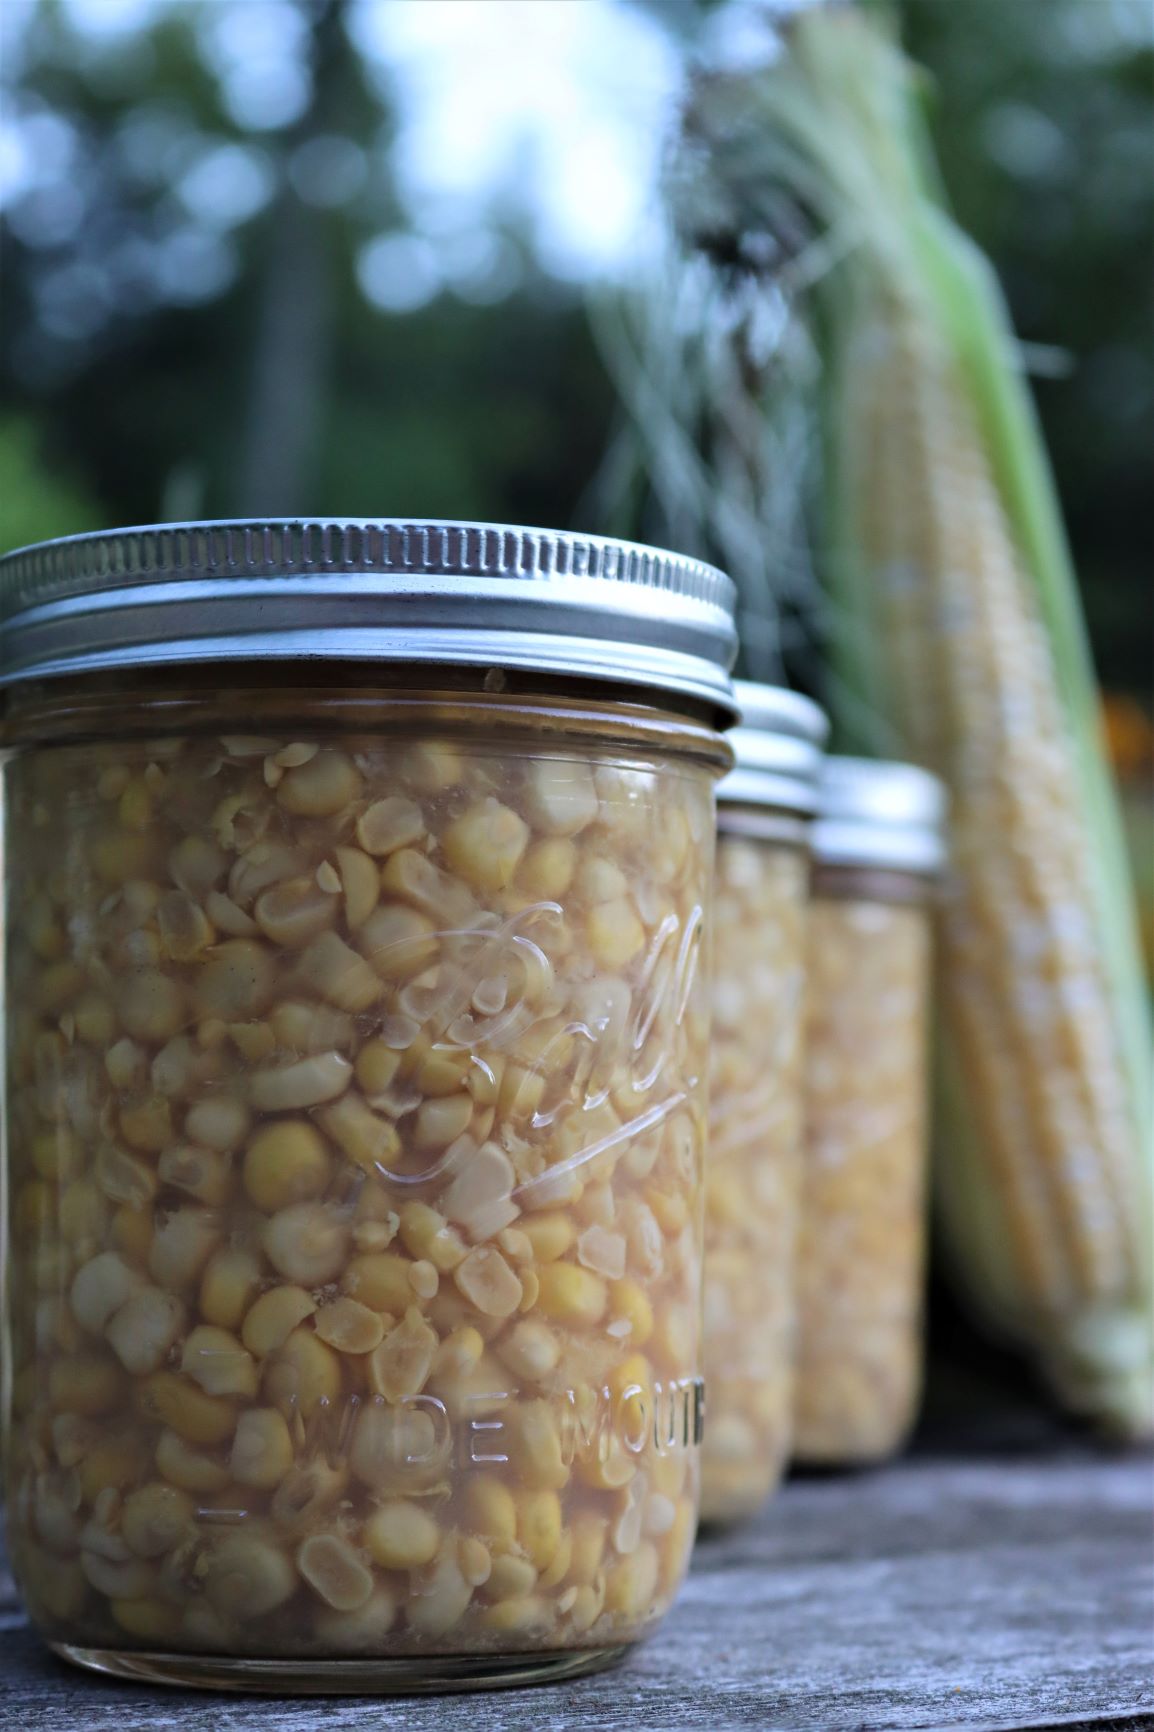
Difference Between Regular and Cream Style
Both regular and cream-style corn should be sweet and full of fresh-corn flavor, the difference lies in the texture and the actual canning liquid.
As the name suggests, whole kernel corn is made up of distinct kernels and a light preserving liquid. Cream-style corn is milkier in texture and can sometimes have a sweeter taste. To make it even creamier, you can blend half of the jar and recombine it, it’s particularly delicious when served hot with pork or game.
If you choose to do that, it must be done after canning (before serving). That extra blended corn thickens the mixture too much for safe canning.
With the jars closed and lids on, it can be a bit tricky to tell the difference between the regular whole kernel and cream-style corn, so be sure you label all the jars if you make both types.
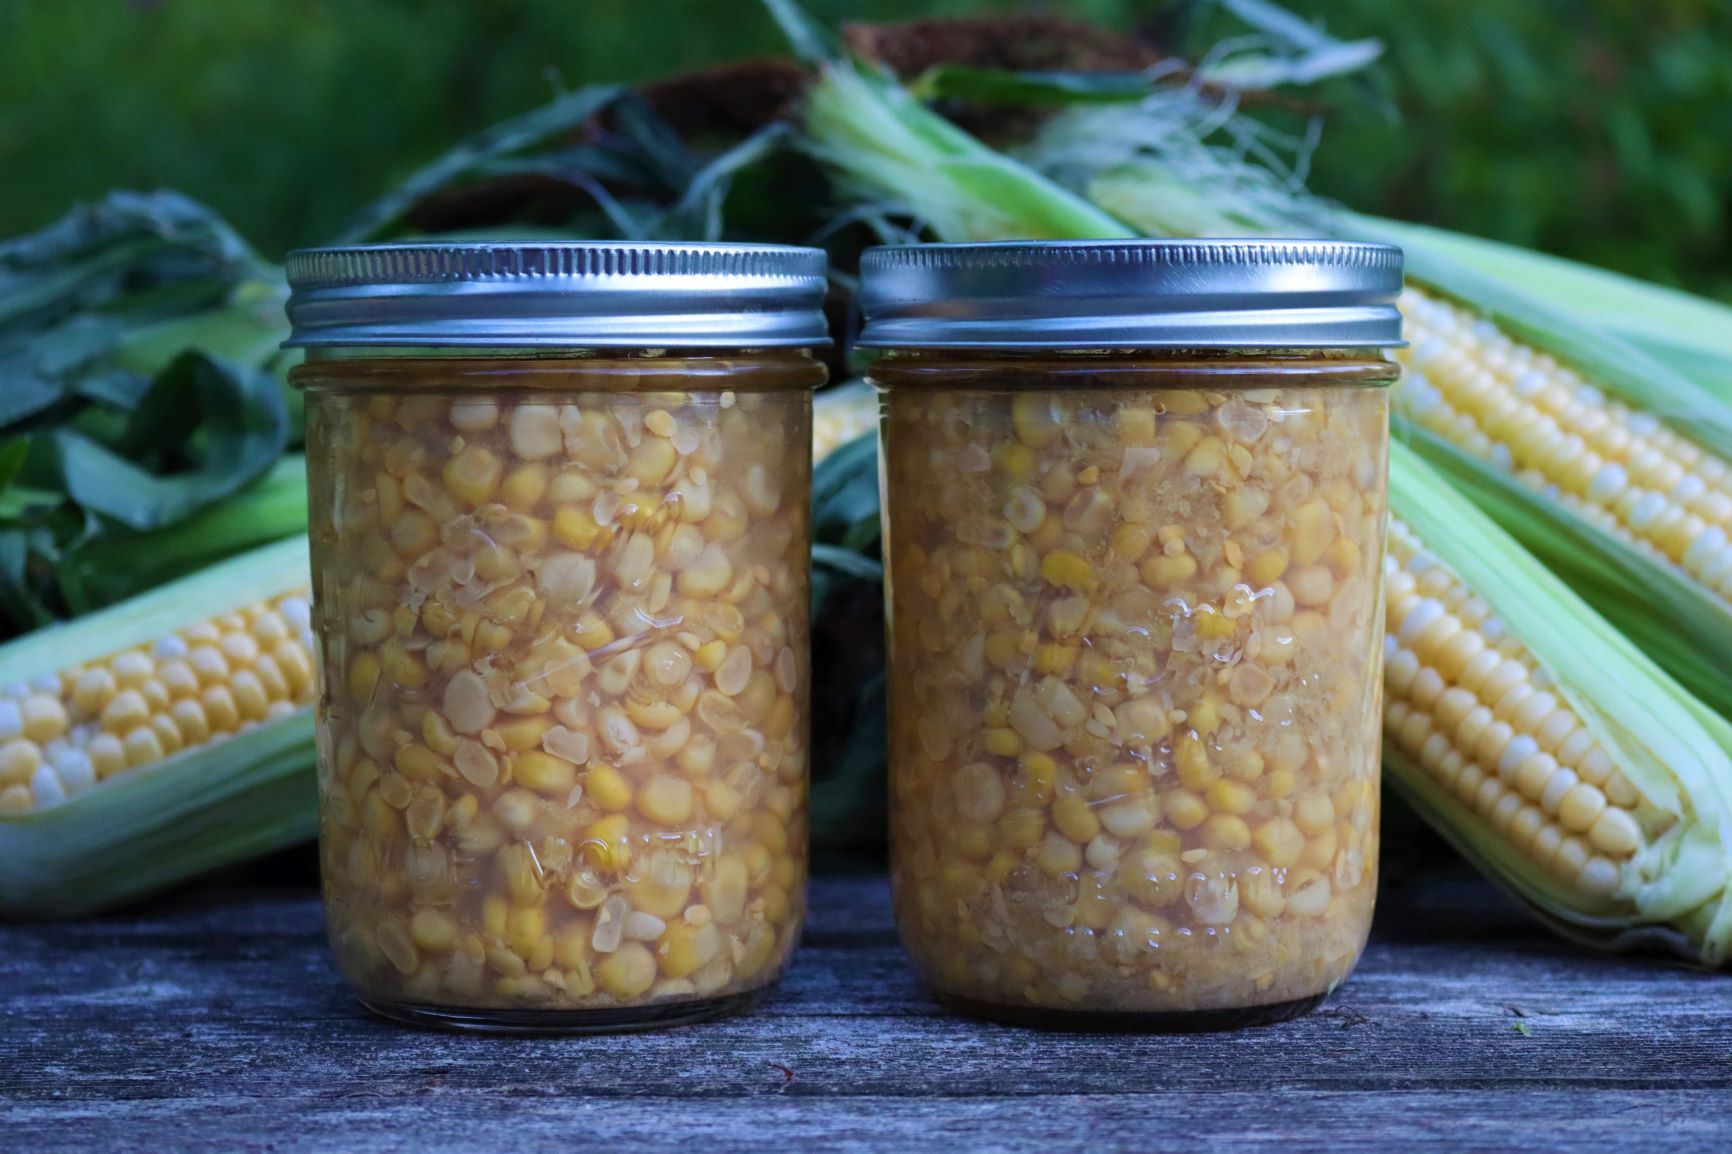
Troubleshooting Canning Corn
Canning corn is a fairly straightforward process, but there are a couple of common problems that can occur when you’re first starting out.
Brown spots
Browning is the most common problem with home-canned corn, and can be caused by a few different issues. The most common is simply the variety of corn. Some modern varieties of sweet corn are super sweet or sugary enhanced hybrids, which are bred to contain absurd amounts of sugar (more sweetness, but less corny flavor).
The sugar crystals in these varieties actually carmelize during the canning process. It’s a cosmetic issue, and the corn is still perfectly fine to eat. (And absolutely delicious.)
If this bothers you, choose heirloom rather than hybrid corn, which still has great flavor, and is plenty sweet. It’s just a bit less over the top, and cans up nicer. Note that not all hybrid corn will have this issue, so really you’ll have to test the particular variety you’ve grown or what’s available at the market.
The other potential cause is canning at too high a pressure. If you’re just barely over 1,000 feet in elevation, you’ll get better results canning corn with a dial gauge pressure canner where you can increase the pressure only moderately to 12 or 13 pounds as directed.
Dial gauge canners require you to jump from 10 pounds pressure to 15 pounds once you’re over 1,000 feet, which can result in caramelization when canning corn.
You’ll have the same problem canning pumpkin or canning sweet potatoes, which will also brown when processed at too high a pressure.
Expansion
Most foods shrink when canned, and home canners go out of their way to really cram fruits into the jar to avoid half-empty jars when canning peaches.
Corn, on the other hand, is a starchy vegetable that expands during canning.
Whenever canning starchy vegetables and legumes that are prone to expansion, things like corn, peas, and lima beans, it’s important to avoid overpacking when filling the jars.
Because corn is fairly dense, it’s important to leave space for the water and corn juice to circulate around the kernels. Pack the jars loosely, and don’t tamp the kernels down in the canning jars.
Siphoning
Siphoning, or liquid loss as it’s also called, occurs when liquid is drawn from the jar because of a sudden change in air pressure and temperature. There are a few ways to troubleshoot this issue:
- Try hot packing instead of raw packing, as hot packs go through less temperature change during the initial canning phase.
- Allow the jars to cool completely before removing them from the canner. While you can technically remove them as soon as the canner reaches 0 pounds pressure, they’re much less likely to siphon if you leave the canner to cool overnight.
- Be very thorough when removing air bubbles. Air bubbles result in pockets of air which leaves room for the liquid inside the jars to bubble over as the air pushes up to escape during canning.
- Tighten the jar bands a bit more. Finger tight is a pretty loose term, and if you’re regularly experiencing siphoning it could be that you’re leaving the jar rings/bands a bit too loose when you pack the canner.
Either way, siphoning is a cosmetic issue, and so long as the jars are sealed, it’s still perfectly safe to eat home-canned corn that has lost liquid (assuming they lost no more than half the liquid and didn’t go completely dry).
Anything above the waterline will brown in storage due to oxidation, so it’s best to eat these jars first if possible.
Starchy or bitter flavors
Starchy or bitter flavors can develop when using corn that isn’t fresh or sweet. Whenever possible, choose just-picked corn fresh from the field or farmers market. The longer corn sits after being picked, the more starchy the flavor becomes.
Other Ways to Preserve Corn
Canning is just one method for preserving fresh corn:
- How to Freeze Corn (with freezing instructions for blanched, unblanched, and whole corn)
- How to Dry Corn for Popcorn
- How to Make Canned Corn Relish
- How to Freeze Corn on the Cob
Canning Corn
Ingredients
- 31 1/2 lbs. for 7 quarts or 20 lbs. (for 9 pints) fresh, in-husk corn
- Salt, optional
Instructions
- 1. For whole kernel corn, husk, desilk, and carefully wash fresh corn on the cob.
- 2. Using a sharp knife, cut corn from the cob and three-fourths the depth of the kernel. Do not scrape the cob.
- 3. If using the raw-pack method: Fill jars with corn kernels, leaving space in case of expansion. If using salt, add 1 teaspoon to each quart jar or 1/2 teaspoon to each pint jar. Add fresh boiling water, leaving 1-inch headspace at the top.
- 4. If using the hot-pack method: For each pint jar add 1 cup of water to a saucepan along with prepared corn. If using quart, add 2 cups of water per quart along with prepared corn. Bring water and corn to a gentle boil and heat for 5 minutes. If using salt, add 1 teaspoon to each quart jar or 1/2 teaspoon to each pint jar. Distribute hot cooking liquid and corn evenly among jars, leaving 1-inch headspace at the top.
- 5. Seal jars with 2-part canning lids and load into the pressure canner.
- 6. Place the lid on the canner and let it come to a boil. Let the steam vent for 10 minutes before adding the canning weight and allowing the canner to reach the correct temperature. If using a dial-gauge pressure canner at 2,000 feet or lower, the canner pressure should be 11 pounds. If using a weighted-gauge pressure canner at 1,000 feet or lower, the canner pressure should be 10 pounds. See tables within the article for higher elevation canning pressures.
- 7. For quarts, process the jars at pressure for 85 minutes; pints should be processed for 55 minutes. Do not start timing until the pressure canner has reached the specified pressure for your altitude.
- 8. Once the processing is finished, let the canner come to room temperature before opening and removing the jars with a jar lifter.
- 9. When the jars have reached room temperature, check whether the lids have sealed properly. Re-process any jars with unsealed lids or store in the fridge for immediate consumption.
- 10. Store sealed processed jars in a cool, dry place (like the pantry) for up to 18 months.
Notes
Pressure Canning Recipes
Want to keep that pressure canner cooking?
- Canning Green Beans
- Canning Beef
- Canning Sweet Potatoes
- Canning Pumpkin
- Canning Potatoes
- Canning Carrots
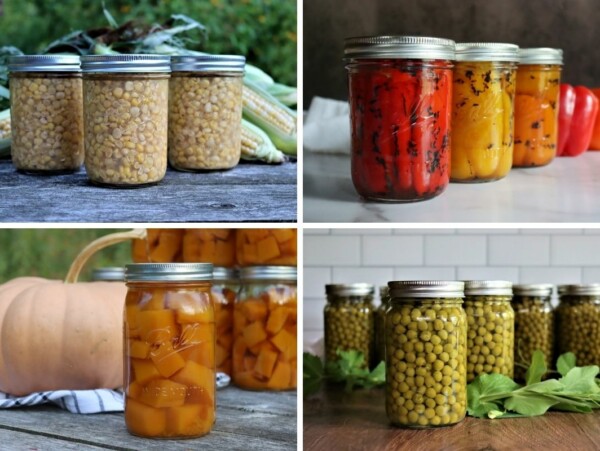
Summer Canning Recipes
Putting up more than just corn this summer?
You answered so many questions for me—thank you so much for all the details and explanations, especially the reasons for blanching corn. I can’t wait for summer corn to start coming in!
You’re very welcome. We’re so glad it was helpful to you.
Hi! First of all, thank you so much for this very detailed information/directions. You have answered several questions for me as I’m new to this. We got the Nesco/Carey electric smart canner. My husband and I tried corn first. Followed all directions EXCEPT we put bottled water in jars to cover corn. It wasn’t boiled. We checked seal by lift method, tap method, Lids were popped when they came out. We think we lost 6 pints, 2 quarts due to water error. Any advice please?
Any food that hasn’t been properly sealed and processed should be consumed right away or frozen for later. It is also possible to reprocess certain foods according to this process. https://nchfp.uga.edu/how/store/store_home_canned.html
Thank you for all the hard work you put into this blog, as I am extraordinarily grateful. My corn has canned perfectly!
You’re very welcome. So glad you enjoyed it.
Hi Ashley! Can the blanching be done using a microwave? I put the full corn cob not shucked into the microwave, cook for 1-2 minutes, then shuck it and rinse in cold water. The silk and leaves come right off. Would that be OK for then processing in the canner? Thanks for any info….living off grid, I’m not sure if you use a microwave!
I’m not really sure how that would turn out since I haven’t tried that method in the microwave. I would also think that if you’re doing a large batch that it would take a long time to do all of your corn that way. I don’t see anything that it would hurt from a safety perspective but it’s possible that it could affect the texture of the finished product. If you decide to give it a try, let us know how it turns out.
I was wondering if the cream corn instructions could be used to can corn chowder?
I would follow these directions for canning soup from the National Center for Home Food Preservation.
Is there a flavour difference if salt is added during the pack process or at the table?
I’m sure there will be a flavor difference but it’s totally ok to leave it out if necessary. The salt is not needed for canning safety.
Hi i was wondering if you were canning 1/2 pints of whole corn how long would you pressure can them for? thank you 🙂
I can’t find any specific processing times for half-pint jars so I would recommend using the same processing time as the pints.