Affiliate disclosure: This post may contain affiliate links. Please see our Privacy Policy.
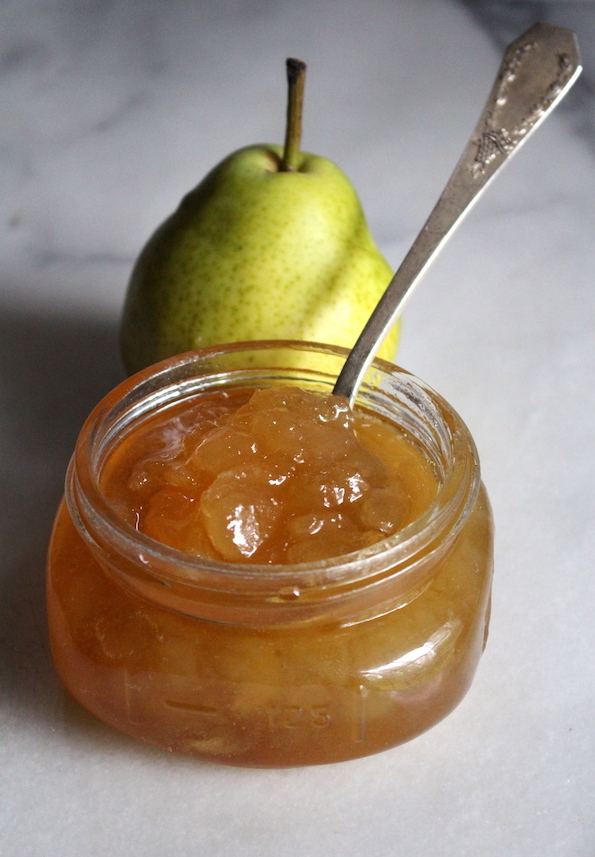
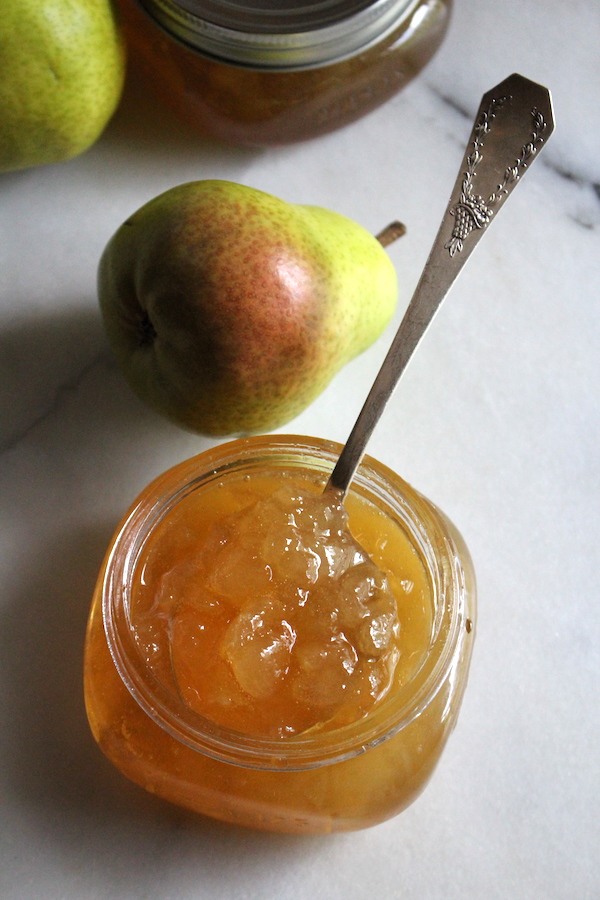
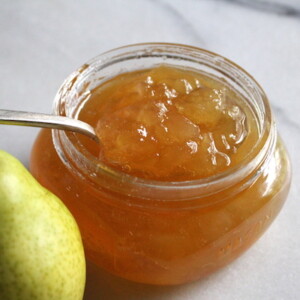
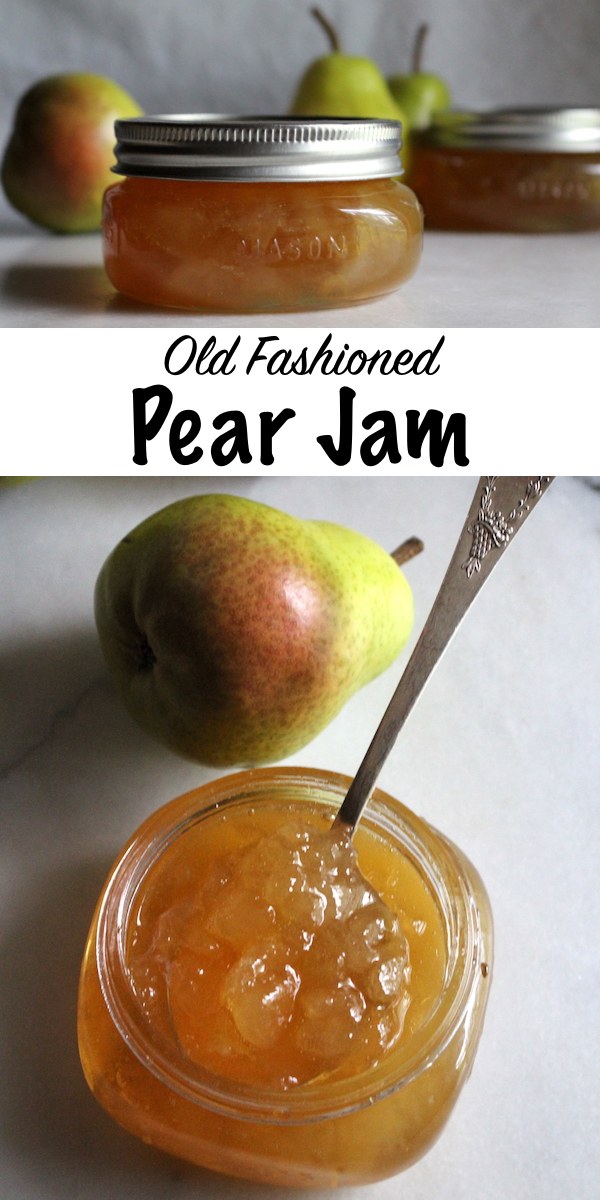
Pear jam captures the delicate, honey-like sweetness of fresh pears in a spreadable preserve that lasts all year long. Unlike store-bought versions that often taste flat and overly sweet, homemade pear jam made without commercial pectin has a rich, nuanced flavor with tender chunks of fruit suspended in a glossy gel.
The secret to getting this old-fashioned preserve just right lies in one simple technique that transforms ordinary pears into something truly special.

Before commercial pectins became widely available, home cooks relied on the natural pectin in fruits to thicken their preserves. Pears happen to be relatively high in pectin, especially when slightly underripe, which makes them perfect candidates for old-fashioned jam making. The catch is that pears also turn to mush quickly when heated, so without the right preparation, you end up with pear sauce or pear butter rather than pear jam.
Macerating the pear chunks in sugar overnight is the key to making a chunky pear jam that sets beautifully on a spoon. This single step changes everything, drawing out the natural juices while firming up the flesh so the pieces hold their shape during cooking.
Notes from My Kitchen

The overnight maceration step is truly non-negotiable here. I know it requires planning ahead, but trust me when I say that skipping this step will leave you with sweetened pear sauce instead of proper jam. The sugar draws moisture out of the fruit cells while simultaneously firming the pectin structure, creating pear pieces that stay intact through the cooking process. Give yourself at least 12 hours, though 24 is even better.
I also want to address a common issue: burning. A few readers have mentioned their jam scorched on the bottom of the pot. The key is to reduce the heat after the jam comes to a boil and stir more frequently as it thickens. Use a heavy-bottomed pot that distributes heat evenly, and keep a close eye on things during the last few minutes of cooking when the jam is most likely to stick.
Choosing Pears for Pear Jam
According to the PennState Agricultural Extension, recommended varieties for preservation include Bartlett, Bosc, Anjou, and Comice, while Kieffer pears are acceptable and Seckel pears work well for pickled and spiced products.
I use Bartlett pears for most of my pear jam batches because they have firm flesh and excellent flavor that holds up well to cooking. The most important factor, regardless of variety, is ripeness. Select pears that are slightly underripe or just barely ripe for jam making. Underripe pears contain more pectin and will hold their shape better during cooking. If your pears are already soft and fully ripe, they will work but may produce a softer set.
Unlike apples that store for months in a root cellar, pears are generally short-lived fruits. If left to ripen on the tree, they actually begin to rot from the inside out, which is why most pears are picked slightly underripe and allowed to mature on the counter. This makes pear harvest time the perfect opportunity for preserving, whether you are making jam, canning pear halves, or brewing homemade pear cider.
Ingredients for Pear Jam
This recipe keeps things simple with just three ingredients, each playing an important role in the final preserve.
- Pears: The star of the show, pears provide natural sugars, pectin, and that distinctive honey-like flavor. Choose firm, slightly underripe fruit for chunks that hold their shape. You will need about 4 pounds before peeling and coring.
- Sugar: Granulated white sugar draws moisture from the pears during maceration, helps activate the natural pectin, and acts as a preservative. This recipe uses 3 cups, though you can adjust between 2 and 4 cups depending on your sweetness preference.
- Lemon Juice: Bottled or fresh lemon juice adds pectin to help the jam gel, provides acidity that balances sweetness and prevents browning. Use 1/4 cup for this batch size. It’s for flavor, not preservation, so feel free to use fresh lemon juice for better flavor.
Traditional pear jam recipes often call for as much as 4 cups of sugar for 4 pounds of fruit, which I find overly sweet. I prefer a ratio that lets the pear flavor shine through rather than tasting like candy.
You can experiment with sugar amounts within the range of 2 to 4 cups and still achieve a nice set, though less sugar may result in a slightly softer jam. For a moderately sweet preserve that is not cloying, 2.5 to 3 cups works well. If you want to reduce sugar even further, consider using Pomona’s Universal Pectin, which allows jam to gel with minimal sweetener.
I’ve made Ashley’s pear jam recipe multiple times now and it always turns out perfectly. The overnight maceration step really does make all the difference. Beautiful chunks of pear in a glossy jam that sets up just right!
How to Make Pear Jam
The key to pear jam success lies in the preparation. If you rush through the maceration step or skip it entirely, your pears will quickly turn into sauce in the jam pot. Follow these steps for pear chunks suspended in a beautiful gel.
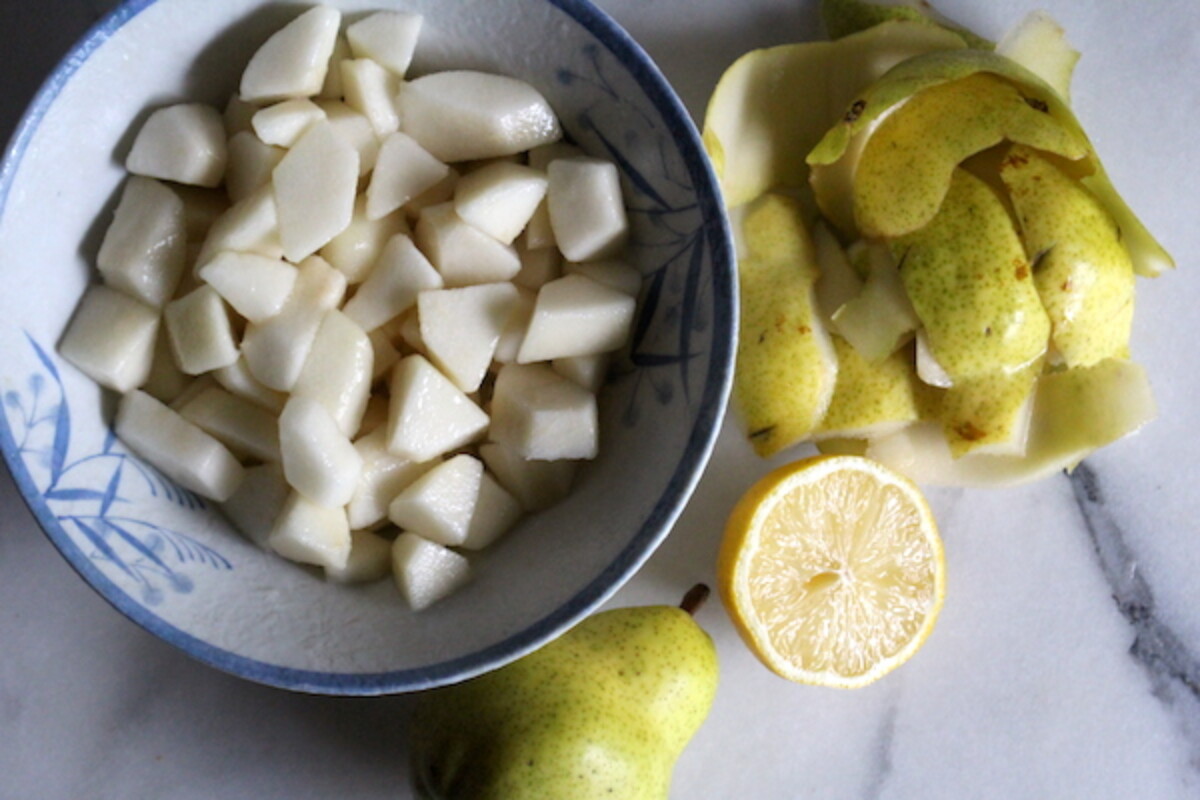
Preparing the Pears
Start by peeling and coring your pears, then chop the fruit into uniform pieces about 1/2 inch in size. The size you cut now will largely remain the same after cooking, so think about how you want your finished jam to look. Larger chunks create a more rustic preserve, while smaller pieces give a smoother texture.
As you work, toss the pear chunks with the lemon juice to prevent oxidation and browning. The lemon juice also contributes extra pectin since citrus fruits are naturally rich in this gelling agent. Most commercial pectins are actually derived from citrus, so you are essentially making your own mild pectin boost.
Macerating Overnight
This step is crucial, so pay close attention. The pear chunks must macerate in sugar for 12 to 24 hours before cooking. If you are truly crunched for time, the absolute minimum is 4 hours, but longer is strongly recommended for the best results.
Add the sugar to your lemon-coated pear pieces and stir to combine. At first, it will look like an absurd amount of sugar on relatively little fruit, but this is exactly what creates the magic. The sugar draws liquid out of the pear cells through osmosis, creating a rich syrup while simultaneously firming up the fruit flesh. This dual action is what allows the pear chunks to hold their shape during cooking.
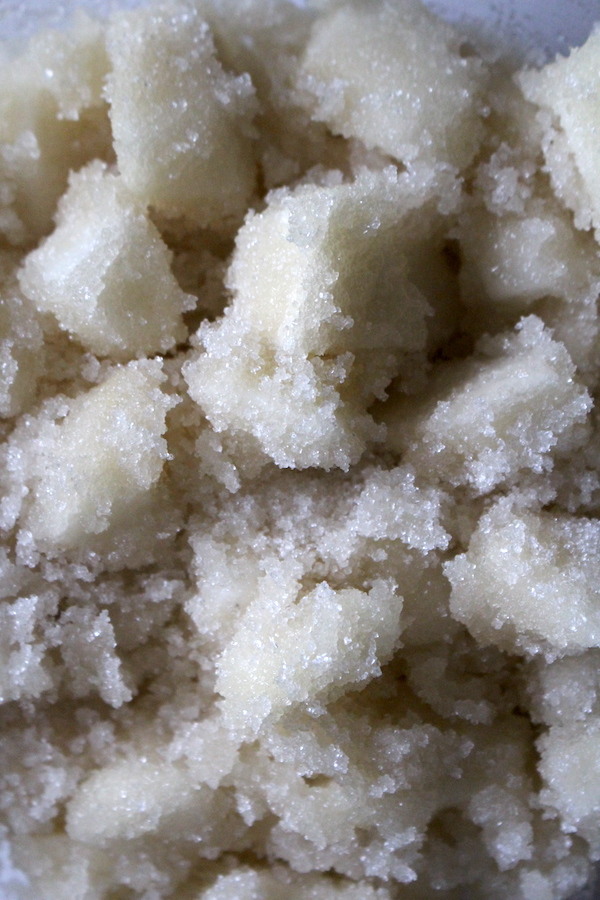
Cover the bowl and place it in the refrigerator overnight. By morning, you should have firm pear cubes floating in a pool of their own sugary syrup, with most or all of the sugar dissolved.
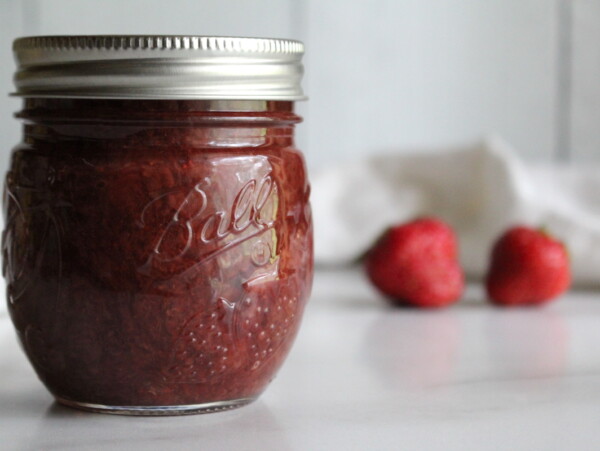
I use this same maceration technique for strawberry rhubarb jam since both strawberries and rhubarb are low-pectin fruits that benefit from this treatment. It also works well for old-fashioned strawberry jam when you want a chunkier texture.
Cooking the Jam
Transfer everything from the bowl, including all the syrup, into a deep, heavy-bottomed jam pot. Leave extra space at the top because the jam will foam up during cooking. Bring the mixture to a hard boil over high heat, then reduce the heat slightly and cook for about 10 to 15 minutes, stirring frequently to prevent sticking.
If the pear pieces seem too large for your liking, you can gently crush some of them with a potato masher or the back of a wooden spoon. I find that the chunks hold their shape remarkably well through cooking, so you may need to break them up a bit if you prefer a smoother consistency.
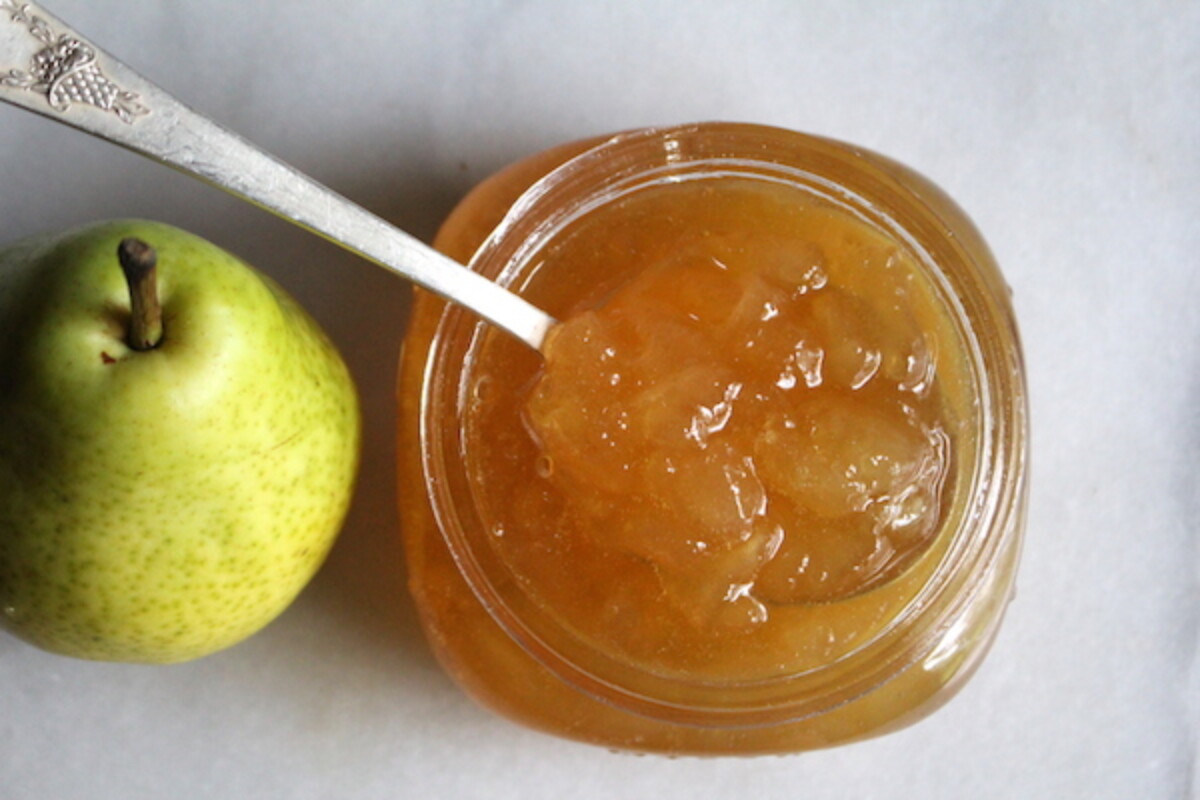
Keep cooking until the mixture reaches gel stage. To test for set, place a small plate in the freezer beforehand and drip some jam onto it. After a few seconds, run your finger through the jam. If it wrinkles and holds its shape, it is ready. Alternatively, you can use an instant-read thermometer. Pear jam sets at 220°F at sea level, and you should reduce this by 1°F for every 500 feet of elevation. Here in Vermont at about 1,000 feet, my jams finish at 218°F.
Once your jam reaches gel stage, immediately remove it from the heat. The jam will continue to thicken slightly as it cools. For more details on testing techniques, see my complete guide on how to make jam.
Canning Pear Jam
I usually can my jam so I can enjoy it all year long, but it is completely optional. You can also store it in the fridge for 2 to 3 weeks or freeze it for up to 6 months. For a complete walkthrough of the process, see my beginner’s guide to water bath canning.
To can your pear jam, start by preparing your water bath canner and washing your jars. When the jam reaches gel stage, ladle it into hot half-pint jars, leaving about 1/4 inch headspace. Run a plastic spatula along the inside to remove air bubbles, wipe the rims, and secure with 2-part canning lids. Process in a water bath canner for 10 minutes. If you are above 6,000 feet in elevation, increase the processing time to 15 minutes.
Once the jars are done, use a jar lifter to remove them from the canner and let them cool on a towel on the counter. After 12 to 24 hours, check the seals by pressing the center of each lid. Sealed lids will not flex. Store any unsealed jars in the refrigerator and use them soon. Properly sealed jars will maintain peak flavor for 12 to 18 months on your pantry shelf. Refrigerate after opening.
Yield Notes
This recipe yields approximately 4 to 5 half-pint jars (8 oz each), depending on how long you cook the jam and how much moisture evaporates. The exact yield also varies based on the water content of your particular pears and the sugar amount you choose.
Pear Jam Variations
While I love the simple three-ingredient version of this jam, pears pair beautifully with warming spices and other flavors. Here are some variations to try once you have mastered the basic recipe.
- Pear Jam with Ginger: Add 2 teaspoons of freshly grated ginger to the jam pot along with the macerated pears. Ginger adds a warm, spicy note that complements the honey-like sweetness of pears beautifully.
- Pear Jam with Vanilla: Scrape the seeds from one vanilla bean and stir them into the finished jam just after removing it from the heat. Adding vanilla at the end preserves its delicate flavor, which would cook off if added earlier.
- Pear Jam with Cardamom: Add 1/2 teaspoon of ground cardamom or place whole cardamom pods in a tea ball and let them infuse during cooking. This creates an exotic, fragrant preserve.
- Pear Cranberry Jam: Replace 1 cup of pear chunks with fresh cranberries. The cranberries are very high in pectin and will help the jam set up firmly while adding a beautiful ruby color and tart contrast. You may want to increase the sugar slightly to balance the tartness. If you have extra cranberries, try canning cranberry sauce for the holidays.
This recipe would also work wonderfully with homemade maple sugar in place of white sugar for a truly local Vermont flavor profile.
Pear Jam FAQs
Lemon juice serves three important functions in pear jam. First, it adds pectin to help the jam gel properly since citrus fruits are naturally high in this gelling agent. Second, it provides acidity that balances the sweetness of the sugar and pears. Third, it prevents the pale pear flesh from oxidizing and turning brown during preparation. While the lemon juice is not required for canning safety in this recipe, it significantly improves both the flavor and appearance of the finished jam.
Pear jam can burn if the heat is too high or if you are not stirring frequently enough, especially during the final minutes of cooking. To prevent burning, use a heavy-bottomed pot that distributes heat evenly. Bring the jam to a boil over high heat, then reduce to medium or medium-high for the remainder of cooking. Stir occasionally at first, then more frequently as the jam thickens. The jam is most likely to scorch in the last few minutes when there is less liquid to buffer the heat.
I strongly recommend against skipping the maceration step. This overnight rest in sugar is what allows the pear chunks to hold their shape during cooking. Without it, the pears will quickly dissolve into a runny pear sauce rather than a proper jam with distinct fruit pieces. If you are absolutely pressed for time, the minimum maceration period is 4 hours, but 12 to 24 hours produces significantly better results.
Traditional pear jam recipes use about 1 cup of sugar per pound of fruit (before peeling), but this creates an extremely sweet preserve. You can successfully make pear jam with anywhere from 2 to 4 cups of sugar for 4 pounds of pears. For a less sweet jam that lets the pear flavor shine, use 2 cups. For moderately sweet jam, use 2.5 to 3 cups. For traditional candy-like sweetness, use 4 cups. Less sugar may result in a slightly softer set, but the jam will still gel properly.
Recipe Tips
- Preventing burning: Use a heavy-bottomed pot that distributes heat evenly. Reduce the heat after the jam comes to a boil, and stir more frequently as the jam thickens during the last few minutes of cooking.
- Managing foam: Jam will foam during cooking, which is normal. Use a pot that is no more than half full at the start to accommodate the foaming. If thick foam accumulates, you can skim it off with a mesh strainer, but the normal bubbling foam will subside once cooking is complete.
- Testing gel stage: The plate test is reliable: chill a small plate in the freezer, spoon a small amount of jam onto it, wait one minute, then push with your finger. If it wrinkles, it is ready.
- Chunk size: Cut pears to the size you want in your finished jam. Unlike many fruits, pear pieces hold their shape through cooking thanks to the maceration step.
- Refrigerator or freezer storage: If not canning, store jam in the refrigerator for 2 to 3 weeks or freeze for up to 6 months. Use freezer-safe straight-sided jars for freezing.
Jam Recipes
If you tried this Pear Jam recipe, or any other recipe on Practical Self Reliance, leave a ⭐ star rating and let me know what you think in the 📝 comments below!
And make sure you stay in touch with me by following on social media!
Pear Jam
Ingredients
- 4 lbs Pears, peeled and chopped into 1/2 inch pieces
- 3 cups Sugar, see note
- 1/4 cup lemon juice
Instructions
- Peel and chop pears: Start by peeling, coring, and cutting the pears into uniform 1/2-inch pieces. The size you chop them now will largely stay the same after cooking since the maceration step firms them up.
- Macerate overnight: Toss pear pieces with sugar and lemon juice, then cover and refrigerate for 12 to 24 hours. This step is essential for drawing out juices and firming the fruit. The absolute minimum is 4 hours, but longer produces better results.
- Prepare canning setup: After maceration, the jam comes together quickly. If you plan to can your jam, set up your water bath canner now. If making refrigerator or freezer jam, skip this step.
- Cook the jam: Pour the pear mixture into a heavy-bottomed jam pot and bring to a boil over high heat. The mixture will foam up, so ensure your pot is large enough. Once boiling, reduce heat to medium-high.
- Stir and mash: Stir frequently to prevent burning, especially as the jam thickens. Cook for 10 to 15 minutes, adjusting heat as needed. If pear chunks are too large, gently crush some with a potato masher.
- Test for gel stage: Continue cooking until the jam reaches 220°F at sea level (reduce by 1°F per 500 feet elevation). Alternatively, place a spoonful on a frozen plate; it should set and wrinkle when pushed.
- Fill jars: Remove from heat immediately and ladle into clean jars, leaving 1/4-inch headspace. Remove air bubbles with a plastic spatula. Wipe rims and seal with two-part canning lids.
- Process jars: Process in a boiling water bath for 10 minutes (15 minutes above 6,000 feet). Turn off heat and let jars rest 5 minutes before removing to a towel-lined counter.
- Cool and store: Let jars cool undisturbed for 24 hours, then check seals. Properly sealed jars keep 12 to 18 months in a cool, dark pantry. Refrigerate unsealed jars for immediate use (2-3 weeks) or freeze for up to 6 months.
Notes
Sugar Amounts
Traditional pear jam recipes include a lot of sugar, around 1 cup of sugar per pound of fruit (before peeling/coring). I tried it that way, and it was way too sweet for my tastes. You can use anywhere between 2 and 4 cups sugar and still get a nice set. I’d suggest these amounts:- Less sweet: 2 cups
- Moderately sweet: 2.5–3 cups
- Traditional sweet: 4 cups
Altitude Adjustments
If above 6,000 feet in elevation, increase canning time to 15 minutes.Shelf Life
For best flavor, consume canned jam within 12–18 months. Refrigerated jam lasts 2–3 weeks; freeze for up to 6 months.Nutrition
Nutrition information is automatically calculated, so should only be used as an approximation.
Canning Recipes
Find the perfect recipe
Searching for something else? Enter keywords to find the perfect recipe!


I have a question I just saw this recipe and I’m very new to canning would I be able to use frozen pears and substitute brown sugar for regular sugar? If I use frozen pears would they have more liquid when they are thawed ? Thank you
The pears will release more liquid after being frozen, but it should still work. Let us know how it works if you decide to try it.
I stuck to your recipe only lemons, pears, &sugar. This is a keeper recipe! I didn’t have white granulated sugar, but I did have cane turbinado sugar so used that as a substitute 1-for-1. This is the most delicious jam I’ve ever made. TRULY!. I had 20 pounds of very ripe pears & some so ripe they had a few bruises. Mine turned out darker than yours probably because the turbinado sugar is darker. But it’s beautiful
Thank you for sharing!.
Turbinado would be perfect in this jam! That’s a really great substitution, and I bet the flavor came out even better.
Also, could I try to reprocess with pectin and try that?
Yes, you can definitely do that. Here’s a good post on fixing runny jam. https://foodinjars.com/blog/canning-101-how-to-save-runny-jam/
I just made this; followed directions specifically. I cooked it for over 20 min and never gelled . I think it is goi g to be pear sauce instead . Ii started with 2 cups sugar and even added a little extra and rebooked to see if it would gel. I used Bartlett pears. Any idea what might have gone wrong?
How ripe were your pears?
I’ve never made jam before but generally consider myself a decent cook. I was very excited to try this recipe. I followed every direction to the letter, and somehow ended up with caramel. It completely solidified into one hard chunk in my jar (no water bath, just into the fridge as given as an option). I was very careful about the temperature, and I’m really not sure at all what went wrong. Super disappointed because I had to throw it away, jar and all. It was completely solidified and absolutely was not edible. It would break a tooth!
Oh no, I’m so sorry that happened. It sounds like it cooked too long and turned into candy.
I’m making the jam now and it’s not gelling. It’s been boiling for 20 minutes. I’m sure you won’t see this, but what can I do for the next time?
Is there anything at all that you did differently with the recipe?
oops i see now that it’s 4 lbs before peel/core – it would be helpful (seeing as more may be taken away during peel/core due to bad parts) to have a weight after peel core.
Hi there, I chose your recipe out of hundreds I looked at, but I am wondering if the 4 lbs of pears is before peel/core or after? Thanks you
That’s before you peel and core them.
This was tasty! … after I scraped what was left out of the pan. You may want to add “once it boils, turn down to simmer/boil on low” for us idiots who aren’t canners… because stupidly and not knowing any better, I left it boiling on hiigh for twenty minutes. Oops.
So sorry about that. Thanks for sharing.
This sounded so great but I only managed to produce pear juice with chunks… Left the pears with sugar and lemon juice in fridge as recommended for 30 hours and then boiled the lot. No jam after 20 minutes so I cooked for much longer but it never set.
Your pieces of pear may have been a little large. They won’t fall apart in the pot like you might expect. We used a potato masher to get them to the proper consistency for our jam. They will retain their shape in the final jam.
Well done! Very explanatory and correct, too! I’ve been canning since I was a little kid with my mother. I’m now 67 and find your information to be extremely helpful—even to us old-timers. Thanks a bunch!
That really means a lot. Thank you so much.
First time making pear jam and it was very easy to follow. I am so glad I did the two cups of sugar VS the 4. It is sugary enough with the two for sure! Excited to use this jam. Thank you for sharing your recipe!
You’re very welcome. So glad you enjoyed the recipe.
Hi! I scanned the comments but didn’t see anyone ask, can I replace pears with apples on this recipe since they are high in pectin also? Thanks!
We actually have an apple jam recipe here. https://practicalselfreliance.com/apple-jam/ It is a very similar recipe and process.
Fresh lemon juice or bottled?
You should always use bottled lemon juice if you plan to can it to be shelf-stable. This will ensure that you have the correct acidity.
I made this as a double recipe. Used about five cups of sugar total and it was still quite sweet. No pectin and it did not really gel at all using my homegrown pears. I cooked in three vanilla beans as the jam was heating up and added two shots of dark rum. I canned it following the instructions here in half-pint jars. Flavor is absolutely sublime, I wish I had added some pectin because it’s more like applesauce than jam but that’s the only change I would make.
I’m sorry that it didn’t set for you but it was probably caused by doubling the recipe. It typically isn’t recommended to double a jam recipe. This often causes the jam to cook differently than a single batch and most people often have trouble with it setting up.
Would it be okay to use an immersion blender after the overnight refrigeration and prior to cooking? I think I would prefer it without the pear chunks.
Yes, that should work just fine.
After all of this work.. And by the way I make jam every year since childhood .
It is runny and I am so disappointed. Use Certo and it will always gell.
I’m sorry that you had trouble with it. You can certainly use Certo if you wish but some people prefer not to use added pectin whenever possible.
I also had no luck with this recipe – I just have chunks in juice despite following instructions to a tee.
How come mine is much darker than yours? Very tasty recipe.
Great recipe! I left it on the counter overnight rather than in the fridge and I think it helped the flavor pull through. I added jalapeno to half the batch and it is wonderful!
So glad you enjoyed the recipe.
You mention freezing this pear jam. I am considering this as I dont have a canner. What do you place the jam in to freeze it? Glass, plastic…..
You can use glass or plastic. If you’re using glass it’s best to leave the lid off until it is frozen and use a jar with straight sides to prevent breakage. I believe there are also jars made specifically for freezing as well.