Affiliate disclosure: This post may contain affiliate links. Please see our Privacy Policy.
Planting apple seeds at home is easier than most people think, and yes, those seedlings really do grow into fruit-bearing apple trees. The seeds inside any apple you eat will sprout readily once they’ve had a few weeks of cold to break dormancy, and from there they grow into healthy young trees that you can plant out into a real backyard orchard.
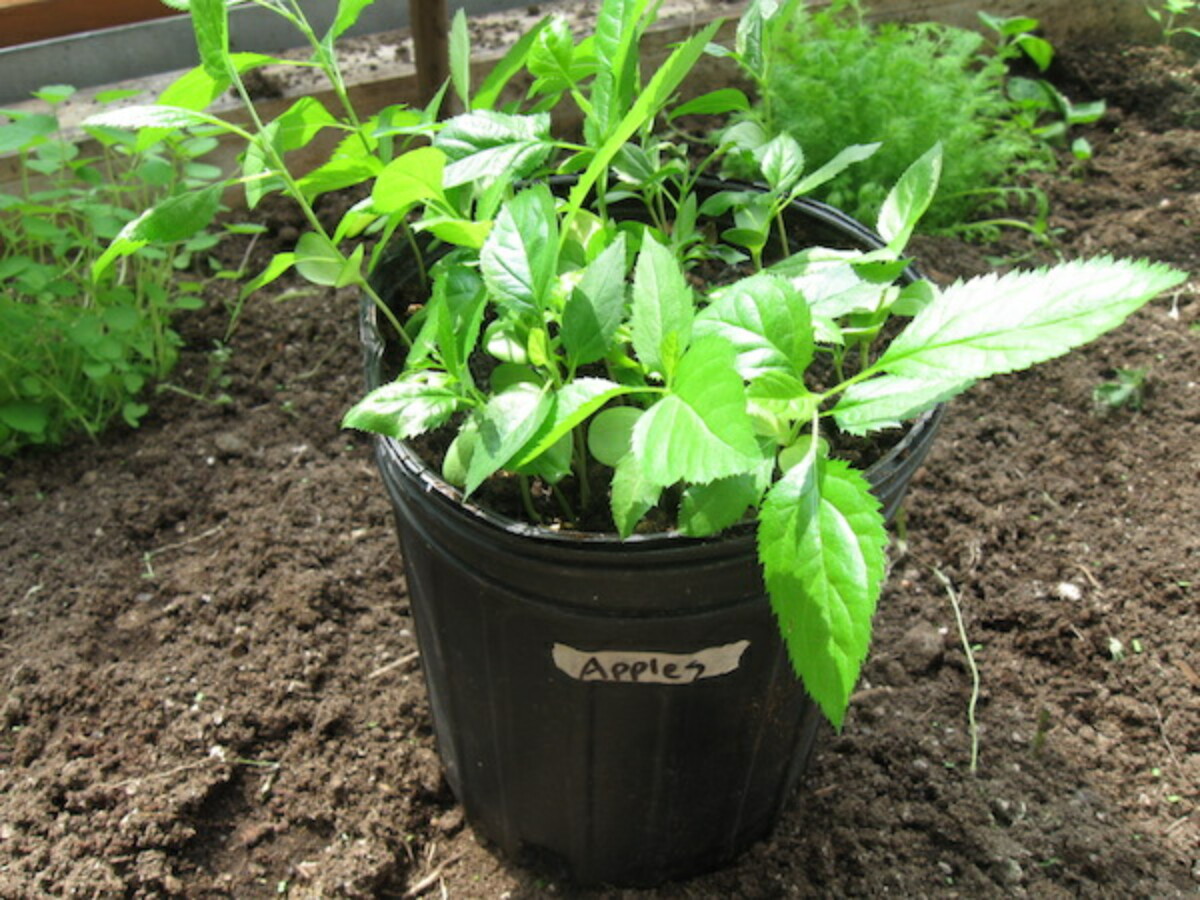
Table of Contents
- Notes from My Homestead
- Can You Grow Apples from Seed?
- Choosing Apple Seeds to Plant
- How to Cold Stratify Apple Seeds
- How to Plant Apple Seeds (Step by Step)
- How Long Do Apple Seeds Take to Germinate?
- Caring for Apple Seedlings
- Overwintering Apple Seedlings
- Transplanting Apple Seedlings
- How Long Until Apple Seedlings Bear Fruit?
- Update from Our Orchard (Several Years Later)
- Other Fruits to Grow from Seed
- Apple Seed FAQs
- More Seedling Growing Guides
- How to Plant Apple Seeds Recipe
Apple trees are surprisingly easy to grow from seed, the catch most gardeners have heard is that apple seeds don’t come true to type. The seedling won’t be genetically identical to the parent variety, so a Honeycrisp seed won’t grow into a Honeycrisp tree, which is why most modern orchards rely on grafted trees instead of seedlings.
What that warning leaves out is that every named heirloom apple in existence (Newton Pippin, Roxbury Russet, McIntosh, and every other heirloom apple variety we treasure) was once a seedling that someone got curious about and decided to keep. Planting an apple from seed is a bit of a lottery ticket, and you’re playing for the chance of something genuinely good.
The actual work is simple. Apple seeds need about six weeks of cold stratification in the refrigerator to break dormancy, and once they’ve chilled, the seedlings emerge in just a week or two and grow into healthy young trees within a few months. The bigger commitment is patience, since seedling apples typically take six to ten years to bear their first fruit. We planted our first batch about a decade ago, and the trees are now starting to fruit.
Notes from My Homestead
Our homestead seedling orchard started with one big apple taste test. We bought every variety we could find at a local heirloom apple orchard, sat down with a knife and a notebook, and ate our way through more than thirty different apples over a long fall afternoon. The seeds from our favorites went into the fridge in damp paper towels for cold stratification, and by spring we had a tray of seedlings ready to plant out. Most of those trees are now nearly a decade old, and several of them have started to fruit.
The honest report from our orchard is exactly what the textbooks promise. Some of our seedlings produce very good apples, some are middling, and we have one tree whose fruit is so tannic it’ll pucker your whole face. That tannic tree turns out to be perfect for hard cider, which actually needs a portion of high-tannin or high-acid apples to balance the sweet ones. We didn’t plant it for cider, but we got cider material anyway, and that’s the whole point of seedling apples. You don’t always get what you bet on, but you almost always get something useful.
I followed your advice. Pulled my seeds out of the fridge today. I had 100% germination on gala apple seeds. They are vigorous and already have roots about an inch long! Thanks for sharing this knowledge!
Can You Grow Apples from Seed?
Yes, you can absolutely grow apple trees from seed, and the seeds inside any apple you eat are perfectly viable for planting. The catch (and it’s worth knowing up front) is that apple seeds don’t come true to type, meaning the seedling won’t be genetically identical to the parent variety. A Honeycrisp seed won’t grow into a Honeycrisp tree. It’ll grow into a unique apple that has some traits of the Honeycrisp mother, some traits of whatever pollinated her flower (probably another tree in the same orchard or yard), and some traits all its own.
For some people, that uncertainty is a deal-breaker. If you want a tree that produces a specific named variety, you need a grafted tree from a nursery, or you can graft scion wood from a known variety onto a seedling rootstock. For others (myself included) the uncertainty is exactly the appeal. You’re planting the next heirloom apple, or at the very least a tree that’s perfectly suited to your specific climate and soil because it sprouted there.
Choosing Apple Seeds to Plant
Not all apple seeds are equally good candidates for planting. Two factors matter most: the parent variety and the second parent (the unknown pollinator). The parent is whatever apple you’re saving seeds from. The second parent is whichever tree’s pollen actually pollinated those flowers, and that depends entirely on what trees were nearby when the apple was forming.
Seeds from a backyard tree where the only nearby pollinators are wild crab apples will mostly produce small, tart, crab-leaning fruit. Seeds from an apple bought at a heirloom orchard, where the trees are surrounded by other tasty heirloom varieties, are much more likely to produce something worth eating. We chose seeds from our absolute favorite varieties for this reason, hoping the unknown second parent was likely also something delicious.
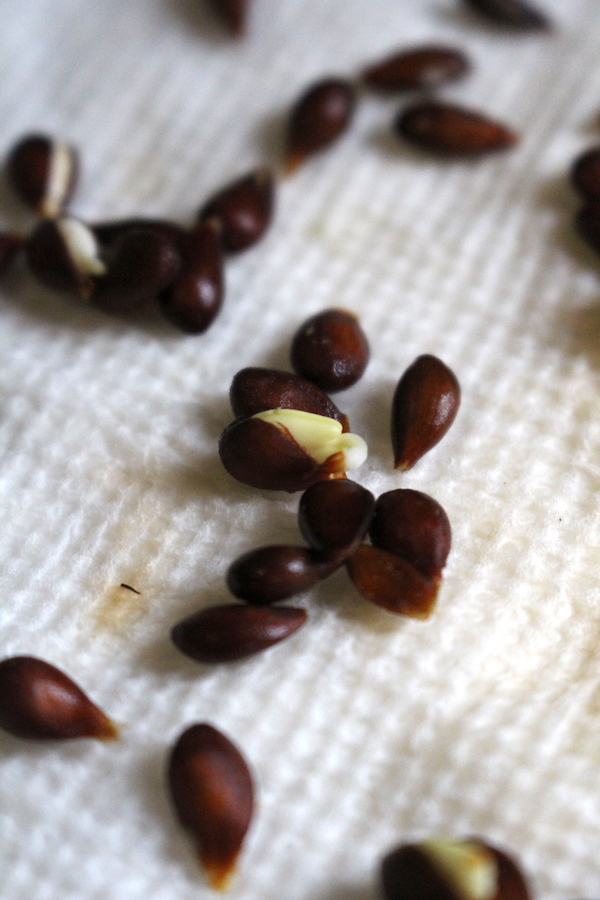
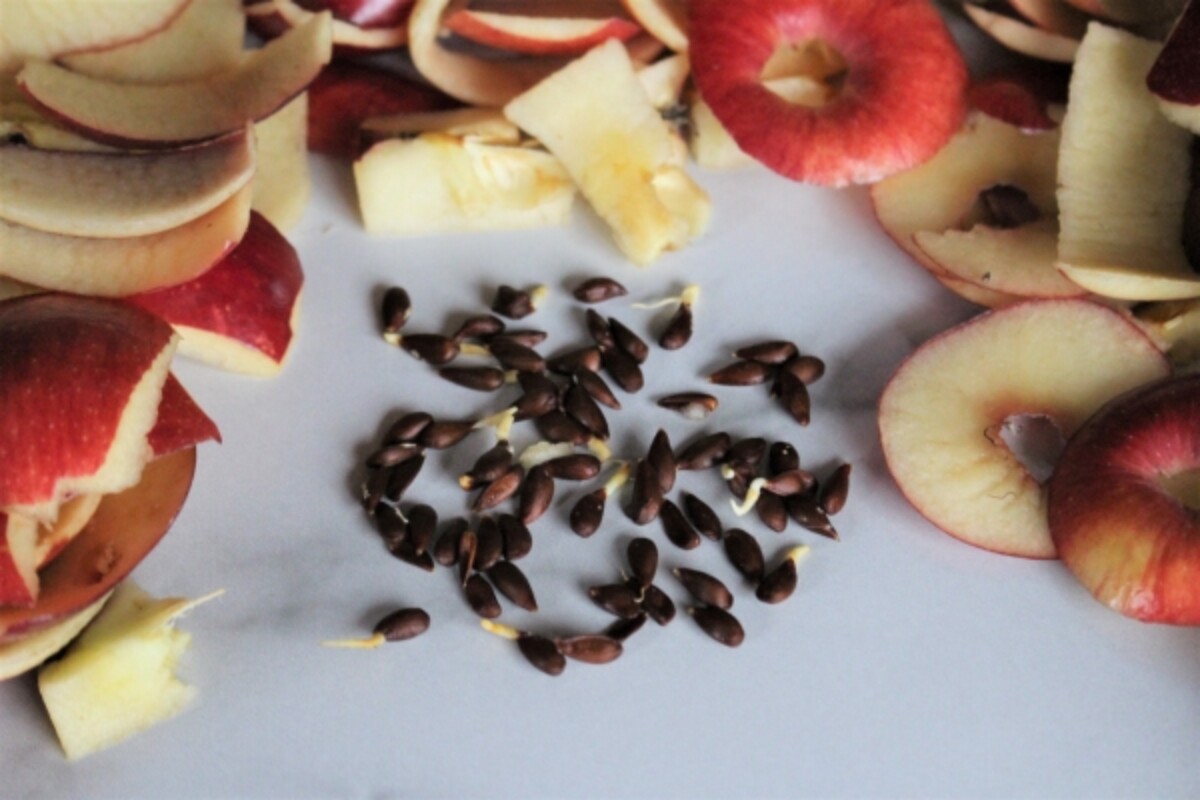
The other thing to consider is whether the apple actually has fully mature seeds inside it. Cut an apple open and look at the seeds before bothering to save them. Mature seeds are dark brown, plump, and uniform. Pale, white, or shriveled seeds aren’t fully developed and won’t germinate. Most fully ripe apples have at least a few good seeds inside, but very small or unevenly developed apples may not. Newton Pippins, our favorite long-keeping heirloom, almost always have a full complement of plump dark seeds inside, which makes them an excellent candidate for seed saving.
How to Cold Stratify Apple Seeds
Apple seeds need cold stratification before they’ll germinate, which is the single most important thing to know about growing apples from seed. Stratification is just a fancy word for the chilling period that signals to the seed that winter has happened and it’s safe to sprout. Without it, the seeds simply won’t grow, no matter how warm and moist you keep the soil. This is the same dormancy mechanism that protects apple trees from sprouting their seeds in the fall when the parent fruit drops, only to die in the first hard frost.
To cold stratify apple seeds at home, you only need a few simple supplies:
- Mature, viable apple seeds (dark brown and plump)
- A folded paper towel
- A small zip-top plastic bag
- A few tablespoons of water
- Six weeks of refrigerator space
Rinse the seeds gently to remove any clinging fruit pulp, since residual sugar can encourage mold during the long fridge stay. Dampen the paper towel so it’s thoroughly moist but not dripping wet, lay the seeds in a single layer in the middle of the towel, and fold the towel over to cover them. Slide the wrapped seeds into the plastic bag, leave the bag open by about an inch for air exchange, and stash it in the back of the fridge where temperatures stay consistently around 35 to 40°F.
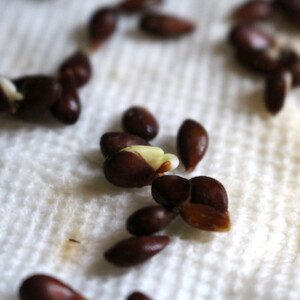
Check on the seeds every week or so to make sure the towel is still moist and to look for any signs of mold or sprouting. After about six weeks, you’ll typically see the first roots emerging from a few of the seeds, which is exactly what you want. Some seeds may take longer (8 to 10 weeks isn’t unusual) and a few stragglers may take even longer than that. Apple seeds have notoriously variable germination rates, with some sources citing rates as low as 30%. In our experience, more like 60 to 80% of well-stratified seeds will eventually germinate, but the exact rate depends on the variety, the age of the seeds, and how consistent the cold period was. Our complete guide to stratifying seeds covers the same general technique for cherry pits, peach pits, plum stones, and other temperate-climate fruit and tree seeds that share the cold-dormancy trait.
One quirk worth knowing: apples bought from a local orchard in winter or spring have often been kept under refrigeration for months, which means the seeds inside have already received a partial or complete cold stratification. Sometimes you’ll cut open a long-stored local apple and find a seed already sprouting inside the fruit, which is a little bit magical and means you can plant it directly without the paper towel step. Even with already-stratified seeds, an extra few weeks of paper-towel chilling won’t hurt them, so when in doubt, stratify.
How to Plant Apple Seeds (Step by Step)
Once the seeds have stratified for at least six weeks, planting them is straightforward. The two main options are direct sowing outdoors after your last spring frost, or starting them in pots indoors and transplanting later. I prefer pots, mainly because squirrels, mice, and voles are aggressive predators of apple seeds and small seedlings, and pots keep everyone honest.
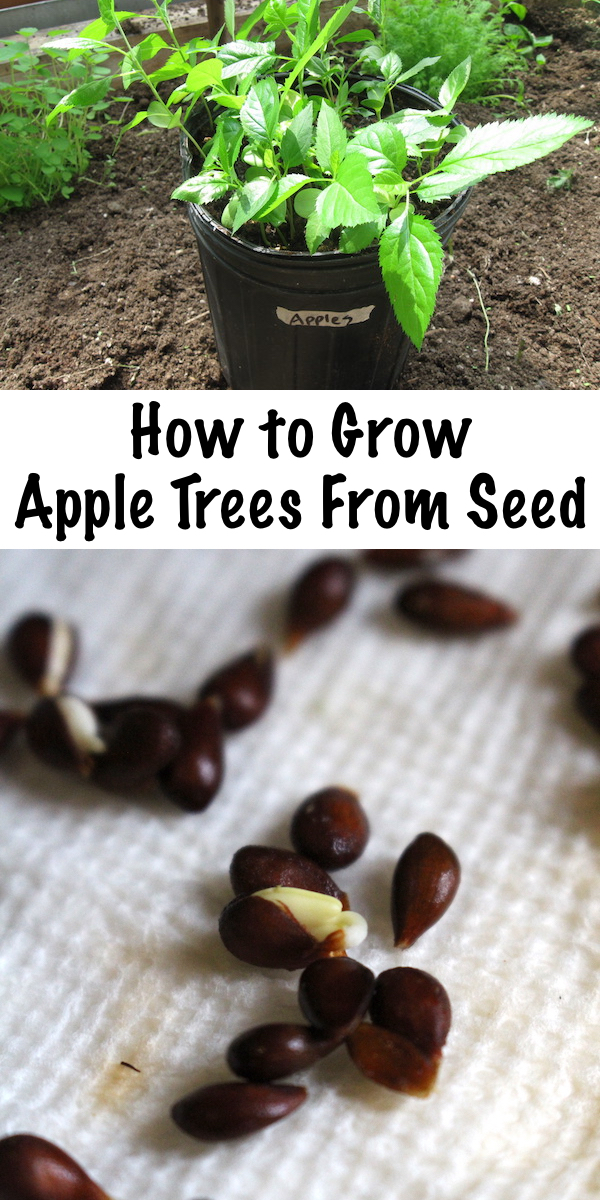
For the pot method, use a one-gallon nursery pot with drainage holes (recycled black plastic ones from old nursery stock work perfectly) and fill it with a sterile seed-starting mix. Plant about a dozen seeds per pot, spaced evenly, pushed about half an inch deep into the soil. Cover gently, water in well, and place the pot somewhere warm and bright. Apple seeds emerge fastest at soil temperatures around 70 to 75°F, which is comfortable indoors but easy to achieve outdoors with a sunny location too.
Keep the soil consistently moist but not waterlogged, and watch for the first seedlings emerging in 1 to 2 weeks. If you’re new to starting plants from seed in general, my beginner’s guide to seed starting walks through the basics that apply to apple seeds just as much as to tomatoes and peppers, and the post on common seed starting mistakes covers the damping-off and overwatering issues that can take down young apple seedlings just as easily as any other plant.
For indoor planting where natural light is limited, supplemental DIY grow lights make a real difference. Apple seedlings can get leggy fast under weak light, with thin pale stems that struggle to hold up the leaves, so don’t skimp on light if you’re starting them on a windowsill in late winter.
How Long Do Apple Seeds Take to Germinate?
Properly cold-stratified apple seeds typically germinate in 1 to 2 weeks once they’re planted in warm, moist soil. Many seeds will already have visible roots starting to emerge from the paper towel before they’re even planted, and those will be the fastest to break the surface. Slow seeds may take 3 to 4 weeks, and the occasional straggler will take even longer, so don’t give up on a pot just because germination is uneven.
If a seed hasn’t germinated after a month at the right temperature, it probably needed more cold stratification time, was an immature or dud seed to begin with, or rotted in storage. Cold stratification followed by warm soil and consistent moisture is the formula. If germination is poor across an entire batch, the most common culprit is insufficient cold time before planting.
Caring for Apple Seedlings
Once your apple seedlings have emerged, the goal for the first year is steady, healthy growth and a strong root system. The seedlings should grow rapidly during their first season, putting on six inches to a foot of height by fall under good conditions. Keep them in their gallon pot for the first growing season, in a sunny location with at least six hours of direct sun per day, and water consistently to keep the soil moist but not waterlogged.
Common first-year problems include leggy growth (almost always low light, fix with more sun or grow lights), drooping or flopping stems (sometimes weak stems from low light, sometimes the top getting too heavy for the developing root system, support with a small stake), and yellowing leaves (typically overwatering or nutrient deficiency in long-used potting mix, ease back on water and consider a light dose of liquid fertilizer).
If you started a dozen seeds in a single pot and several have sprouted, you can either let them all grow together for the first season and divide them at transplant time, or thin to the strongest two or three early on. I tend to let them all grow in the shared pot through the first year and then carefully separate them in spring of the second year, which lets you pick the most vigorous candidates for permanent planting and gives weaker ones a chance to catch up.
Overwintering Apple Seedlings
This is the most common question I get from readers in the comments, especially from people in colder zones. The short answer is that potted apple seedlings in their first year are vulnerable to winter cold because their root systems aren’t established enough to handle the kind of deep ground freeze that mature apple roots can survive without trouble. The pot itself amplifies cold, since potted soil freezes solid much faster than ground soil does.
For first-winter potted seedlings in zone 5 or colder, the safest approach is to bring them into an unheated garage, basement, or cool indoor space for the coldest months. They want to stay cold (so they go through their natural dormancy) but not so cold that the roots freeze solid. Anywhere between 28 and 50°F works well, and the plants need very little water during this period since they’re dormant. A weekly check is enough to make sure the soil hasn’t dried out completely.
By the second year, the seedlings can usually be planted directly in the ground, where their roots will establish a real network in the surrounding soil and survive normal winter cold without protection. If you’re not ready to plant them out, a larger pot (3 to 5 gallons) buried up to the rim in a protected spot in the garden gives the same protection as in-ground planting through the second winter.
Transplanting Apple Seedlings
Apple seedlings are ready to plant out in their permanent location once they’re at least 4 to 6 inches tall, well-rooted, and the danger of hard frost has passed in your area. In Vermont, that usually means late May or early June for first-year seedlings. Wait until nighttime temperatures are consistently above 50°F, harden off the seedlings gradually over a week or two by exposing them to outdoor conditions for increasing periods, and then transplant on a cloudy day or in the late afternoon to reduce transplant shock.
Choose a permanent location with at least six hours of direct sun, well-drained soil, and enough space for a full-sized tree. Seedling apple trees grow on their own roots without the dwarfing effect of grafted rootstocks, which means they grow large. Plan on at least 20 feet between trees, and keep them well away from septic systems, foundations, and anywhere a 30-foot mature tree would be a problem in 20 years. Our guide to planting fruit trees covers the planting hole, soil amendments, and staking procedure that gives a young tree the best start.
Stake young seedlings with a soft loop of cloth or rubber tubing for the first year or two, since one casual step or a curious deer can take down a foot-tall sapling in seconds. Mulch the planting area with two to three inches of wood chips or shredded leaves, leaving a small gap right at the trunk to prevent rot. Water deeply once a week through the first growing season unless rainfall takes care of it for you.
How Long Until Apple Seedlings Bear Fruit?
Apple trees grown from seed typically take 6 to 10 years to bear their first fruit, though some bear earlier and others take longer. The exact timing depends on the genetics of the seedling, the growing conditions, the climate, and how vigorously the tree grows in its early years. Trees in good soil with plenty of sun will fruit faster than trees in poor or shaded conditions, and warm climates will see first fruit somewhat sooner than cold ones.
Surprisingly, that timeline isn’t really any longer than what you’d expect from a grafted nursery tree. Grafted trees often hit their first fruiting at year 5 to 8 after planting, but they spent some unknown number of years in nursery pots before that, getting root-bound and stressed in the process. A seedling planted directly in the ground after one year in a pot will often catch up to and surpass a nursery transplant by the third or fourth year, since it’s never had its growth interrupted by transplanting.
If you want fruit faster, the best approach is to graft scion wood from a known variety onto your seedling once it’s two or three years old. The seedling becomes the rootstock, the scion becomes the fruiting top, and you get fruit in just a few years instead of waiting for the natural seedling fruiting timeline. Our guide to grafting fruit trees walks through the technique, which is a satisfying skill to learn and lets you turn any seedling into a tree of a known variety.
Update from Our Orchard (Several Years Later)
It’s been a long time since I planted those original seedlings from our heirloom apple taste test, and I get asked enough about how they turned out that it’s worth a real update. The short version: most of our seedlings are now thriving young trees, several have started to fruit, and the early results have been about what the textbooks promise.
Of the seedlings that have fruited so far, we have a small number of really good apples (genuinely worth eating fresh), a larger number of middling ones (fine for sauce, drying, or cooking but nothing special), and one tree whose fruit is so tannic and astringent that the only thing it’s good for is hard cider. Cider makers actually need a portion of high-tannin apples in any blend, so even the spitter has earned its place in the orchard. None of our seedlings have produced fruit identical to either parent variety, which was expected, but several have produced fruit that’s distinctively their own and pleasant in its own way.
The genuinely surprising thing about the seedling experiment isn’t how the seedlings turned out. It’s how our grafted nursery trees did by comparison. Of the two dozen labeled grafted varieties we bought from a nursery the same year, more than half are not what they were labeled as. A tree sold to us as “Golden Russet” is producing insipid red apples. A summer-ripening variety is producing apples that taste like a potato in mid-October. We’ve since top-grafted several to known varieties using scion wood from a separate online nursery, and even some of those scion grafts came in mislabeled too, with the wrong variety appearing on the branches a few years later.
So the moral of the story, after a decade of running this experiment, is that there’s some uncertainty in any apple tree you plant unless you propagate from your own known parent. Seedlings are uncertain by design, and you know that going in, which I now think is more honest than the false predictability of a nursery label. The seedling apples are, in some ways, the most satisfying trees in the orchard, because every harvest is a discovery.
Other Fruits to Grow from Seed
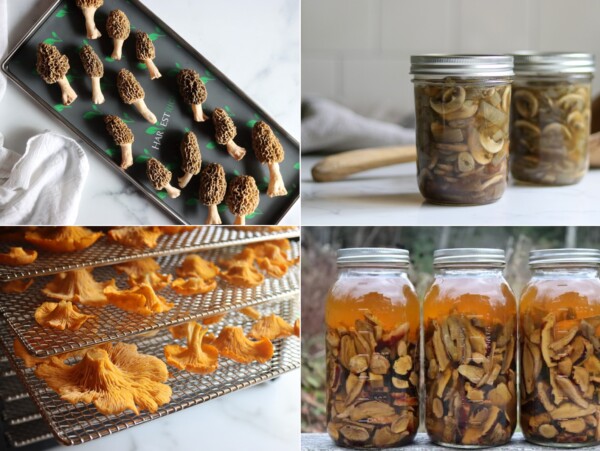
Apples aren’t the only perennial fruit you can grow from seed, though they’re one of the most rewarding. Growing lemon trees from seed is another long-game project that produces a beautiful tree even before it fruits, and citrus actually comes mostly true to type from seed unlike apples. Strawberries from seed, rhubarb from seed, and asparagus from seed are all faster to harvest and pair well with seedling apples on the homestead.
Once your seedling apples are in the ground, they’ll eventually produce a real harvest, and you’ll want a plan for what to do with all those apples. Our guide to preserving apples covers more than thirty methods, and our most-loved apple recipes include canning apple pie filling, apple jam, apple butter, homemade apple cider vinegar, and of course hard cider for those tannic seedling apples that nobody’s going to eat fresh.
Apple Seed FAQs
Yes, a seedling apple tree will produce real apples once it matures, typically after 6 to 10 years. The fruit won’t be identical to the parent variety because apple seeds don’t come true to type, but the apples will be edible. Some seedlings produce excellent fruit, some produce middling fruit, and some produce fruit that’s better suited to cooking, sauce, or hard cider than fresh eating.
Apple seeds need a minimum of 6 weeks of cold stratification to break dormancy, with 8 to 10 weeks producing the best germination rates. Refrigerator temperatures around 35 to 40°F are ideal. Some seeds may sprout while still in the refrigerator, which is normal and a good sign that the chilling period was sufficient.
After cold stratification, apple seeds typically germinate in 1 to 2 weeks once planted in warm, moist soil at temperatures around 70 to 75°F. Many seeds will already have visible roots from the stratification period and will emerge fastest. Slower seeds may take 3 to 4 weeks, and germination across an entire batch is usually uneven.
Apple seeds are small, teardrop-shaped, and dark brown to nearly black when mature. They’re roughly a quarter inch long and a little less than that wide, with a smooth, slightly glossy seed coat. Pale brown, white, or shriveled seeds are immature and won’t germinate, so look for plump, dark, uniform seeds when selecting for planting.
Mature seedling apple trees are typically as cold-hardy as their parent varieties, often hardier since they’ve adapted to local conditions from the start. First-year potted seedlings are more vulnerable because their root systems aren’t established, so they should be overwintered in an unheated garage, basement, or other cool protected space until they can be planted in the ground. By the second year, most seedlings can survive normal zone 4 winters once planted out.
Yes, apple trees need cross-pollination from a different apple variety to produce fruit reliably. A single isolated apple tree usually produces little or no fruit. If you don’t have other apple trees nearby, plant at least two different seedlings together, or include a crab apple in your planting since crab apples bloom over a long period and pollinate most other apples effectively.
Most apple varieties need a period of winter chill (sustained temperatures below 45°F for hundreds of hours) to set fruit properly. In warm climates without a real winter, standard apple varieties usually produce poor harvests or no fruit at all. Low-chill apple varieties like Anna, Dorsett Golden, and Tropic Sweet can succeed in subtropical and Mediterranean climates, and seeds from those varieties will produce seedlings adapted to warm climates.
If you tried planting apple seeds, leave a ⭐ star rating on the how-to card and let me know how it went in the 📝 comments below!
And make sure you stay in touch with me by following on social media!
How to Plant Apple Seeds
Equipment
- Paper towel
- zip-top plastic bag
- refrigerator
- 1-gallon nursery pot with drainage holes
Ingredients
- Mature apple seeds, dark brown and plump
- water
- seed-starting mix
Instructions
- Cut open ripe apples and pick out the seeds. Choose plump, dark brown seeds and discard any that are pale, shriveled, or white, since those are immature and won't germinate. Rinse the seeds gently under cool water to remove all clinging fruit pulp, since residual sugar can encourage mold during the long fridge stay.
- Dampen a paper towel until it’s thoroughly moist but not dripping wet. Lay the seeds in a single layer on one half of the towel and fold the other half over to cover them completely.
- Slide the wrapped seeds into a zip-top plastic bag, leaving the bag open about an inch for air exchange. Place the bag in the back of the refrigerator where temperatures stay consistently between 35 and 40°F.
- Check the seeds every week or so to make sure the paper towel stays moist and to look for any signs of mold or sprouting. After about six weeks of cold stratification, many seeds will have visible roots beginning to emerge, which is the signal that they’re ready to plant.
- Fill a one-gallon nursery pot with sterile seed-starting mix. Plant about a dozen stratified seeds roughly half an inch deep, spaced evenly around the pot. Water gently until the soil is evenly moist but not waterlogged.
- Place the pot in a warm, bright location with soil temperatures around 70 to 75°F. Seedlings should emerge from the soil within one to two weeks, with seeds that already had visible roots emerging fastest.
- Once the seedlings are 4 to 6 inches tall and nighttime temperatures are consistently above 50°F, transplant them outside to a permanent sunny location with at least 20 feet of space between trees. Stake young seedlings for the first year or two, mulch around the base with wood chips or shredded leaves leaving a small gap at the trunk, and water deeply once a week through the first growing season.
Once your apple seedlings are settling into the orchard, the homestead calendar keeps turning. Our guide to heirloom apple varieties is a good companion read if you’re starting to think about which named varieties to graft onto your seedling rootstocks down the road, and the year-round fruit orchard guide covers how to plan an orchard that produces from June through deep winter.
Find the perfect guide
Searching for something else? Enter keywords to find the perfect guide!


If my seedling is about 2 inches tall, and kept on an eastern facing, always open window, would that be the same as hardening it? Thank you!
I would think that would offer some benefit but in order to truly harden off, I would suggest that it be completely outside in the elements for small periods of time and gradually increasing that time until it is planted out.
I have a question. I was just winging it and I soaked some apple seeds my grandson wanted to plant in water for about 5 days. 2 of the 5 germinated in the water, the others must have been close because when I put them in the soil, they grew!!! What I’m wondering, is that the season is warming so I will be able to put outside soon, BUT, what happens next winter? Will they be acclimatized to make it through while staying outside. Here on the West Coast of Canada, they are just 2 and 3″ high now, and I’ve just started putting them out for the day. Frost is almost done. I do have a small home greenhouse with a plastic cover where I could keep them during the winter. We do have moderate winters here, but it does freeze. ??????
If they are outside for the duration of your growing season, they should be fine to winter over, especially if your winters are moderate.
I winter sowed my apple seeds .. 100% germination… now lets hope they make it…. what is thr longest I xan keep the plant in a 5 gallon pot?
It can stay in the 5 gallon bucket as long as it continues to grow well. If you notice that the tree has slowed growth or stopped completely, then it is probably time to plant it in the ground or get a larger container.
Thank you for all advise. However, I encounter problems with my apples seeds. They start to grow and then they die. It looks like their stem turns brown/ red and kills the plant. Any suggestions what I should do? Please help.
It could be a variety of different things. How long are they growing before they die? It could be the soil, light or water.
I found a different article/blog last year and decided to try my hand at it. I think I had 39 seeds in my fridge for a couple months. I potted them and eventually transplanted the ones that took off but thought they all died. My husband went walking around our property earlier this week and noticed around 18 of them are back and growing STRONG! Various apple types so I’m not sure what we’ll get, if any, in the future but I just wanted to thank you for posting the steps so people like me can give it a go!!
You’re welcome. So glad you enjoyed the post.
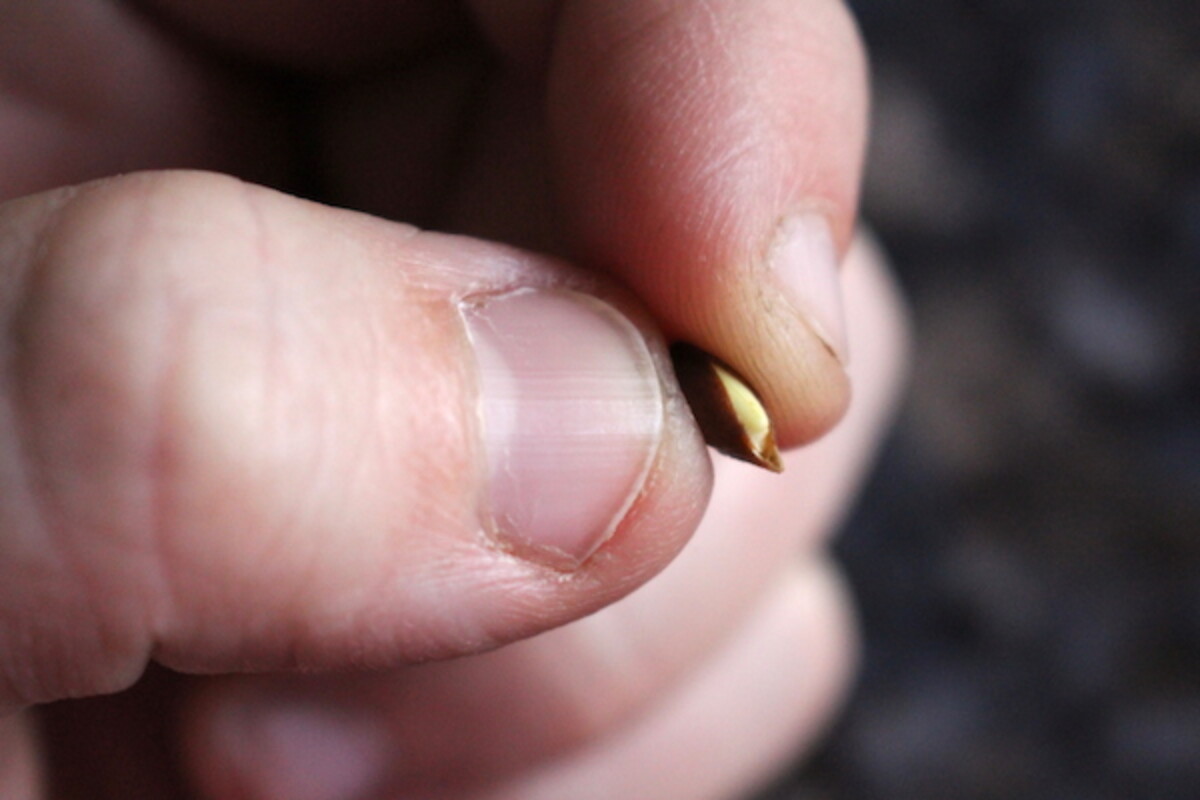
I had great luck sprouting apple seeds without stratification! If you have nimble fingers, just carefully peel the brown seed coat off a fresh apple seed and put in between two damp paper towels. About 30-40% of them will start to germinate in less than a week.
I’m a Head Start teacher and I’ve started apple seeds from a snack that my children had. My seedlings are about 3 inches tall, and the children are enjoying watching the seedlings grow. I’m hoping to start our own orchard eventually by using a grafting method. I’m wondering how difficult it is to get a graft from one of the local apple orchards in my county. How old should my trees be before I spent this process?
From what I have seen, you would need to wait for the rootstock to be at least a year old before grafting. The longer you wait, the better results you will have.
On Jan 27th I put 5 organic apples seeds in the fridge according to your instructions, I just now planted all 5 which had 1″ sprouts and one even has a leaf starting. They are now planted to your instructions, and in a warm and bright location inside. My great grandson and I are going to plant one each and give the other 3 away to friends, thanks for your great instructions and we are hoping that all 5 will grow into healthy trees 🙂
That’s wonderful. Thanks for sharing. So glad you found the instructions helpful.
Just wanted to let you know that all 5 seedlings are now about 2 1/2″ above the soil line and thriving, all have leaves and one has it’s next set of leaves. I have been keeping the soil slightly moist and misting the seedlings, I am wondering if that is recommended? Do recommend any soil amendments or or something like an Epsom salt spray?
It sounds like they are doing great! I would just keep doing what you’re doing.
Okay, sounds good and thanks for the inspiration to try this project, we are building a large vertical garden fence and will be trying out espalier with one of the seedlings once they are big enough 🙂
That sounds lovely.
I live in zone 4b, saved seeds from a 100+ year old tree on our farm and they germinated fairly well following your advise, we have 21 of them under a grow light, in the spring I intend to put them in my garden to continue to grow, but I have a few questions: 1. at what size are they ready to be transplanted to their permanent site? 2. Given I am in zone 4b, what should I do next fall to prepare them to make it through the winter? Any advise is greatly appreciated, Thanks.
It’s not so much about the size of the seedlings but the temperature outdoors. You want to be sure that the temperature is consistently above 50 degrees at night before moving them outdoors. I would also recommend a gradual hardening off process just like you would any other seedling.
Hi Ashley,
How deep do you plant the seeds in the one gallon pot?
Thank you for your great site.
I plant them about 3/4 to 1 inch deep.
Hi Ashley,
Top side or bottom watering of apple seedlings??? I am having a devil of a time keeping things alive in my home. A massive infestation of Fungus Gnats is killing everything. Apple seedling, tomato seedling, carrot plants…If it has a fragile root, it blooms just long enough to tease me and then dies!!!! (self inflected wounds, I made my own compost and did not pasteurize before using in-indoor pots)
I am down to 2 apple seedling, should I water at the bottom to dry the top of the soil.
And along these lines, do you think it is safe to apple dishwater solution to apple seedling (and tomato seedling)
Watering from the bottom could actually promote root issues since the roots will most likely be sitting in water. I would water from the top, making sure that the water has a place to drain away and the roots aren’t sitting in it. You may want to allow the top surface of the soil to dry out in between waterings if it seems too wet.
Hello, I have started several apple trees from seed. They are doing well and then some start too die off. I had one growing very nice and I moved it in front of a large glass door. Do you think it’s too hot and the sun is just cooking the young trees?
I have a avacado tree growing in the same bucket, it’s almost 3’ tall. It’s not a disease, just wondering if direct sunlight and heat through the glass is bad for the young sprouts?
It’s definitely possible, especially if it is a sudden change. You always want to introduce any kind of seedling to new weather conditions in a gradual way.
James,
I’m George. I am having a hard time with seedlings as well (apple and tomato). They live 3-4 weeks and die. Apples are fragile and are susceptible to root rot and to “hold you hat”..Fungus Gnats (these little creatures look like fruit flies). Both problems are similar and are caused by a similar issue. Moist/wet soil. Avocados are not susceptible to either and will thrive with no issues. So it explains your issue.
Read my comment/question to Ashley…
Keep your pot on the dry side..let it dry so as to kill the fungus/larvae and the bacteria that causes root rot. Once you moved it to the window, you may have brought it closer to where the fungus gnats like to stay. I did the same and have destroyed a chunk of all my seedlings. Lemon trees and avocados..unaffected!.
Sadly you may have lost your plant. Try again. Go through a complete process of sterilizing pots, pasteurizing medium (or use new sterile medium), do not mix seed types…once they germinate, thin to a single plant per pot. Keep dry…wait on Ashley to tell you if water from top or bottom. Keep away from the window..put the pot 2-3 feet back.
One other thing to not do..DO NOT transplant until fairly mature. Transplant shock to apple trees/seedlings is real and difficult to overcome. If the plant does not die, it may remain stagnant for months.
I am trying to start an apple tree here in Nigeria ……I really can’t say how hot the climate is but I just dried the seed up and then planted the seedling in a vast
I am trying to start trees from seed. I put them in the fridge in containers on moist paper towel. they have almost all sprouted already. I wasn’t anticipating it happening so quickly. so now am in the middle of winter. what do I do with the sprouts? If I pot them all I will have pots everywhere. Help?
You do need to get them in some soil once they have sprouted but you could put them all in one container together until they get a little bigger and then move them to individual pots. This should buy you a little time.
Thank you. You have been very helpful. I do have those flies. And my lemon tree and avacado tree are thriving.
I moved them from the window. I’ll know in a few weeks to a month if things work out. I moved them to another room.
I use garlic for the fruit flies. Just a clove or two broken up in and layed on the soil. It doesn’t take much and keeps them away. Works like a gem!
Hi, how can I get the less chill variety of apple that suitable for tropical region?
I would just research apple tree varieties for tropical regions and find a nursery that specializes in those varieties.
I started my apple seeds this summer. They are about 6-10 inches tall and have 3 to 4 sets of leaves and those leaves have gone shades of maroonish red this october. These seedlings have been outside in a very large pot/bucket/tub … like a half a bathtub in size …since late summer. Several light frosts here in Massachusetts seem to have had no ill effect and they are shielded from the wind by the rim of the pot. I am wondering if I should move the pot inside my garage when things get really cold… or perhaps I should mulch around the seedlings to give them some extra warmth… I’m just afraid that bc they aren’t in the actual ground…they won’t make it bc the bucket spill will get colder than the ground. But I think they are already hardened so to speak so I don’t want to bring them back inside…plus I need a team of oxen to move the bucket. Anyhow I just wondered if anyone here has left baby trees this small outside in a large pot through a Massachusetts or.comparable winter and if so whether they made it. This post is awesome! I’m so curious to see what kind of apples might come from my pink lady seeds!
I think you’re better off leaving them where they are. In MA, they’ll likely be just fine, it’s not nearly as cold there as it is here. Still, they’d benefit form a little root zone protection, and if you can pile bark mulch or chip mulch around the pots, that’d be ideal. Another option is to make a box around the pots with straw or hay bales.
Hello! I have apple seedlings growing in a small pot approaching 4 ” high. There are 3 that are growing very close to each other. Super excited. But concerned of crowding and when I should transplant and seperate them.
The sooner you can separate them, the better. If you aren’t ready to put them outdoors yet, you could always just put them in a separate larger container.
We have 3 growing close together in a small pot. About 1 year old now. Never been inside. In a somewhat shady spot. How do we know when to separate them without losing them? My son planted them and I never thought they would grow. Now we wan to do everything possible to keep them going in pots. We live in an apartment and want to bring them with us whenever we move next. The leaves went brown this winter, but never fell off. We’re in Utah 6B-7A.
If they’re a year old and close together then I would definitely go ahead and separate them out.
Thank you. Does it make a difference when we separate them? Before they bud, after they have a certain number of leaves?
I would think before budding would be your safest bet.
Thank you so much! We’ll get on that after this next snow storm.
You’re very welcome.
I’m at the three-week mark and my seeds are already starting to poke out! I’m so excited to see how much better they’ll become! Thanks for all of your help 🙂
You’re welcome. That’s so exciting.
I have an Apple seedling growing on my kitchen counter in a pot. It’s about 2’ tall now. I’m in zone 4 and we’re in full on winter now, so I can think about planting it out in the spring. But in the meantime, what do I do with it? Do I need to trim it or anything like that? I’m just a home gardener, and this seed was sprouting so I thought what the heck, let’s stick it in some dirt! And it grew! Now it’s just the challenge of seeing if I can get a tree to grow. I don’t even care what the apples are like! It’s parent was a delicious Ambrosia. Right now It’s just one tall branch in an 8” pot.
Planting in the spring is a good idea at this point. For this winter though, put it in a semi protected place, like an unheated garage or cool basement so that it can go dormant. It should lose its leaves and not need light (though occasional water is good so the soil doesn’t completely dry out). All the way outside might be too much, since the pot is exposed (rather than burried). Somewhere cold-ish this winter, then plant in the spring.
Update – my seedling is now a year old, 4’ tall and growing new leaves after being dormant for winter. It is just one tall stick that keeps growing up. My new question now is when will it start to development branches, or do I need to do something to help it out? I see nubs where the old leaves from last year used to be, but nothing is regrowing from those. It’s been about 2 months since this top bud started opening up. I think I will keep it in a pot for at least one more year. Thanks for this very informative page!!!
As long as it is continuing to grow, you shouldn’t need to do anything with it.
I didn’t refrigerate the seeds since the apples were in the fridge, they grew quick! About 3 inches tall now. Hope to see them in the yard next spring!
Without doing any research, my son (7) planted 5 seeds from his golden delicious apple picked from a local orchard. He used a gallon bucket from and top soil from the garden.
3 of the 5 sprouted after 10 days and I thought he might be a savant gardener. Now 2 weeks after sprouting, 2 of the 3 are dead and the 3rd is looking sorry. Is this because we didn’t do the 6 weeks in the fridge or did we fail taking care of the small plants?
It’s apparent we are now going to have to try again!
I’d say it’s more likely a failure in taking care of the small plants in some way (easy enough to do, seedling care can be tricky in a bucket, especially with water management). The refrigeration is just to break the seed dormancy and get them to germinate. It sounds like yours germinated fine, but then something else happened. Given how quickly they died, I’d guess it was a soil-borne disease known as dampening off? But really hard to say honestly, it could be a lot of things.
Most likely the topsoil from the garden is the problem. Too much clay, poor drainage. Best bet with seeds would be to make a soil composed of shop bought potting compost and grit/sand in ratio 2 x compost/1 x sand//1 x 2mm grit. Then just make sure it remains moist.
Am currently in the middle east and I love apples, I would love to leave a seedling behind before I go home.
I got a seed which has bust open and I have put it on a container with soil.
Should I place the part of the seed which as shot up in the soil or facing up?
You want the part that has sprouted to be coming up out of the soil.