Affiliate disclosure: This post may contain affiliate links. Please see our Privacy Policy.
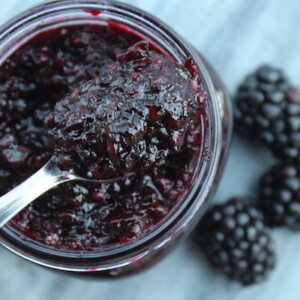
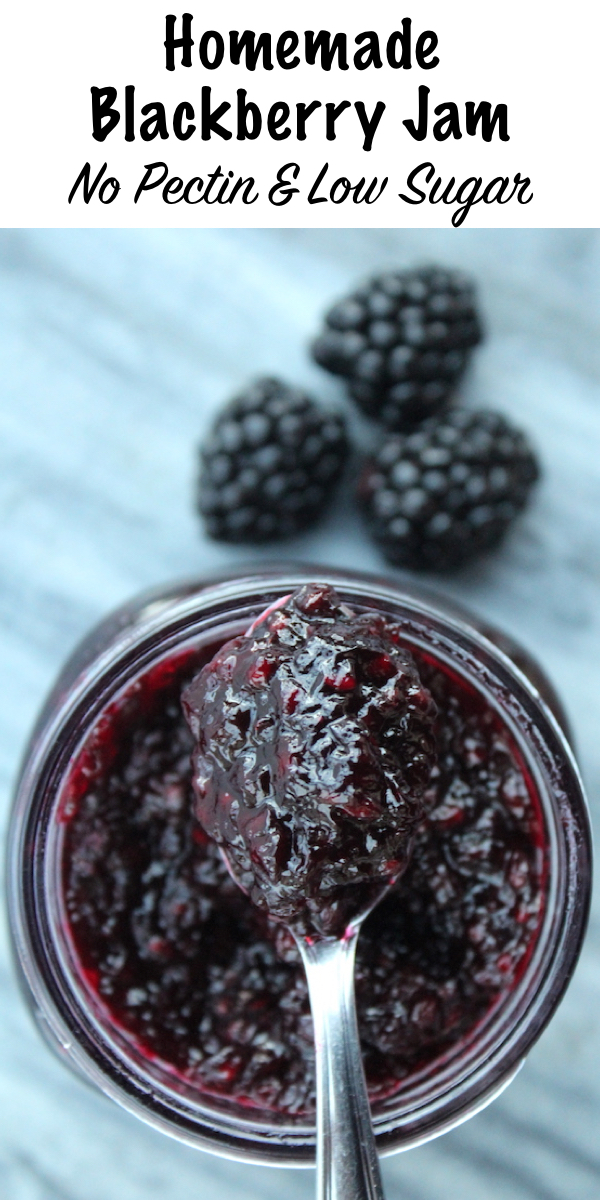
Homemade blackberry jam without pectin captures the deep, rich flavor of summer berries in a thick, spreadable preserve that comes together with just two ingredients. Blackberries are naturally high in pectin, so they set beautifully on their own with nothing more than sugar and a bit of patience at the stove.
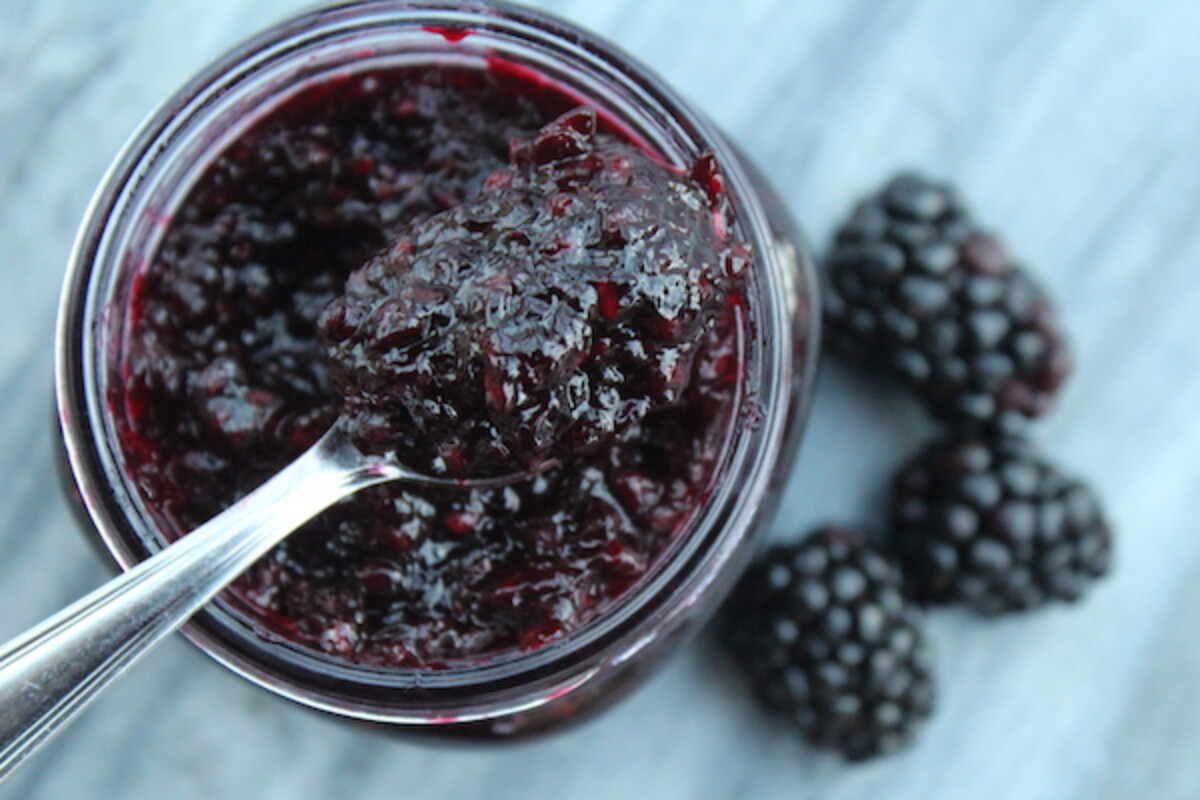
Table of Contents
- Notes from My Kitchen
- Choosing Blackberries for Jam
- Sugar Options for Blackberry Jam
- Ingredients for Blackberry Jam
- How to Make Blackberry Jam
- Testing for Gel Stage
- Canning Blackberry Jam
- Altitude Adjustments
- Yield Notes
- Storage Options
- Recipe Tips
- Ways to Use Blackberry Jam
- Blackberry Jam FAQs
- Jam Recipes
- Blackberry Jam Recipe Without Pectin
- Canning Recipes
Blackberry jam is my husband’s absolute favorite preserve, and it’s the one jam we make every single summer without fail. I’ve been making homemade jam for years now, and this recipe remains one of the simplest and most foolproof in my collection.
Blackberries are naturally high in both acid and pectin, which means they gel easily without added thickeners. That makes this one of the best jams for beginners, and one of the easiest to adapt based on your personal taste. Even if you’ve never made jam before, this is a great place to start. My beginner’s guide to water bath canning covers everything you need to know about the canning process itself.
This particular jam works well as a low sugar preserve or with traditional amounts of sugar, and I’ve included instructions for both variations below. You can choose to use more or less, or anywhere in between.
Notes from My Kitchen

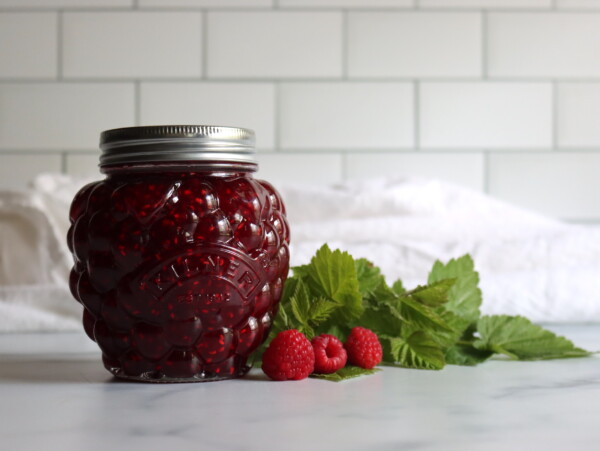
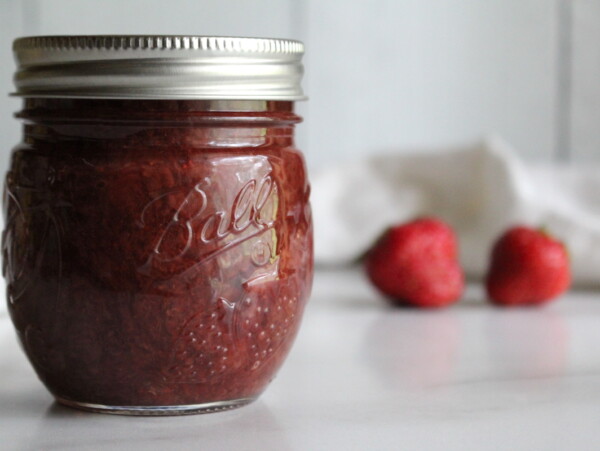
The beauty of this recipe is how forgiving it is. Unlike pectin-based jams where you have to follow exact ratios, blackberry jam without pectin gives you flexibility. Want it less sweet? Use less sugar. Prefer a firmer set? Cook it a bit longer. Once you’ve made this a few times, you’ll develop a feel for exactly how you like it. If you enjoy this recipe, try raspberry jam or strawberry jam using the same no-pectin method.
One thing I’ve learned: stay at the stove and stir constantly. Blackberry jam foams dramatically as it cooks, and it can overflow if you’re not paying attention. I keep a long wooden spoon in hand the entire time, stirring down the foam and scraping the bottom to prevent scorching.
Choosing Blackberries for Jam
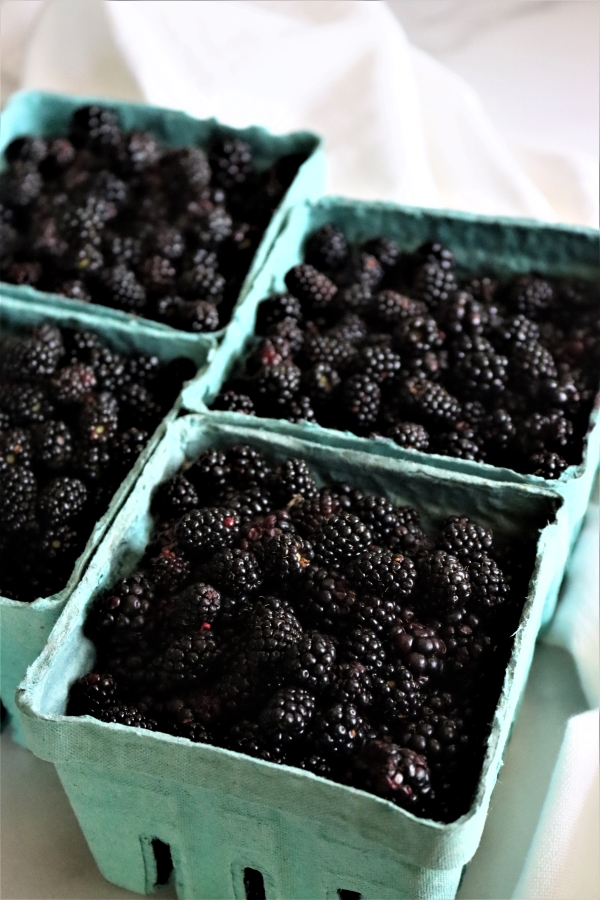
Any kind of blackberry works here, whether wild, cultivated, or even frozen berries from the grocery store.
- Wild blackberries tend to have more pectin and firmer fruit. The berries often stay whole in the jam unless you choose to mash them. If you’re foraging wild blackberries (or related species like dewberries), be sure to pick them fully ripe. Slightly underripe berries can be pretty tart and don’t release juice as easily during cooking.
- Cultivated blackberries tend to be juicier and sweeter, and will fall apart into a smoother jam. If you’re using sweeter cultivated berries, you may want to add a splash of lemon juice for balance.
- Frozen blackberries have a bit less pectin since freezing breaks down pectin in fruit. The jam will still set with frozen fruit, but it may have a slightly less firm set and lower yield than with fresh.
I’ve made the equal parts sugar/blackberries and your low sugar recipe and yours is by far the best recipe I’ve come across. This is the first review I’ve ever left for any recipe that I’ve ever cooked! It’s that good!
Sugar Options for Blackberry Jam
This recipe works with just about any amount of sugar, which makes it incredibly versatile. Here are a few ratio guidelines to help you choose the right version for your taste:
- Perfect Blackberry Jam (Recommended): Use 4 cups sugar to 6 cups mashed fruit. This is the amount currently recommended by the National Center for Food Preservation and strikes a nice balance between sweetness and fruit flavor.
- Low Sugar: Use 2 cups sugar to 6 cups mashed fruit. A nice set, but reasonably tart and more fruit-forward. The perfect spot if you like low sugar but still want a high quality jam.
- Old Fashioned High Sugar (Traditional): Equal parts sugar and mashed fruit. Very sweet with a firm set and high yield. This is too sugary for my tastes, but some people really love those old fashioned candy preserves.
You can also use honey or maple syrup instead of sugar. Just keep in mind that they’re sweeter by volume, so start with about two-thirds the amount of sugar and taste as you go. A thermometer helps here since the visual cues are harder to read with alternative sweeteners.
No matter how much (or little) sugar you use, the jam will still be safe for water bath canning because blackberries are naturally high in acid.
Ingredients for Blackberry Jam
- Fresh Blackberries: You’ll need about 3 pounds of whole berries (12 cups as purchased) to yield 6 cups of mashed fruit. Any variety works, including wild, cultivated, or frozen.
- Sugar: Use 2-6 cups depending on your sweetness preference (see ratios above). The recipe as written uses 4 cups for a balanced flavor.
- Lemon Juice (Optional): 1-2 tablespoons of fresh lemon juice brightens the flavor and helps balance sweeter cultivated berries. Skip it if your berries are already quite tart. Since blackberries are naturally acidic enough for canning, fresh lemon juice works fine here (no need for bottled).
How to Make Blackberry Jam
Making blackberry jam without pectin is straightforward, but it does require your attention at the stove. Plan for about 30-40 minutes from start to finish.
Preparing the Berries
Rinse and sort your fresh blackberries, removing any stems, leaves, or damaged fruit. Use a potato masher to crush them in a large mixing bowl or directly in the jam pot. Generally, 2 cups of whole fruit yields about 1 cup of mashed fruit.
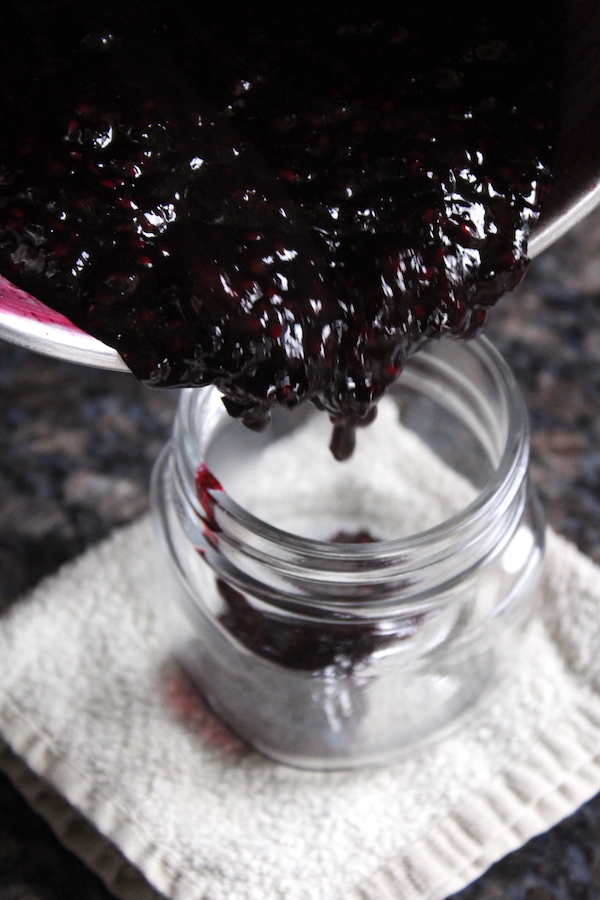
Cooking the Jam
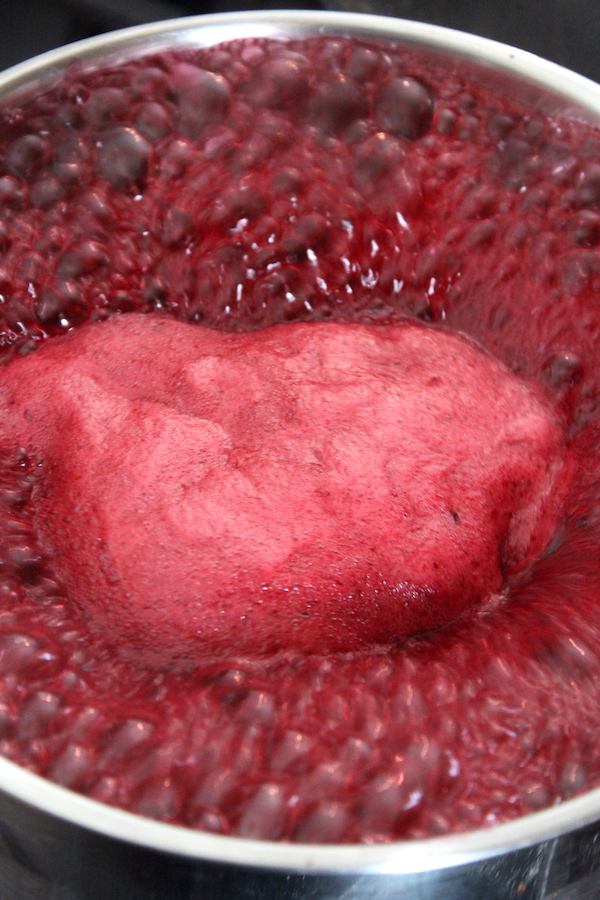
Combine your mashed berries and sugar in a large, deep jam pot. If you’re using lemon juice, add it now. Bring the mixture to a boil over medium-high heat, stirring frequently. Blackberry jam tends to foam a lot, so keep a close eye and use a deep pot to prevent overflow.
Some people add a little butter (about ¼ teaspoon) to reduce foaming, which is considered safe even for canning, but I usually skip it. Staying present and stirring keeps the foam down naturally, and the National Center for Food Preservation notes that butter may cause off-flavors in long-term storage.
Continue cooking for 20-30 minutes, stirring constantly and scraping the bottom of the pot to prevent scorching. As the jam cooks, the foam will subside and the mixture will thicken and turn glossy. This is your cue that you’re getting close to gel stage.
Testing for Gel Stage
There are several reliable ways to test if your jam is ready:
- Freezer plate test: Before you start cooking, put a small plate in the freezer. When you think the jam is ready, spoon a little onto the cold plate, wait 30 seconds, and run your finger through it. If it wrinkles and holds a line, it’s done. If it runs back together, keep cooking.
- Temperature test: Use an instant-read thermometer. Jam sets at 220°F (104°C) at sea level. Subtract 2°F for every 1,000 feet of elevation above sea level.
- Sheeting test: Dip a spoon into the jam, hold it sideways over the pot, and watch how the jam falls. If it falls off in a sheet or a slow blob (not individual droplets), it’s likely ready.
- Don’t overcook! Jam can quickly go from perfect to too thick if you push it past the gel point. When in doubt, pull it off the heat sooner rather than later.
Canning Blackberry Jam
Once your jam reaches gel stage, remove it from heat and skim off any remaining foam if desired. Ladle the hot jam into prepared jars, leaving ¼ inch headspace. Wipe the rims clean, apply lids and rings, and process in a boiling water bath.
Altitude Adjustments
Processing times must be adjusted based on your elevation:
- 0-6,000 ft: 10 minutes
- Above 6,000 ft: 15 minutes
Yield Notes
Understanding blackberry measurements helps you plan your batch:
- 2 cups whole blackberries = 1 cup mashed fruit = about ½ pound
- 6 cups mashed blackberries + 4 cups sugar = about 5-6 half-pint (8 oz) jars
- Maximum batch size: This recipe can be doubled, but don’t increase beyond that. Larger batches don’t cook evenly and may not set properly.
Final yield depends on the berries’ moisture content and how thick you cook the jam. Longer cooking = thicker jam = lower yield.

Storage Options
You have several options for storing your blackberry jam:
- Canned jam: Properly sealed jars keep for 12-18 months in a cool, dark pantry. This is my preferred method because it means blackberry jam all winter long.
- Refrigerator jam: Let jars cool and store in the fridge. Use within 3-4 weeks.
- Freezer jam: Use freezer-safe containers with headspace for expansion. Lasts up to 6 months frozen.
- Once opened: Refrigerate and use within 2-3 weeks. Low sugar jams spoil faster once opened than high sugar versions, so keep that in mind.
Recipe Tips
- Removing seeds: If you prefer seedless jam, run the cooked berries through a fine mesh strainer or food mill before adding sugar. You’ll still keep the pulp for a proper jam texture, just without the seeds. For a completely smooth, seedless spread, make blackberry jelly instead by straining through a jelly bag.
- Foam management: Blackberry jam foams heavily during cooking. Stirring constantly helps, and you can add ¼ teaspoon butter if needed. Skim any remaining foam before jarring.
- Jam too thick? If your jam set too firm, stir in a bit of boiling water before using, or warm the jar to loosen it. Overcooked jam still makes a great glaze for cakes, roasted meats, or drizzled over ice cream.
- Jam didn’t set? The most common reason is undercooking. Make sure it reaches 220°F (at sea level) or passes the freezer plate test. You can recook runny jam by bringing it back to a boil until it hits the proper temperature.
- Flavor variations: Stir in a splash of Chambord or cassis liqueur after cooking, just before jarring. A pinch of cinnamon or cardamom gives warm, spiced notes. You can also mix in raspberries, blueberries, or cherries for a custom blend.
Ways to Use Blackberry Jam
Beyond toast and PB&J, blackberry jam is incredibly versatile in the kitchen. Swirl it into yogurt or oatmeal, use it as a filling for thumbprint cookies or layer cakes, or warm it slightly and drizzle over vanilla ice cream. It also makes a wonderful glaze for pork tenderloin or duck breast. If you find yourself with more jam than you know what to do with, check out my guide to 100+ ways to use up a jar of jam for more inspiration.
Blackberry Jam FAQs
Yes! Blackberries are naturally high in pectin, so they don’t need any commercial pectin to gel. With a bit of patience and the right sugar-to-fruit ratio, you can get a perfect set using just blackberries, sugar, and optionally lemon juice. This is one of the easiest jams to make without pectin.
The most common reason is undercooking. Without added pectin, this recipe relies on evaporation and temperature to set. Keep cooking until the jam reaches 220°F at sea level (or 8°F above your local boiling point) and passes the freezer plate test. If your jam is still runny after cooling, you can recook it by bringing it back to a boil until it reaches the proper temperature. Sometimes jam that looks thin while hot will still set once it cools completely.
You have two options. For seedless jam that still has pulp, run the cooked berries through a fine mesh strainer or food mill before adding sugar. This removes the seeds while keeping the fruit texture. For a completely smooth, seedless spread, make blackberry jelly instead by straining the juice through a jelly bag. You can also find a seedless blackberry jam recipe with detailed instructions.
Yes, when properly sealed in a water bath canner, low sugar jams last just as long as full sugar jams (12-18 months in the pantry). The canning process is what preserves the jam, not the sugar. However, once opened, low sugar jams spoil faster in the fridge. Expect to use an opened jar of low sugar jam within 2-3 weeks, whereas high sugar jams can last months refrigerated.
Many fruits have enough natural pectin to set without added pectin. Raspberry jam, strawberry jam, blueberry jam, and plum jam all work beautifully using this same basic method. Stone fruits and berries tend to have more natural pectin than tropical fruits, making them ideal for old-fashioned jam recipes.
Jam Recipes
If you tried this Blackberry Jam Recipe, or any other recipe on Practical Self Reliance, leave a ⭐ star rating and let me know what you think in the 📝 comments below!
And make sure you stay in touch with me by following on social media!
Blackberry Jam Recipe Without Pectin
Equipment
Ingredients
- 6 cups mashed blackberries, see note
- 4 cups granulated sugar
- 2 tablespoons lemon juice, optional, see notes
Instructions
- Prepare canning setup: Wash and sterilize 5-6 half-pint jars. Place lids in hot (not boiling) water. Prepare your boiling water bath canner and keep everything hot until ready to fill.
- Crush the berries: Rinse and sort fresh blackberries, removing any stems or debris. Use a potato masher to crush them in a large bowl or directly in the jam pot. Generally, 2 cups whole fruit yields about 1 cup mashed.
- Combine fruit and sugar: Place crushed blackberries in a large, deep jam pot. Stir in sugar and optional lemon juice. Mix thoroughly to help sugar dissolve before heating.
- Bring to a boil: Turn heat to medium-high and bring to a steady boil, stirring frequently to prevent scorching. Blackberry jam foams heavily, so stay nearby and stir often.
- Cook to gel stage: Continue boiling, stirring constantly, until jam thickens and reaches gel stage. This typically takes 20-30 minutes. Test using the freezer plate test (jam wrinkles when pushed) or an instant-read thermometer (220°F at sea level).
- Remove from heat and skim foam: Once gel stage is reached, remove pot from heat. Skim off any remaining foam if desired.
- Ladle into jars: Carefully ladle hot jam into prepared jars, leaving ¼ inch headspace. Wipe rims with a clean damp cloth, apply lids, and tighten bands to fingertip tight.
- Process in water bath canner: Place jars in boiling water bath canner, ensuring they're fully submerged with 1-2 inches of water above lids. Process for 10 minutes (15 minutes above 6,000 feet).
- Cool and store: Remove jars and let sit undisturbed for 12-24 hours. Check seals, label, and store in a cool, dark place for up to 18 months.
Notes
- Recommended (4 cups): Balanced sweetness with good fruit flavor
- Low Sugar (2-3 cups): More tart and fruit-forward; may take longer to reach gel stage
- Traditional High Sugar (6 cups): Very sweet with firm set; old-fashioned style
- Freezer plate test: Spoon jam onto a cold plate, wait 30 seconds, push your finger through. If it wrinkles and holds a line, it’s done.
- Temperature test: Jam sets at 220°F at sea level. Subtract 2°F for every 1,000 feet of elevation.
- Sheeting test: Dip a spoon in jam and hold sideways. If jam falls in a sheet (not droplets), it’s ready.
Nutrition
Nutrition information is automatically calculated, so should only be used as an approximation.
Canning Recipes

Find the perfect recipe
Searching for something else? Enter keywords to find the perfect recipe!


Can I just put this in my mason jar with lid and straight in to the fridge? I’m sure it will get eaten within a few days because I did half the recipe and don’t feel like canning
Yup, you can just put it in the fridge if you’re going to eat it in the next few weeks.
Thank you so much for the excellent tutorial and recipe! I made x4 batches this weekend and it is excellent!
Wonderful! So glad you’re enjoying it =)
Sorry if this is a silly question, but I have never canned anything before. Is regular white granulated sugar okay to use? I saw some recipes that said you have to use special canning or fine sugar ? Thank you in advance, your pictures are all so beautiful!
White regular sugar is totally fine for canning (and it’s what I use). The superfine sugar thing is mostly for no-cook freezer recipes where the jam wont be cooked so it needs to be fine so it can melt. For canning, you can use any sugar you want (raw cane juice, turbanado, white sugar, maple, honey, etc). They’re all fine, but anything besides plain white sugar will add flavor to your finished jam. For a pure fruit flavor, go with white sugar.
We love low sugar blackberry jam, and I found last year that yield can be increased without changing flavor by adding some chopped apples, up to about 1/4 the weight of the blackberries. This year will be my first try at using frozen blackberries, since I’ve only been picking a few each day in the hot weather we’ve been having.
Has anyone made this with honey? I’m wondering how it would turn out and how it would affect the taste.
Very clear explanations. Beautiful photography.
I wouldn’t have thought a California suburbanite would cling to advice from a Vermont off-grid, but these are the best jams I have ever made. The pictures throughout the website are inspiring. Yes, I’m subscribing and paying attention. Thank you!
Thank you so much! I’m glad you’re here!
I used four cups of our picked wild blackberries in our backyard to one cup of sugar, with a squeeze of lemon. I was a little nervous because I never made jam before, but after exactly 30 minutes of medium-low cooking the jam was perfect! Maybe even a little too jelly-like because we picked them slightly early. After straining out the seeds with a wire strainer (don’t like the seeds) we ended up with two 4 oz. jars–one for us and one for our neighbor. Best jam ever, thank you! But next time we’ll pick more berries 😀
Wonderful, so glad it worked out for you!
Thank you so much for the recipe. I just made this with blackberries from my garden. Last year my jam did not come out well and I learned through your recipe that I wasn’t patient last year. I used 5 cups of blackberries, 2 cups organic raw cane sugar, and 2 tbsps fresh lemon juice. I cooked the game in a cast iron pot. It was 4:18 when I put everything in the pot and now it’s 5:31 and I just got finished putting the jam into the jars. It made 8 4oz jars plus about 2 extra ounces. I learned that I needed to turn my heat up to get the berries to a higher temp. I stopped it at 218F. I didn’t know what gelling should look like so I Googled it and tested it on a plate I had in left in the freezer for about 15 minutes. I was amazed and when I finally saw the gelling. No wonder my jam was not good last year. It takes patience and lots of stirring but this was so worth it. Now to go clean up my big mess. HAHA.
I’m so glad this recipe worked for you this year, Theresa!
Where can I find an example of what to look for when testing for gel on the frozen plate???
Here’s something from the national center for food preservation with illistrations of jam “sheeting” off a spoon: https://nchfp.uga.edu/how/make-jam-jelly/jams-jellies-general-information/testing-jelly-without-added-pectin/
This recipe has a decent picture of the plate gel test…but I’ll work on taking one of my own that’s clear: https://commonsensehome.com/how-to-make-apple-jelly/
That helps tremendously! Off to make some jam!
Hi! About how many pints will this recipe yield?
Sorry I just found the answer when I re-read the recipe. Thanks
Great Recipe and instructions. I just made sugar free raspberry jam yesterday and used chia instead of pectin. Came out beautifully. Set up very nicely. Good less expensive option to store bought pectin.
Hi how did you use chia? I have some chia seeds and know they can thicken so interested how you made this work.
Hi there, is it possible to overcook the jam? I boiled and cooled the jam, then refrigerated last night. I opened my jar this morning and it’s super thick/dense and not very spreadable.
Yes, if you overcook it well past gel stage it’ll candy like that.
Omg it came delicious perfect consistently I made one jar being that it was my first time making it. I weight the blackberry 3.85 and added 3.85 sugar and one full lemon juice. Cooked at medium low heat and exactly at 20 minutes turn to jam. Wow amazing! Thank you
My husband and I test it still hot and let me tell you best we ever had. Can’t wait for tomorrow morning to put it on our toast. Looking forward to make more jars. Can I also use same recipe for raspberry and blueberry?
Thank you again for sharing this recipe
Wonderful, so glad it came out well for you. I do use the same recipe for both raspberry and blueberry. Often recipes for those will include pectin, as they’re a bit lower in pectin than blackberries, but I make them without added storebought pectin without issue (and like them better that way). The yield will be a bit lower than the blackberry version since they’ll cook down slightly more. I also use that technique for seedless raspberry jelly (recipe here: https://practicalselfreliance.com/raspberry-jelly/)
THAnk you Ashley I appreciate it will try that too
The first time I made Blackberry Jam it turned out terrible; Sugars crystallized and tasted TERRIBLE! Definitely not my great grandmother’s yummy goodness, which was the goal. After reading your detailed post/recipe, I am really looking forward to attempting it again (6 years later, lol)!! Thank you!!
Have you or do you know how to add peppers to this to make blackberry pepper jelly?
You may want to see if you can find a tested recipe so that you know the acidity is correct for canning since peppers are a low acid food.
Measured out a double batch added 2 cups sugar and 2 tbsp lemon juice. After 30 minutes it had not set and after 1 hour nothing! Can this be resurrected or is a total loss?
I think your heat is not high enough, it really shouldn’t take that long, especially with 2 cups sugar. Is the jam boiling this whole time? After an hour I’d think there’d be nothing left if it was boiling. To answer your question though, yes, continue cooking until it’s done.
So enjoyed reading your responses. They are kind and detailed.
I’m about to attempt this. I don’t see where you mention how many jars this typically yields. Can you provide an approximate? Thanks!
The yields will vary dramatically based on how juicy your berries are (wild ones tend to be quite dry but have more pectin, while storebought are very soft and juicy but have less pectin), and on how much sugar you use. I got two half-pint jars from 5 cups berries and 1 cup sugar. Other readers (above in the comments) report 4 half-pint jars when starting with 5 cups berries and 2 cups sugar, which seems on the high end to me. Expect between 2 and 4 half-pints, depending on how you start.
Can you make blackberry jam from frozen berries
Yup!
Can I just put the end product (preserves) in the refrigerator for a few days to use and not so called can?
I have never canned and a bit scared of the process of canning.
Yup! Canning is completely optional. The jam should last at least 2 weeks in the fridge even with low sugar.
If you do a high sugar recipe it lasts a lot longer in the fridge, as long as several months. That’s one reason older (pre-canning) recipes have so much sugar, it helps keep the jam from spoiling in a root cellar before canning was invented.
But yes, to answer your question, you only need to can it if you’re trying to make a shelf-stable jam that can last in the pantry for a year or more. If you’re just going to eat it in the next few weeks there’s absolutely no need to can the jam.
If I boiled a few sprigs of thyme with the fruit, that wouldn’t affect either its gelling or shelf-stability once canned, would it?
Correct, that won’t affect the gelling or canning at all. Some herbs taste better than others in the canning process, as that can change the flavors. Things like cinnamon/cloves can get bitter, and herbs can get really strong if you leave them in the finished jars. If I were you, I’d cook the jam with the sprigs but then be sure to pull them out.
Thanks! Wasn’t planning to leave them in, if for no reason other than aesthetics 🙂