Affiliate disclosure: This post may contain affiliate links. Please see our Privacy Policy.
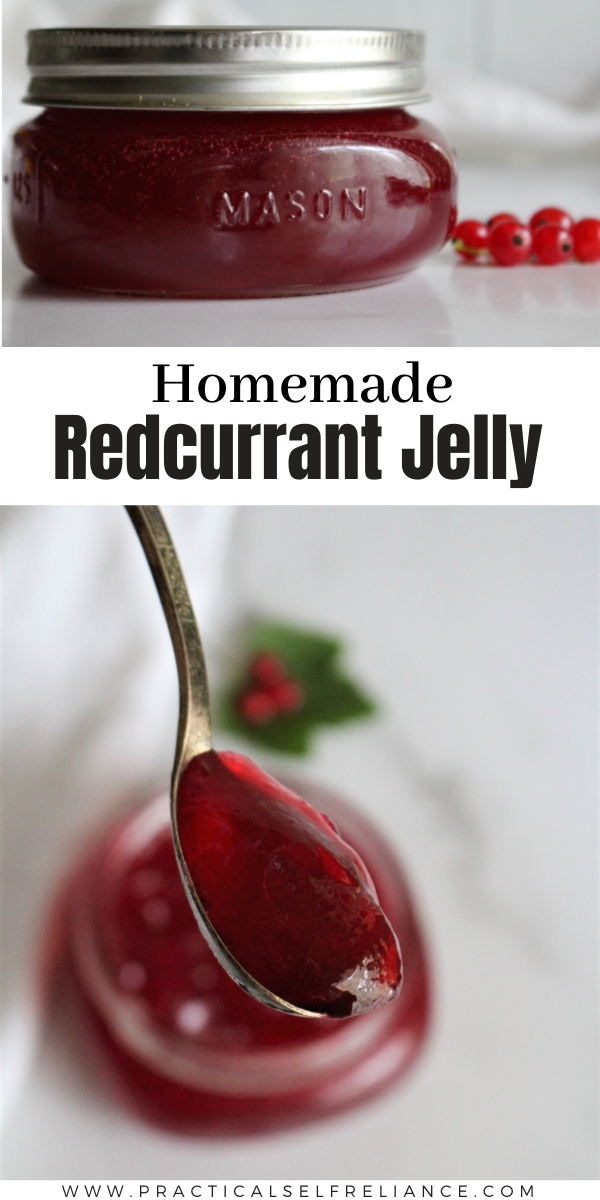
Red currant jelly is one of the easiest preserves you can make with the summer’s bounty. Red currants are naturally high in both acid and pectin, so all you need is the fruit and a bit of sugar for a spectacular two-ingredient currant jelly.
Red currants are one of those crops you’ll never see in the grocery store. They’re only at peak freshness for a few days, and the soft fruit doesn’t transport well. Farmer’s market stand and backyard bushes are where these ruby beauties shine.
If you’re lucky enough to have a few backyard red currant bushes (or know someone who does), then you’re well on your way to a bright red jar of summery goodness.
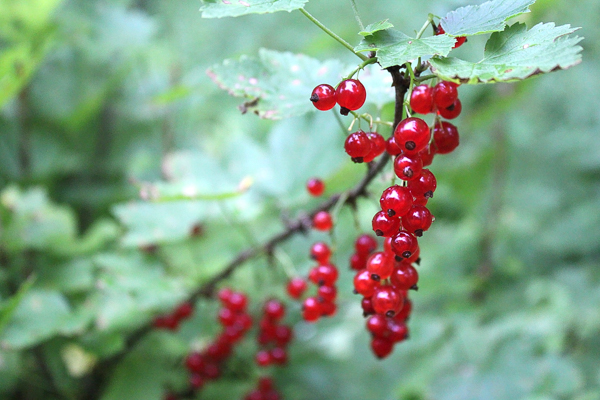
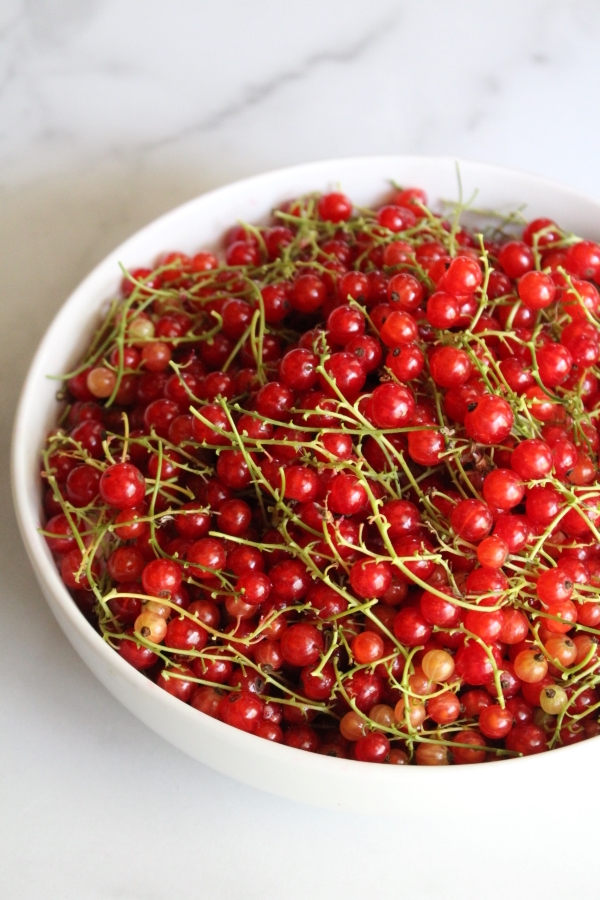
Red currant jelly starts with fresh-picked red currants. Ideally, they’re picked fresh just before making the jam, and the stems are left on.
Yes, that’s right. There’s no need to stem the currants, and the jelly actually turns out better if they’re left in. There are two reasons for that…
First, cooking red currants on the stems increases the amount of pectin in the finished jam, meaning a higher yield. More jelly in the jar is always a good thing, especially if it saves you both the expense of buying commercial pectin and the time of stemming the fruit.
Second, they add a teeny tiny bit of tannin to the mix, which rounds out the flavor of the finished currant jelly. Currant leaves and stems are actually added to all manner of pickles, preserves, and homemade wines for this reason.
If you’ve picked up a pint or two of already stemmed currants from the farmer’s market, no worries! They’ll still make a spectacular currant jelly, as the stems aren’t strictly necessary, just a nice yield increasing, taste-enhancing bonus. Since the stemming work was already done for you, try making red currant jam (which does require stemming the fruit).
If you’re picking backyard currants definitely leave the stems on given the choice.
How to Make Red Currant Jelly
Making red currant jelly is incredibly simple, especially if you’re familiar with the basic process for making homemade jellies. Start by placing the fruit in a saucepan with a bit of water.
Red currants are pretty dry on their own, and since they’re full of pectin they don’t give up their juices easily. It helps to add a bit of water to get the process started and prevent scorching. I add 1/2 cup water to the pot for every pound of red currants.
Slowly bring the water/fruit mixture up to a gentle simmer, mashing the fruit as you go to encourage them to release their juices. Simmer the fruit for 1-2 minutes and then remove from the heat.
(This is important, as the fruit will very quickly turn into a thick jam on its own if cooked too long. In about 5-8 minutes of simmering the whole pot will set, so just barely cook them to get them to release their juices.)
If you happen to have a steam juicer, this process goes much smoother and you get better yields with less work. They’re incredibly useful, and I use mine to make huge batches of blackcurrant jelly, raspberry jelly, and cherry wine every year.
Our red currants tend to come in slower, so I stick with small batches every few days and an old fashioned jelly bag. Lacking a jelly bag, use a cheesecloth-lined colander to strain the juice from the fruit.
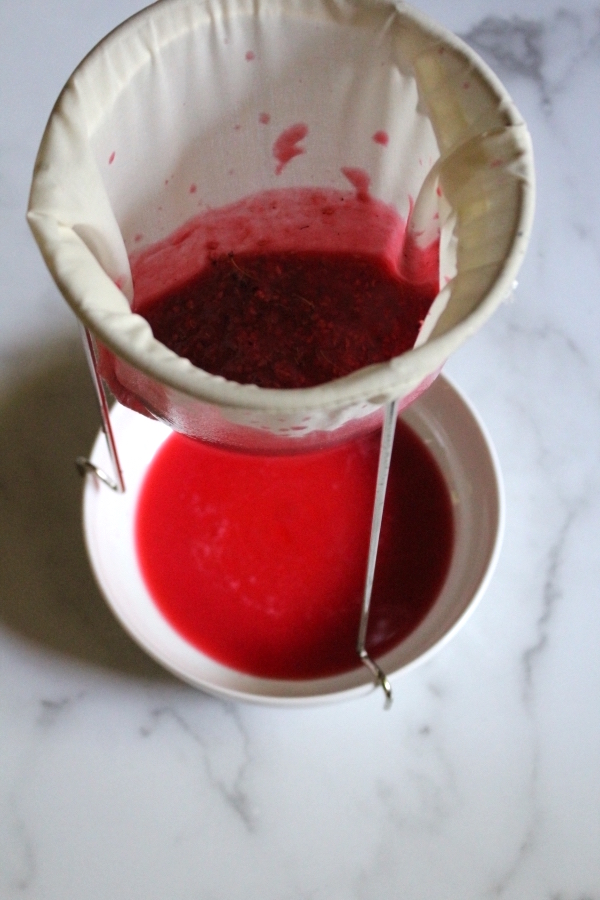
Just about every jelly recipe will tell you NOT to squeeze the jelly bag, but simply to allow the fruit to slowly drip for several hours (or overnight). The reason for this is cosmetic, because sometimes when you squeeze the jelly bag it will result in a cloudy finished jelly.
I normally follow this advice, but not with red currant jelly. The fruit pulp just doesn’t give up its juice easily, and the fruit only releases about 1/4 to 1/2 of its juice without squeezing the bag (in my experience).
I’ll allow it to slowly drip for about an hour until the fruit has cooled, but then I go to work squeezing every last drop of juice out of the red currant pulp. With that method, I get about 1 cup of juice from every pound of fruit.
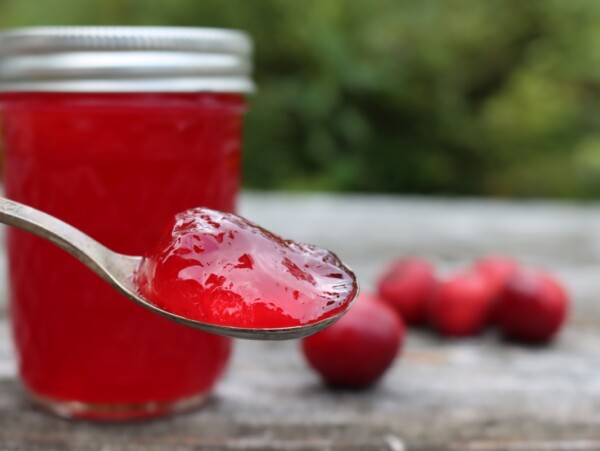
And my jelly still comes out clear, not cloudy at all…
Whether you squeeze the bag or not, when you’re happy with the yield, it’s time to measure the juice. For every cup of juice, add 1 cup of sugar. Or if you prefer to weigh the sugar, for every pint of juice, add a pound of sugar (it works out the same).
Place the sugar and juice into a jelly pot, stir to dissolve the sugar and bring the mixture to a boil on the stovetop.
This jelly is going to reach the gelling point quickly because it’s very high in natural pectin. Mine simmered for about 5 minutes before I turned off the heat.
Experienced jelly makers know there’s a telltale point where the bubbles change and you can actually see the jelly “finish” just by watching the bubble pattern. That’s actually tricky with red currant jelly because as soon as it starts bubbling it’s nearly done cooking.
A more foolproof method uses an instant-read thermometer. The gel point is at 220 degrees F at sea level (or 8 degrees above the boiling point of water). At higher altitudes, that finish temperature drops by 1 degree for every 500 feet of altitude. We’re at right about 1000 feet in elevation, so I finish my jellies at 218 F.
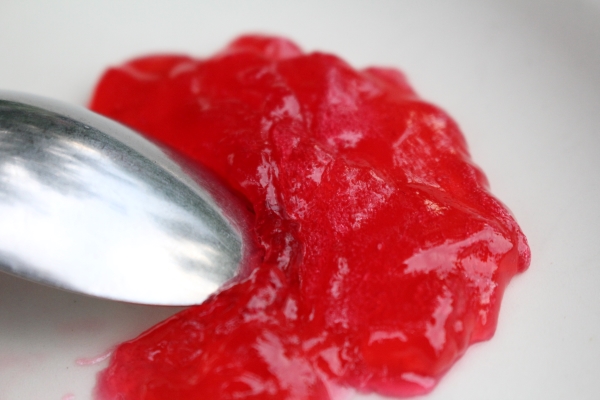
Lacking an instant-read thermometer, you can also place a small plate in the freezer about half an hour before you begin cooking the jelly. When you think the jelly’s done, scoop a small spoonful onto the plate. It should set quickly, and wrinkle back when you push it with a fingertip or spoon.
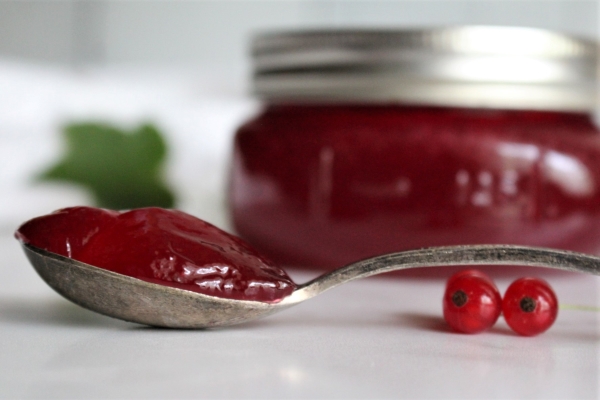
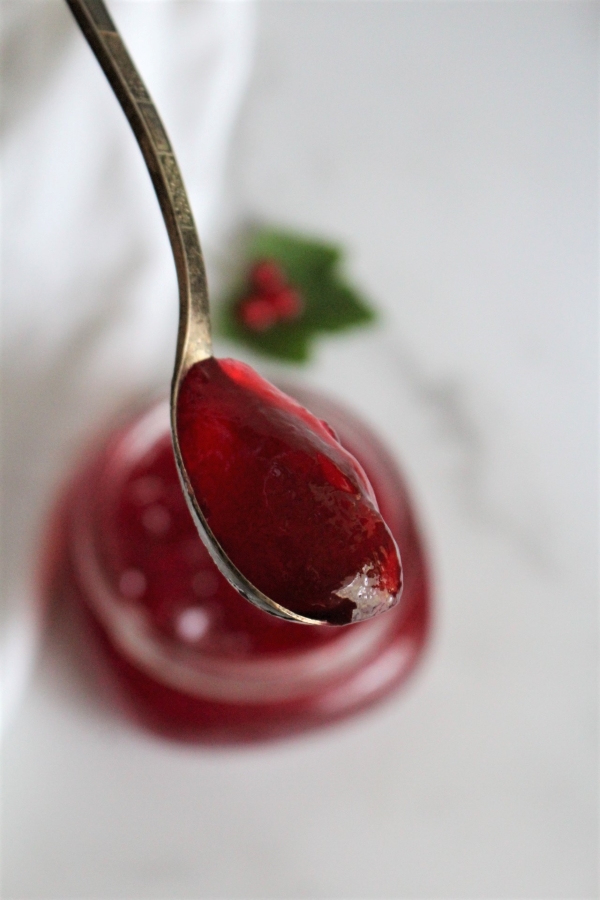
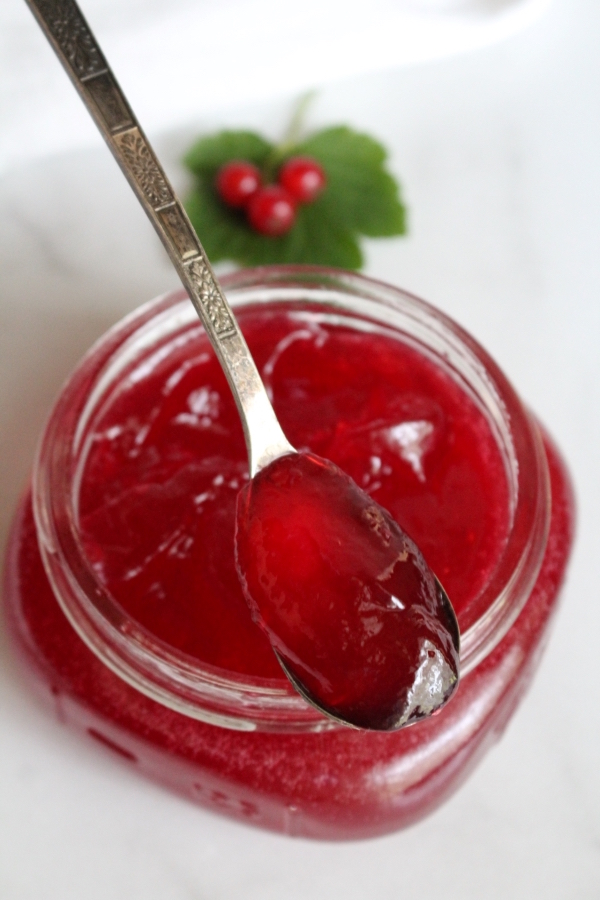
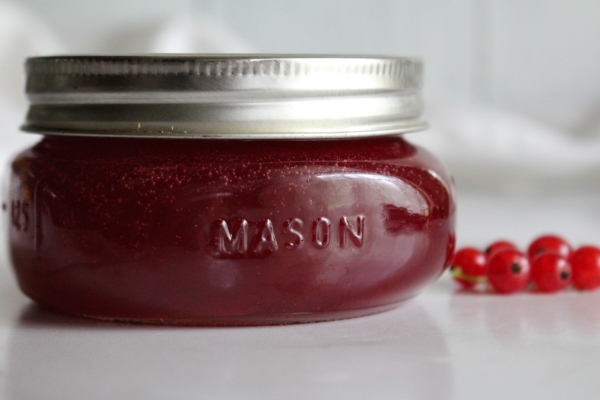
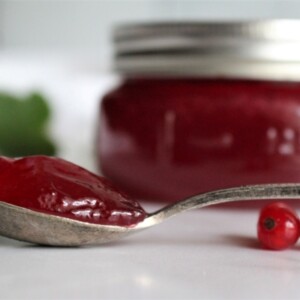
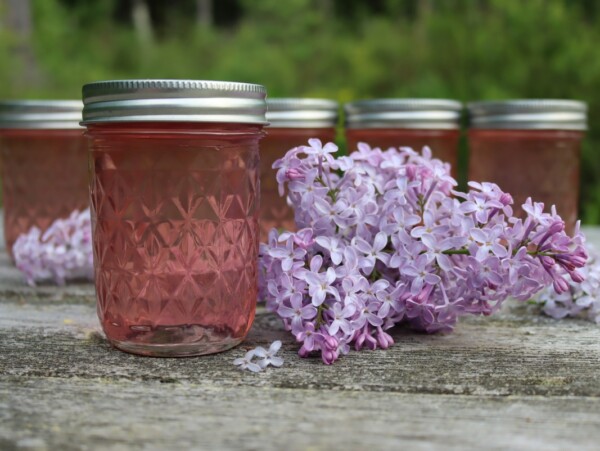
Once the red currant jelly reaches the gelling point, turn off the heat and ladle it into jelly jars. Work quickly, it sets in the pot pretty fast.
Red Currant Jelly Yield
As with any fresh fruit jelly, the total yield is going to depend somewhat on your fruit. Red currants vary a good bit in terms of juice output, and the larger varieties tend to yield more juice.
For rough approximations though, a pound of red currants (roughly 4 cups, or 1 quart) will yield about 1 cup of juice. When you add in an equal measure of sugar and cook to the gelling point, the finished yield is about 1 cup (half a pint, or one 8 oz jelly jar).
Weigh or measure your fruit before you start and you’ll have a rough idea of your finished yield, and you can expect 1 cup of red currant jelly for every pound of fruit (4 cups).

Canning Red Currant Jelly
There’s absolutely nothing wrong with making this red currant jelly recipe as a refrigerator or freezer preserve. It’ll keep for several weeks in the fridge or up to 6 months in the freezer.
Red currants only come once a year though, and I love enjoying red currant jelly year-round. To can this jelly, simply prepare as you otherwise would.
When it reaches the gel point, ladle into canning jars leaving 1/4 inch headspace. Cap with 2 part canning lids and process in a water bath canner for 5 minutes. Turn off the heat on the canner and leave the jelly in the water to cool slightly for about 5 minutes before removing to cool on a towel on the counter.
(This extra 5 minutes is important and helps prevent siphoning of the jelly as a result of thermal shock on the jars. If you want to see what siphoning looks like, check out the pictures from my post on canning apple pie filling, as that one’s especially likely to siphon.)
After 24 hours, check the seals on the jars. Store any unsealed jars in the refrigerator for use within the next few weeks. Properly canned and sealed jars will keep on the pantry shelf for 12-18 months without losing quality (and will technically keep even longer).
Red Currant Recipes
Looking for more ways to use red currants this summer?
- Red Currant Pound Cake
- Red Currant Yogurt Cakes
- Red Currant Coffee Cake
- Red Currant Crumb Bars
- Red Currant Ice Cream
Red Currant Jelly
Equipment
- Ball Regular Mouth Canning Jar 8 oz. 12 pk
Ingredients
- 4 cups red currant juice, from 4lbs fruit, about 16 cups, unstemmed
- 4 cups sugar
Instructions
- Place the unstemmed red currants into a saucepan with water (1/2 cup per pound or 2 cups total for this recipe). Bring the fruit to a boil, mashing the fruit to encourage the red currants to release their juices. Simmer 1-2 minutes and turn off the heat.
- Pour the fruit pulp into a jelly bag (or cheesecloth-lined strainer) and allow the mixture to drip for several hours (or overnight). Squeezing the bag will result in a higher yield, but might affect the jelly clarity (it didn't affect mine, I squeezed).
- Measure the resulting juice. For each cup of red currant juice, add 1 cup sugar.
- (Optional) If canning, prepare a water bath canner.
- Place the juice/sugar mixture into a jelly pot and bring to a boil on high heat. Boil hard for 5-10 minutes, until the jelly is set. (Test for set on a plate that's been placed in the freezer, see picture above. Or, test for the gel stage with an instant-read thermometer. The gel stage is 220 degrees F at sea level. See notes for higher altitudes.)
- When the jelly reaches gel stage, remove from heat and pour into jars, leaving 1/4 inch headspace.
- For a refrigerator jam, cap and allow the jars to cool to room temperature before storing in the refrigerator for use within a month.
- If canning, cap with 2 part canning lids and process the jars in a water bath canner for 10 minutes. Turn off the heat and allow the jars to sit in the canner for 5 more minutes before removing to cool on a towel on the counter. After 24 hours, check seals and store unsealed jars in the refrigerator for immediate use. Sealed jars can be stored in the pantry for 12-18 months.
Notes
Summer Canning Recipes
Canning up more than just red currant jelly this summer? I’ve got plenty of canning recipes to share…
Jelly Recipes
Sticking with jellies? Here are a few more…

This is a wonderful recipe. We grow currants in our front yard, and I have made this recipe for a couple years. I have to also say—your chokecherry (low sugar) jelly recipe is the tastiest! Thank you so much!
Wonderful, I’m so happy you like it!
So delicious. The directions were so precise it was easy to get it right. This is the best currant jelly I’ve ever had!
That’s so great to hear! It’s one of my favorites too.
My first batch also did not jell… I’m going to try to re-simmer and hope for the best. I also use my jams and jellies on homemade yogurt… Thank you Wendy! I never thought to add ginger, but that sounds amazing!
Thanks for the tip on leaving the stems in. To squeeze or not to squeeze? ( The bag that is!) Here is a solution if you want crystal clear jelly, so clear that you can read text through the jar. My trusty 1970’s Reader’s Digest Cookery Year says you should take a “second extract”. So after boiling, mashing and straining through jelly bag (jeelie bag in Scotland) with no squeezing, put the pulp back in the pan with a smaller amount of water, and reboil for max 15 minutes. Strain again and add to the first extract. Crystal clear jelly and maximum juice extracted.
Thank you for sharing that tip.
Great Recipe, Jelled to perfection, made 8 /125mls
jars.
Had the same problem so i just cooked it longer and it worked. Maybe too many berries were overripe which might have decreased pectin….
I’m a little disappointed with the results. I had a bumper crop of red currants this year, 1st time my bushes have yielded so many berries! I tried this recipe twice, and could not get my berry juice to jell. After the first attempt, my husband suggested I just use some pectin, but I replied, “No, I want to follow the recipe.” No good. 🙁 No jam this year I guess.
However, the fruits of my labor did not go to waste; I now have some delicious red currant syrup that tastes wonderful in bubbly mineral water as a refreshing summer drink, Or to flavor my iced tea.
I’m so sorry it didn’t work out for you. That’s so disappointing. I am glad you were able to salvage the syrup though. That sounds like a lovely drink.
Thank you! I’m weaning my jams and jellies off of certo and trying to make this jelly less firm, so I’ll take your advice.
Wonderful, I hope it sets beautifully for you!
I freeze my red currants for jelly because they don’t all ripen together and I am busy in the summer. After thawing them I don’t cook them before squeezing the juice out through cheesecloth draped in a cone shaped colander, starting by smashing them with a potato masher. I end up by hand squeezing the berries in the cheesecloth very hard to get all the juice, and I get half the amount of juice as berries, 1 pint of juice for each quart of berries. The juice is really clear. The freezing seems to break them down to release the juice. I make a gelled syrup with 1 cup of honey to 4 cups of red currant juice and half the amount of Pomona’s Pectin recommended for jelly. I eat the syrup in homemade yogurt with grated frozen ginger root.
That sounds delicious! Freezing fruits for a week or more generally reduces their pectin content by half, meaning they might need supplemental pectin to gel naturally. It sounds like you’re using Pomona’s which is a great option. Ginger sounds like a good complimentary flavor too!
I’ve made currant jam with frozen currants for years using only sugar, a bit of lemon juice, a pat of butter and the currants. I’ve never had a problem with setting.
Oh my god! I just moved to a new job in public horticulture and there’s a lovely stand of red currants that are just going to the flies. I’m so glad I stumbled onto your website; I’ve already canned 12 pints (my first time canning) and my freezer is full of berries that I don’t have time to process at the moment. Lots of sour cherries and raspberries to come! Its going to be jellies and jams for Christmas presents this year.
Awesome! They’ll make wonderful gifts!